
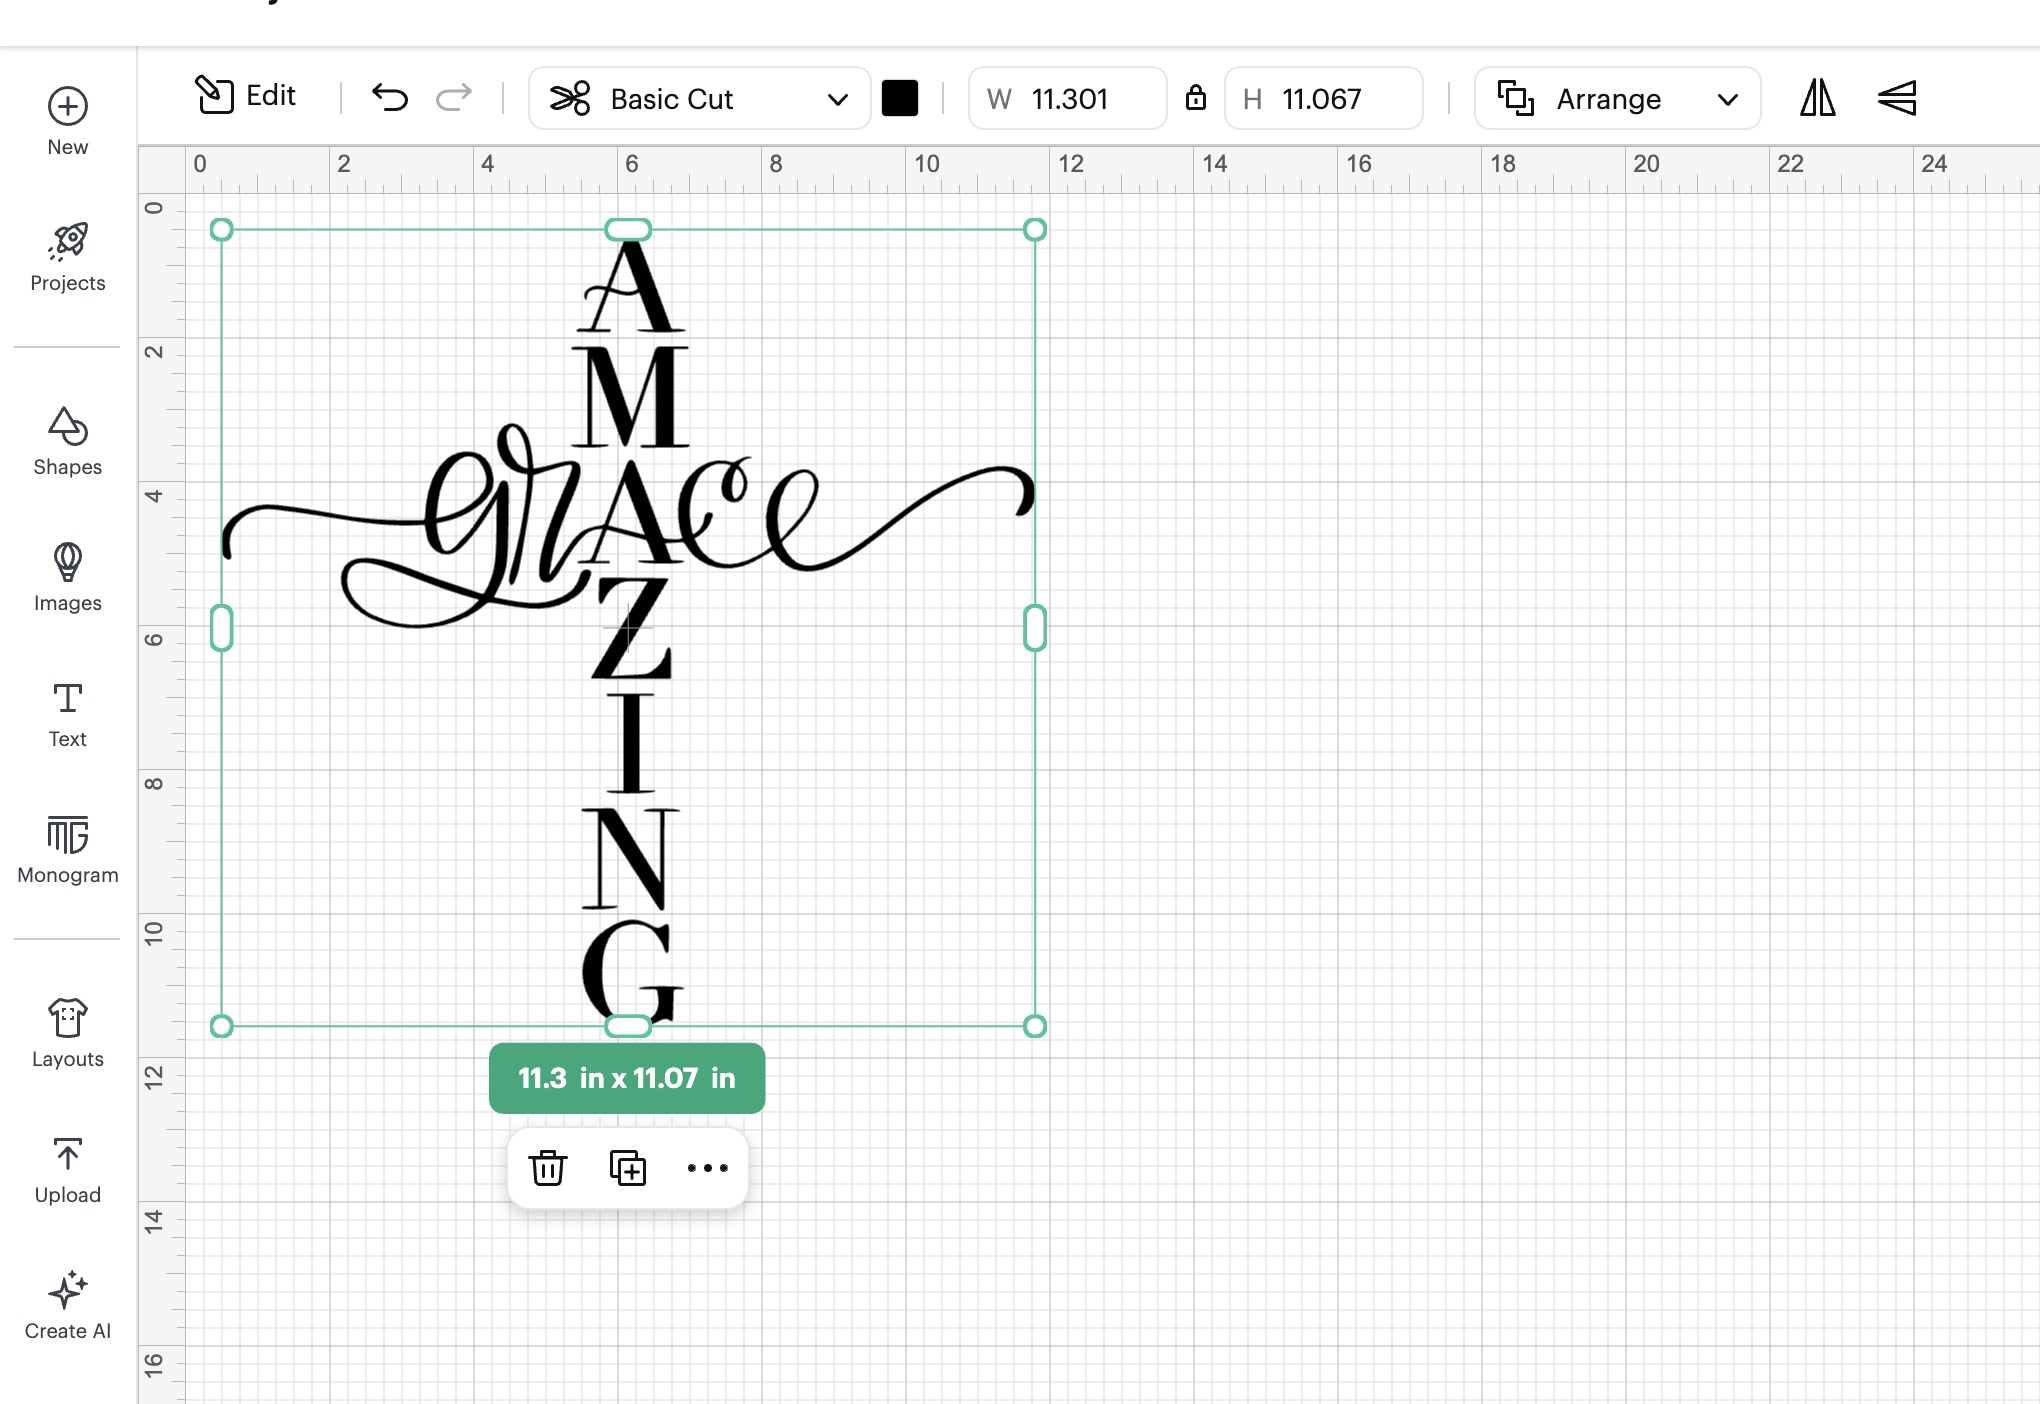
I have a free Amazing Grace SVG perfect for the Easter season. Use this design to make t-shirts, cards, signs, and more.
I'm using HTV for the sign I'm making, but you can also make a wood sign using adhesive vinyl.
New to using iron-on on wood? My How to Use HTV on Wood tutorial will walk you through that process.

How to Make an Amazing Grace Easter Sign
To make an Amazing Grace sign, begin by gathering the supplies.
I am using HTV and a purchased wood sign for this project, but you can make signs, shirts, flags, ornaments, etc, with this design. You could also use this design to create sublimation projects.
Supplies Used
- Free Amazing Grace SVG
- Cricut Machine
- Cutting Mat
- Weeding Tool
- HTV
- Brayer
- Scraper
- Wood Sign (or other blank)
Step 1 – Download the Free Amazing Grace SVG File
To download the file, click here and enter your email address. If you've already signed up for emails, don't worry. Enter your info, and the file will be sent right to you. You will not be signed up for anything extra.
Download the file to your computer. Use the SVG file in Design Space. I've also included JPG and PNG files that you can use for sublimation or printed projects.
I am using a Cricut machine for today's project.
Step 2 – Upload the Amazing Grace SVG into Design Space
Upload the file into Design Space. If you haven't done that before, my How to Use an SVG with Design Space tutorial will help.
Step 3- Measure the Sign Blank
I am using a purchased wood sign today. If you want to paint your sign, do that first and allow it to dry for at least 24 hours. Apply thin coats and allow them to dry between coats.
Since we'll be applying heat, we want the paint completely dry first.
While the paint is drying, measure the blank you're using.
Whether you're making a wood sign like I am, or adding this SVG to a shirt, make sure you measure your blank. I am measuring both the height and width to ensure my design will fit the sign perfectly.
Step 4 – Adjust the Design for Your Blank
With the design on the canvas, you can resize the image to fit your blank. This design is all one color, so it will upload as one layer.
If you're using a different design, make sure to select all the layers before resizing so they'll all resize appropriately.
Remember – the colors on the canvas do not dictate the color of your project. Just because my SVG is black in Design Space doesn't mean my finished project will be black. The color HTV you add to the mat will be the color of your project.
If your blank is a different shape than mine, you can unlock the proportions when resizing. As long as you don't change the size too much, it shouldn't distort the image.
Step 5 – Cut Out the HTV
Next, we're going to cut out the HTV.
Load the material onto the cutting mat, shiny side down. I like to use a brayer to make sure the iron-on is stuck to the mat really well.
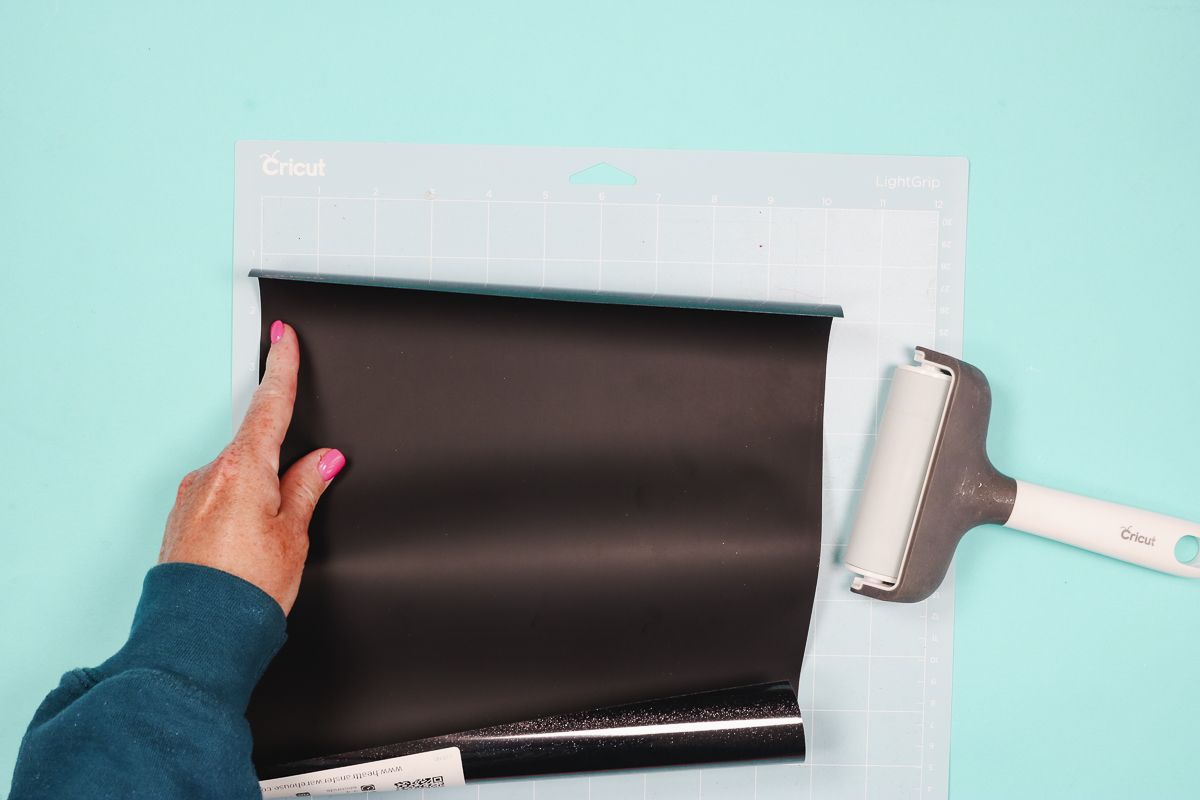
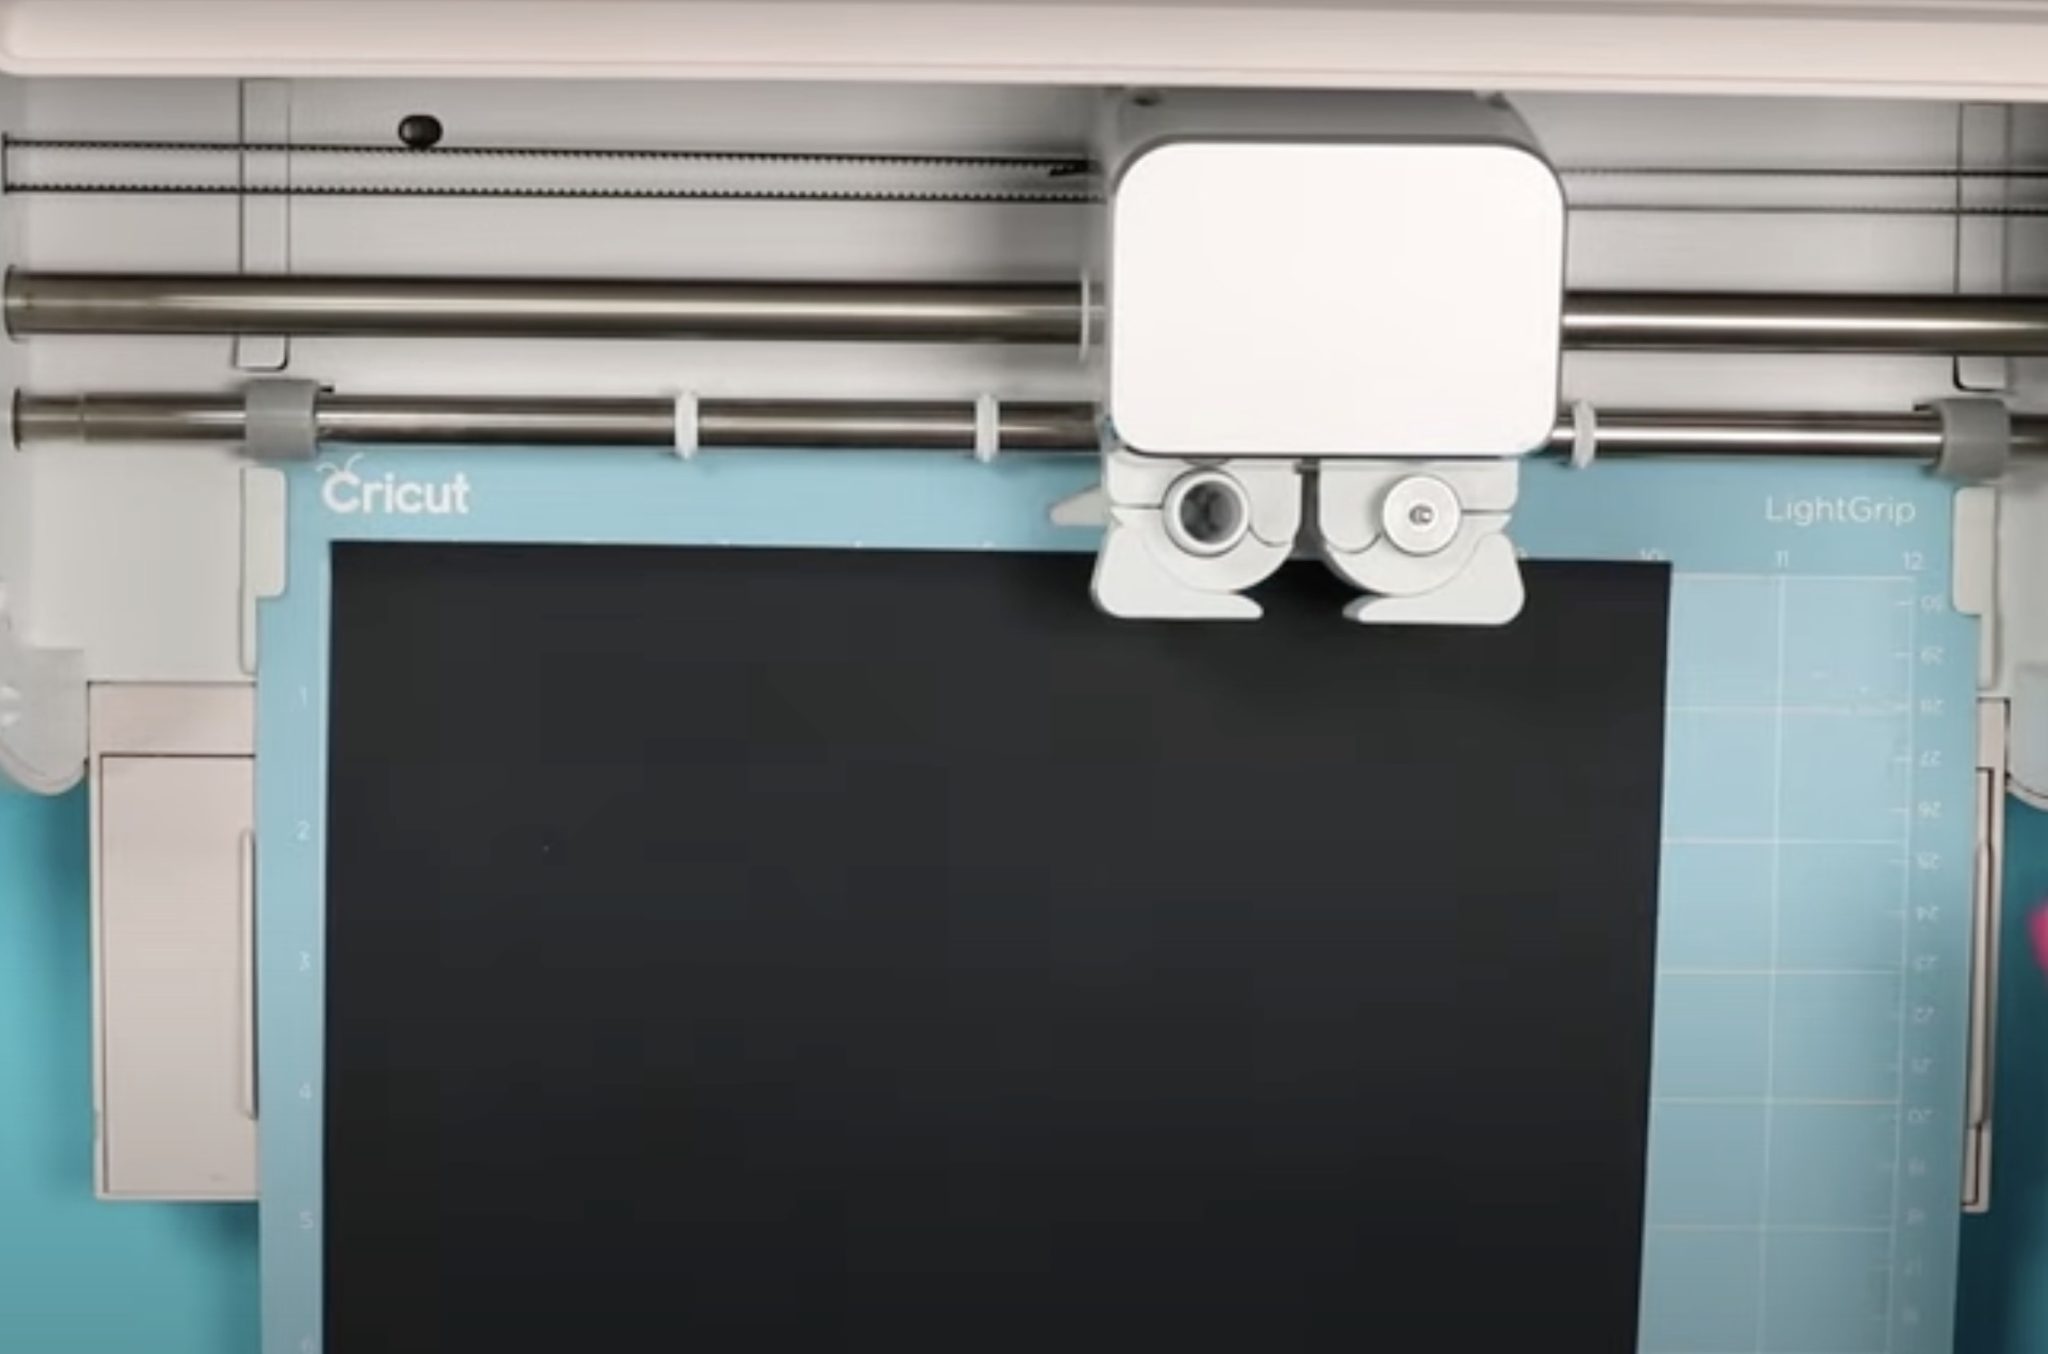
Next, load the mat into the machine.
HTV is cut with the Fine Point Blade, so you can use any Cricut machine; the only limitations would be size restraints on Joy and Joy Xtra.
Select the material setting that matches the HTV you're using, and press Go.
Anytime you use a new machine or material, make sure to do a test cut. I always recommend a test cut if you have made any changes, including replacing the blade.
Step 6 – Weed Away Excess Vinyl
Use a weeding tool to remove all the excess HTV. Don't forget the inside pieces, including the insides of the letters.
Step 7 – Locate Design on Sign
The great thing about using HTV for projects like this is that you have the ability to locate your design perfectly
The back of the HTV material is not sticky until heat is applied. Move the design as needed until it's located exactly where you want it, and then press down.
If you find the carrier sheet isn't sticky enough, use a few pieces of heat-resistant tape to secure it in place.
Step 8 – Apply Heat
I find that a handheld press is best for projects like this. My sign has a frame, and I want to be able to press within the frame.
For the size of my project, the EasyPress Mini worked best.
Preheat the Mini to the second line, and when it's up to temperature, start applying heat to the HTV.
Apply firm, consistent pressure and move the press over the design, making sure to press the entire surface.
Check your pressing recommendations. Does your HTV call for a warm or cold peel? If it's a cold peel, make sure to let it cool completely before trying to remove the carrier sheet.
Step 9 – Remove HTV Carrier Sheet
Starting at one corner, gently roll back the carrier sheet to see if the HTV has stuck down. If you notice any lifting, lay the carrier sheet back down and press for a little bit longer.
My design has actually stuck down really well. Continue to roll the carrier sheet away from the HTV.
With the carrier sheet removed, I like to do a post-press to ensure everything is stuck down really well.
Add a piece of protective paper over the top of the design and press the whole surface again for a few seconds.
Remove the protective paper, and you're done. The HTV should almost look melted into the wood.
Step 10 – Enjoy Finished Wood Sign with Free Amazing Grace Easter SVG
I love how this Amazing Grace sign turned out. I think it's a beautiful project to hang in your home either during the Easter season or year-round.
You can use any color of HTV you want for this project. If you'd like something in more traditional Easter colors, whip out the pastels and see what you think.

I hope you've had fun making this wood sign with me. Don't forget to get this free Amazing Grace SVG today so you can make your own projects with it.
If you have any questions about making a wood sign with HTV, leave them in the comments and I'll be happy to answer them for you.