

These stenciled flour sack dish towels are the perfect gift idea! Easily customize these with your own design to give to friends and family. Use your Cricut machine to make a stenciled dish towel in minutes!
This one was first published on October 29, 2013 but I am adding more information for you below.

Grab a few flour sack towels at your local store to get started. I actually purchased mine from Walmart and love them. We have a few options for stenciling on your towels but you can use this same method with any design you like.
If you’ve ever wanted the perfect handmade gift, this is it! This would be so cute as a housewarming gift, birthday present, or even for a wedding shower.
These add just the right amount of farmhouse style. Plus, you can customize them with any design or quote you like.
How to stencil flour sack towels with a Cricut
Supplies needed to make a DIY stenciled dish towel:
Some links below may be affiliate links which means that you do not pay anymore, however, a small commission will go to this site.
- Flour Sack Towels (prewashed)
- Cricut Machine (click here to see which is my favorite)
- Vinyl (stencil vinyl or any vinyl color that you have on hand) (can also use contact paper)
- Transfer tape
- Fabric Ink (this is my favorite)
- Iron or EasyPress
- Sponge or foam brush
- Cut file (if you want to make towels like mine)
NOTE: Always wash your items before applying any type of design.
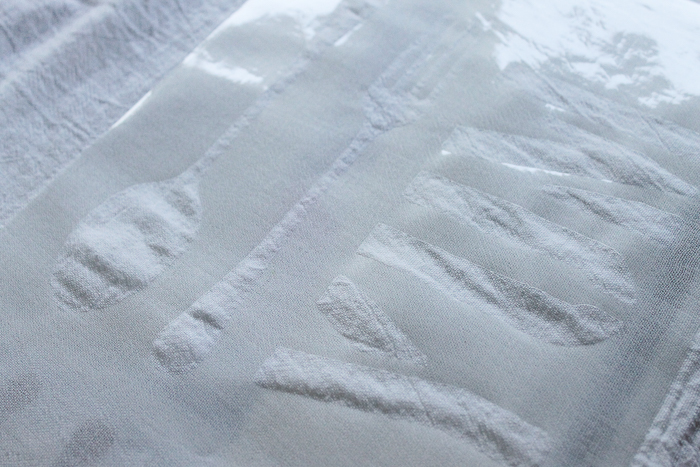
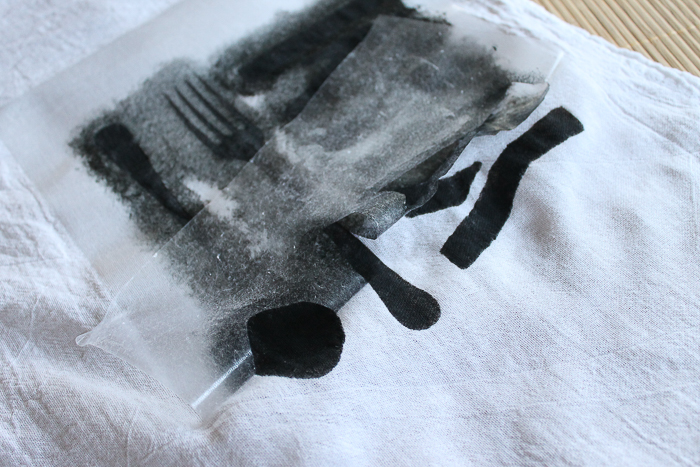
First, use your Cricut to design and cut your stencil for your towel. You can find designs similar to those shown here. You can use stencil vinyl, regular vinyl in any color, or even contact paper. Since you are throwing it out, the color does not matter. Here is my vinyl after it was cut with the Cricut. Be sure to size the design to fit your towel before cutting.
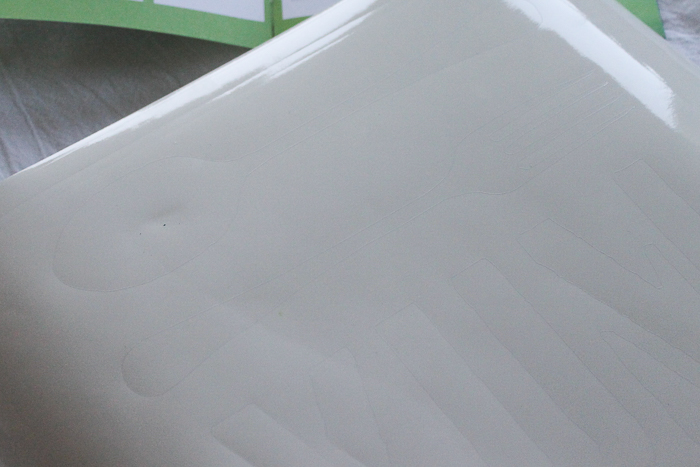
Remove the unwanted areas of your stencil with your hands or a weeding tool.
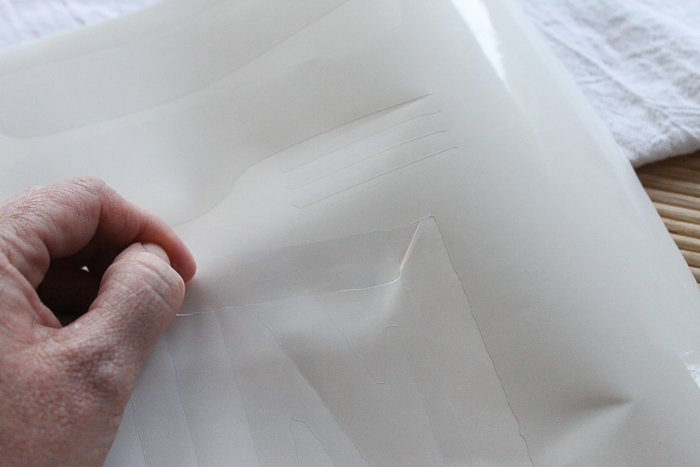
Then, apply the transfer tape to your design. Some stencils may not need transfer tape but you will definitely need it if you have any small pieces. Press the tape down well and eliminate as many air bubbles as possible.
Remove the vinyl liner and apply the entire thing to your towel. Burnish it down well on your towel.
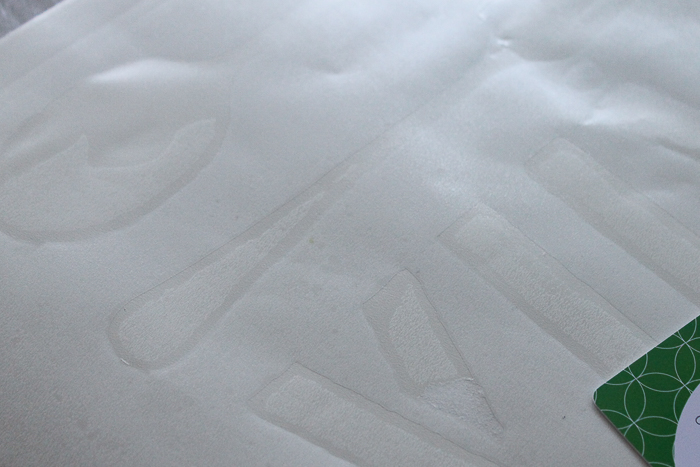
Carefully remove your transfer tape and you are left with your stencil.
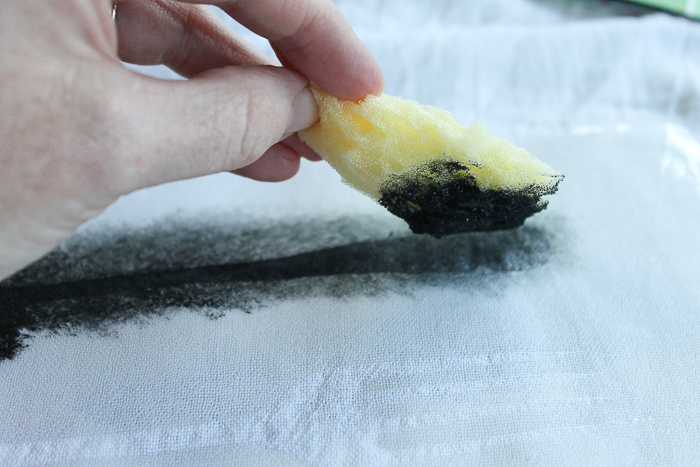
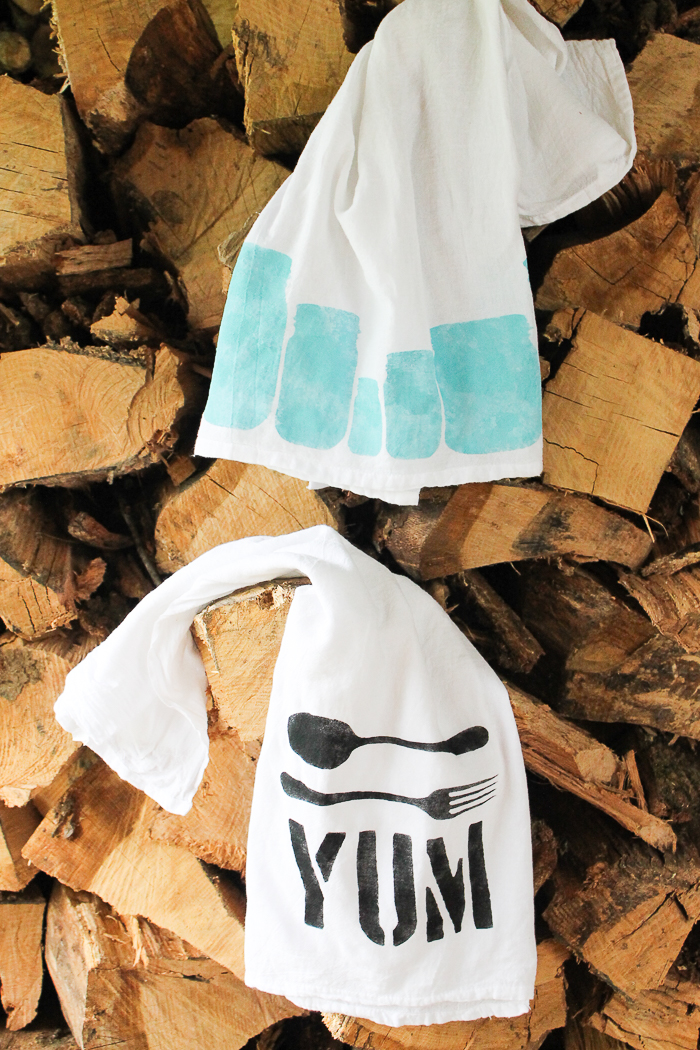
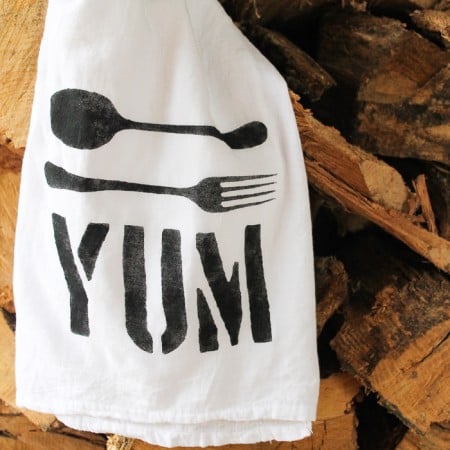
To paint the stencil, use a sponge or foam brush to apply your fabric ink. I applied black ink to this design. The sponge will give more of a distressed look. Use a foam brush for a more polished feel to your stenciled dish towel.
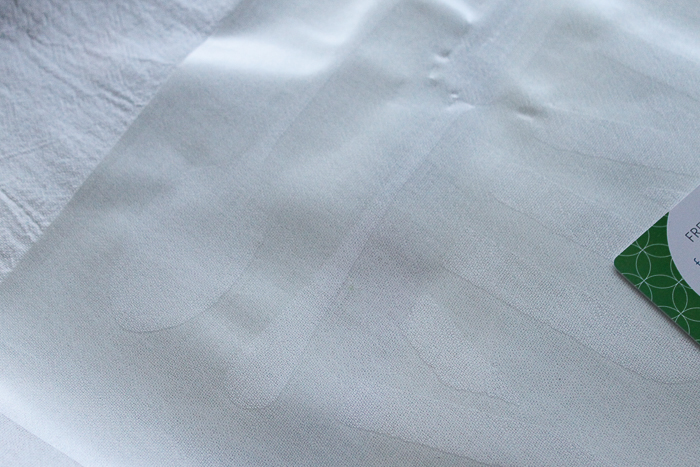
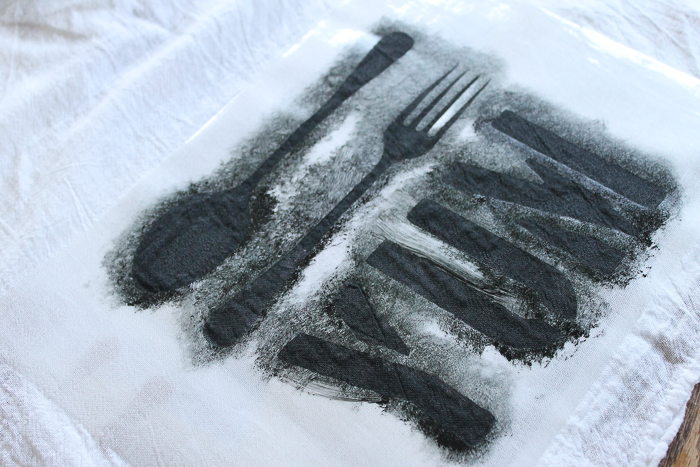
Allow your project to dry completely before removing the vinyl stencil.
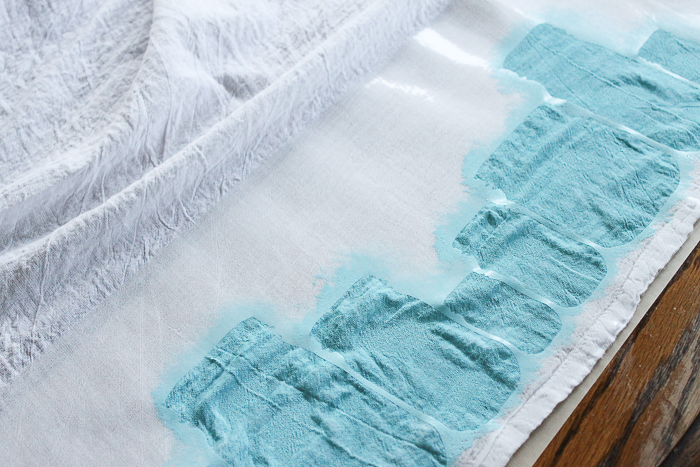
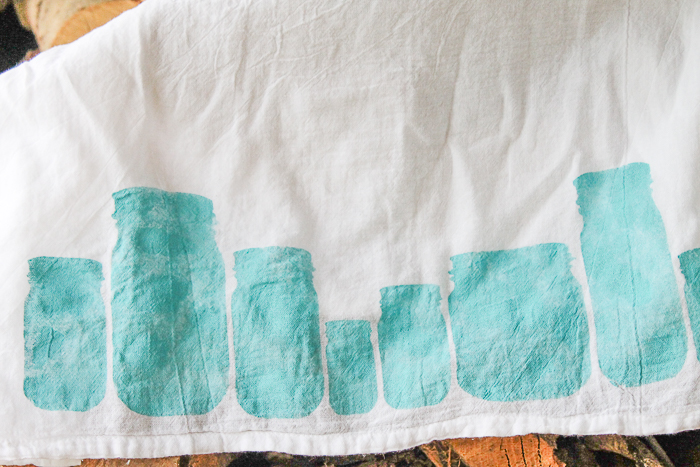
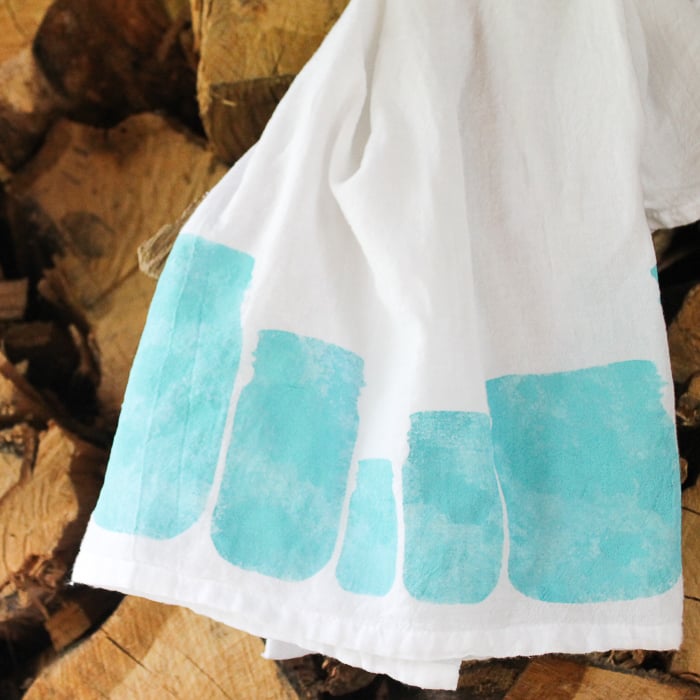
Using the same steps, I made this towel with a row of jars.
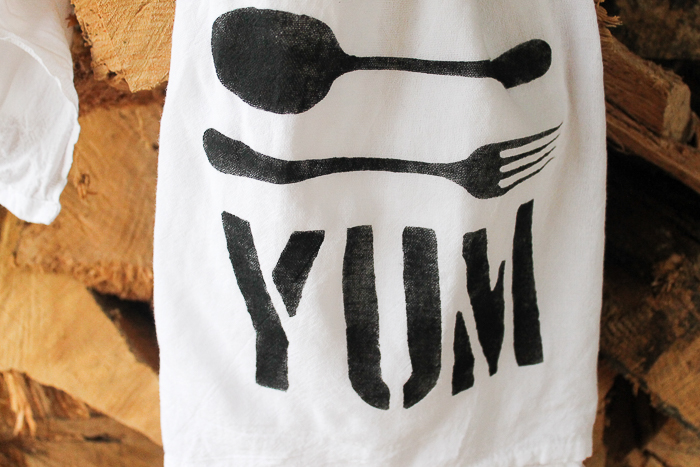
Once dry, just remove your stencil to reveal the magic underneath. Be sure to iron your design to heat set it before using or washing. You can use a regular iron or the Cricut EasyPress for this. Follow all instructions on the back of your fabric ink for this step.
You are left with a completely customized stenciled dish towel that is the perfect handmade gift. Can you see one for dad with a bar-be-que grill?
This option below would be the perfect gift for someone that loves mason jars!
Let your imagination run wild! So be sure to get started making your own DIY stenciled dish towel today. Plus these make a fabulous handmade gift for just about anyone.
I love to use my Cricut for stenciling projects so this one is right up my alley!
Are you going to make a stenciled dish towel? Or maybe a dozen?

So, do you want more handmade gift ideas? Try the links below!
- Tractor Applique Pillow
- DIY Modern Tree Art
- Over 60 Handmade Gifts for Kids (a gift guide)
- Custom Photo Charm Bracelet
- Banana Dark Chocolate Mix in a Jar
- Stenciled Tissue Cover
- also don’t miss our Handmade Gift Gallery Page
Supplies
- Flour Sack Towels (prewashed)
- Cricut Machine
- Vinyl (stencil vinyl or any vinyl color that you have on hand – can also use contact paper)
- Transfer tape
- Fabric Ink
- Iron or EasyPress
- Sponge or foam brush
- Cut file (if you want to make towels like mine)
Instructions
- First, use your Cricut to design and cut your stencil for your towel. Be sure to size the design to fit your towel before cutting. Remove the unwanted areas of your stencil with your hands or a weeding tool.
- Then, apply the transfer tape to your design. Press the tape down well and eliminate as many air bubbles as possible.
- Remove the vinyl liner and apply the entire thing to your towel. Burnish it down well on your towel. Then, remove your transfer tape to reveal the stencil.
- With the stencil still in place, use a sponge or foam brush to apply the fabric ink to the towel. Allow your project to dry completely before removing the vinyl stencil.
- Once dry, just remove your stencil to reveal the magic underneath. Be sure to iron your design to heat set it before using or washing. You can use a regular iron or the Cricut EasyPress for this. Follow all instructions on the back of your fabric ink for this step.
New to Cricut?

Sign up for our email list to download the Beginner's Guide to Cricut Design Space for FREE today!
Sign up to get the guide emailed to you!


I’ll figure out a way to make these towels. Have lots of stencils so will fake it and make do. Now if Walmart or wherever will have the towels. Also have lots of plastic templates with lots of shapes, about time I used them. Where there’s a will there’s a way. Happy crafting
I do not have a circuit. Can I do these towels another way?
You can try finding a premade stencil that you like.