

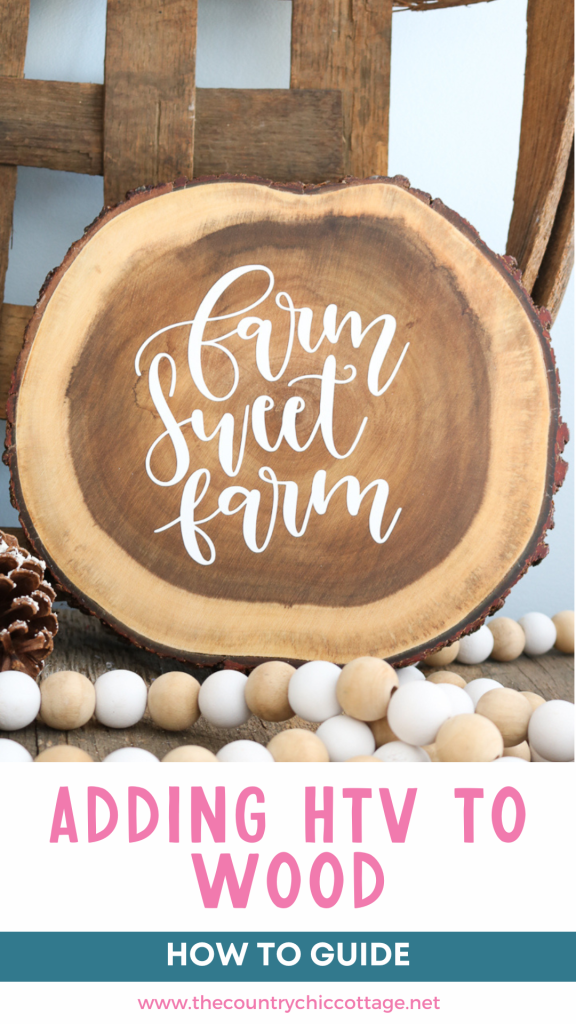
If you’ve ever wished painting on wood could be faster (and less messy), you’re going to love this! Adding HTV to wood is surprisingly simple and gives you a smooth, painted look in minutes. No brushes, no drying time—just crisp, professional results every time. Keep reading to learn exactly how to apply HTV to wood and create beautiful projects with ease. Then you can make projects like this farmhouse wreath with a wood sign!

HTV On Wood Video Tutorial
Watch the video below to see how easy it is to add heat transfer vinyl to wood!
Can't watch the video or missed some of the information? You can also keep reading below.
Types Of Heat Transfer Vinyl For Wood
I am using the Cricut brand iron-on; however, any heat transfer vinyl should work for decorating wood. That said, you might have a harder time getting something like glitter HTV to stick to wood.
Types Of Wood You Can Use
I am using a wood slice in this example, but you can use painted wood with this tutorial as well. You can see a project I made with HTV and painted wood here. It is easier if you use a smooth wood surface. Otherwise, you can pick your favorite blank wood surface.
How To Add HTV On Wood
Now that you know the type of HTV and wood I am using, let's decorate our wood slice!
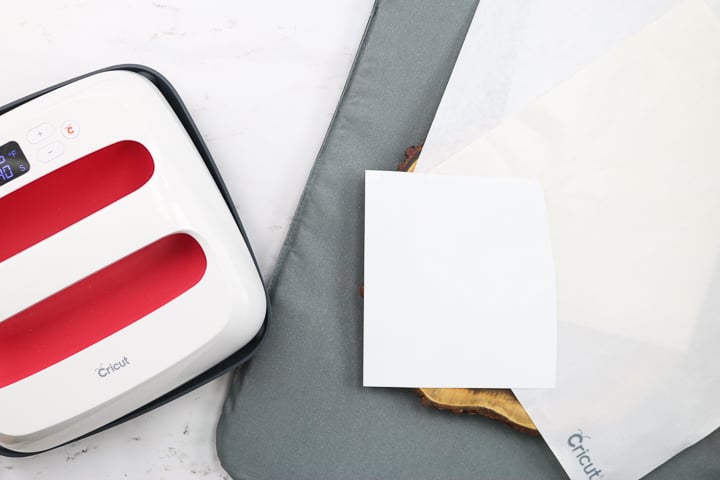
Supplies Needed For Adding HTV To Wood
- Wood Round
- Cricut Cut File
- Cricut machine
- EasyPress or iron
- EasyPress Mat
- Iron-On Vinyl
- Scraper or old gift card
- Teflon sheet or parchment paper
- Weeding tools (optional)
Preparing Your Iron-On
Step 1: Pick Design
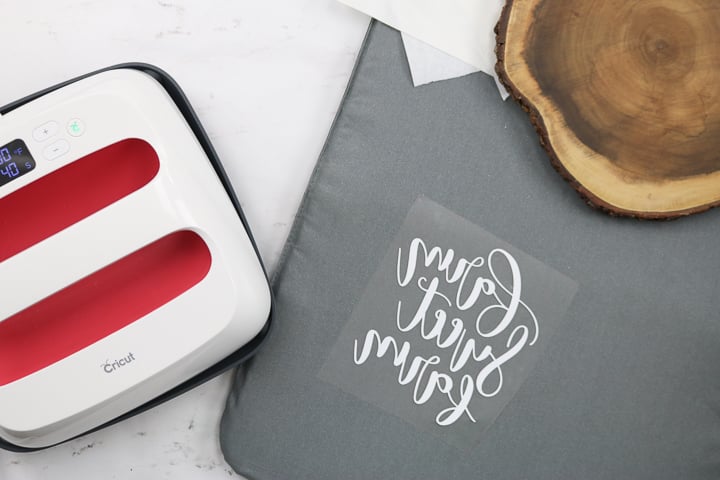
Select a design you want to cut from heat transfer vinyl. You can find this farm sweet farm design here.
Step 2: Cut Design
Place your heat transfer vinyl face down on the mat. Mirror your design in Design Space, then cut it with your Cricut.
Step 3: Weed Design
Then weed away all excess HTV. This includes the outside and the centers of any letters. You only want the design to be transferred to the wood left on the transfer sheet. Have questions about using heat transfer vinyl in general? Try our post here.
Applying The HTV To Wood
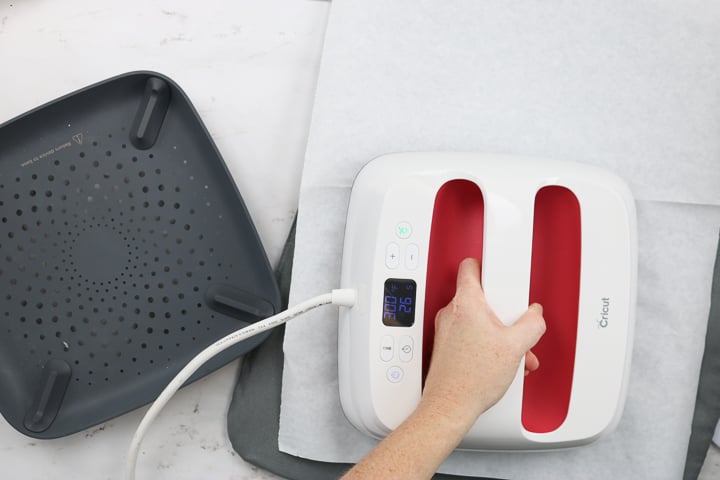
Step 1: Add HTV To Wood
To get the time and temperature needed, check the packaging or the brand's website. If using the Cricut brand, you can use their heat guide here. Just be sure to pick wood as the surface to which you are applying the product.
Set the time and temperature on your EasyPress. Place either a Teflon sheet or parchment paper over the wood. Warm up your wood with the EasyPress for a few seconds. This is just to remove any moisture. Be sure to use the Teflon or parchment as it will protect your EasyPress. Some wood will produce sap when heated.
Remove the EasyPress and the parchment, then place your design on the wood. Add the protective sheet back over the top. Press for the recommended time at the right temperature using your EasyPress.
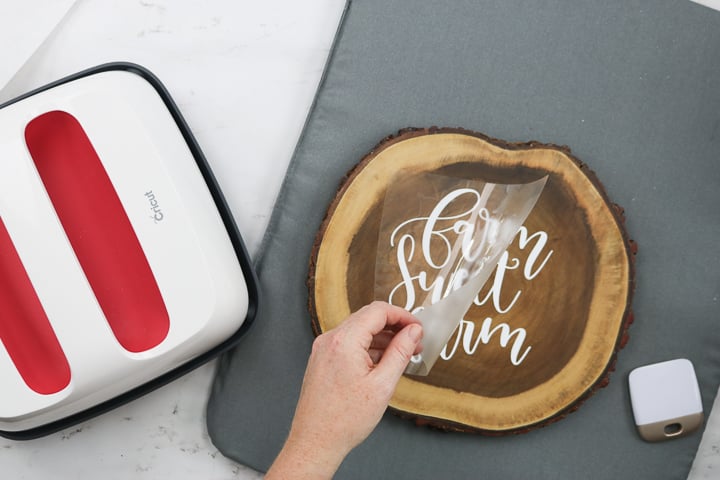
Step 2: Burnish HTV Onto Wood
Remove the EasyPress and protective sheet. Then burnish the top of the iron-on with an old credit card or scraper. I find that this helps the material adhere to the wood's uneven surface. I usually rub until it is almost cool, then try to pull the carrier sheet back.
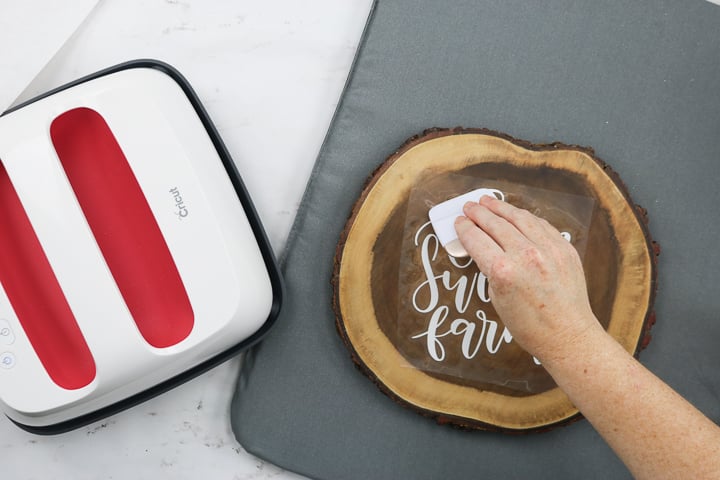
Step 3: Remove Carrier Sheet
If the HTV tries to lift when you pull back, just repeat the entire heating process. Continue until you can pull the carrier sheet off the heat transfer vinyl.
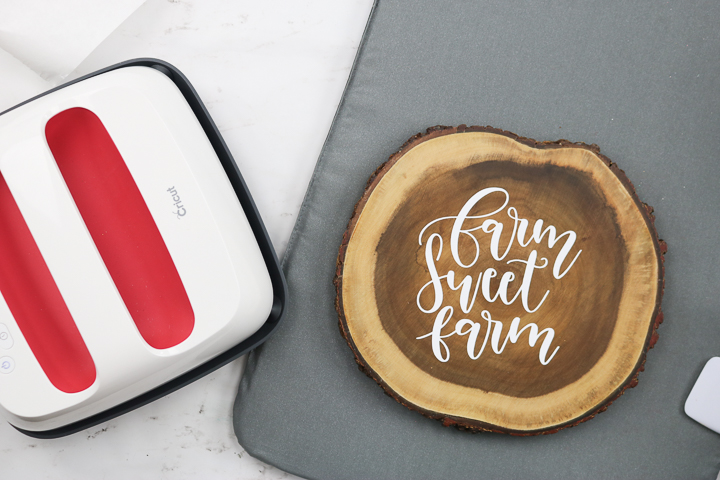
Step 4: Heat Design One More Time
Then add the Teflon or parchment back over your design and press one last time with the EasyPress at the same temperature and for about half the time. This will ensure everything adheres well. Once you have completed this final press, your project is complete and ready for display. Just be sure to allow it to cool completely before handling. The wood can hold heat for a while.
Now that you know how to add HTV to wood, you can use this process for all sorts of craft ideas!
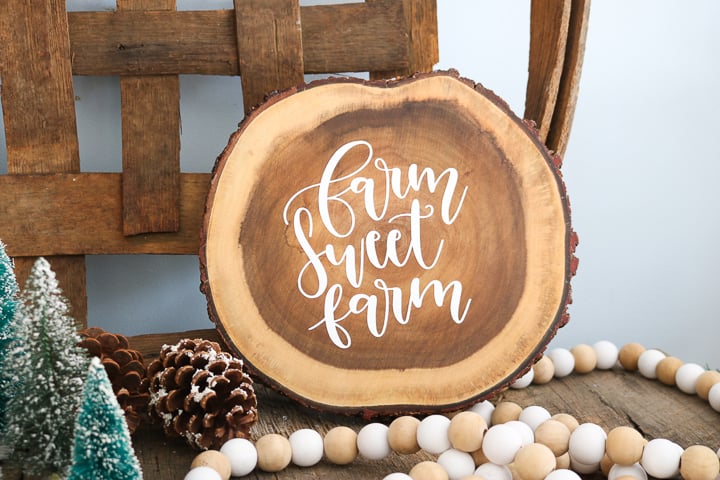
So, will you be trying these techniques with your Cricut machine? Adding heat transfer vinyl to wood is one of my favorite Cricut craft techniques.

FAQs About HTV On Wood
Here are answers to some of the most frequently asked questions I receive about applying HTV to wood. If your question isn’t listed, feel free to drop it in the comments, and I’ll be happy to help!
Where Do You Buy Wood Blanks?
I usually get my blanks at my local craft store, but you can also find them online at Amazon.
Do I Need To Prep The Wood At All?
If you want to stain or paint it, then yes, you would.
Do You Mirror The Image To Cut For Application?
Yes, you do.
I Heat-Pressed On Painted Wood, And My Paint Started To Bubble. Why Did This Happen?
The number one cause of that is not allowing your paint to dry long enough, as the moisture is coming out. I would let the paint to cure for a minimum of 72 hours before attempting this.
Can The Wood Be Spray Painted? If So, Are There Specific Paints To Stay Away From?
You can spray paint the wood. The main thing I would say is that people do not let the paint cure long enough. For spray paint, I would wait 72 hours before applying anything on top. Then use the minimum temperature and time that you can get away with.
When I Used My Heat Press It Caused The Wood To Warp A Little But After A While It Layed Flat, Is This Normal?
Yes, that definitely happens, especially with thinner pieces. I sometimes allow it to cool while weighted down.
How Would You Seal The Finish Sign?
I don't seal for indoor use. Outdoor – I use a few coats of polyacrylic over the entire thing.
11 More Projects Using Heat Transfer Vinyl And Wood
Did you love learning about HTV on wood, and are looking for more craft ideas? Then check out the projects below!
- Clothespin Picture Frame with Cricut Wisteria EasyPress
- Wooden Box Centerpiece with Iron-On
- Wood Gift Tag
- DIY Farmhouse Sign
- Personalized Door Hangers
- Wood Wall Art with Iron-on
- DIY Wood Christmas Sign
- We Are Still Growing Sign
- DIY Scrabble Words
- DIY Watercolor Picture Frames
- Floral Monogram Letters


Rattling fantastic info can be found on site.
Hi .
Love this project but i have one question.
Can i do the same thing for coasters ?
I want to start doing that for my business but i don’t know if i can seal them .
Thank you !
Sure! For coasters, I would put epoxy or something over the top.
I made ornaments with small wood slices and used htv, but a couple weeks later, the htv started to bubble. How can i keep that from happening?
Hmmm. Wondering if the wood wasn’t dry. I think I would make sure to bake the slices in the oven on a low heat to dry them out before applying.