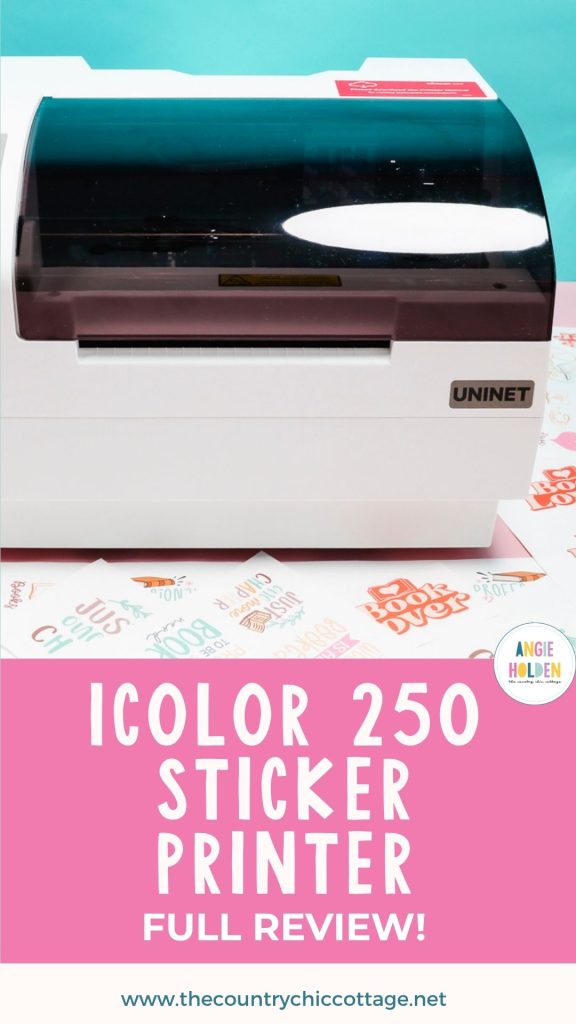
If you want to create custom stickers that are cut out perfectly with no offset required, you’re going to love learning about the iColor 250 printer.
The iColor 250 is technically a label printer, but we’re going to use it to make sticker sheets and individual stickers to see how it does.
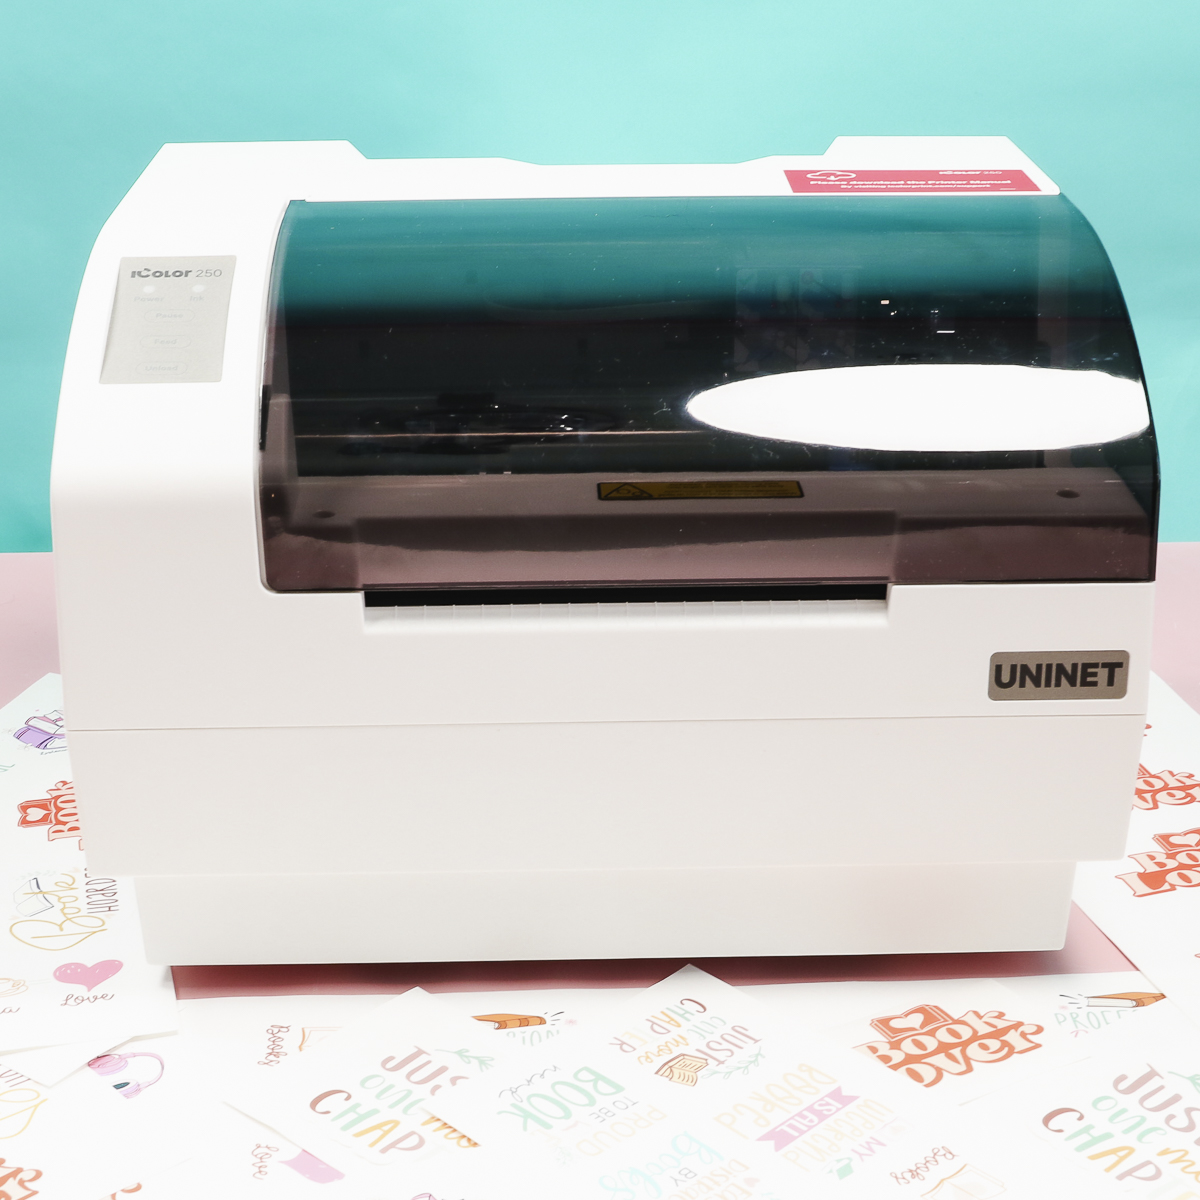
If you want to add professional-looking stickers or labels to your small business, keep reading to see everything this printer can do.
The iColor 250 is a printer and cutter in one. When the print comes out of the printer, it is already cut and ready to go.
iColor 250 Sticker Printer
I’m going to show you how to make a single sticker without an offset, how to add and adjust offsets, how to create a sticker sheet, and more. If you’re looking for a sticker and label printer, this may be just what you’re looking for.
iColor 250 Printer – What Comes with It?
First, we’re going to unbox the printer. Make sure to remove all the packing materials. Some items may be packaged inside the printer.
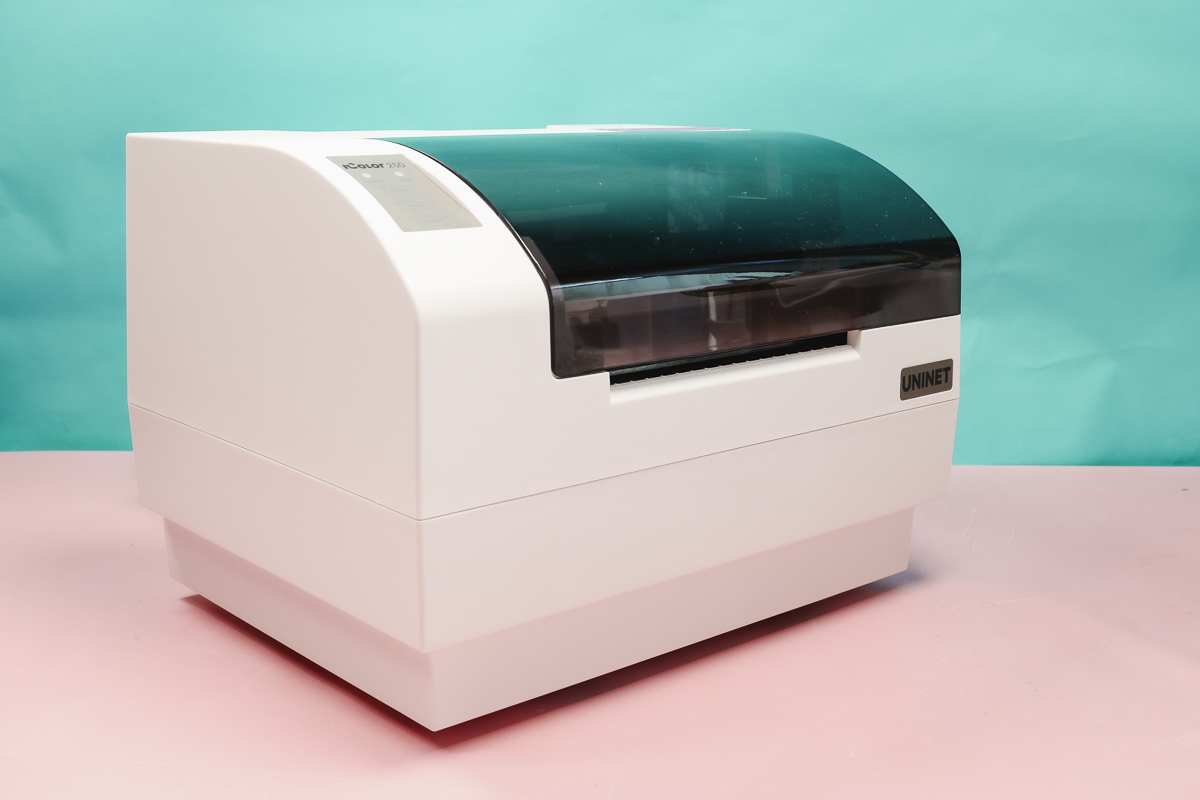
In the box you’ll find:
- Printer (You can purchase this printer here!)
- Printer Cartridge
- Power Cord
- USB Printer Cord
- Cutting Blade
- Thumb Drive with Software
- Roll Holder
- Quick Start Guide
Assembly and Setup
There isn’t a lot you need to do to get the printer ready to go.
First, we’re going to install the cutting blade. Remove the protective cap, and inside the printer you’ll see a blue piece toward the side. Slide the blue piece toward the front of the printer to open the clamp.
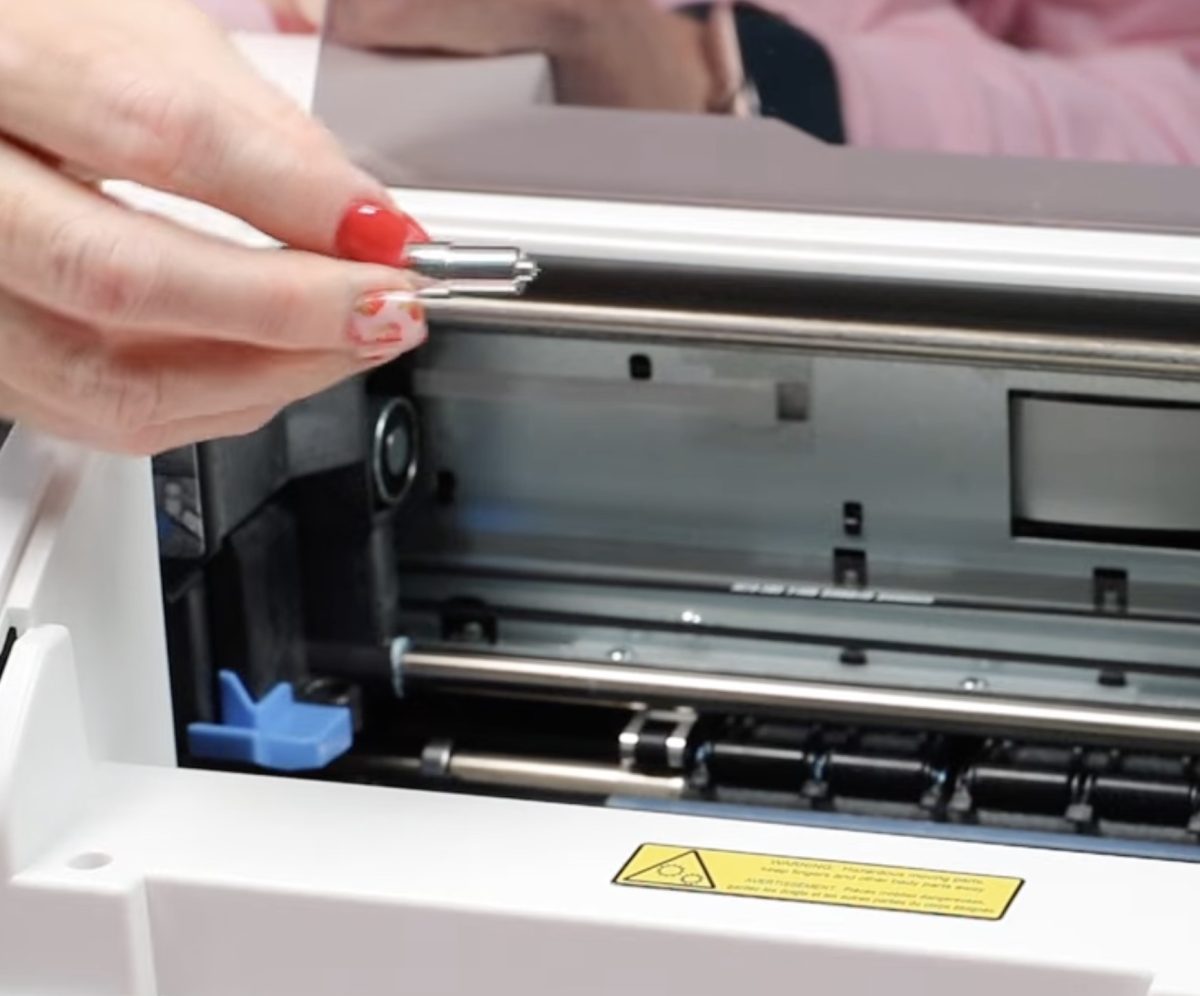
Drop the blade inside the clamp and press it down to make sure it’s all the way down.
Slide the blue piece back to lock everything into place.
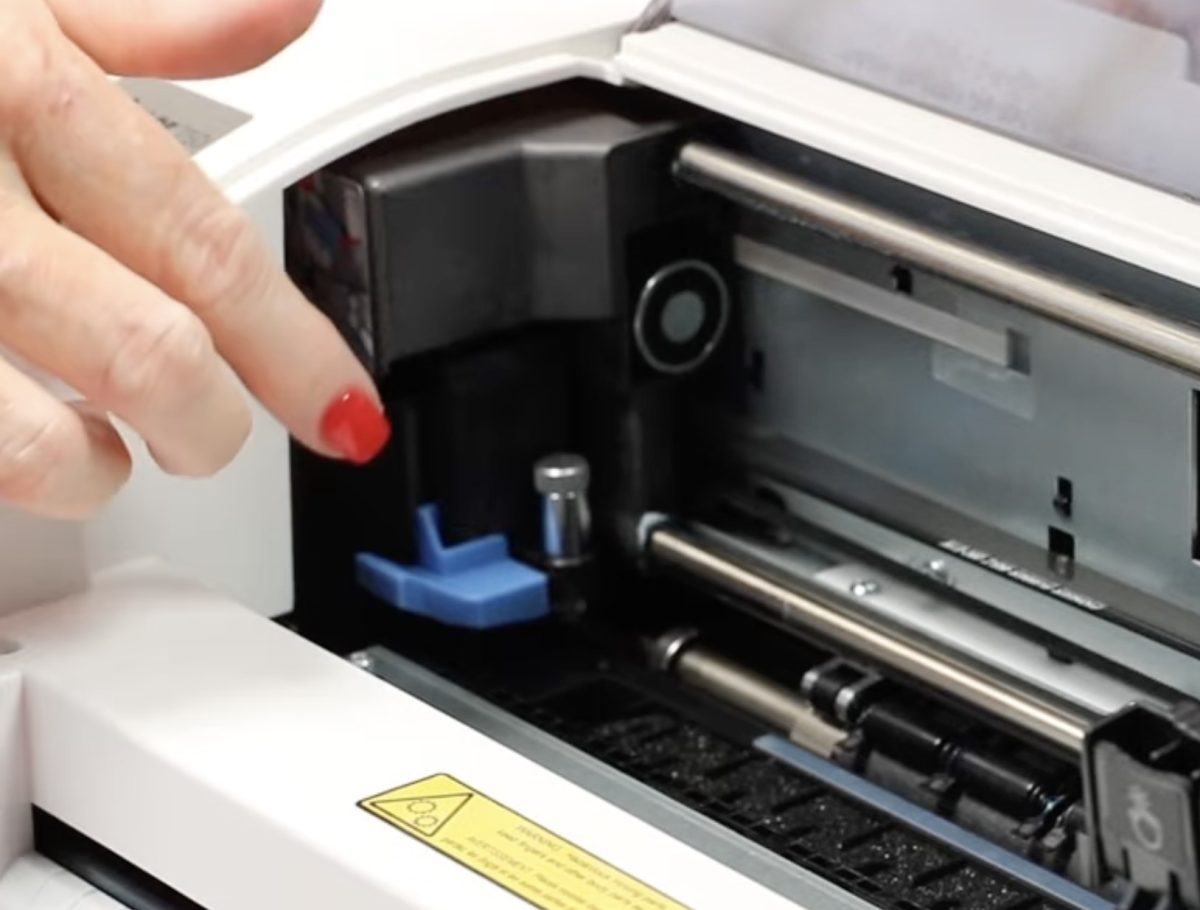
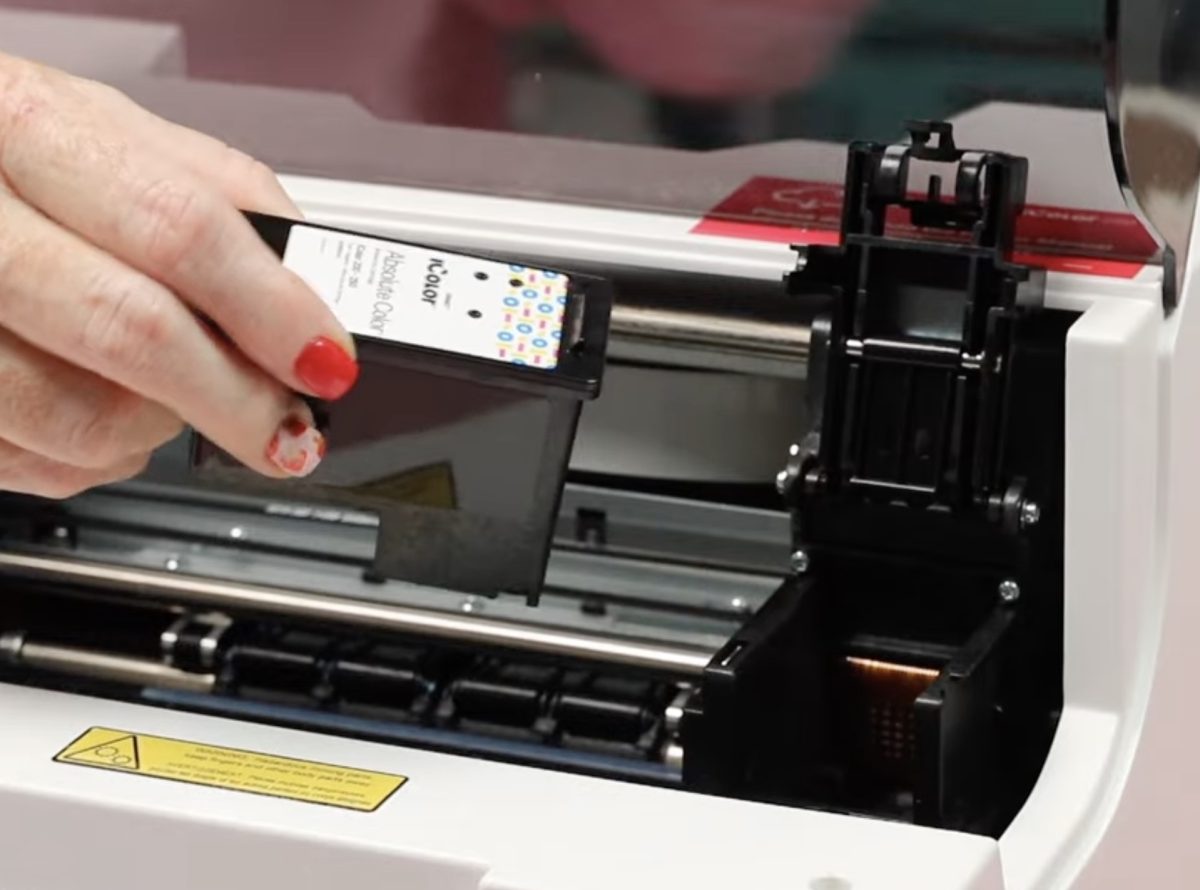
Now we’ll move to the other side to install the ink cartridge. Don’t forget to remove the protective film from the ink cartridge before inserting it into the printer.
Lift the cap-type piece and slide the cartridge in at an angle. Push the cartridge down and back. When it’s fully in place, you can close the top; you should hear it click into place.
Assemble the Roll Holder
Next, you need to turn the printer around and flip it over so you can see the bottom and the back.
On the back you’ll see a rail, and on the bottom there is a groove.
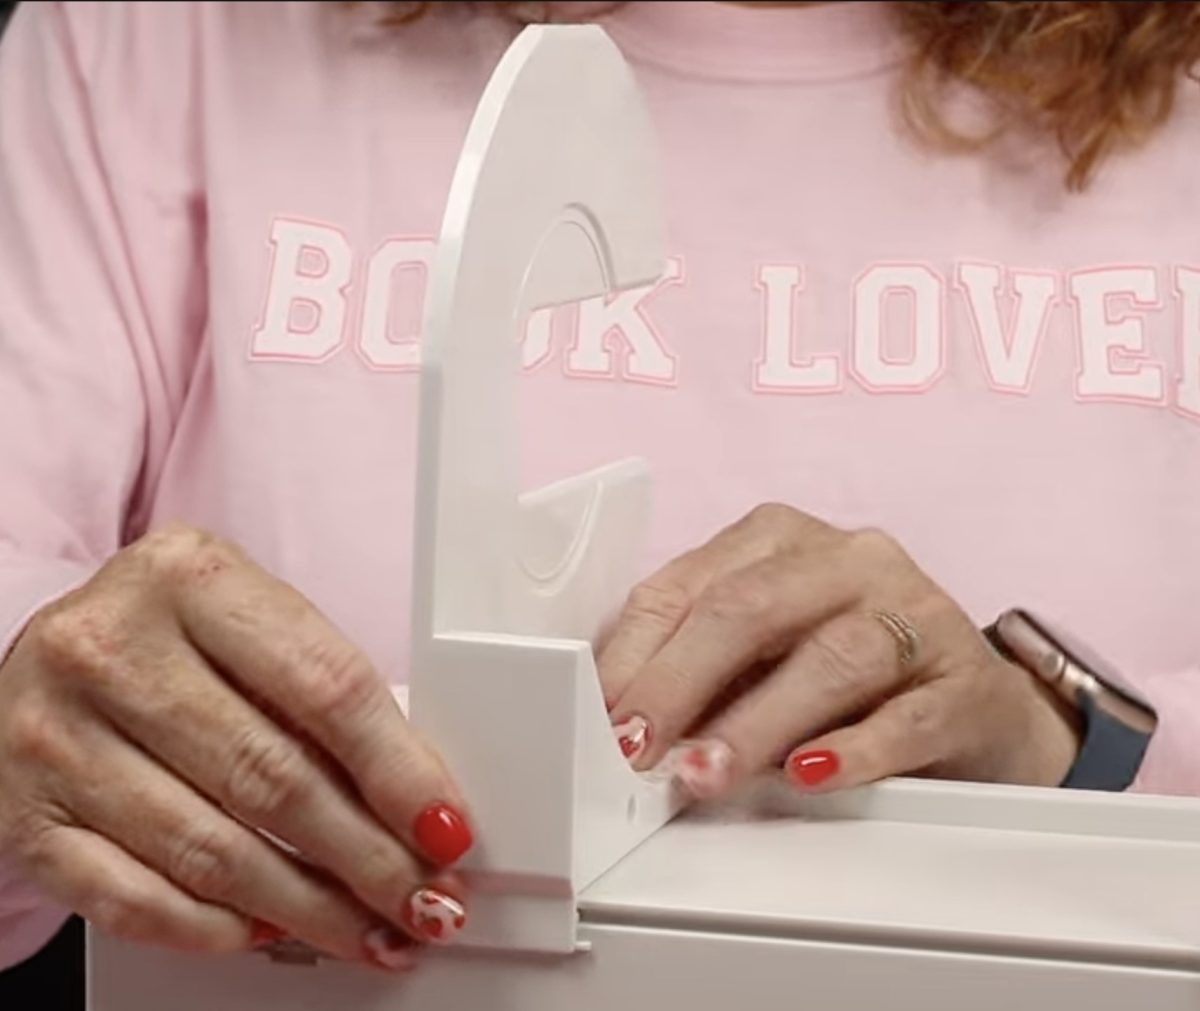
There are 3 pieces to the roll holder. First, we’re going to find the end piece that doesn’t have green on it.
Slide it onto the rail, and you’ll feel it drop into the groove. Slide it all the way to the side.
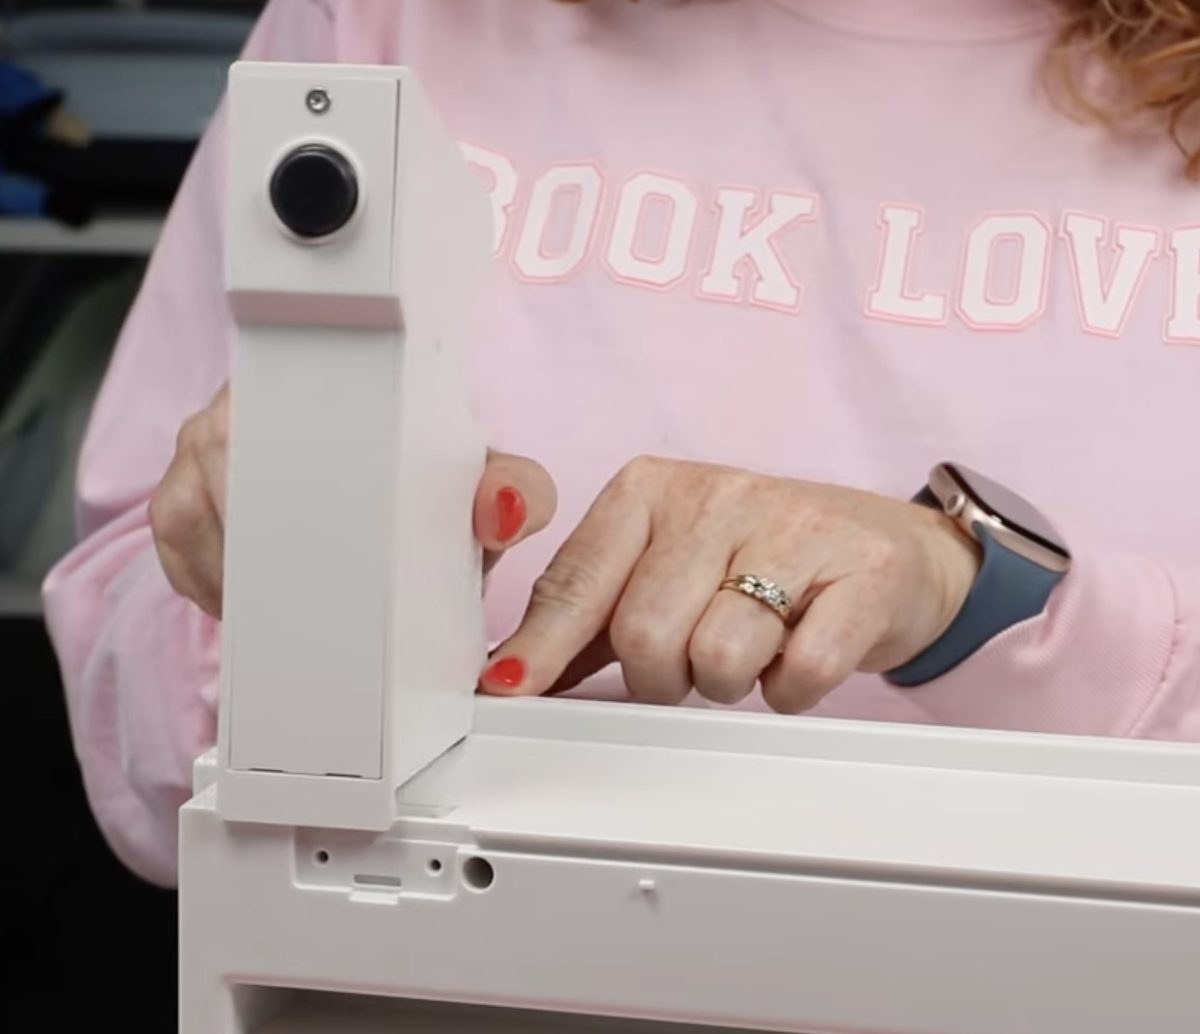
Next, find the piece that looks round and install it the same way. Go slow as you slide it over because it will hit a hard stop quickly.
On the last piece, you’ll see it has a green insert and a computer cable. Plug the cable into the back of the printer, and as you slide the piece in place, push the excess cable into the bottom recess of the piece.
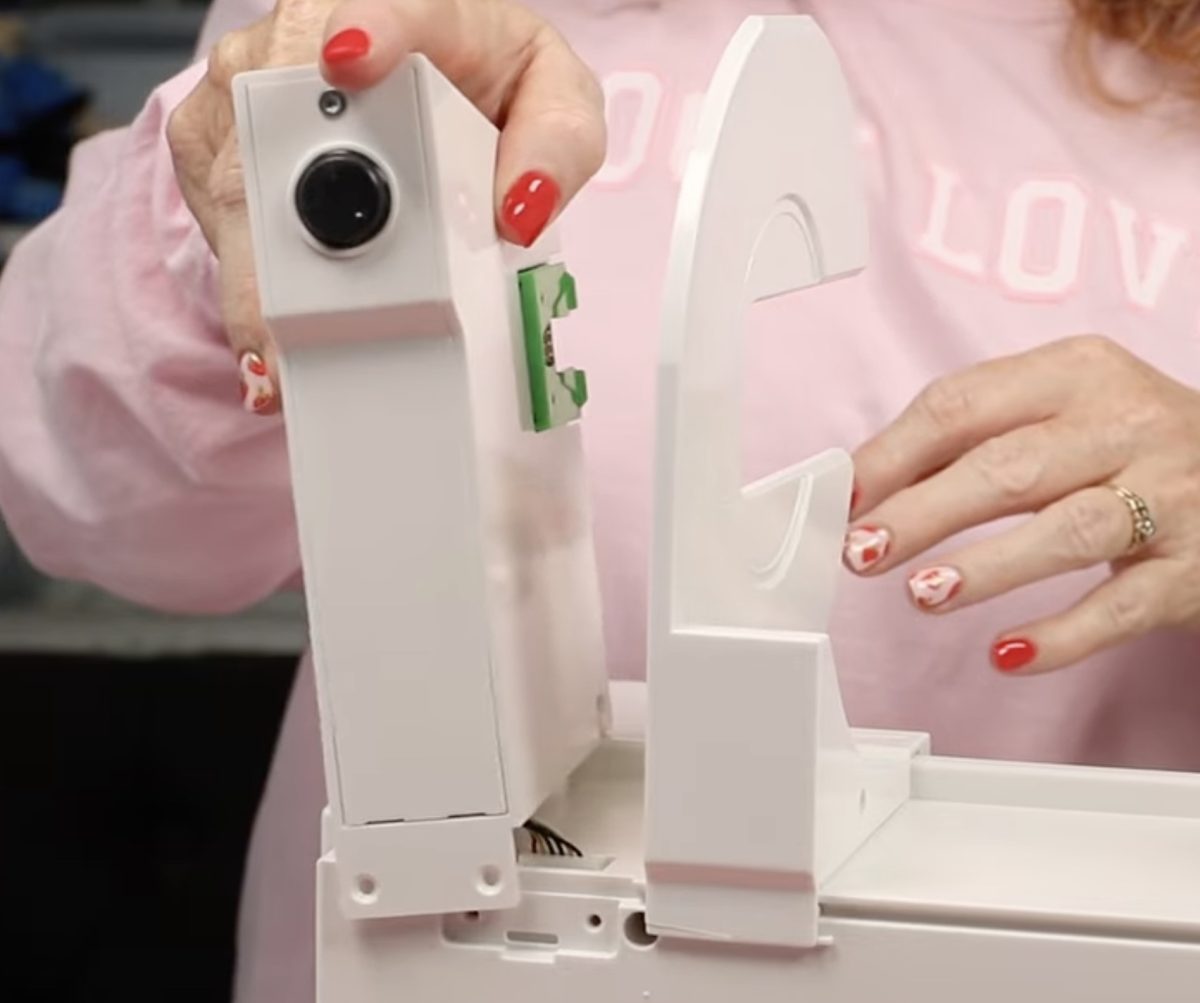
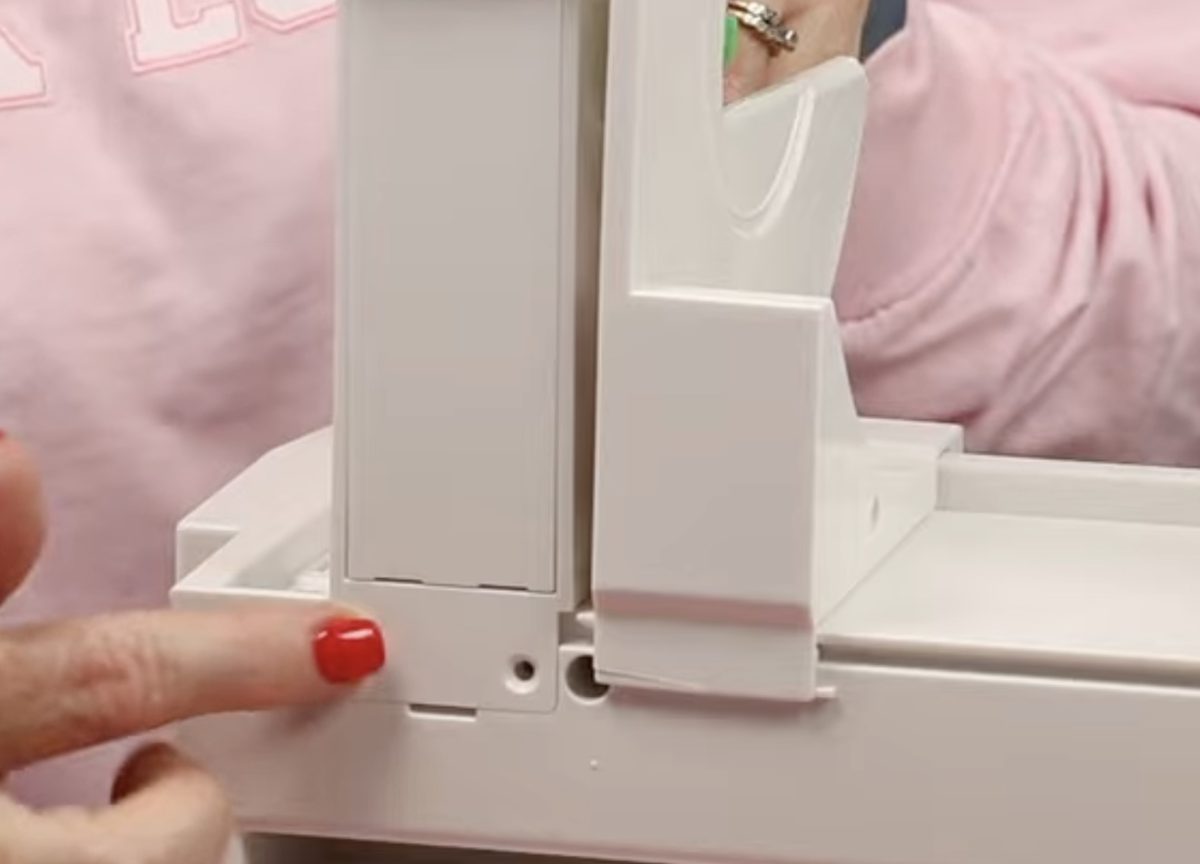
When the piece is in place, the holes should line up, and you can use the included screws and Allen wrench to lock it in place.
Software Installation
Now that we have the roll holder attached, we’re ready to install the software.
The software activation code is on the back of the Quick Start Guide.
The printer comes with software for both a PC and a Mac. I am using a PC, which is what they recommend for the best experience. At this time, the Mac version is a scaled-down version of the software.
During the installation process, I was prompted to plug in the printer, power it on, and use the USB cable to connect the printer to my computer.
I installed the drivers and software on my computer. The most important software pieces are the Custom Cut software and the Print Hub.
The Custom Cut software is the software that will allow us to cut around shaped stickers without needing an offset.
The Print Hub allows us to adjust some settings that we’ll look at in a little bit.
Load the Print Media
The iColor 250 can accept print media up to 5 inches wide. I am using a gloss media.
The gloss media is just one type of print media you can use. There is also matte media and pre-cut media that come in different sizes. You can use that if you don’t want your machine to do the cutting for you.
Uninet print media comes with a computer chip, and that is what locates your cuts.
While other brands can fit in the printer and work with it, if you want to use the print and cut capabilities, you want the media from Uninet so it has the computer chip.
The iColor 250 comes with a green disk. You would use that if you’re using print media from somewhere other than Uninet.
My glossy media is from Uninet, so it has the computer chip, and I do not need the green disk.
There is a blue disk that will need to be added to the other side. Now the media is ready to be installed in the printer.
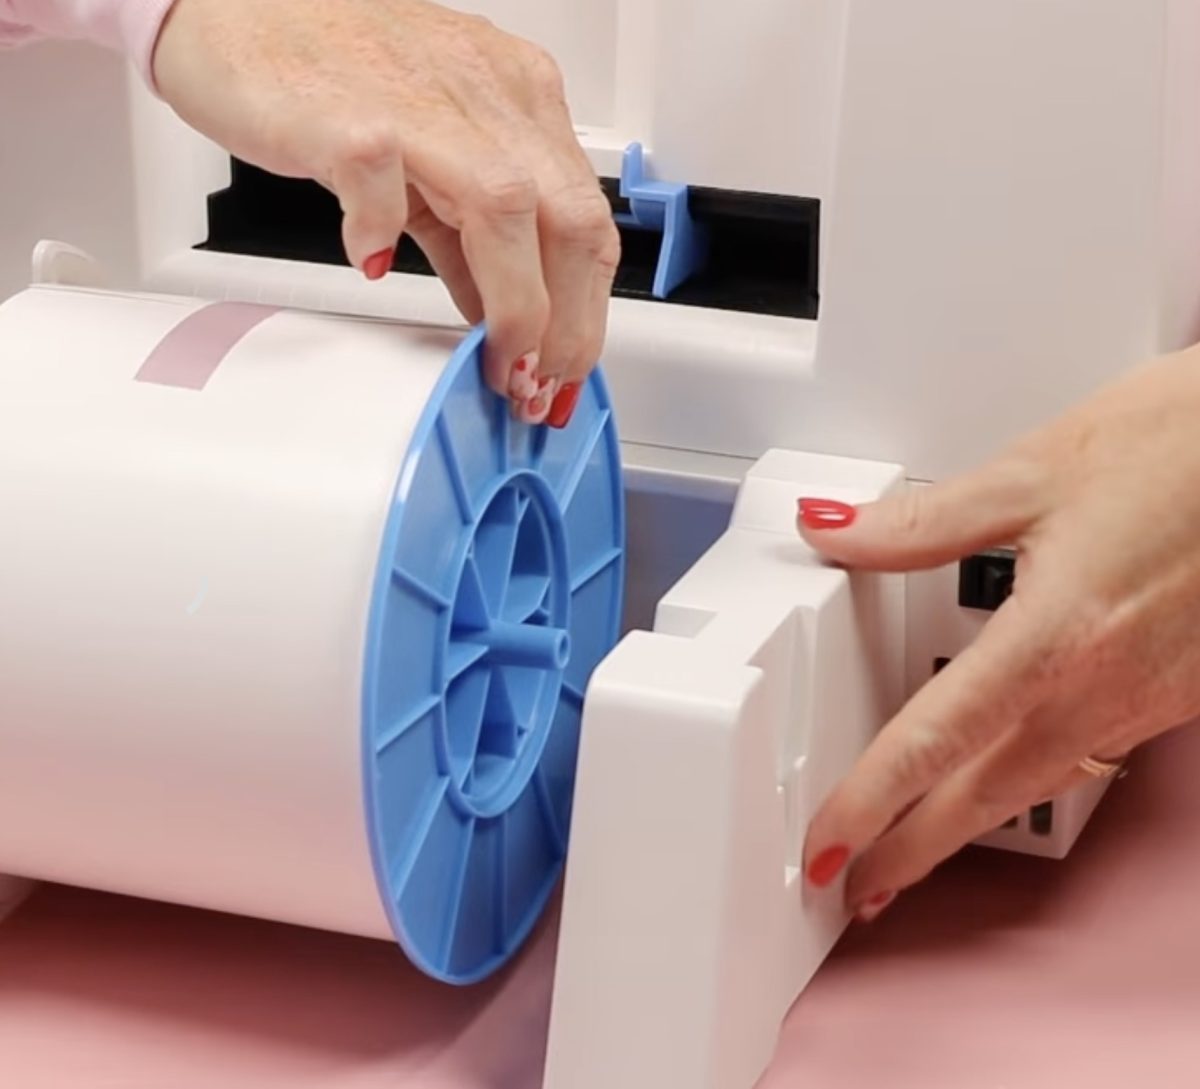
To feed the media into the printer, it needs to come over the top and feed with the feed facing into the printer. My media actually came with the computer chip on the wrong side. Luckily, it is very easy to swap it to the other side.
Slide the end with the computer chip into the end of the holder that we plugged into the printer, and then slide the holder piece on the other end in so it supports the blue end of the media roll.
Feed the media into the back of the printer and slide the blue adjustable piece so it sits right against the side of the media.
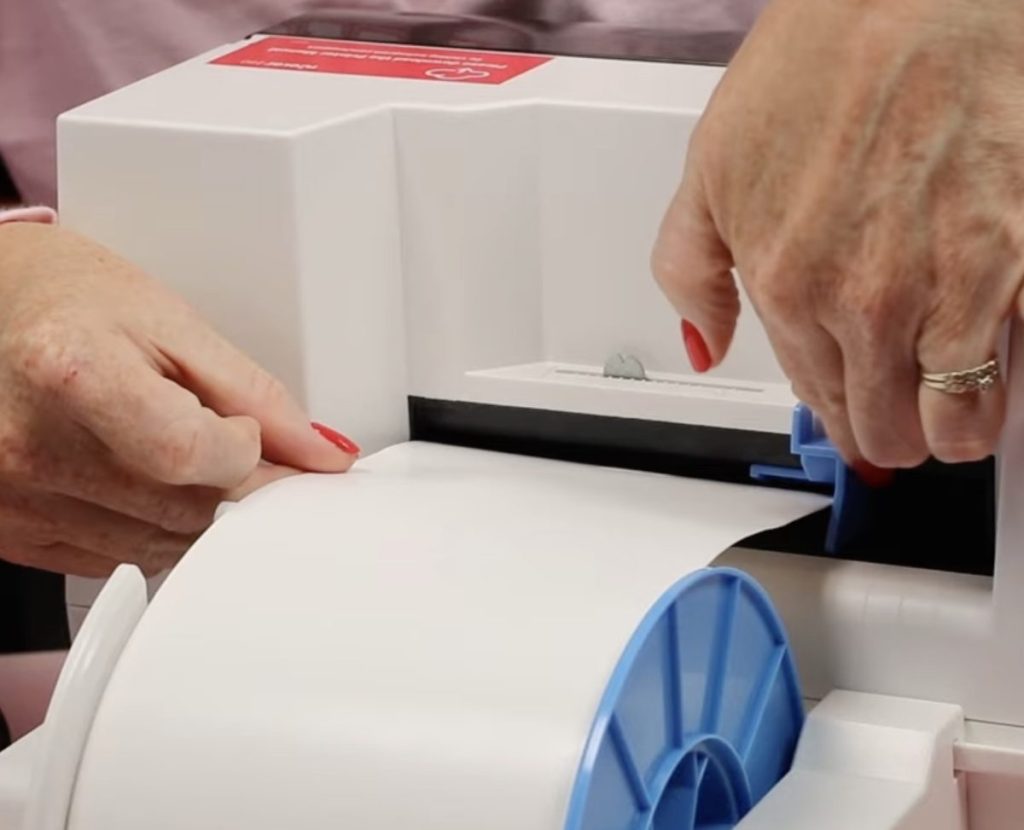
As you slide the media into the printer, you should hear it kick on, and it will grab the material and automatically start feeding it in.
Now we are ready to print.
iColor Custom Cut Software
Open the iColor Custom Cut software and click New Project. Here you can name your project. I titled mine Bookish Stickers 1.
Next, you can choose from a variety of different page sizes or click Custom Size.
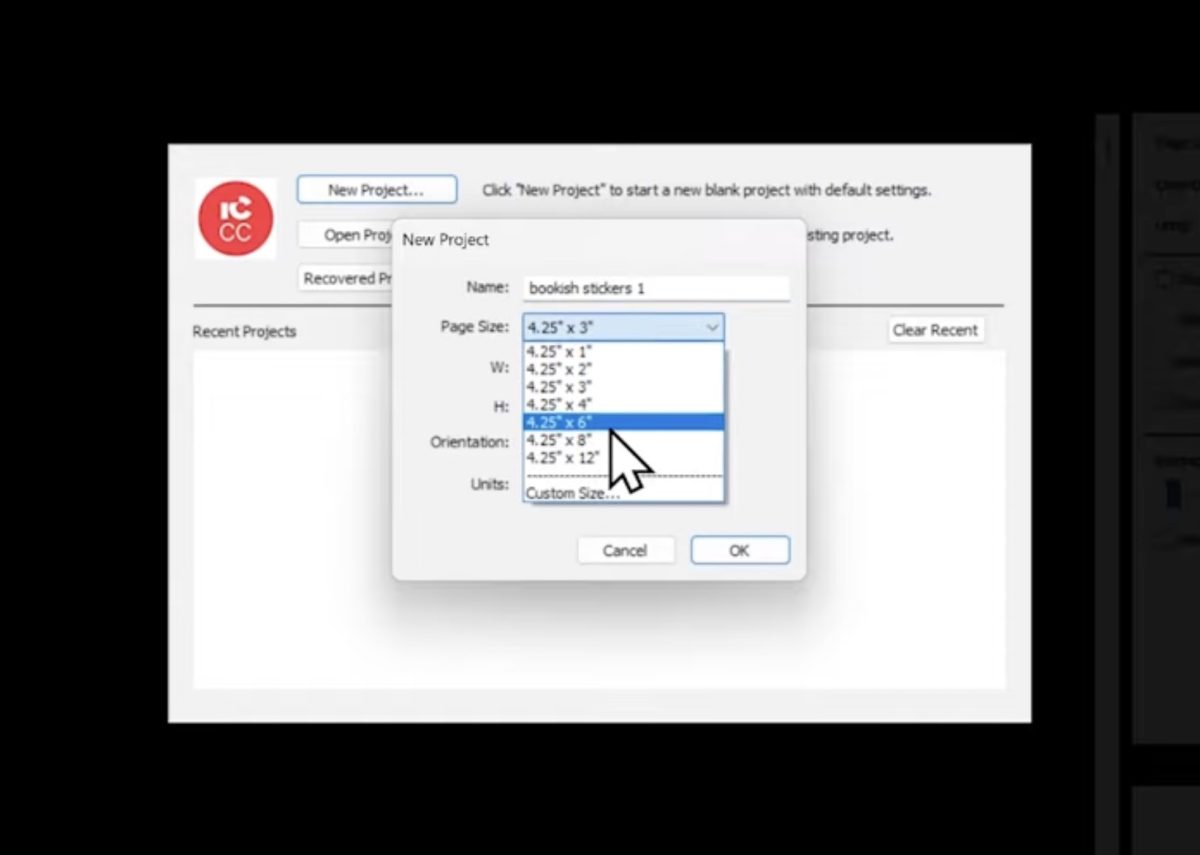
My material is about 4.25 inches with a maximum length of 12 inches.
How to Make a Small Sticker
First, I am going to make one small sticker. In the size dropdown, I chose 4.25 by 3, and you can choose horizontal or vertical orientation.
My software is set up for inches, but you can change that to millimeters or centimeters if you’d like.
Click Okay, and now you can see that shape as the canvas in the software.
Upload Design Files
You can import almost any type of image file. JPEG, PNG, PDF, SVG, etc all work. I would recommend using an image file like JPEG or PNG with a 300 or greater DPI.
Click Import and find the files you want to use on your computer. My image is a PNG file that has a white border.
Resize the design to fit on the canvas.
Trace the Design
For the printer to know where to cut, we need to trace the design. Click Trace in the top toolbar and make sure that you have Monochrome checked.
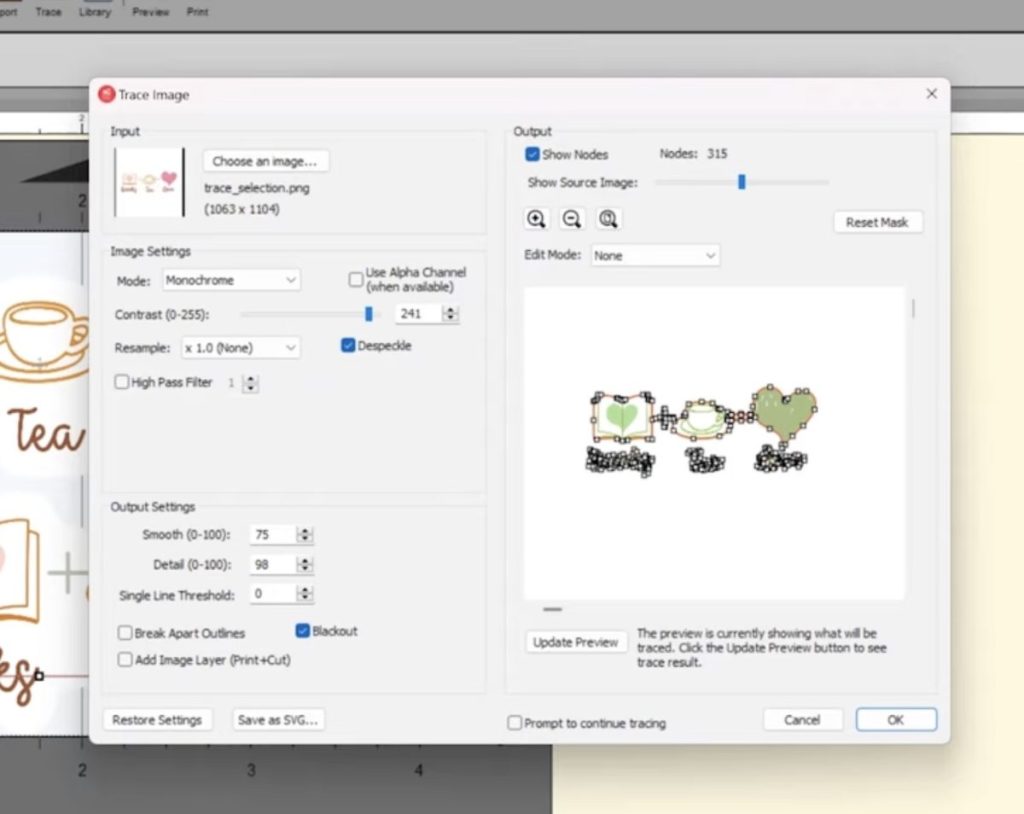
The trace feature ignores the white outline I have on my design. If you want the offset, you can add that back on later.
I found it easier to see where it would cut by turning the nodes off. To make adjustments to the trace, you can move the contrast slider
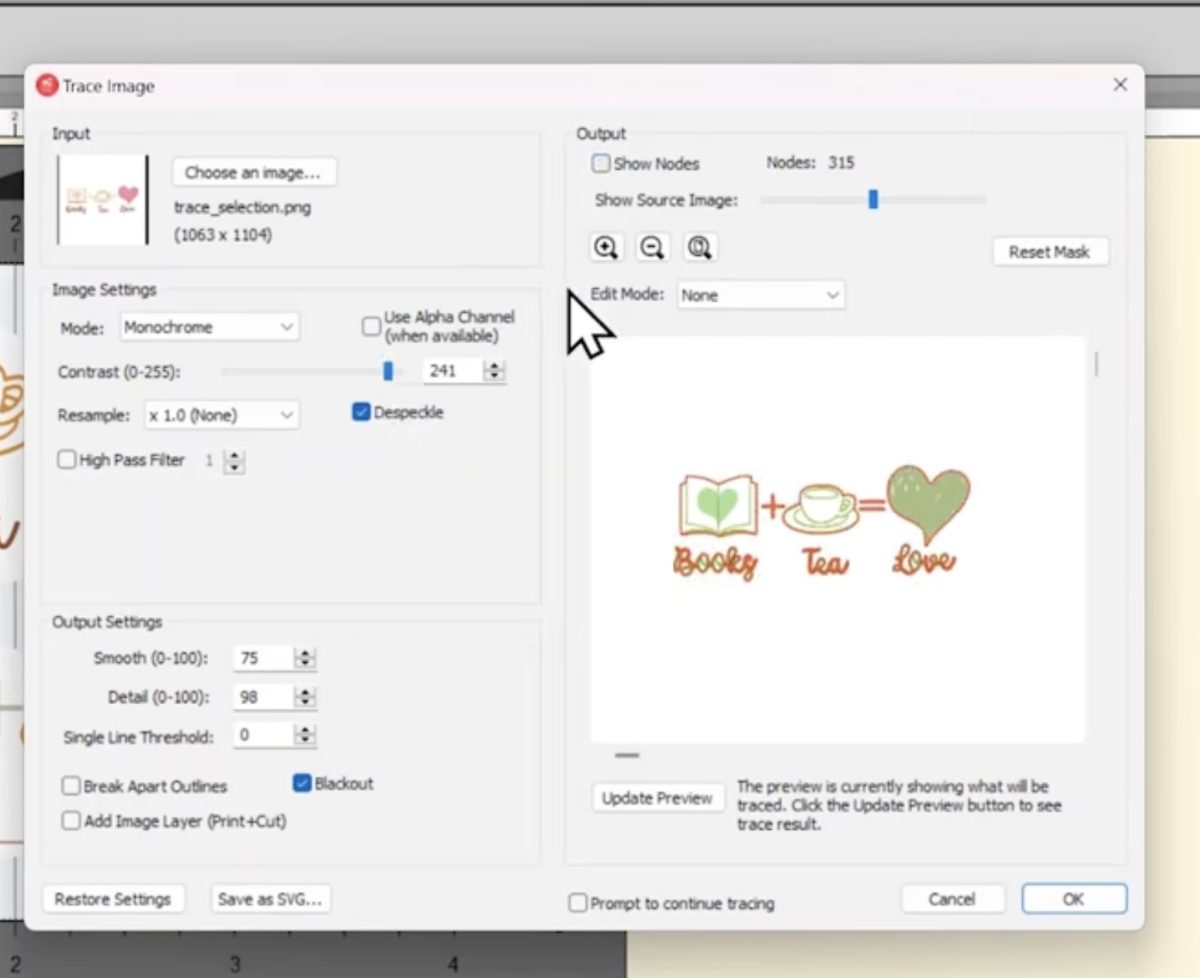
Click Update Preview to see the new cut lines. Because I am going to add an offset, I don’t need it to be perfect around every letter.
Click Okay, and now you can see the red lines around the image.
Add an Offset
Click Path in the top Toolbar and then Offset Path.
Here you can make adjustments to the type of offset you want to do. You can do an internal offset or an external offset. I like an offset of 0.125 inches. Click Okay, and you will see the red outline outside the white offset.
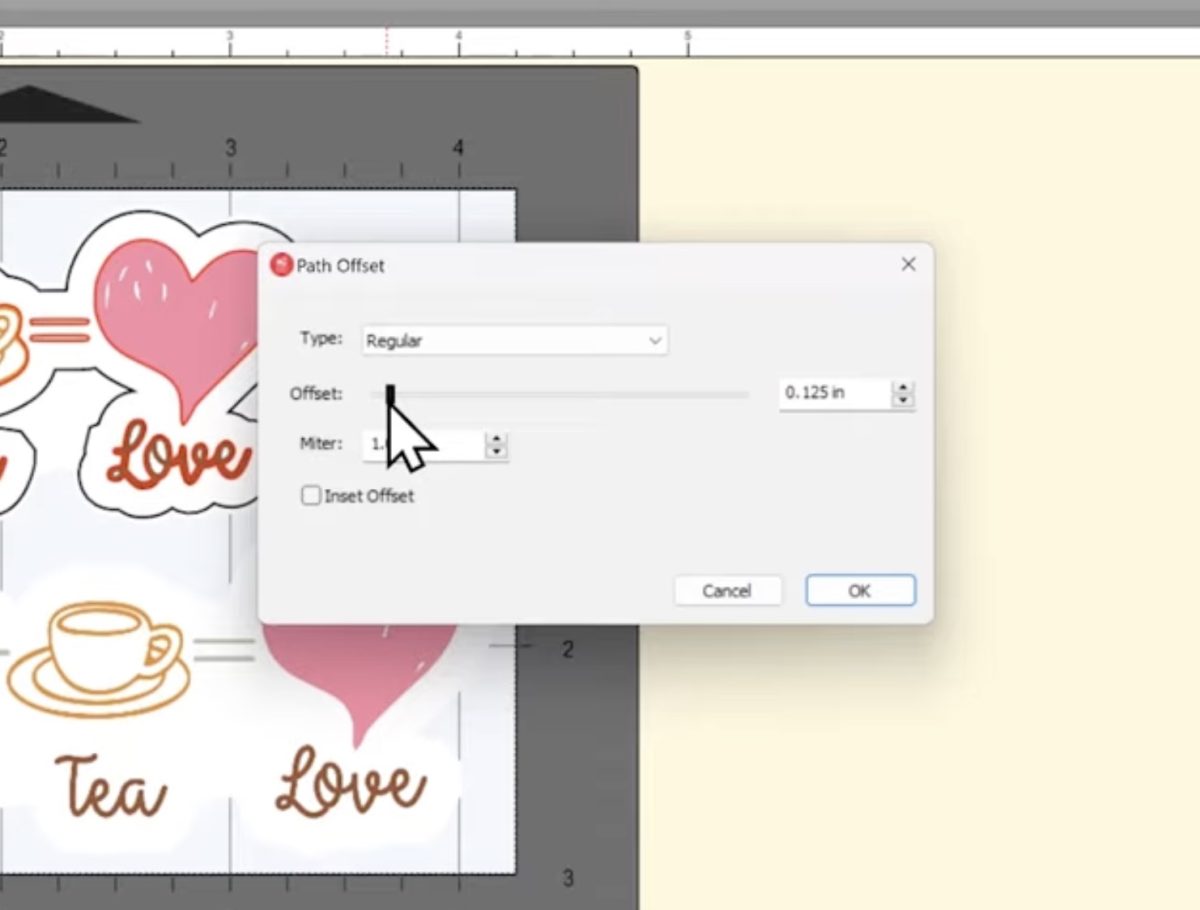
With the size of my sticker, I can actually get 2 on this canvas. Copy both the sticker layer and the trace layer and paste them onto the canvas. I found the nudge buttons a little easier to work with than the mouse for small adjustments.
Print and Cut the Stickers
Click File and then Print. Make sure Print and Cut is selected and click Okay.
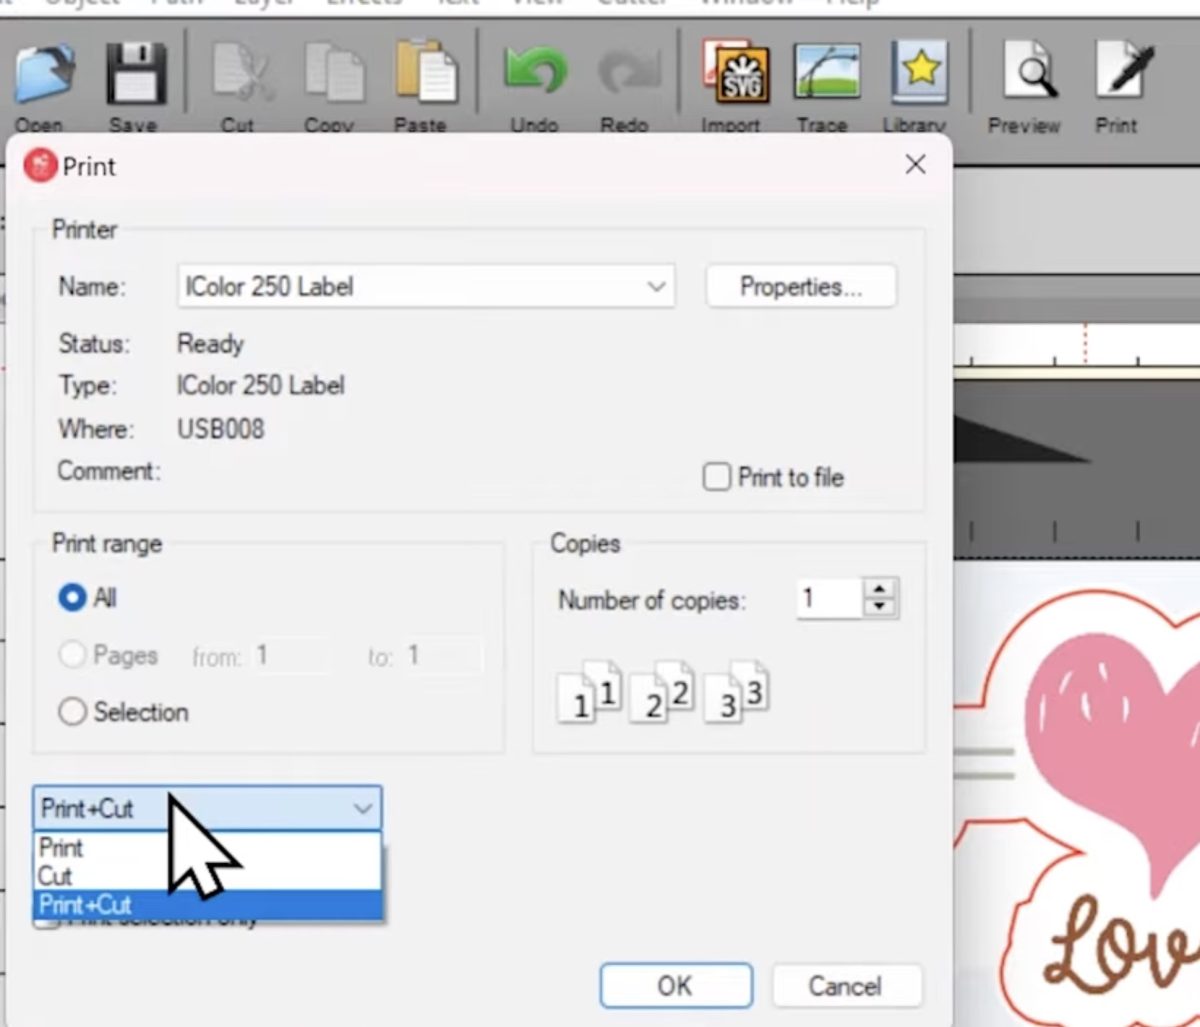
The printer is very fast, and while it makes noise while printing, I didn’t find it to be too loud.
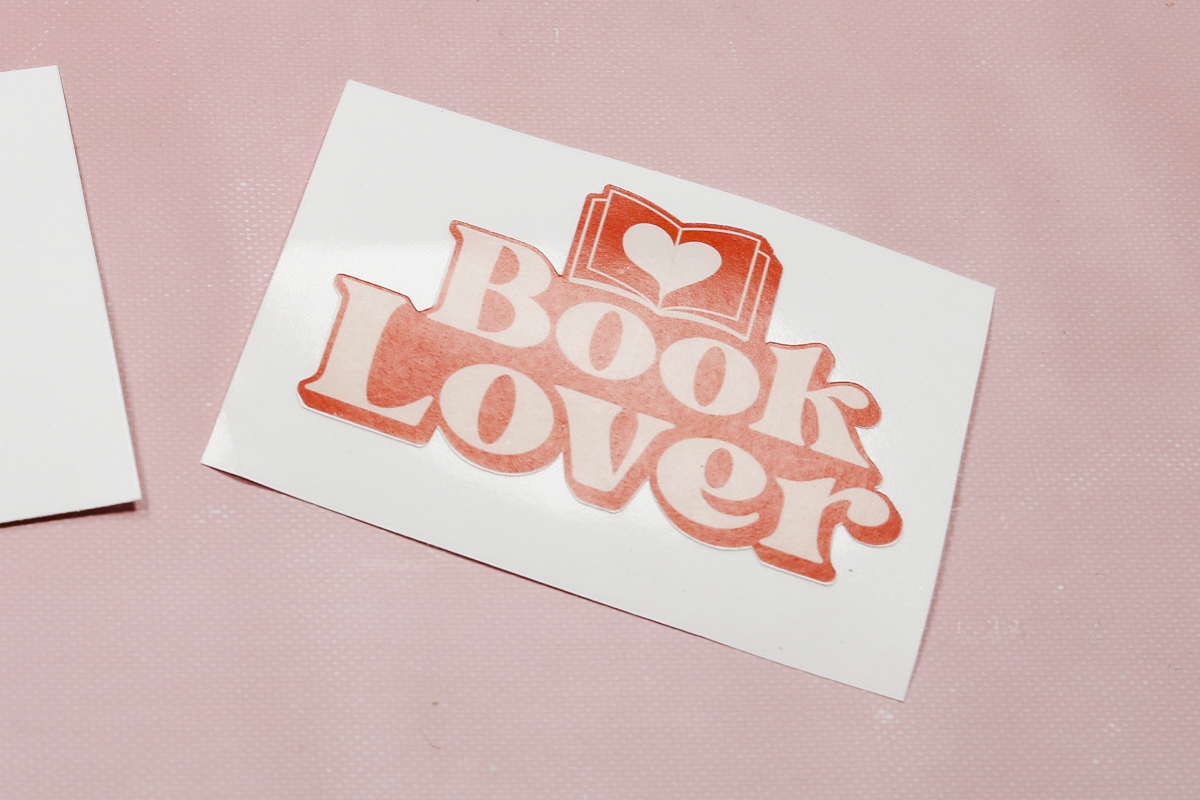
After printing, the iColor 250 will cut the media, and the sticker will drop onto the table.
For my very first stickers, I am impressed with how perfectly both the print and cut features worked.
How to Make a Multi-Sticker Sheet
To make a sticker sheet with multiple stickers, the process for uploading and tracing the image is the same as we did for a single sticker.
There are a couple of things I learned testing this process that I think will be helpful to know before you start.
First of all, there is an option for a 4.25 by 12-inch page size. I tried several different ways to print and cut with that size, and on each one, the cuts ended up being a little bit off.
Stick to no longer than 9 inches if you’re printing and cutting multiple stickers. I am using the 4.25-by-8-inch page size.
For this multi-sticker page, I am going to add some designs with an offset and some without to see how well it follows the image while cutting.
You can add as many images as you want as long as they fit on the page.
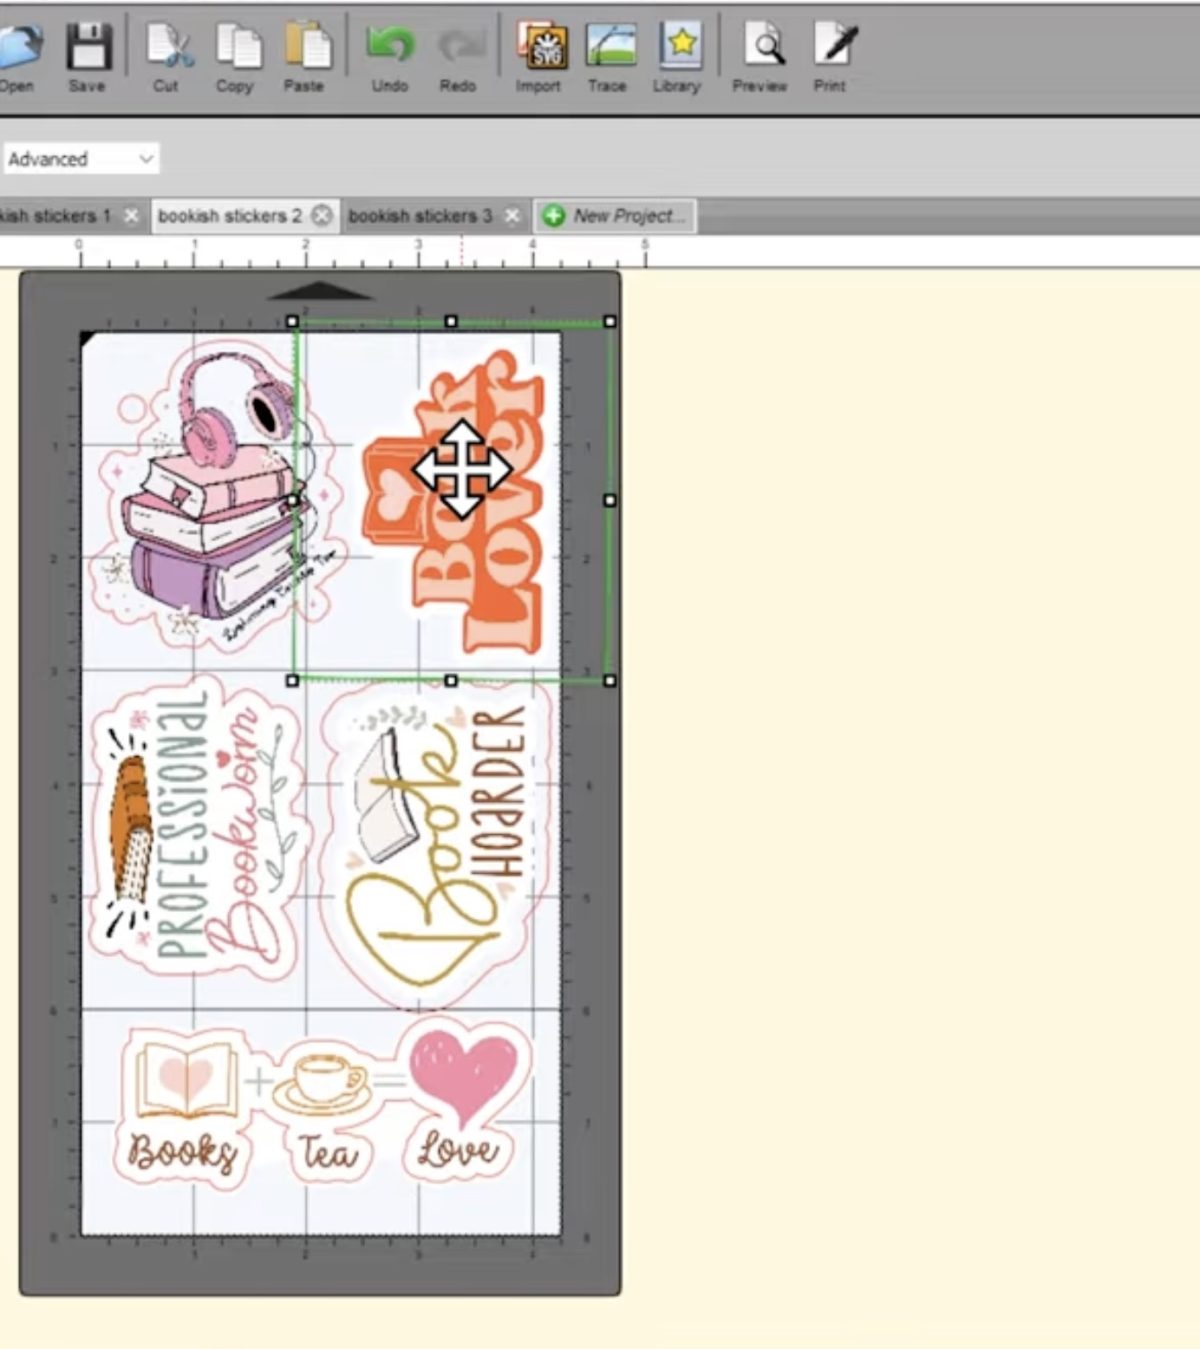
With all of the images loaded and traced, we’re ready to make any adjustments we want to make in the Properties tab.
I changed my Quality to Best Quality and changed the Color Matching to Vivid Graphics. I would do a couple of test prints, trying some of the different settings to see which combination you like best. The media you use can also give you different results.
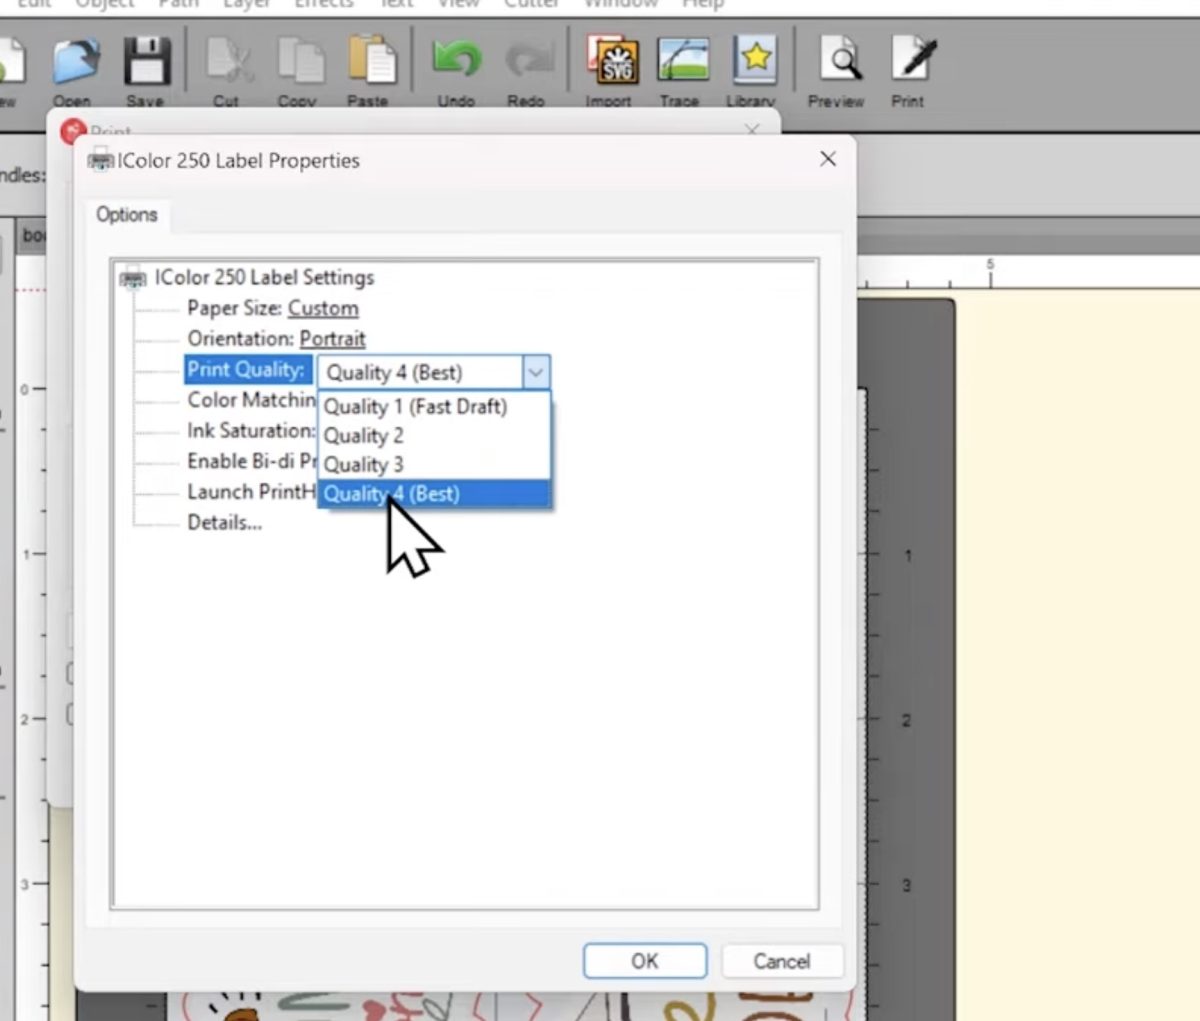
Click Okay, and now we’re ready to send it to the printer. I upped the number of copies to three so I can show you how the iColor 250 prints multiple copies.
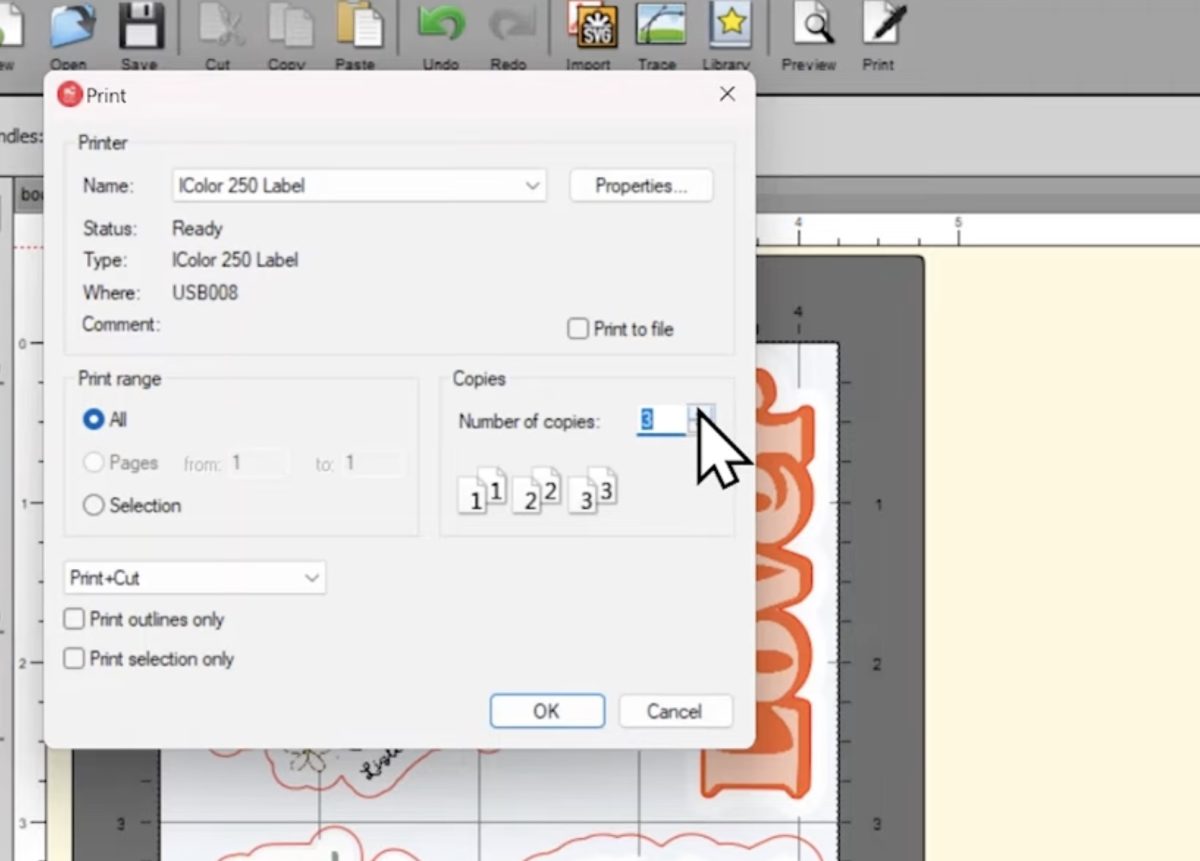
If you want to get longer cuts, you can duplicate the design, and it will print multiple times, repeating the design you have on the canvas.
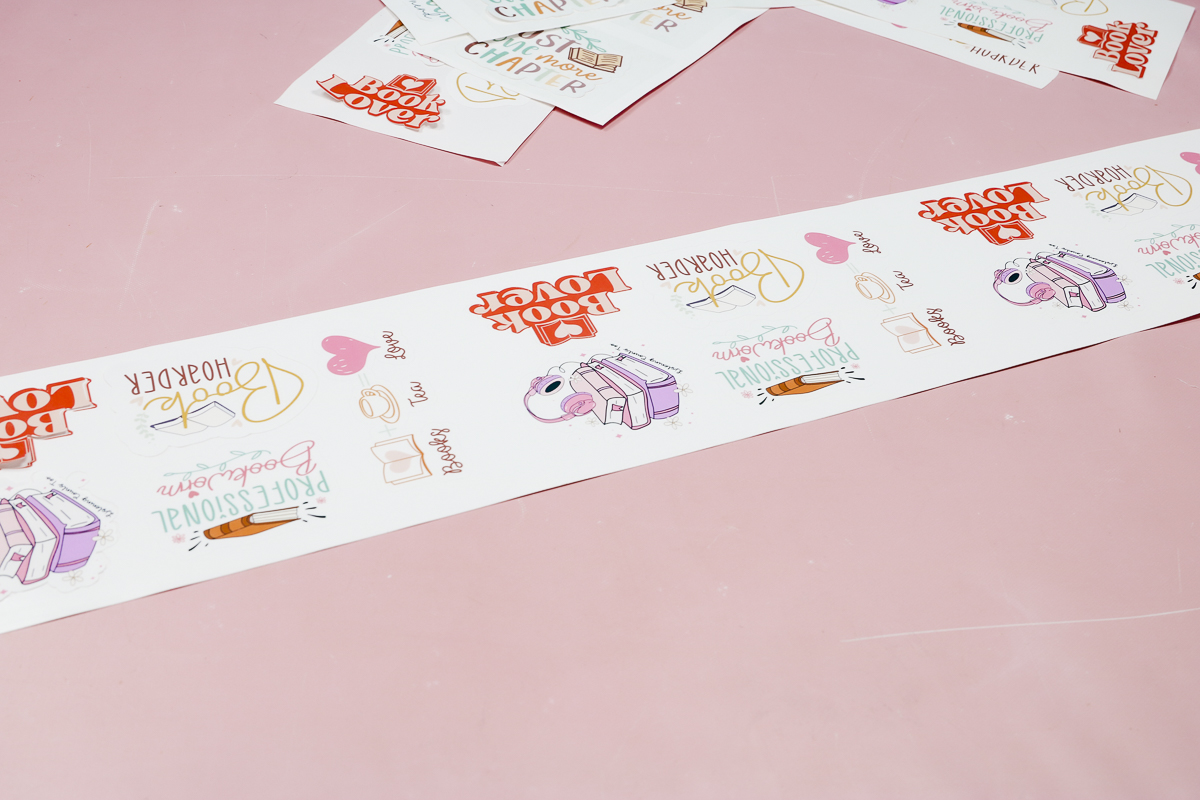
Multi-sheet Print and Cut Results
After testing the process multiple times, I learned that the designs at the top of the canvas should have an offset because the cut lines were slightly off. Moving the detailed images without an offset to the bottom of the screen
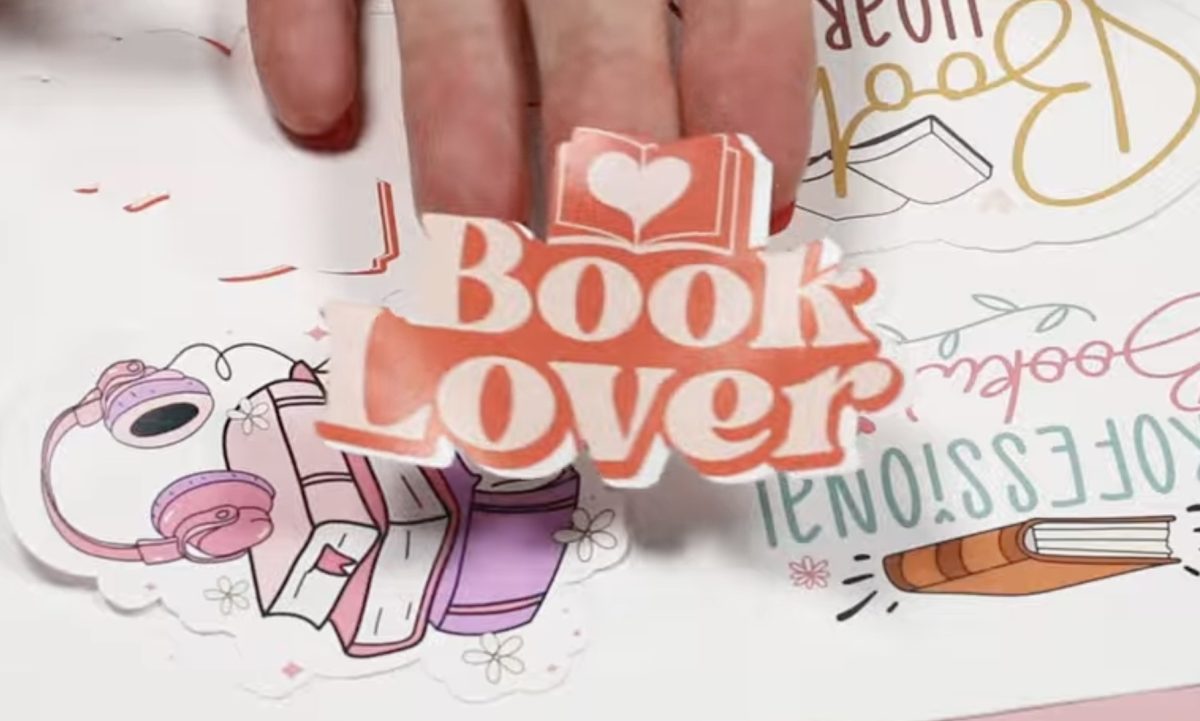
For some reason, the designs at the bottom of the screen cut beautifully even without an offset added.
If you want to print and cut stickers without an offset on a multi-image sheet, move those designs to the bottom of the page.

How to Get Precise Cuts Every Time
If you need multiple prints with precise cuts, select the 4.25-by-2-inch mat in the Custom Cut software, upload the design, and trace it.
When you send it to print, increase the number of copies, and the printer will print each one and cut around it.
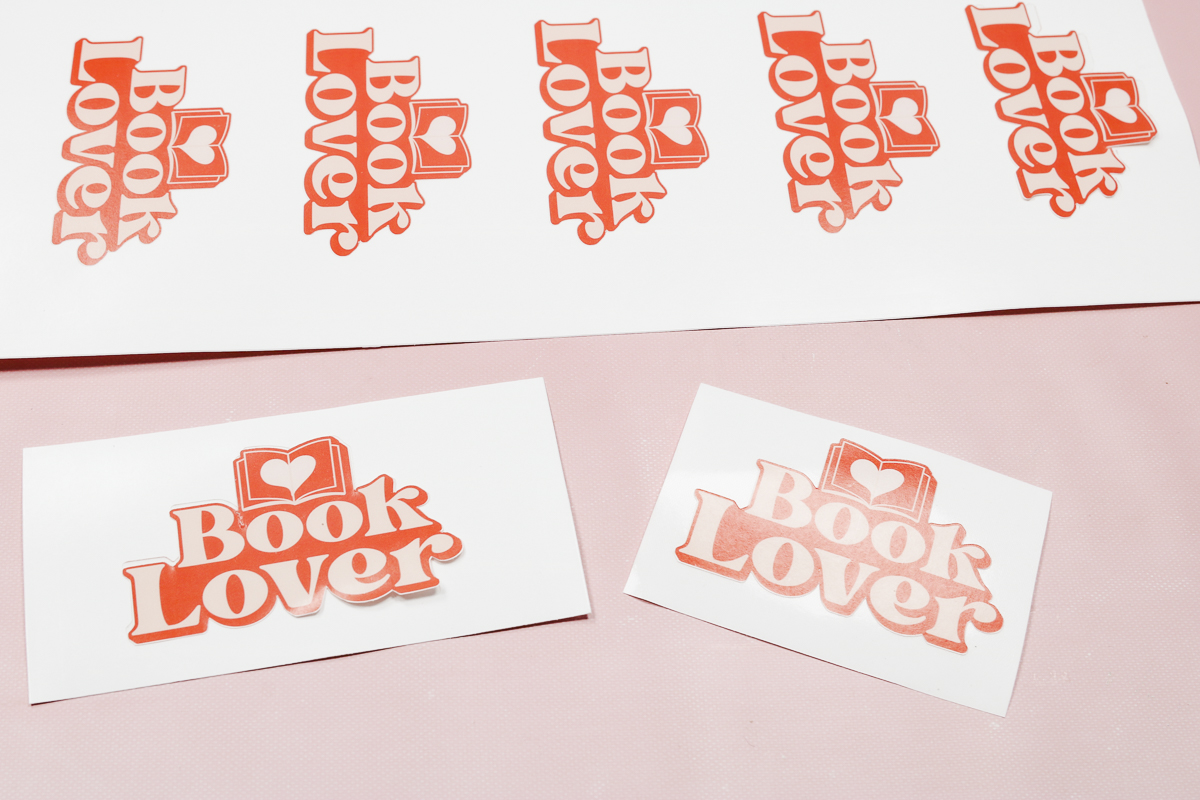
Because I selected the shorter mat, each design was cut out perfectly.
If you’re worried about the cut being slightly off, you can do a very thin inset instead of an offset, and that will bring the cut line in a small amount, ensuring you don’t have any white on the sticker.
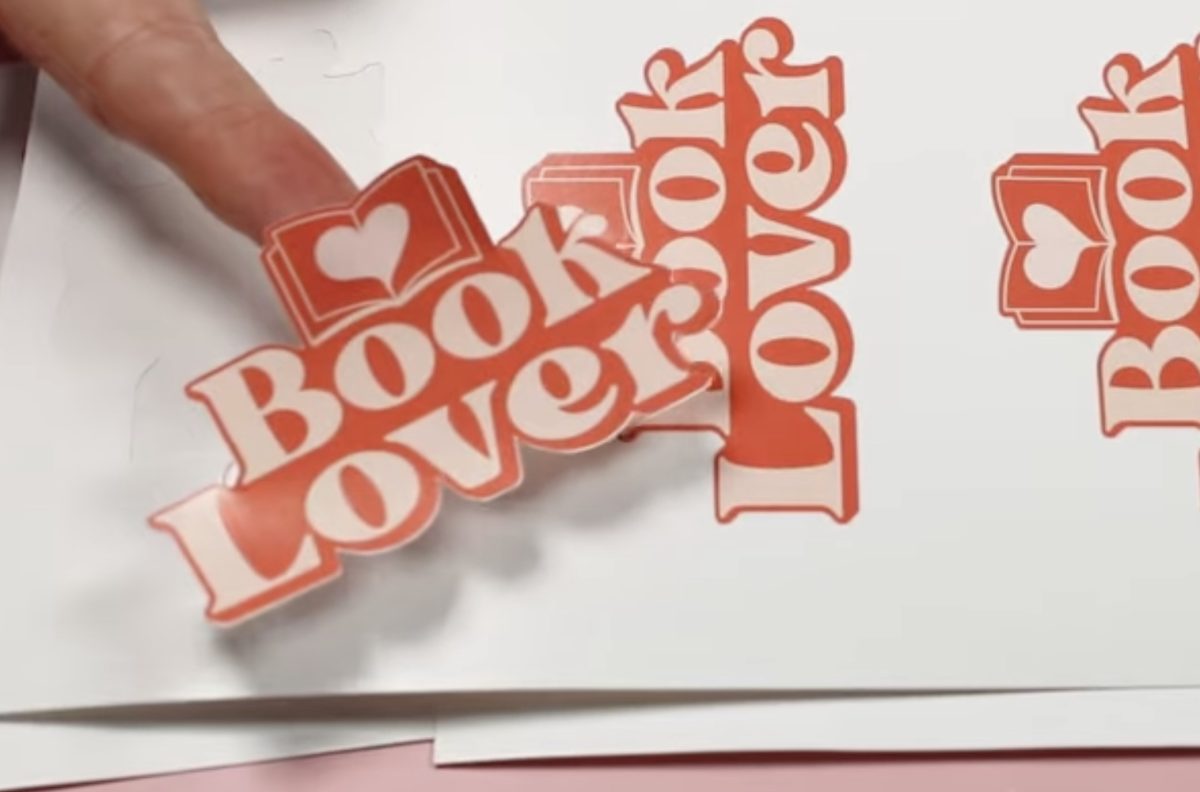
Laminate Stickers with the iColor 250 Sticker Printer
There are a lot of different materials you can print on with the iColor 250. Adding a laminate to stickers can add durability, making them a favorite for water bottles, phone cases, and other places where they are handled more often.
Before setting up the design, go into the iColor Print Hub, click on Printer Settings, and go over to Advanced Settings.
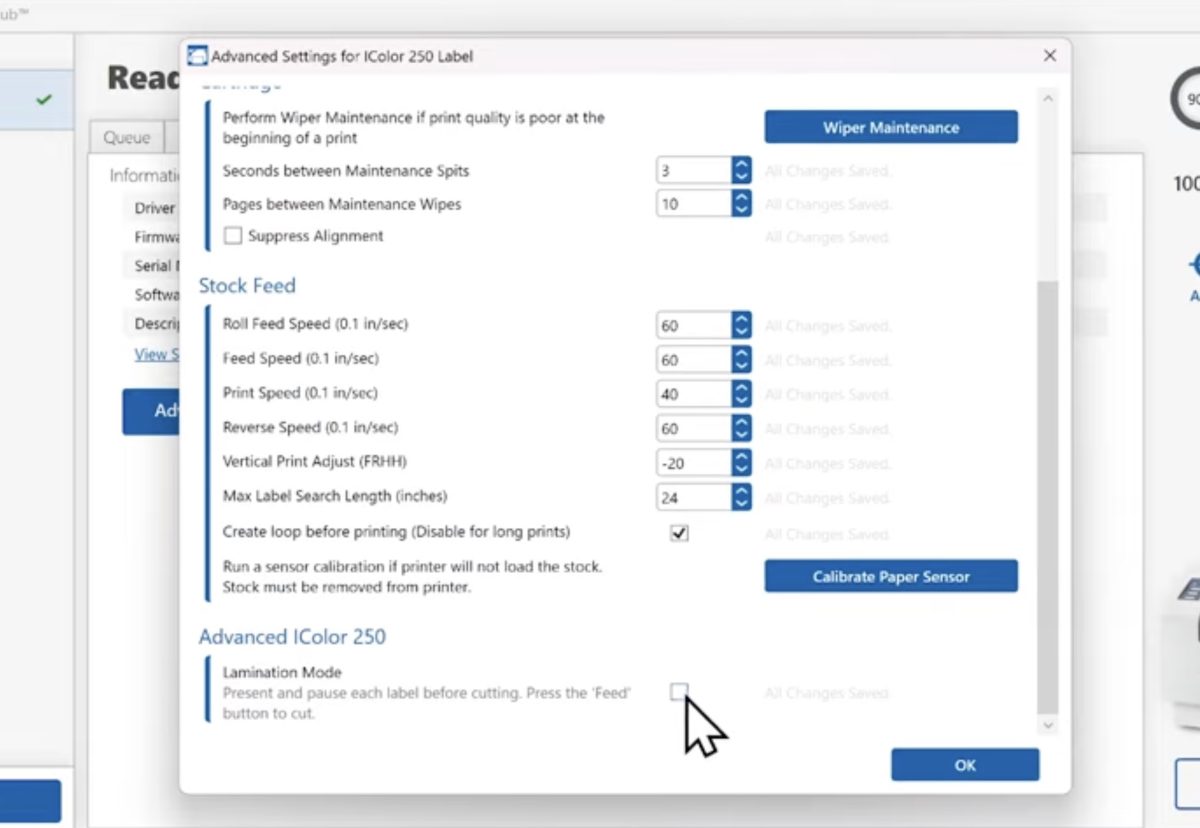
Scroll all the way to the bottom of that screen and click the box next to Lamination Mode to turn it on. Don’t forget to turn off this step if you’re making stickers without a laminate.
Next, click the XY Cutter tab and increase the knife pressure. Depending on the materials you’re using and the age of your blade, you may need to make adjustments to this setting.
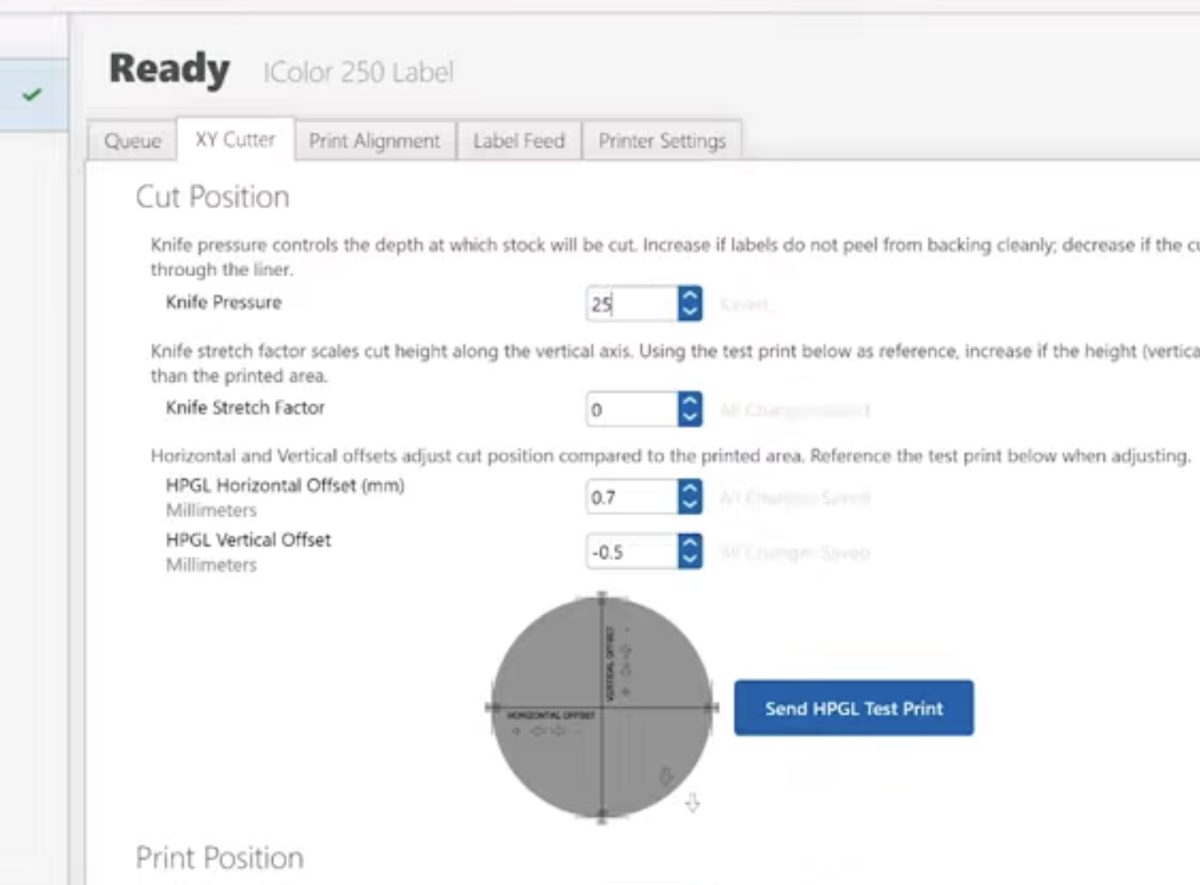
For the Uninet laminate I’m using, I increased the pressure to 25.
Now we can go over to the Custom Cut software and follow the steps we did above to create a design.
My laminate size is 4.25 by 3 inches, so I chose that same size for my page size. Make sure to check the size of your laminate before you begin to help avoid material waste.
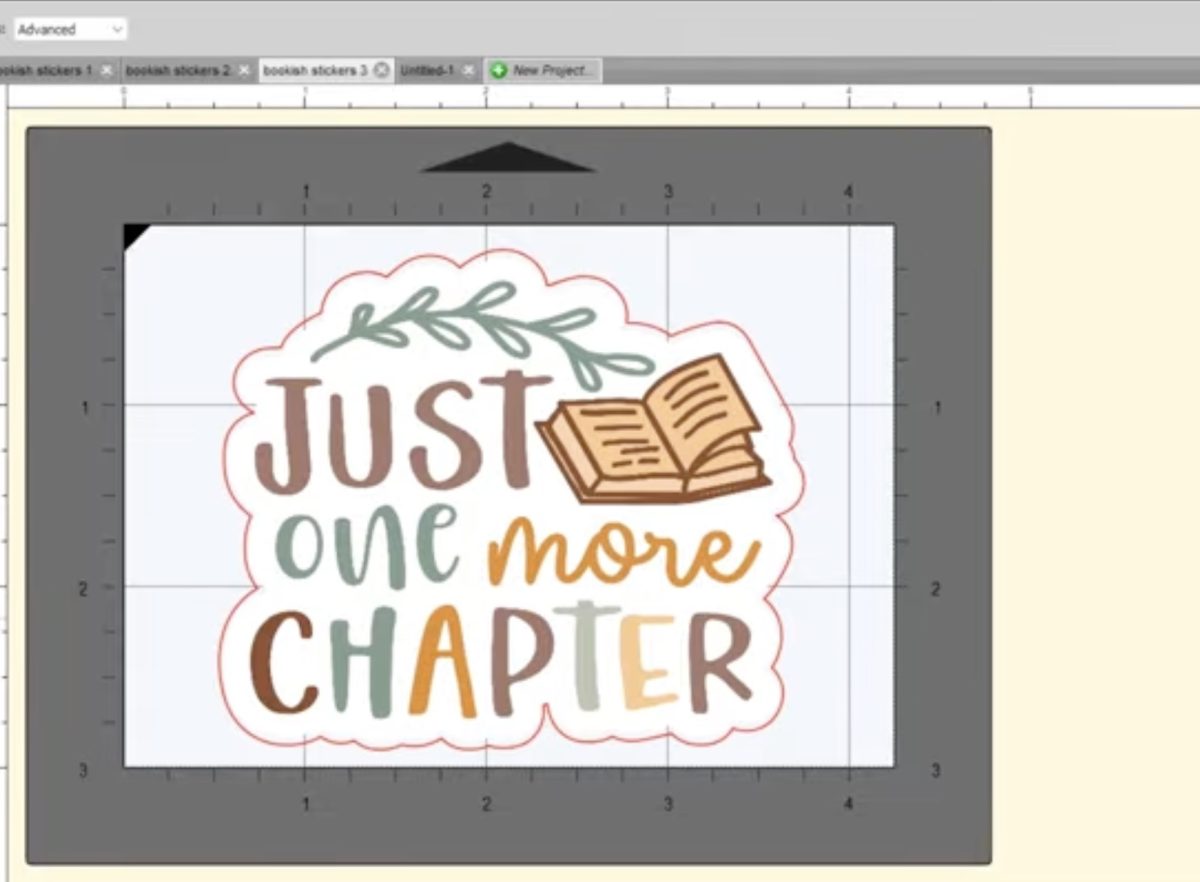
I uploaded the image, traced it, and then added an offset. Now we can click Print and see how the iColor 250 works with laminate.
Make sure you have the Print and Cut setting turned on.
How to Add Laminate to iColor 250 Prints
For the laminate stickers, the 250 is going to print out the design, and it will stop with the sticker hanging out of the front of the machine.
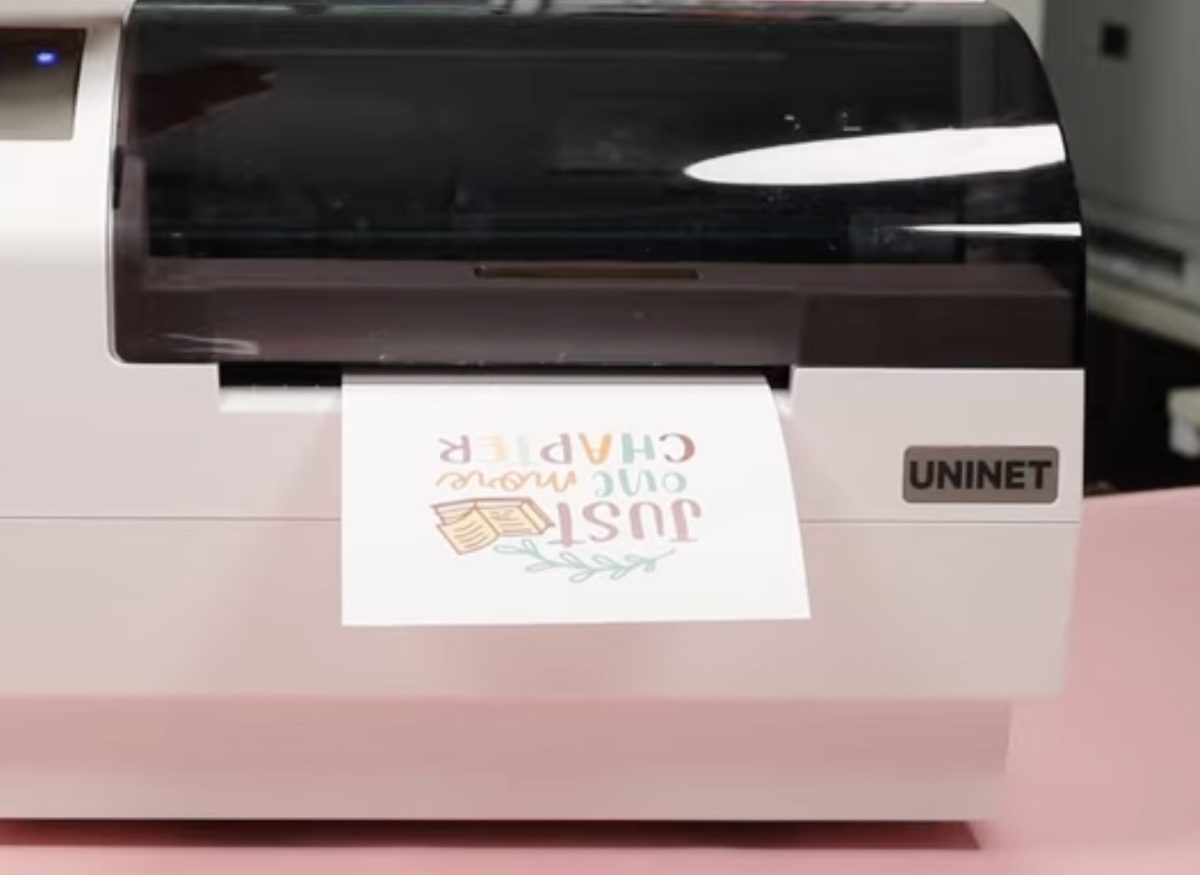
Remove a piece of the laminate from the roll and place it over the sticker, making sure the entire sticker is covered with the laminate.
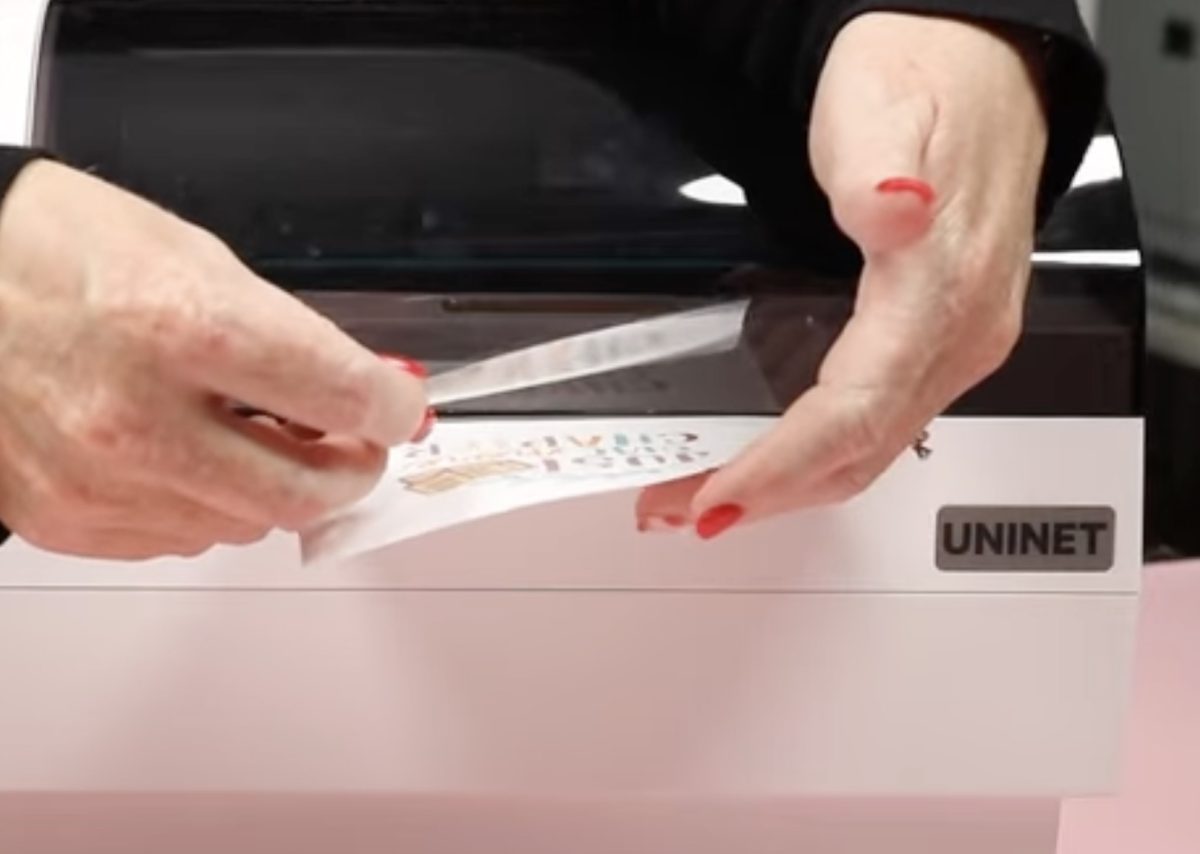
Smooth it over the surface and on the control panel on the front of the printer, click the button that says Feed.
The printer will pull the sticker with the laminate on top back into the printer and do the cutting process.
When it’s done cutting, it will cut off the sticker sheet and eject it like normal.
Now we have a perfectly cut sticker with a laminate over the top.
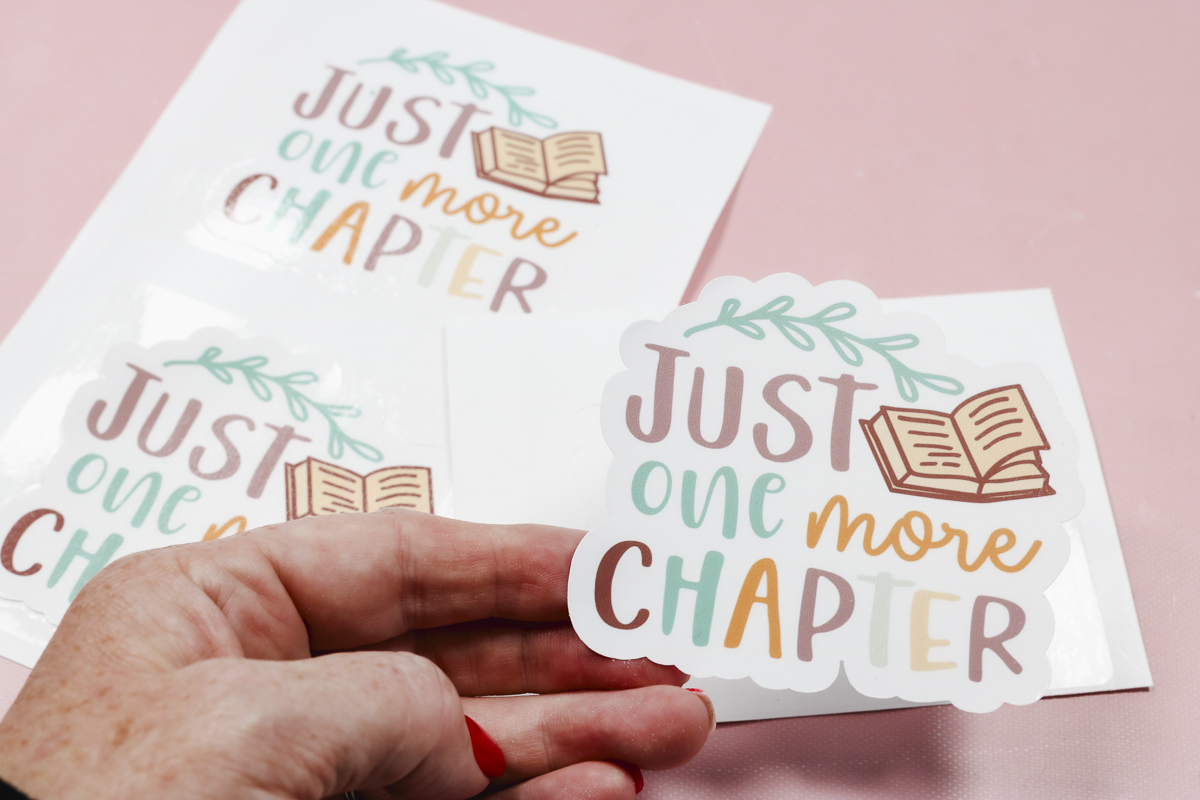
I did test printing of more than one sticker, and the process is actually the same. It printed one sticker and had me add the laminate, and then, after it cut the first sticker, it printed the second sticker and prompted me to add the laminate.
The only difference is that it didn’t cut the media roll until after it processed the second sticker.
Even with having it print and cut two stickers with the laminate, it cut both of them really well. The cuts are clean through the sticker media and the laminate and follow the path beautifully.
Note – I used the Uninet Laminate material. You can try different laminate materials on your stickers; just know you will need to do some testing to find the right cut pressure for your material.
How to Create Stickers to Sell with the iColor 250 Label Printer
If I were creating stickers to sell, I would do a couple of things depending on whether I was selling a sticker sheet or an individual sticker.
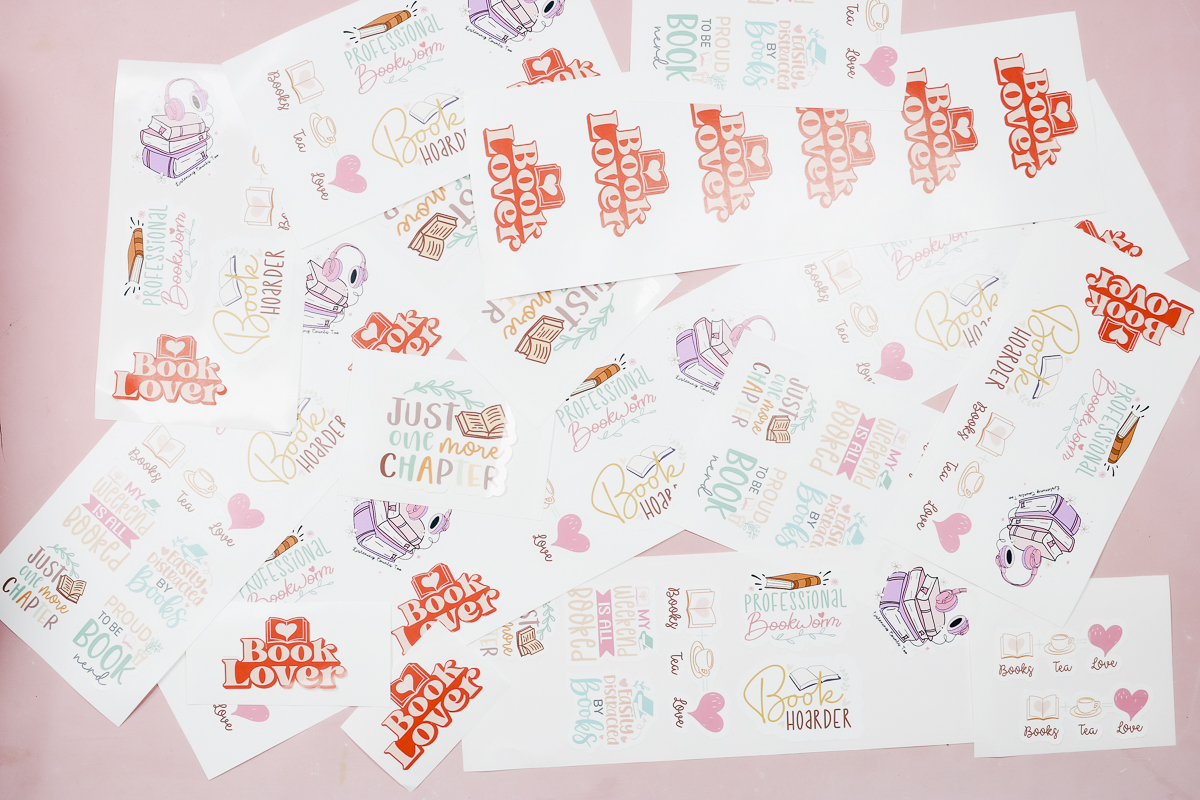
- For individual stickers, I would trim all 4 sides of the media close to the sticker itself, and then I would remove the excess sticker material from the outside of the actual sticker. This will make it easy for people to peel the sticker off the backer.
- If I were selling sticker sheets, I would make sure to fill the area as much as possible before printing, and then I would simply peel off the excess sticker material.
- For a sticker sheet, you should end up with a similar amount of backing material on all four sides. If you feel like it is too much, you could trim it. I probably wouldn’t, because without trimming it you’ll be left with a consistent size for all the sticker sheets.
NOTE: Because of the type of printer this is, there isn’t a way to have it cut all the way through the backing material. I think the steps I shared above are the best way to get a professionally looking finished sticker or sticker sheet.
Pros and Cons of the Uninet 250 Sticker Printer
Now, let’s look at the pros and cons of the 250 sticker printer.
Pros
- First, it is very easy to use. I was pleasantly surprised by how easy it was to set up and use. I felt like I was creating stickers in no time at all.
- Another pro is that it does a really good job of cutting around the stickers. There were a couple of exceptions that I shared above, but I think those are easy to work around, and you may even find other tips to help prevent the issues I had.
- The print quality is excellent. Even with having a single cartridge, the black looks really good. I am really happy with how my designs printed.
- Another pro is being able to make adjustments to the print settings. I am a fan of being able to try different things to find what works best with the materials you’re using.
Cons
- The cons would include the couple of exceptions I mentioned above. For sticker sheets, I think you will want to put designs without an offset toward the bottom of a sticker sheet to get the best results, even on the 8-9 inch sticker sheet.
- I didn’t get good results on sticker sheets longer than 8-9 inches, even with the added offset. I am not sure if there are more adjustments that can be made, but right now, the only way I have had success getting a longer sticker sheet is to have it print more than one of the sheets I was printing. This is a nice feature if you just need a lot of stickers, but it’s not great if you want a lot of different stickers on one long sheet.
- I didn’t find a way to connect the printer via Bluetooth. That means I have to plug the printer into my computer every time I want to print.
- Also, I had to use my PC and not my Mac to get all the functions of the software. Hopefully, in time, the Mac software will have all the same functions, but for now, if you want the ability to do everything, you need a PC.
- While being able to add a laminate and adjust the settings to cut through the laminate and the sticker paper is a pro, the extra step is kind of a con. That being said, I don’t know of an application for making stickers that doesn’t require that additional step. There is probably a really big, expensive sticker/label printer on the market that can do it all for you, but all of the options I know about require you to add the laminate manually.
- My last con is probably a pro and a con, depending on your needs. The size limitation of less than 5 inches in width does restrict how large you can print. You can get prints larger than 5 inches by rotating the design, but that only works if your design can be rotated. I think there are a lot of people who will be happy with the smaller size of this printer simply because they have space limitations.
As long as you know the printing restrictions beforehand, I think you can work around them and be really happy with the stickers you’ll get out of the printer.
One last thing to note that could be a pro or a con depending on what you’re currently doing.
Because the iColor 250 cannot cut all the way through the backing, you would need to trim the stickers yourself if you want the backing closer to the sticker. This is an added step compared to printing and cutting on a machine like the Cricut.
That being said, compared to all the other sticker-making processes I’ve tried and what I have in my craft room for making stickers, this method is significantly faster. I was very happy with how quickly it prints and cuts.
Is the iColor 250 Sticker Printer Right for You?
I think the iColor 250 from Uninet is a great printer for labels and stickers. If you want to sell stickers and labels, it really produces a professional-looking end product.
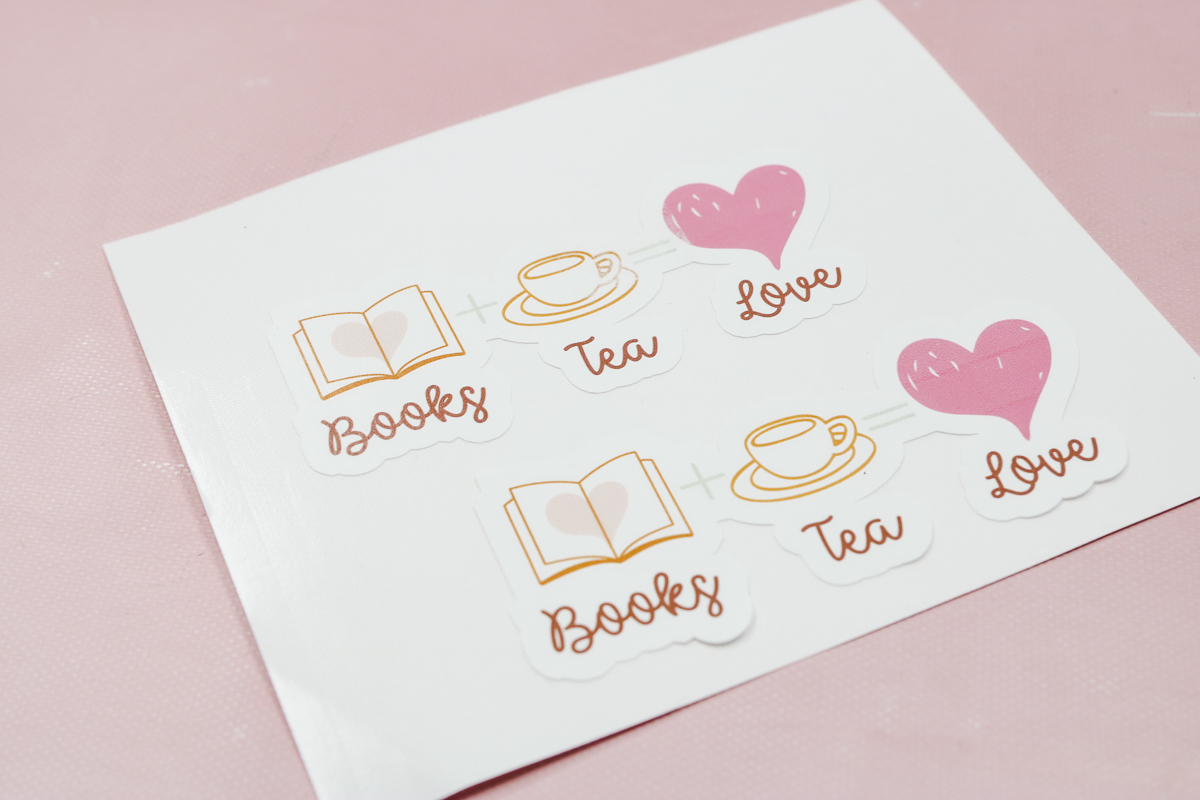
If you own a small business and want to put your own labels on the items you sell, this could be a great option for you. Make sure to do the research so you’re getting the right media for your product and that what you need to create fits within the size restrictions.
Is this the right printer for someone who wants to create stickers for themselves? That would be a personal decision. I think it would depend on how many stickers you’re actually making and if the price of the printer makes it worth it vs purchasing the stickers you want.
You definitely can use it to make stickers for yourself. You’d never have to buy a gift tag again with the iColor 250 on hand. You just need to weigh the cost of the printer and materials against what you’d spend purchasing the same items to see if it’s right for you.
While the iColor 250 is a more expensive sticker printer, I feel like it may be right for a lot of people. If you’re currently using a Cricut machine to make and sell stickers, it’s likely you could make more, faster, with the iColor 250. So I would at least look into it if you’re making and selling stickers. It may not be right for you right now, but it is something you want to purchase later as you are making and selling even more stickers.
What Maintenance is required for the iColor 250?
There is very little maintenance required for the iColor 250. After every 2,000 prints, you need to run a cleaning card through the printer. You can purchase the cleaning card from Uninet.
It is going to take me a while to get to 2,000 prints, so I looked up the process, and it appears to be very simple.
What Consumables Do I Need to Buy?
Things you will need to replace in time are:
- Blades
- Ink Cartridges
- Printable Media
How often you’ll need to replace the blade and ink cartridges will depend on how often you’re printing, the size of the stickers, and whether you’re doing print and cut every time.
I love that the software tells you exactly how much each print costs you. This can be really helpful in the pricing process if you’re selling your stickers and labels.
I hope that I’ve answered any questions you have about the iColor 250 sticker printer. If you have any other questions, leave them in the comments, and I’ll be happy to answer them for you.