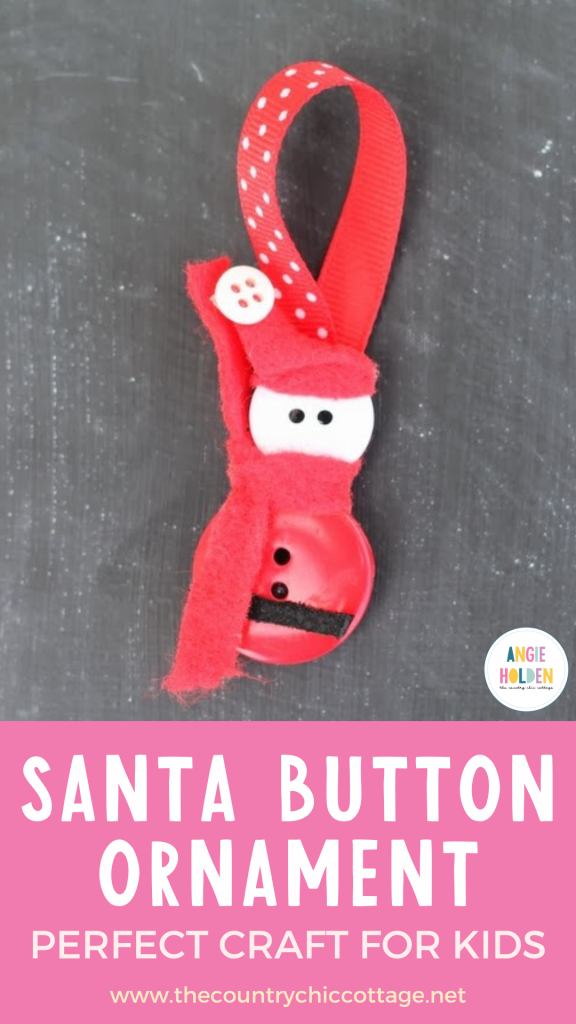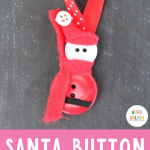
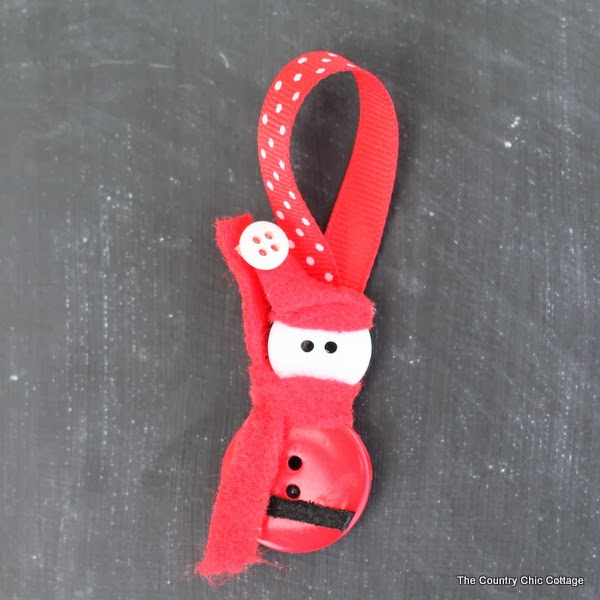
Christmas ornaments are fun crafts that both kids and adults enjoy making, and they can make great DIY gift ideas. Learn how to make a Santa button ornament for your own Christmas tree or to give as a DIY gift!
In our home, crafting dominates throughout the holiday season because it's just so rewarding and enjoyable. I craft solo, and I also bring the kids in for a few crafting projects. The holiday season is so much more fun to spend with family and friends, right?
You know that old saying, “the family that crafts together stays together”…is that how it goes? Well, it sounds right to me!
I am back today with another fun video tutorial for my Santa button ornament. This cute ornament comes together quickly and will be the talk of your Christmas tree!
Santa Button Ornament Video Tutorial
I started out in a hangout with Carolina from 30 Minute Crafts, where we both made cute and festive ornaments. And, well, since we do these videos live, unfortunate things sometimes happen.
Let's say this one did not go as planned, y'all! Go ahead and watch below for a few giggles and to see Carolina's completed ornament.
Now that you have laughed or cried (or whatever) over that video, here is an additional video to show you how to make those super cute Santa button Christmas ornaments.
Can’t watch the video or missed some of the steps? We have instructions below as well!
How To Make A Santa Button Ornament
My Santa button ornament is sure to be a hit with crafters of all ages (from kids to adults). Here's everything you need to know about making this fun ornament.
NOTE: If you want even more Christmas ornament inspiration, check out our Plaid Christmas Ornaments, Vinyl Christmas Ornaments, and Sublimation Ornaments.
Supplies Needed To Make Santa Button Ornament
- 2 Large Red Buttons (With 2 holes in each button)
- 2 Medium White Buttons (With 2 holes in each button)
- 2 Small White Buttons
- Black Felt
- Red Felt
- Black Leather
- Polka Dot Ribbon
- Scissors
- Hot Glue Gun and Hot Glue Sticks
Step 1: Gather Up Buttons
Start with 2 large red buttons, 2 medium white buttons, and 2 extra small white buttons. My buttons are provided by Buttons Galore and More.
Step 2: Glue Buttons Onto Felt
Cut a rectangle of black felt and use hot glue to adhere the buttons in the direction shown in the photo.
NOTE: You want the holes of the large red buttons to be stacked on top of each other, so they look like Santa's belly. The holes of the medium white buttons should be side by side to look like Santa's eyes.
Step 3: Add Felt Scarf
Cut a long rectangle of red felt and tie it on around Santa's neck (just below the medium white button) for a scarf on these button ornaments.
Step 4: Add Black Leather Cord Belt
Cut a strip of black leather cord and glue it below the red button for Santa's belt.
Step 5: Add Felt Hat
Cut a triangle from red felt and glue the bottom to the top of Santa's head.
Step 6: Glue Small White Button To Hat
Apply some glue to the hat and make it lay over in a “floppy” fashion. Add the smallest white button to the tip of the hat.
Step 7: Create Ribbon Hanger
Use hot glue to attach a ribbon to the back for hanging. The glue on the back will give your ornament added stability.

Enjoy this fun Santa button ornament with your kids or on your own. Just be sure to hang some on your tree this holiday season!
FAQs About Santa Button Ornament
Here are a couple of questions that I see readers ask about making this Santa button ornament. If you have a question, please check to see if I’ve already answered it below. Don’t see your question? Leave it for me in the comments!
Where Did You Get Your Buttons?
I got my buttons from Buttons Galore and More!
Is Hot Glue The Best Type Of Glue To Use For This Project?
Yes. Hot glue is easy to use (supervise young children to prevent burns), sets quickly, and adheres strongly.
If you are in a pinch and need a good substitute for hot glue, I recommend using craft glue or super glue. Both will require longer drying times and will probably be a little messier. But they will work well if you don't have a hot glue gun.
Could I Change The Colors Of The Ribbon Or The Buttons?
I don't recommend changing the colors of the buttons or felt hat because they give these button ornaments their classic Santa look. However, you could change the felt color for the scarf or the ribbon color if you want!
Can I Change The Size Of The Buttons?
Technically, yes. If you want to make your ornament bigger, you could definitely use larger-sized buttons. However, I do not recommend using buttons that are smaller than a normal-sized button.
Can I Use Fabric Instead Of Felt For This Project?
I would not recommend it. This is because regular cotton fabric is not as sturdy as felt; it's thinner and prone to fraying.
5 More Ornament Crafts
If you love this adorable Santa button ornament, I have even more ornaments for you! If you're searching for even more crafting ideas, check out these links.