
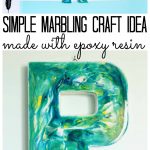
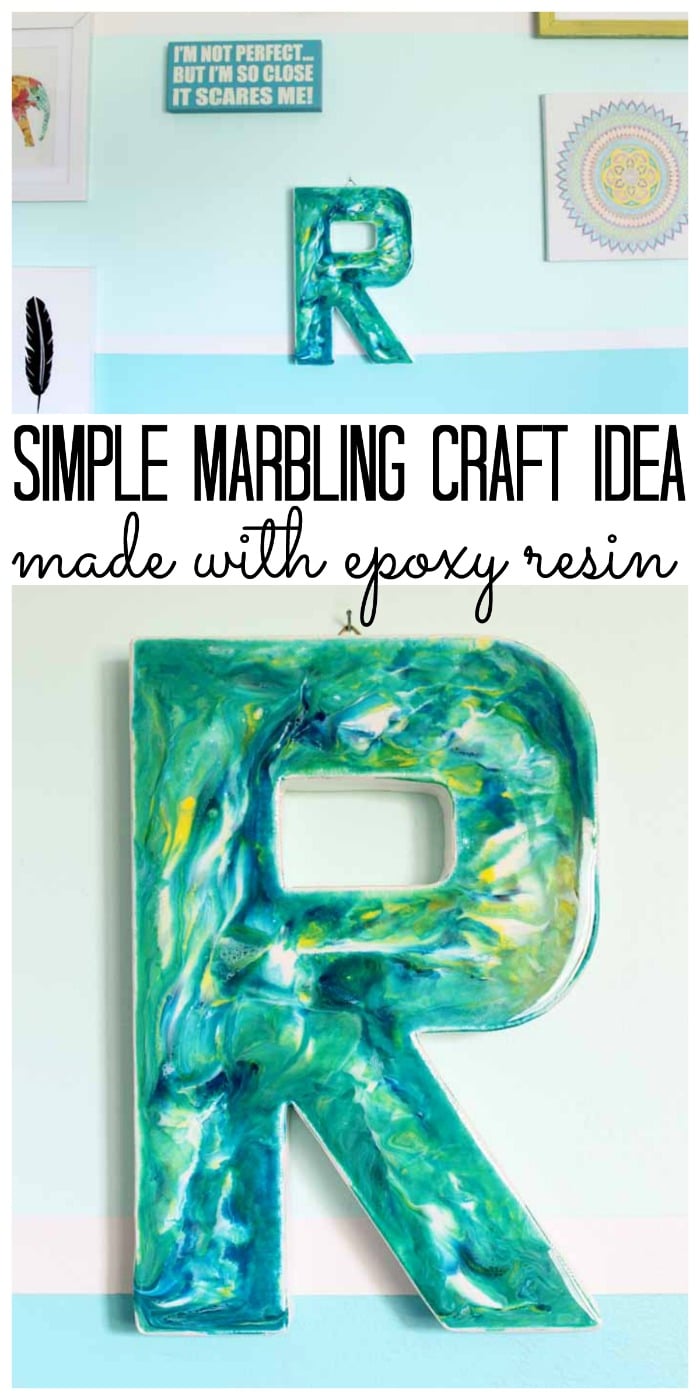
If you love that marbled paint look, try creating a marble effect yourself with this easy technique that uses epoxy resin. You'll love how simple it is!
I love a good marbling craft, and they are oh-so-popular right now. You might realize my love for marbling by looking at my DIY Marbled Mug, Marbled Flower Pot, and Marbling on Candles. It's so much fun because the final product is almost never exactly like what you think it will be – it's usually even better. 🙂
I enjoy testing out different techniques to achieve a similar end result. Nearly everyone uses paint to get a marble effect, so I thought I would try the technique with epoxy resin instead of paint.
I know it may sound intimidating, but don't worry! This product is actually super easy to use, and it gives projects like this monogram a professional finish. The process is similar to the one I used for these fun Resin Coasters!
If you love all the cool things you can do with resin, check out my Glitter Tumbler, Summer Wreath with USA Cutout, and DIY Wood Coasters for more inspiration.
How To Paint Marble Effect Using Resin
Here's what you need to know about this project to ensure success, including the supplies you'll need to gather and the detailed steps you'll follow.
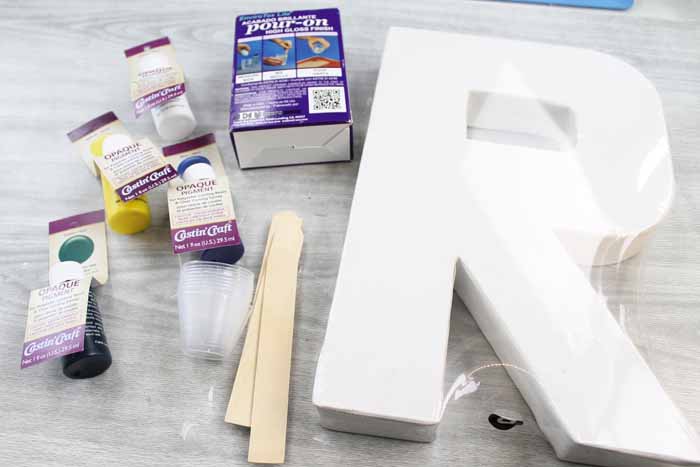
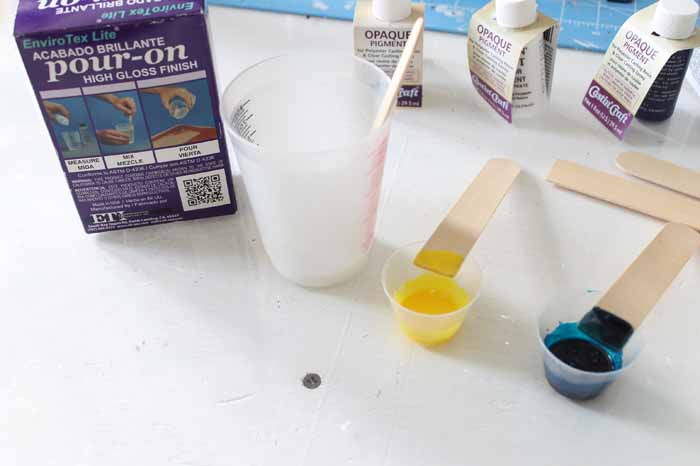
Supplies Needed
Here is everything you will need to know to create this cool marble effect with Epoxy Resin. I even included a few links to help you find what you need faster.
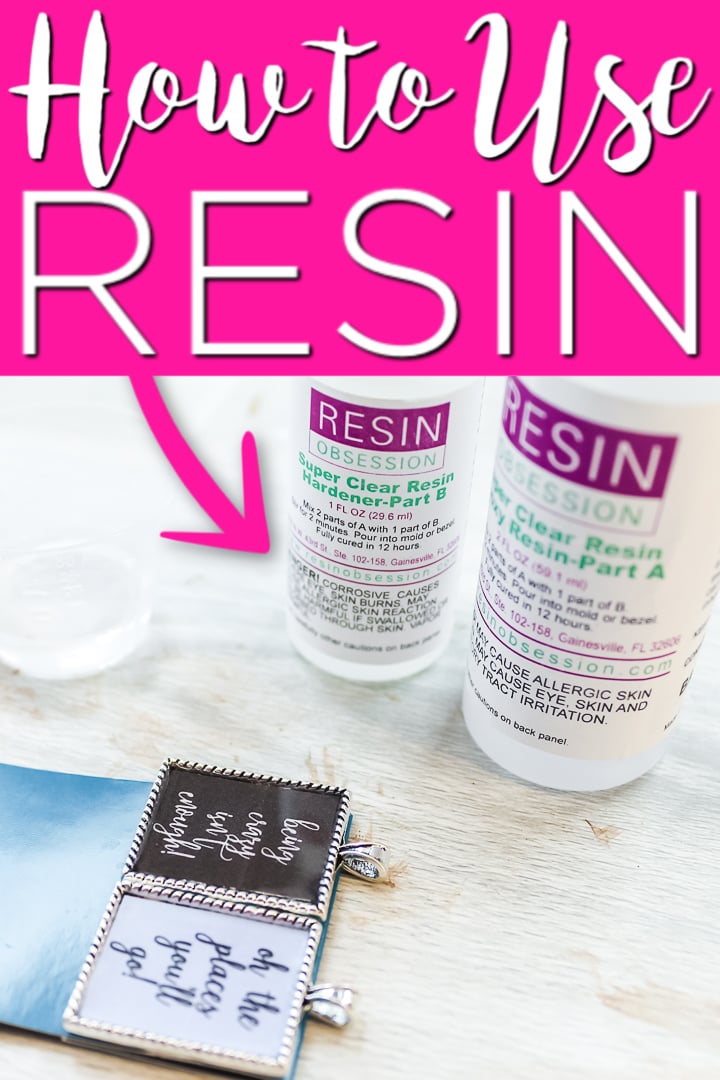
- EnviroTex Lite® Pour On High Gloss Finish
- Castin’Craft Opaque Pigments in the colors of your choice
- Canvas Monogram
- Decoupage Sealer
- Mixing Cups
- Measuring Cups
- Stir Sticks
Instructions
Just follow these steps and see for yourself just how quick and easy this project is! In just a bit you’ll have fun marbled monogram to adorn your home or give as a DIY gift.
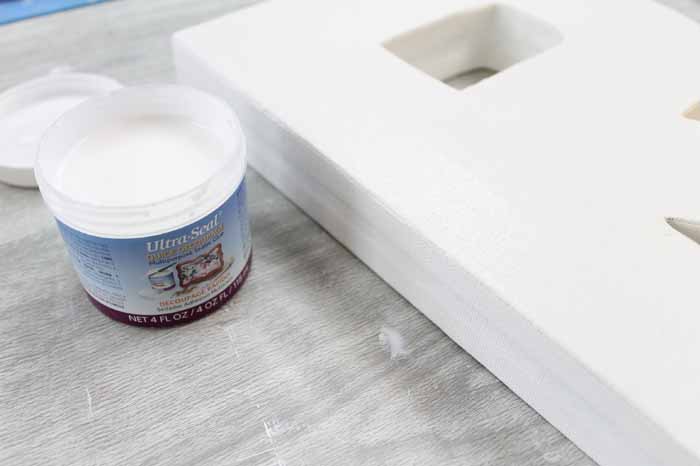
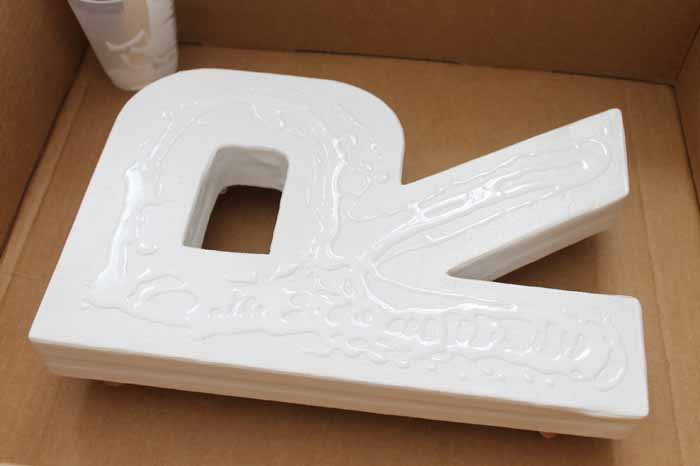
Step 1
Seal your canvas monogram on the front and sides with decoupage medium. I have had issues with canvas material creating bubbles in my final finish so this step will prevent that.
Allow it to dry completely before continuing.
Step 2
Mix up a batch of EnviroTex Lite® Pour On High Gloss Finish according to the package directions. Divide it up by pouring it into small measuring cups.
Use the Castin’Craft Opaque Pigments to tint these any color that you would like. I did one white, one yellow, and one with equal parts green and blue.
The measuring and mixing of components is critical to your success. Be sure to follow all instructions that come with your package.
Step 3
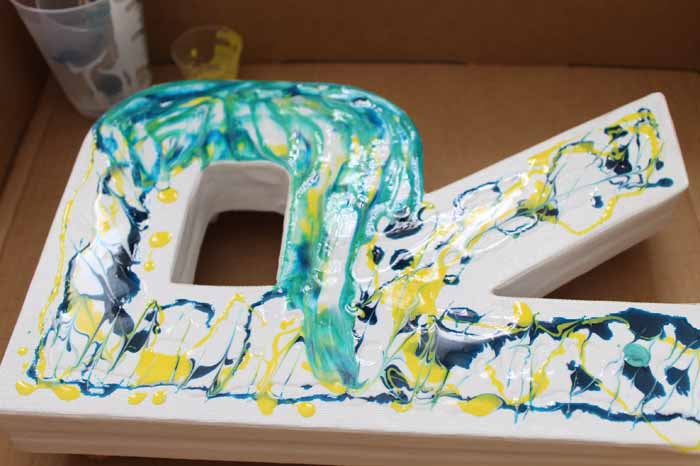
Then just start drizzling on your mixed resin with a stir stick. I started with white but you can use any colors that work with your home's decor.
Pro Tip: I like to lay my marbling crafts inside of a box so that the mess is contained. In this case, you will also have to support the monogram underneath to lift it off of the bottom surface.
Step 4
Keep adding more colors. The stir sticks you used to mix up the resin make a great tool for adding the product to the front surface.
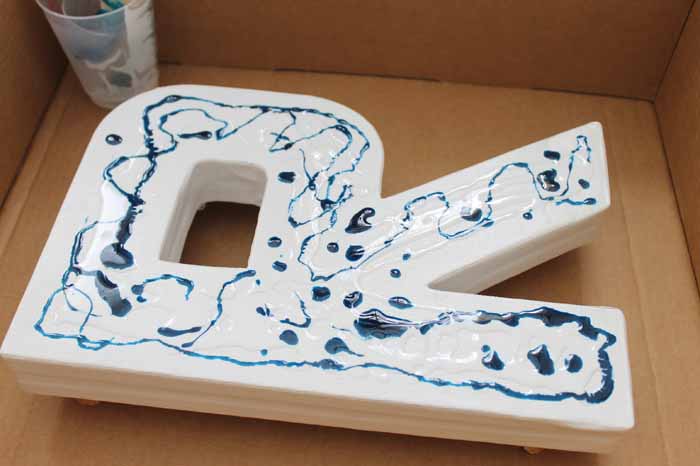
NOTE: Make sure you drizzle each one randomly. The best part of creating marbling crafts is that you get a different result each and every time.
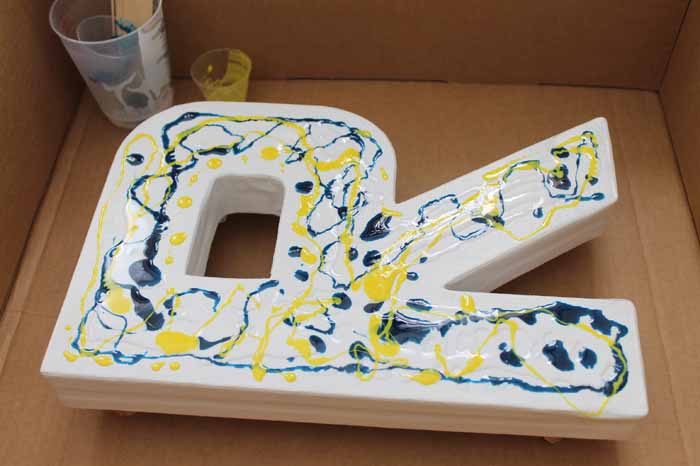
Step 5
Now it is time for the fun part! I used the flat end of a stir stick to begin to swirl and mix the resin right on the monogram. Create patterns and have fun with it!
Step 6
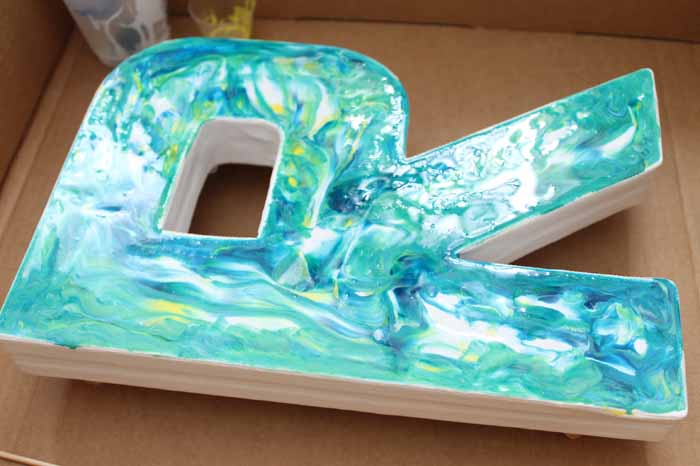
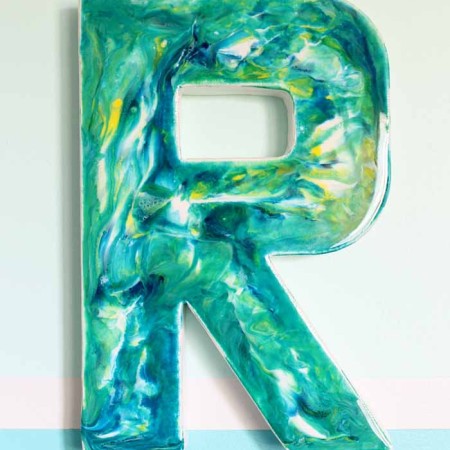
Continue until the entire monogram is covered with resin and marbled. I chose not to have the resin pour over the edges of the monogram.
If you love that look, just use enough resin so that the excess will pour over all of your edges!
Step 7
Let your project dry. As it's drying, keep an eye out for bubbles. You will want to pop any bubbles that come up to the surface.
There are a few methods for doing so in the instructions that come with your resin.
NOTE: Allow your marbling craft to cure overnight before you touch or move it. Make sure it is on a level surface and peek at it occasionally to ensure there is no runoff over the sides (unless your trying to get runoff on the sides).
FAQs
Here are a couple of questions that I see readers ask about making projects like this one using a marble effect with resin. Please check to see if I’ve already answered it below if you have a question. Don’t see it? Leave it for me in the comments!
Can I use other products to color the resin?
I have seen some people use mica powder to color resin. I prefer using the pigments because they are specially designed to create even and beautiful colors in resin.
How can I carry the marble effect over the sides of the monogram?
To carry your marble effect over the side of the monogram, simply continue the same process on the sides that you did on the front. There are a couple of things you'll want to be aware of as you do this:
- Take care not to use too much resin, or it will just slide off the edge and onto your work surface.
- Ensure that your work surface is covered and protected because you will more than likely have a little resin spill from the monogram side.
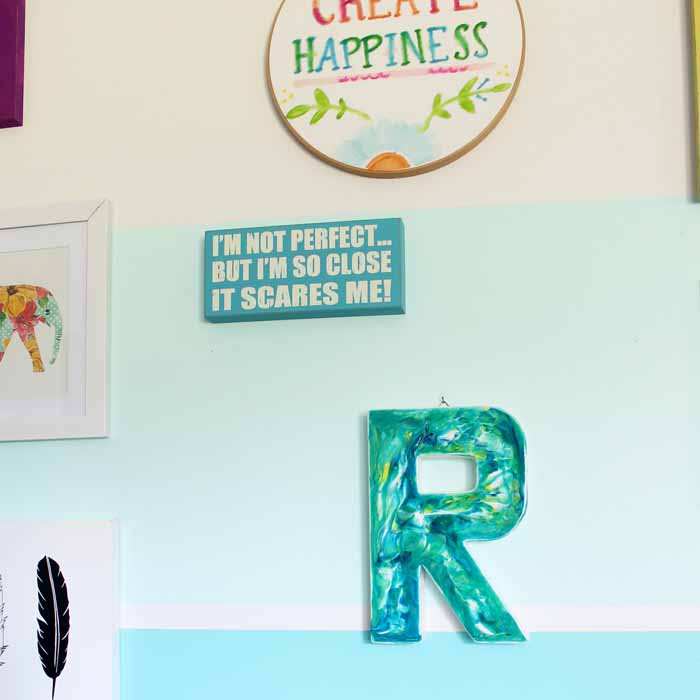
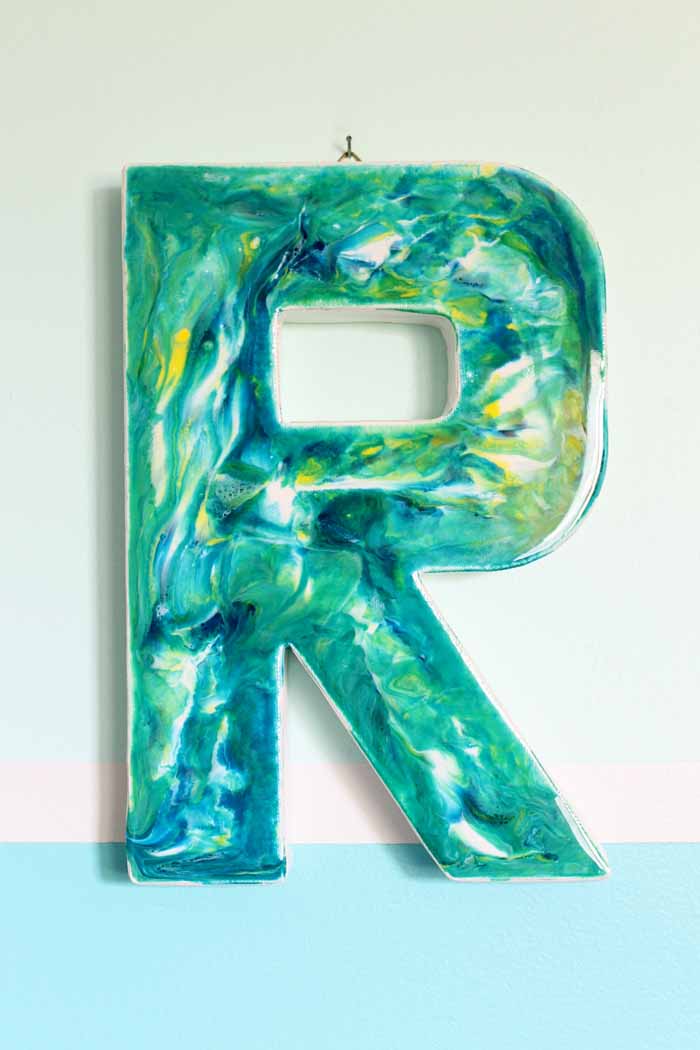
When you are done, you will have a glossy monogram that will look great in any room!
More Marble Effect Inspiration
Love this marbling craft and also want more ideas? Try the links below!
- Marbled Flower Pot
- Marbling with Acrylic Paint on Candles
- Gold Marbled Mason Jar
- Make Your Own Marbled Mug
- How to Marbleize Paper
Struggling with resin and need help?
I know that a ton of you are intimidated by resin. Don't be! You just need to know the basics and gain some experience with the medium. I have a course that will help you master epoxy resin and give you the confidence you need to tackle this project and so much more.
With unique insights drawn from more than a decade of creating and selling resin jewelry worldwide, this course is from an Amazon best-selling author on the topic. This class goes beyond making a few projects. You get thirty video lessons to give you clear directions on how to make resin jewelry you can confidently share and sell. Want to see more?
Supplies
- EnviroTex Lite® Pour On High Gloss Finish
- Castin’Craft Opaque Pigments your choice of colors
- Canvas Monogram
- Decoupage sealer
- Mixing cups
- Measuring cups
- Stir Sticks
Instructions
- Use the decoupage medium to seal the front and sides of your monogram to prevent the canvas material from creating bubbles. Allow it to dry before moving on.
- Follow package directions to mix a batch of EnviroTex Lite® Pour On High Gloss Finish. Pour it into small measuring cups to divide it up so you can create different colors.Use the Castin’Craft Opaque Pigments to tint the resin in each of the mixing cups.
- Start with any color you like and begin drizzling your mixed resin onto your monogram with a stir stick.
- Continue adding in more colors, using the stir sticks to add the product to the front surface.
- Use the flat end of a stir stick to begin to swirl and mix the resin right on the monogram. Have fun with creating patterns or making it totally random.
- Continue until the entire monogram is covered with resin and marbled.
- Let your project dry overnight. As it’s drying, keep an eye out for bubbles and pop any bubbles that come up to the surface.


