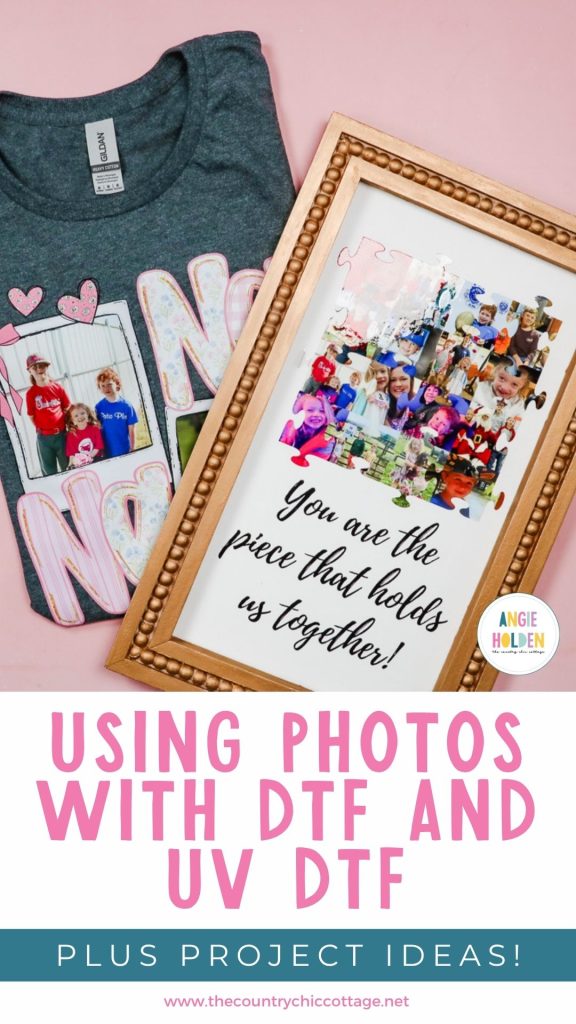
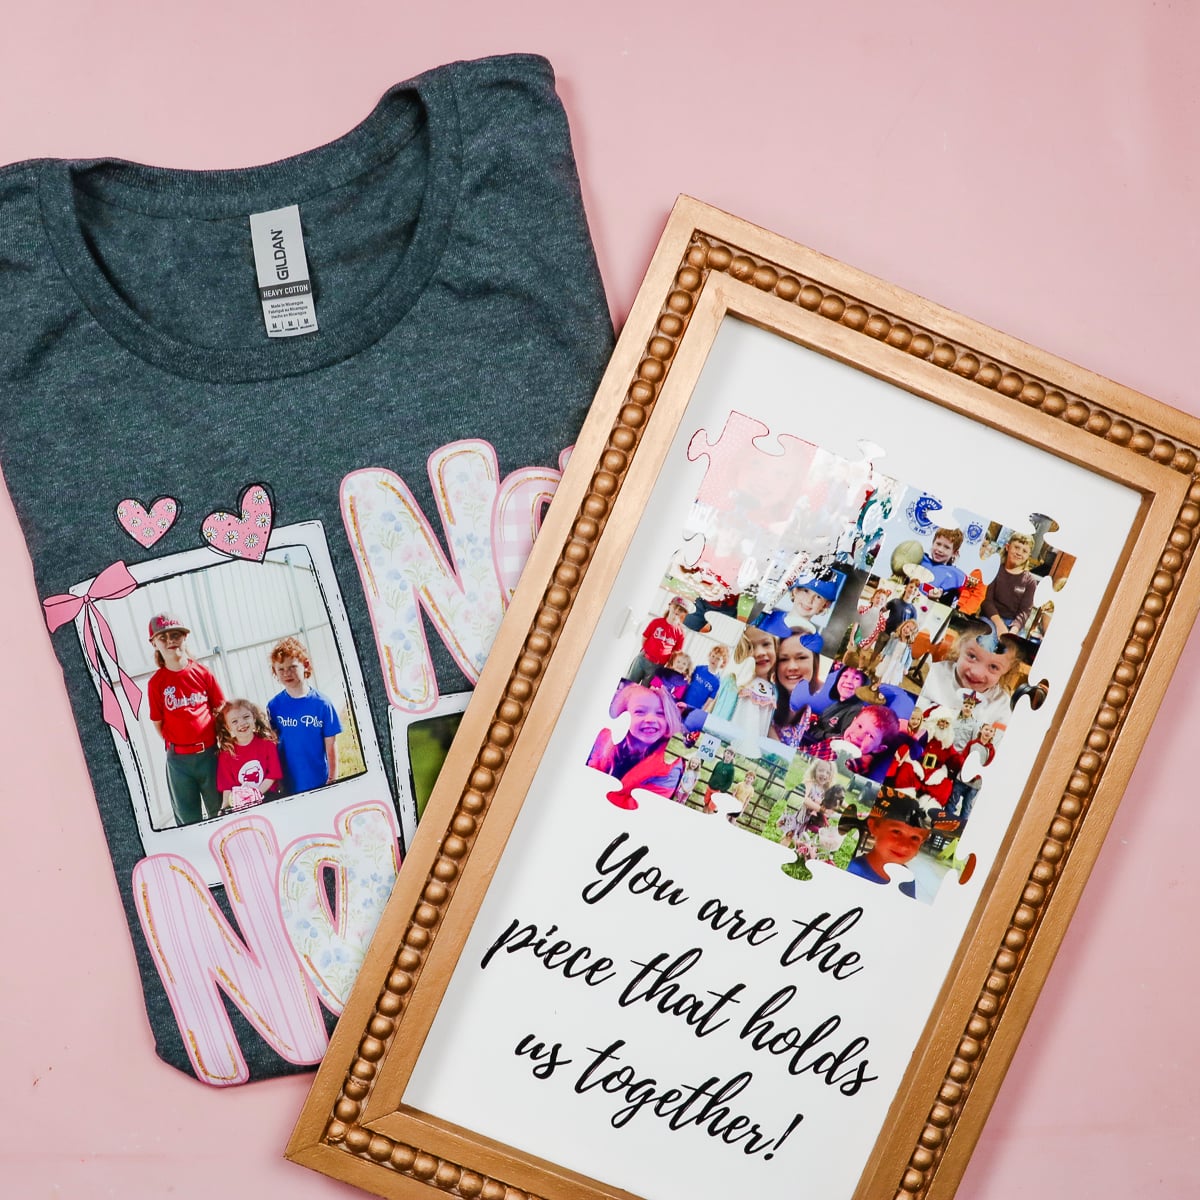
Have you ever wanted to use photos with DTF and UV DTF prints? Today, I'm going to show you how to create DTF and UV DTF designs using photos and how to add them to blanks to create amazing projects perfect for gifting.
I love how these projects turned out, and I can't wait to see what you create with photo DTF and UV DTF designs.
Not sure how DTF and UV DTF are different? Learn all about both in this DTF vs UV DTF comparison.
Using photos with DTF and UV DTF designs is so fun. I'm already looking for more projects to make with these designs.
Watch me create these designs and make these projects by pressing play on the video below.
Making UV DTF and DTF Designs with Photos
I am going to order both the DTF and UV DTF prints from Ninja Transfers. The photo results were great through them. I haven't ordered photo DTF or UV DTF from anyone else, so I can't speak to any differences you may see if you order elsewhere.
For my projects today, I'm using a design I found on Etsy for the DTF print and a design I created in Canva for the UV DTF print. You can get both designs in the supply list below if you want to make projects exactly like the one I made.
I don't know what it is about photo gifts, but I always think about them as Mother's Day gets closer. I think both of the designs I used today make wonderful Mother's Day gifts, and they're extra special because they can be personalized with photos that are special to you and your family.
Supplies Used
This is the supply list for both projects. If you are only making DTF or only making UV DTF projects, you will not need everything on the list.
UV DTF Supplies
- Free Puzzle Template
- Order UV DTF Prints Here
- Frame (I used a thrifted frame. I painted the frame and the inside to give myself a clean base to work with. If you purchase the frame first, you can usually make the design fit the frame that you have.)
DTF Supplies
- NANA Shirt Template
- Order DTF Prints Here
- Protective Paper
- Paper Dispenser
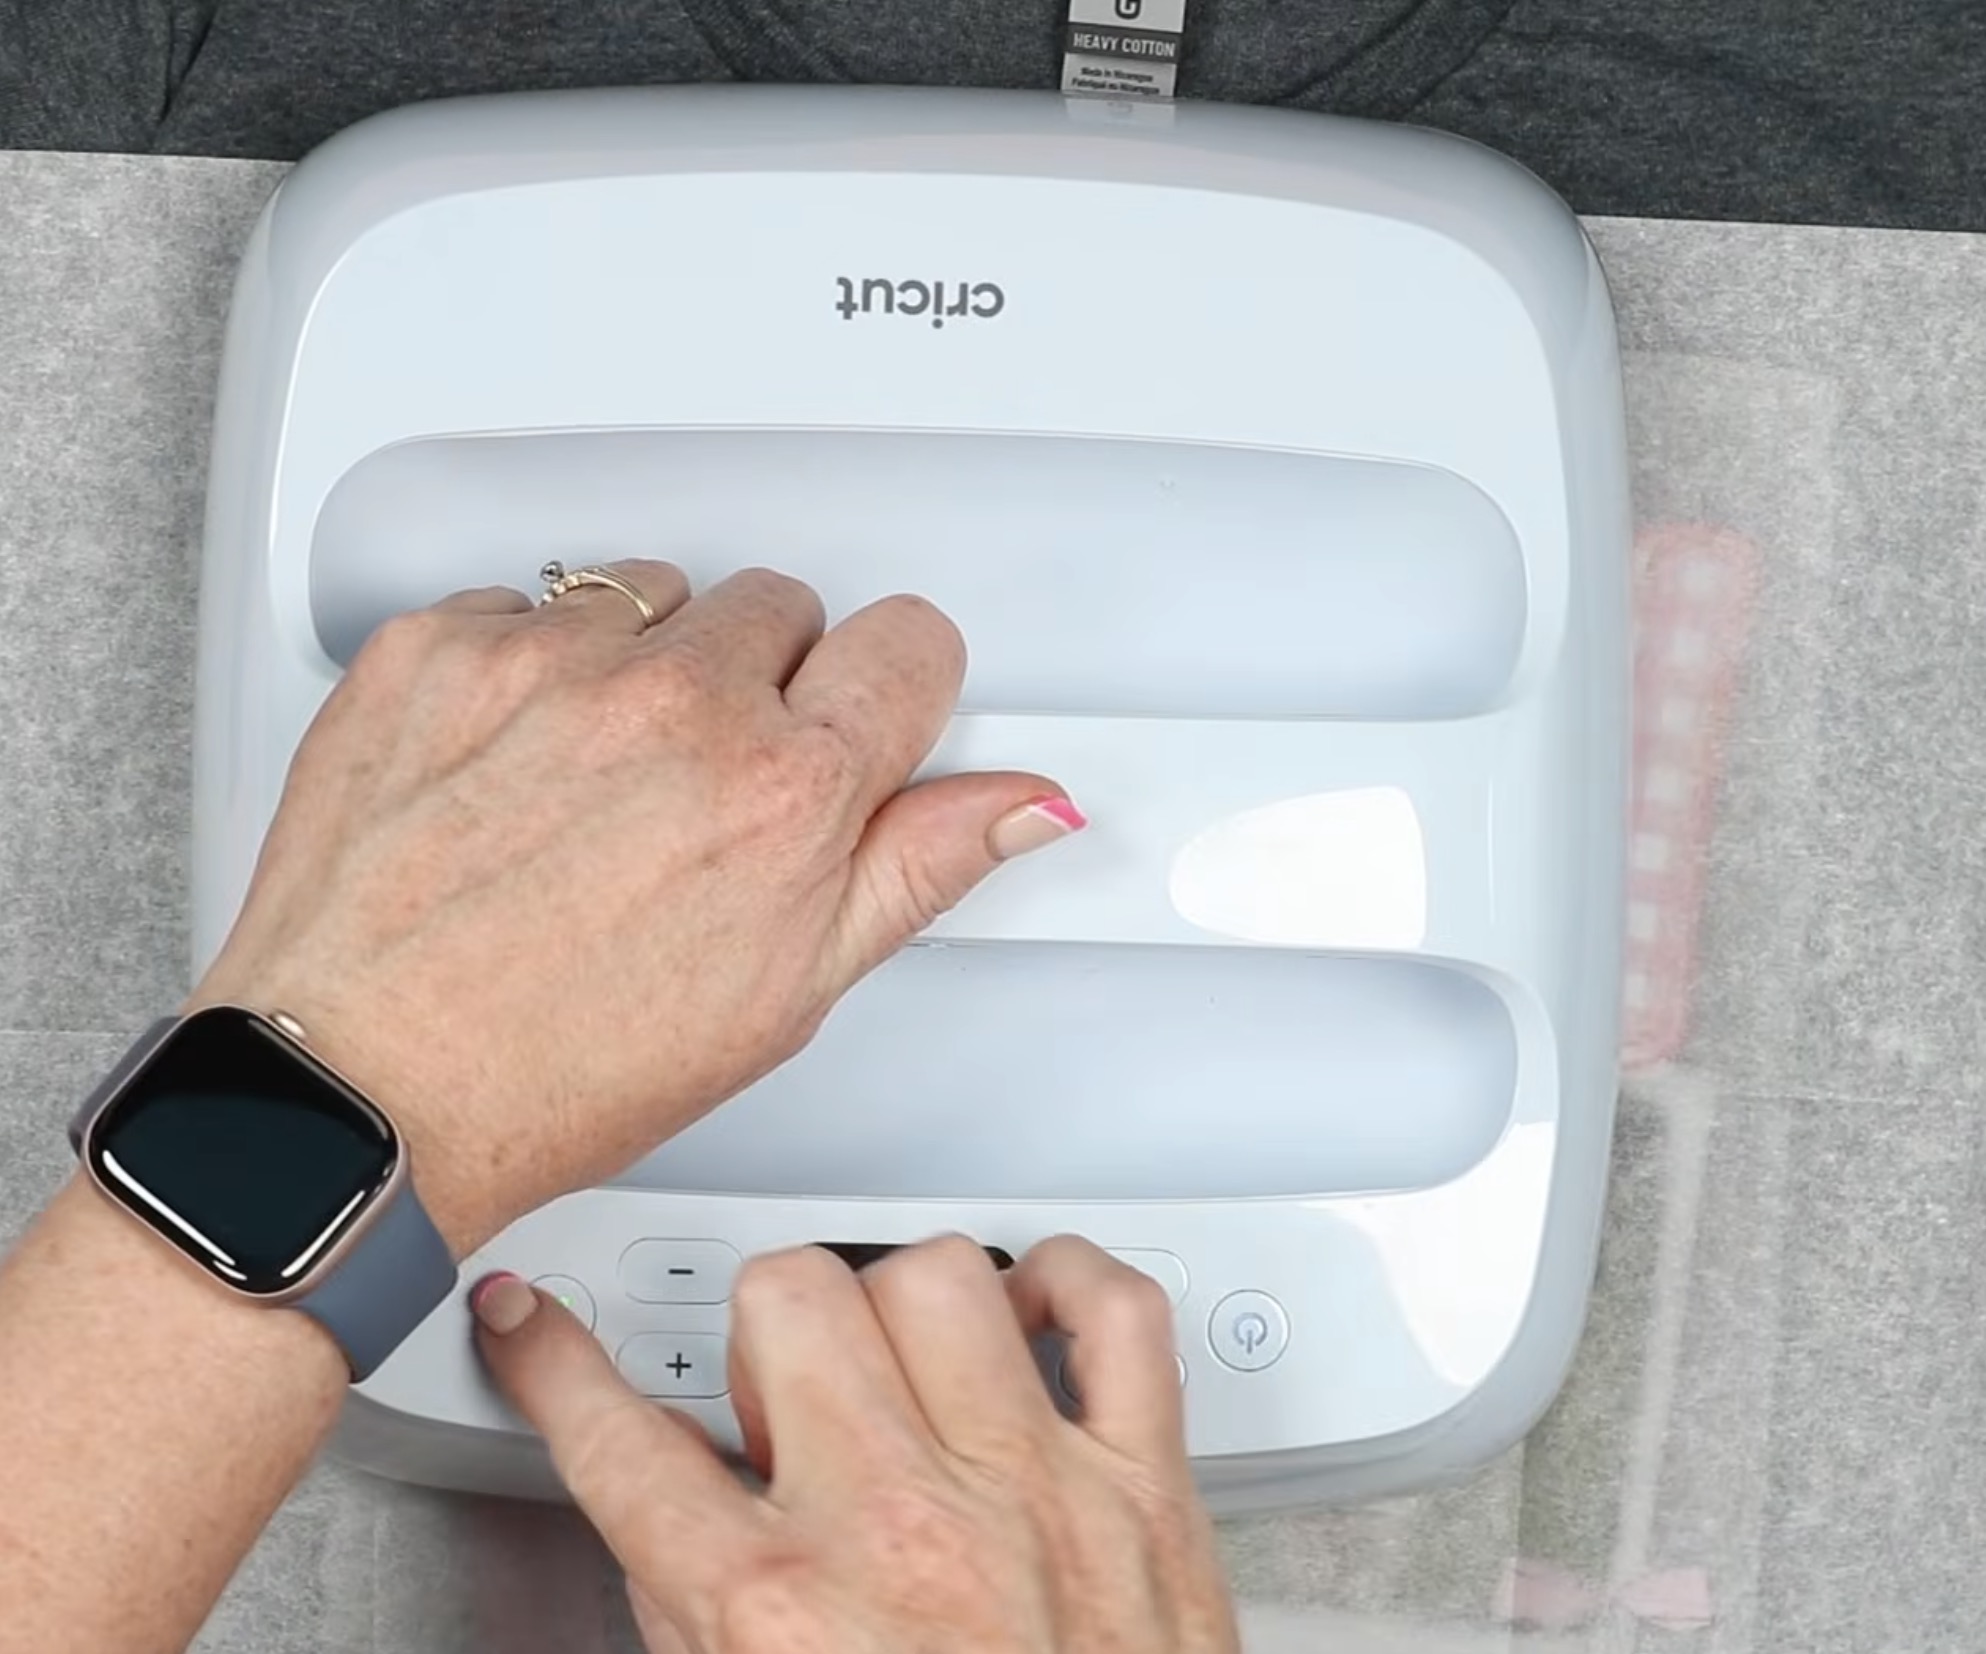
- Cricut EasyPress
- Heat-Resistant Mat
- DTF Cooling Block
- Shirt (You can use any shirt in any color you would like. That is one of the great things about DTF.)
Step 1 – Create the Designs
I am using Canva to create both of these designs.
Open Canva, click Create, and then Custom Size. I am making mine 12 inches by 12 inches because I want the DTF print to be large enough to put on a shirt.
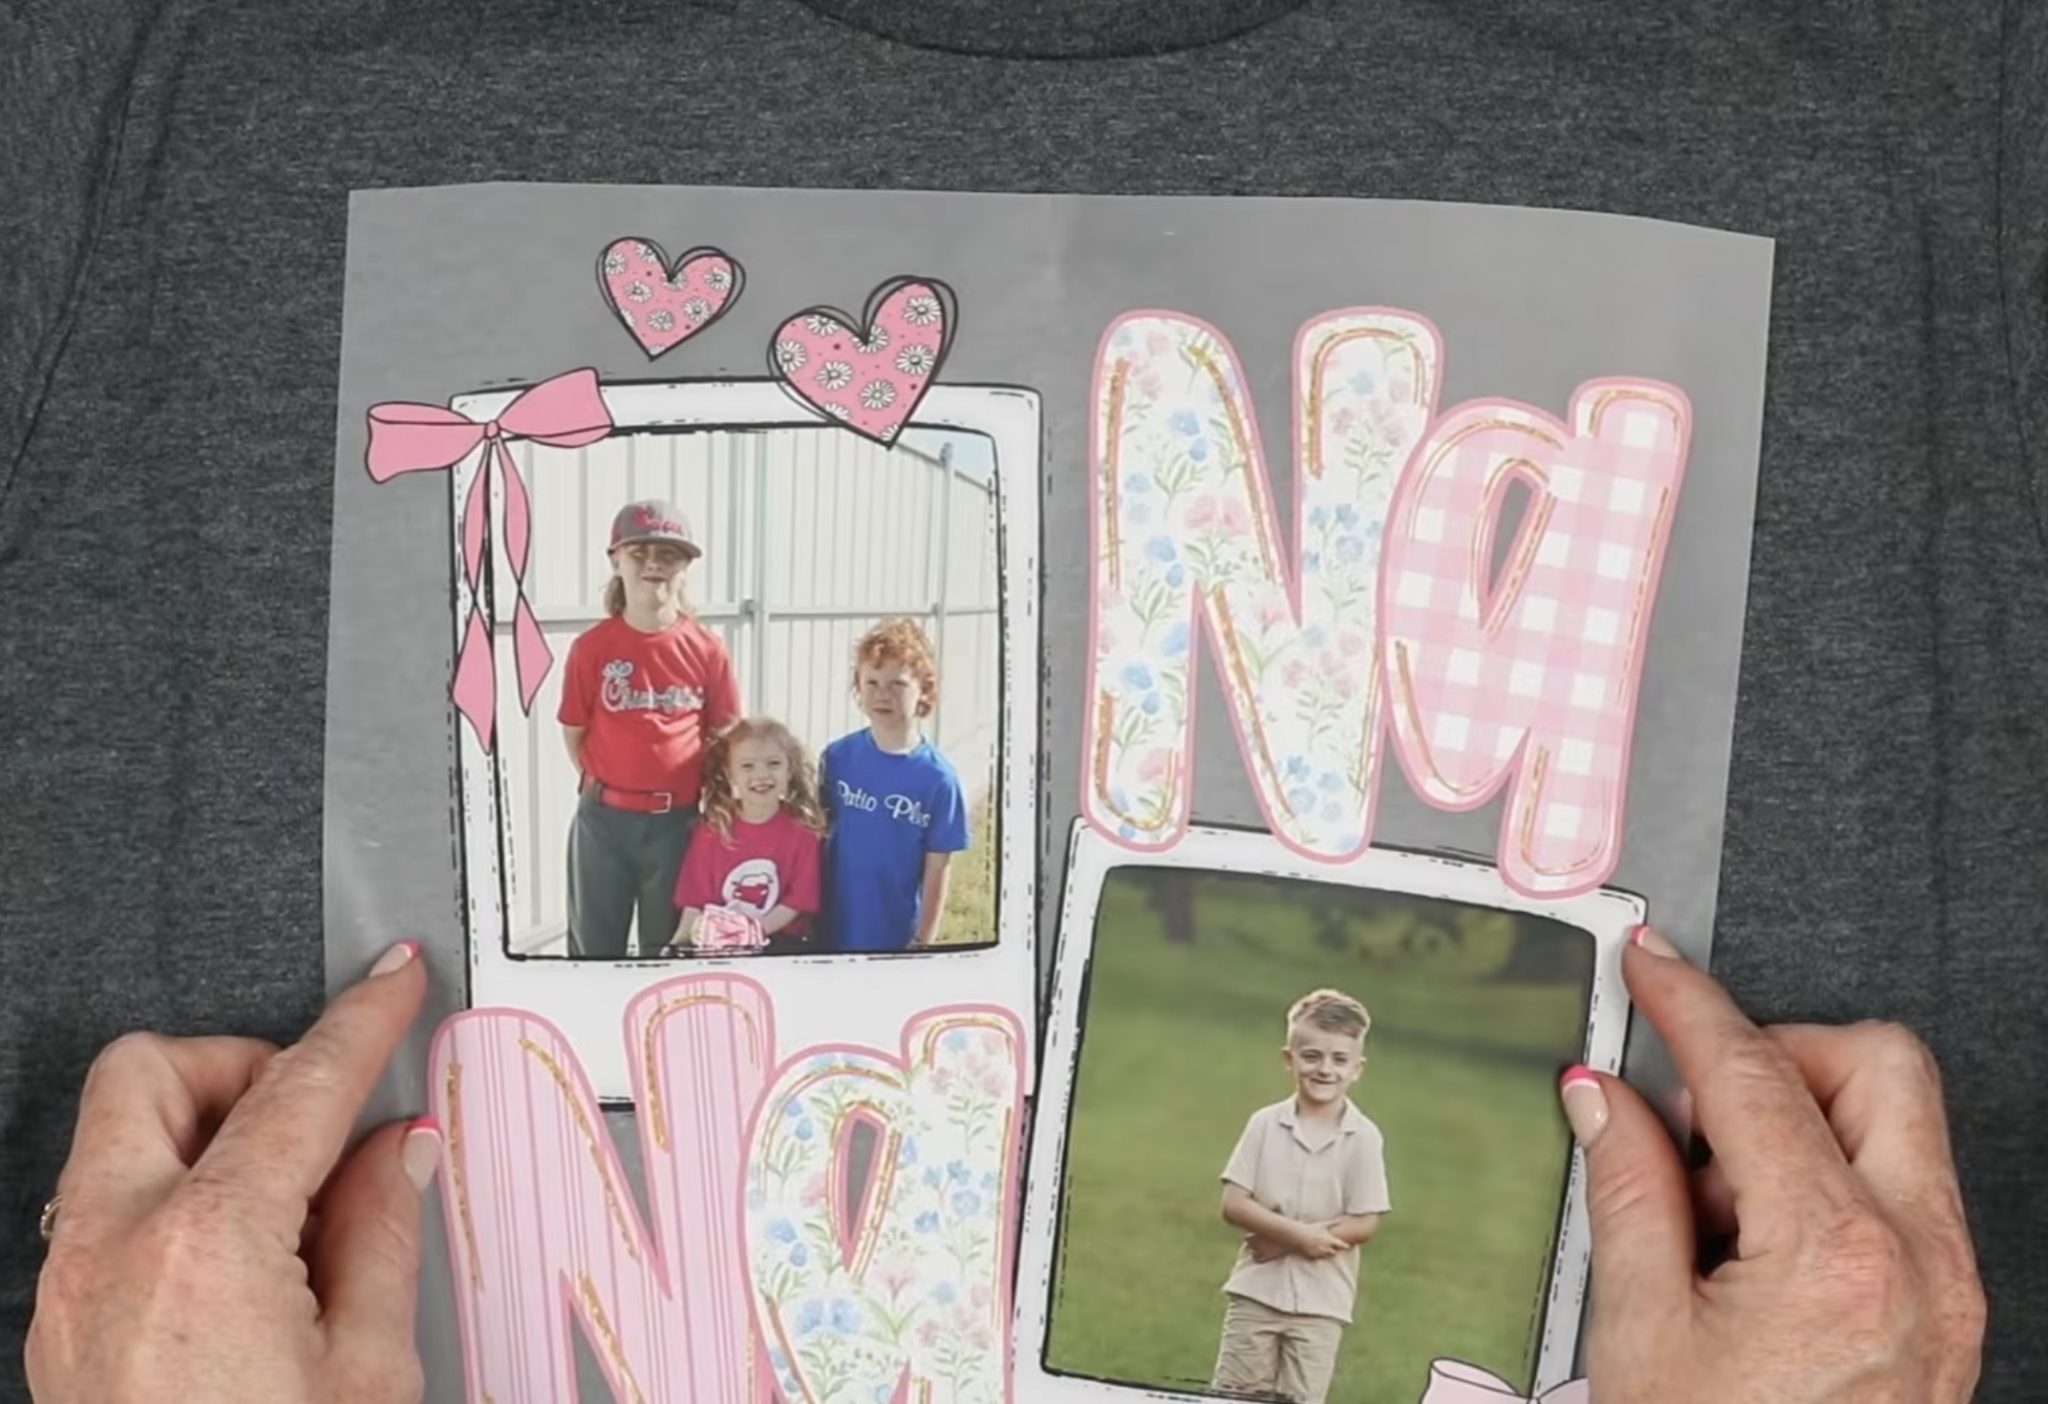
DTF Nana Design
Click Upload and upload the design and the photos you want to use.
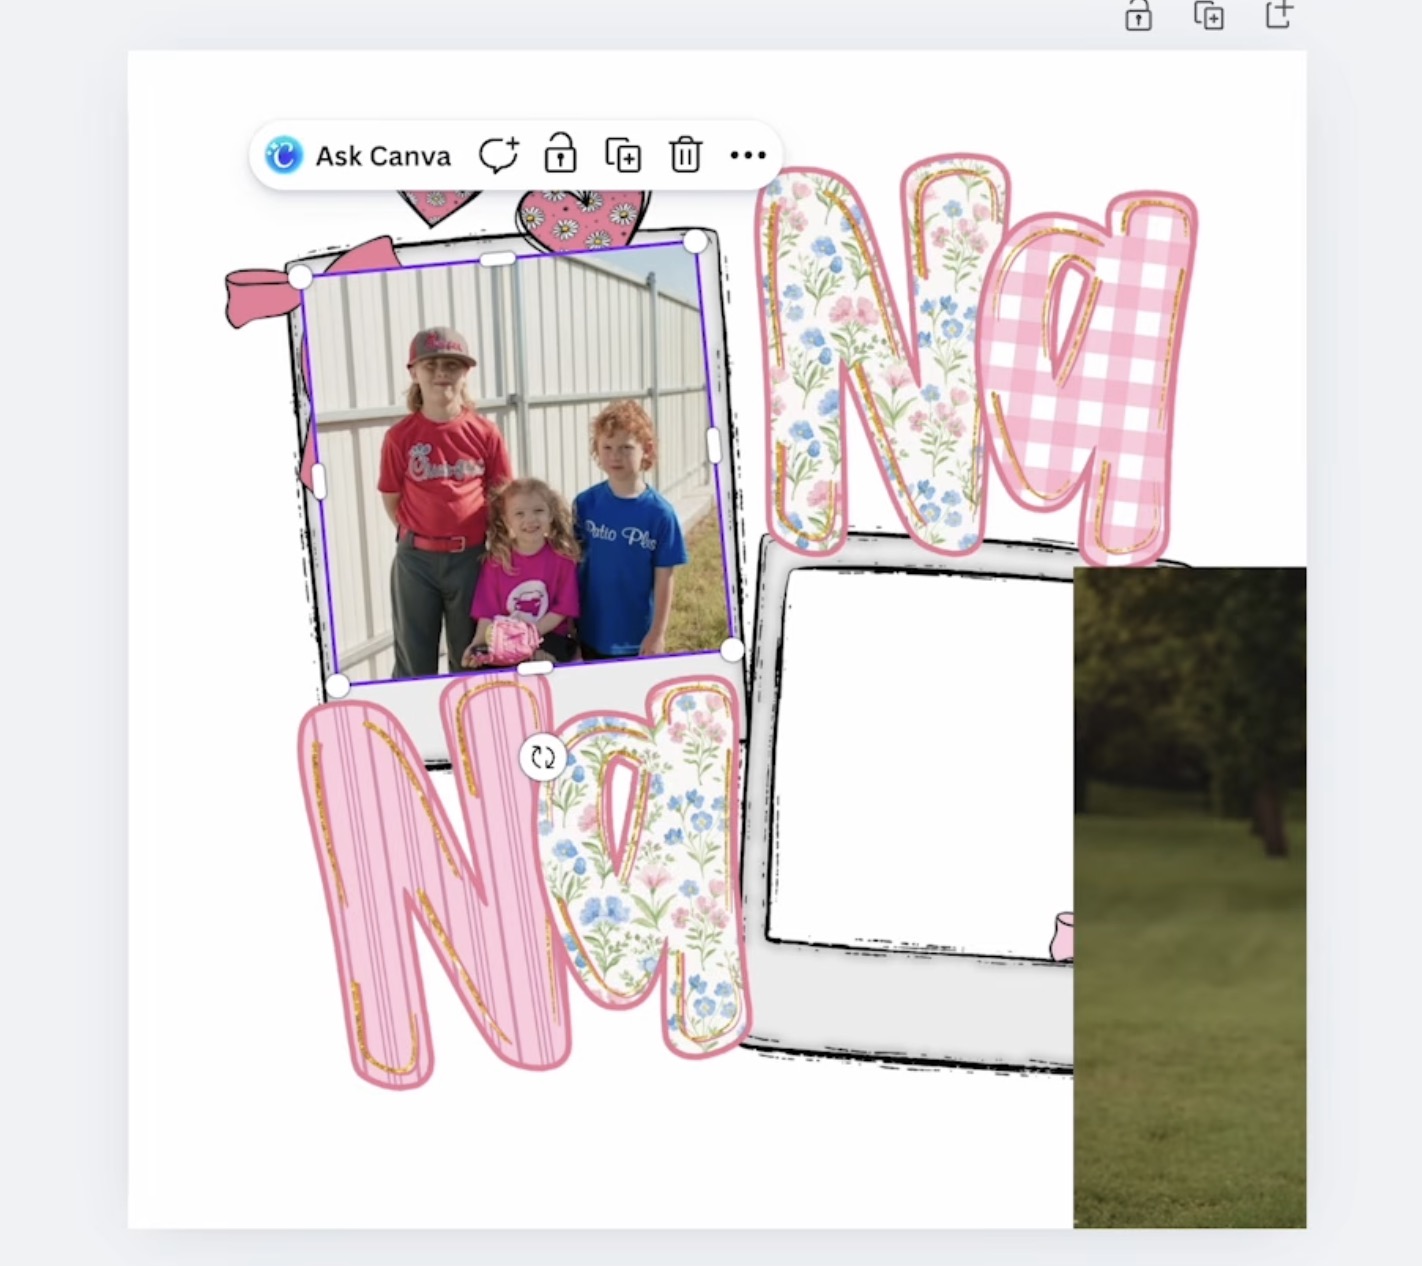
Add the design to the canvas and resize it to the size you want for your shirt. I am resizing mine to 10 inches wide because it will be going on a small shirt.
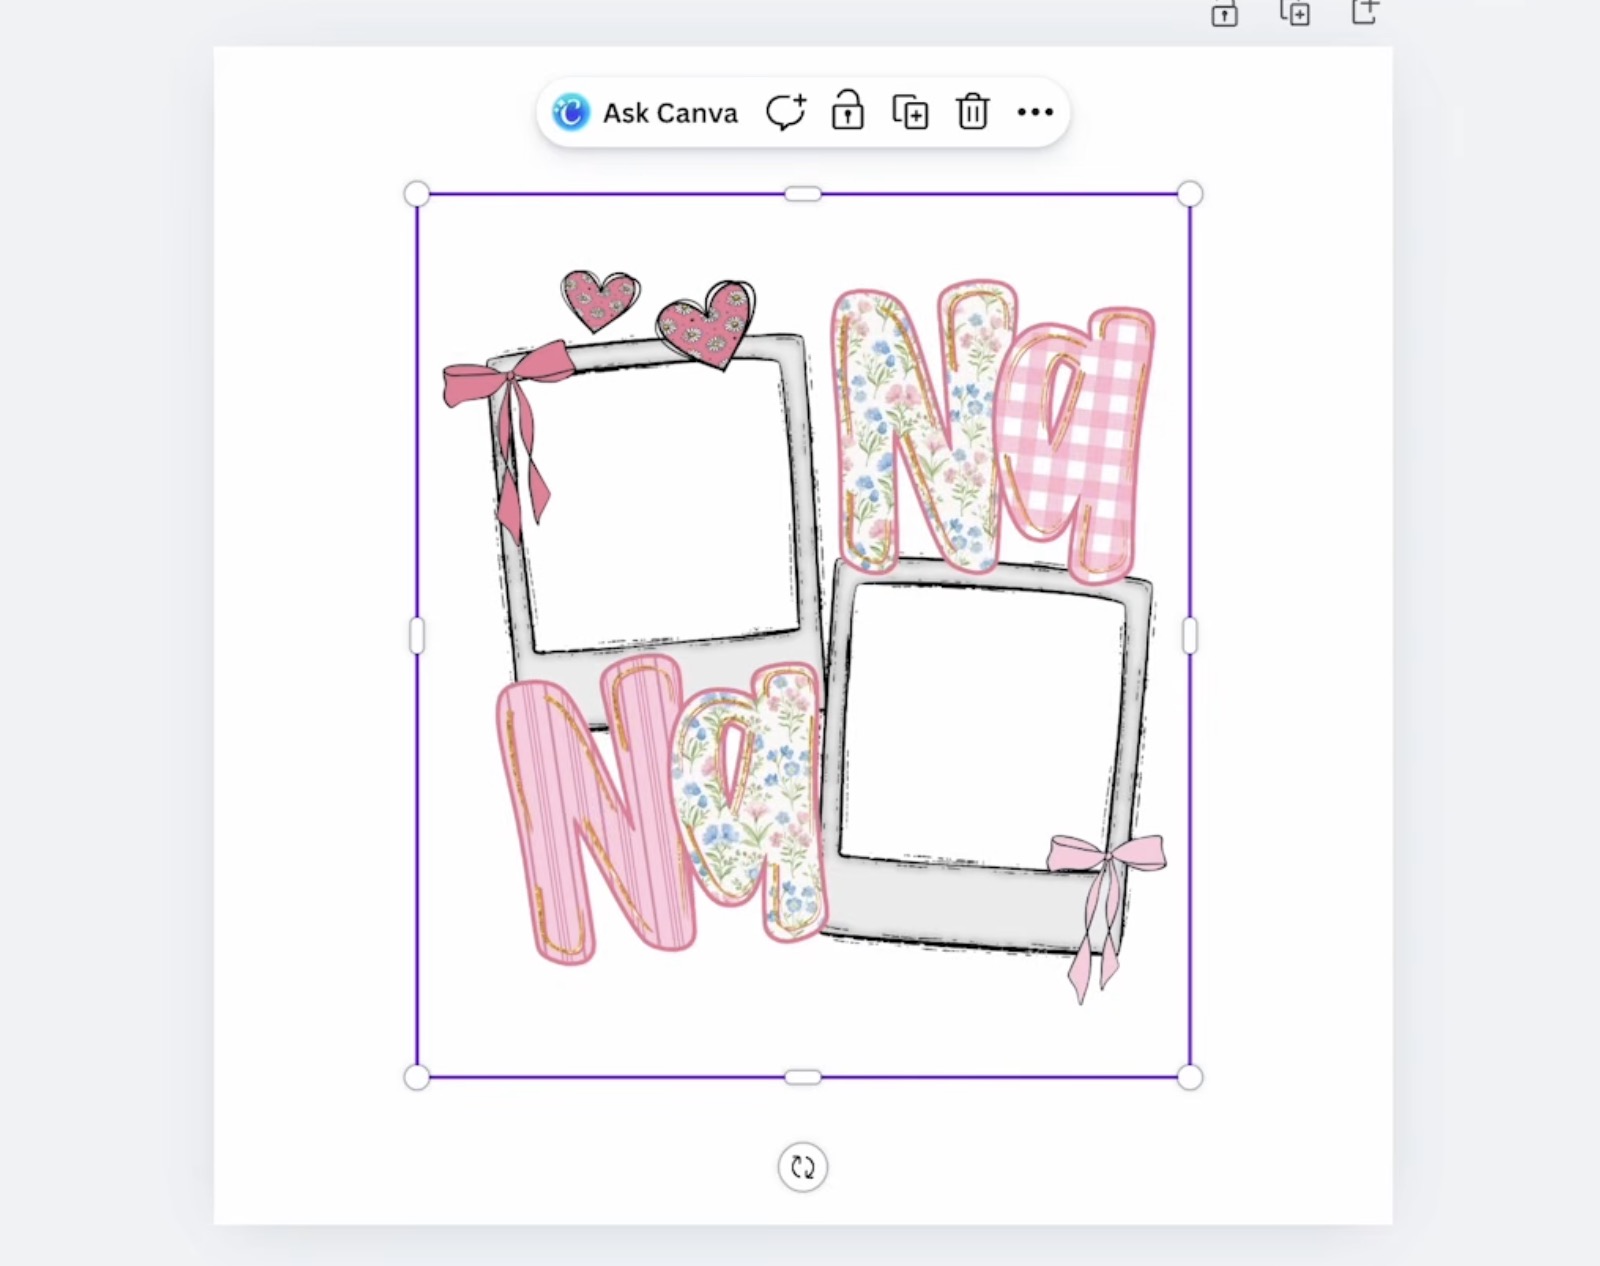
Next, we're going to add the photos to the design.
This design is not like some others created in Canva. You cannot just drag and drop the photo into the frame.
Click Uploads and then click on the image, and it will add it to the canvas.
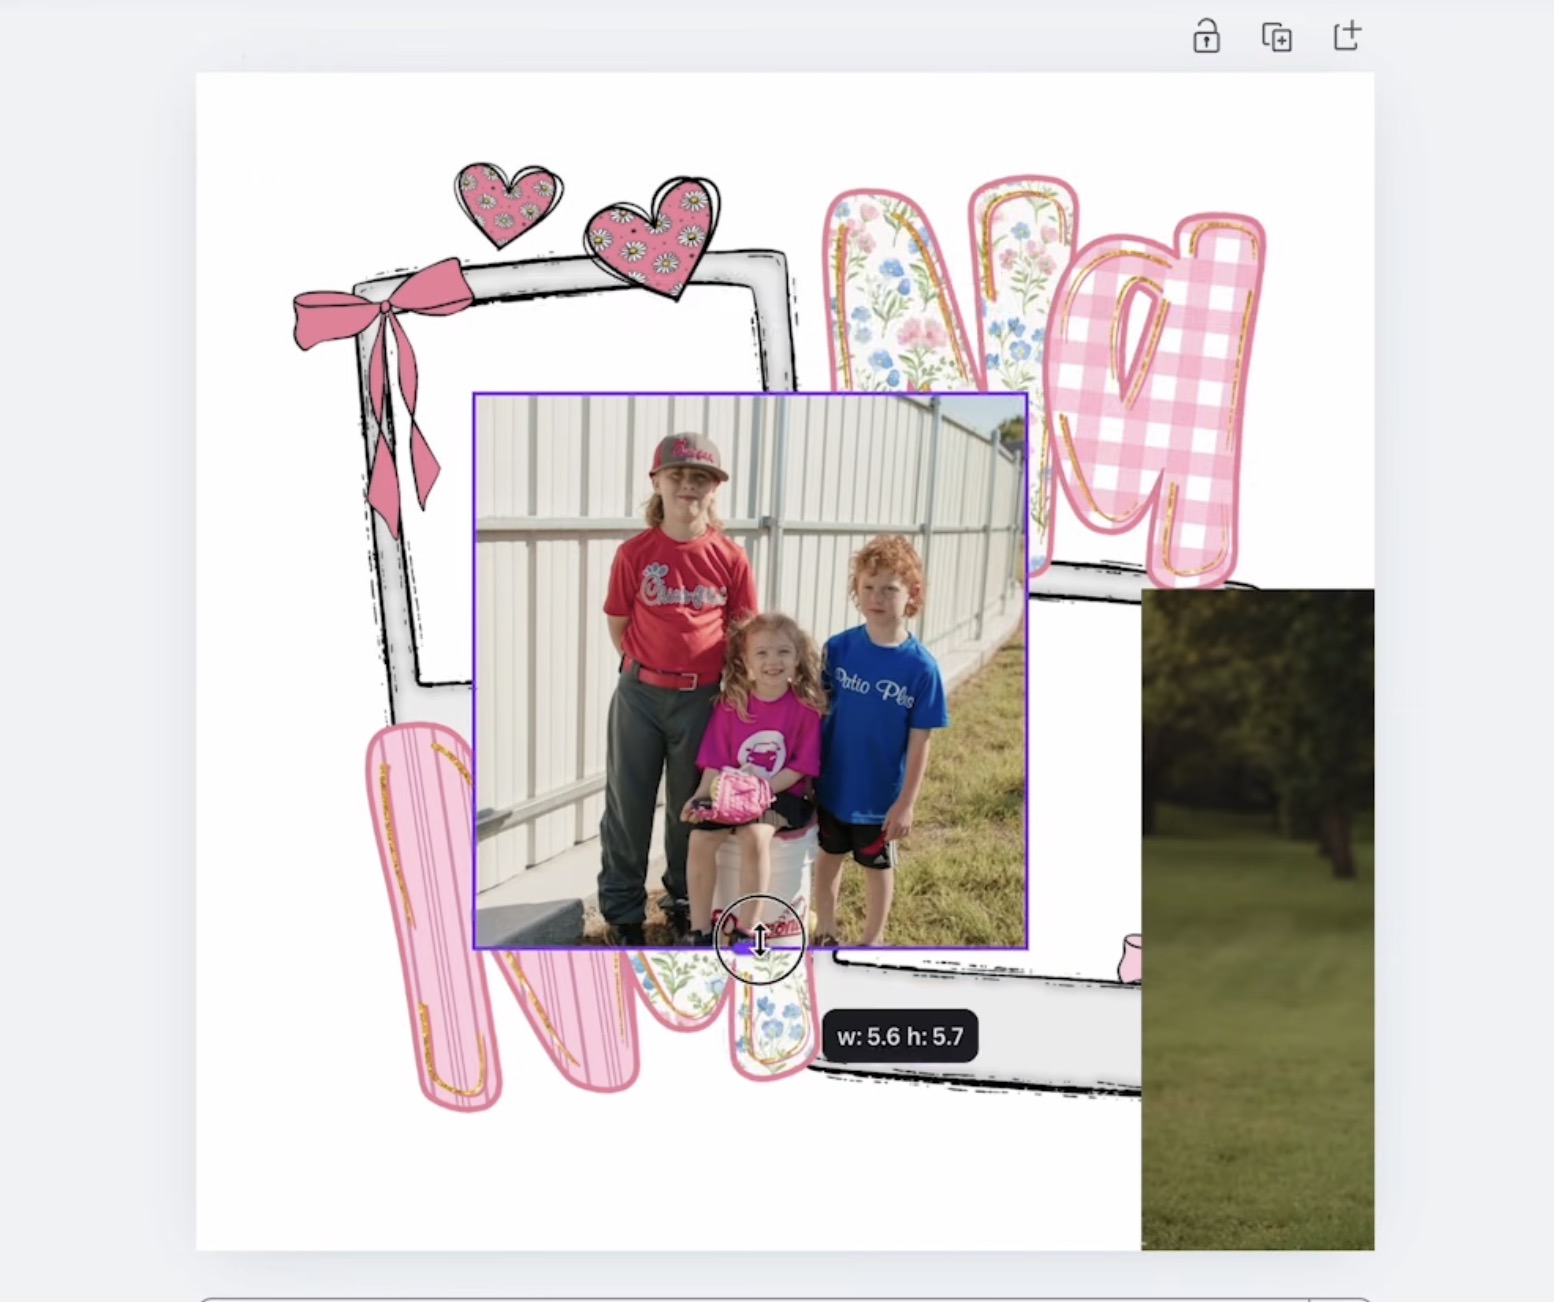
Use the handles to resize the image so it will fit within the frame.
When you have it sized correctly, move it over to the opening and rotate it a little so it is oriented correctly.
Next, click Position and move the photo layer to the back so the photo frame sits over the edges of the photo.
Repeat these steps for the other photo.
With the photos added, double-check to make sure everything is still sized correctly and click Share.
Next, click Download and download the image as a PNG with a Transparent Background. I also moved the Size slider over to 2.
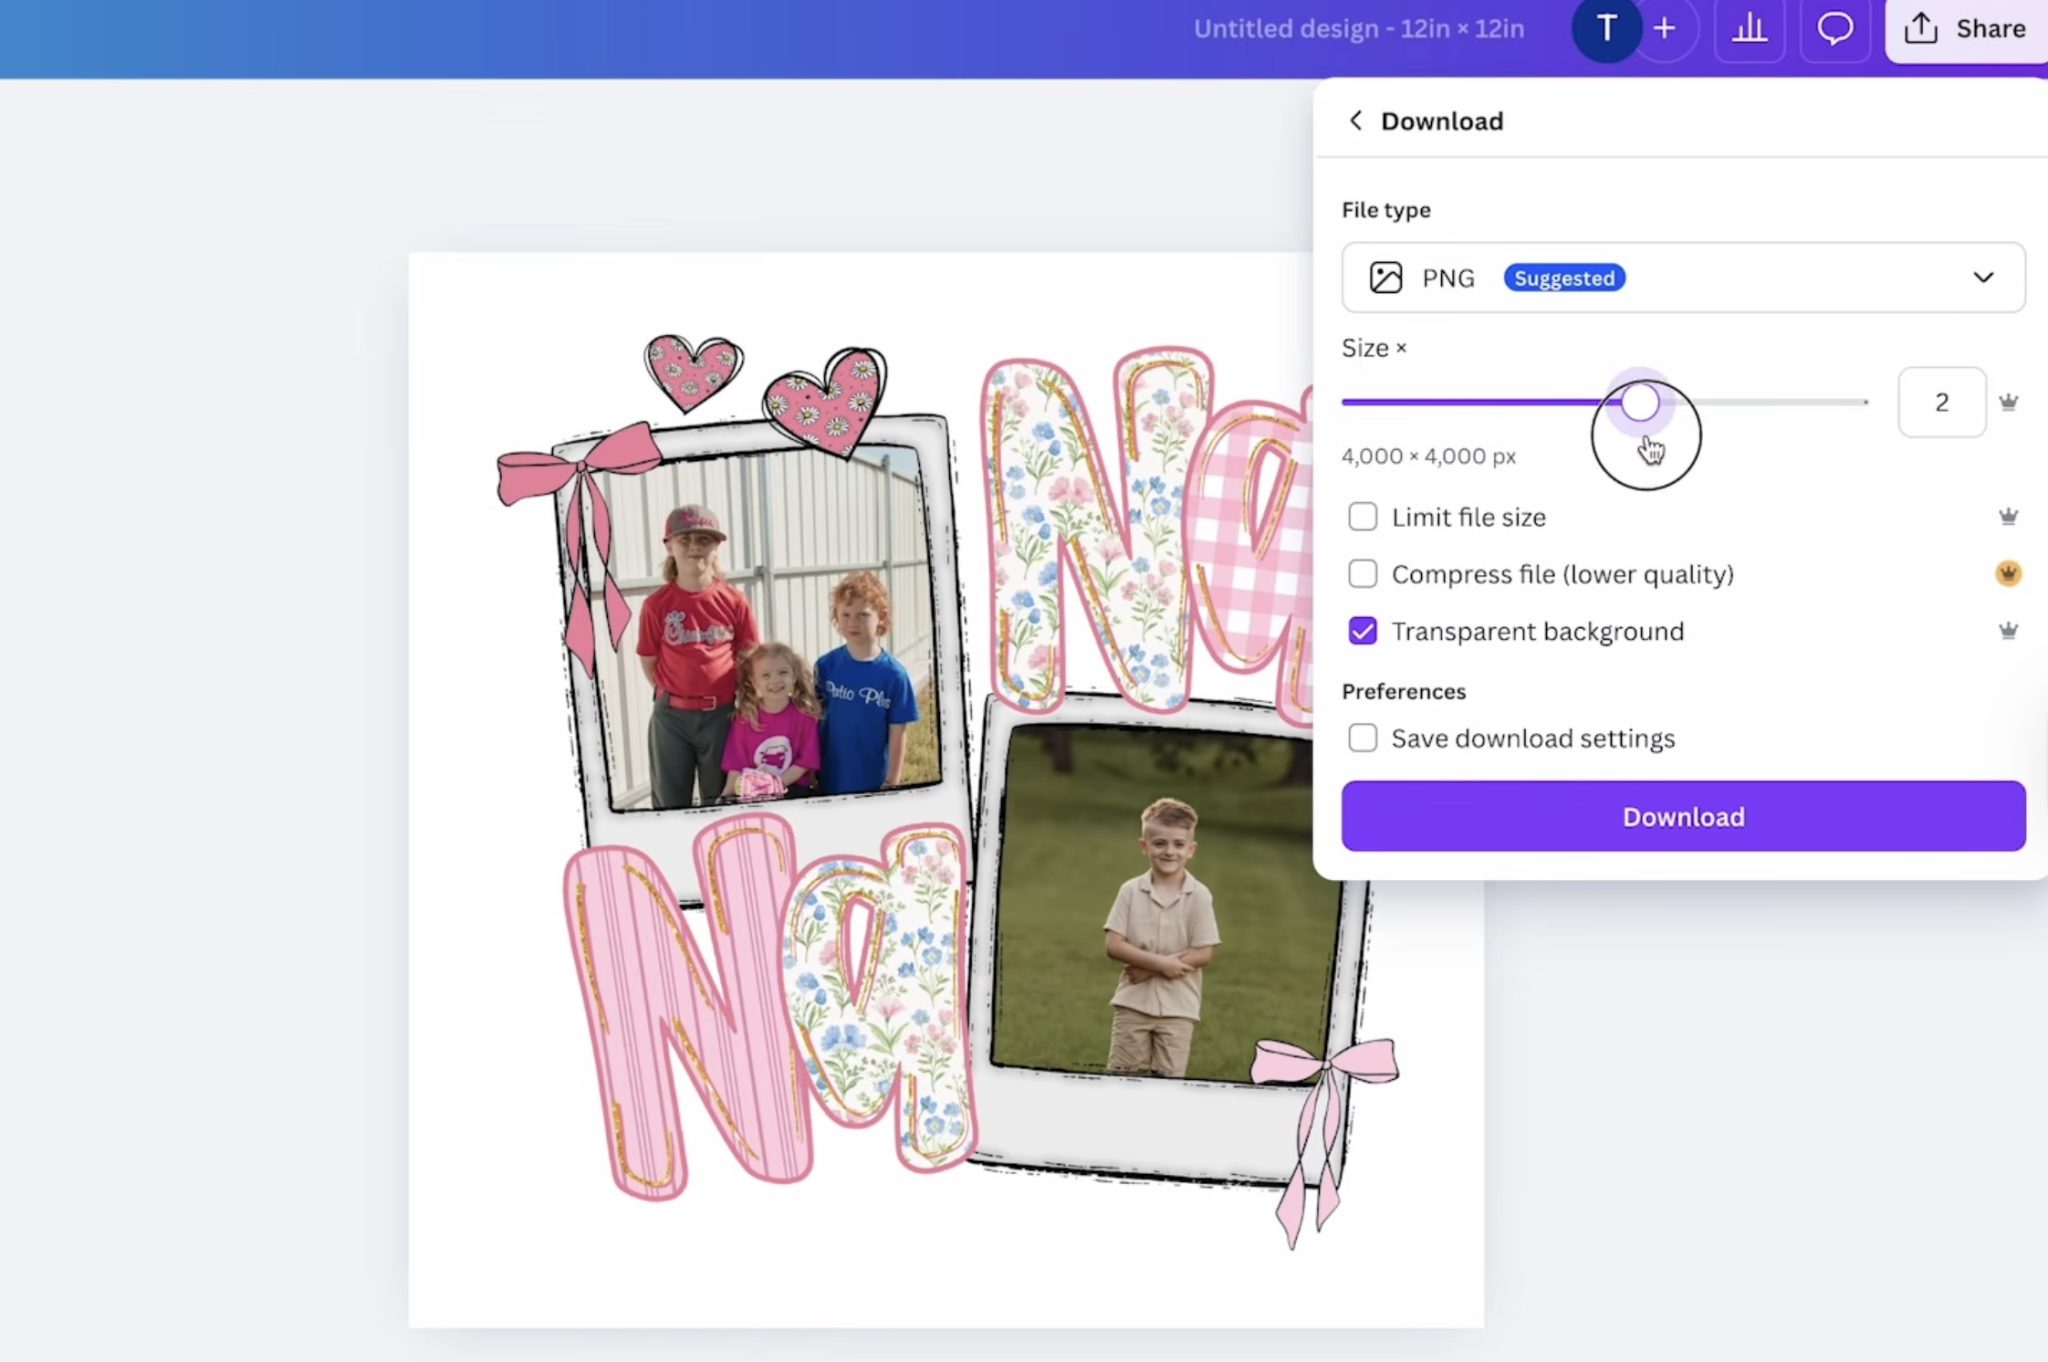
This makes the file size two times larger, which will give us a high enough resolution to get a good print from Ninja Transfers.
UV DTF Puzzle Design
For the UV DTF design, I have a Canva template that is easy to drag and drop photos into.
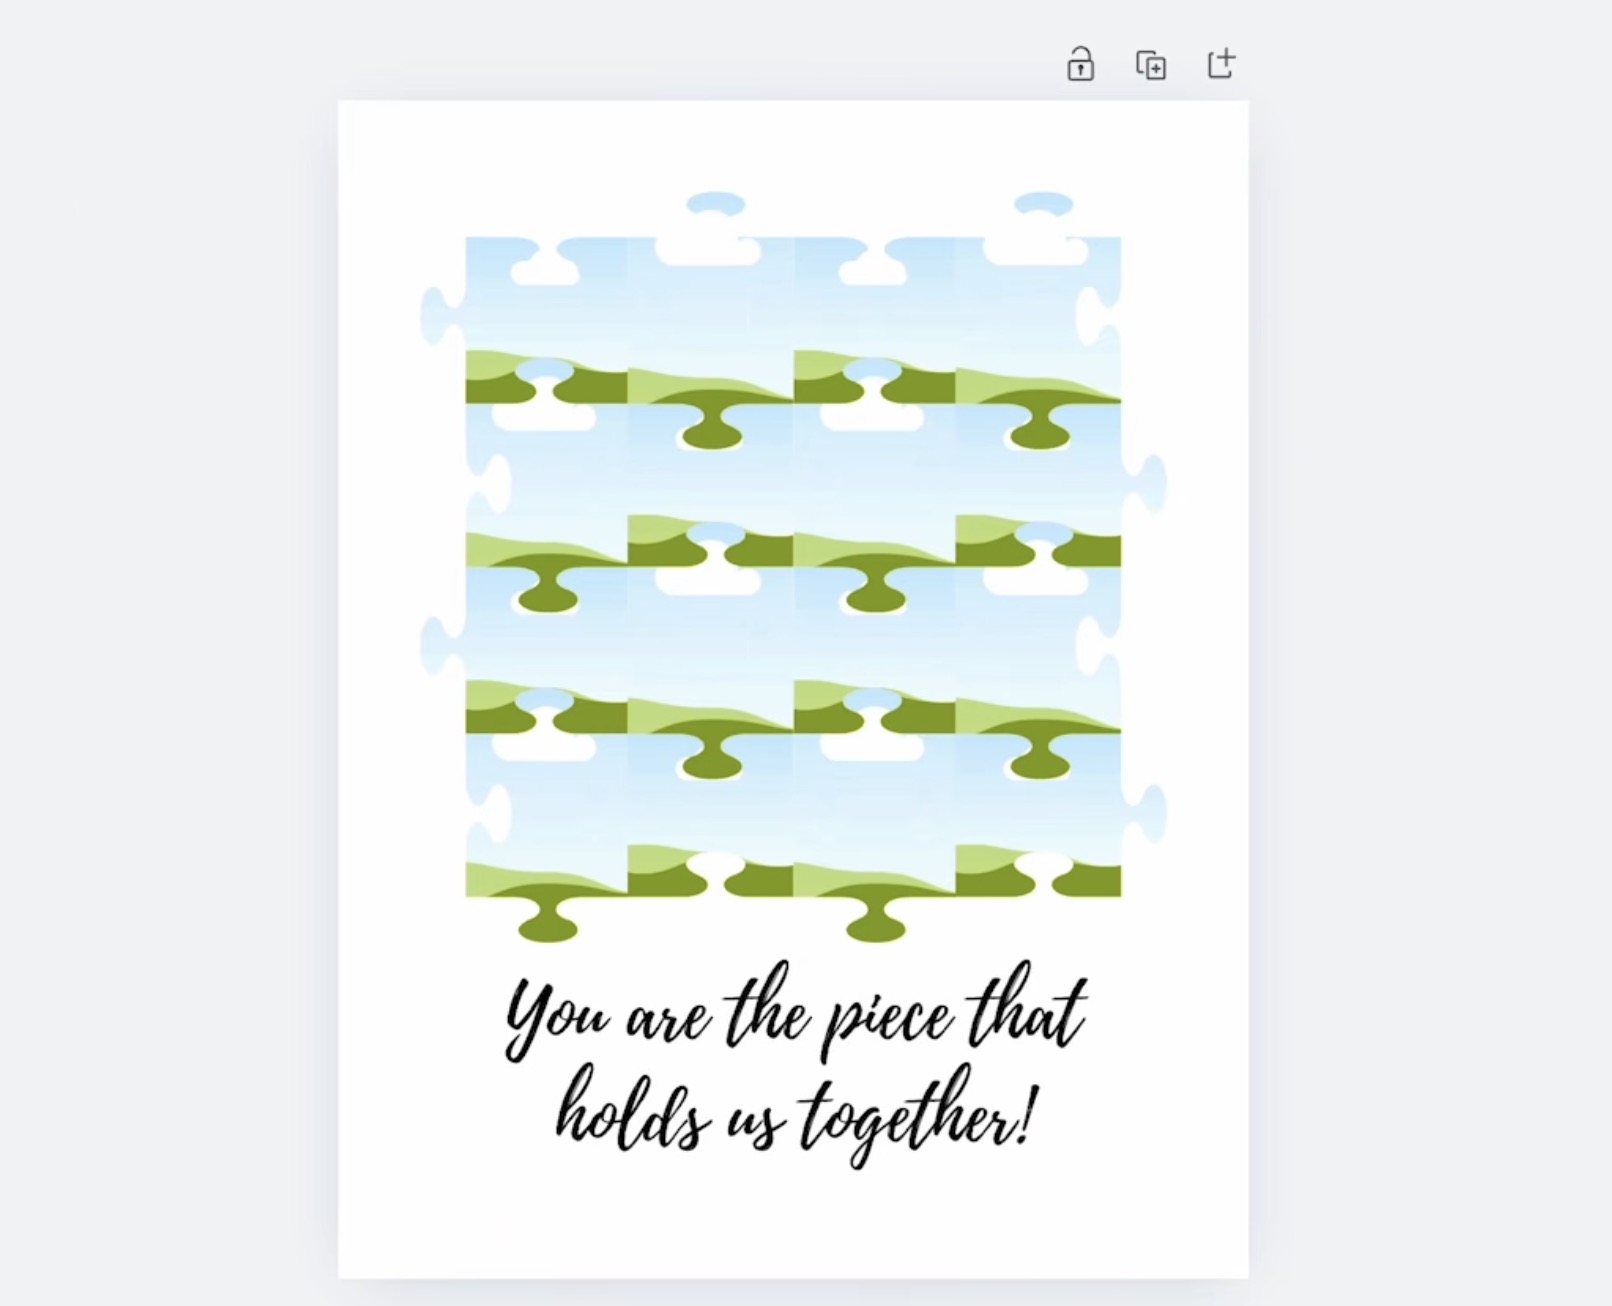
Click on the link in the supply list above and open the template in Canva.
Next, add a square to the Canva template and resize it to match the size of the blank you're using.
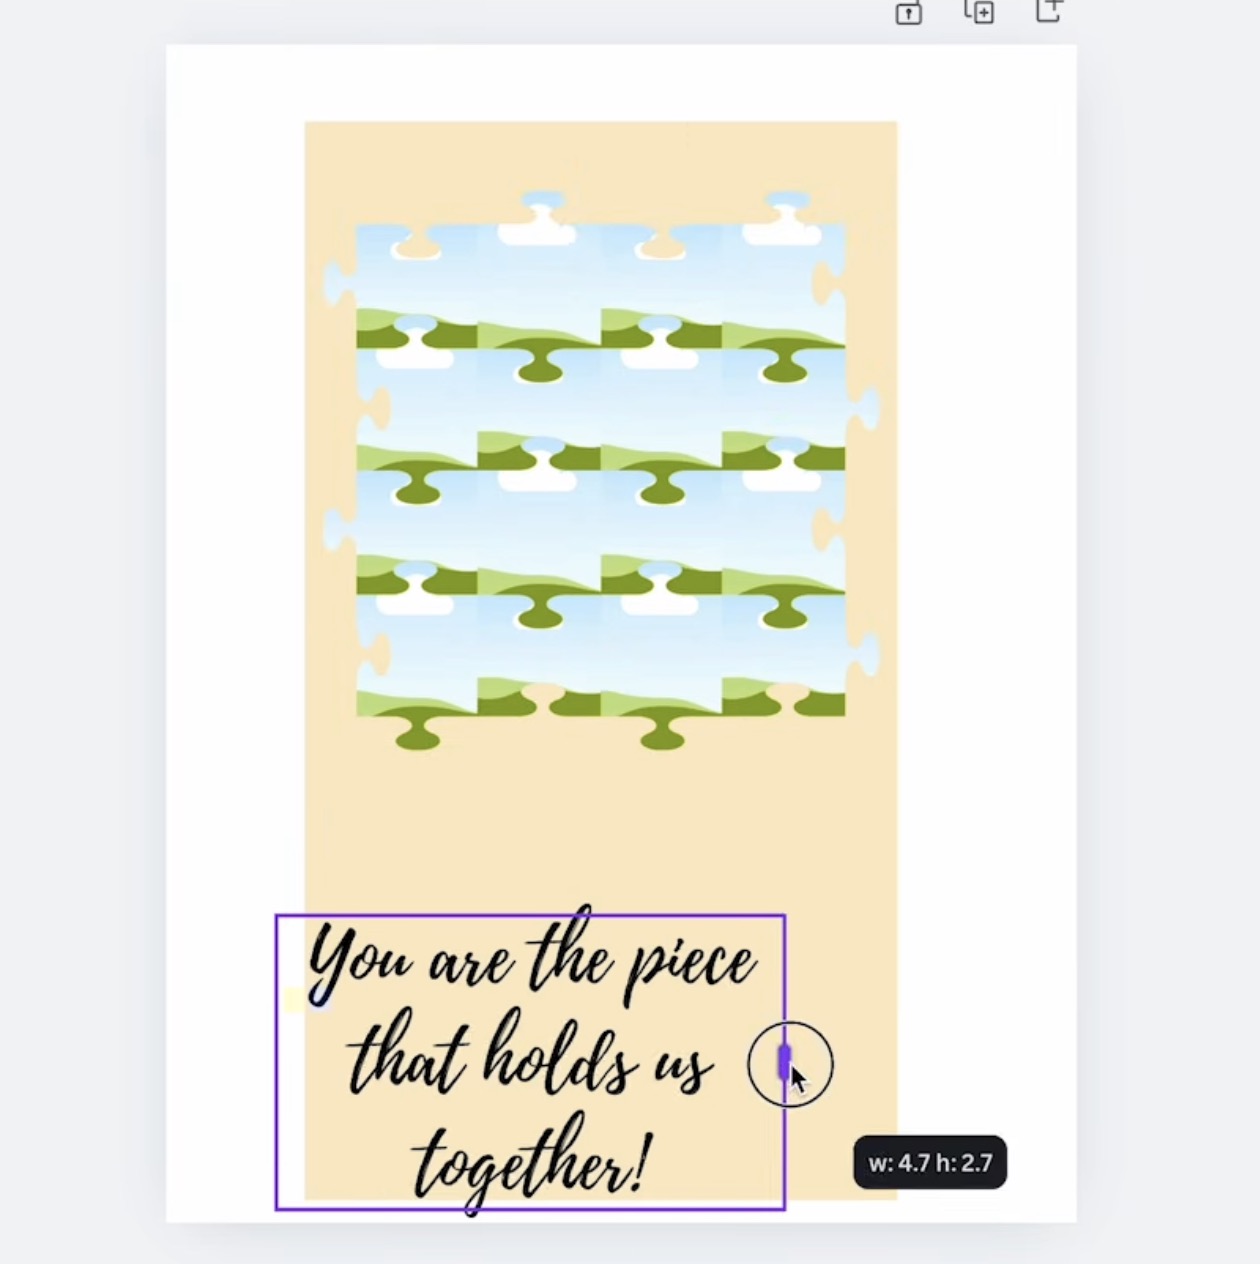
With that shape added, you can resize the text and puzzle design to fit how you want on your blank.
Now we can upload the photos. You'll want a photo for each of the puzzle pieces. There are 16 puzzle pieces, so upload 16 images.
With this design, you can drag the photo over to the puzzle pieces and release it, and it will drop into the shape and fit within it.
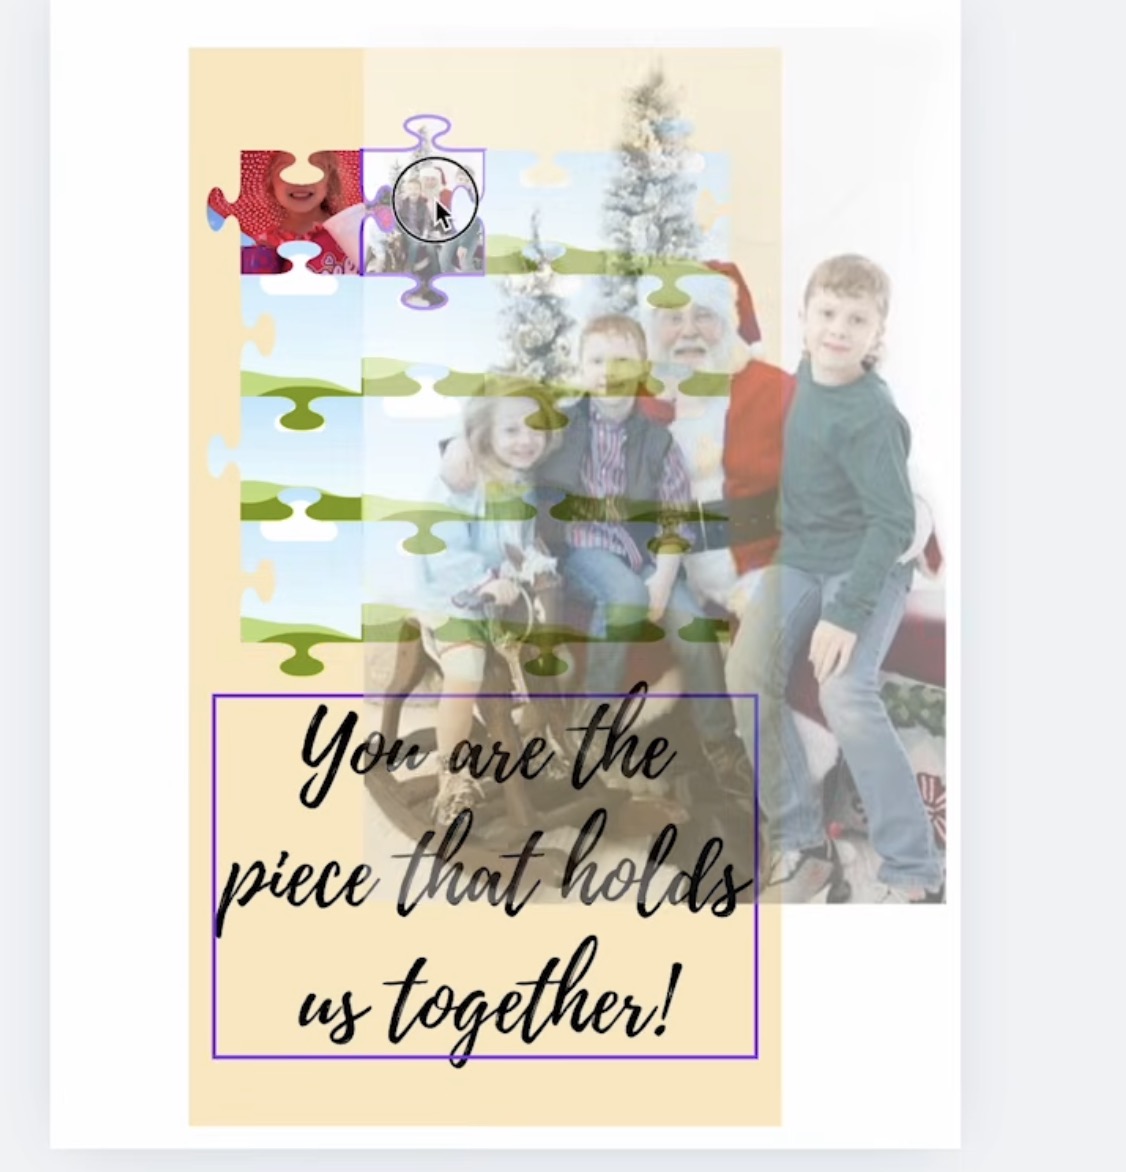
Double-check each picture. You can double-click the picture to resize or move it so it looks right in the puzzle piece. My goal is not to have heads cut off and for it to look as good as possible.

Because these are puzzle pieces, you're probably not going to fit the entire photo in the opening; something will be cut off, so you can move them around or try the photo in a different puzzle piece to see if it fits better.
With all the photos added, check to make sure the design is still the correct size and download it.
Download it as a .png file. And again, I made the file twice the size in order to get the resolution needed for ordering.
Step 2 – Ordering UV DTF and DTF Prints
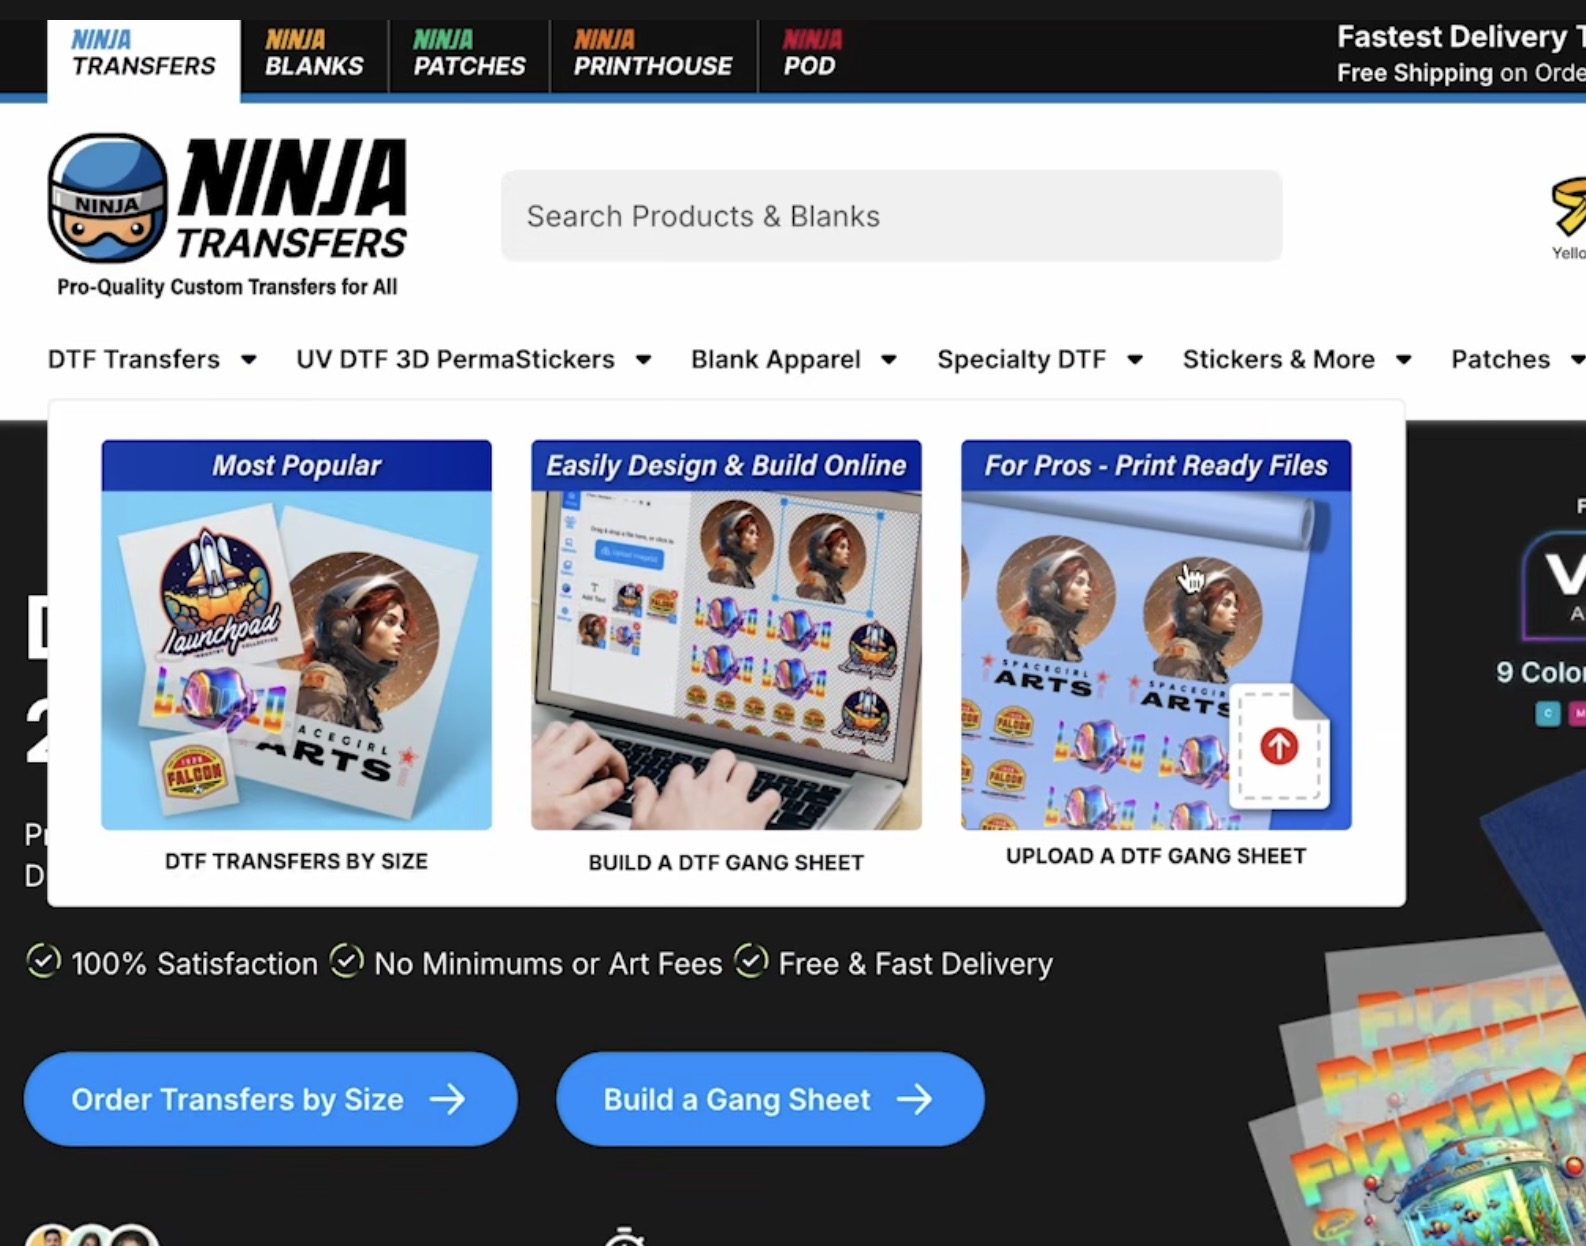
I am ordering both the DTF and UV DTF prints from Ninja Transfers.
How to Order DTF Prints
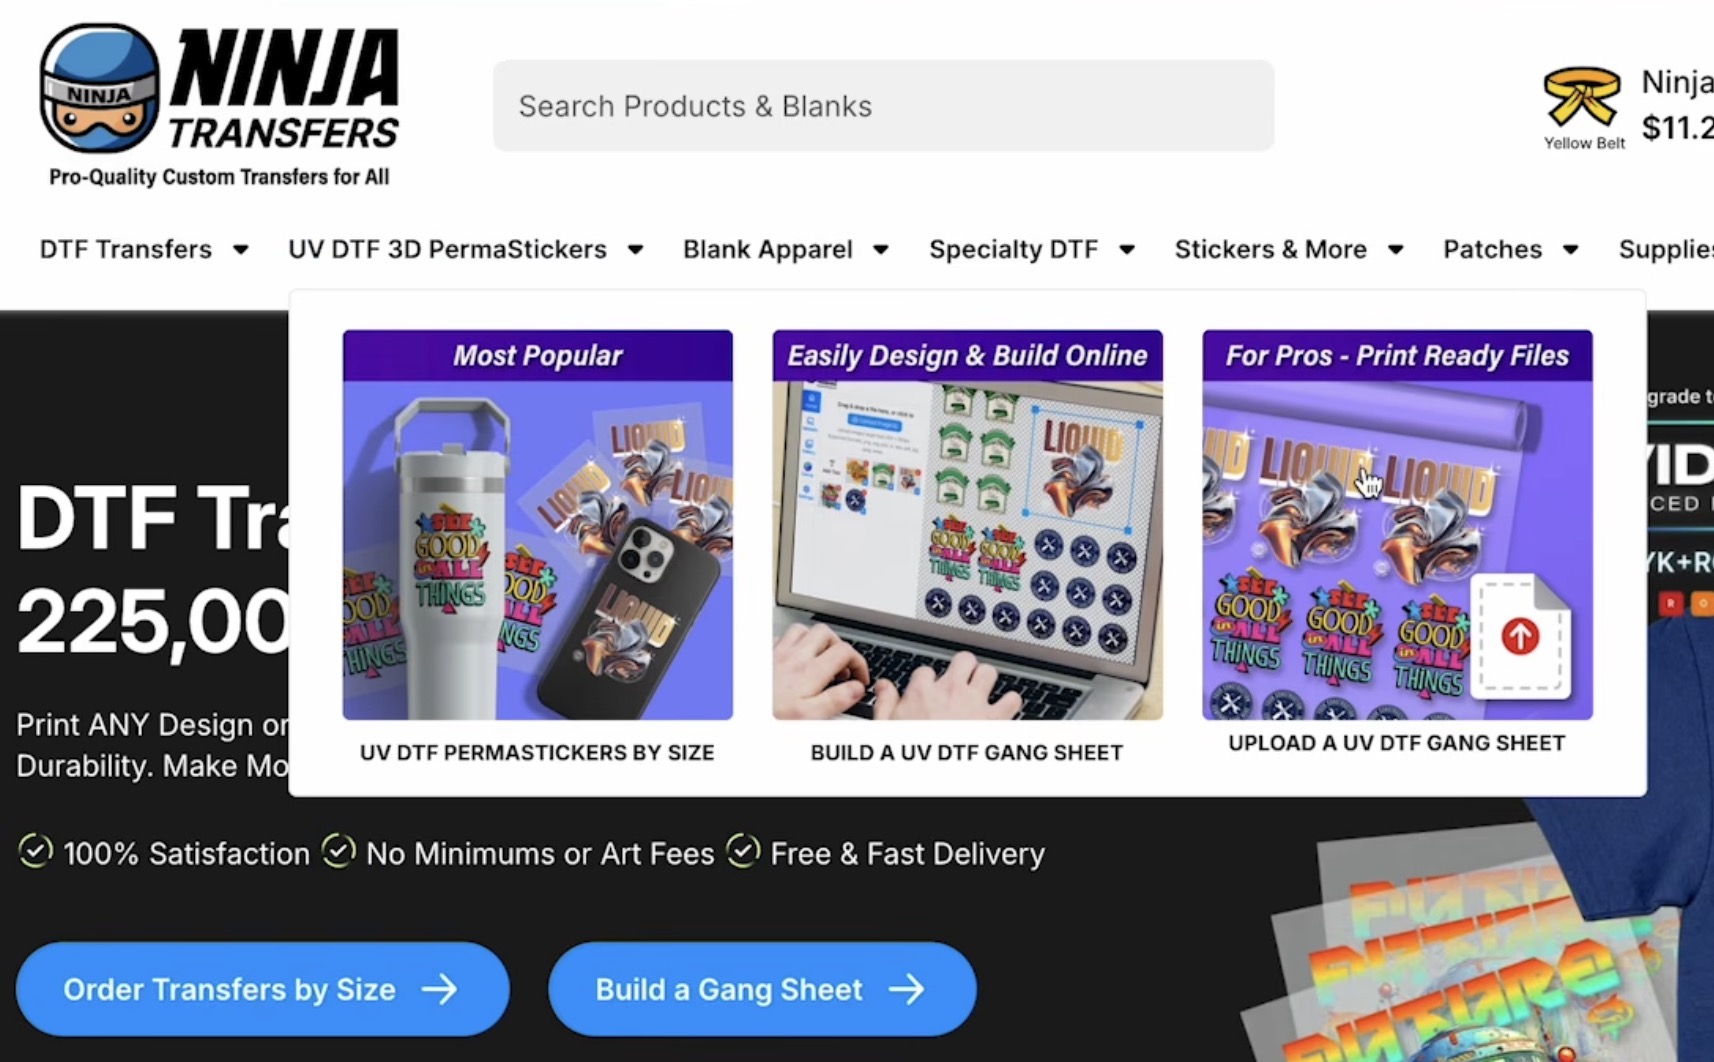
Head to Ninja Transfers website and you'll see they have a lot of different options for ordering DTF prints. Today, I am going to click DTF Transfers by Size.
Upload the Nana image we created in Canva and input the measurements for your finished design. I want mine to be 10 inches wide, and the height was adjusted in proportion to the width.
At this point, you can add more designs or select the blank you want.
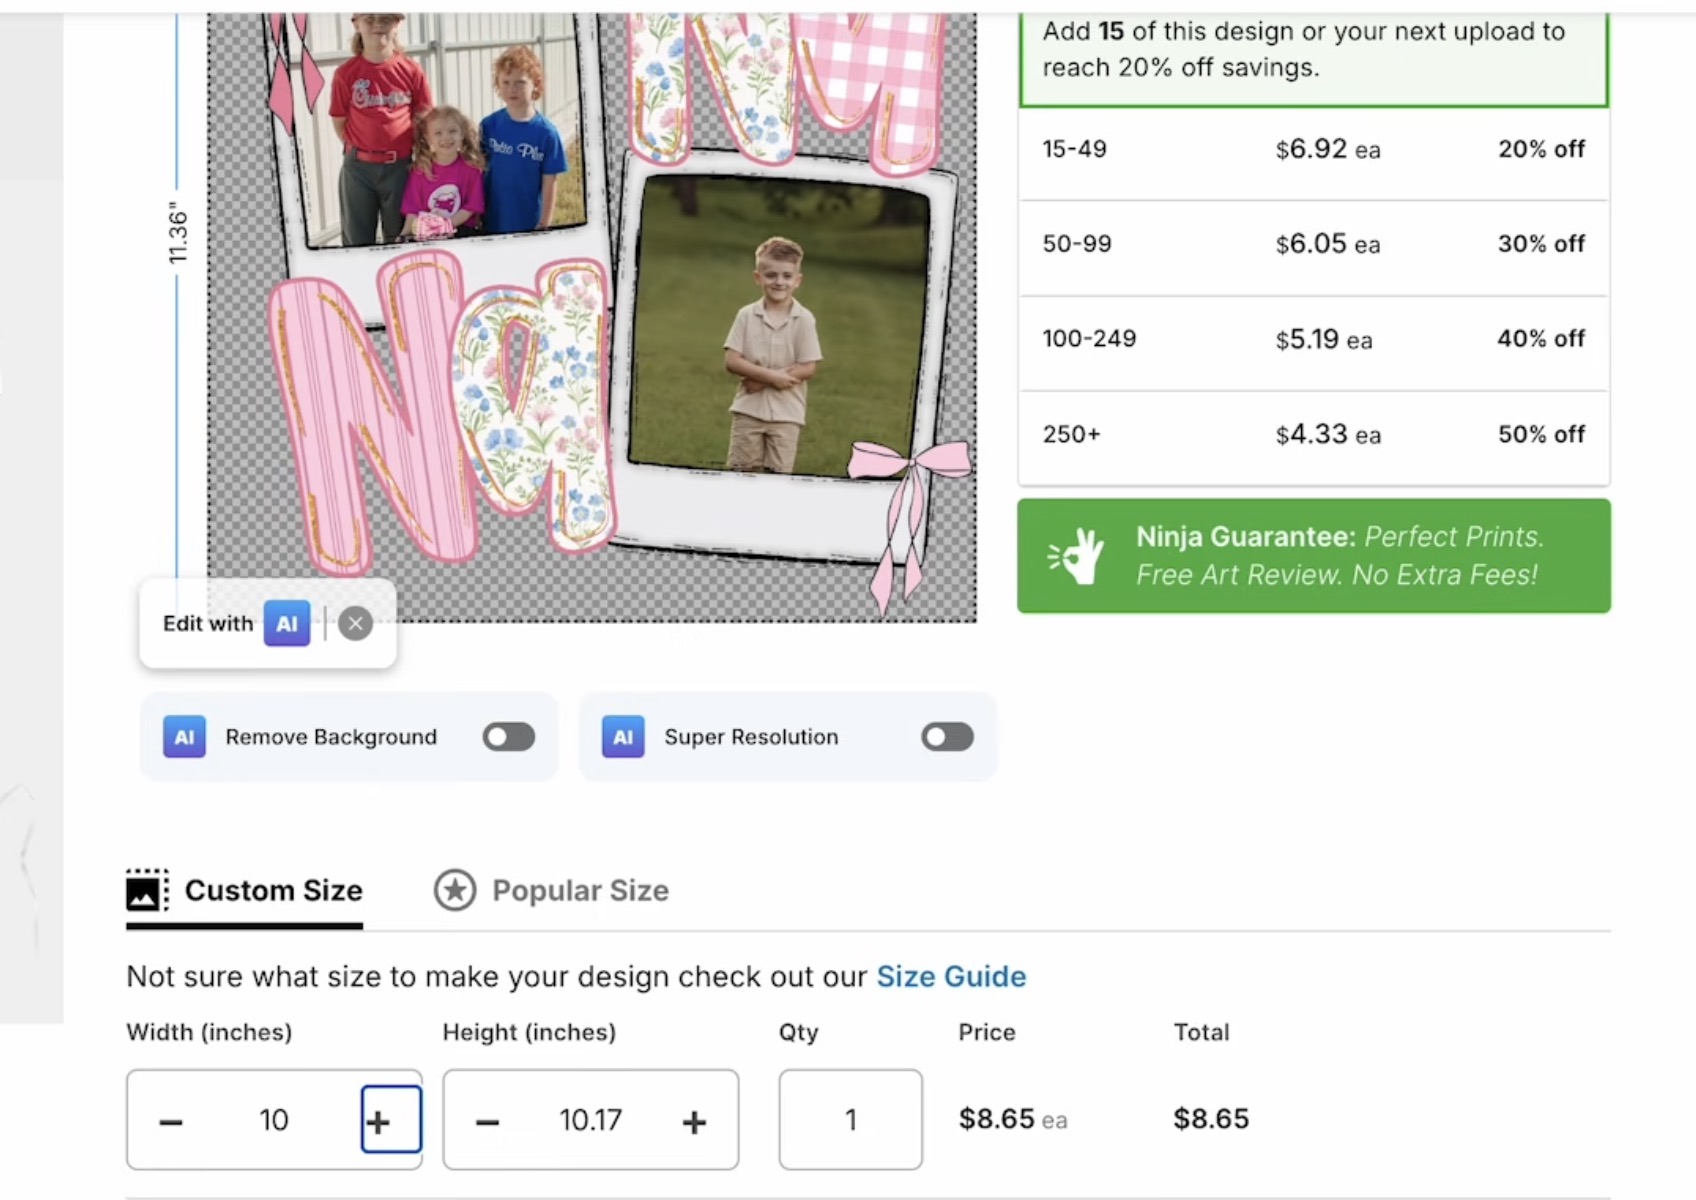
If you didn't know, Ninja Transfers sells a lot of blanks. I selected the Gilden t-shirt I want to use and added it to the cart along with the DTF print.
How to Order UV DTF Prints
Within Ninja Transfers, I selected the UV DTF 3D PermaStickers and then chose UV DTF 3D PermaStickers By Size.
Browse your device and find the file. Upload the file and confirm the size matches your blank. I did have to resize mine a little to make sure the size was correct.
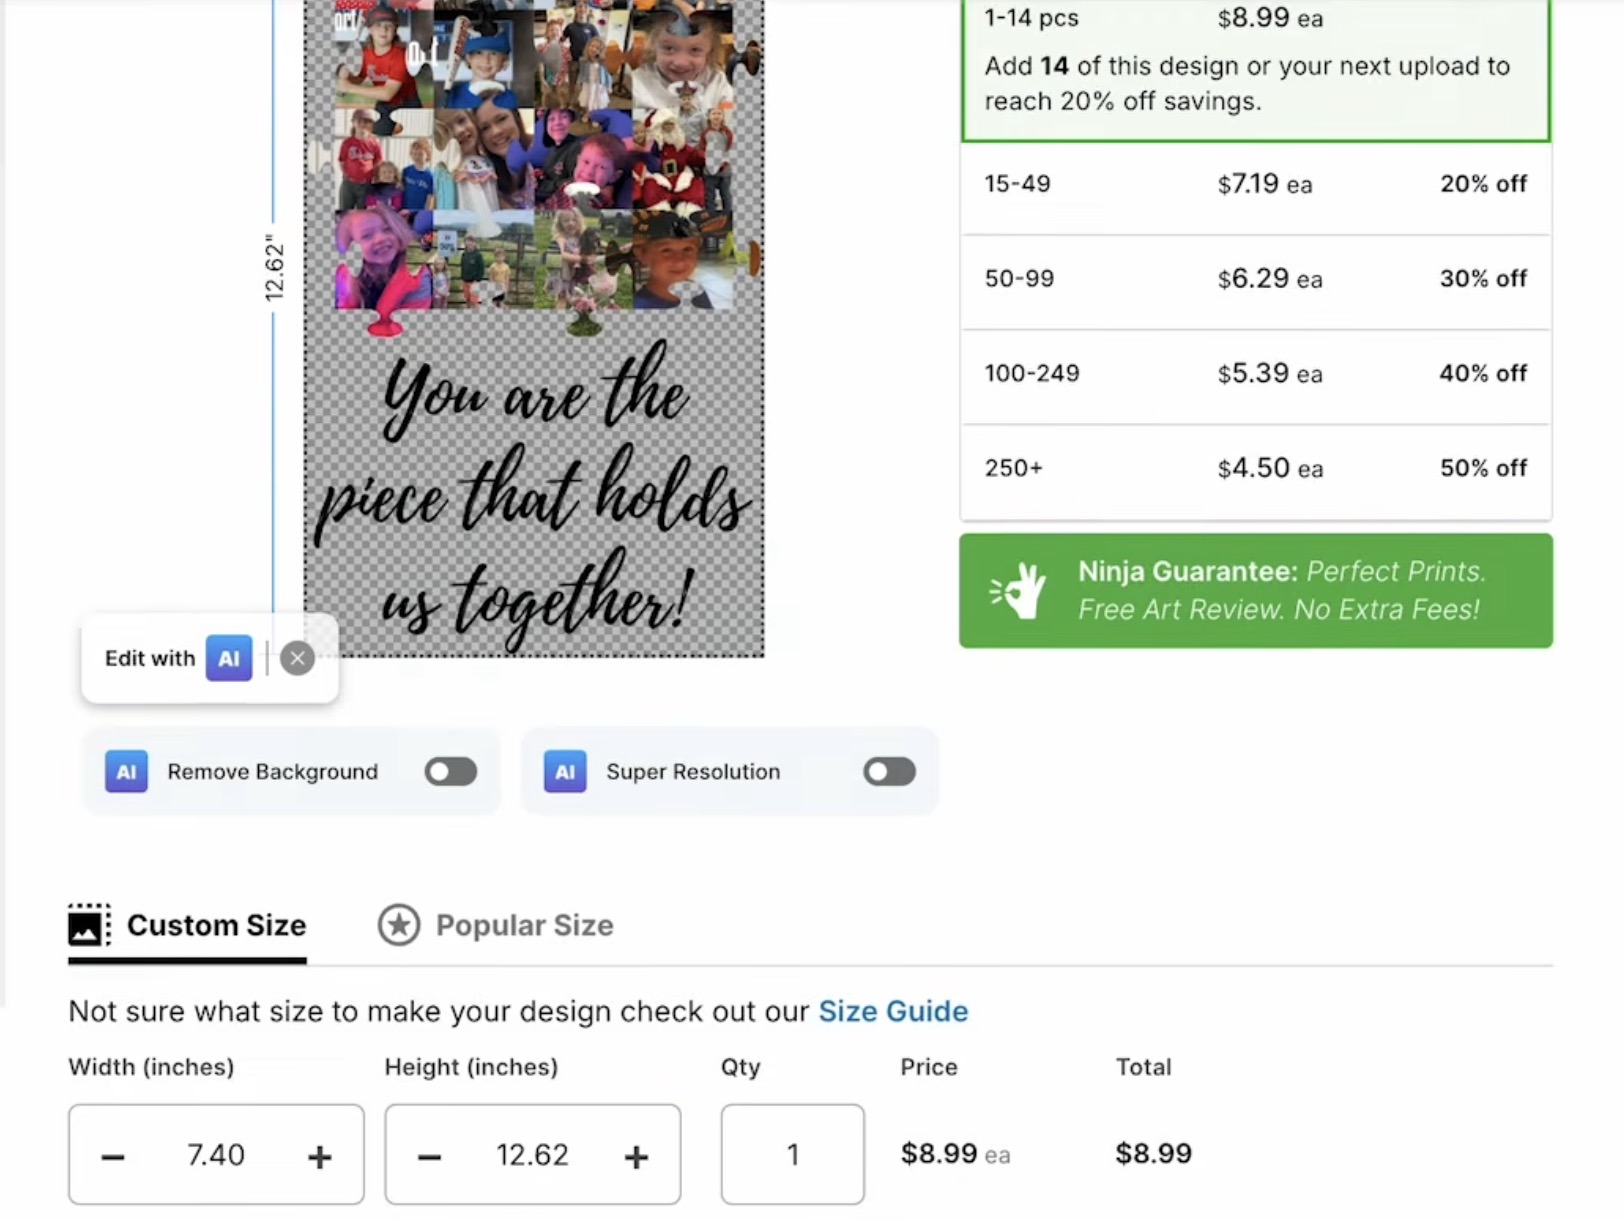
With the size correct, proceed to check out.
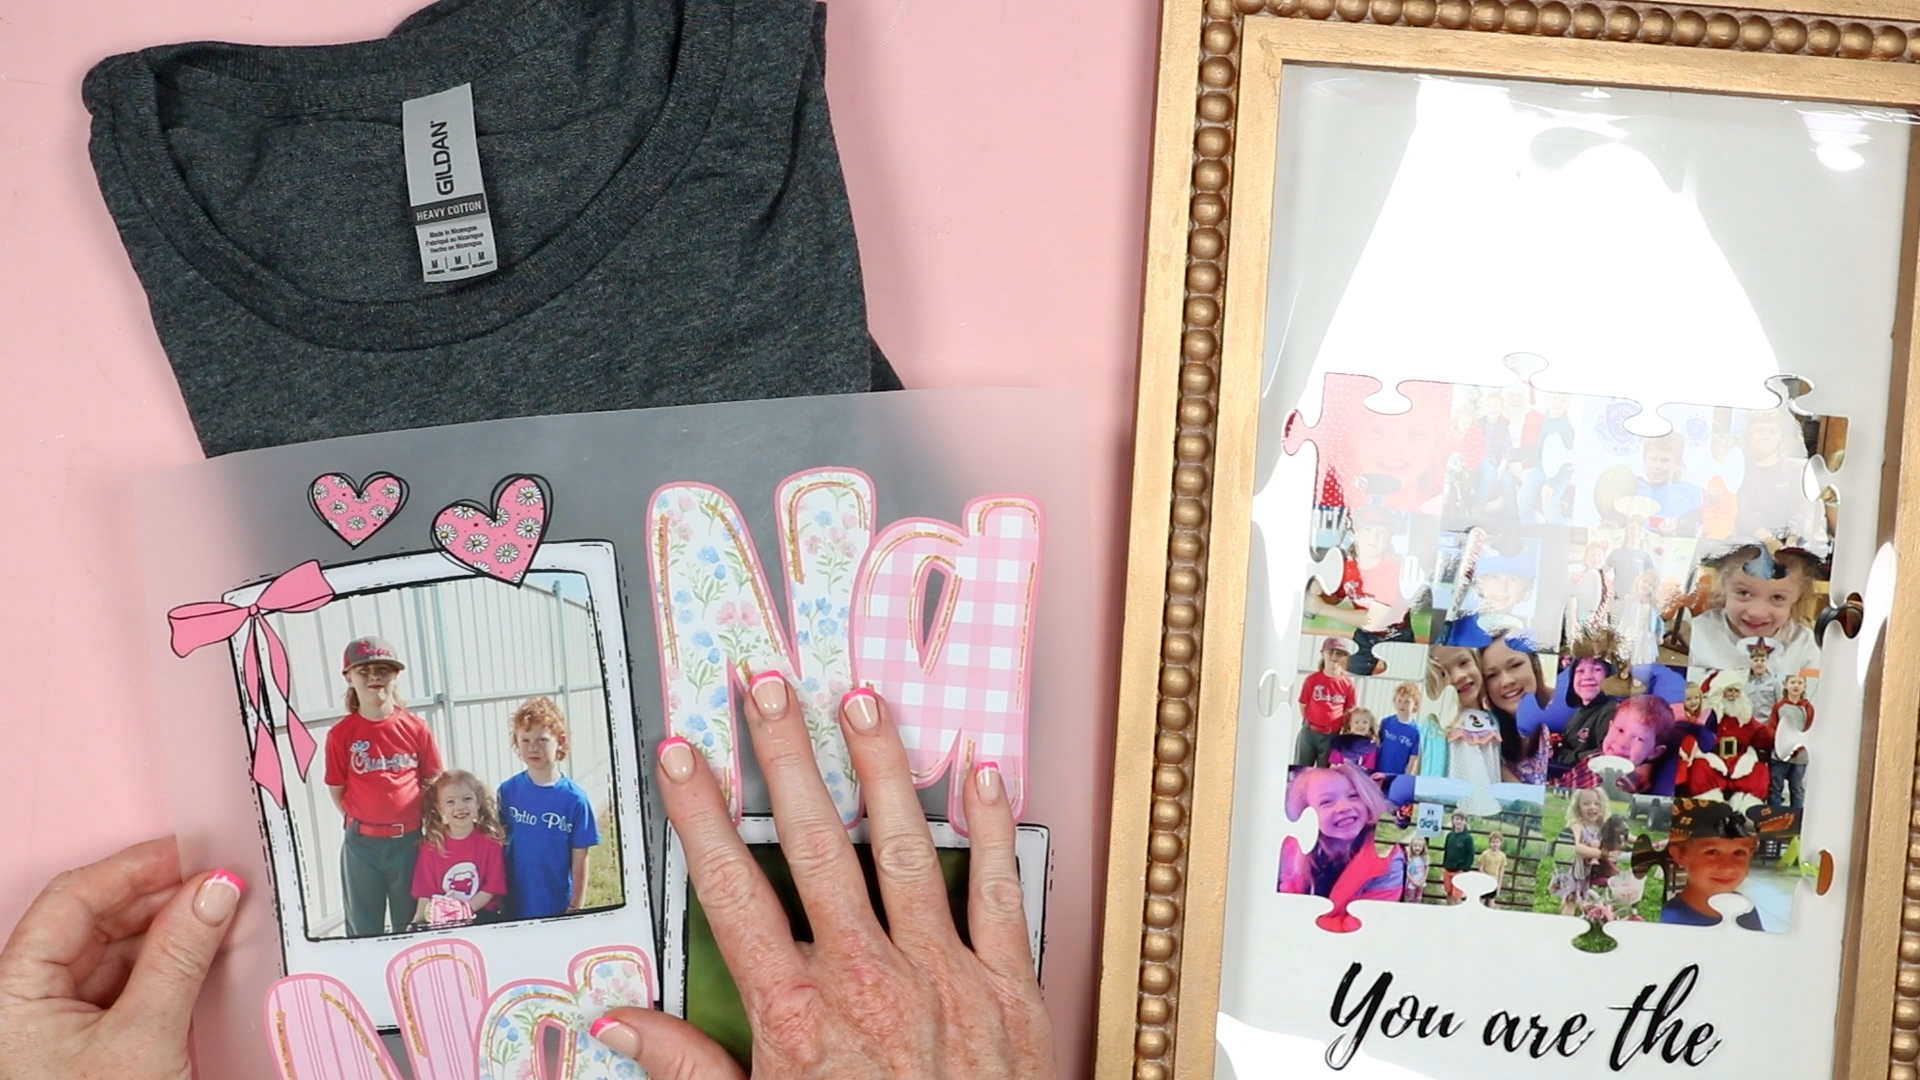
Step 3 – Apply the Design to the Blank
Now, all we need to do is wait for the designs to arrive.
How to Add a UV DTF Print to a Sign
For the UV DTF project, I am adding the design to a frame I painted.
If you paint a sign as I did, make sure you allow the paint to cure for at least 72 hours before applying the design, or you may have issues with it transferring.
UV DTF stickers have a very strong adhesive. You need to get it in the right location the first time.
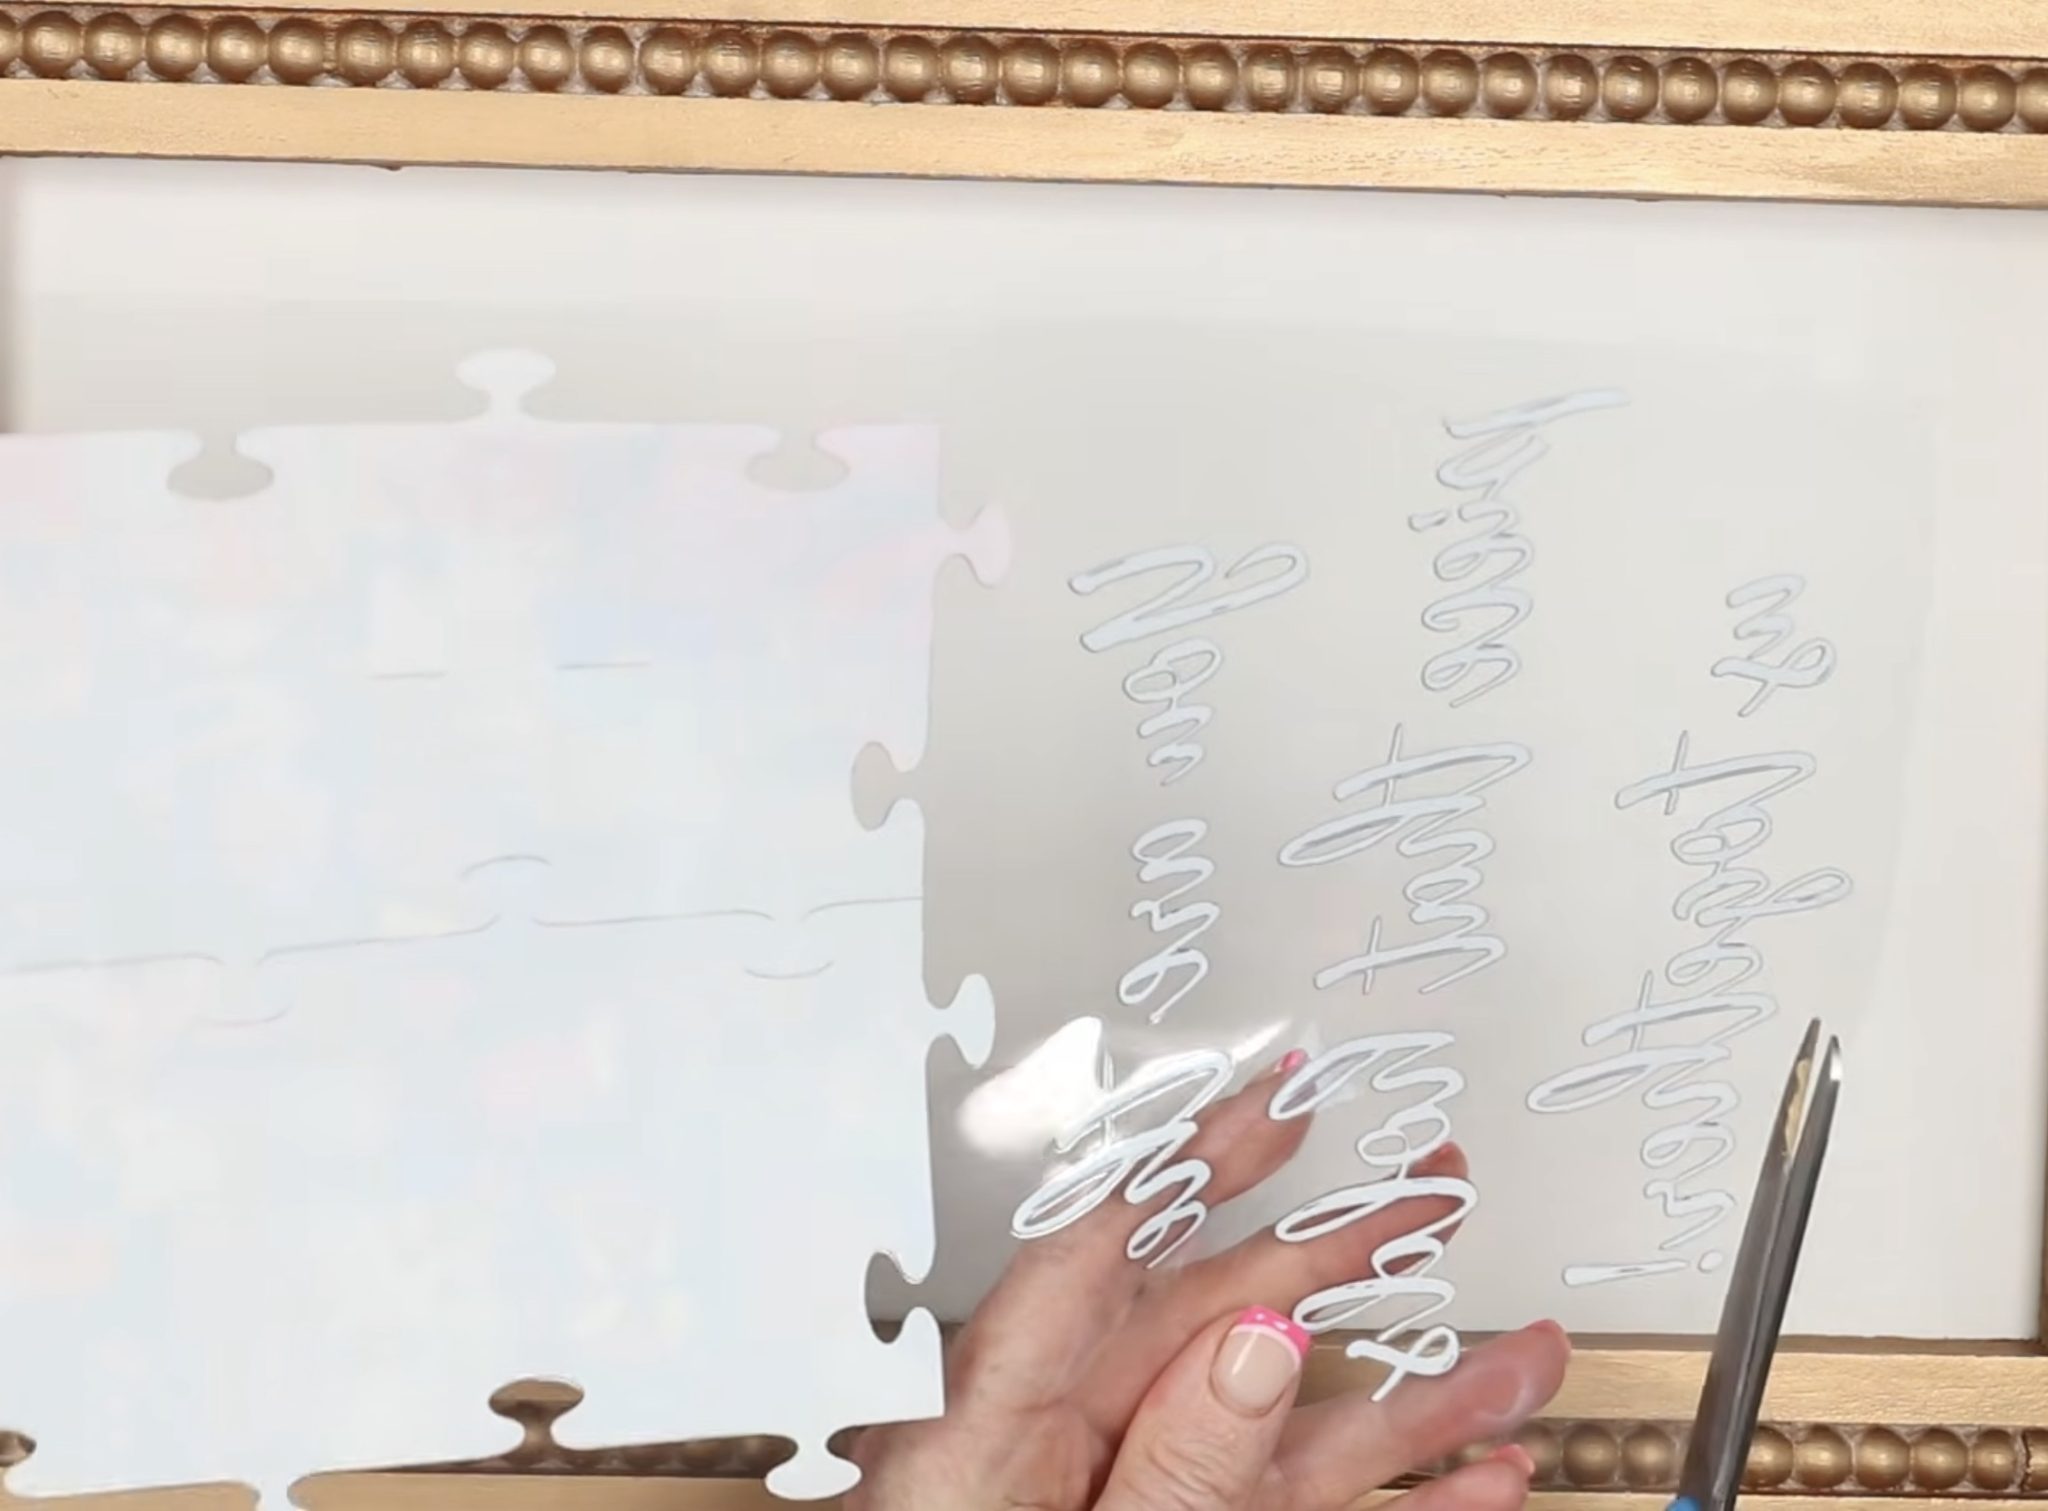
I cut the carrier sheet very close to the print to make it easier to locate it on the sign.
When you have it located where you want it, use a piece of masking tape or washi tape to secure one end in place.
Without removing the tape, lift the opposite end of the sign and carefully peel away the backing.
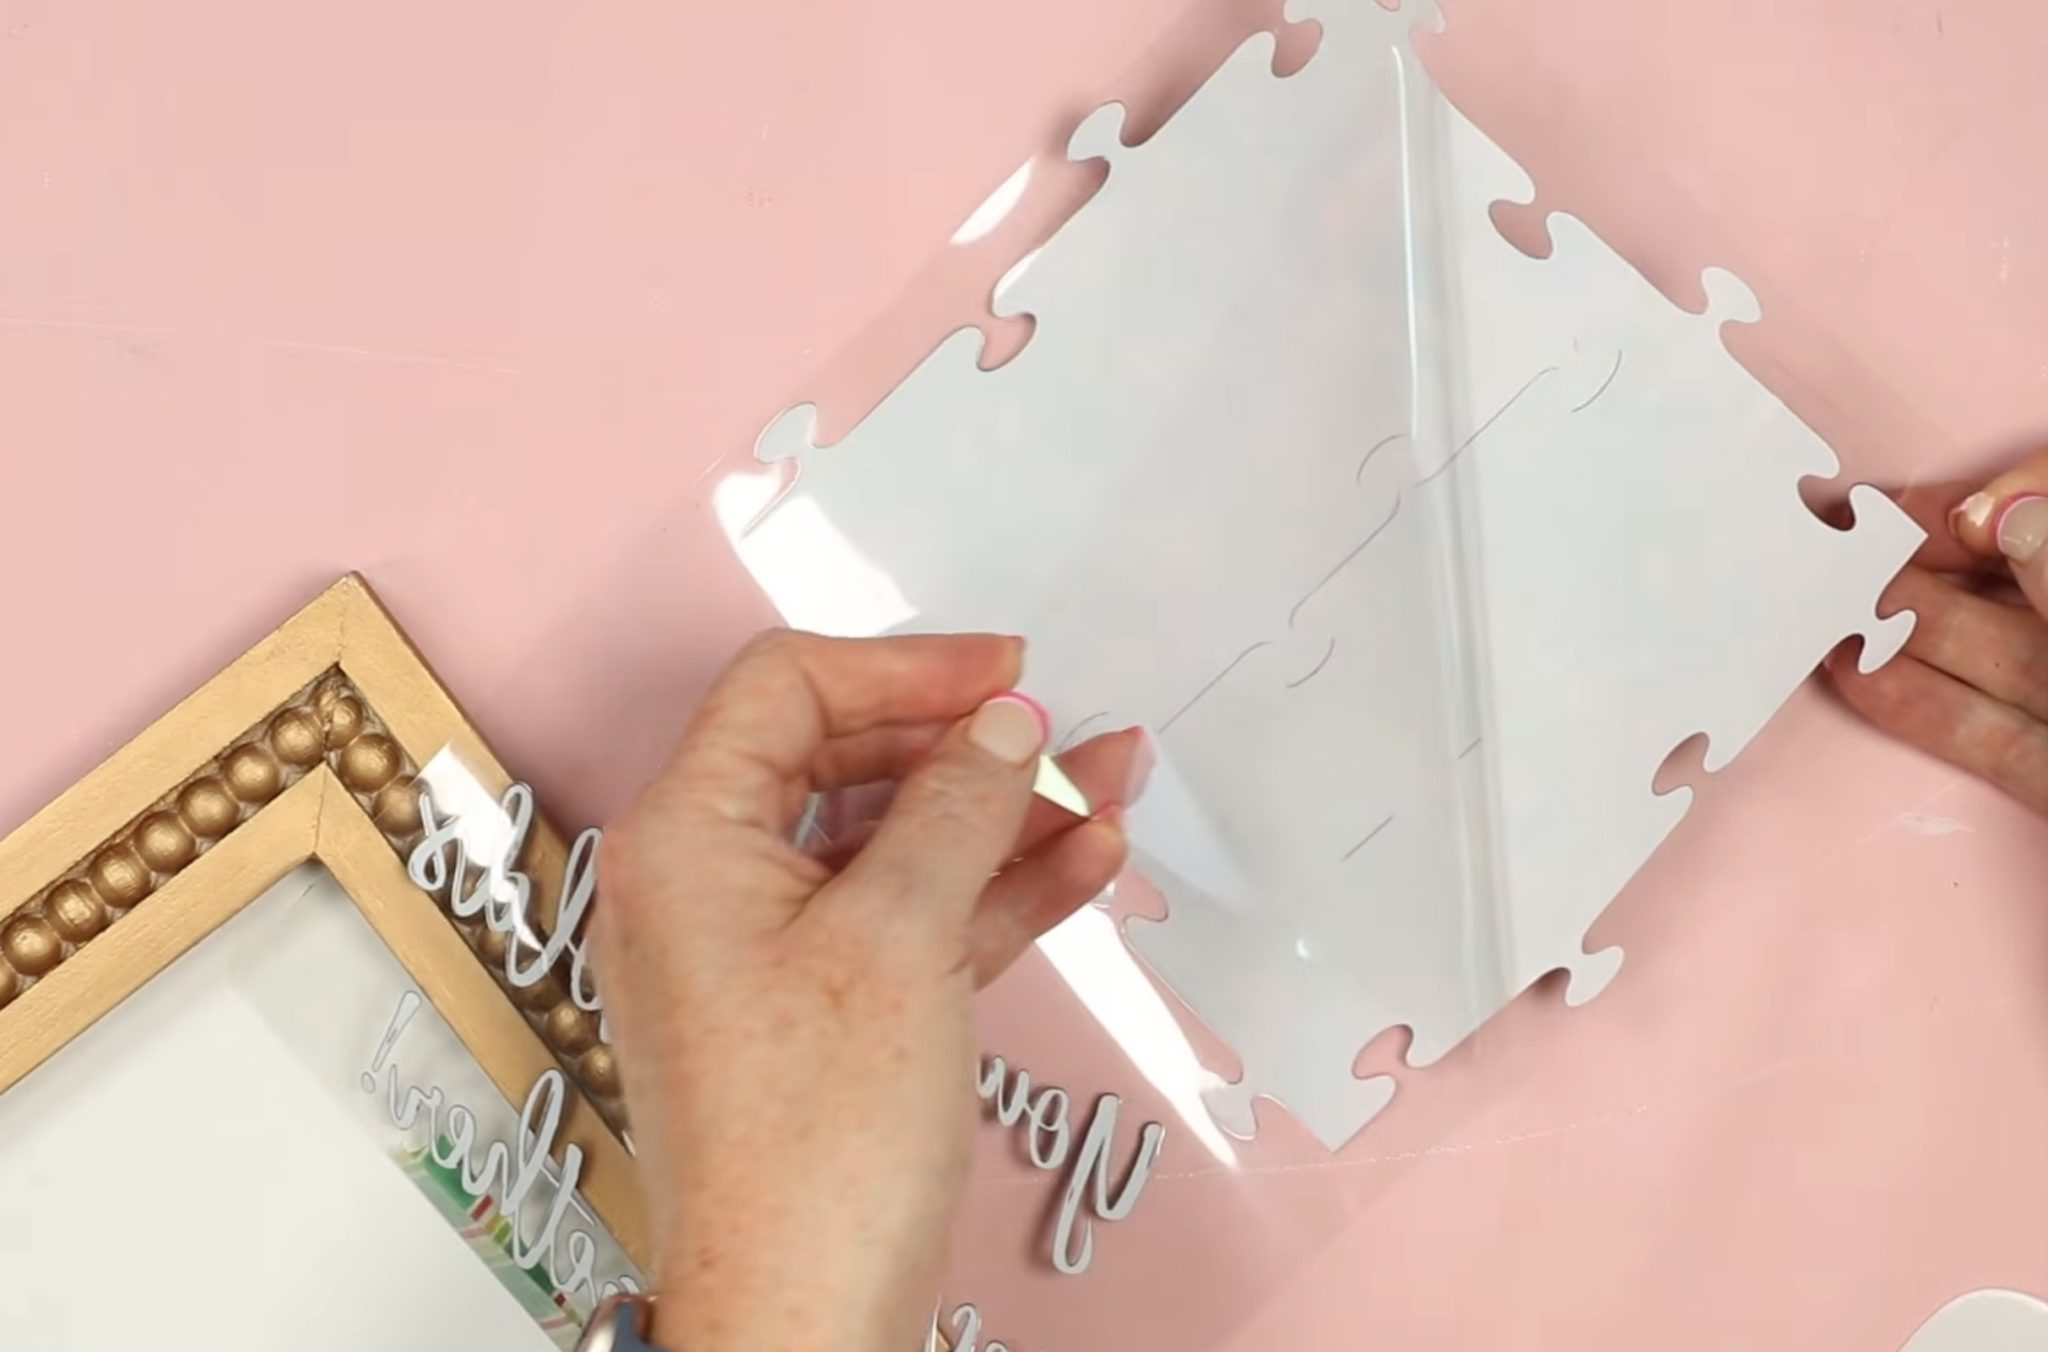
Remove the entire backing and, using a scraper, slowly lay the design down on the sign.
I am applying my design from the bottom toward the top. Depending on the shape and size of your design, it may be easier to add it by going from side to side.
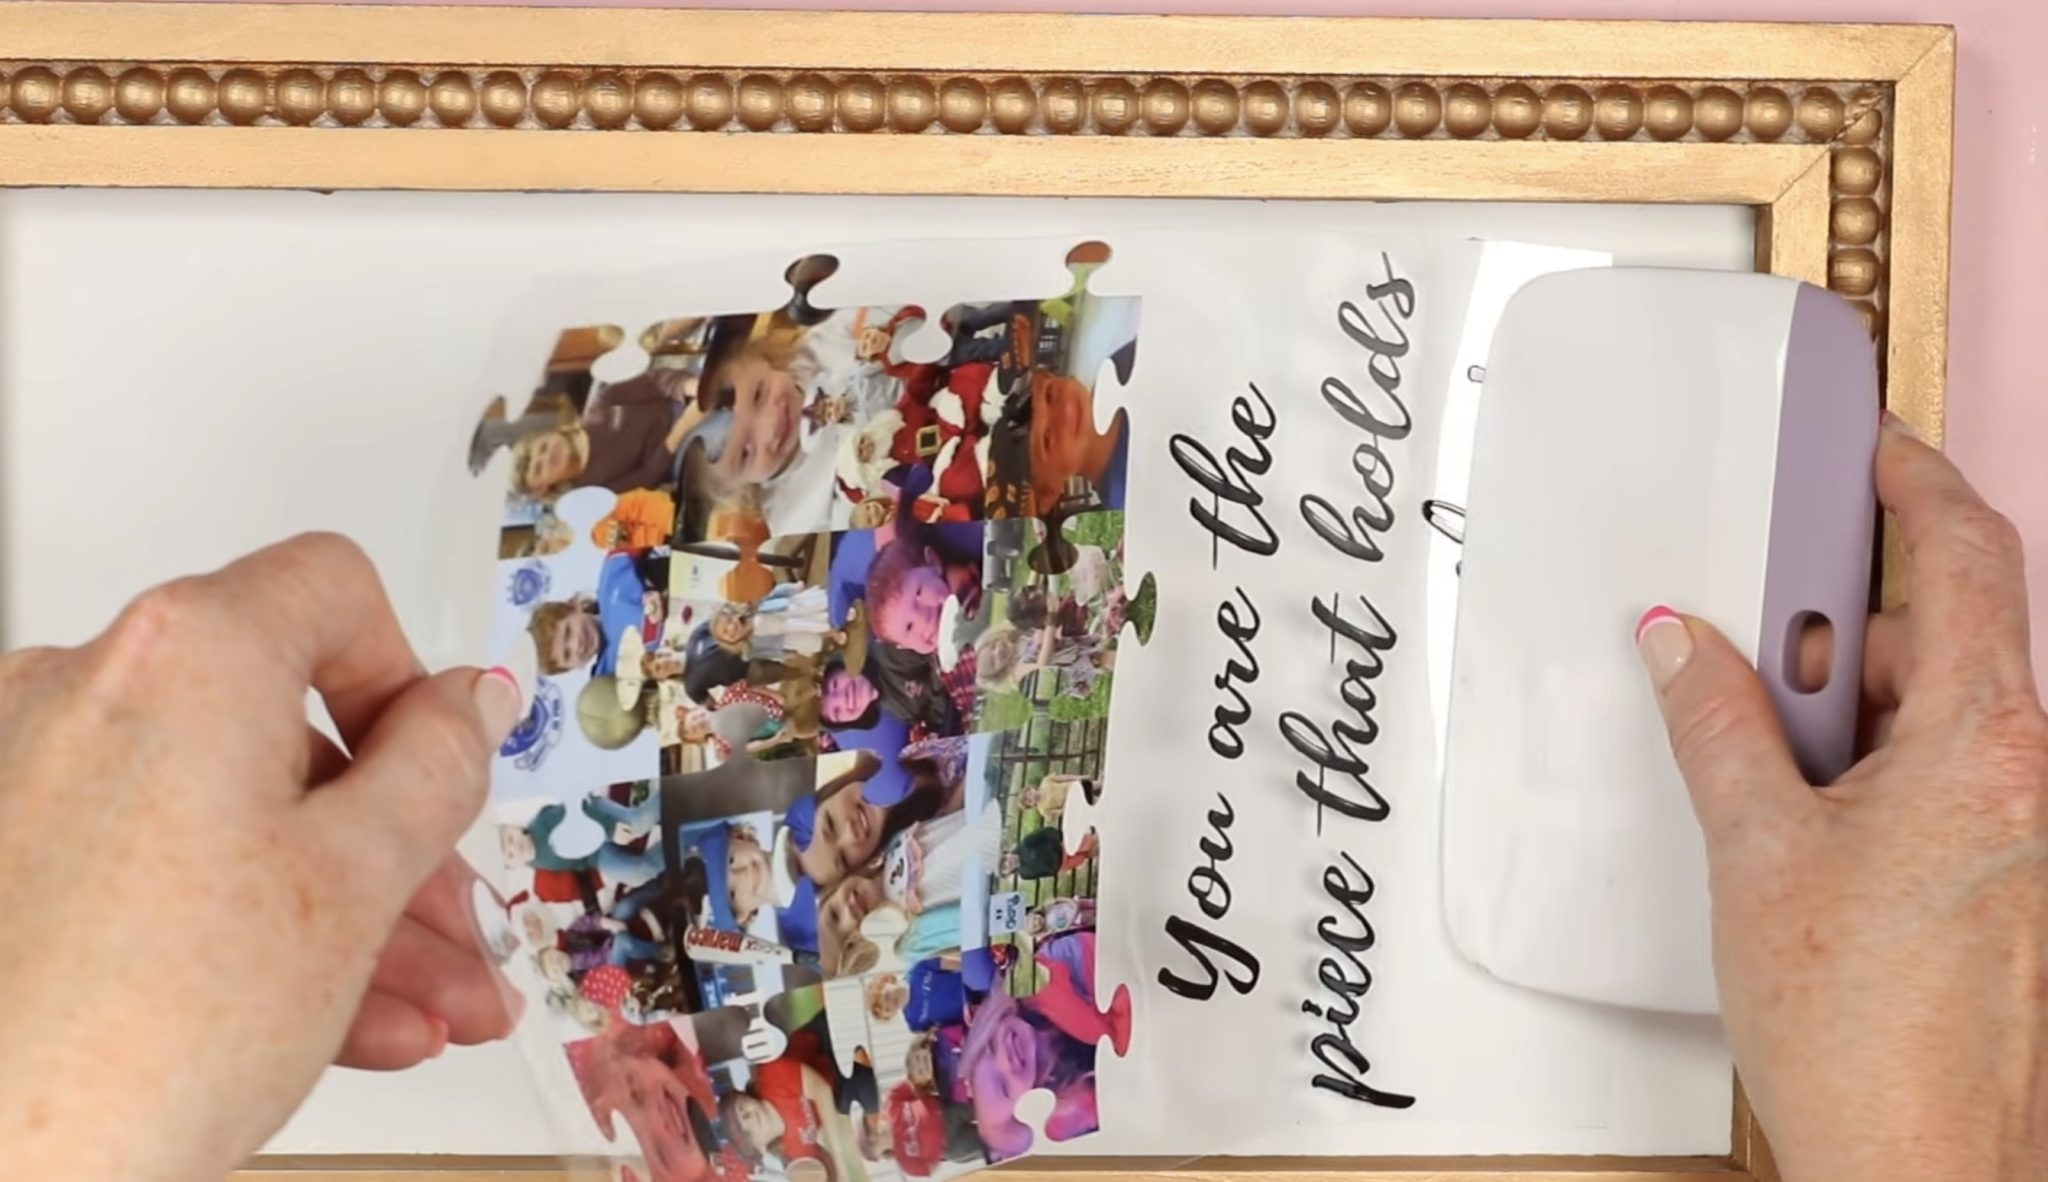
Doing this slowly, in a controlled manner, helps prevent bubbles. Because the carrier sheet adhesive is very sticky, I kept the corner that doesn't have any design lifted up, which will make it easier to remove.
Go over the entire design with the scraper, making sure it's stuck down really well, and then remove that carrier sheet.
Remove the Carrier Sheet
Slowly, peel back the carrier sheet, taking time to ensure the UV DTF design is sticking to the surface.
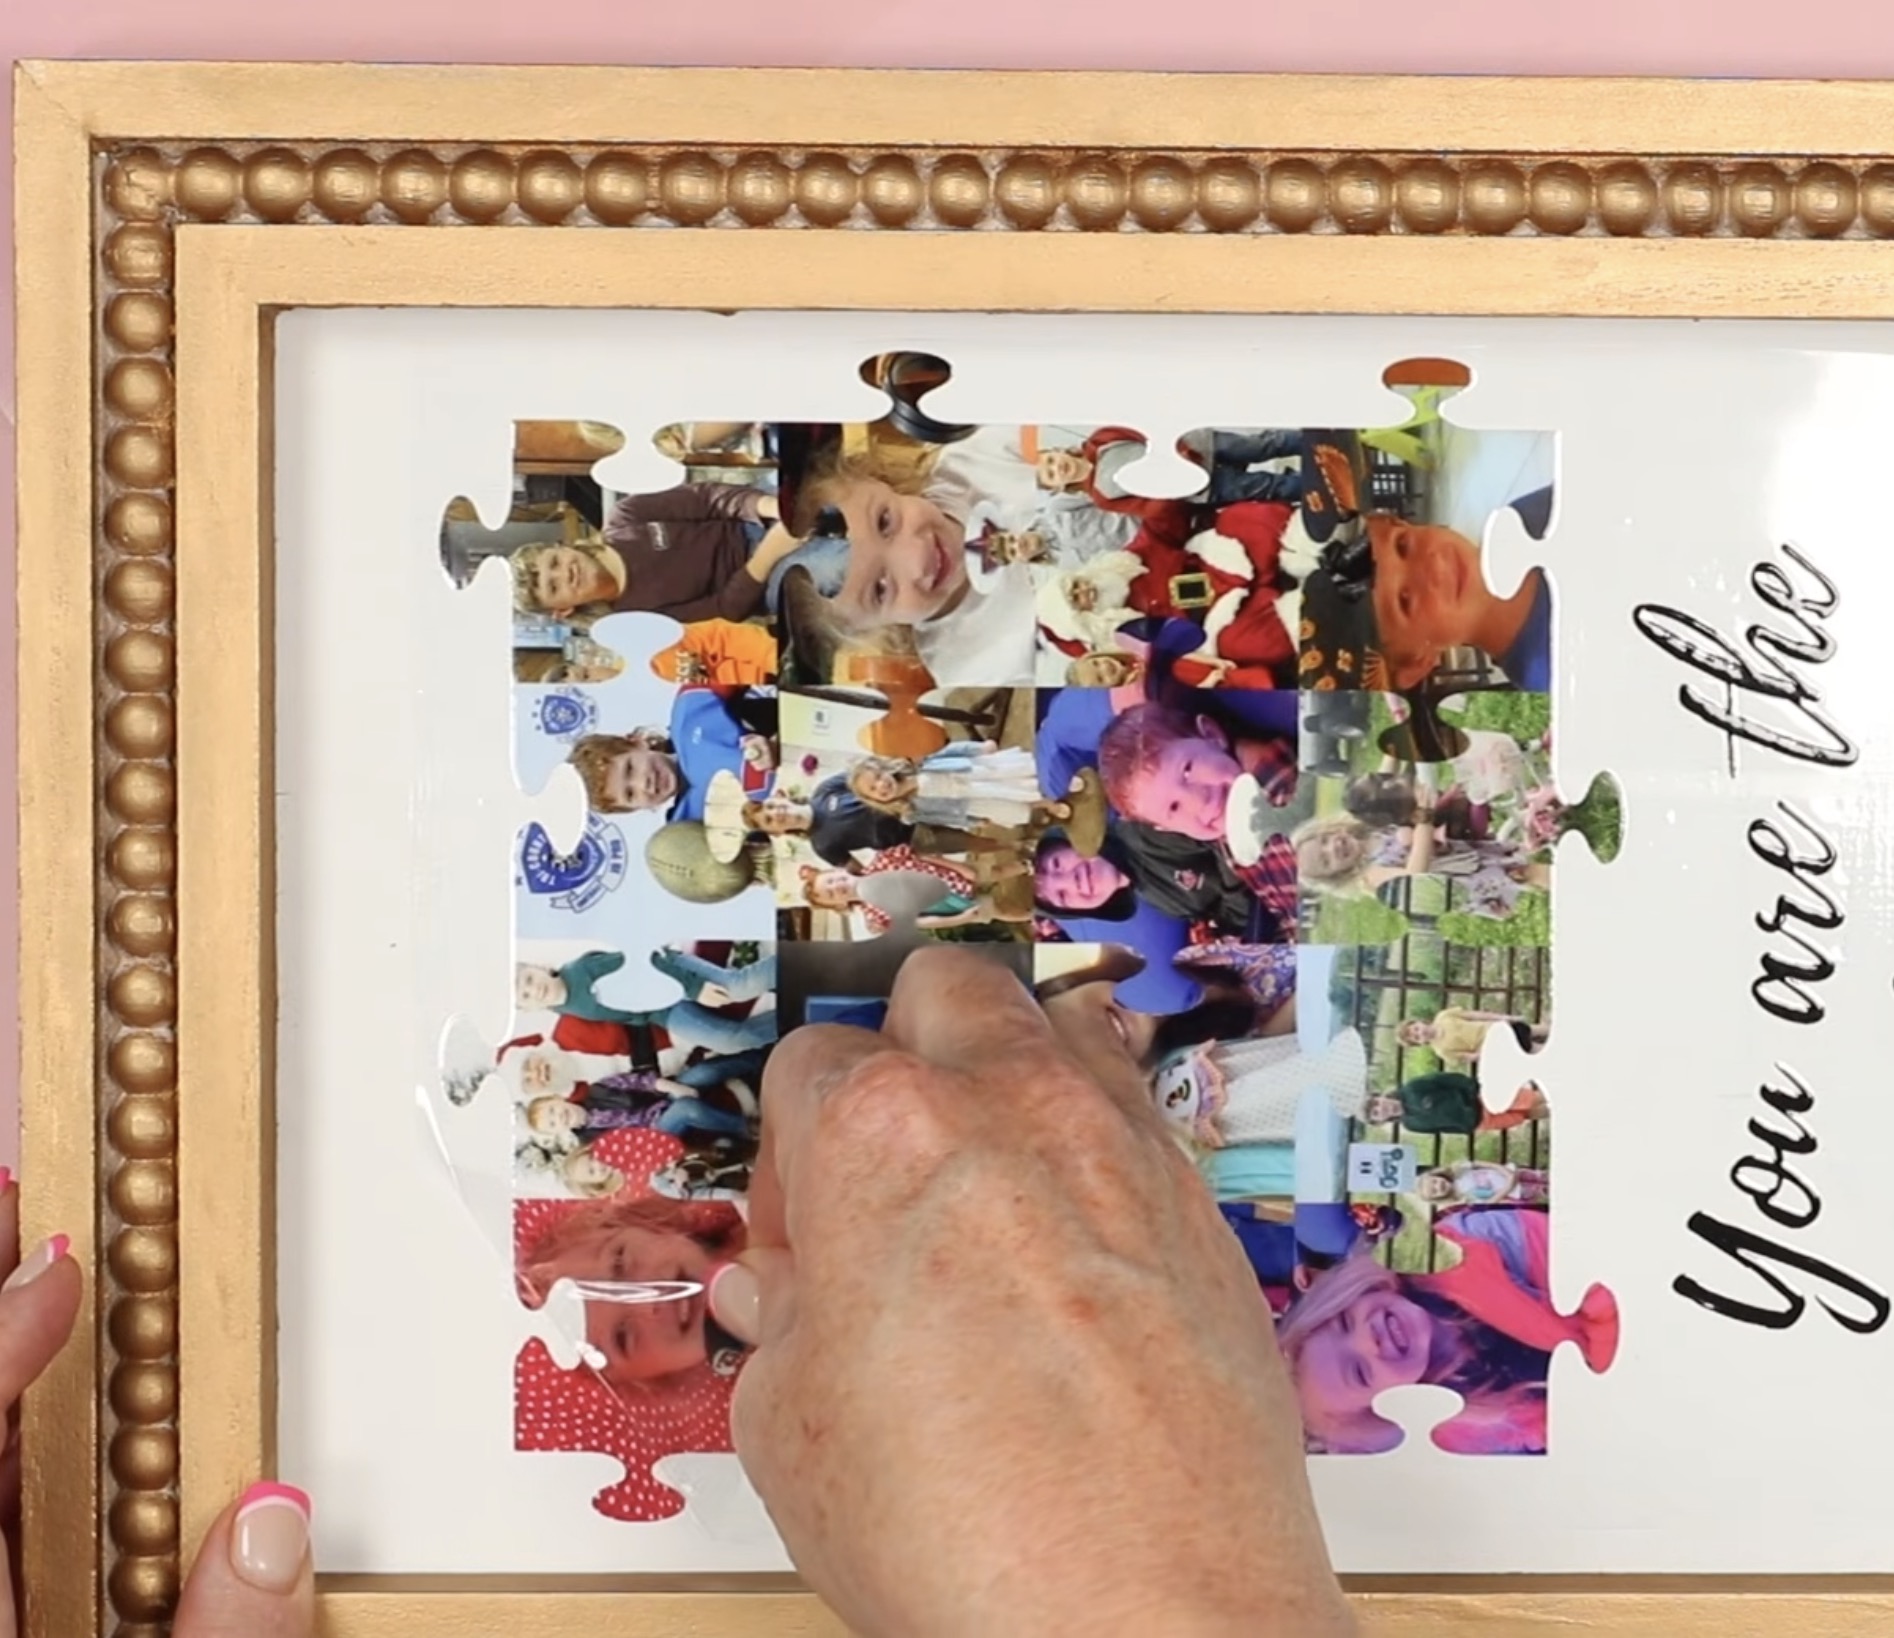
I am always extra careful around lines that aren't very thick. Look at the fonts and design for any areas that are small and may break or lift easily.
If you come across an area that isn't sticking all the way, go over it with your finger. That is a benefit of going nice and slow: you'll catch areas that aren't sticking and can fix them before you ruin your design.
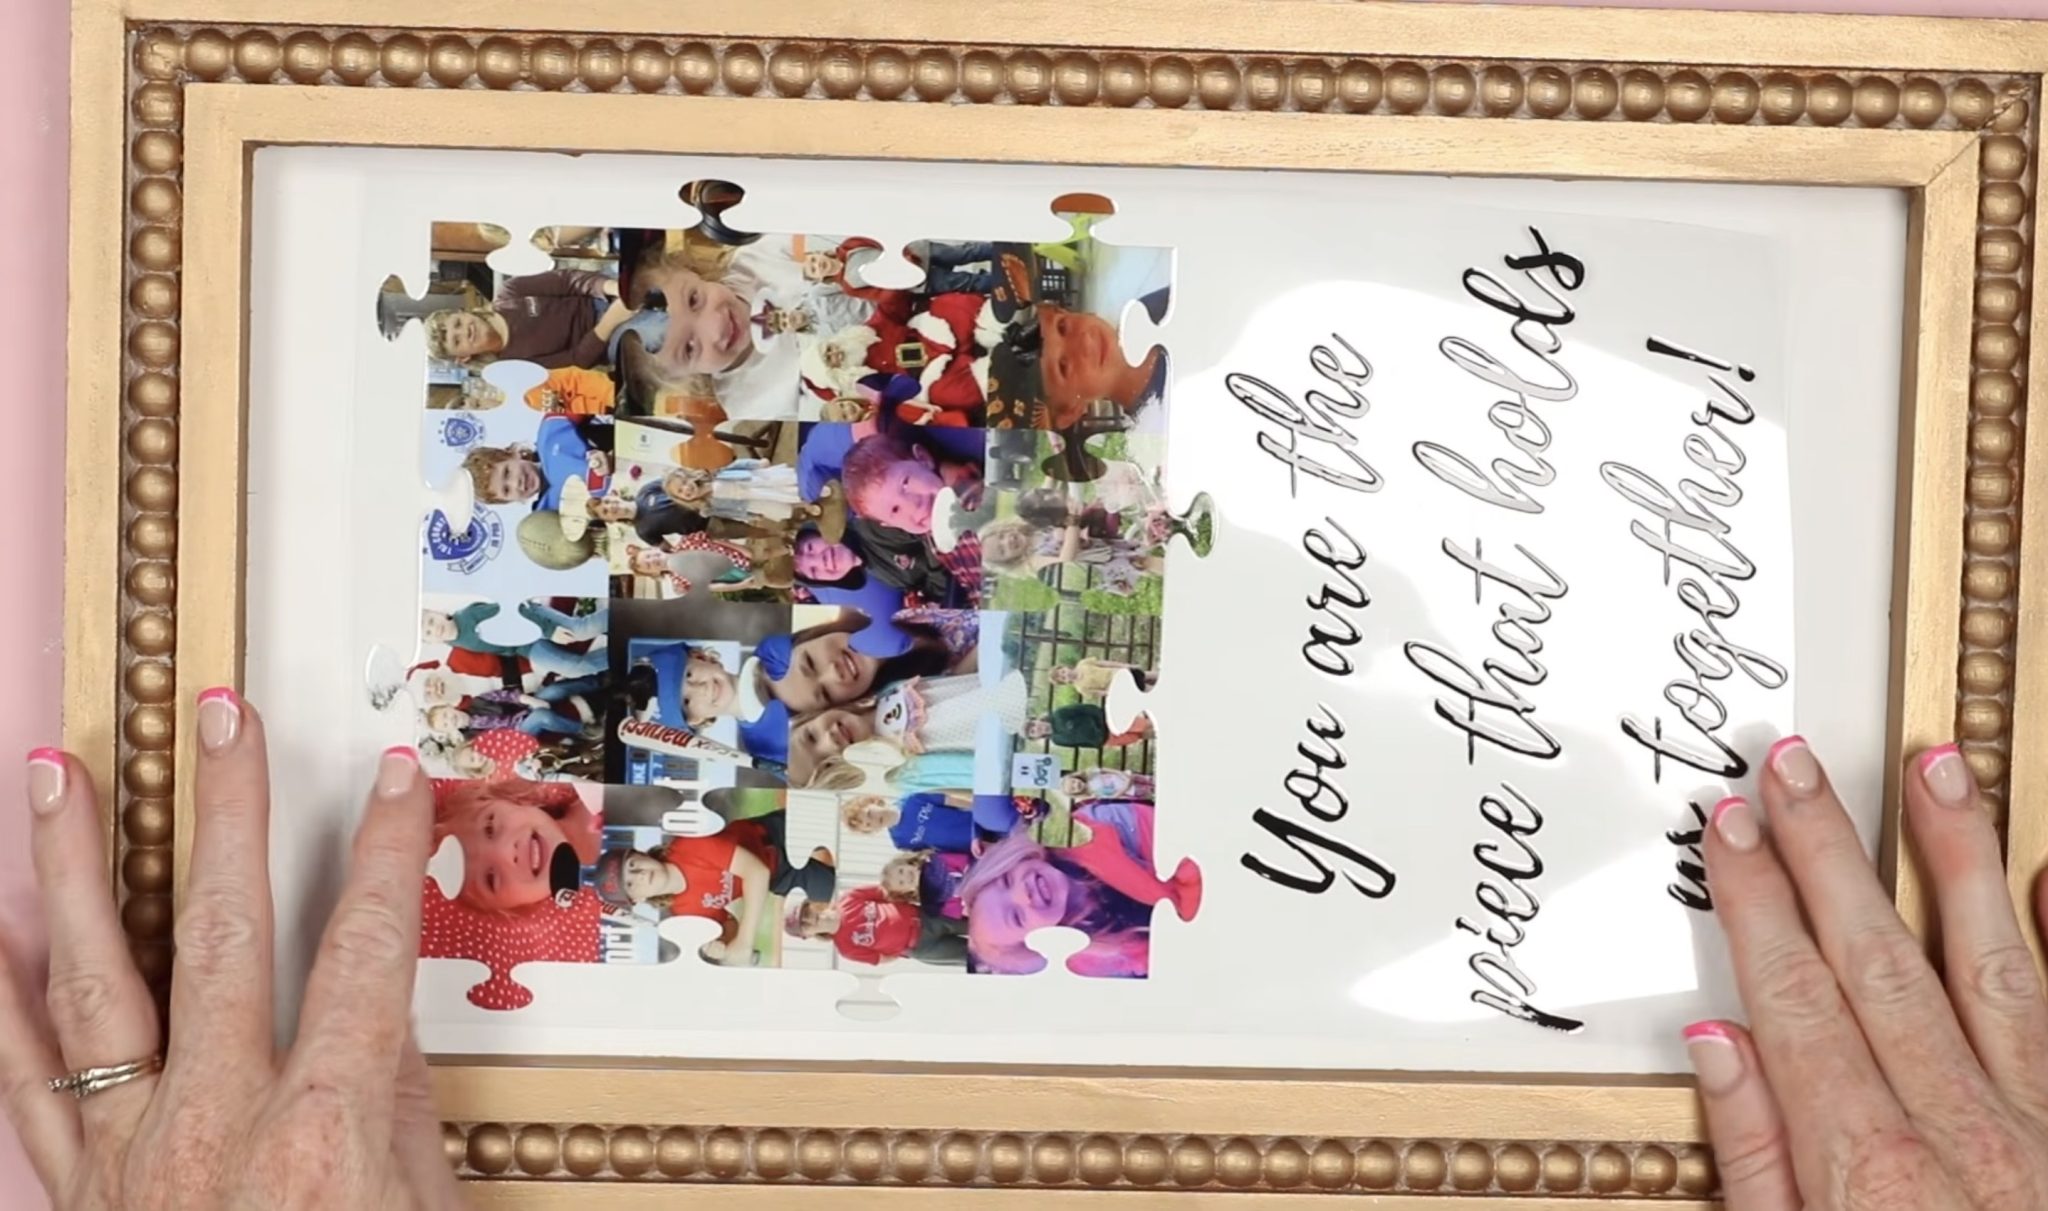
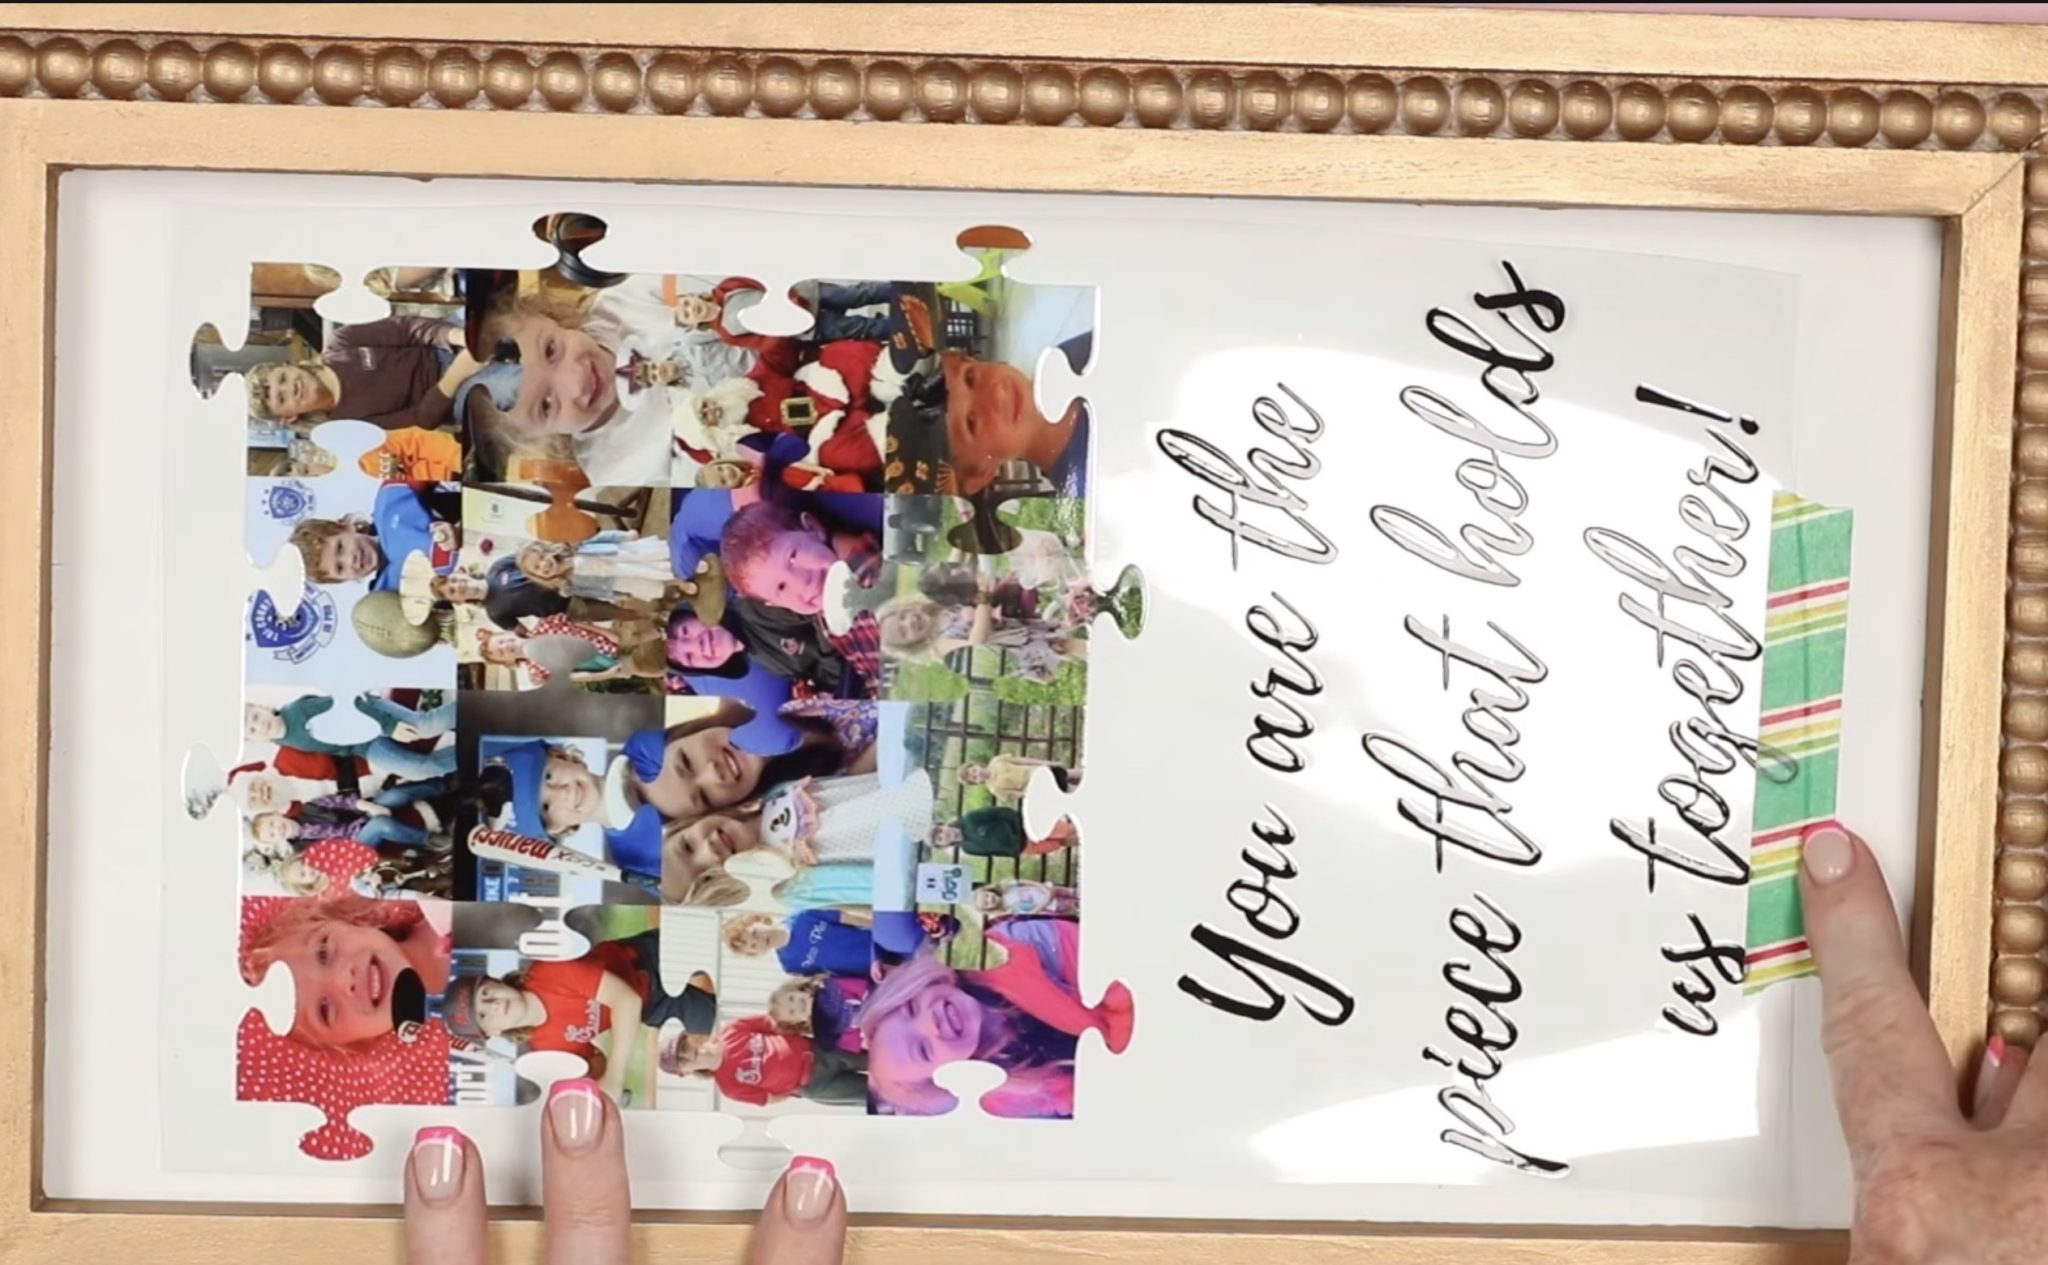
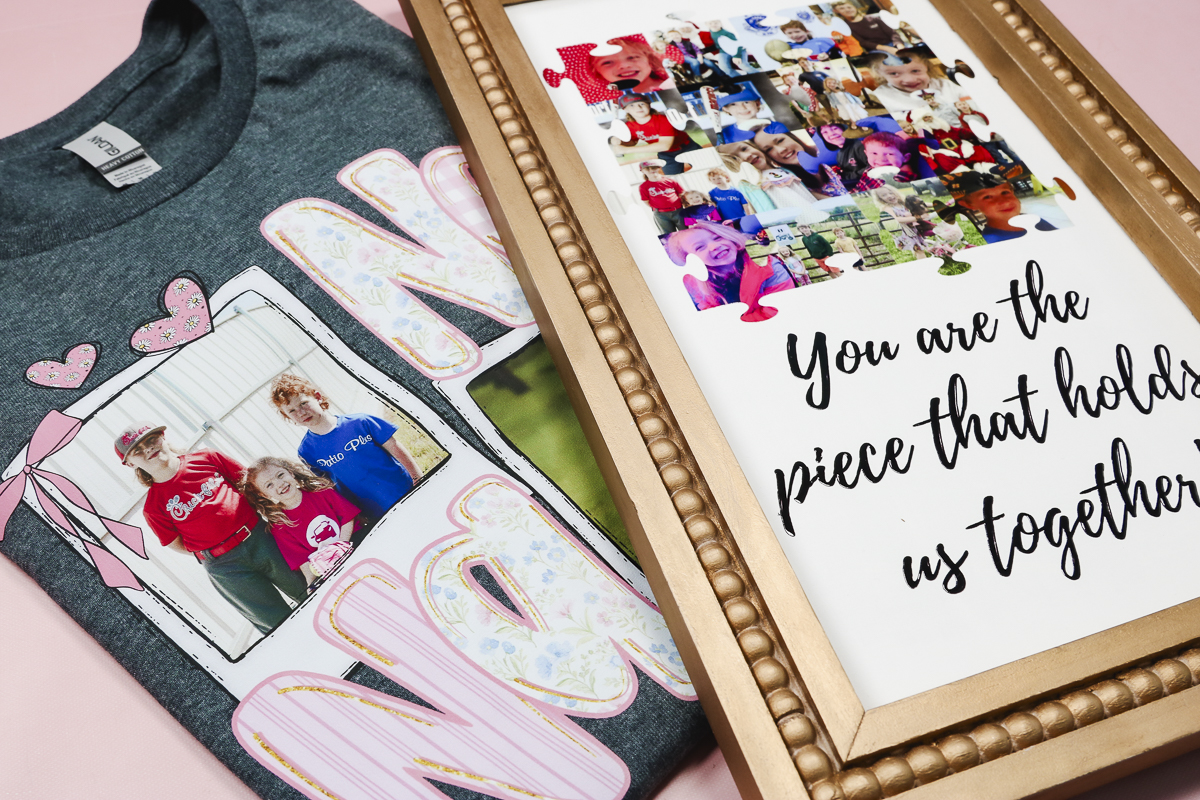
Finished UV DTF Sign
When the carrier sheet is completely removed, I like to go over the entire design with a felt-edged scraper or my finger to make sure everything is stuck down.
That is the last step, with the design stuck down, your project is finished.
This turned out so cute! I used a font that has a brush look, and I love it. I wouldn't recommend a font like this if you're using adhesive vinyl because it would take a long time for the machine to cut and wouldn't be fun to weed, but it's perfect for UV DTF.
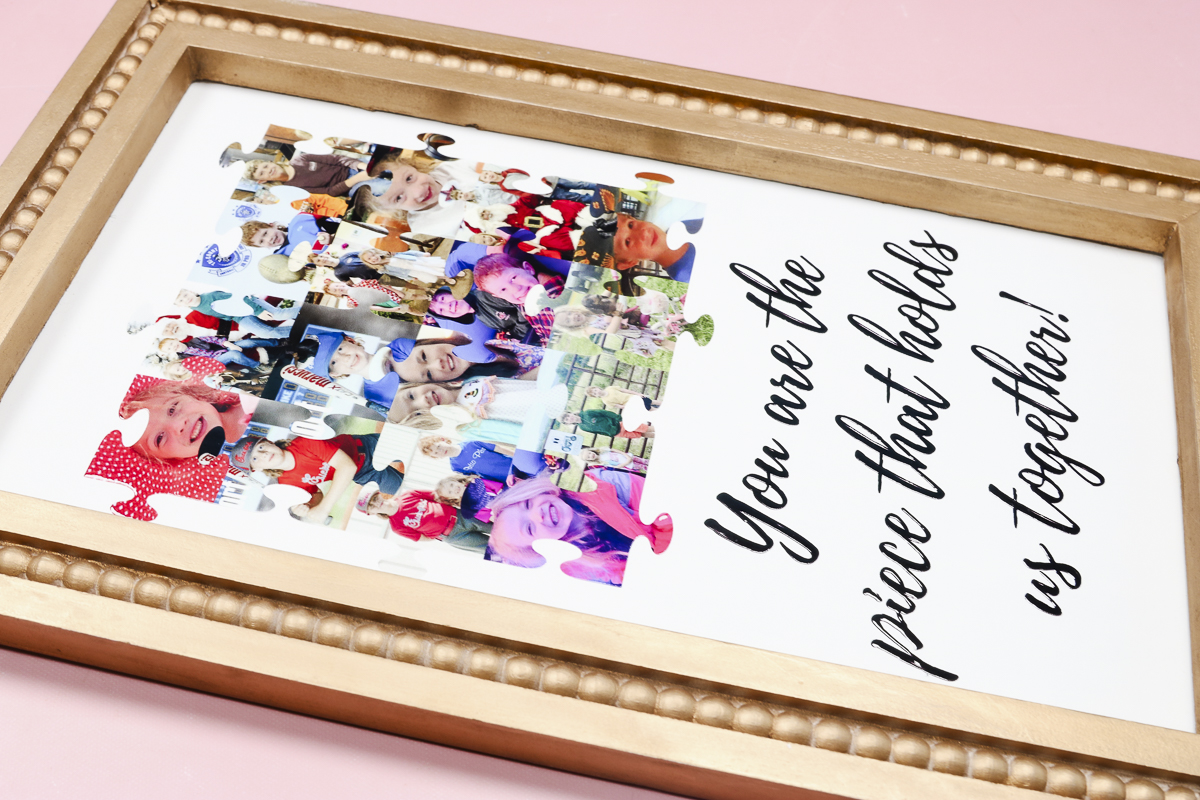
I'm really impressed with the photos. Even though this is UV DTF, they are high quality and look very good.
Since the entire design is UV DTF, it is going to last a very long time.
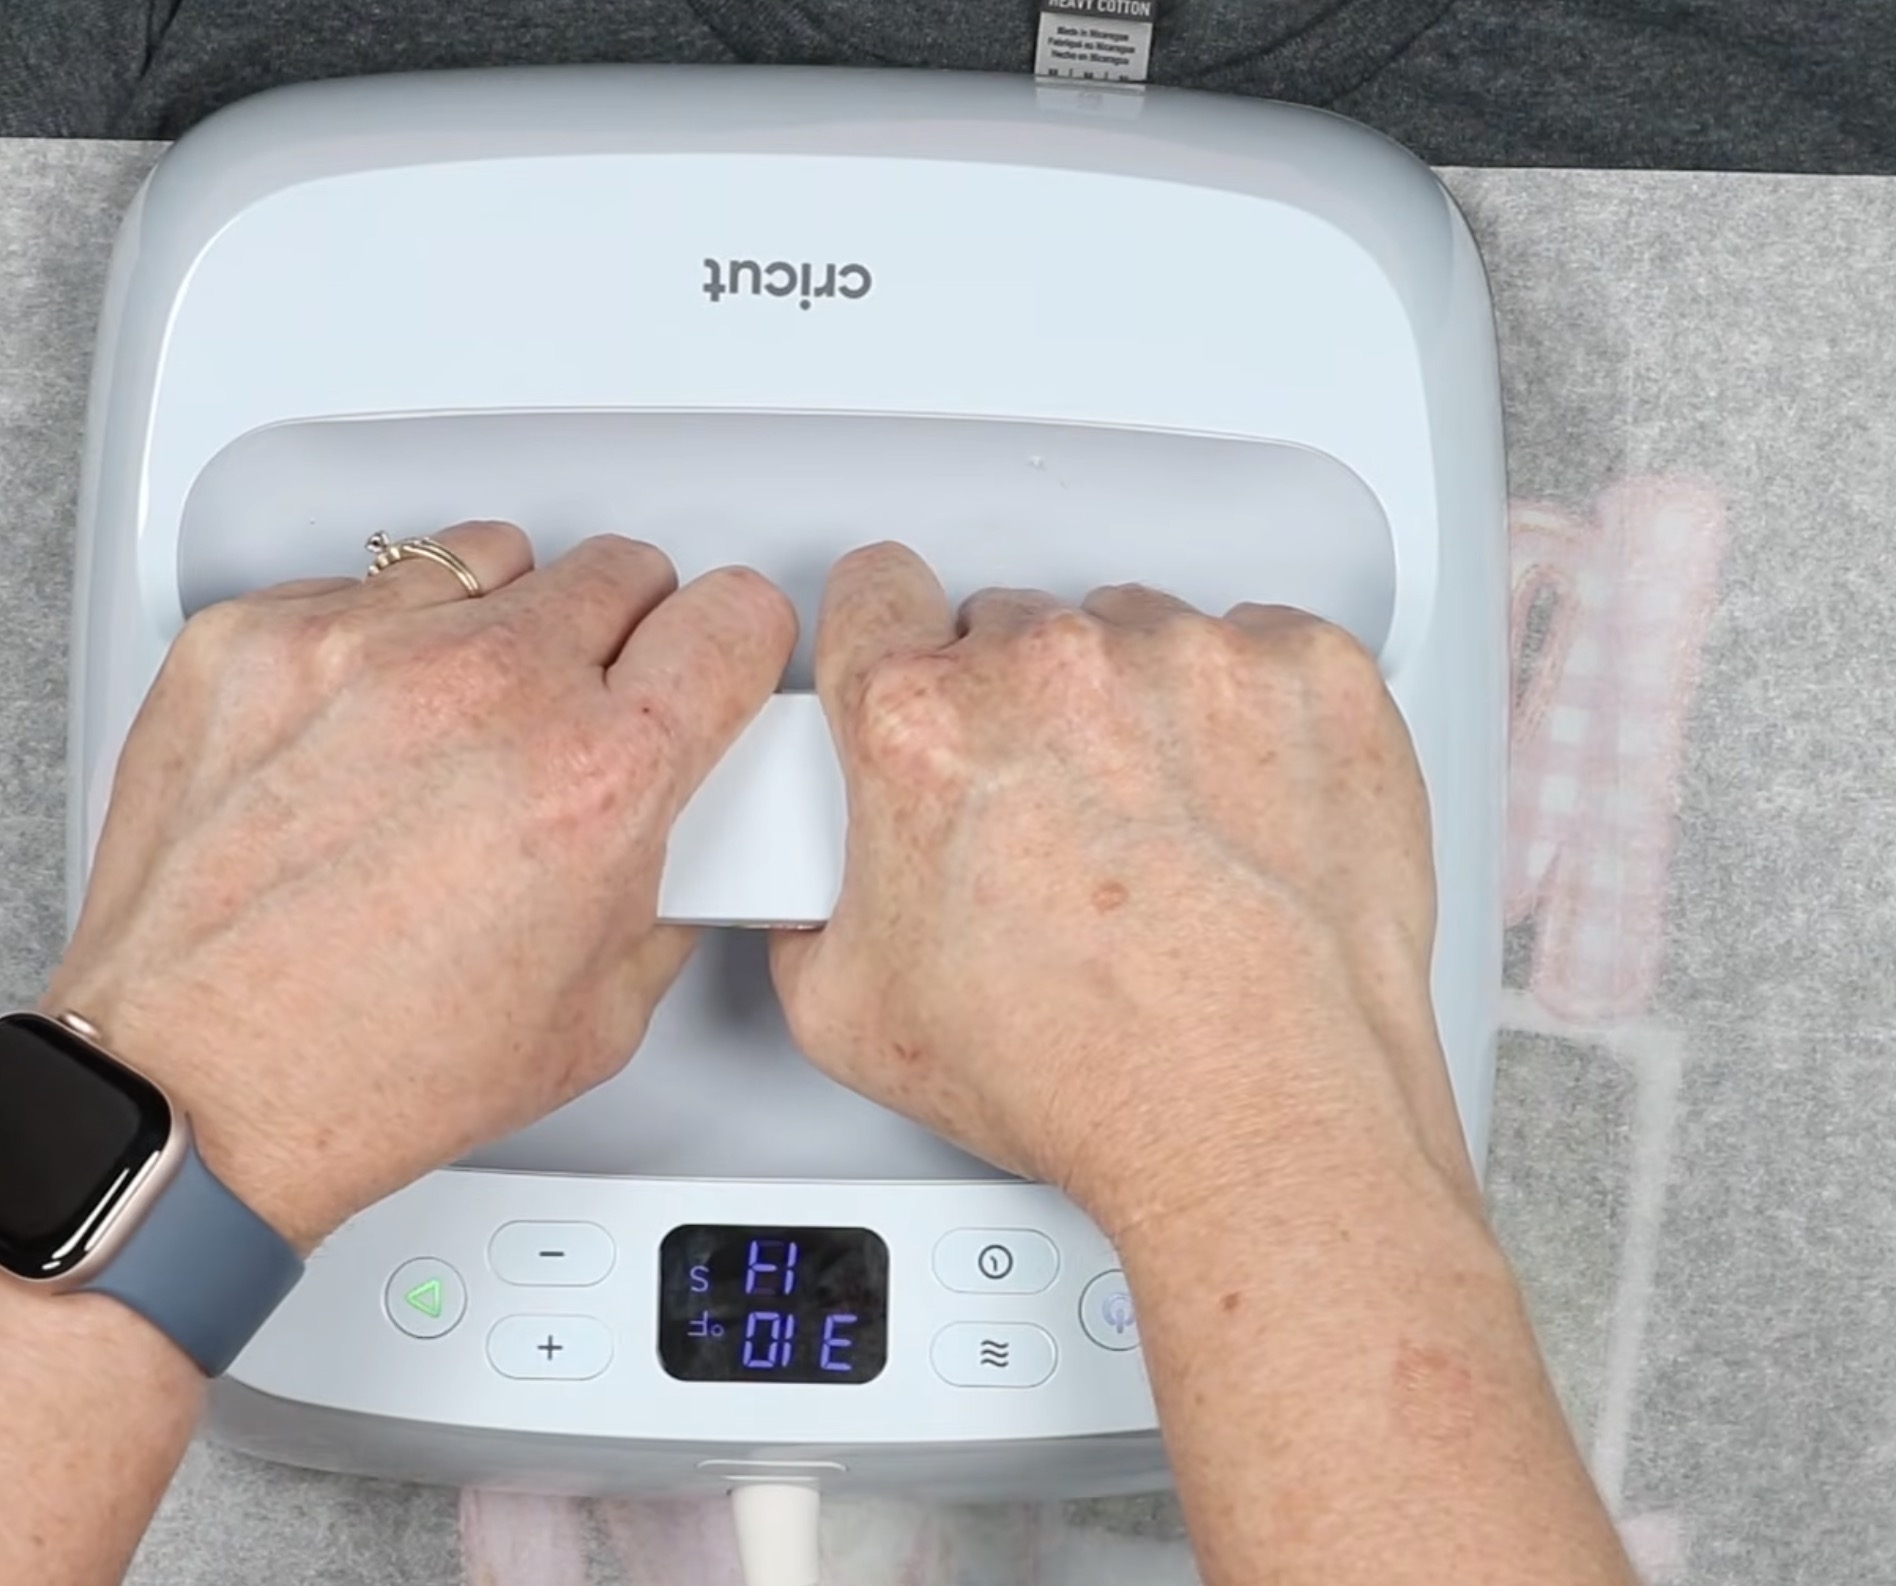
How to Apply DTF to a T-shirt
Now that the UV DTF project is done, we're ready to add our photo DTF design to a t-shirt. DTF prints come ready to press. You don't have to do anything to prep them for pressing.
Prepare the Shirt for Pressing
Place the t-shirt on a heat-resistant mat, making sure it's smooth and there are no wrinkles.

I am using a cotton shirt, but one perk of DTF is that you can use any shirt as long as it can handle the heat required to apply the design.
I have my EasyPress temperature set to 310 degrees and the time set to 15 seconds.
If you're using a different press or a DTF print from a different company, make sure to check the recommended settings.
Some brands require a pre-press; Ninja Transfers does not, but I always pre-press my fabric blanks. Also, Ninja Transfers has instructions for heat presses and even a household iron.
Locate Design
Locate the design on the shirt where you want it and cover it with a piece of protective paper. Ninja Transfers includes a piece of parchment paper with every order.
Press DTF Design
My EasyPress does not cover the entire design, so I will have to press it in multiple presses.
Unlike sublimation, pressing multiple times isn't an issue with DTF.
Due to the size of my design, I am going to press it in 4 different sections.
Place the press on the design in one location and press with medium pressure for the full time. Lift the EasyPress and move it to another location, and press again. Repeat these steps until you've pressed the entire design.
If you overlap the area you press, that is okay.
Remove the Carrier Sheet
Ninja Transfer DTF prints are a warm peel product. I like to go over the design with a DTF cooling block to help it cool down more quickly.
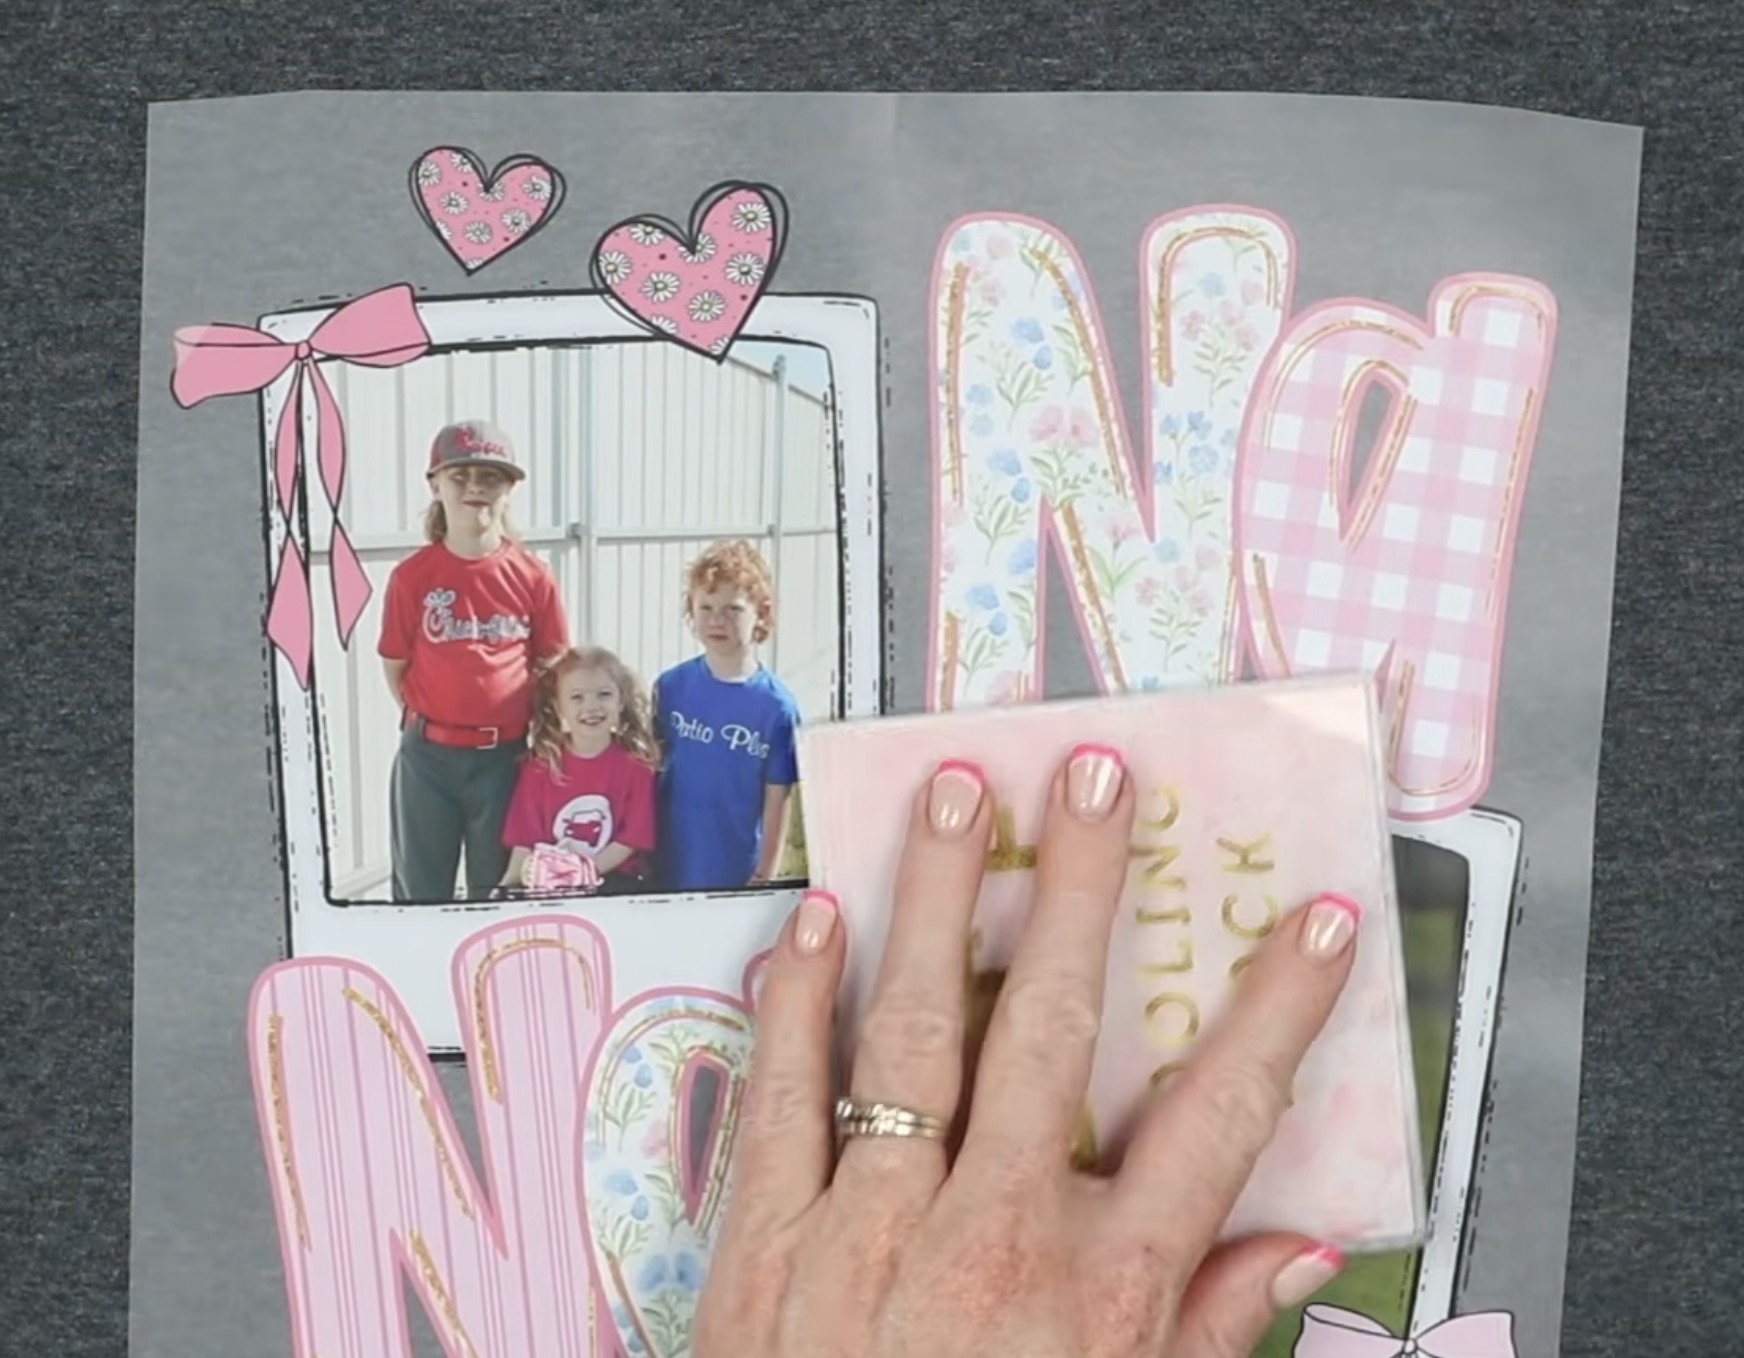
Using the DTF cooling block also allows me to look at the design to make sure everything looks okay. When using an EasyPress, you want to check and make sure it all looks like it has stuck to the shirt.
If everything looks good, peel back the carrier sheet. If anything looks like it's not stuck, go ahead and press it again.
DTF Post Press
The post press is a very important step in the DTF application process.
Cover the design with the parchment paper and press the entire design again at 310 degrees for 15 seconds.
I am pressing in 4 sections again, applying medium pressure to each section.
After the post-press, remove the parchment paper, and you'll see the print is really pressed into the fabric now, and it feels so good.
Finished DTF Photo Shirt
I really can't believe how good these photos look with DTF. The photos are bright and vibrant, even when applied to a dark shirt.
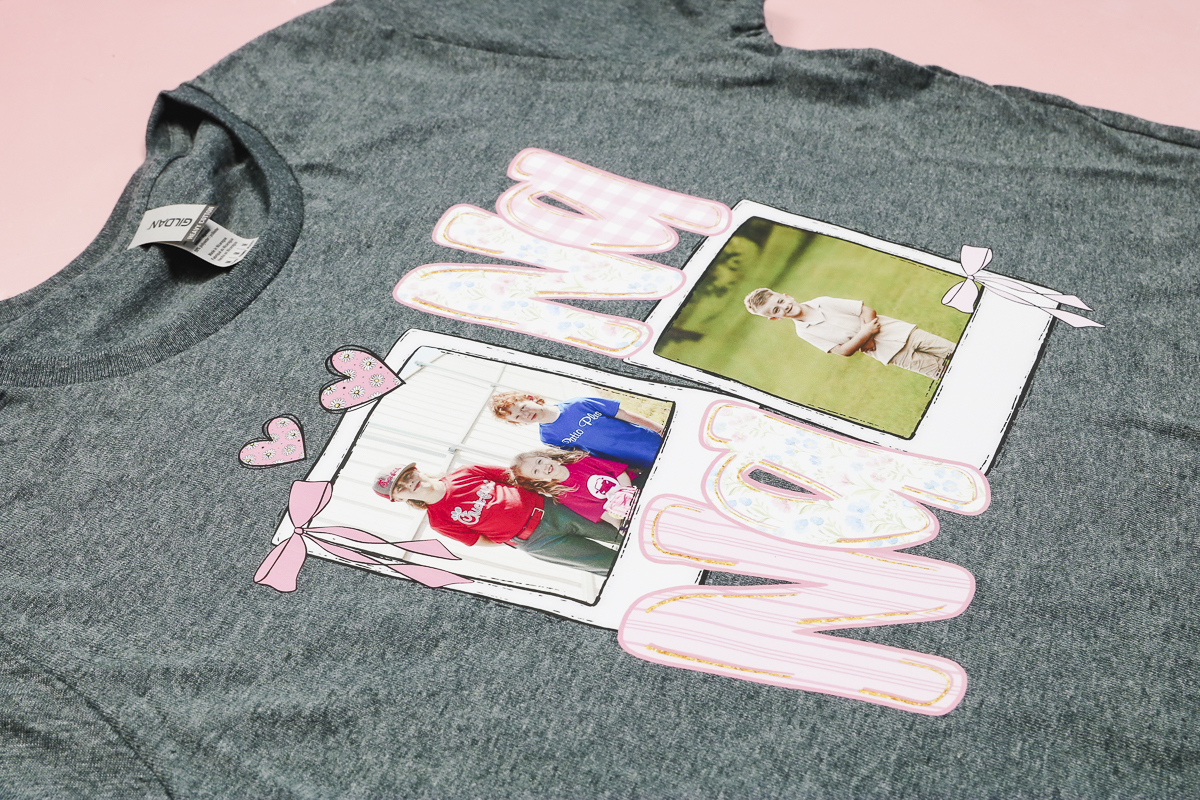
That is another huge benefit of using DTF prints. Not only can you use any type of shirt, you can also use any color of shirt. Because of the way the designs are printed, the color of the shirt doesn't impact the pressed design.
More Ideas for UV DTF and DTF Photo Designs
Once I realized how great the UV DTF and DTF photo designs turned out, I came up with even more projects that would be perfect for these types of prints.
For UV DTF prints, you'll want to use a hard surface. If you don't have a sublimation oven, UV DTF photo prints would be perfect for creating photo tumblers and mugs. You could even apply them to bookmarks, magnets, and keychains.
For DTF, I showed you how great the photo print worked on a shirt, but you could also make things like garden flags, photo banners (thinking of graduation parties and milestone birthdays), add a family photo to the front of a fabric scrapbook, etc. Basically, if it's a soft blank, you can probably add DTF to it.
Are You Ready to Make Photo Projects with UV DTF and DTF Prints?
While I expected these projects to work, I was really impressed with how beautifully they turned out.
The photos are vibrant and bright, detail isn't lost even when added to fabric. If you've ever done a print from home iron-on transfer, you know what I'm talking about. Those photos tend to look very faded. That is not the case with either of these.
If you want to make the same projects I made today, grab the links in the supplies list above. Don't let these projects limit your creativity. I can't wait to see what you come up with.
I hope I've answered any questions you have about using photos with DTF and UV DTF prints. If you have any additional questions, leave them in the comments, and I'll be happy to answer them for you.