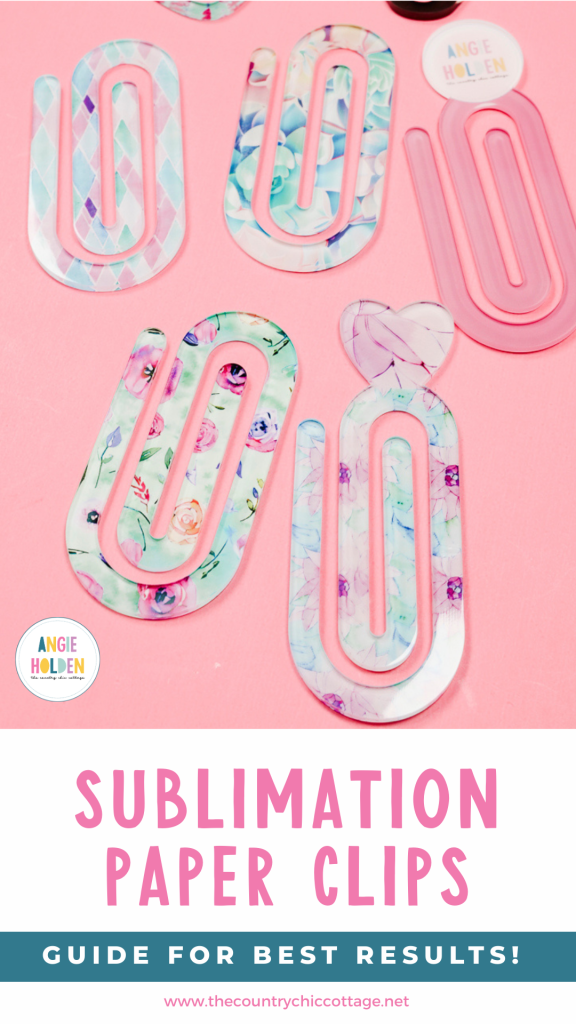
I am always looking for fun and unique sublimation blanks to try, and I'm excited to share these sublimation paper clips with you!
There are a bunch of different sublimation paper clips you can purchase, and I'm testing a variety pack to give you a bunch of ideas for how to use them.
The process for these paper clips is similar to most other sublimation blanks. I created a template that you can use to help if you're struggling to get your sizing correct.
You can watch me make these sublimation paper clips by pressing play on the video below.
Sublimation Paper Clips
These paper clips are easy to customize and can be used for many different things, including teacher gifts, bookmarks, and decor.
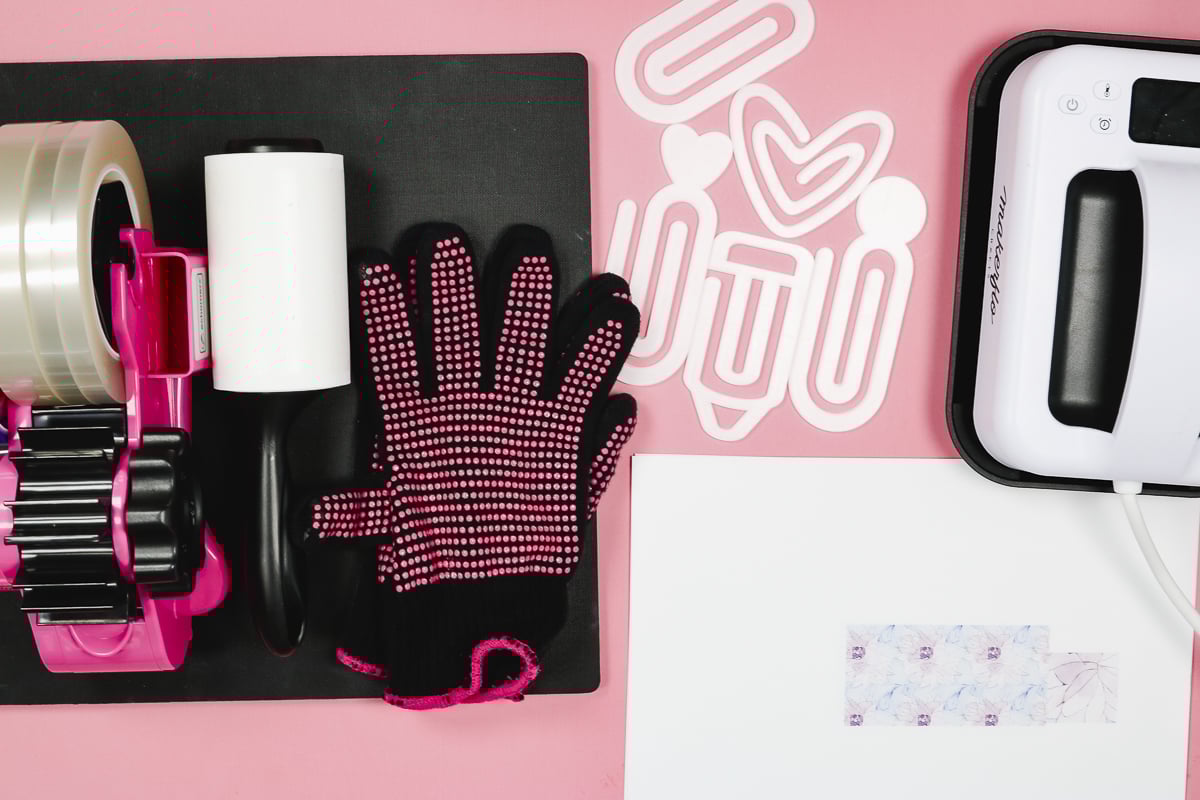
Supplies Used
- Free Files and Templates (NOTE: If you purchase paper clips from a link other than the one I have below, you may need to alter the designs to fit your blanks.)
- Sublimation Paper Clips
- MakerFlo Heat Press
- Heat Resistant Mat
- Brother Sublimation Printer
- Sublimation Paper
- Lint Roller
- Heat Resistant Tape
- Heat-resistant Gloves
- Tape Dispenser
- Protective Paper
- Paper Dispenser
Step 1. Create the Sublimation Design
The design process is very easy. Open the Canva template you get from the supply list above and upload the designs you want to use in Canva.
You can use the designs I shared for free or upload your own.
Scroll through the pages to find the template that matches your paper clip, and then drag the image you want to use over the template.
If needed, you can double-click the image to resize it to fit on the template.
When you have everything located where you want it, click Done, and you can download the design.
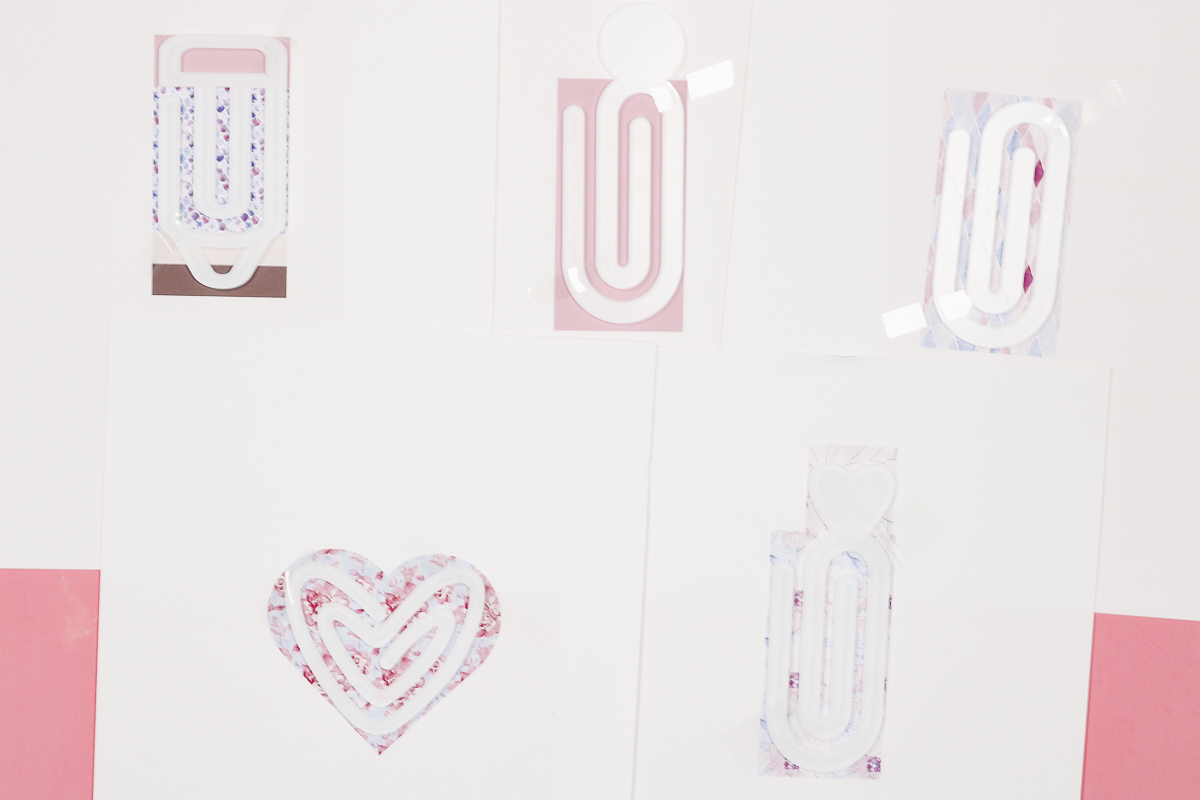
Depending on the paper clip you're designing, there are multiple elements for you to add images to.
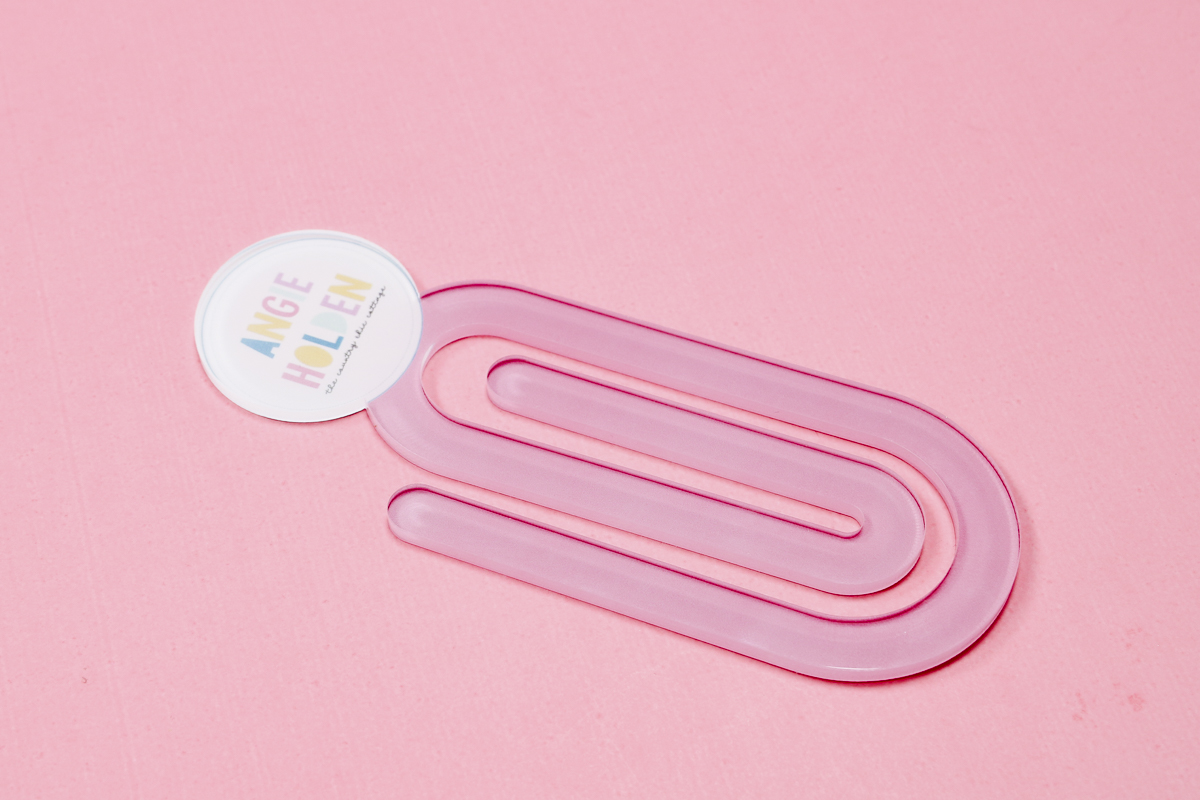
Customize Circle Paper Clip
The paper clip with the circle on top, I am adding my logo to the circle. To make the bottom of the paper clip a plain color, I searched Square under Elements and added the square to the canvas. Resize the square to make it the exact same size as the template and change the color to whatever I want it to be.
If you choose a solid color and you add a new element, make sure to remove the photo element layer.
The logo I'm using has a transparent background. I don't want the pink from the bottom of the paper clip to show in the logo area, so I need to add a circle the same size as the circle on the top and change the color. I made mine white and moved it to the back and removed the photo element.
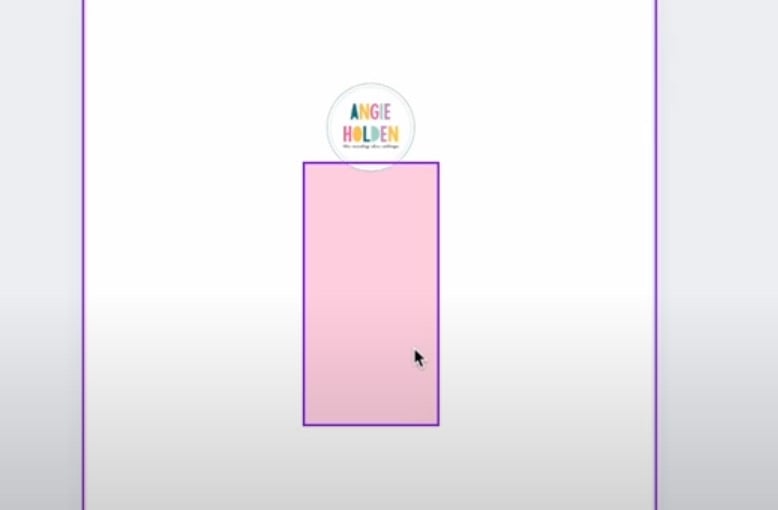
Now I have a design that has my logo at the top and a pink rectangle at the bottom.
The process will be similar for all of the other paper clip shapes.
Step 2. Download and Print Designs
You cannot print directly from Canva. Click Download, and for my printer, I like to choose PDF for Print and CMYK.
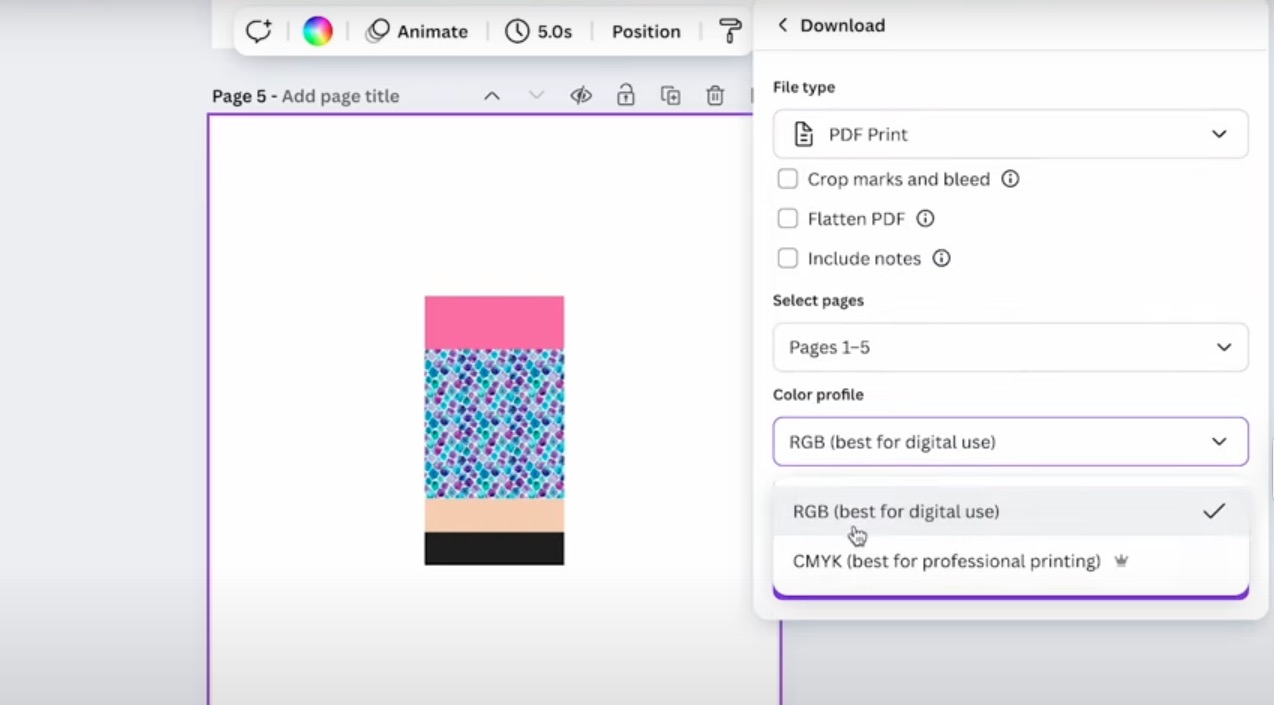
Download the design to your computer and then print it out.
You need to print sublimation ink on sublimation paper from a sublimation printer.
IMPORTANT – With these blanks, you do not need to mirror your design. Because you add the design to the back of the blank, if you mirror it, any text will be reversed when you press it.
Step 3. Prepare Blanks
Next, we need to prepare the blanks. My paper clip blanks have a clear side and a white side. We will add the print to the white side.
Check to see if there is any protective film. Mine does have a protective film, so I removed that.
Because I just removed the film, my blank should be clean. If you need to clean the paper clip, use a lint roller and go over the surface.
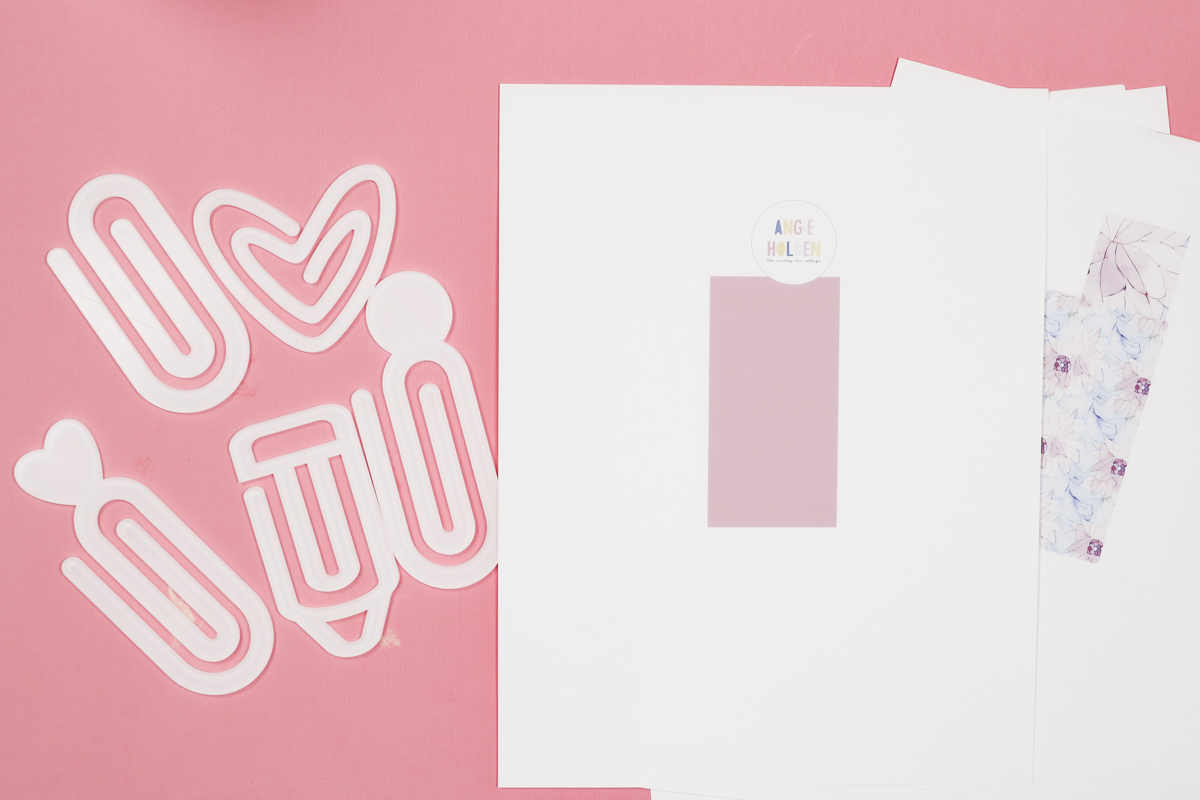
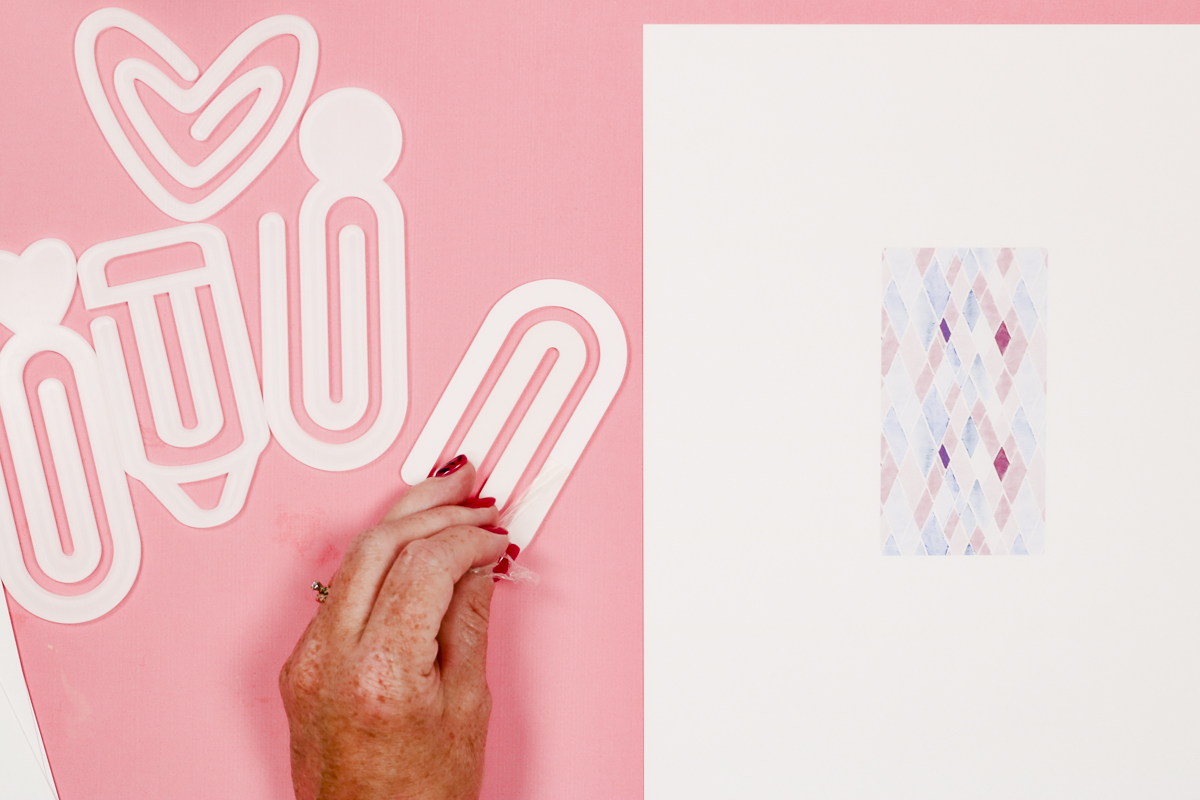
Step 4. Locate Design on Sublimation Paper Clip
Because we're adding the sublimation print to the back of the paper clip, it is easiest to place the paper clip on the print.
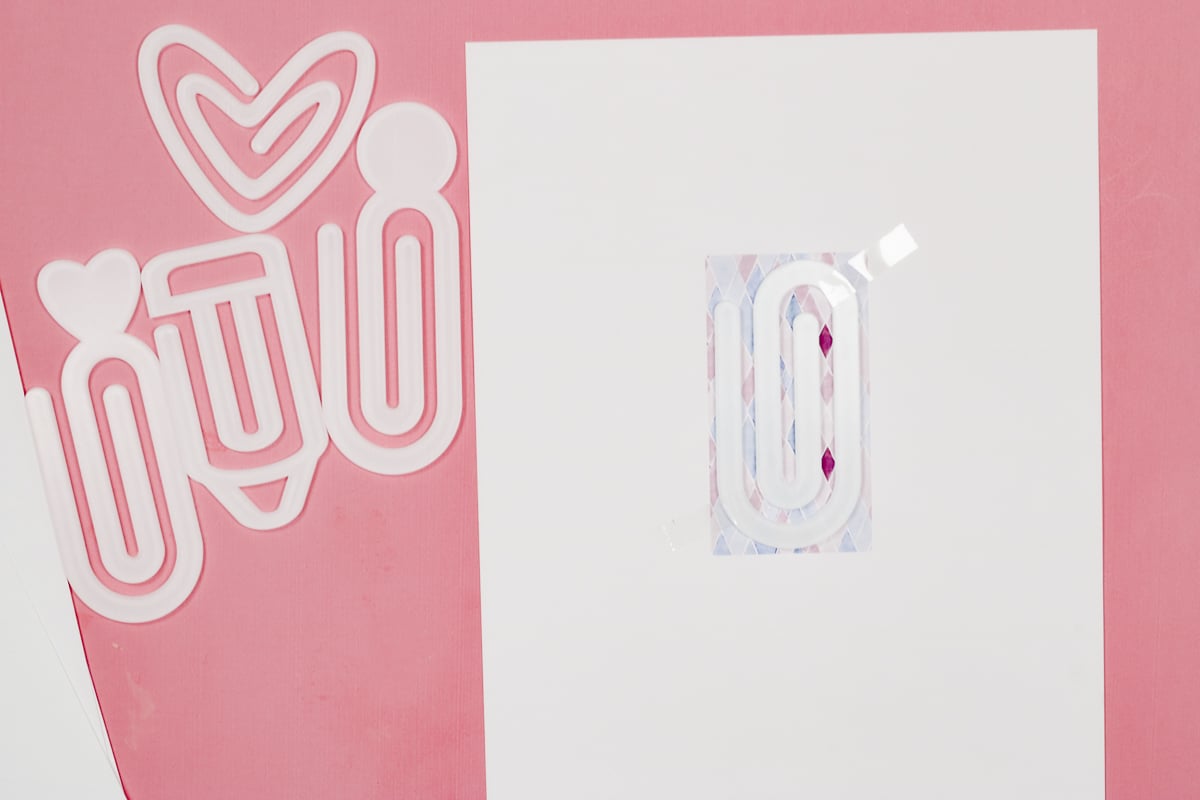
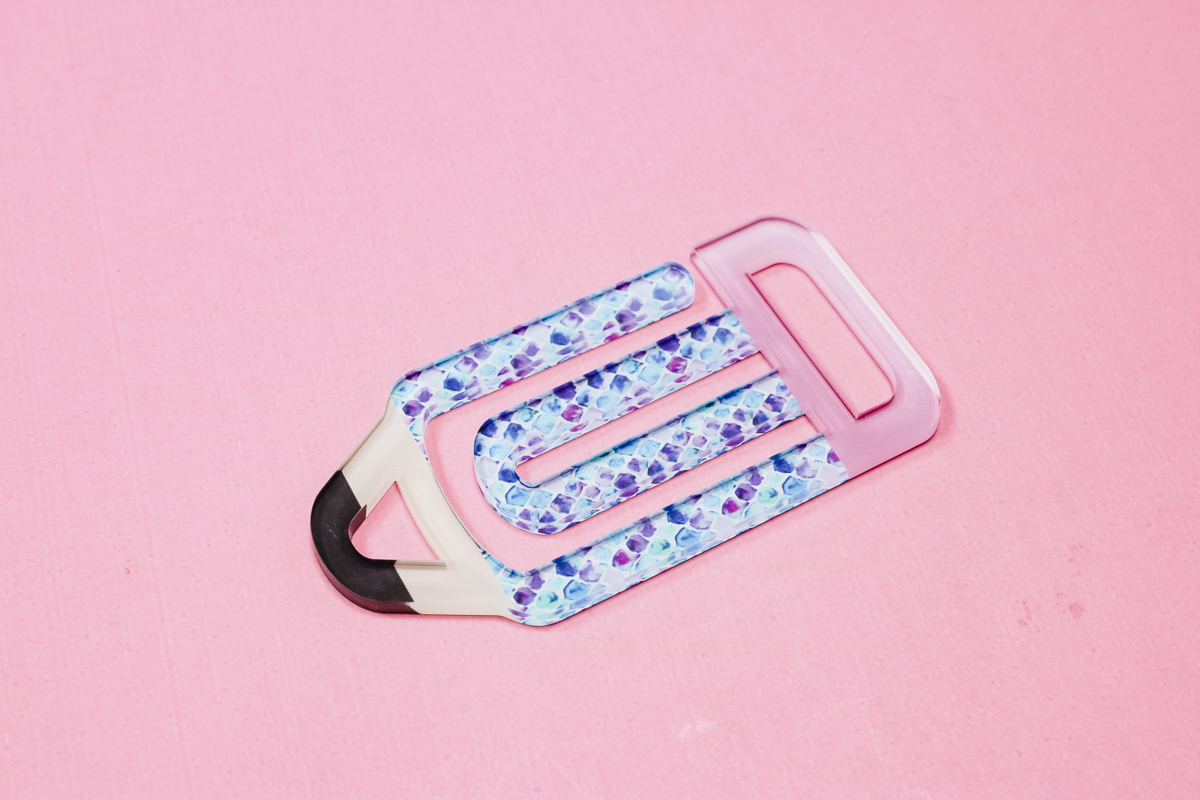
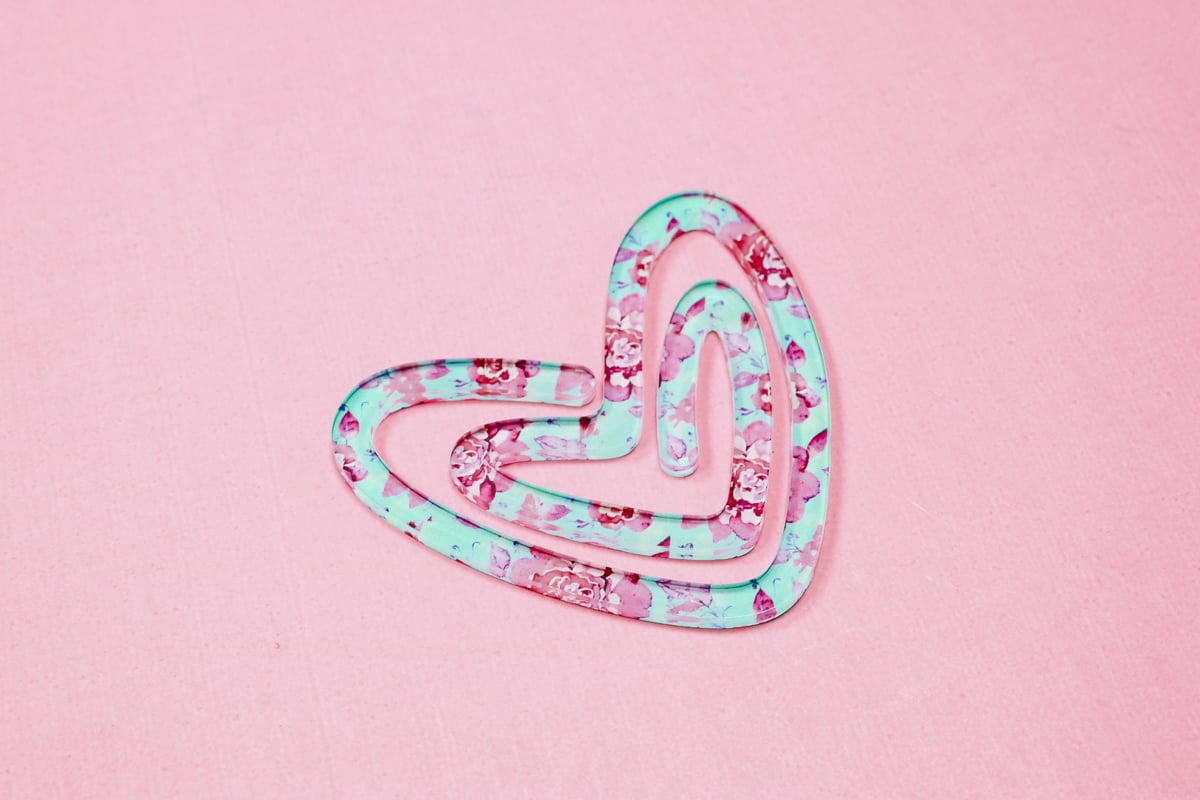
Take your time to get the paper clip located correctly on the print. Pay attention to lining up the design, especially on the multi-part designs like the heart, logo, and pencil. Use heat-resistant tape to hold the paper clip in place, and we're ready to press.
Repeat the process for each paper clip.
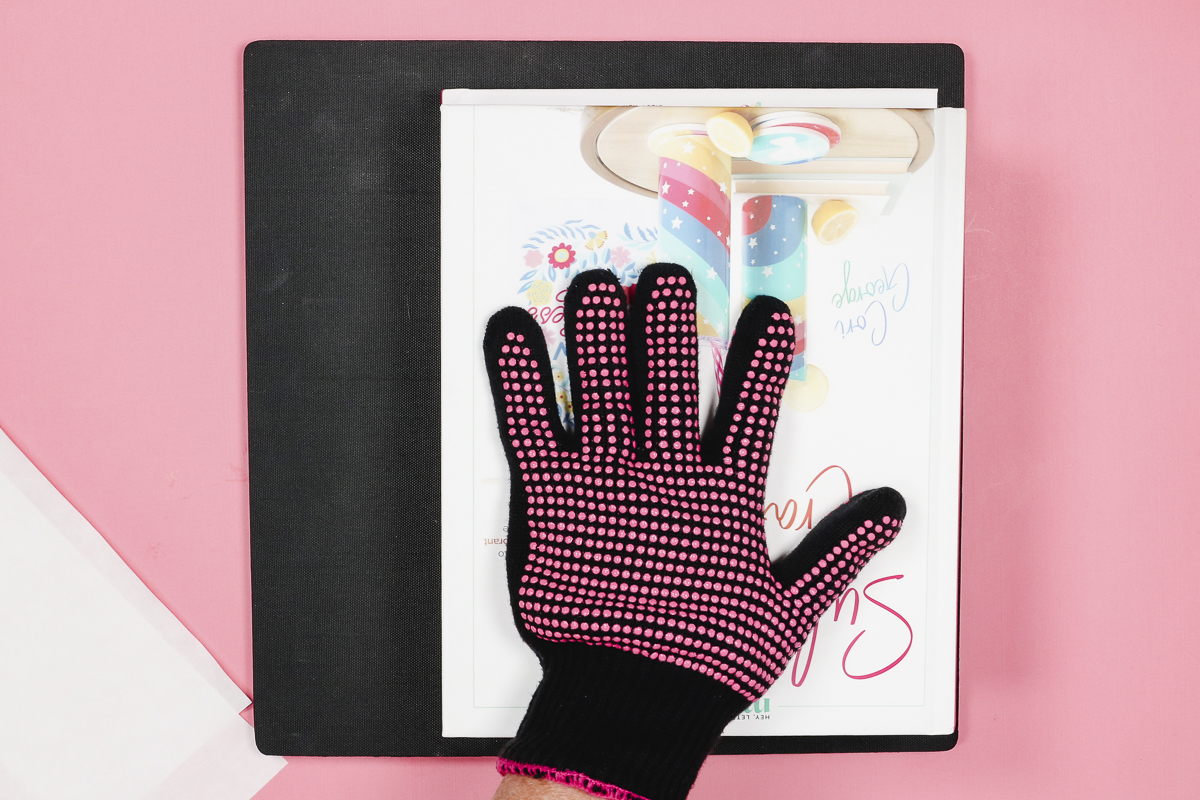
Step 5. Press the Design on the Paper Clip
Place protective paper on a heat-resistant mat and add the sublimation paper clip with the print side up on the mat.
Cover the print with protective paper and press at 375 degrees for 70 seconds.
I am using a small handheld press from MakerFlo, but you can use any heat press or EasyPress for these blanks.

When the time is up, flip the sublimation sandwich over and remove the protective paper. You should be able to see the design through the blank to make sure it is transferred completely.
The paper clips will be very hot. You want them to cool under something heavy to prevent any warping.
I placed mine under the heat-resistant mat with books on top, and that worked fine.
Step 6. Remove the Sublimation Print
When the paper clip has cooled, remove the heat-resistant mat and then peel back the heat-resistant tape and the sublimation print.
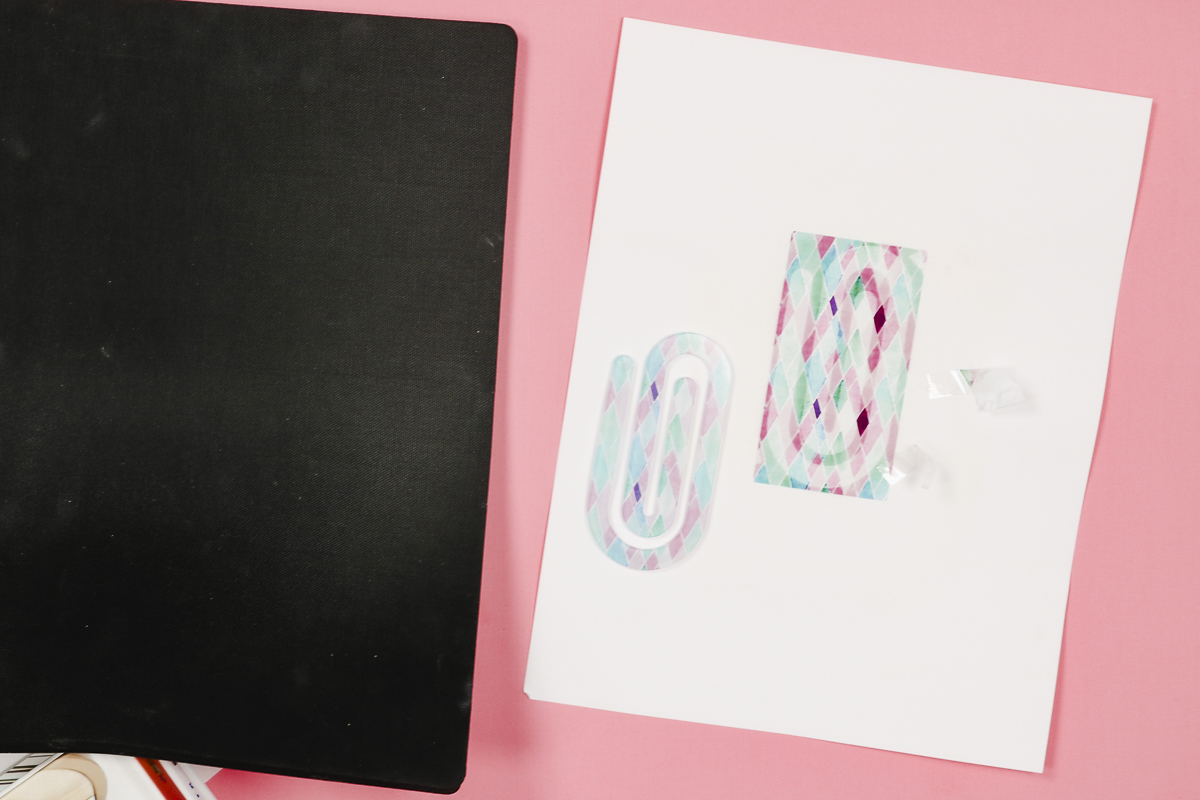
My blanks had a protective film on the clear side of the blanks. When I peeled back the heat-resistant tape, it lifted with the tape, so I was able to easily remove it at that point.
Repeat the process for all the other sublimation paper clips, and they are complete.
Note – if your sublimation paper sticks to the paper clip, soak it in water and it should all come off easily. I didn't have that happen with these blanks, but I have had it happen in the past.
Step 7. Reveal the Finished Product
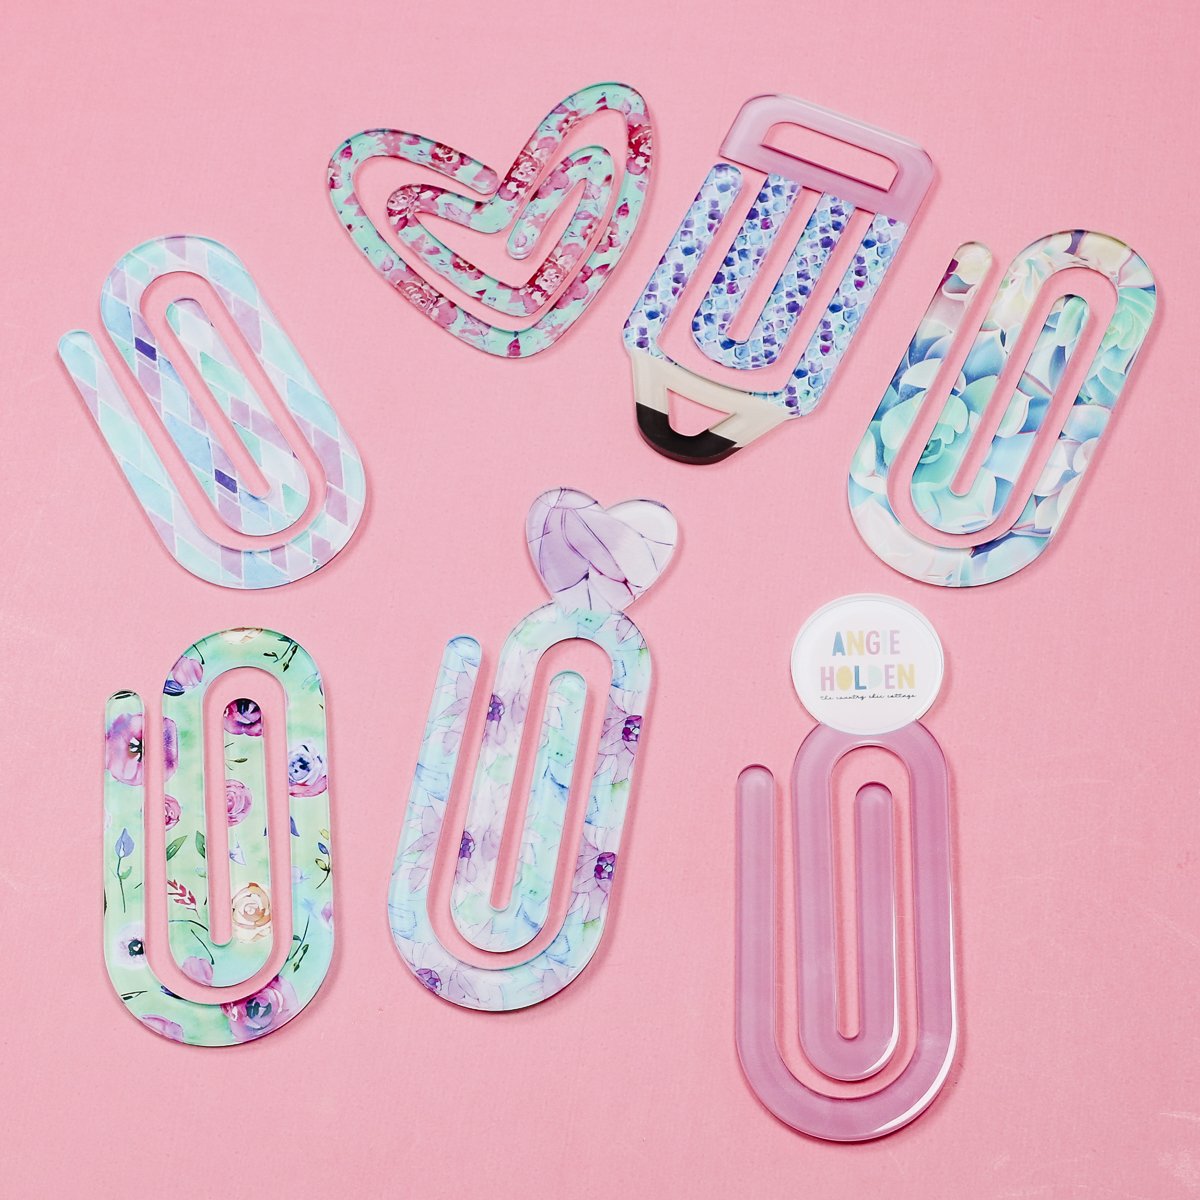
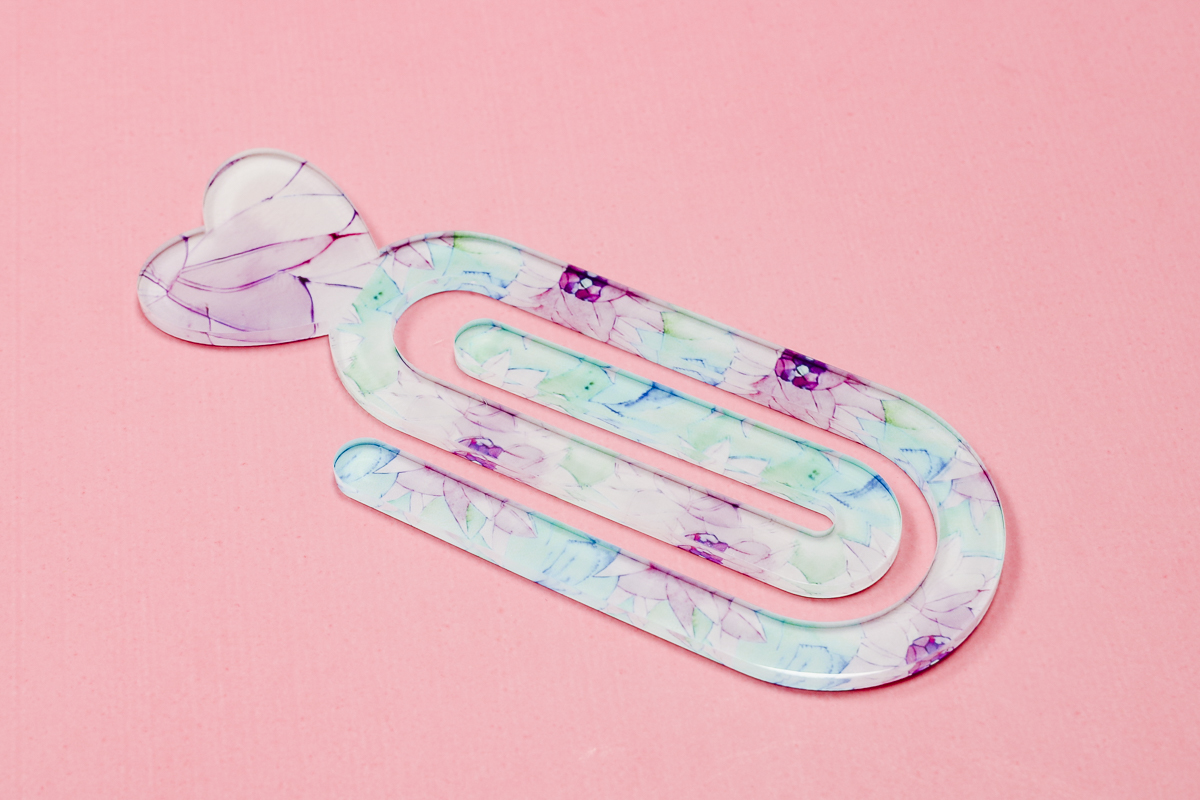
I love how these sublimation paper clips turned out.

I do want to note that the front of the paper clip will look dull until you remove the protective film. With the film removed, it looks really good; the design is vibrant and really pops.
The back of the paper clip, the side we added the print to, will still look white and muted, but it looks good.
Tips and Tricks for Sublimation Paper Clips
I do want to note that any text in your design will be reversed if you look from the back. If you don't like that look, I'd choose a design that doesn't have any text or numbers.
These paper clips turned out so cute. I did a really good job with the location, except for the pencil. I have a little white at the top of the eraser, but other than that, they all look great.
The project is very simple, but you have to remember to cool them under something heavy. You can use books or anything else flat and heavy to prevent warping.
The protective coating on the front was easier to remove when the paper clip was completely cool.
I think these sublimation paper clips are so fun. They make great teacher gifts, bookmarks, class or office decor, and more. I'd love to hear how you would use them in the comments.
I hope I've answered any questions you have about making sublimation paper clips. If you have any additional questions, leave them in the comments and I'll be happy to answer them for you.