

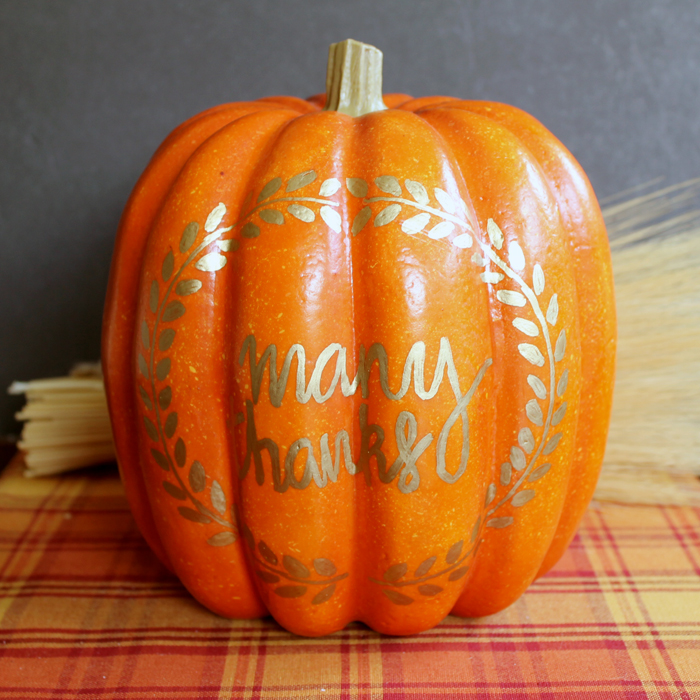
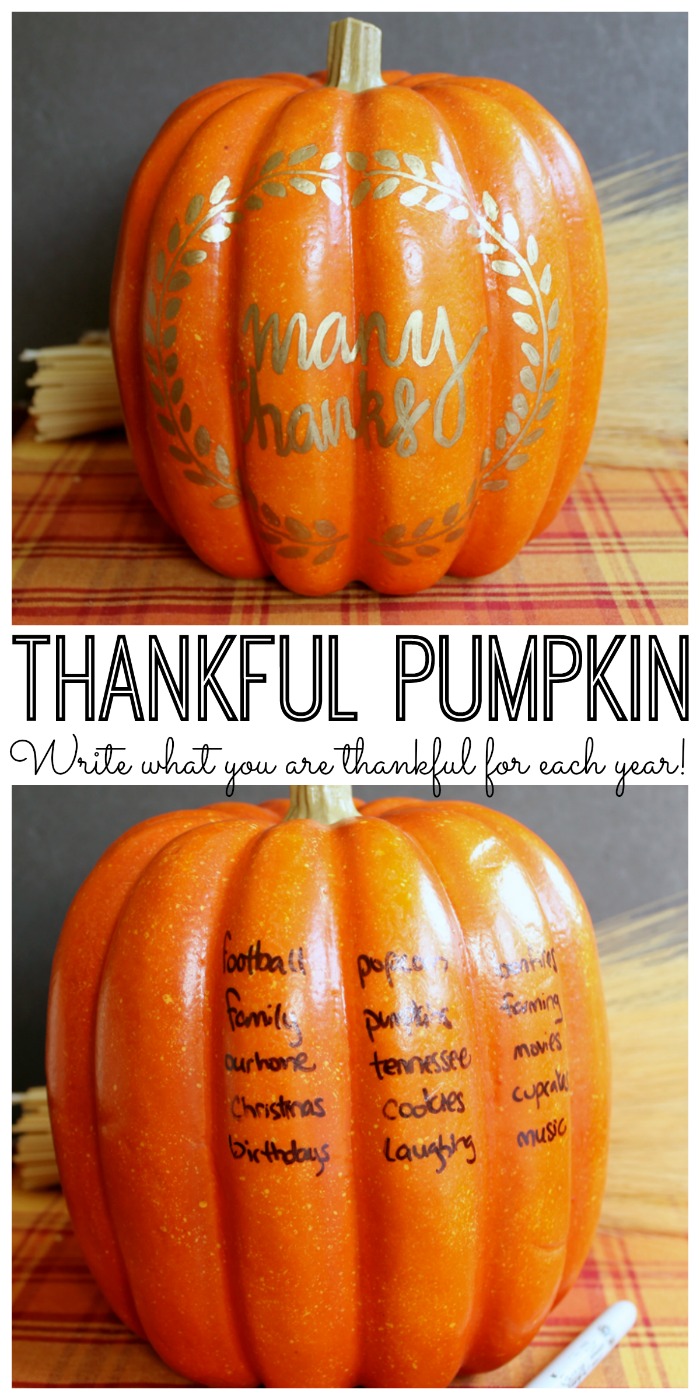
Start a Thanksgiving tradition this year with Fall activities such as this gratitude pumpkin craft! Make it this year, then pull it out year after year to write down what your family is thankful for and to remind them of those items from past years.
This will soon become a fun tradition for your entire family. Crafts with pumpkins are so much fun. If you're looking for more pumpkin ideas, then check out our 20 Pumpkin Decor Ideas blog post!
How To Make Gratitude Pumpkin
Every Fall, we gather around the table and go over everything we are thankful for! It's a tradition we have been doing for years and the kids always love it. If you're looking for mindful and intentional activities to do with your children, then you will love this gratitude pumpkin idea.
This craft is so fun to do whenever you're looking for some plans to do at home. With only a few steps, you will have your very own gratitude pumpkin craft ready to be displayed in your favorite spot!
Supplies Needed For Gratitude Pumpkin
- Artificial Pumpkin: You can find this at most well-stocked craft stores.
- Elmer's Paint Pen in Gold: I used fine point.
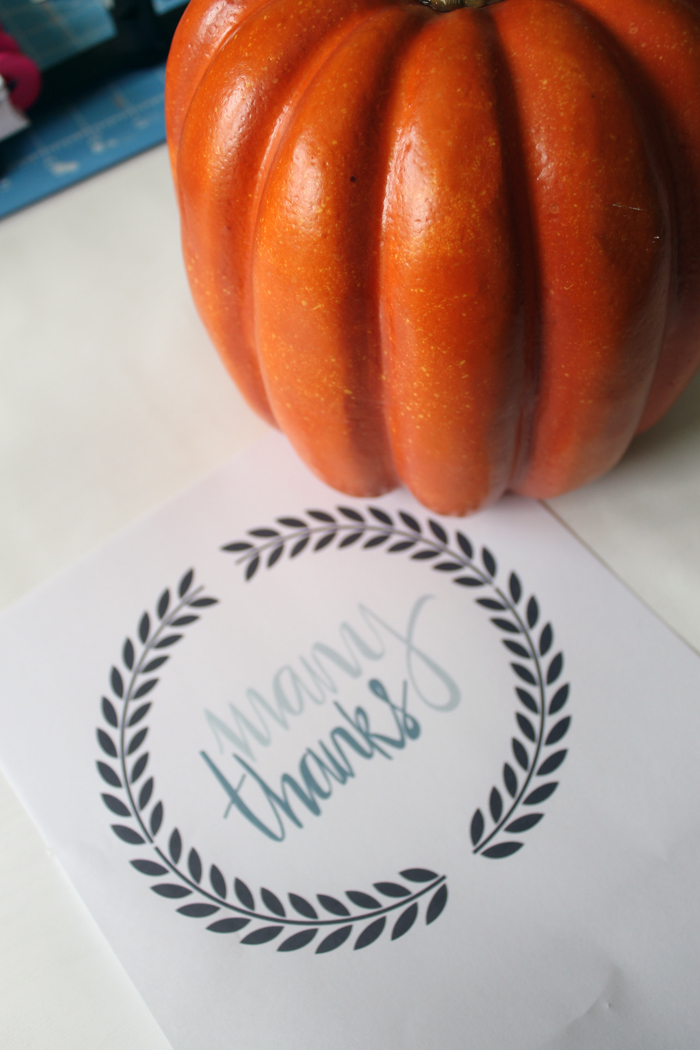
- Many Thanks Print: Click here to print on your printer
- Carbon Paper: Carbon paper is used to transfer the design onto the pumpkin. You can find it online or at craft stores!
- Pencil
- Permanent Black Marker
- Tape
Note: You can even paint your pumpkin any color you would like such as white or any pastel color like natural pumpkins.

Step 1: Print Many Thanks Art Print
Start by printing our many thanks art (you can find it here) on standard printer paper.
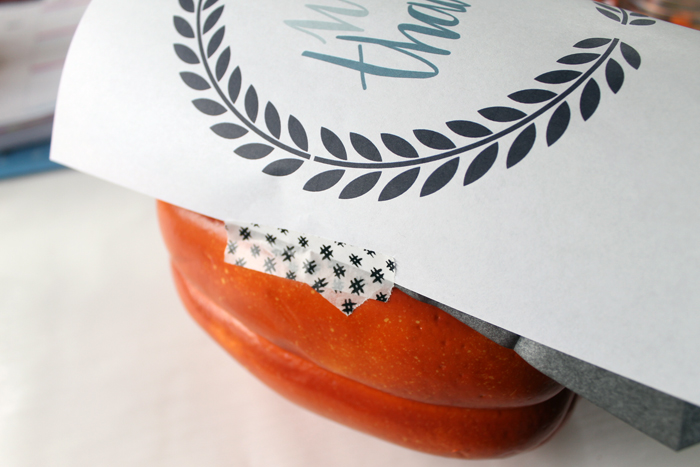
Step 2: Tape Carbon Paper & Print To Pumpkin
Add the carbon paper and the print to the front of your pumpkin and secure with tape.
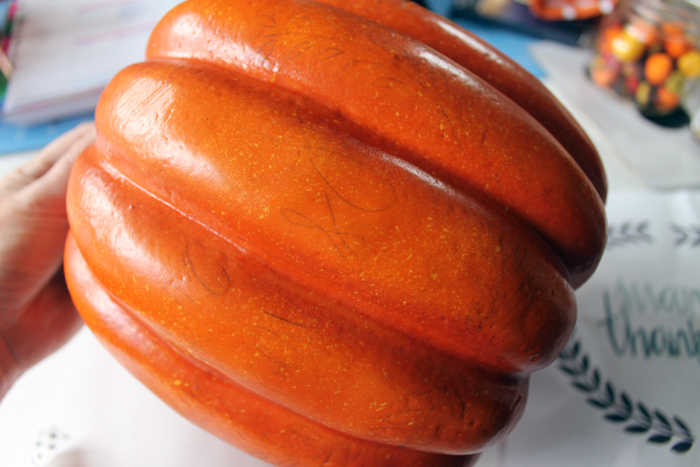
Step 3: Trace Design
Use a pencil to trace the design. Remove the design and carbon paper. You will be left with an outline on your pumpkin that is ready for painting.
Step 4: Outline With Elmer's Paint Pen
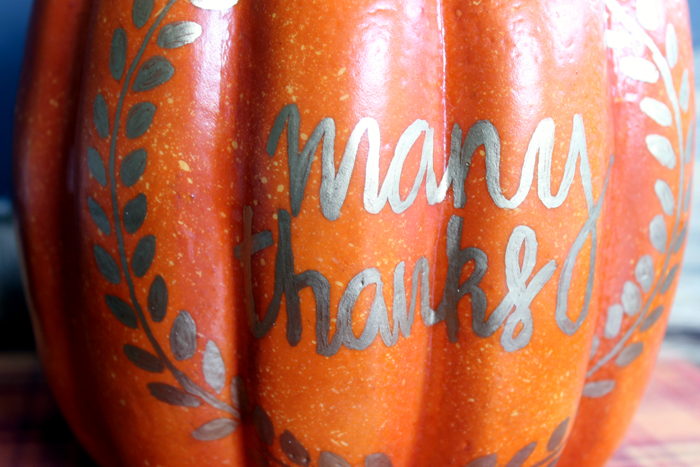
Start going over the outline with your Elmer's Paint Pen. The best thing about using the paint pen is that painting this design is just like using a pen to trace a design. So simple yet it turns out gorgeous!
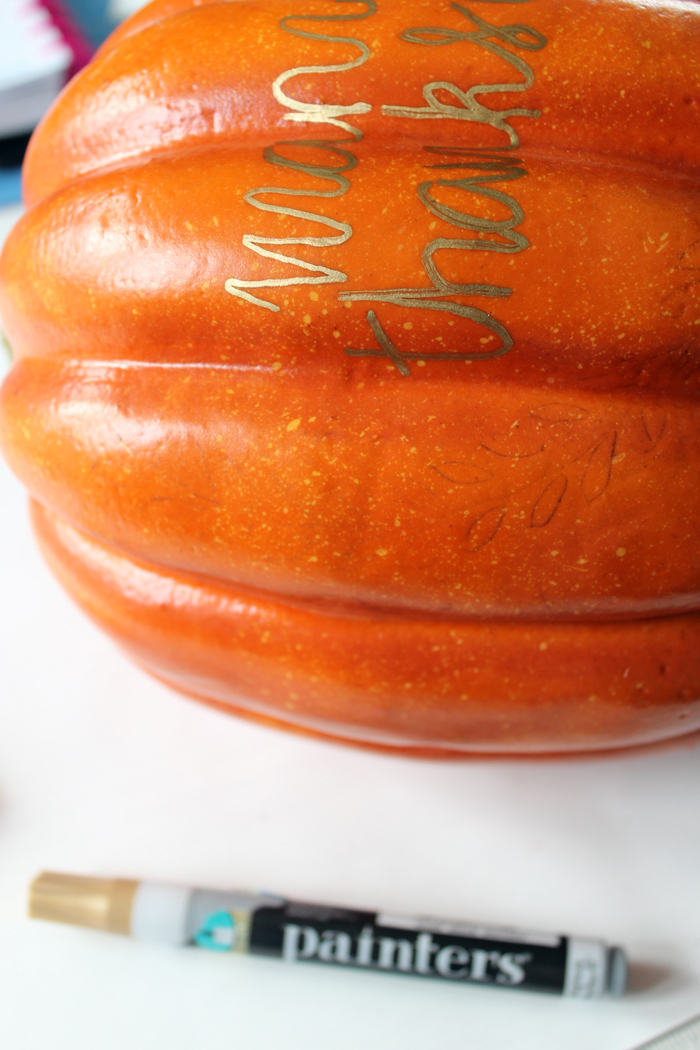
I went over the words twice with the fine-point paint pen. The vines were only painted once.
The paint actually dries really quickly but make sure everything is dry before you continue.
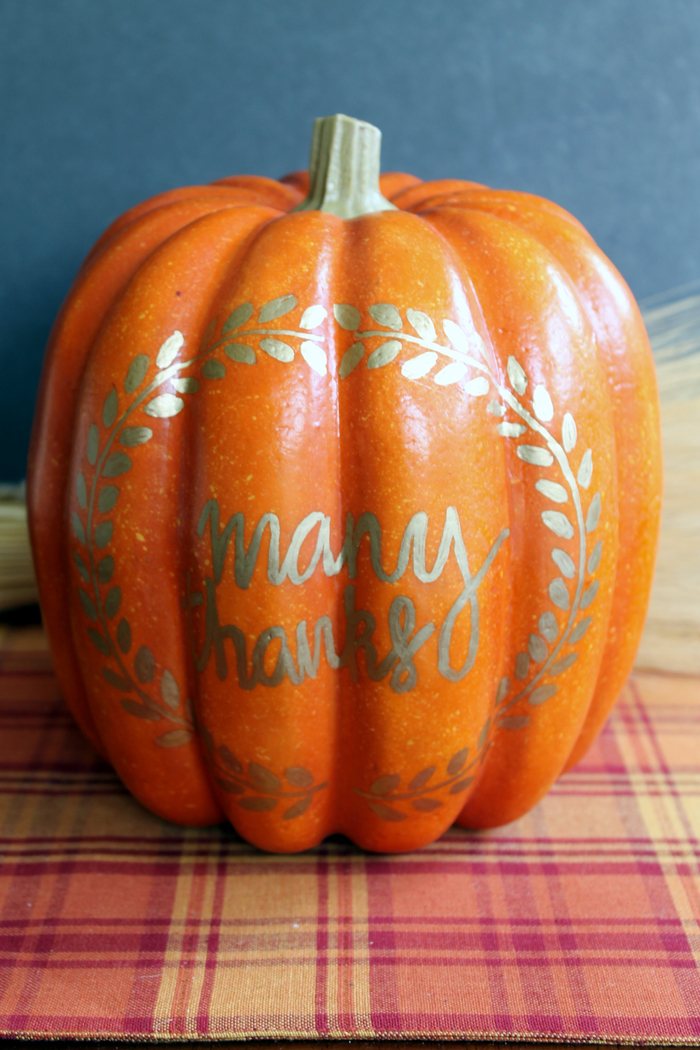
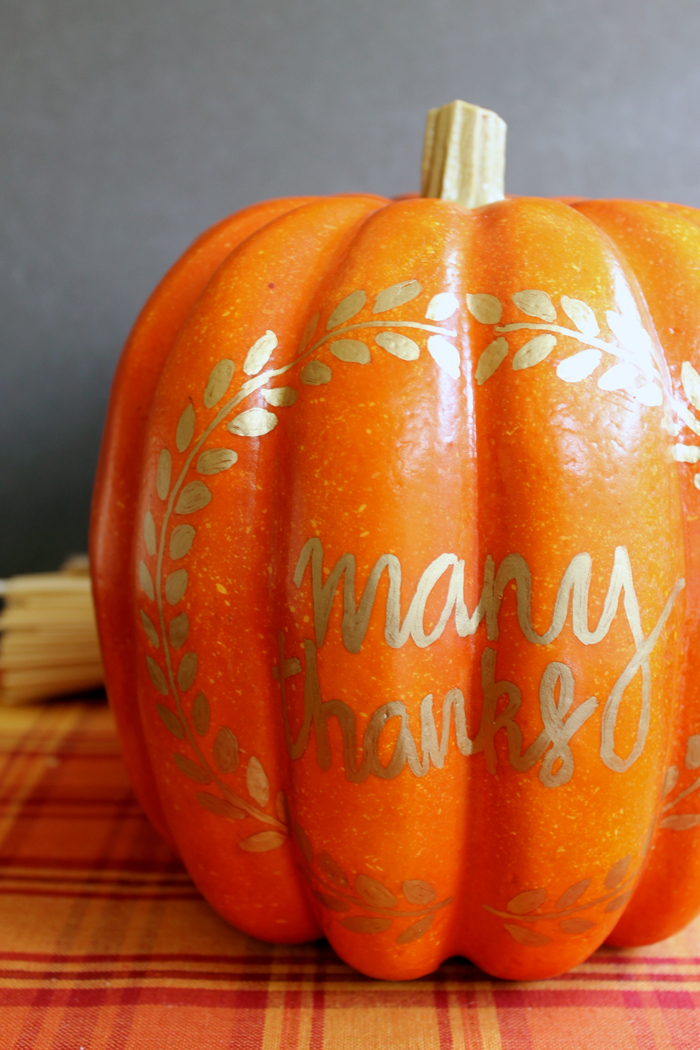
You can use the pumpkin craft as is in your home decor but I had something else planned for this project. Set this gratitude pumpkin out where your entire family can see it every day.
How To Use Gratitude Pumpkin
Be sure to keep a permanent black marker beside the pumpkin so you can easily draw on it. Then, encourage your entire family to write down what they are thankful for this year.
The items can be ANYTHING! Let them fill up the pumpkin if they wish or just write down a few things and put this one away until next year.
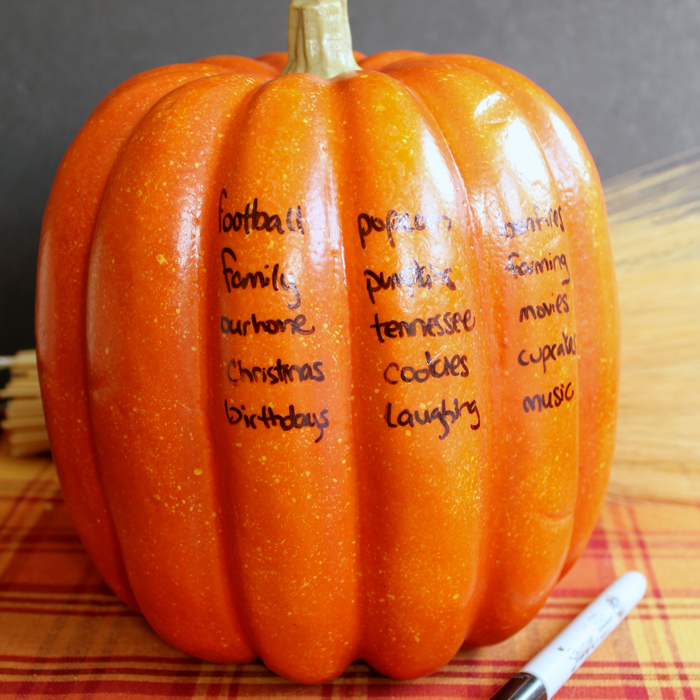
Pull this gratitude pumpkin out every year! You can even wrap around your “thankful” items around the front of the pumpkin. Imagine pulling this gratitude pumpkin out in five years and reading what you wrote this year. A fun Thanksgiving tradition that your entire family will love!
Tips and Tricks For Gratitude Pumpkin
Now that you’ve seen this gratitude pumpkin, are you ready to make your own? Here are a few tips and tricks to ensure your project goes as smoothly as possible!
- Use A Regular Gold Marker – If you don't have a paint marker on hand, you can use a regular gold marker! However, you may need to go over the design a few extra times to get the look you want.
- Use Cricut Vinyl To Create A Print Then Cut Design – If you have a Cricut, you could use Cricut vinyl instead of a marker for this project! The only thing to keep in mind is that you may want to get a pumpkin that is more flat so your vinyl can adhere better to the pumpkin.
- Decorate Your Pumpkin Even More – I wanted to keep this project simple, but you could decorate your pumpkin further with a bow or leaf!
- Add The Date – Whether you make a new gratitude pumpkin each year or use the same one, make sure you add the date to your pumpkin so you know what year your ”gratitude list” is from!
5 More Thanksgiving Day Activities & Crafts
Did you love this gratitude pumpkin, and are looking for more Thanksgiving Day activities and crafts? Then check out the ideas below!
- Thanksgiving Cootie Catcher Free Printable
- Free Printable Thanksgiving Placemat
- DIY Turkey Pinecone (Thanksgiving Craft for Kids)
- Thanksgiving Word Scramble Printable
- Thanksgiving Painted Rocks (Tic Tac Toe Game)


A lovely project.
I love your Thankful pumpkin! what a great idea!
Such a great idea! Love it! Thanks for sharing.
That’s a fantastic idea, you can look back at everything you’ve been thankful for over the years. And your handwriting is pretty damn gorgeous by the way.
What a lovely idea! We have been making TONS of pumpkin recipes in our home this month. Will have to try your super gratitude pumpkin idea! Love it! 🙂 Thank you!
Oh I love this idea! 🙂
I would love for you to share this with my Facebook Group for recipes, crafts, tips, and tricks: https://www.facebook.com/groups/pluckyrecipescraftstips/
Thanks for joining Cooking and Crafting with J & J!
Angie, This is just the cutest project ever! I just love it and what a great project to bring the family together. Thanks for linking up to Celebrate It!
So Pretty. Thanks for joining us at the Inspiration Spotlight party. Shared.
Such a cute idea! Absolutely love this 🙂