
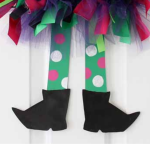
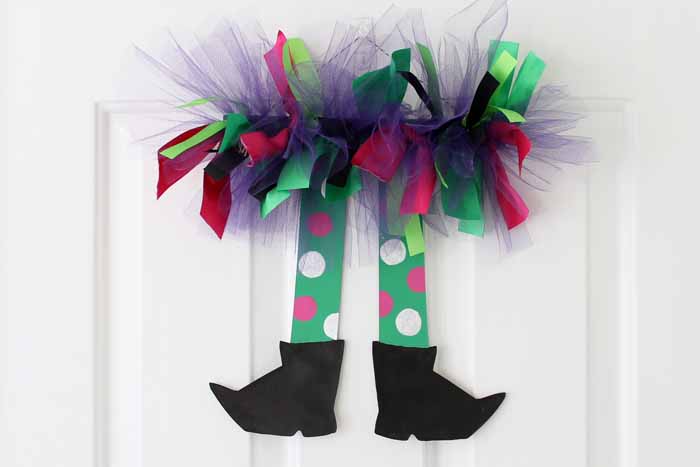
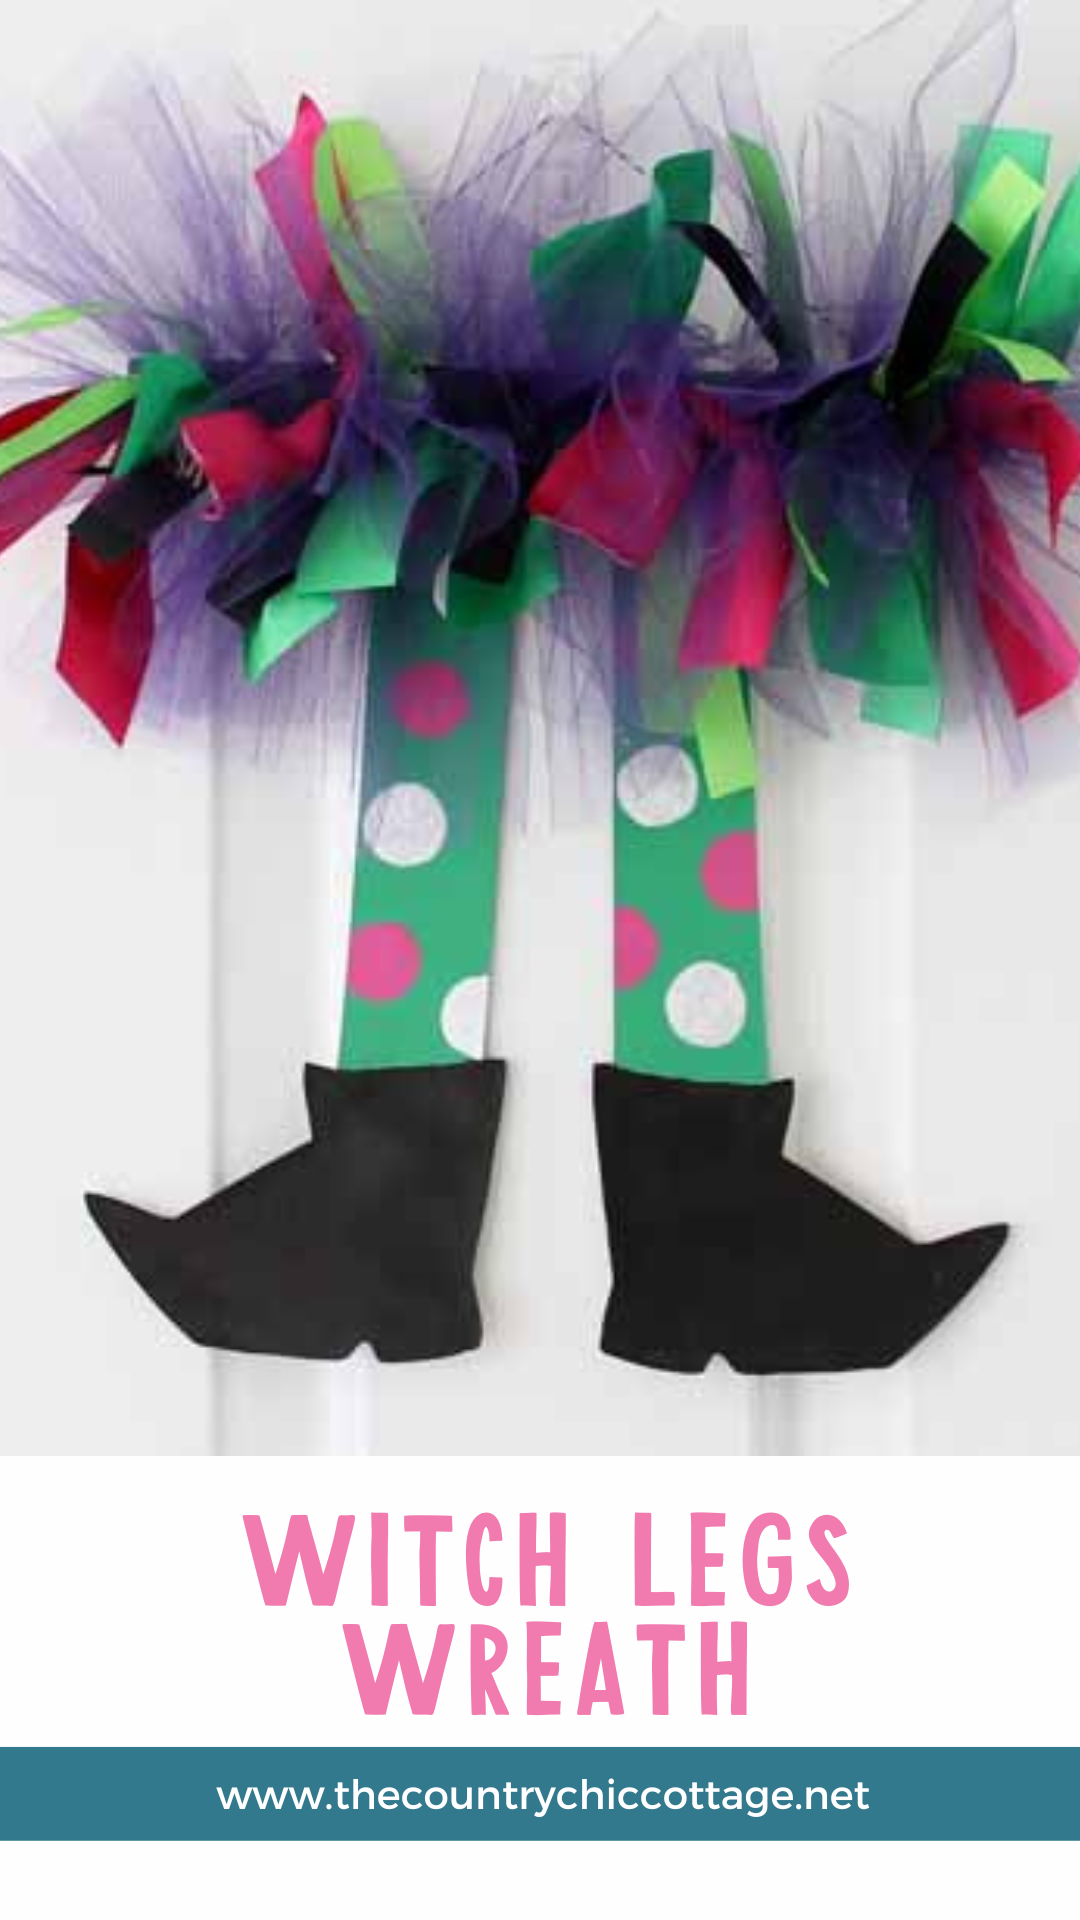
Want a Halloween wreath that is a little bit different? Try some witch legs! The legs and a bit of the skirt are all you need for a whimsical wreath that everyone will surely enjoy. This week, I am sharing 15-minute Halloween crafts. If you have missed our past ideas, click here to see them all!

Witch Legs for Wreath Decor
Want to use witch legs as a wreath option? It is super simple with your Cricut machine. For this project, you can use any Cricut machine except the original Cricut Joy.
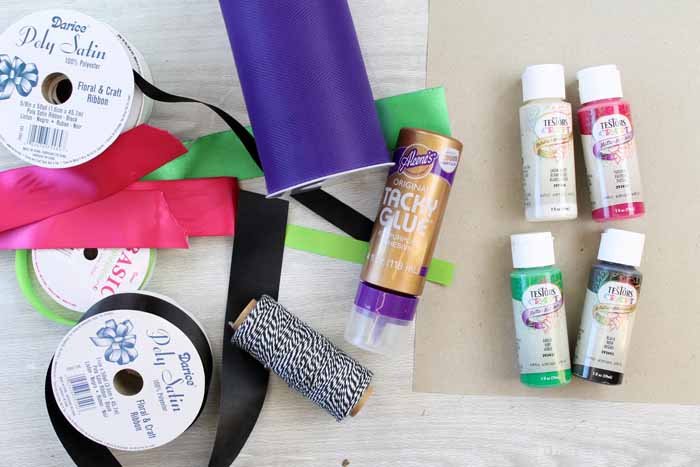
Supplies needed:
- Craft Paint (in black, green, white, and fuchsia)
- Cricut Cutting Machine (See which machine is right for you)
- Kraftboard or Chipboard
- Witch Legs File (you can see how to get the file below)
- Purple Tulle
- Various Ribbon
- Paintbrush
- Tacky Glue
- Hot Glue and Glue Gun
- Baker's Twine
- Scissors
- Ruler
- Pouncer Brush
Witch Legs SVG File
To make this wreath with your Cricut, you will need a cut file for your Cricut machine, and I have a free SVG file below. Sign up for the newsletter in the box below, and the file will be sent directly to your email. Look for a box below with a picture of the file you need. If you already receive my newsletter, add your information again, as you will not be signed up for anything further. After you add your information, check your email to get your file. You can follow the instructions here to upload the file into Design Space.
How to Make a Witch Legs Wreath
I thought this one really deserved a video to show you exactly how to make it. Follow along below!
Can't watch the video or missed some of the steps? Find the instructions below on how to make a Witch Legs Wreath.
Instructions:
Step 1
Start by cutting five of the witch legs from a chipboard or kraft board. NOTE: A thinner chipboard will require fewer pieces.
Step 2
Use tacky glue between the layers, glue them together into a stack, and allow the stacked layers to dry. PRO TIP: Use a heavy object or books to weigh them down while drying.
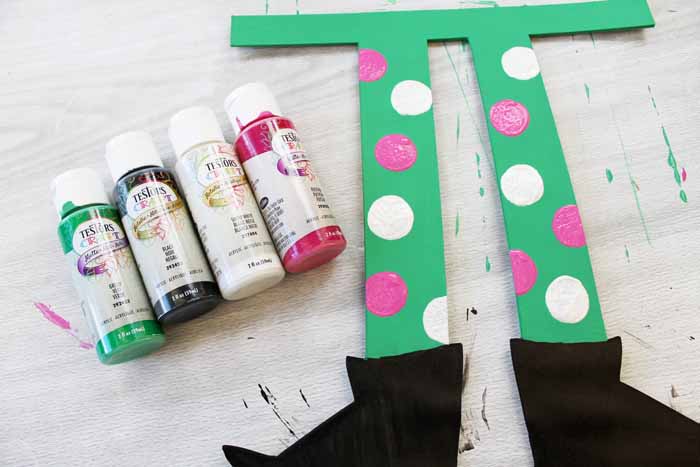
Step 3
Once the glue is dry, use craft paint to paint your legs and shoes, as shown below. Be sure to paint your edges for a finished appearance.
Step 4
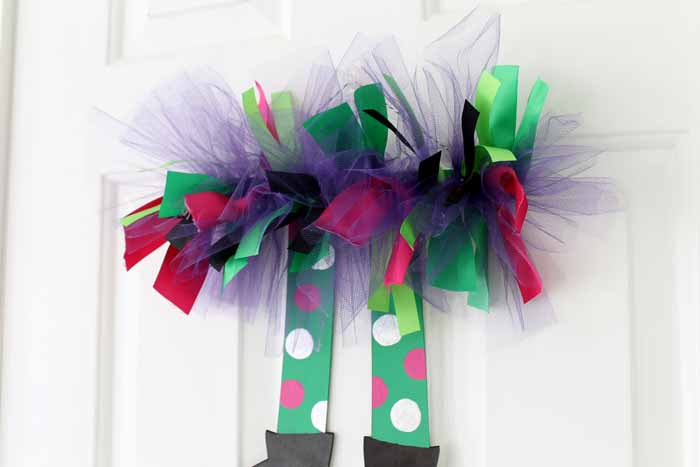
While the paint dries, cut your tulle and ribbon into 8-inch strips. Then, tie each strip in a knot in the center.
Step 5
Use hot glue to secure the knots across the top of the witch legs. Alternate colors and textures, as this will become the witch's skirt.
Step 7
Flip the base over and add some baker's twine with hot glue for a hanger.
That's it! Wasn't that easy and fun? So, will you be making these adorable witch legs for your home this fall? Add that touch of whimsy to any room in just minutes!
This quick and easy Halloween project will look great in your home. You can mix it up and make it in any color you like. What will your witch legs look like?
Additional Halloween Projects
Want more quick and easy Halloween crafts? Try the links below!


Would love to win a cricut maker.
I’d love to win a cricut maker…but the post references a giveaway widget which isn’tshown. ??
It should appear in the post. You might refresh if you aren’t seeing it. If all else fails, click here to see it: http://www.rafflecopter.com/rafl/display/20f5ee3c52/?
nice give away would love to be the winner!
I agree! I hope Rafflecopter picks me! I want one so badly, but they are too expensive for me right now! 🙂 Awesome machine though! I’m also enjoying many projects on your site and several others I saw while signing up today! Can’t wait to start some things for the holidays!
I would love to win a Cricut Maker! It looks like an awesome machine!
Oh I just love this! 🙂
I would love for you to share this with my Facebook Group for recipes, crafts, tips, and tricks: https://www.facebook.com/groups/pluckyrecipescraftstips/
Thanks for joining Cooking and Crafting with J & J!
I love that witch!! So cute!! And I desperately want a cricut for my birthday!!
You should linkup at Bloggers Spotlight too!
http://www.raisingfairiesandknights.com/category/bloggers-spotlight/
LOL, those witch legs are the best Angie. It would make me smile every time I see it.
What a super cute and easy Halloween decor idea! I love it. Perfect for a not-so-spooky Halloween front door. Thanks for sharing your easy tutorial with us at Merry Monday this week!
Congratulations! Your post was my feature pick at #ThursdayFavoriteThings this week. Visit me at https://www.marilynstreats.com on Wednesday evening and to see your feature and grab your badge! All hosts choose their own features so be sure to return to my blog. I invite you to leave more links to be shared and commented upon.