
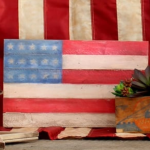
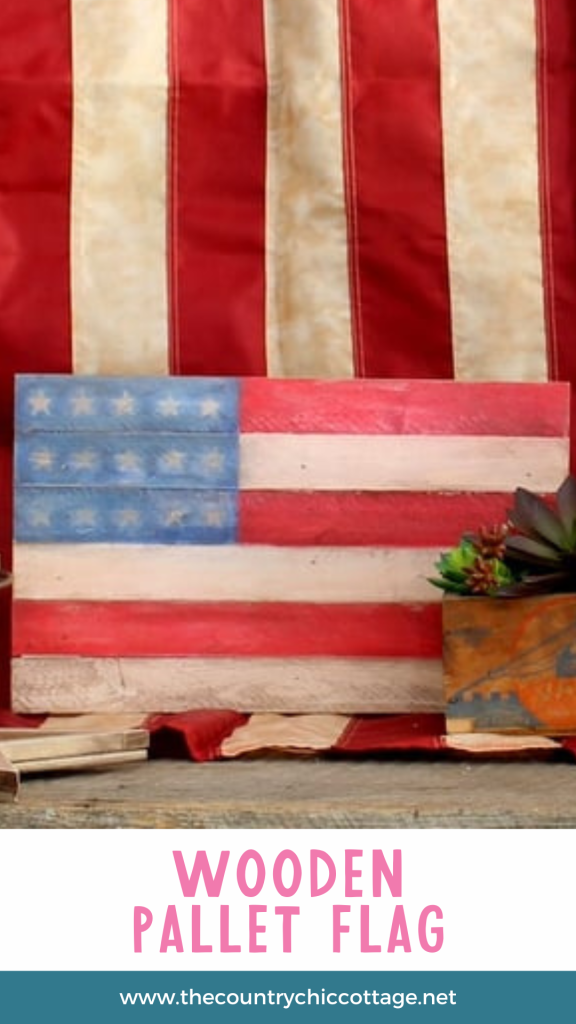
Have you seen those pallet flags that people display on their porches and in their yards? Today, I'm showing you how to easily make an American flag from a pallet for your own home!
I love creating and displaying patriotic colors during the summer! There's just something about the red, white, and blue that puts me in a festive summer mood, ready to enjoy the warm weather and spend time with friends and family.
Do you enjoy showing off your red, white, and blue all summer long? A pallet flag is a simple way to do that! If, like me, you don’t have a flagpole, this is the next best option. I’m excited to show you how to make one!
Make a wooden flag in just minutes with our step-by-step DIY tutorial below. Yes, you can have a cute pallet flag for your summer decor, both indoors and out!
I've even got a simple trick for making those stars quickly and easily without having to draw each one out individually.
Instructions to Make a Pallet Flag
Since you don't have to put together the actual pallet, making your American flag pallet won't take you very long. Simply follow these instructions, and you can complete it today!
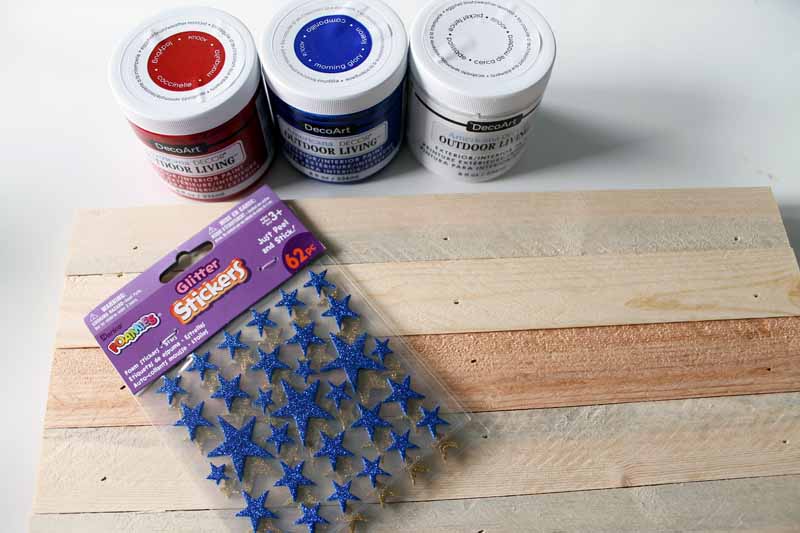
Supplies Needed
- Wood Pallet Sign (this is another option)
- Chalk Paint in red, white, and blue
- Foam Star Stickers or make your own (read on for more)
- Cricut machine
- Removable vinyl
- Paint Brushes
- Sand Paper
- Stain (optional)
- Ruler
- Pencil
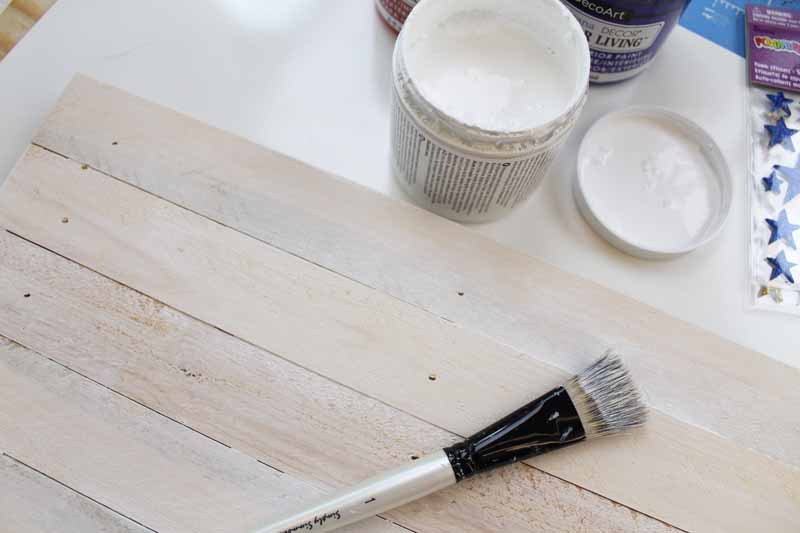
Step 1
Start by going over the entire surface with a coat of white paint. Or you can purchase a pallet plaque that is already whitewashed!
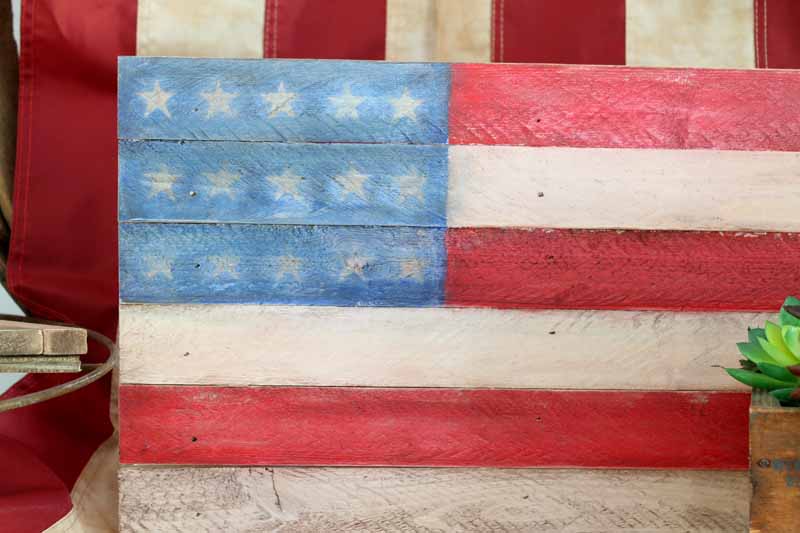
I am going for a really rustic look with my wooden flag, so I used a dry brush technique. To do this, simply apply a small amount of paint to your brush and move it rapidly across the surface. This will give a light coat with wood showing through in a few places.
Step 2
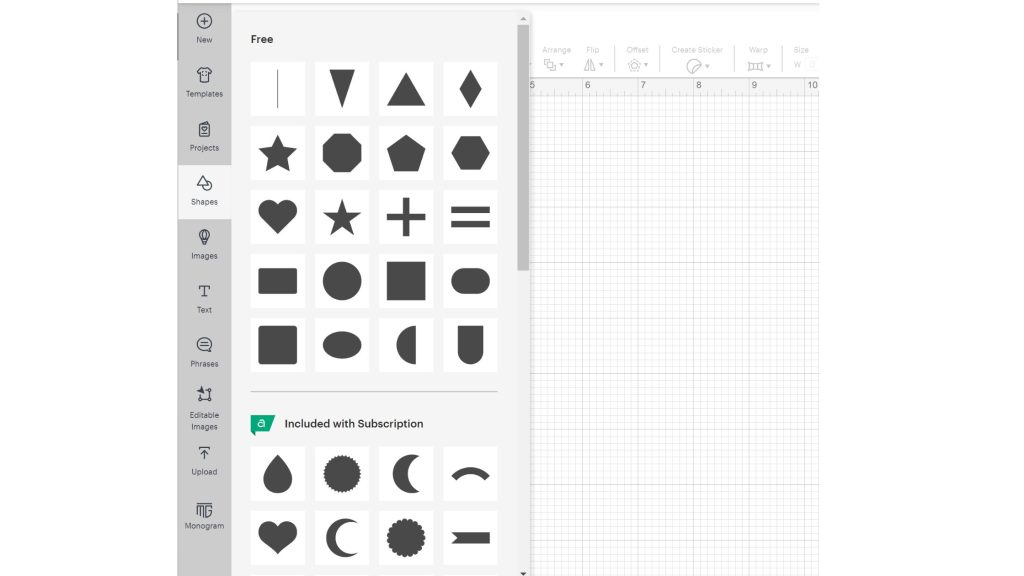
While the paint is drying, create your star stickers. Open up Cricut Design Space and get ready to cut your stars. On your canvas, there are a couple of free stars under “shapes”, or you can search for a different type of star in images. Size your stars and cut them out using removable vinyl or use pre-made star stickers.
Step 3
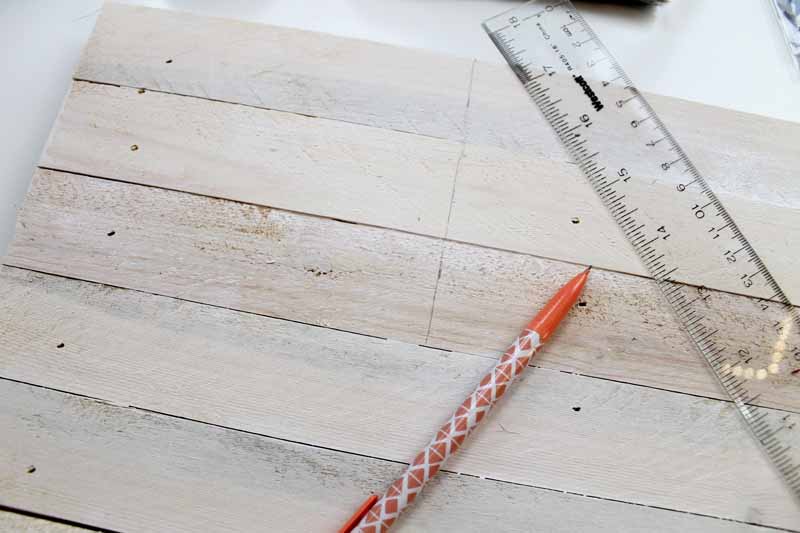
Use a ruler and a pencil to mark off an area for your stars.
Step 4
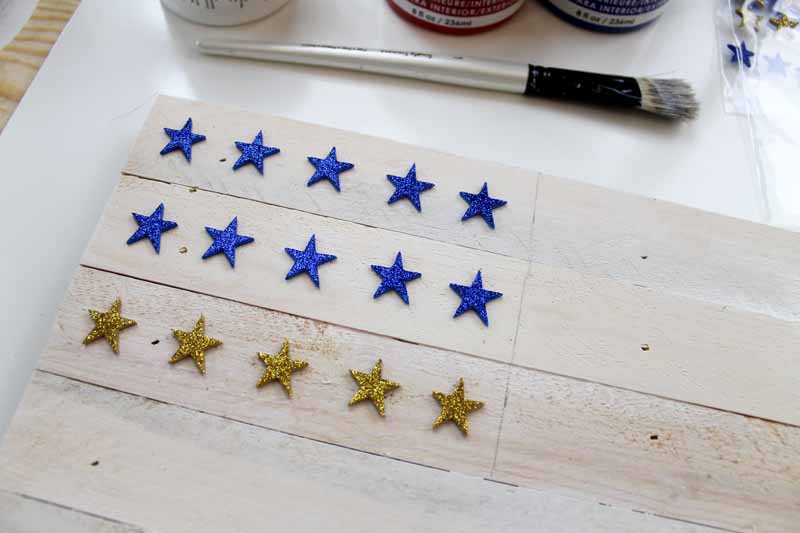
Add the star stickers or vinyl to this area as shown below. We will use these as a mask when painting.
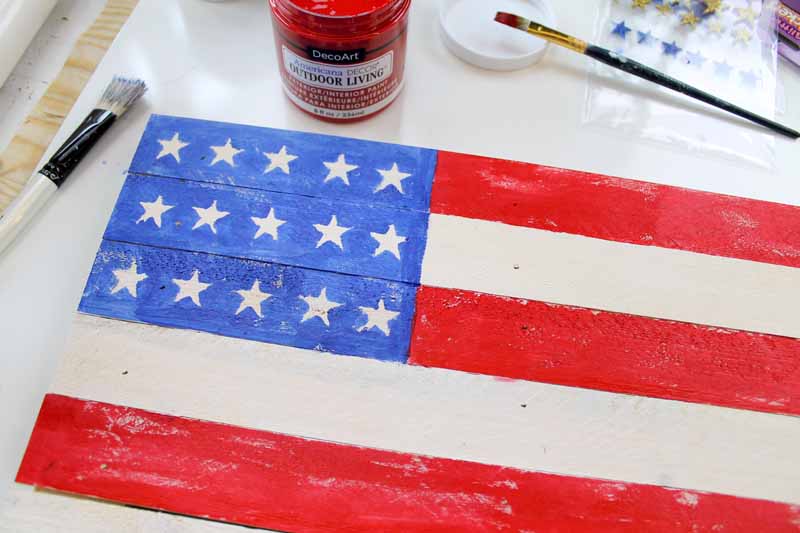
Step 5
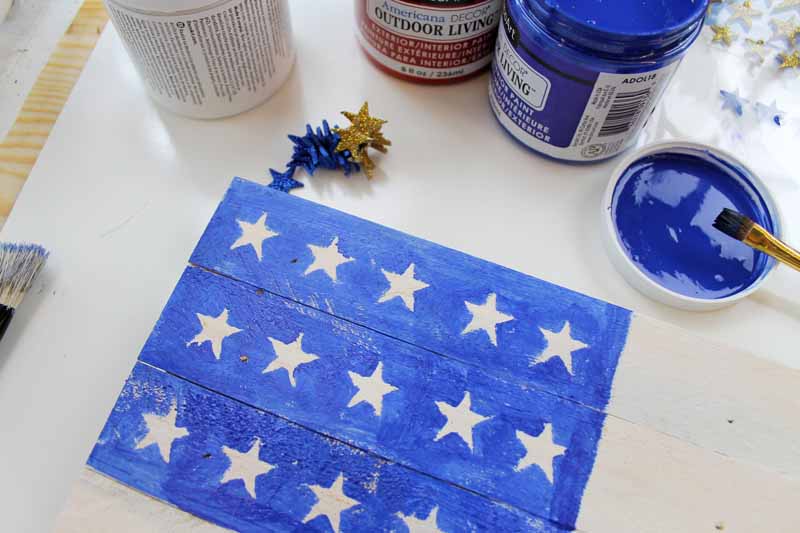
Then, use your blue chalk paint to cover the entire area and around the stars. Be cautious around the stars and use a light coat of paint so that you don't accidentally paint under the stars and ruin the star shape on the white background.

Step 6
Once the paint is dry, simply remove the stickers, and you'll have beautiful rustic stars on your wooden flag!
Step 7
Now it's time to create the red stripes! Use red paint to color every other board of the pallet flag. The boards provide nice, straight lines to follow for easy painting. (Please note that the specific pallet I used for this project is no longer available. Depending on your desired look, you may need to measure and divide your boards to create additional stripes.)
I used my dry brush technique again here to achieve that rustic look I was going for.
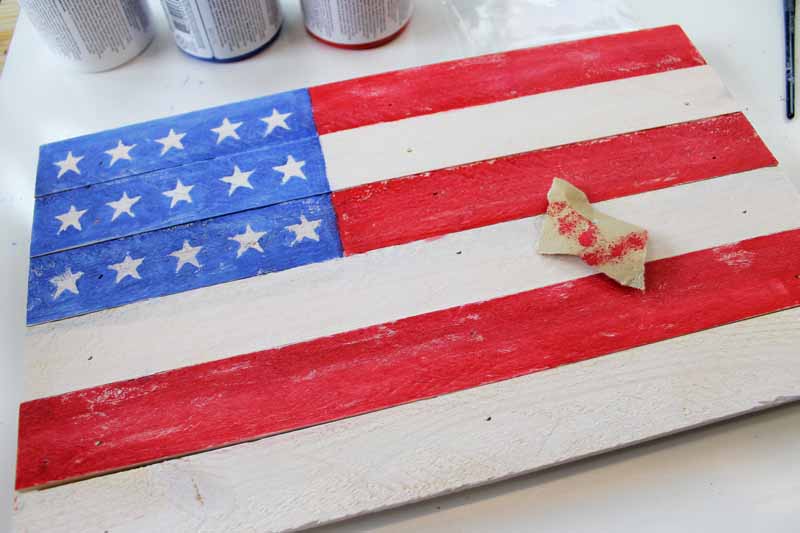
Step 8
Ensure that everything dries completely.
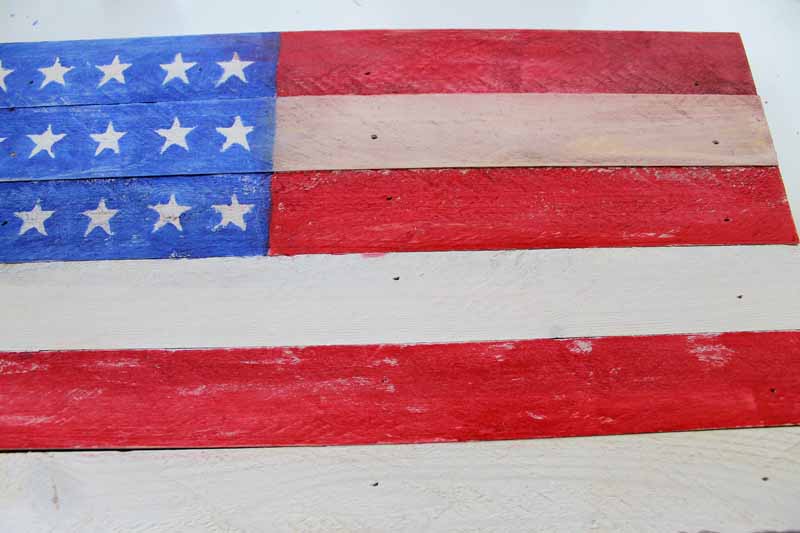
Once the paint is dry, you can use sandpaper to remove additional layers of paint and enhance the rustic appearance, if desired. However, if you're satisfied with the current look, you can simply stop here and display your wooden flag.
Easy peasy, right?
Pallet Flag Project Tips
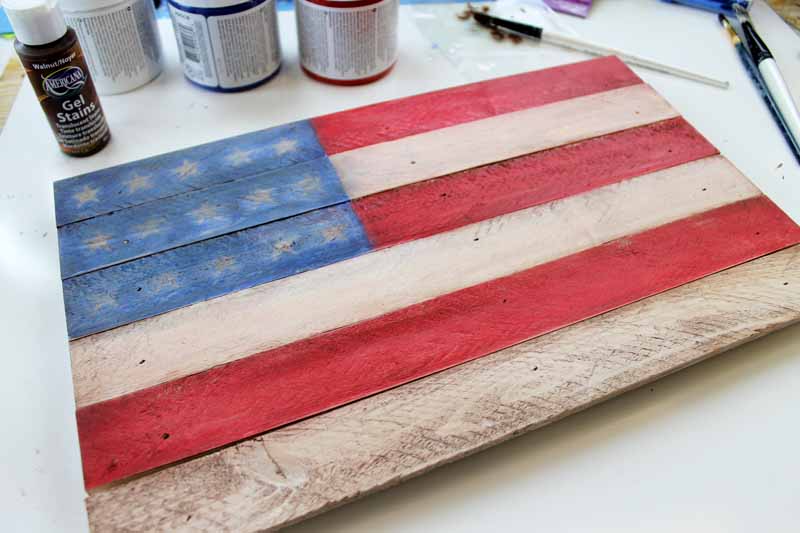
Want to add even more of a rustic look? Here's a fun tip!
Add a dark stain over the top of the painted wood. Apply paint to the stain, allow it to sit for a few seconds, then gently rub away the excess with a soft cloth. You can see in the image below what a difference this makes, as the top has been stained while the bottom is just painted.
Really gives it that rustic vibe, right?
I like the look, so I went over my entire surface with the stain to give the entire palette flag a rustic and worn appearance.
Then just allow your wooden flag to dry and add it to your summer decor.
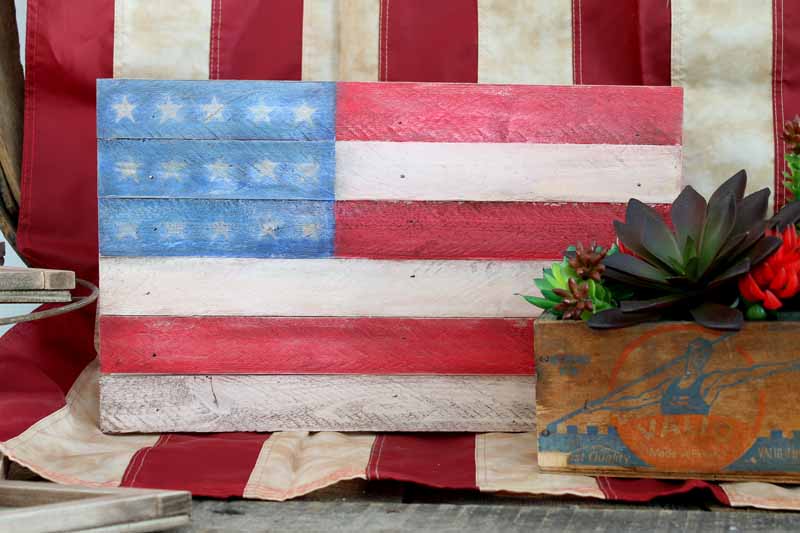
If you love rustic decor, this project is perfect for you! Just remember to pay attention to the sides of the project as well. Be sure to paint or stain them so that the flag looks consistent from all angles.
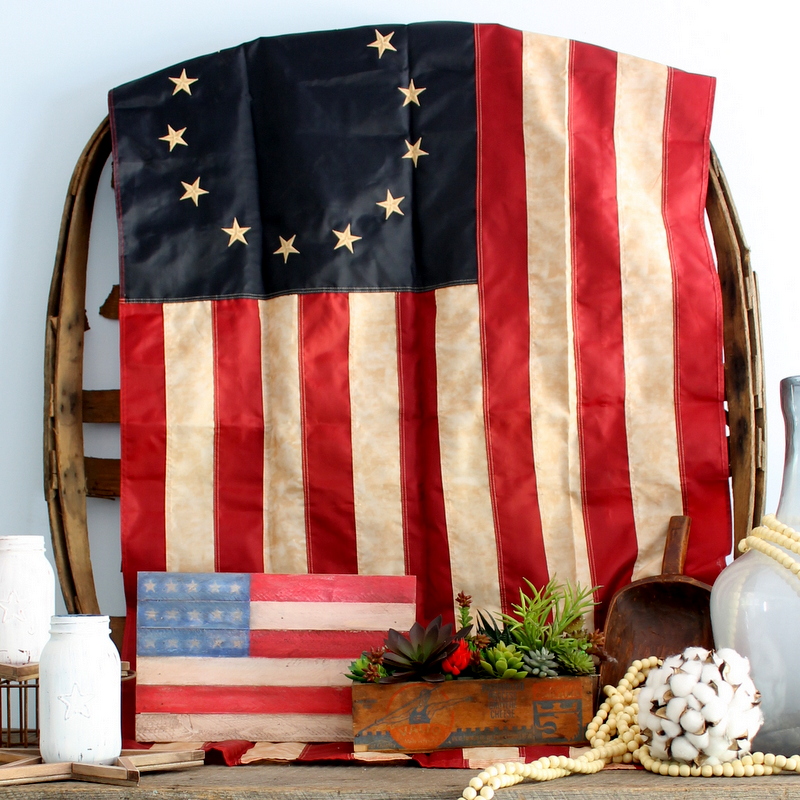
You can even add your wooden flag to your summer mantel! You can also make those patriotic mason jars. So, where will you add your wooden flag this summer?
More patriotic projects
Love this wooden pallet flag and want more ideas? Try these projects!


This pallet wood flag is awesome! I love your tutorial!
Love your flag. think just might make smaller one to put on shutter shelf for Memorial Day, July 4th, and Labor day. The bigger flag I made about 3 yrs. ago is still in great shape hanging on our front porch rails. It faces North is why it’s still in good shape, The sun here is so hot it cremates everything. Back of our house facesdue West, in Summer can’t touch door knob in afternoon,is so hot.
I used a stencil for the stars, got a flag to be sure to position them correctly. Took me about 4 days to make, wanted it to look realistic.
Love how you made your flag look rustic with the stain, think will make small one for holidays that way.
Havewonderful week Angie
Good luck Jane! Hope it works out!
I love the flag. I guess with all of the patriotic holidays we celebrate during the summer it is perfect.