
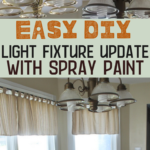
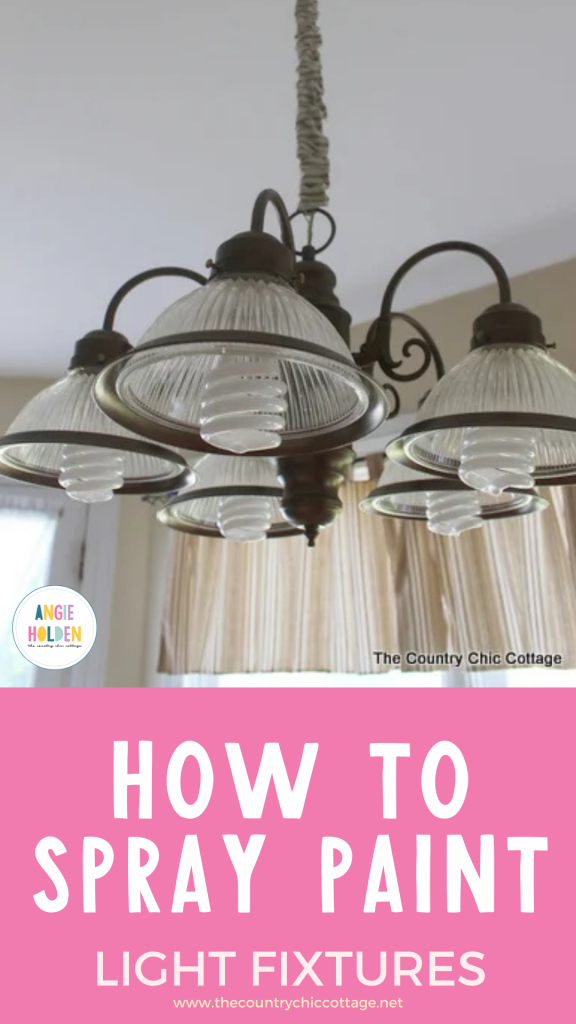
Are you ready to learn how to spray paint light fixtures? My kitchen light fixture needed to get out of the 80s y'all. So I broke out some spray paint and updated it over a long weekend.
Let's face it, light fixtures make a big statement in our rooms but they're the last things we update. Tell me I'm not alone here! The crazy part is once you learn how to update a light fixture and see just how inexpensive it is, you'll be hooked!
Can you spray paint brass light fixtures?
Yes!! I used this same spray painting method I'm sharing below on some fixtures in my bathroom over a year ago, so I know the method works! Plus it stays put and looks great for the long haul. First I headed to Walmart for my light bulbs and spray paint. Then on with my makeover!
How to Spray Paint Light Fixtures
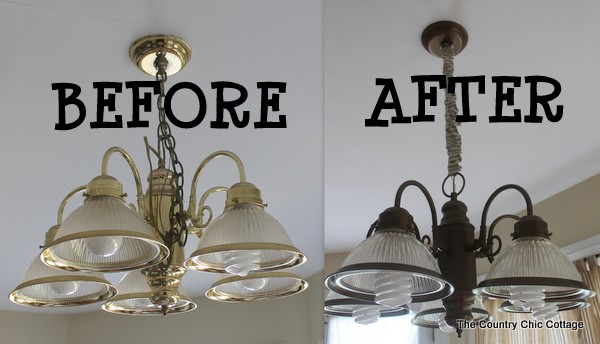
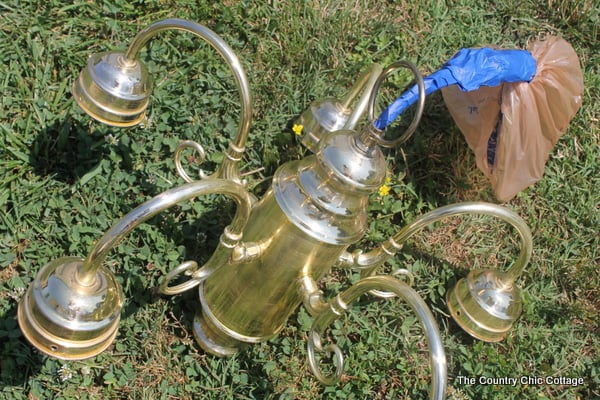
First, we took down the old fixture. Just for y'all, I am going to keep it real. It was NASTY! Ick…
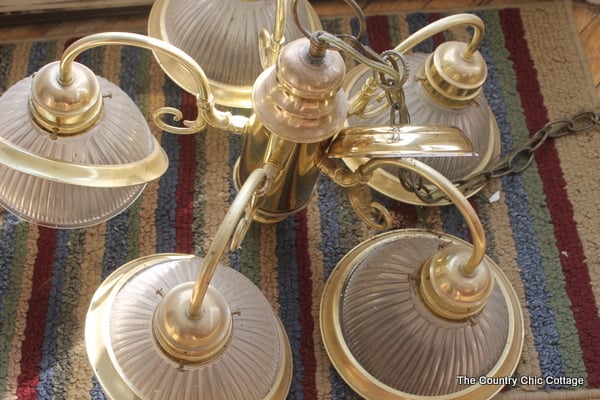
Next, you will need to dismantle your fixture and clean each piece really well.
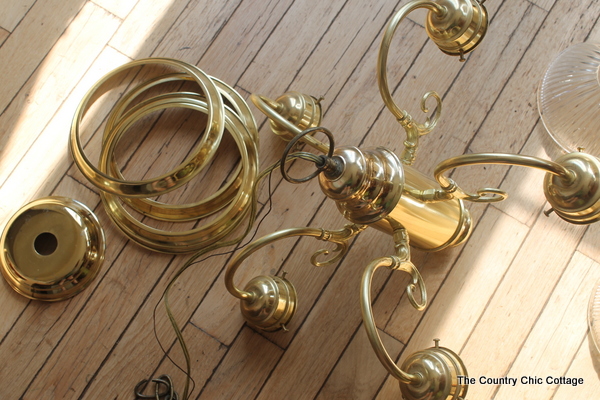
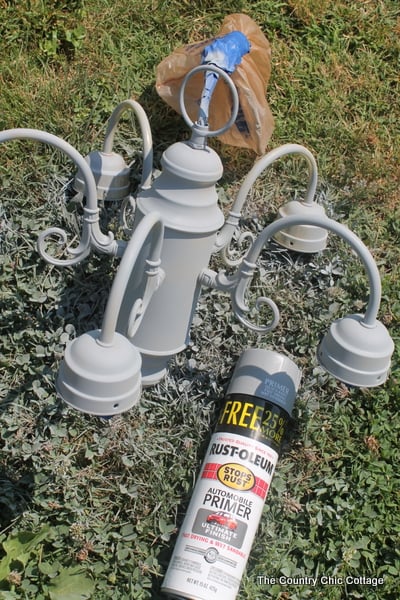
Now comes the fun part…okay it is the not so fun part but it is necessary. Sand each part very, very well. Then wash the entire fixture really well again.

When you are sick of sanding and washing, do it some more. That part is important so take your time. Then mask off any areas you do not want to be painted.
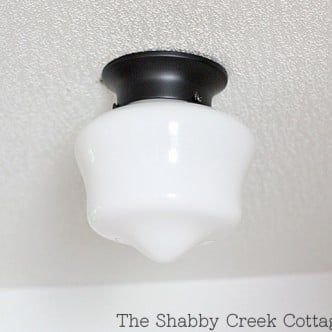
Begin by spraying the entire fixture with primer meant for metal. I recommend this product from Rustoleum.
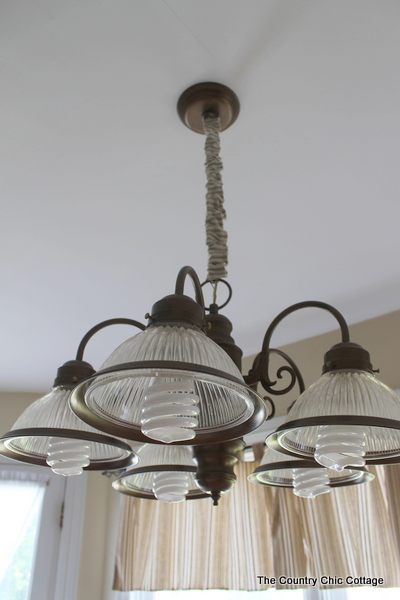
Then break out your final color. I went with antique brass by Rustoleum.
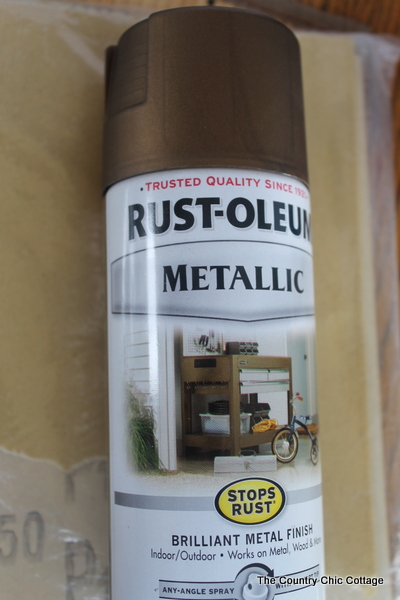
Spray your entire light fixture with at least two coats of spray paint. Then let it dry and cure as long as possible. Yes, it is dry to touch quickly but the paint has not fully cured and hardened. I would recommend at least overnight…longer if you can wait. Then hang it back up and ooooh and aaaaah over your great new finish.
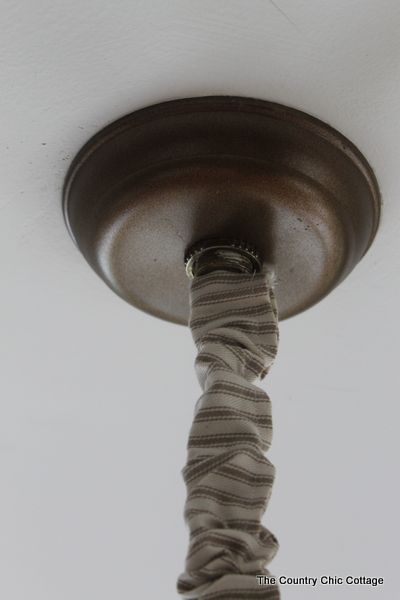
We shortened the chain and wire when hanging it back up. Then I made a chain cover. This is literally a scrap of fabric and some hot glue. No one is going to be climbing up there to critique your workmanship. Make it easy and simple.
What kind of paint do you use on a light fixture?
I love the ease of spray paint, not to mention it is fairly inexpensive. Rustoleum has some amazing different colors and textures that look great on light fixtures. If you're not comfortable spray painting your light fixtures you can also use chalk paint or even acrylic paint if that's all you have on hand!
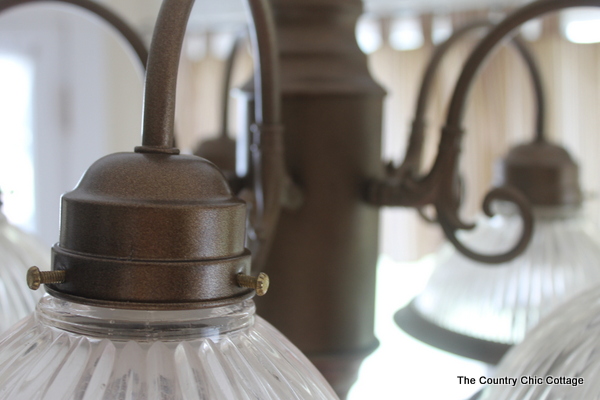
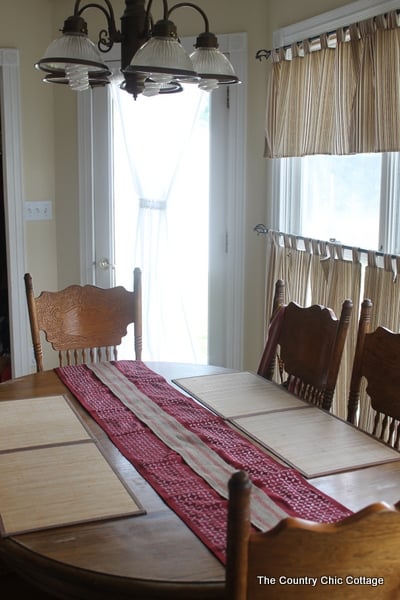
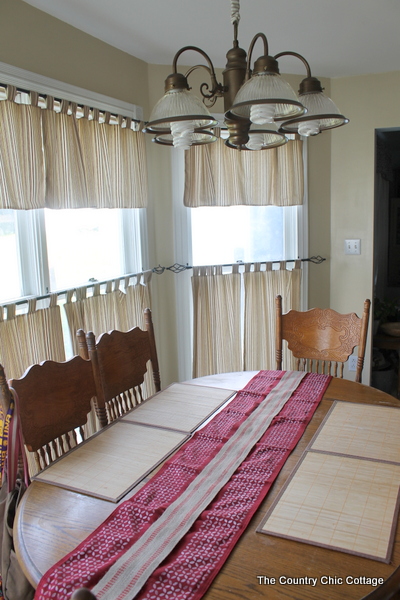
The changes in our kitchen are amazing. Just with a few lighting changes, it looks like a completely different room. Love that table runner? Click here to see how to make your own.
I love that darker splash on the ceiling. Perfect for our home. I wish I had a couple of weeks to change up every fixture in our home. For now, it will be baby steps.
Don't be afraid! You can do this! Just follow these step by step instructions on how to spray paint your light fixtures!
I am off to enjoy my new light fixture! Yes, I have so many more in my home to do. But I can do this!! Y'all be sure to bookmark this tutorial on how to spray paint your light fixtures! You will use it over and over again!
Love this tutorial on how to spray paint a light fixture and want more ideas? Try the links below as well!


I have been looking for just the right color spray paint for my fall wedding centerpiece lanterns and I think this is it! Thank you so so so so much. You did such a great job.
We have the exact same fixture AND the exact table and chairs! Must be a sign that I need to do this project 🙂
We have the same light fixture AND the same table and chairs! Must be a sign for me to do this project, nice work!
We have lights very similar, but ours are (scratch that) were white. I wonder if we’d have to do the sandpaper and primer? What do you think? I’d like for both of our fixtures in the kitchen to match and this would be a a great way to accomplish this! Found you via Pinterest. Glad you posted this!
I did the same thing to the same lamp but in flat black. So much better, right??? Try removing those rings from the glass. – its a huge change 🙂
Great job, the room looks great. I just did two of these that I found at thrift stores. I did one in brushed nickel and one in oil rubbed bronze. I used Rustoleum Metellic primer and paint in one. Great stuff.
I really like your style and creative nature. Have you thought about replacing your kitchen light shades with large canning jars? It seems like it would “go” with your style and be a little more farmhouse chic than the old 80s glass. It might contrast the new paint well too. I did a similar project with my pendant lights in my kitchen that were a bit plain. The jars are really creative. People comment on them often. It’s is so easy. It took me about 30 minutes to make two, including gathering supplies, and I messed up once. You just need large canning jars, screw lids, and the metal lid insert. Measure your hole for your light. Cut the hole with metal snips and replace the old shade with your new one. I didn’t put holes for heat and they’ve been up for over a year. No issues. You can poke a few holes in the metal, if you are worried. I do use small, round bulbs or edison bulbs work too. This project was free to me as I can and we have a lot of tools, but shouldn’t cost much if you shop around for the jars (maybe craigslist, yard sales). The lids are very inexpensive.
Sorry, just thought another option might be to remove the shades all together and replace it with edison bulbs. It would look “industrial chic”.
Change the bulbs!!
Why do you need to sand and what kind of sandpaper?
Sanding roughs up the surface and gives the paint something to grip to. I would do a fine grit sandpaper.
I wish to paint the chain, cord and canopy base a hanging chandelier because I don’t like the dated silver…..anyone tried it?