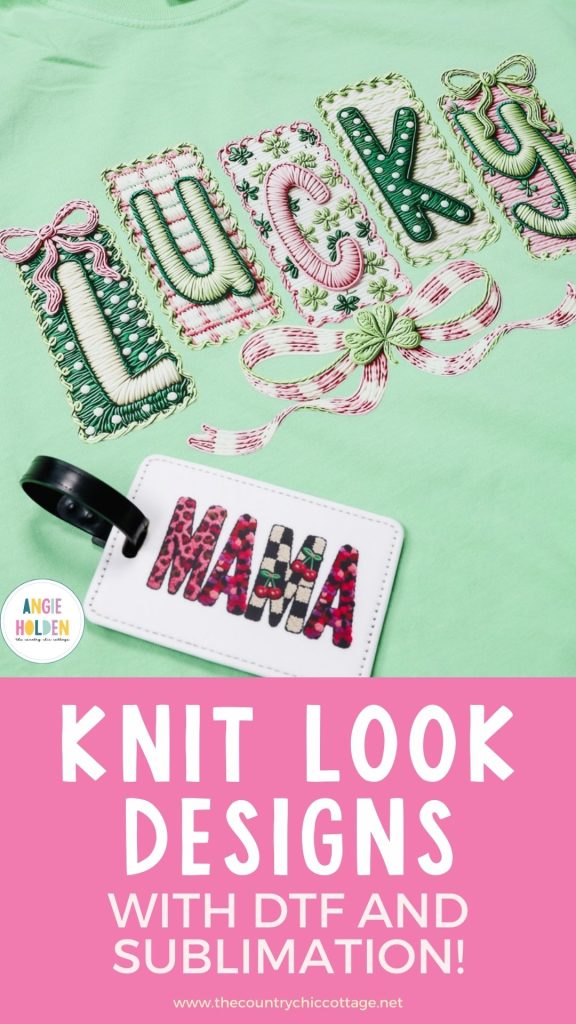
I am obsessed with all the knit projects that are popping up everywhere, and I'm going to show you how to get a knit look quickly and easily using DTF and sublimation.
To help you decide if these designs are for you, I'm going to test them on soft and hard blanks using both DTF prints and sublimation.
Want to learn more about DTF printing? My DTF Printing Beginner's Guide is a great place to start.
If you love the look of embroidery, knitting, punch needle, cross stitching, etc., you're going to love how easy it is to get the knit look using sublimation and DTF prints.
You can watch me make all these projects by clicking play on the video below.
Where to Find Knit Look Designs
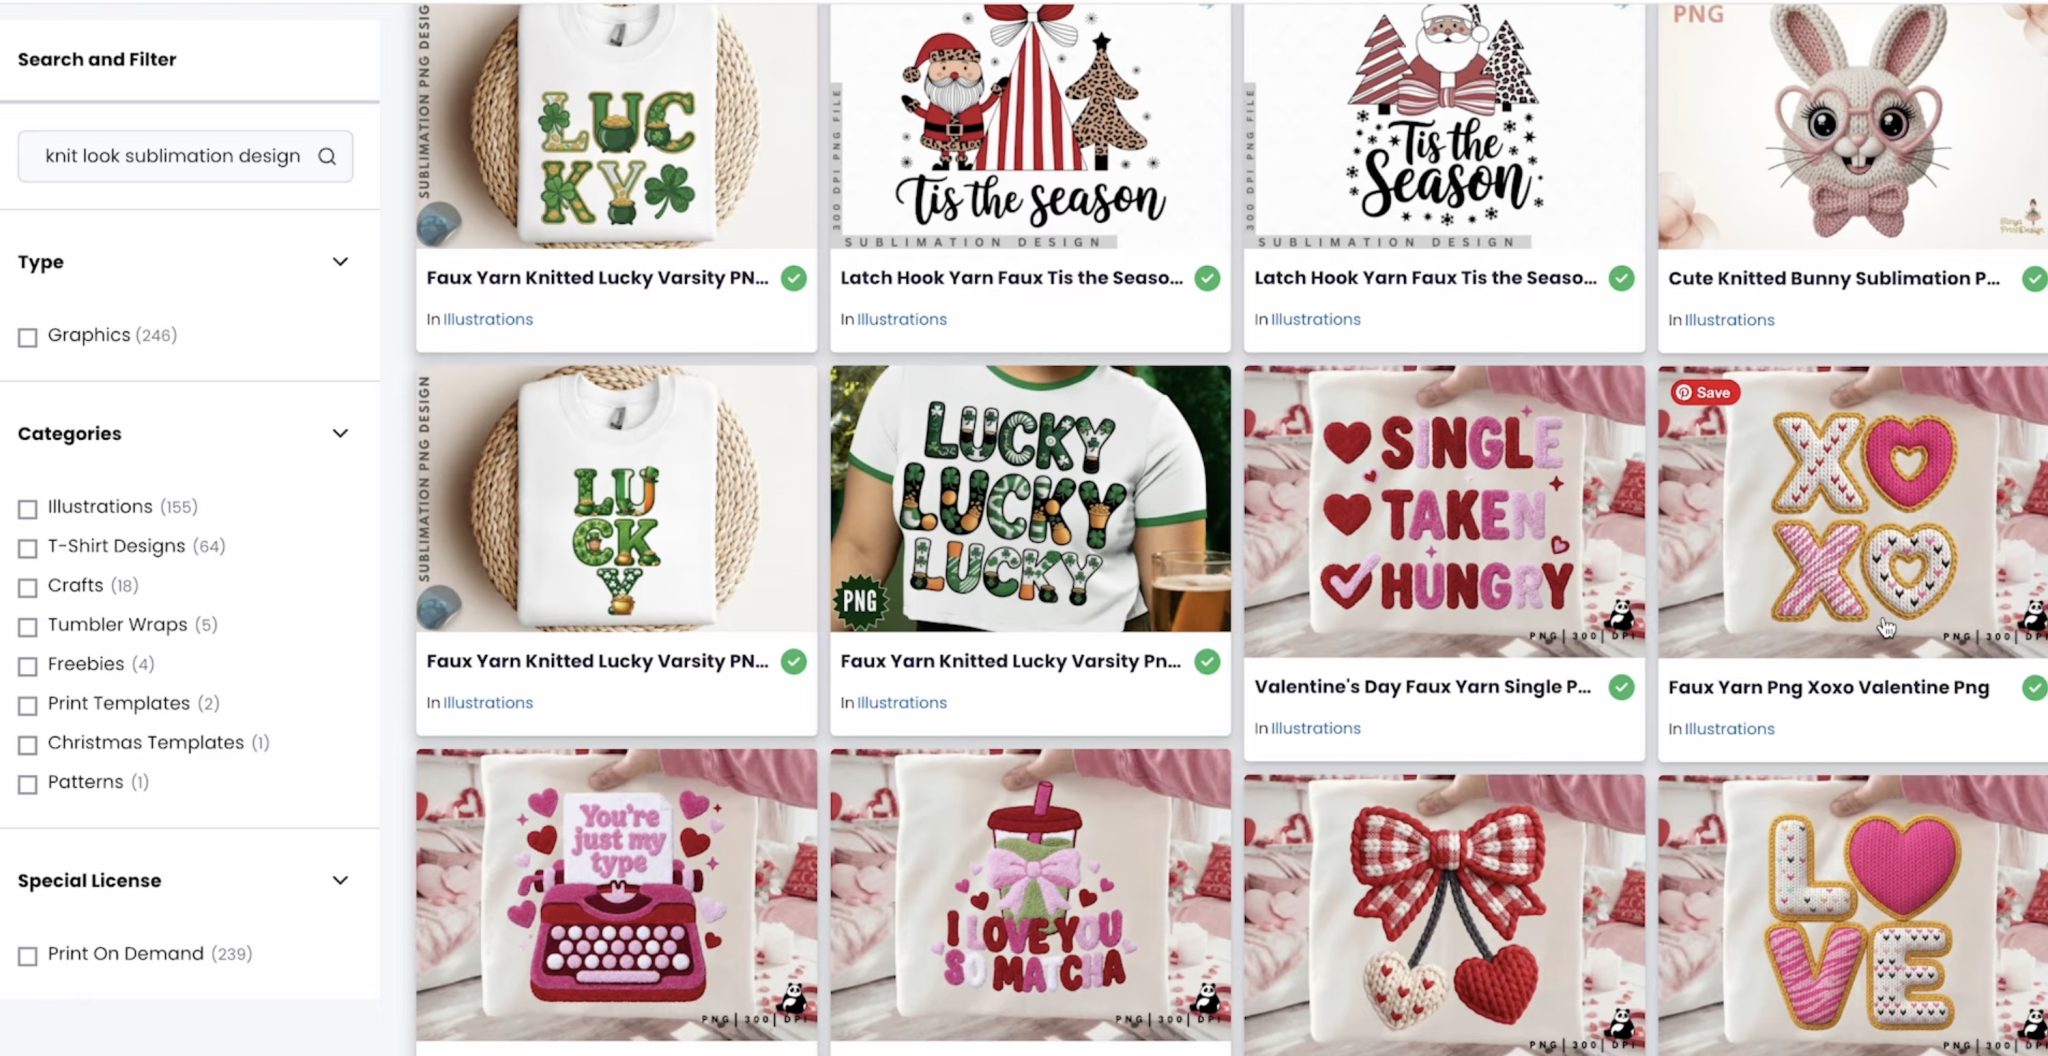
You can find designs like these on different design sites. I am using Creative Fabrica to find my designs. You can use these same search prompts on whatever site you prefer.
I did try using a few different free programs to see if I could turn other designs into knit-looking designs, and I did not have any success. The designs looked really rough and were not what I'd want to put on anything.
When you're searching for designs, you can use a variety of different keywords.
Keywords I've used:
- Sublimation Designs Yarn
- Crochet Knit Sublimation Designs
- Embroidery Designs
- Knit Look Sublimation Designs
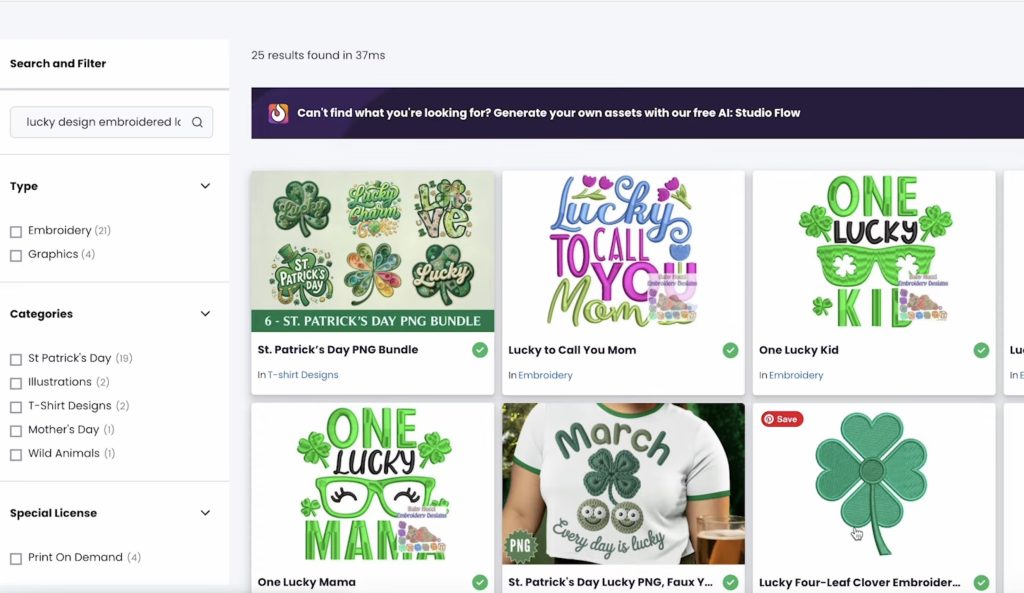
- Lucky Design Embroidered Look
- Faux Yarn Lucky Design
Double Check File Types
When I used the term Embroidered Look, it brought up a lot of actual embroidery designs that you'd use with an embroidery machine.
You can't use those designs for these projects. If you use the words Embroidered or Embroidery, make sure to check the file type.
I had the most success finding designs I liked by trying different combinations of the words.
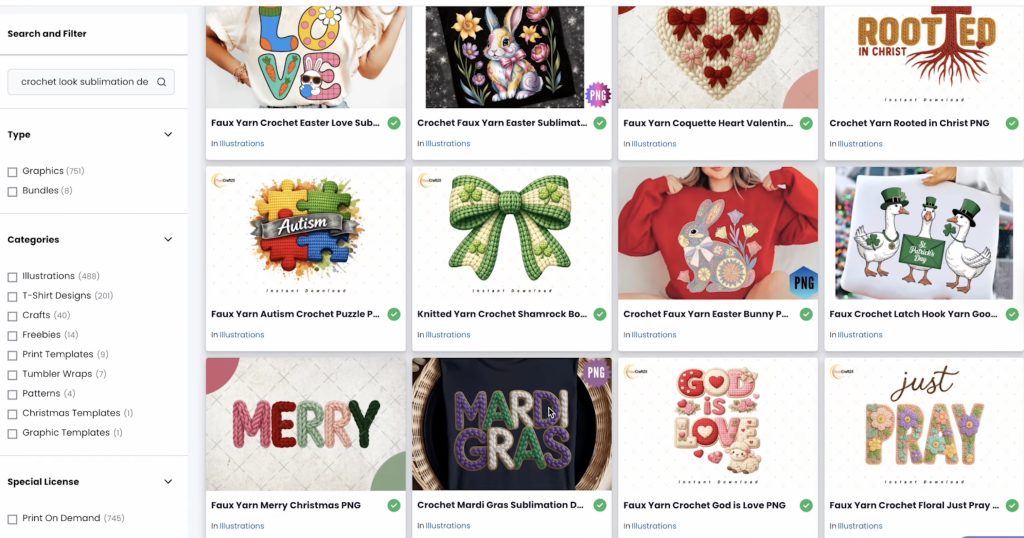
Here are some designs that came up when I searched Crochet Look Sublimation Designs.
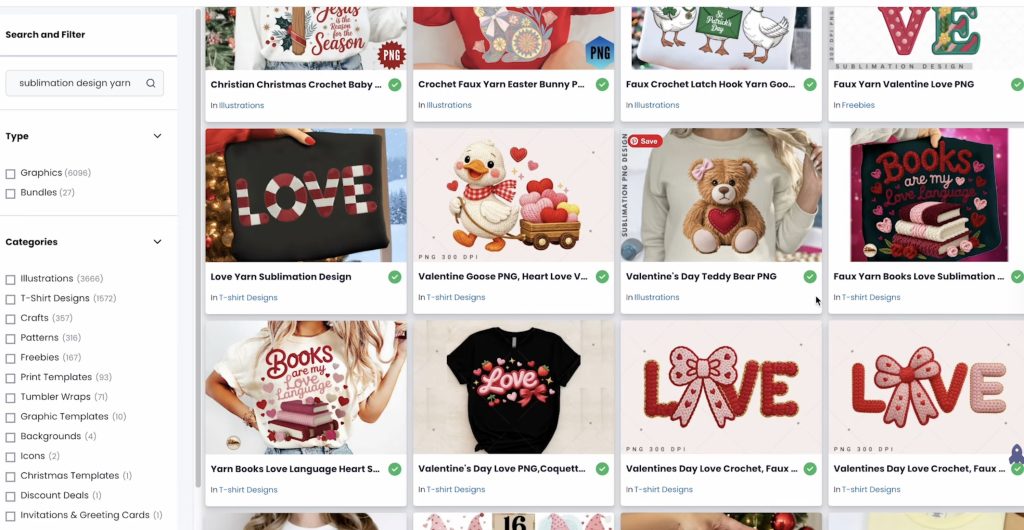
These are the types of designs that came up with the Sublimation Design Yarn keywords.
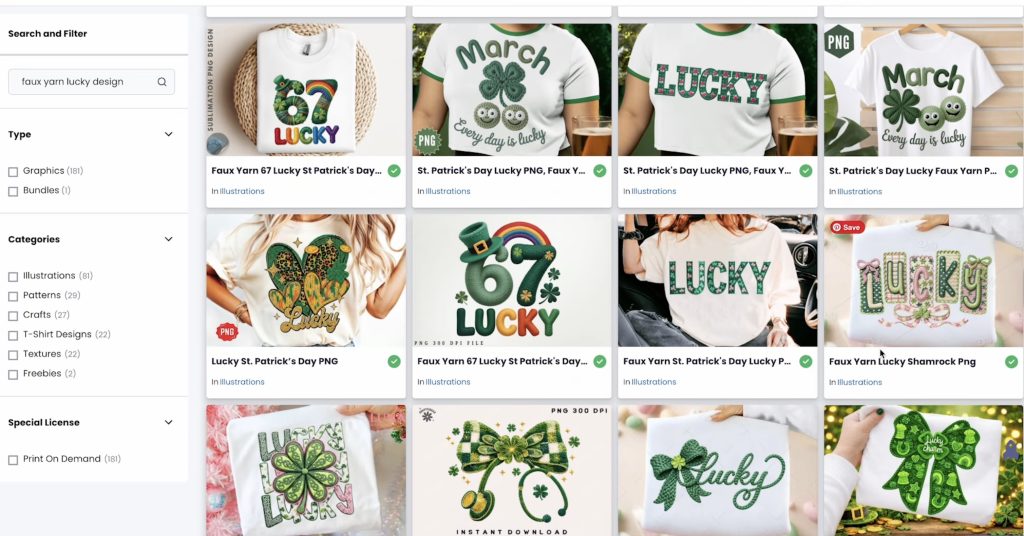
I had the most luck finding designs I liked when I added the word Faux before my search.
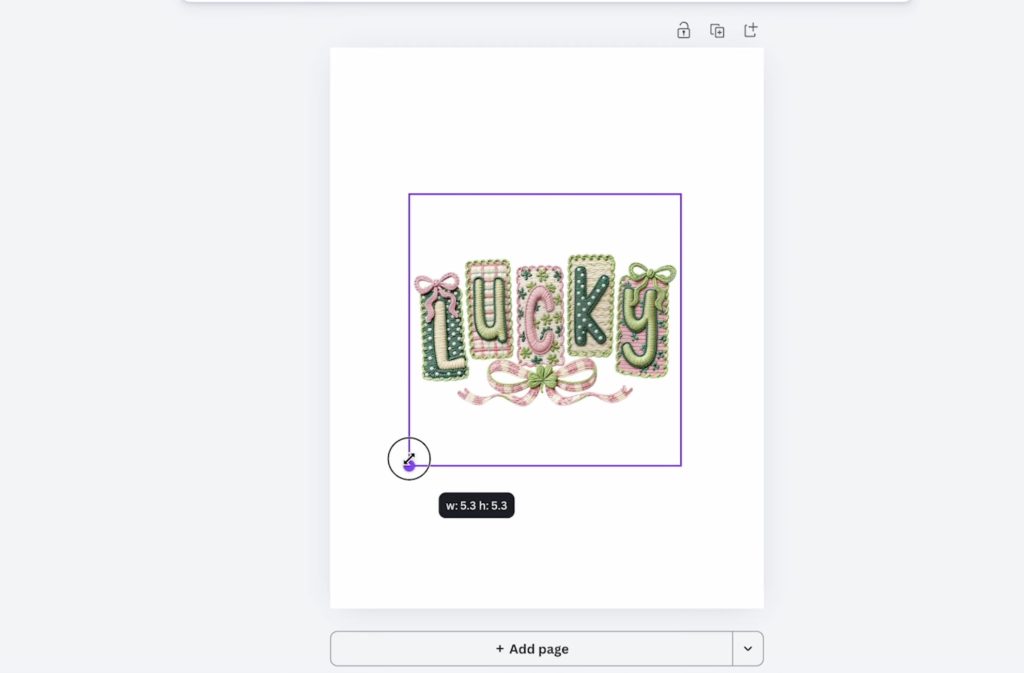
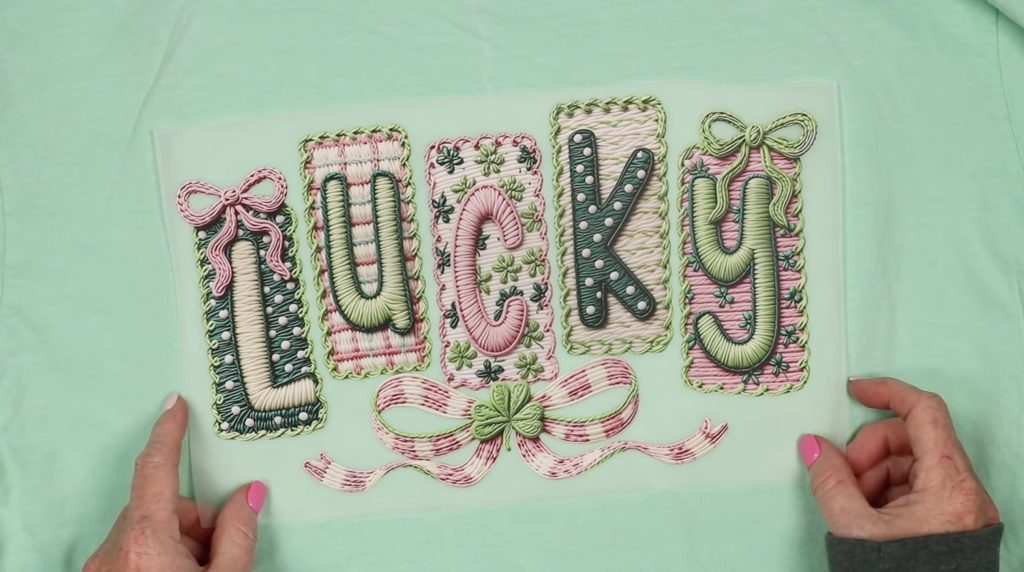
These designs came up with the Faux Yarn Lucky Design search, and I love the Faux Yarn Lucky Shamrock PNG design. I'll be using that design today.
When choosing a file for sublimation and DTF projects, you need an image file. Look for designs that say PNG, or click into the design and make sure at least one of the file types is a PNG.
Repeat the search process for any additional designs and download them all to your device.
How to Make Projects with Knit Look Designs
I am going to print each design as a DTF print and a sublimation print then make a few projects!
How to Order DTF Prints
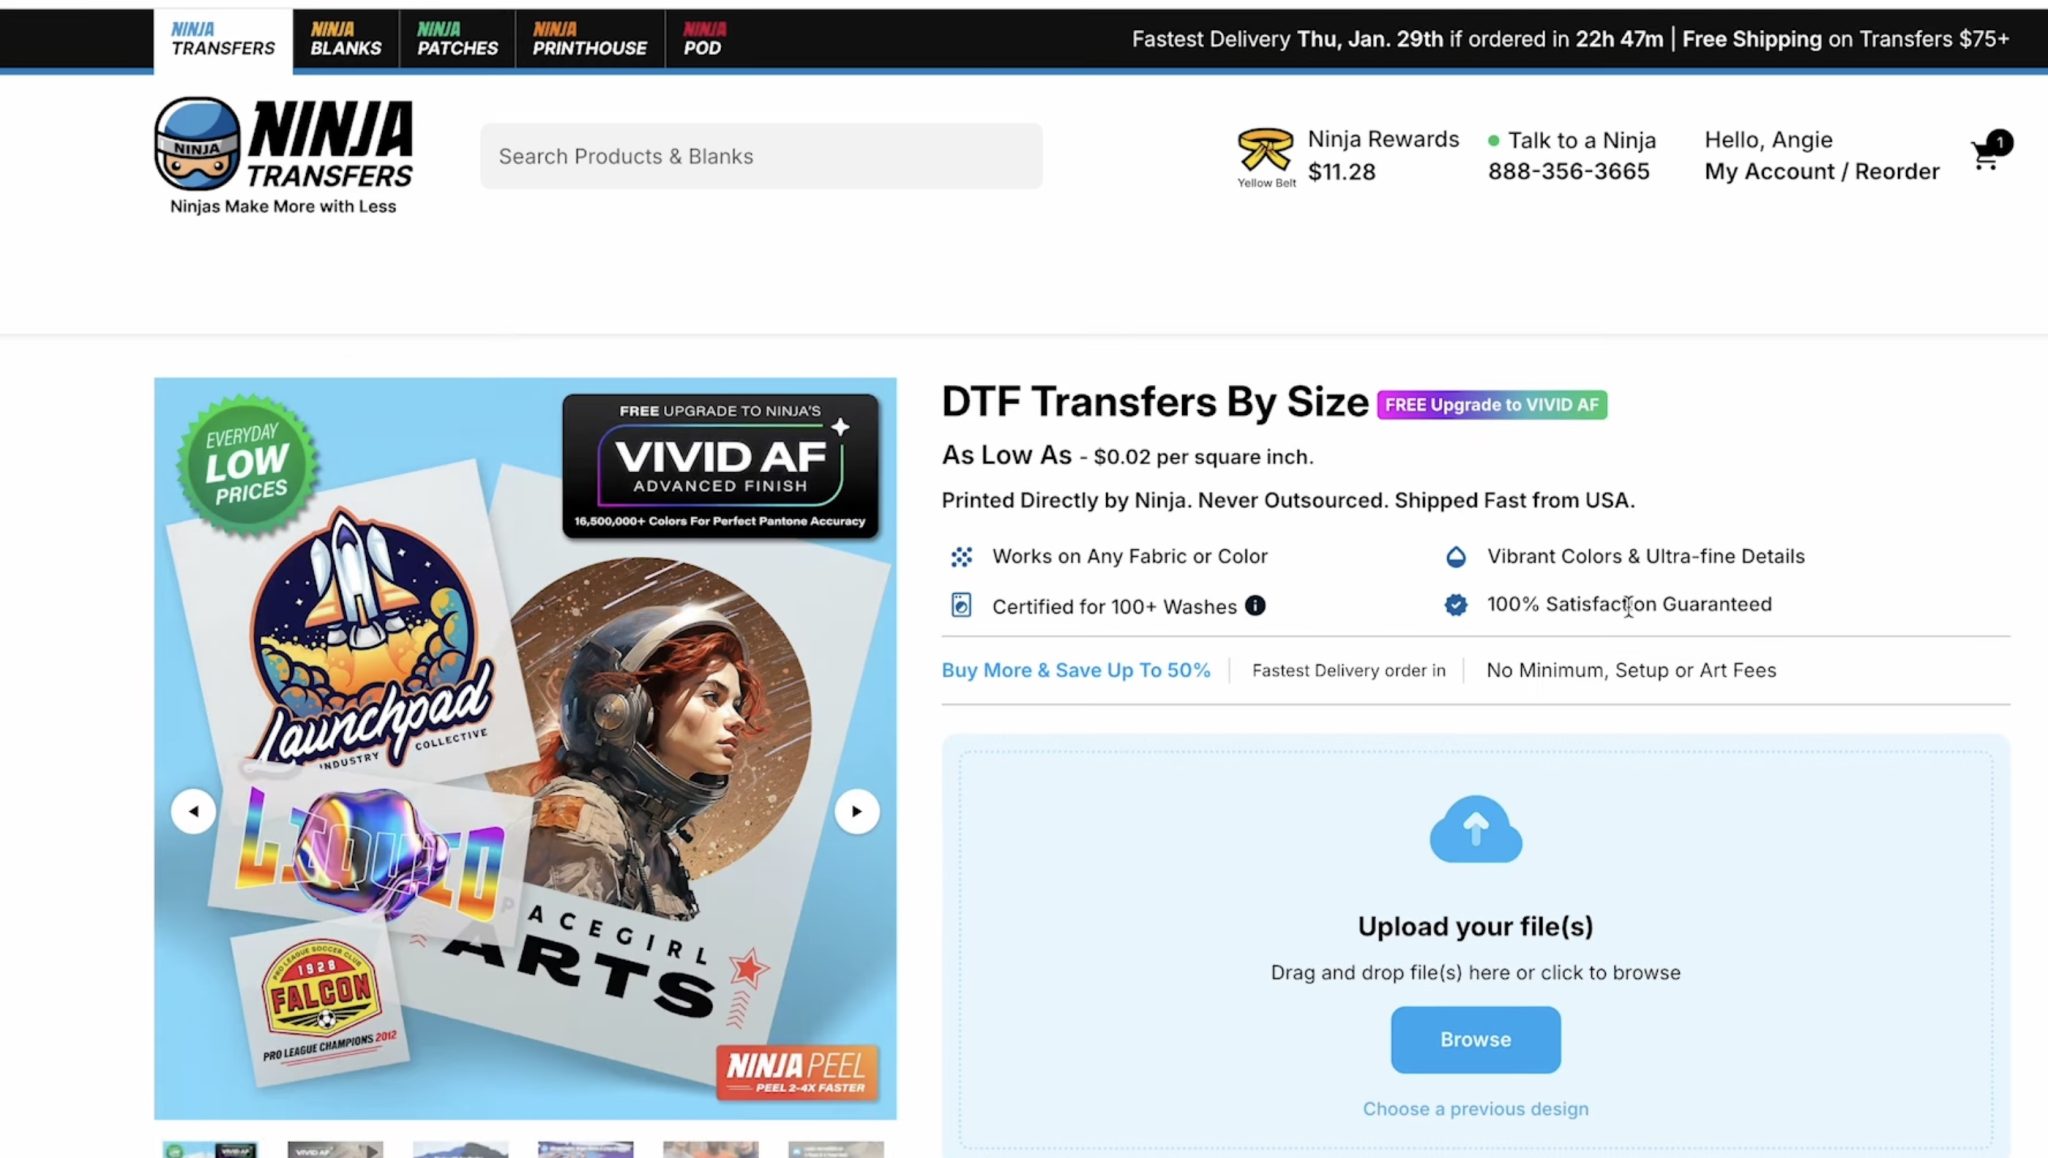
I am using Ninja DTF to order my DTF prints, and this time I am going to order the transfers by size vs a gang sheet.
Click on Ninja Transfers and then choose DTF Transfers By Size.
Upload the files and select how many designs you want to order.
As you can see, the more of each design you order the price goes down.
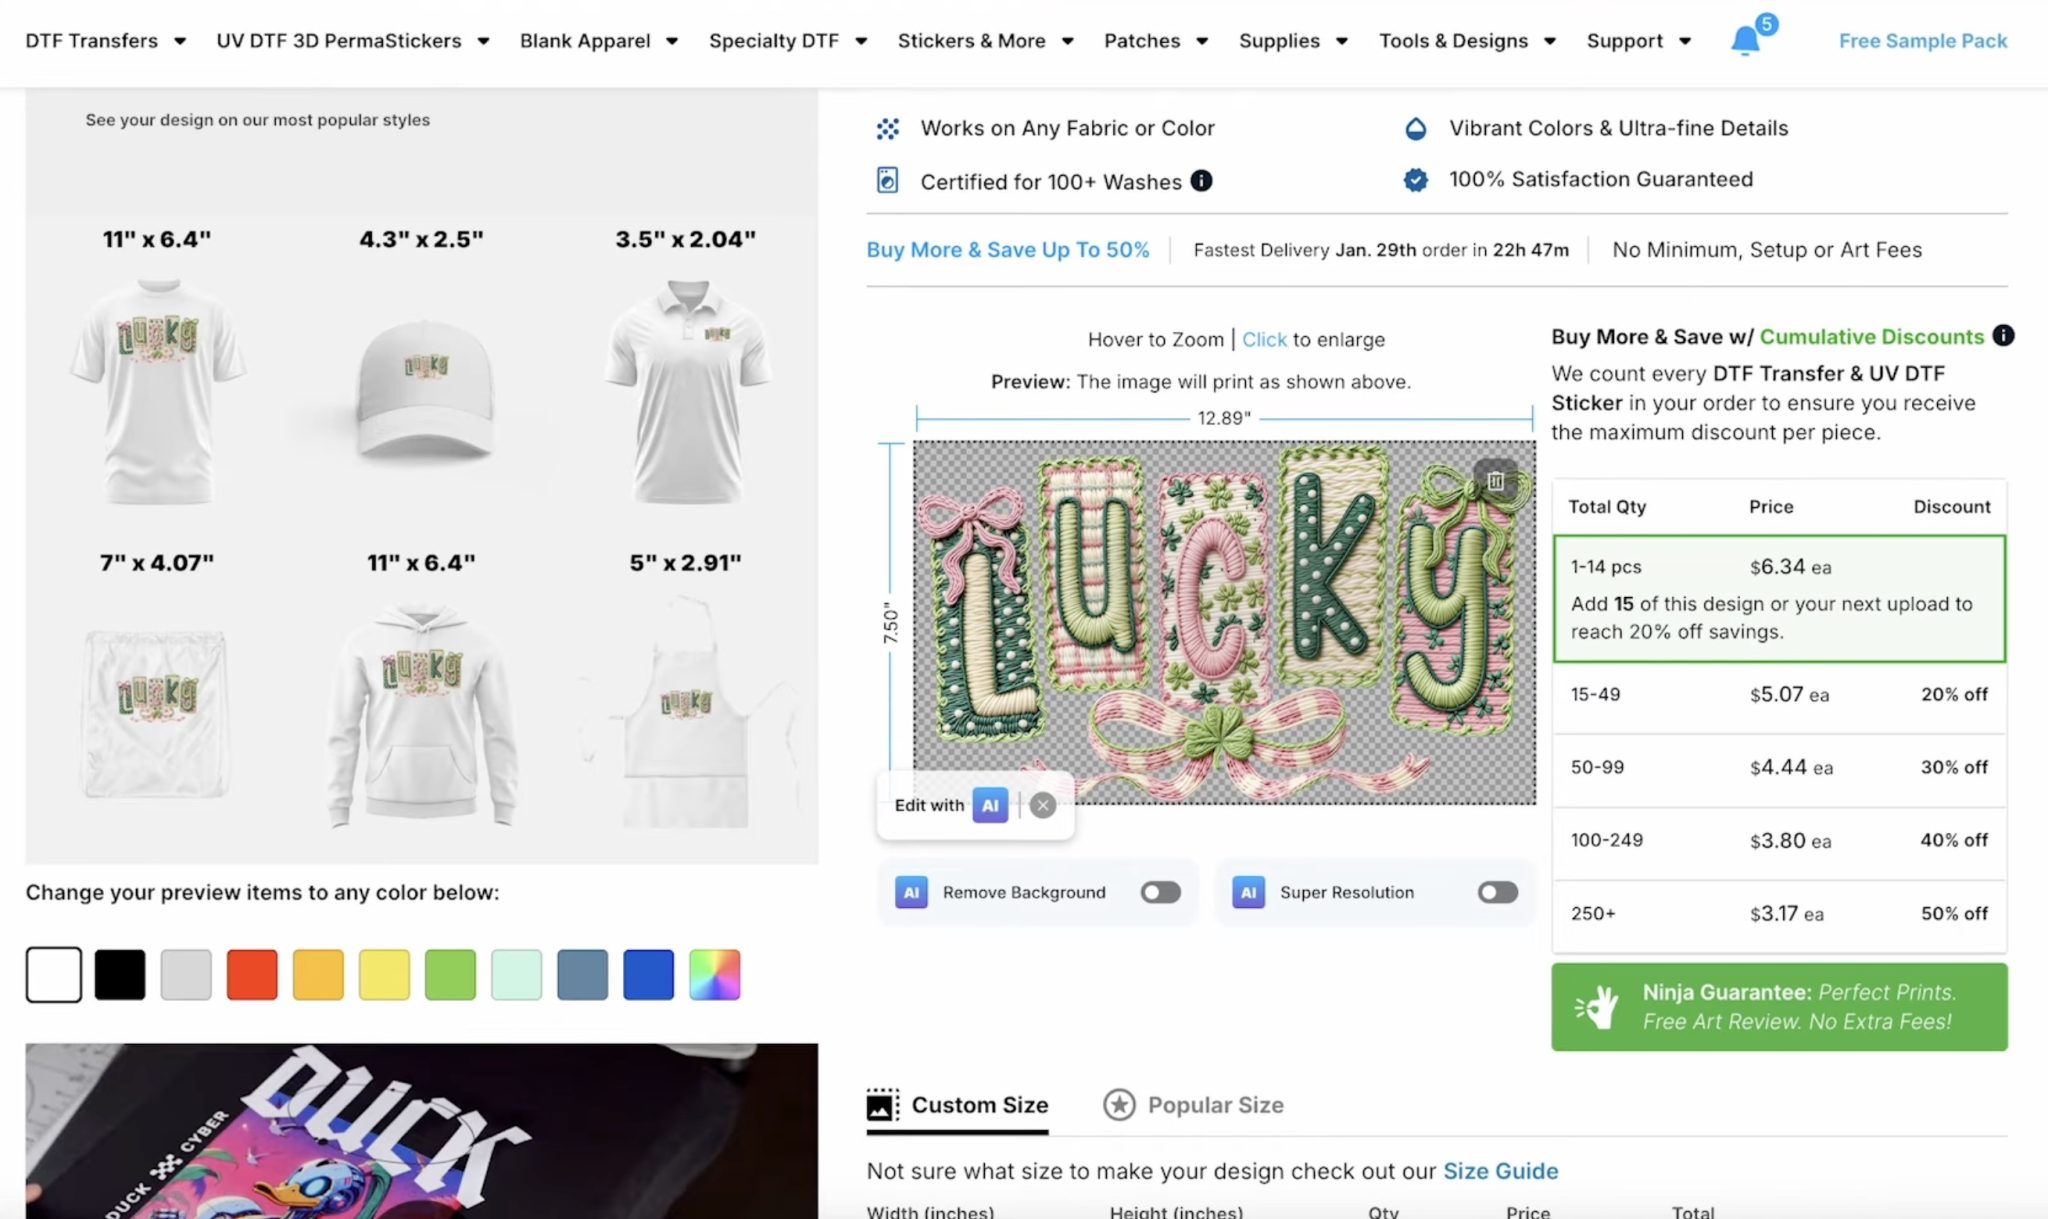
Scroll down and select the size you want. You can select between Popular Sizes or enter a Custom Size.
I am setting the width to 11 inches, and the height will be automatically resized to the right size.
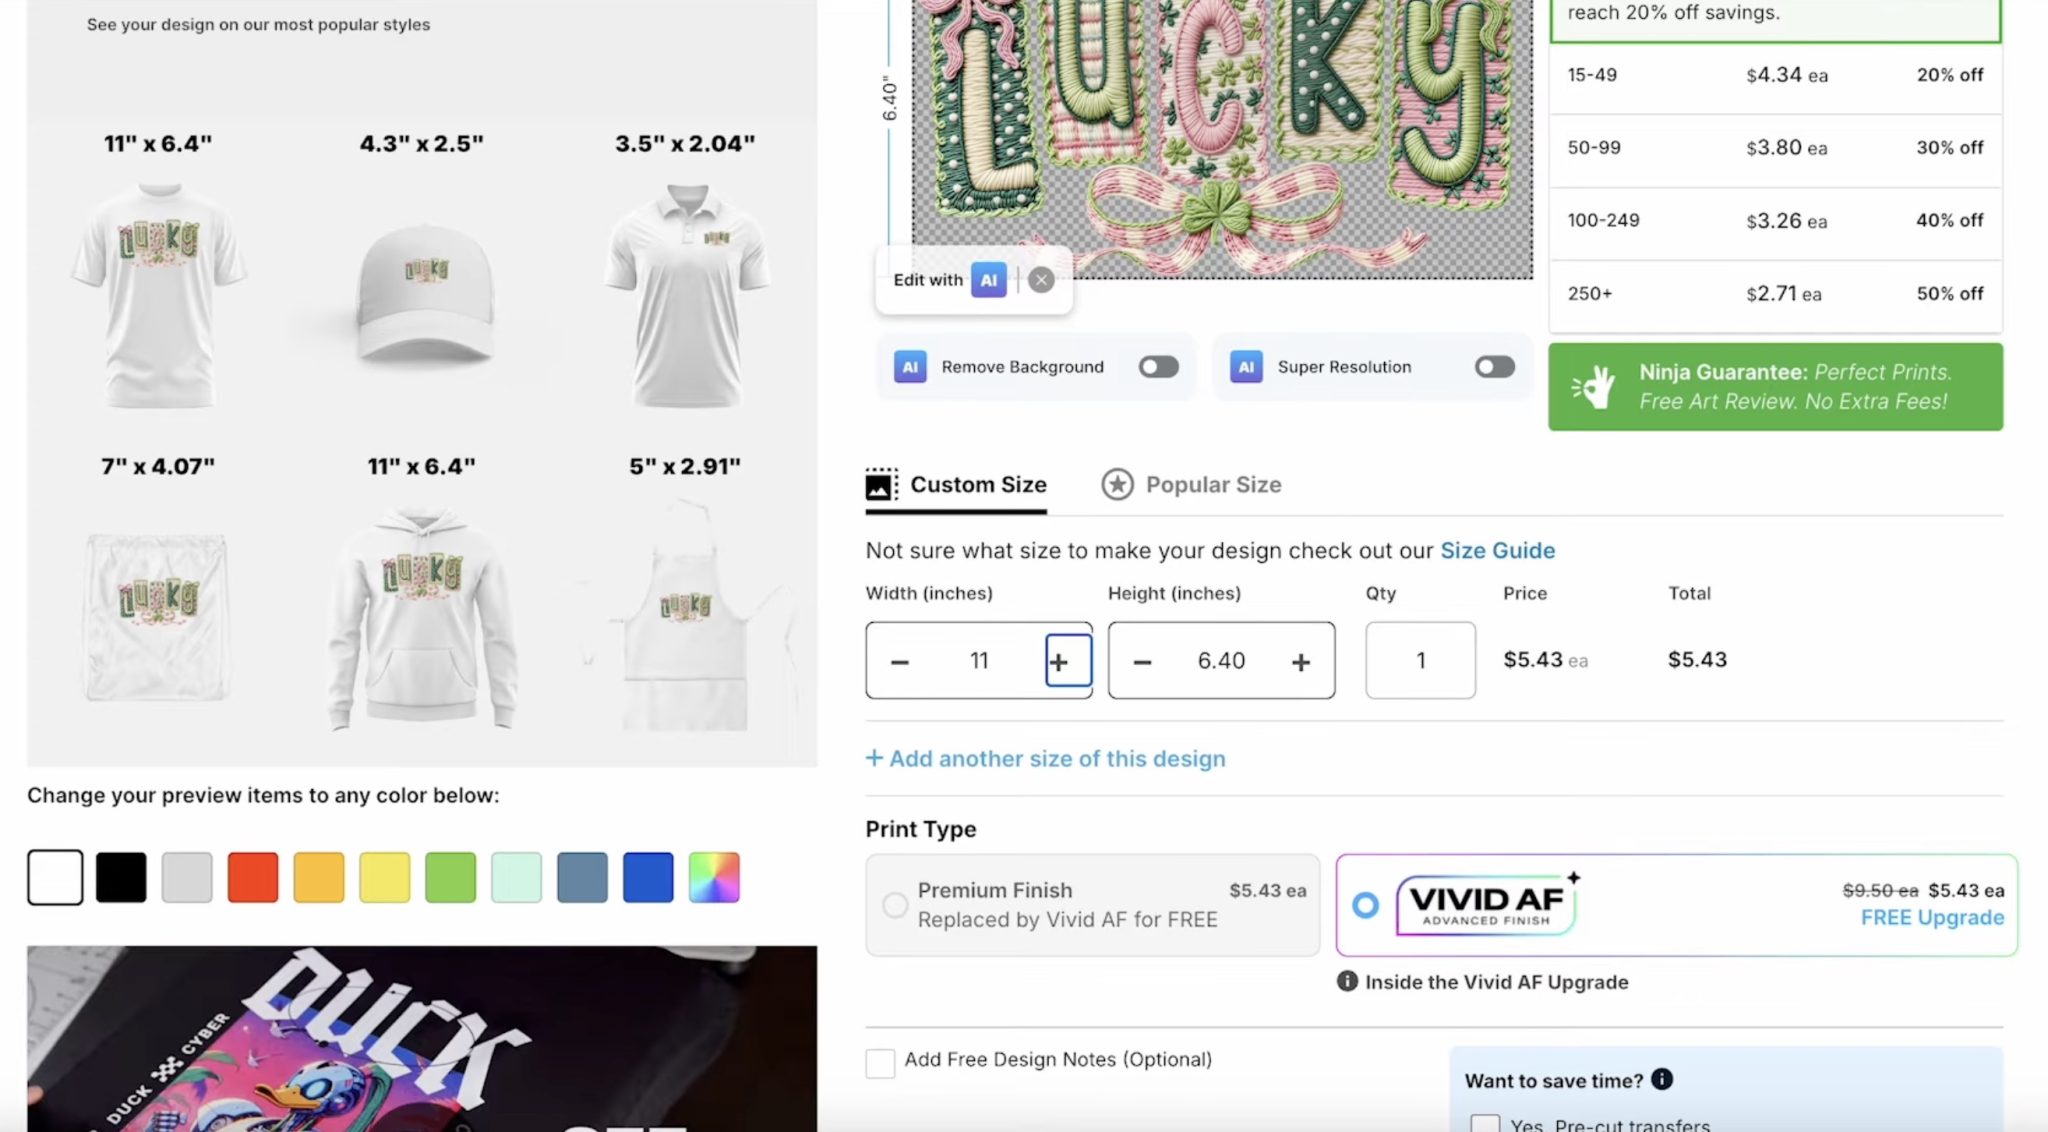
Go through the process to complete the order, and your prints should arrive within a few days.
How to Print Sublimation Designs
I am using Canva to create my sublimation prints.
Choose Create a Design and then Custom Size. I am sizing my design to 8.5 by 11, which is the same size as my sublimation paper.
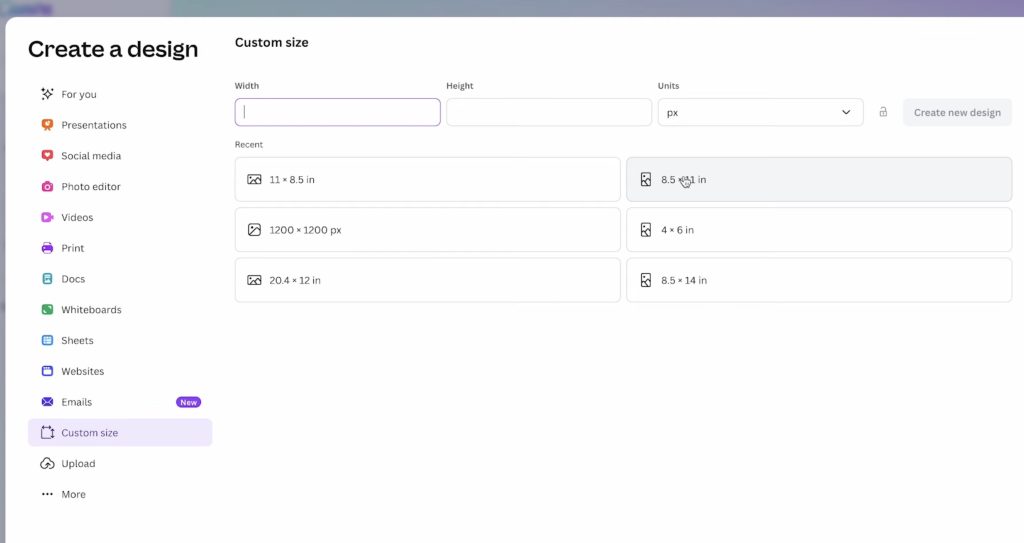
Click Upload and then upload the designs.
Add the design to the canvas and resize it to fit the blank you want to add it to.
If there is extra white space around your design, make sure to take that into account so the size is correct. You can use the bounding boxes around the design to remove the extra white space.
I am making multiple sublimation projects, so I am going to make the most of this sheet of sublimation paper by adding as many images as I can to the canvas.

With all of the designs added to the canvas, click Share and then Download.
For my printer, I have the best results using PDF Print and then CMYK.
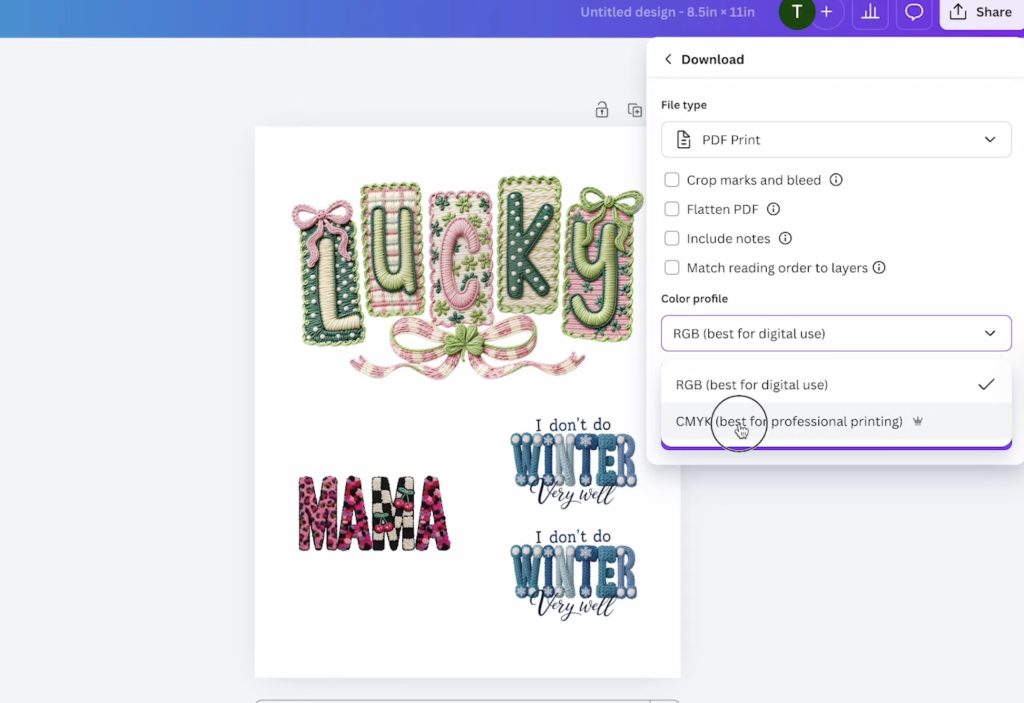
Print the file on sublimation paper using sublimation ink and a sublimation printer. Make sure when you print, you mirror the design.
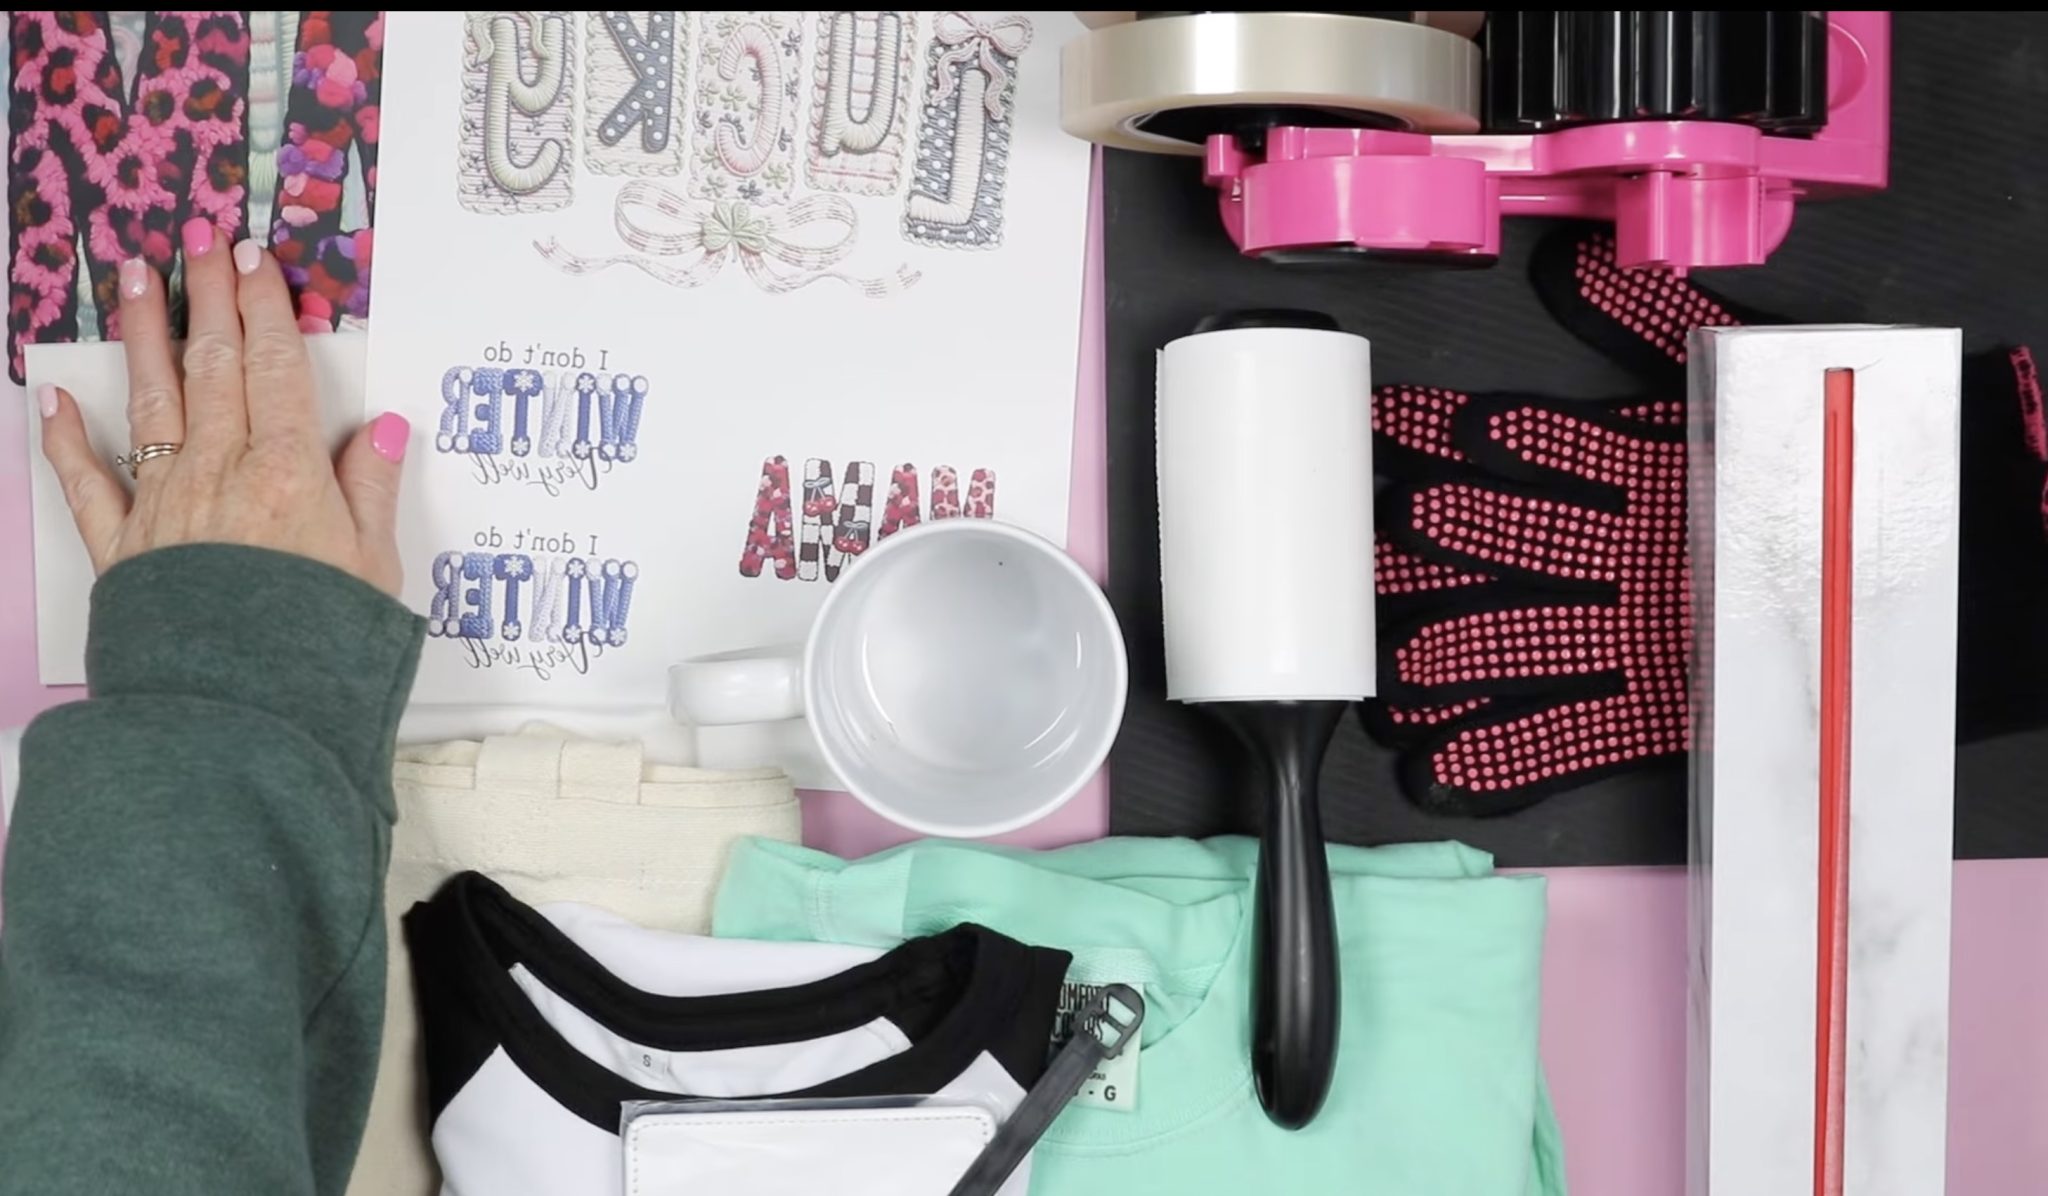
Supplies Needed for Sublimation and DTF Projects
Designs used:
Generic Supplies
- Lint Roller
- Heat-Resistant Gloves
- Protective Paper
- Paper Dispenser
- Cricut EasyPress
- Heat-Resistant Mat
- Cricut Mug Press
Supplies for DTF
Supplies for Sublimation
How to Make Knit Look DTF Projects
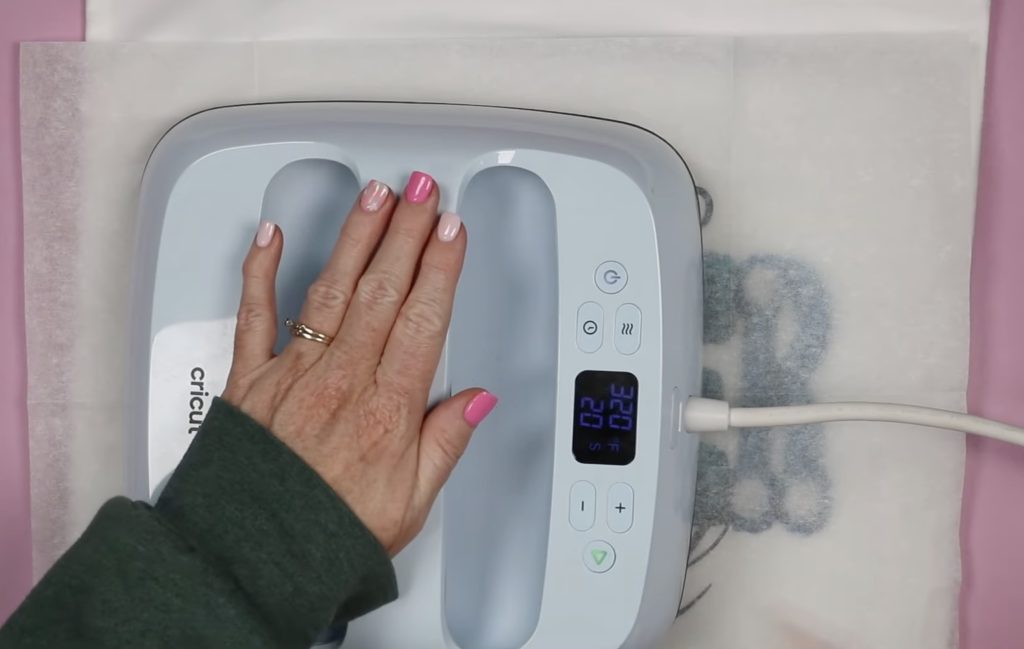
For my projects today, I am using my EasyPress.
Preheat the EasyPress to 320 degrees and set the time to 20 seconds.
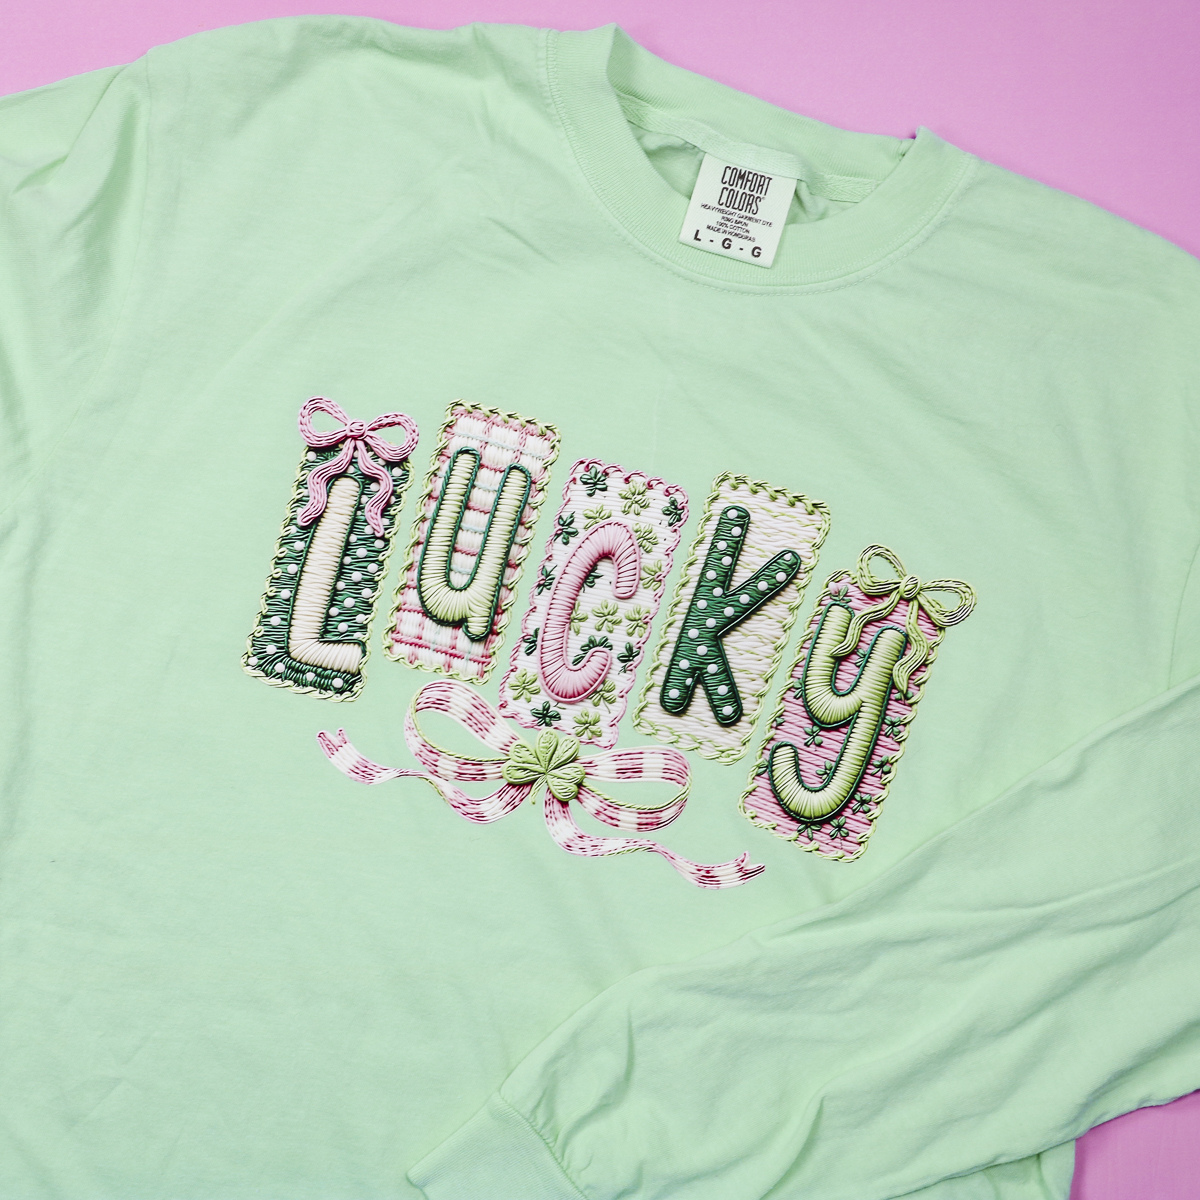
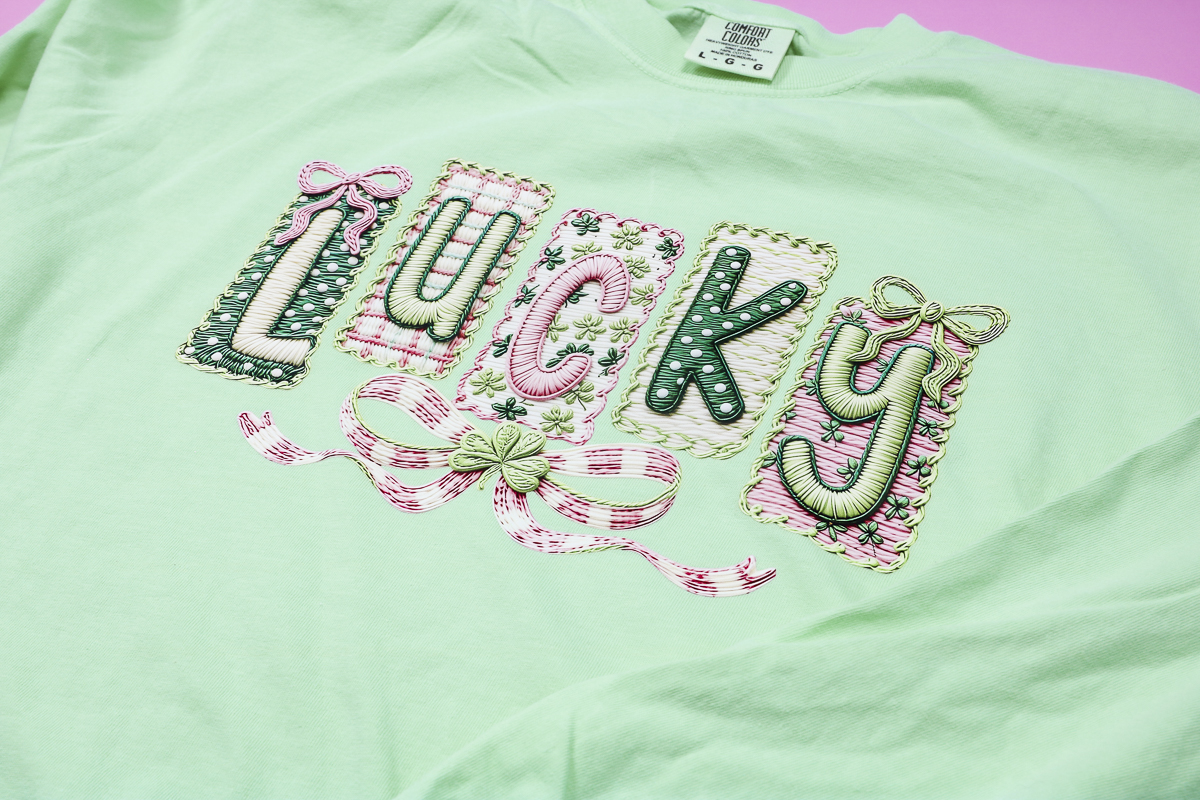
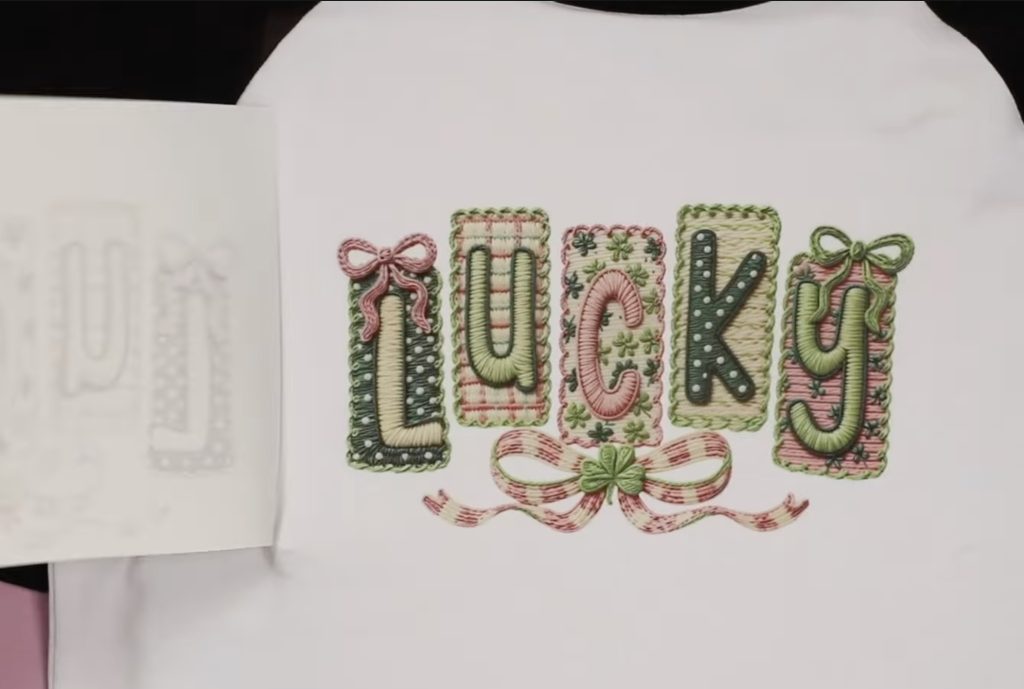
The first project I'm going to make is a long-sleeve shirt using the Lucky knit look DTF design.
First, lint-roll the surface to remove any pet hair, dust, or other debris.
Place the shirt on a heat-resistant mat and prepress for a few seconds to remove any moisture or wrinkles.
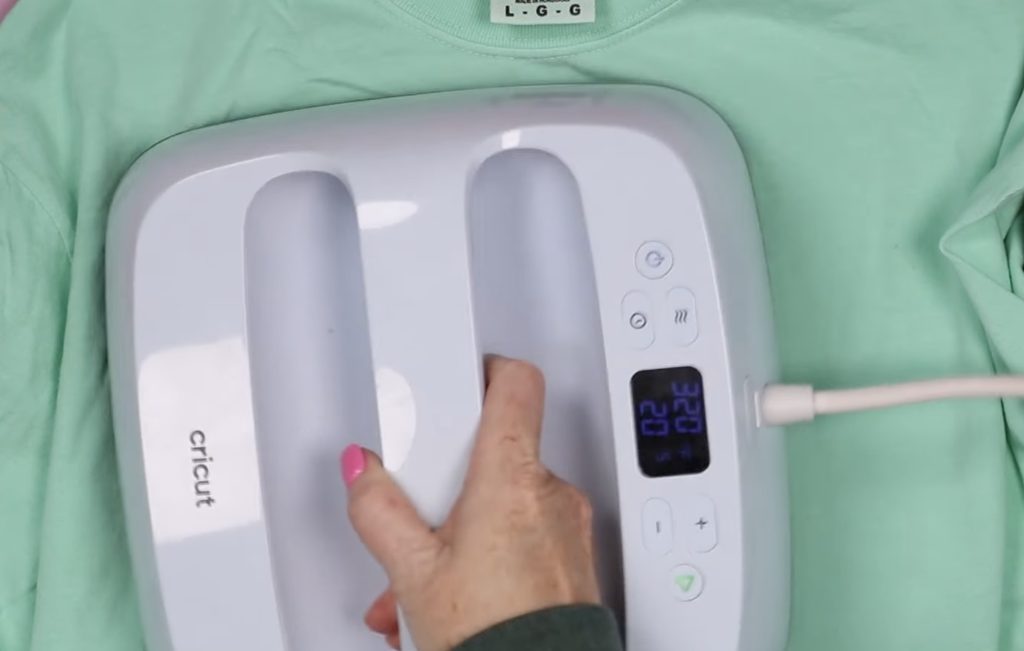
Next, locate the DTF print on the shirt where you want it and smooth it into place.
With the knit look design in place, cover with protective paper and press with medium pressure for the full time.
My design is larger than the EasyPress I'm using, so I am going to press it in two sections, pressing each section for the full time.

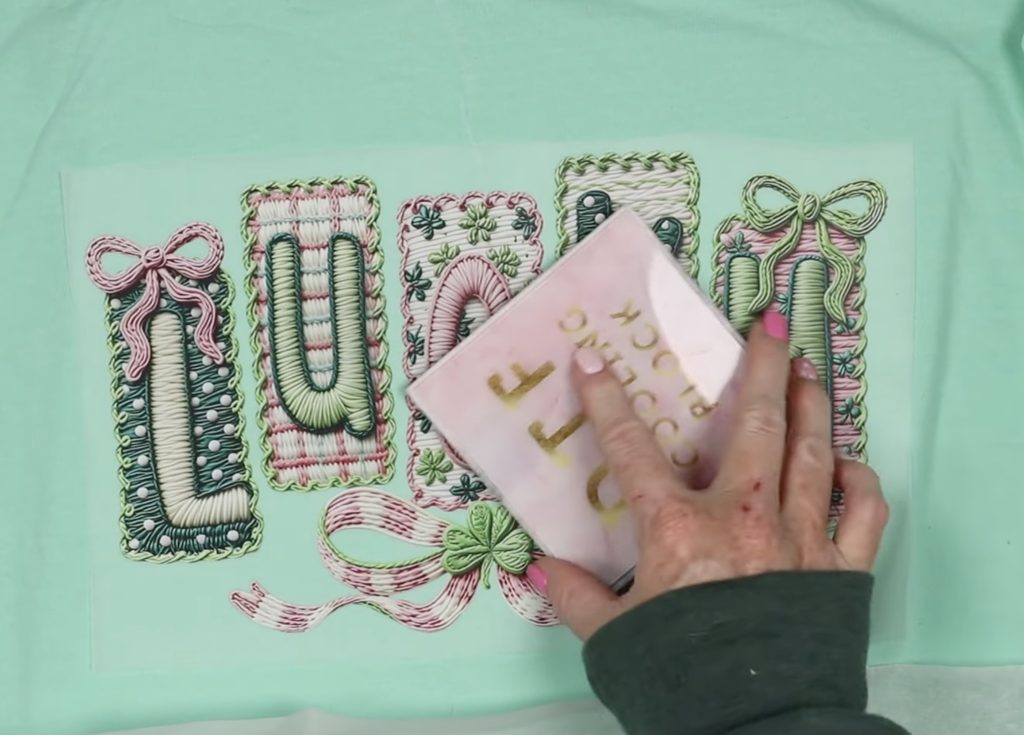
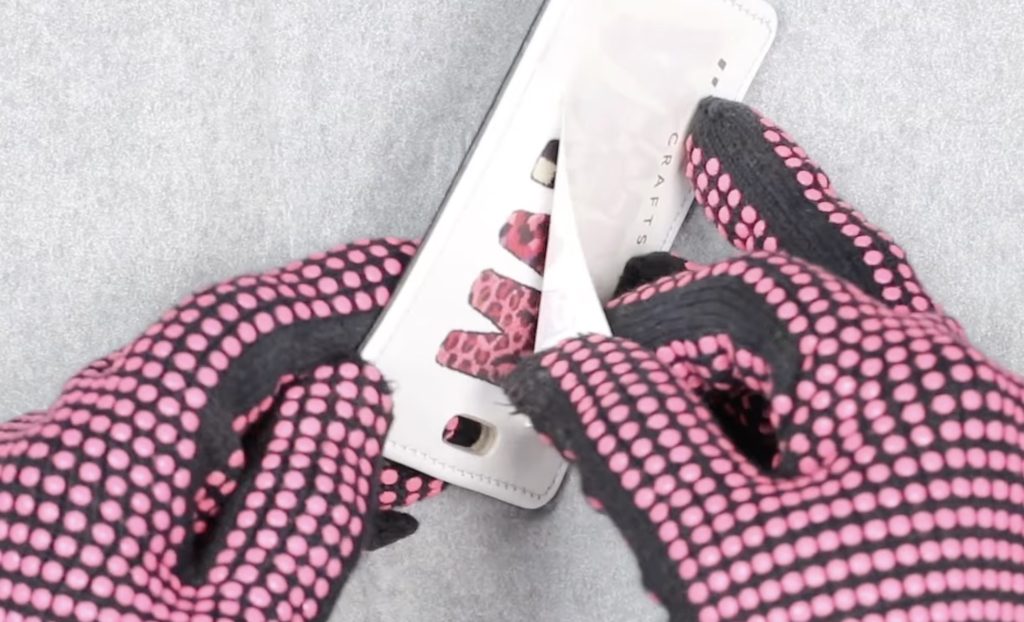
When the time is up, remove the EasyPress and allow the design to cool a little using a DTF cooling block if desired.
You do not have to let it cool completely before removing the carrier sheet.
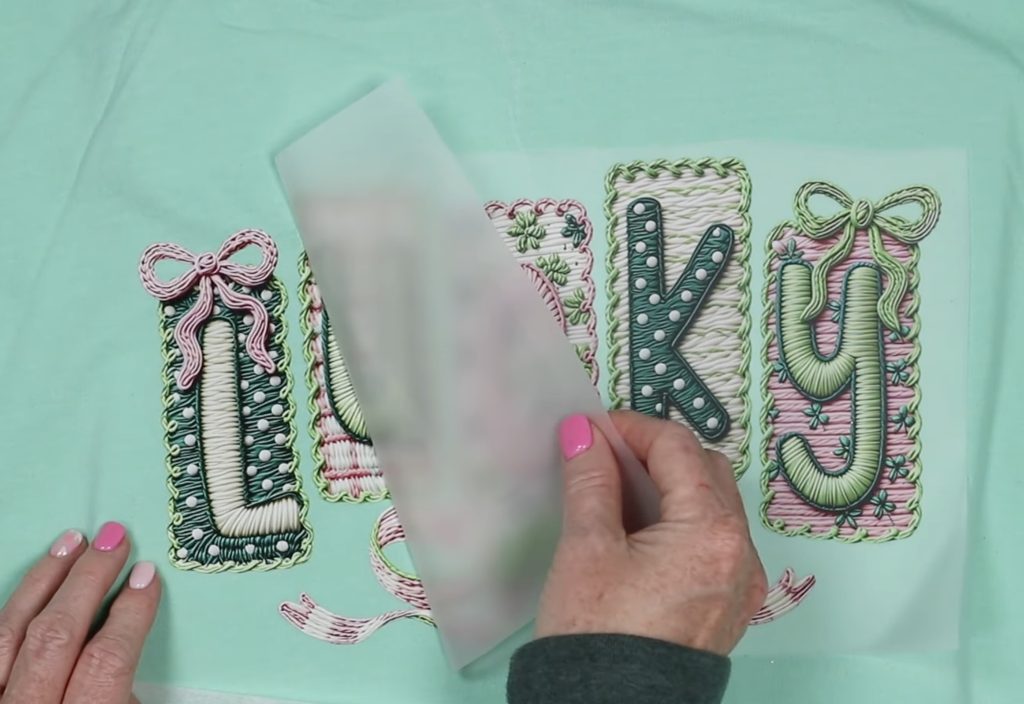
Start at one corner and gently peel away the carrier sheet, making sure the design is stuck down everywhere.
With the carrier sheet removed, replace the protective paper and do a post-press at 320 degrees for 20 seconds.
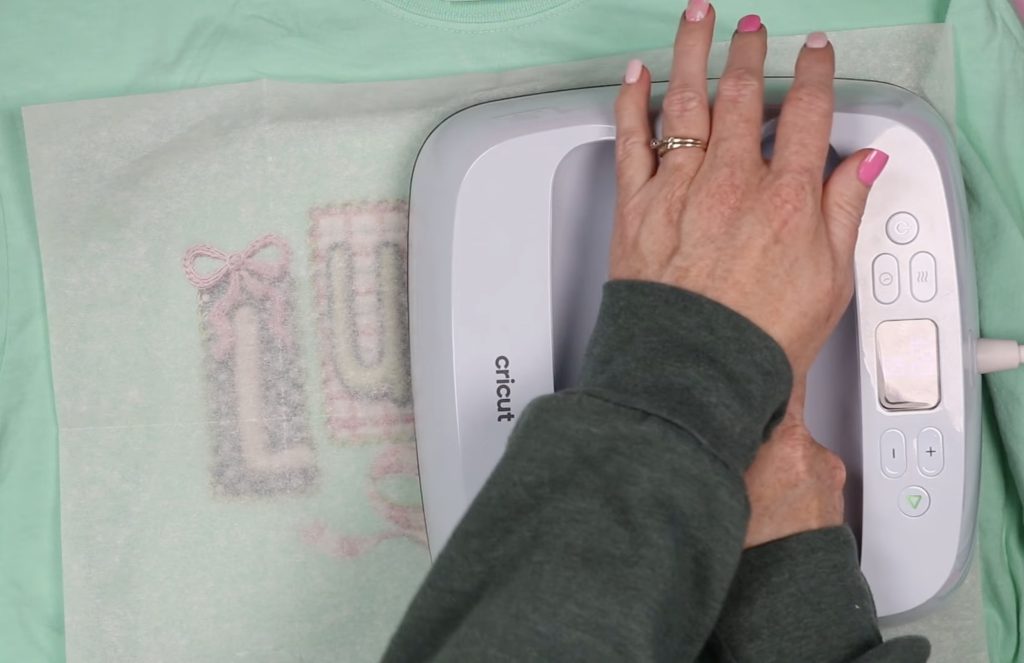
The post-press really helps press the design adhesive into the fabric fibers, which will result in a long-lasting final product.
This design looks so good on the shirt, and you really get that embroidered look because the letters appear to pop off the base design.
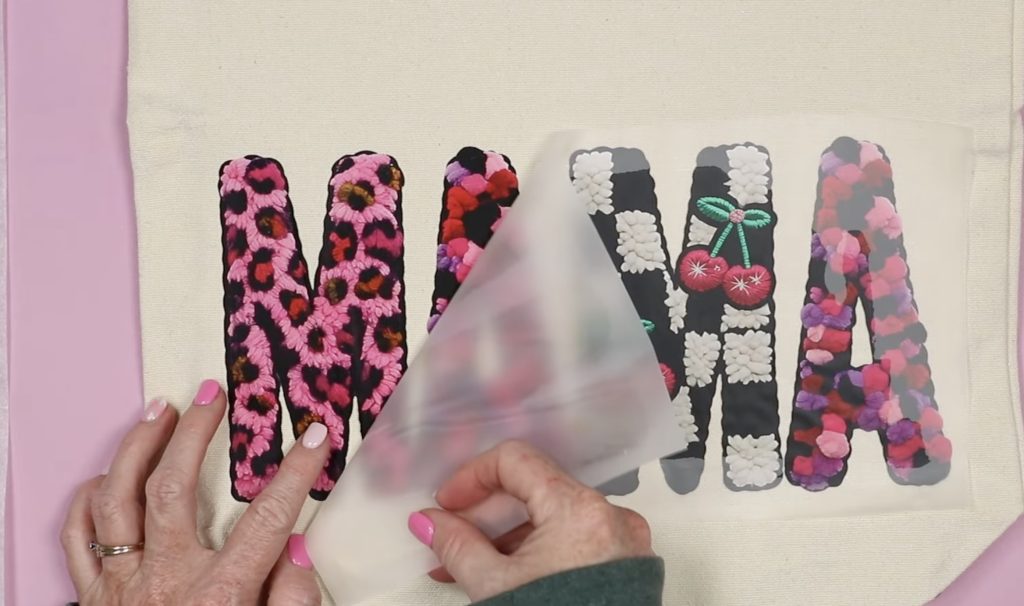
The next two projects I am making using the knit look design DTF prints are a pillow cover and a canvas tote bag.
The process is the same for all of these blanks:
- Lint Roll
- Pre-Press
- Locate
- Cover with Protective Paper
- Press Entire Design
- Remove Carrier
- Cover with Protective Paper
- Post Press
- Done
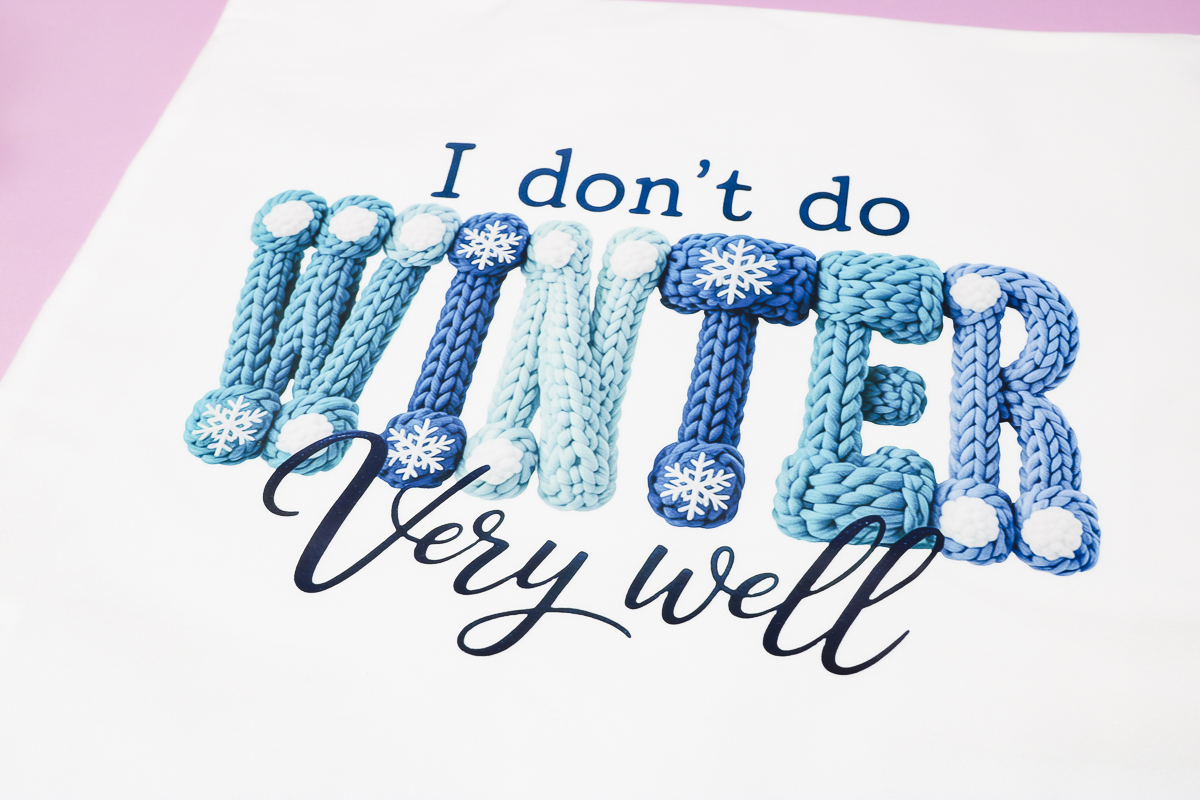
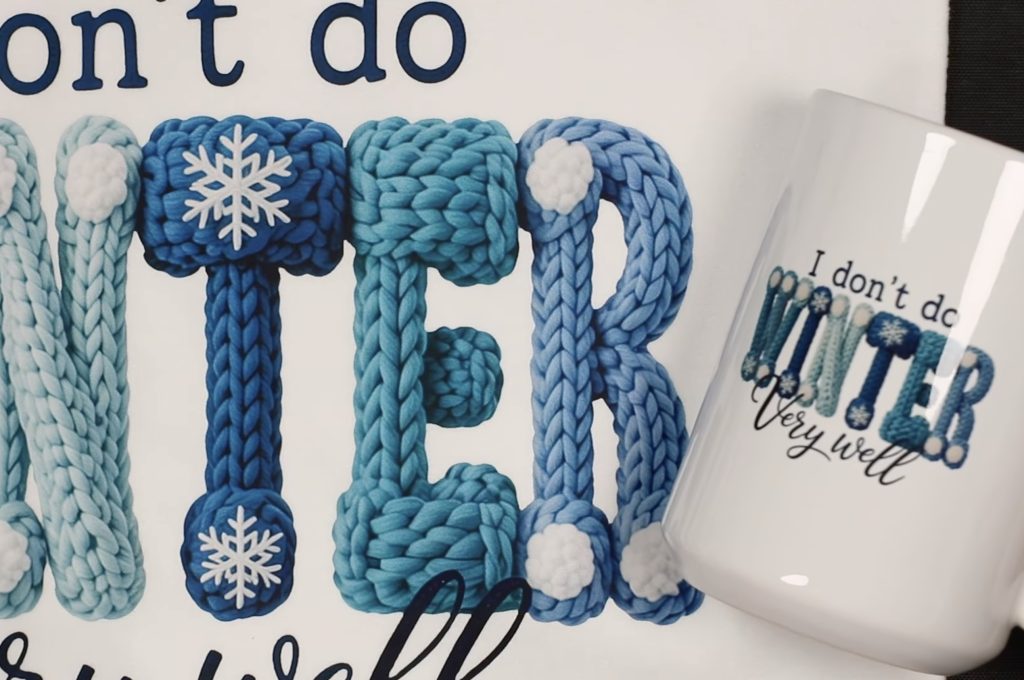
I am obsessed with how this I don't do winter very well design turned out on the pillow cover.
The knit part of the design pops off like it's really knit on.
Tips for Working with Canvas-Type Fabrics
Canvas is known for being a little stubborn with heat-activated adhesives.
These tips apply to all transfers with a heat-activated adhesive.
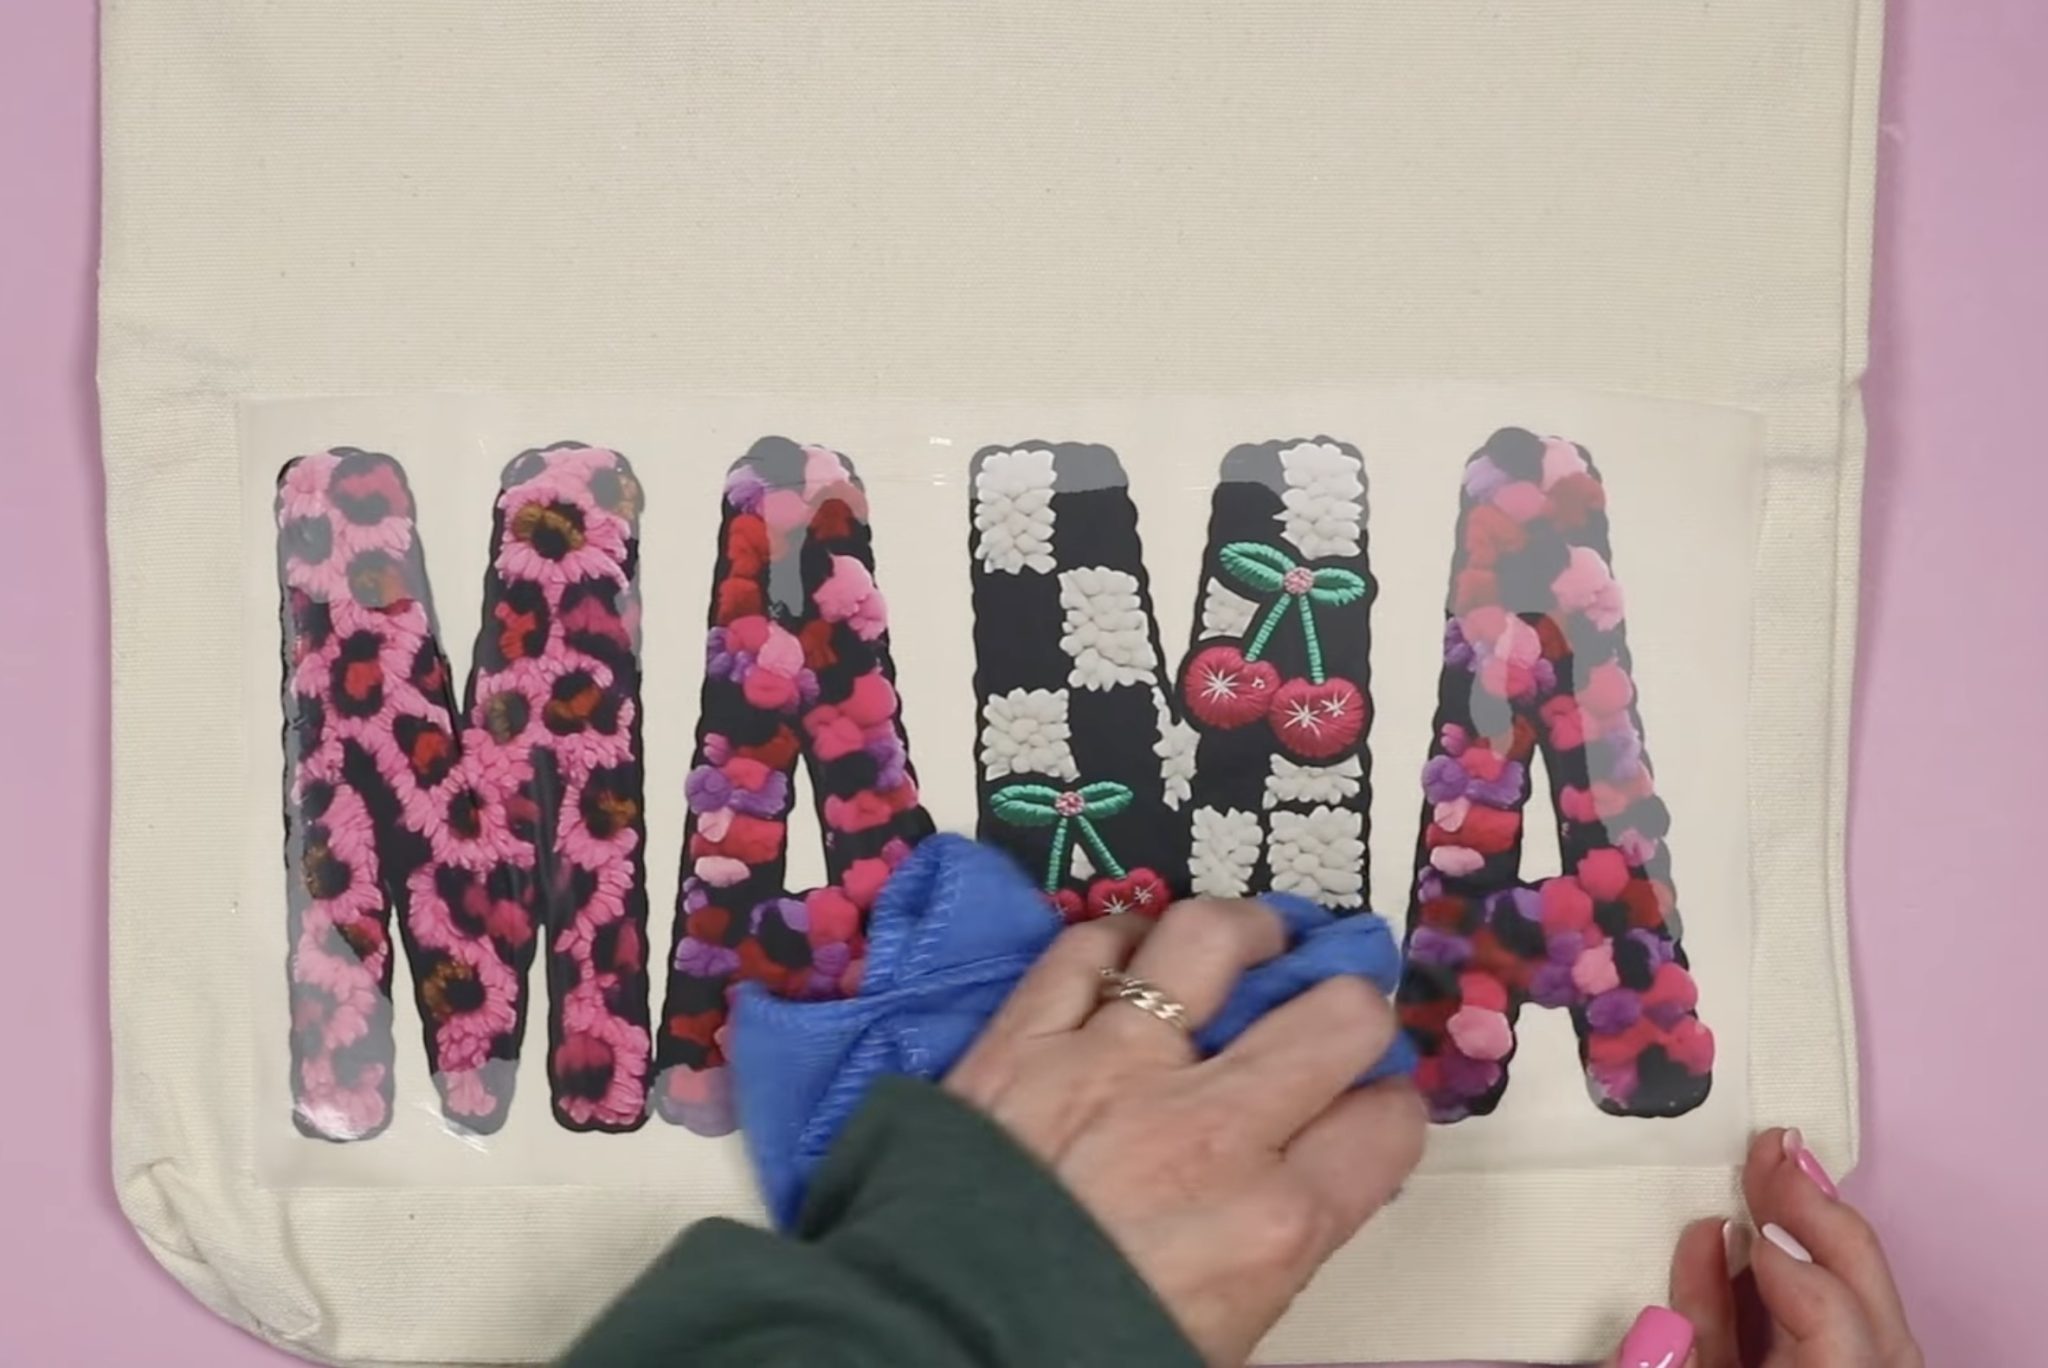
- You may need a little more pressure. Press down really well while pressing.
- Rub the surface with a cloth while it's cooling. This helps the adhesive stick to the fabric.
- Check each corner to ensure the design is stuck down before removing the carrier sheet.
- If you have any lifting, press that area again for a few seconds.
- Remove the carrier sheet slowly and at an angle.
I love that even in this photo, it looks like my finger is pressing down on yarn. This knit-looking design turned out perfect as a DTF print.
I'm obsessed with this design. It looks so good.
How to Make Knit Look Sublimation Projects
If you've ever made sublimation projects before, making projects with knit look designs is no different.
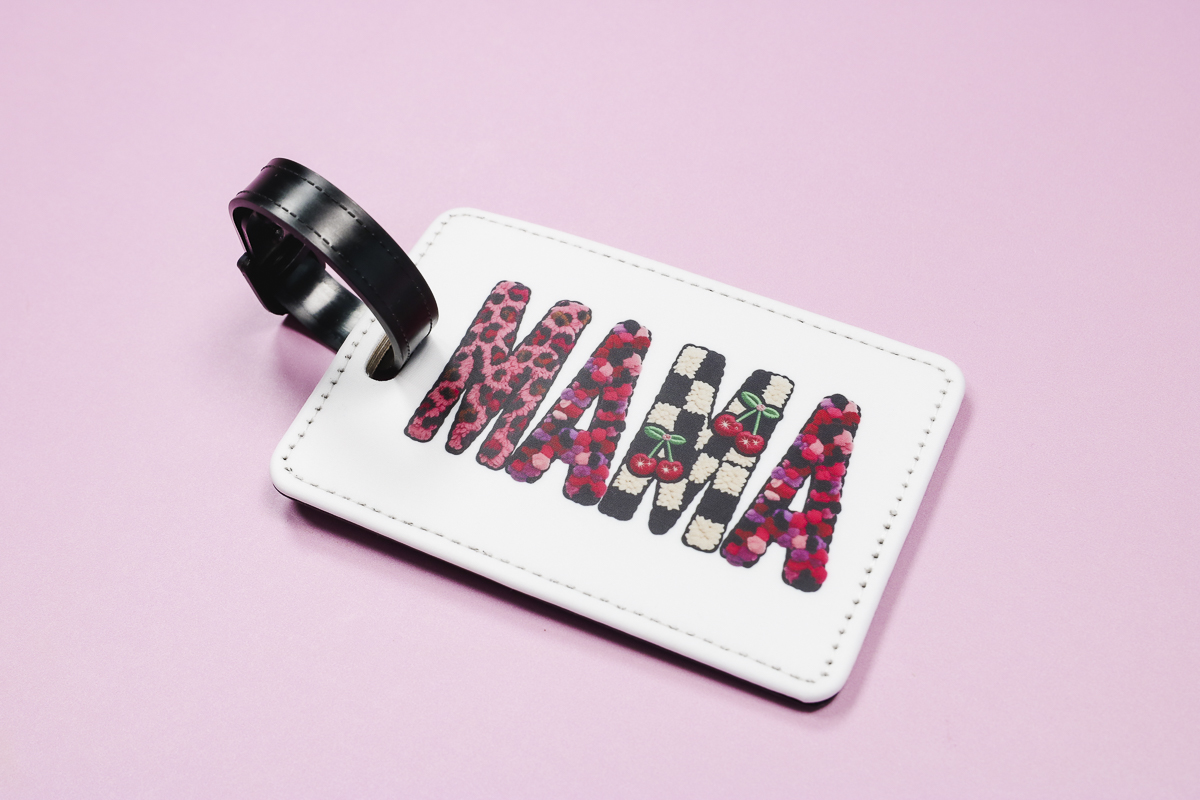
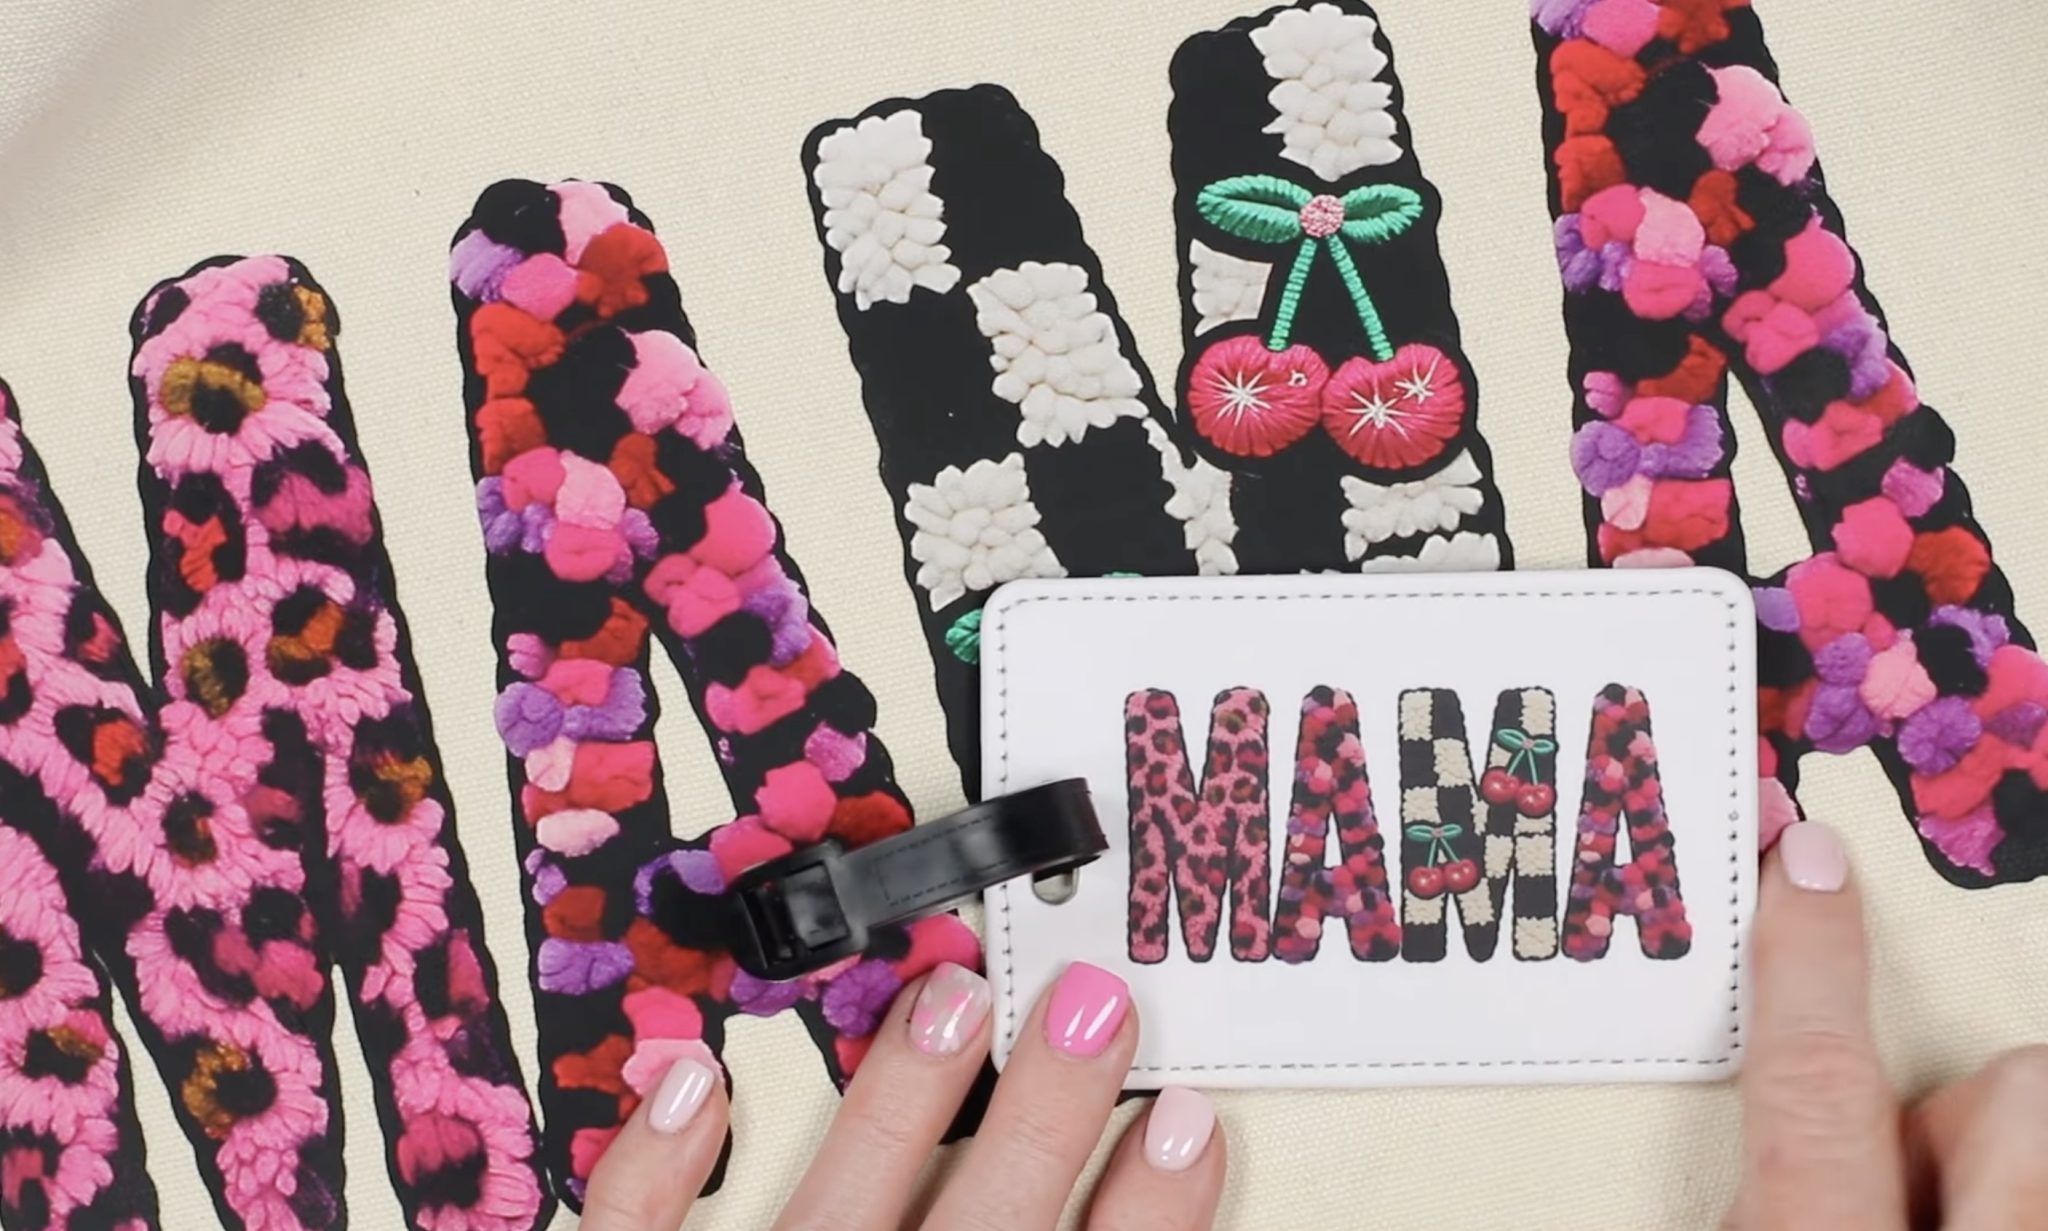
First, we're going to make a sublimation luggage tag.
Use a lint roller to clean the surface and then locate the design.
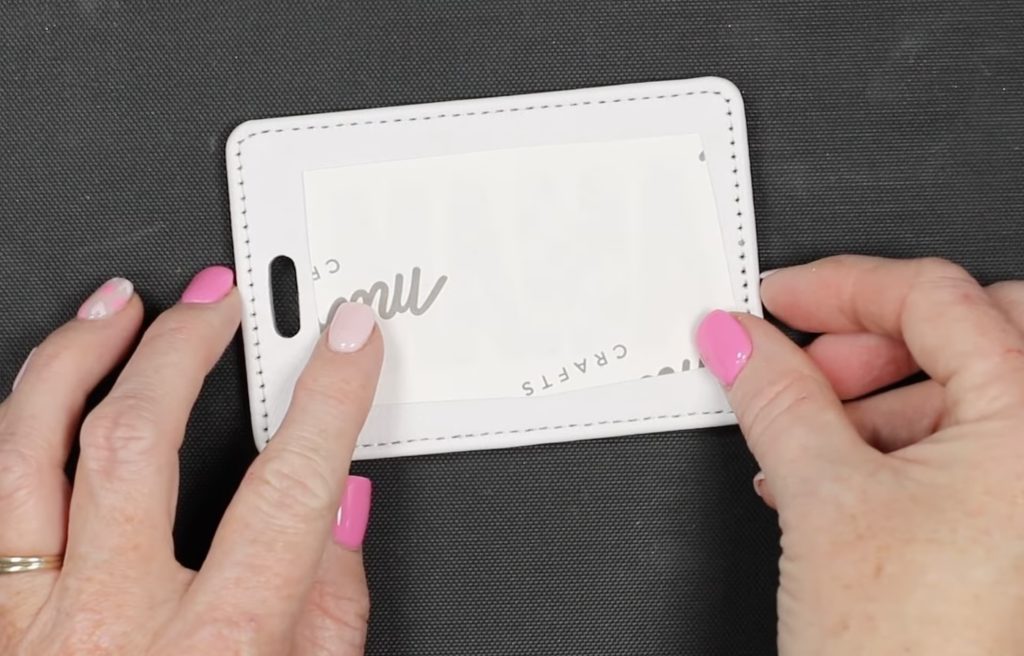
Add heat-resistant tape to the sides to secure it in place.
Add protective paper to the top and bottom and place on a heat-resistant mat.
Press for the time listed for your blank. Mine has a temperature of 380 degrees for 60 seconds.
When the time is up, remove the protective paper and peek at the corner to ensure the design has transferred.
If it has transferred, remove the paper, then add the strap, and your luggage tag is complete.
Next, we're going to use the same lucky design and make a sublimation shirt.
Place the shirt on a heat-resistant mat with protective paper between the front and the back of the shirt.
Locate the design and secure it in place with heat-resistant tape.
Cover with protective paper and press. The time and temperature will be determined by the shirt blank you're using.
When the time is up, remove the protective paper and the sublimation paper, and your shirt is finished.
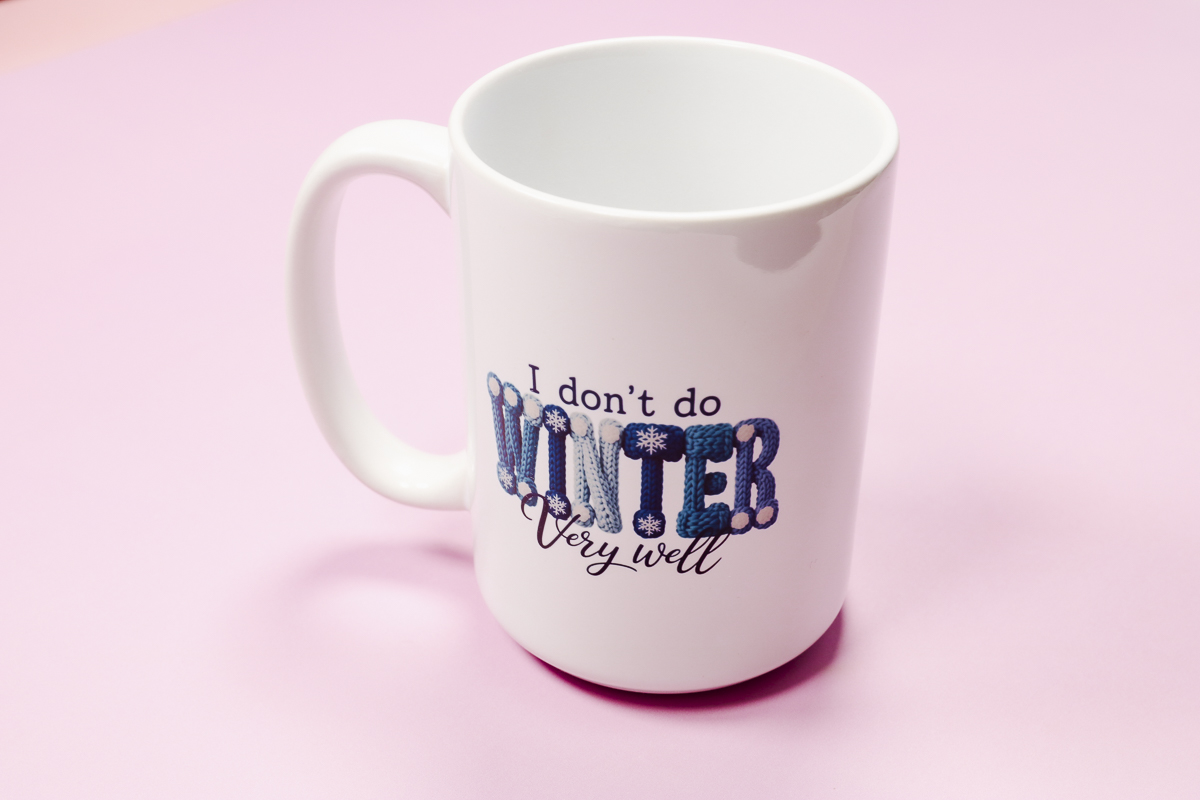
For the sublimation mug, I am going to use the Cricut Mug Press.
Clean the surface with a lint roller and locate the knit-look sublimation print on the mug.
I printed this design twice so I can add it to both sides of the handle.
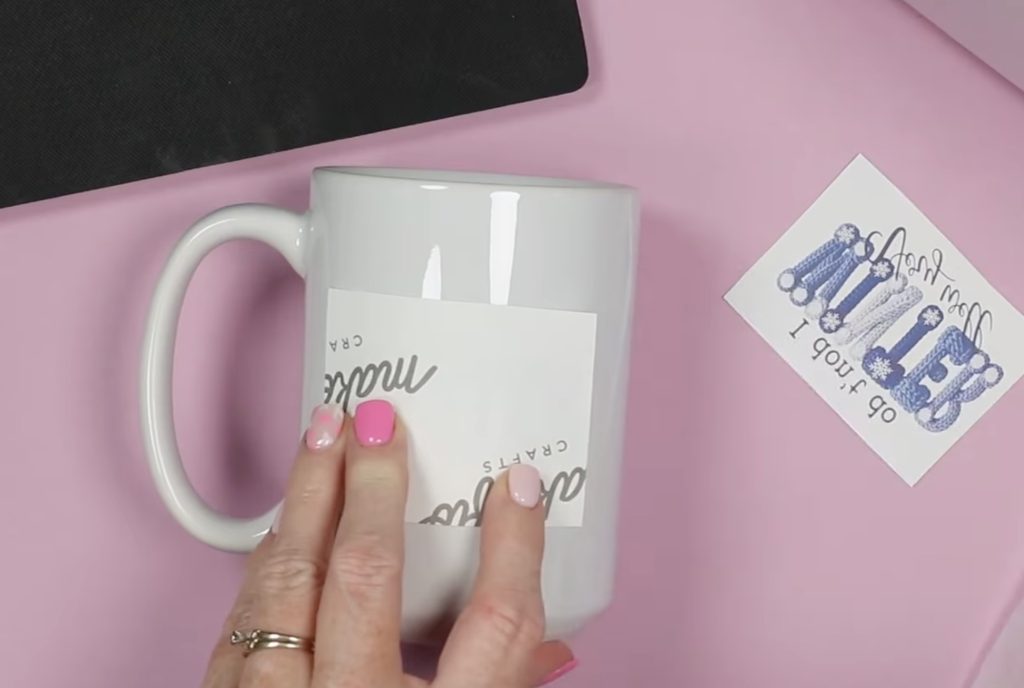
Secure the print with heat-resistant tape and place the mug in the mug press.
If your design is very dark, you may want to add protective paper around the mug to keep any transfer from bleeding through onto the inside of the press.
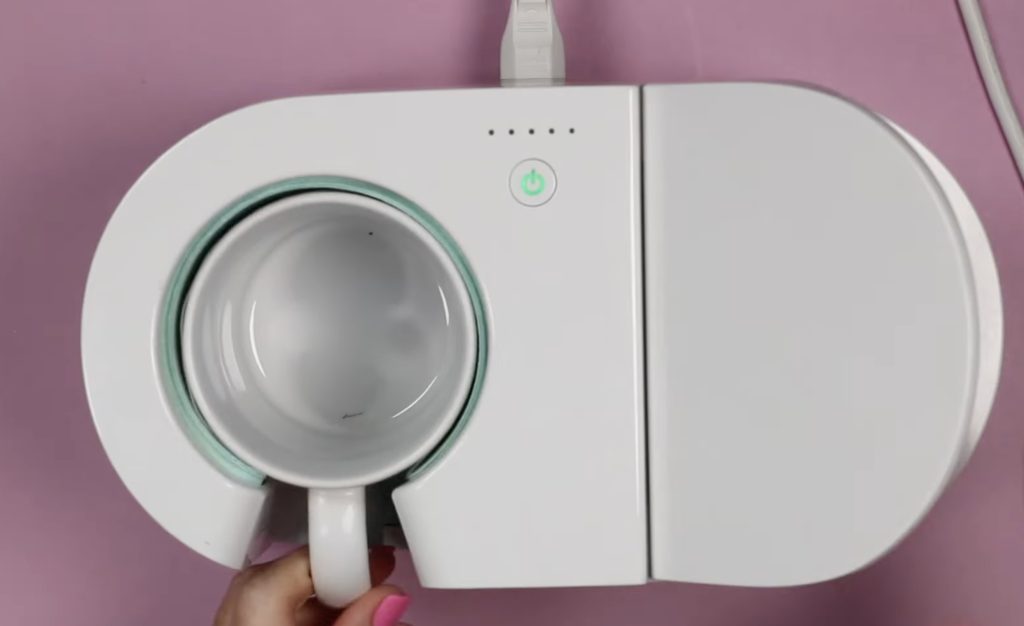
With the Cricut Mug Press, you don't have to set the time or temperature. You place the mug inside the press, and when you close the lever, the timer automatically starts.
When the time is up, lift the lever, remove the mug, and place it on a heat-resistant mat.
Remove the sublimation print, and your mug is finished.
Comparing Knit Look Designs with Sublimation and DTF
Now, let's look at how these knit look designs look made with both sublimation and DTF.
The first print is the winter design, and it looks really good on both the pillow cover and the mug. I think the knit look looks more authentic on the pillow cover than it does on the mug. I love how it looks on the pillow cover.
Maybe partly because I know you wouldn't be able to knit right on a mug. The knit portion of the design does pop off the mug and is really cute.
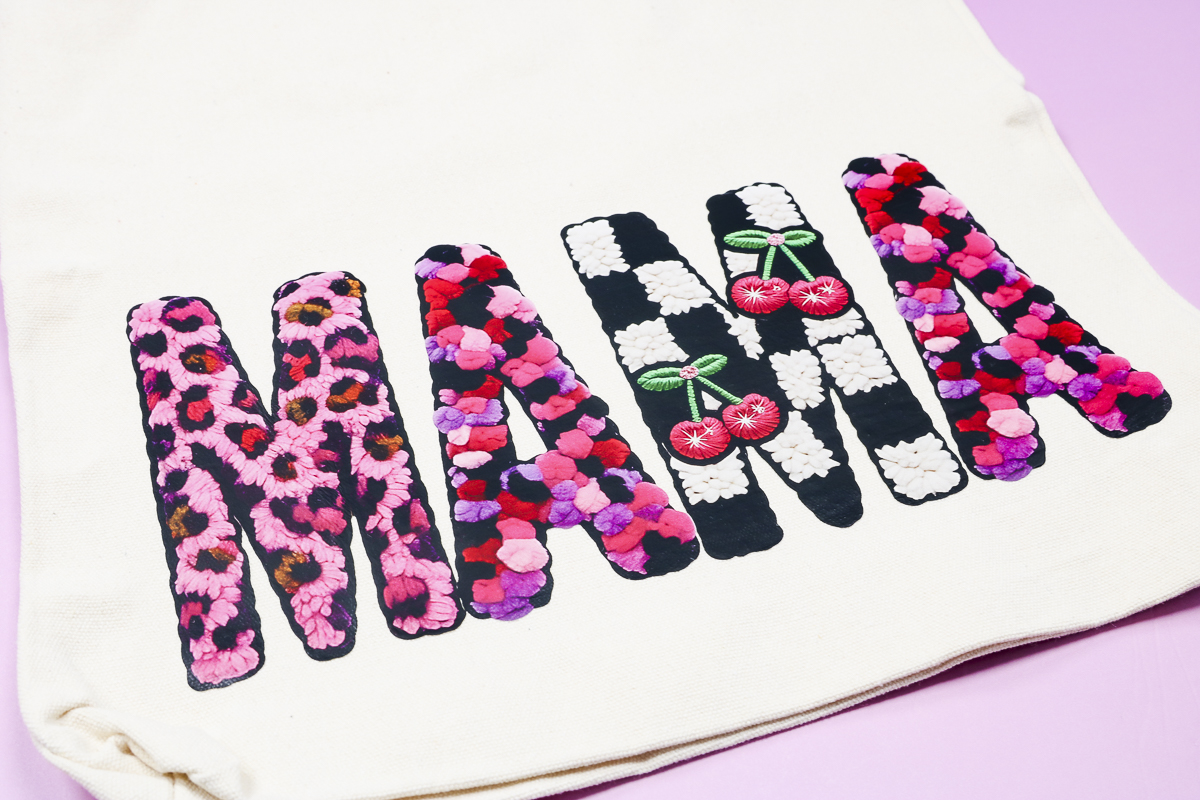
I love this design, maybe more than I expected to. I love the different knit looks on each letter. It looks great on both the tote bag and luggage tag.
I do think this bag may be my favorite knit look design project.
Ninja Transfers has a Vivid Bright process with their DTF prints, which includes brighter whites. I think that is why the colors really pop off the tote and look like actual yarn fibers.
The last projects we're going to compare are the two t-shirts.
I love both of these shirts so much. The embroidery look is so cute, and the different textures and colors really pop with this design.
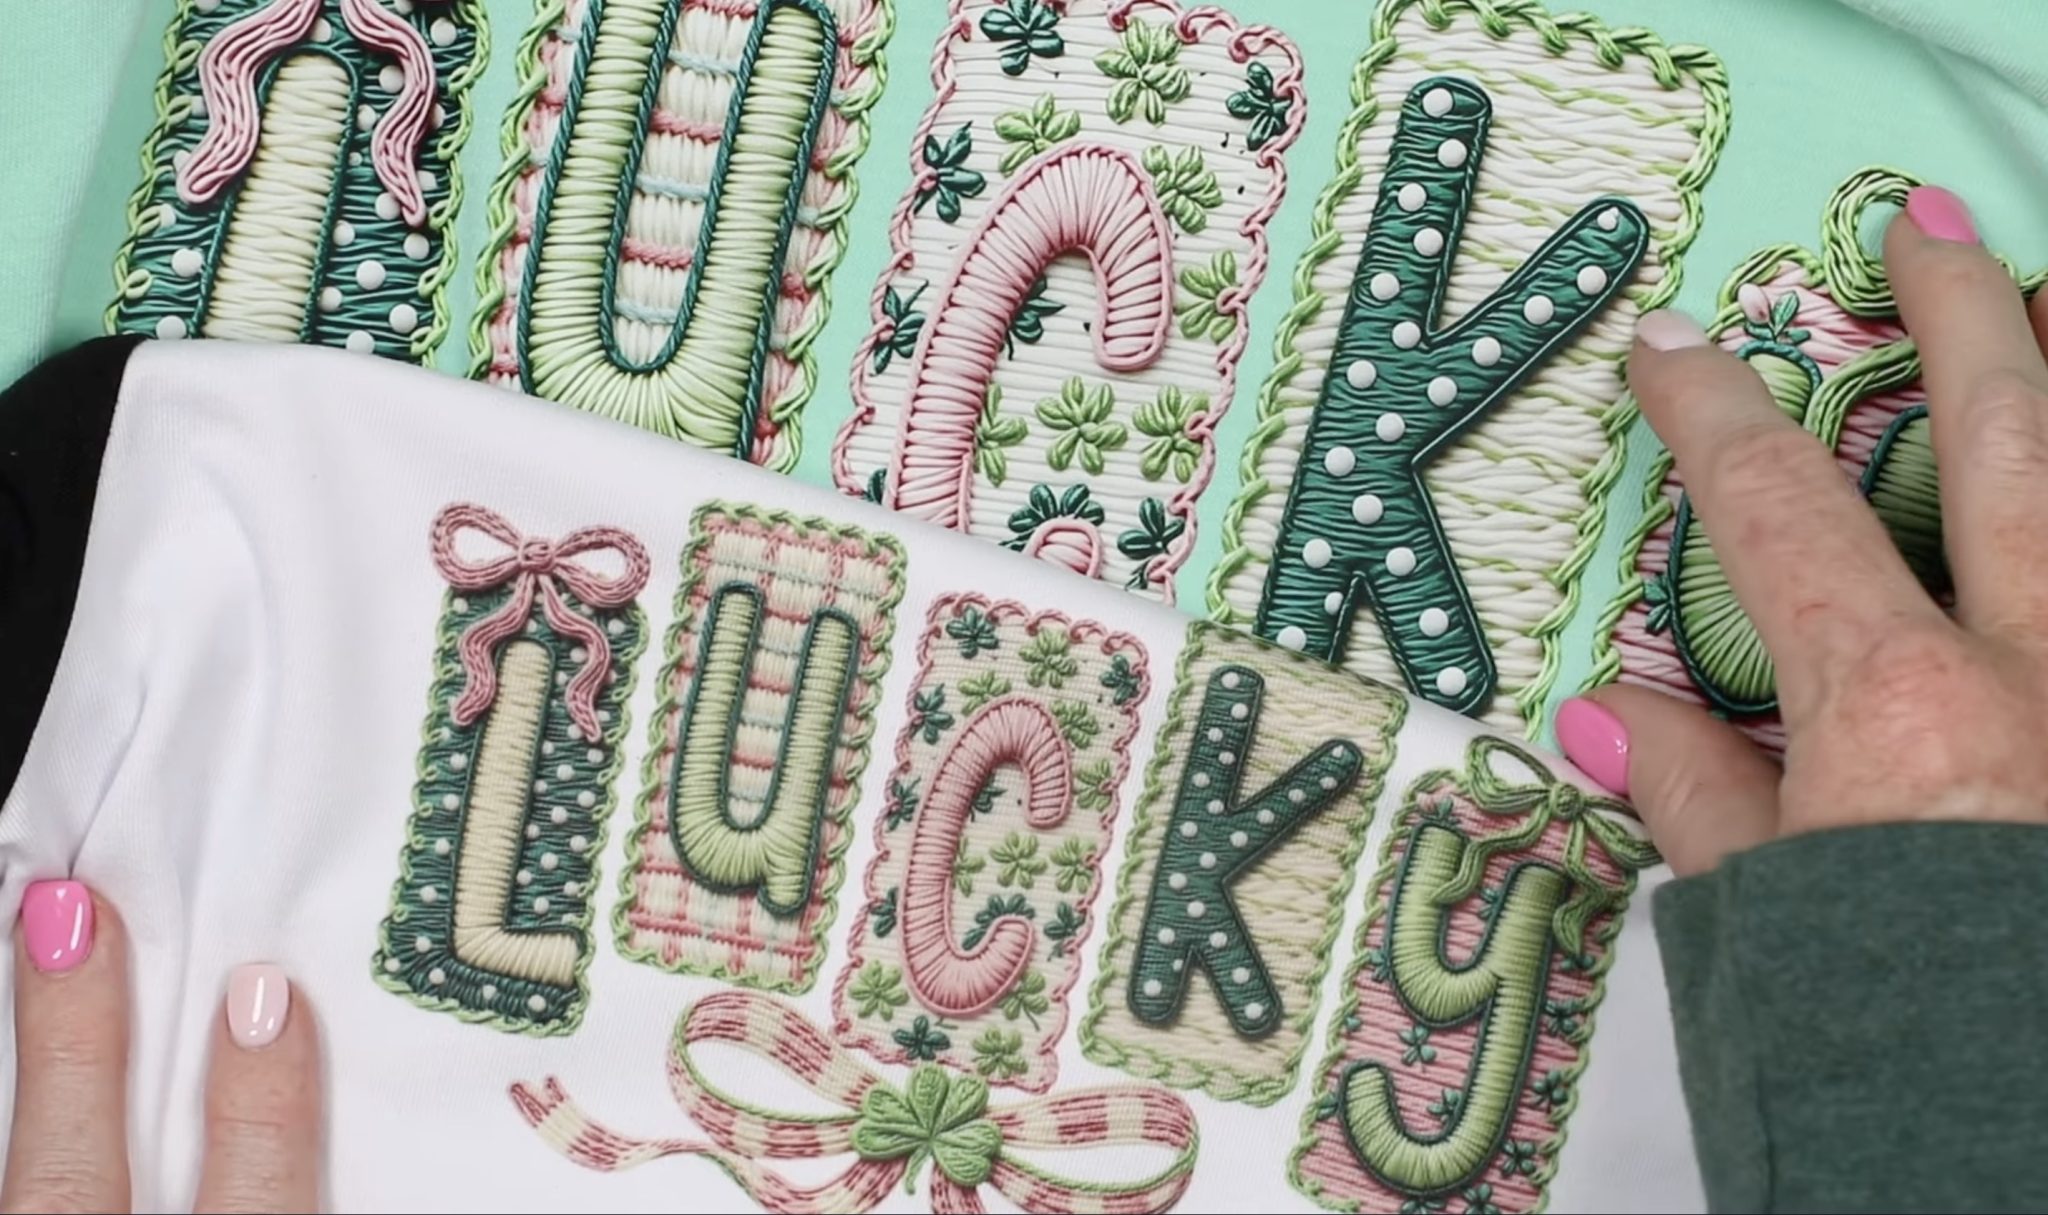
Once again, if I have to pick the DTF print wins. It's so vibrant, and all of the letters look lifted off the bottom layer. At a glance, you'd really think it was embroidered on the shirt.
That being said, the sublimation print looks really good. It's only when it sits right next to the DTF print that you notice a difference.
Are You Ready to Make Projects with Knit Look Designs?
These knit look designs are so cute, and there are so many options to choose from. What I shared today are just a few options, and I can't wait to make more projects that look like embroidery, without having to actually embroider anything.
If you have a sublimation printer, you can try these designs right away. Sublimation is great because you can add it to hard and soft blanks.
The Ninja Transfers DTF prints work really well with these designs. With the Vivid Bright inks, the colors really pop off the fabric and give the look of true kint and embroidered designs.
I hope I've answered any questions you have about finding and using Knit Look designs for DTF and sublimation projects. If you have any additional questions, leave them in the comments, and I'll be happy to answer them for you.