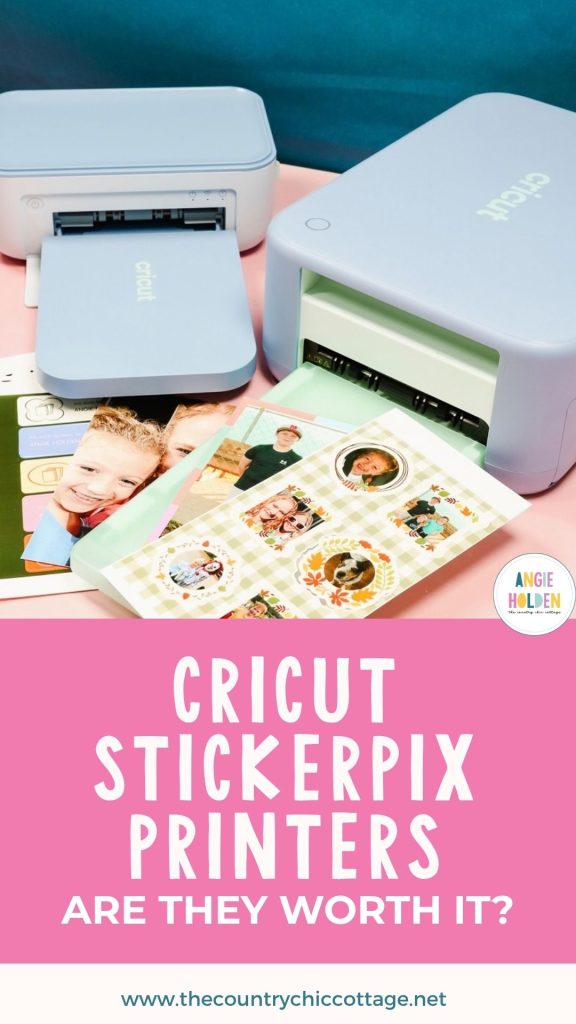
Today, Cricut is launching two brand-new machines, and I'm really excited to introduce you to the Cricut Stickerpix Print and Cricut Stickerpix Print + Cut.
Both of these printers produce high-quality 4×6 photo prints and allow you to create photo-quality customized stickers.
Is the Stickerpix Print or Stickerpix Print + Cut right for you? Keep reading to learn all about both of these new machines.
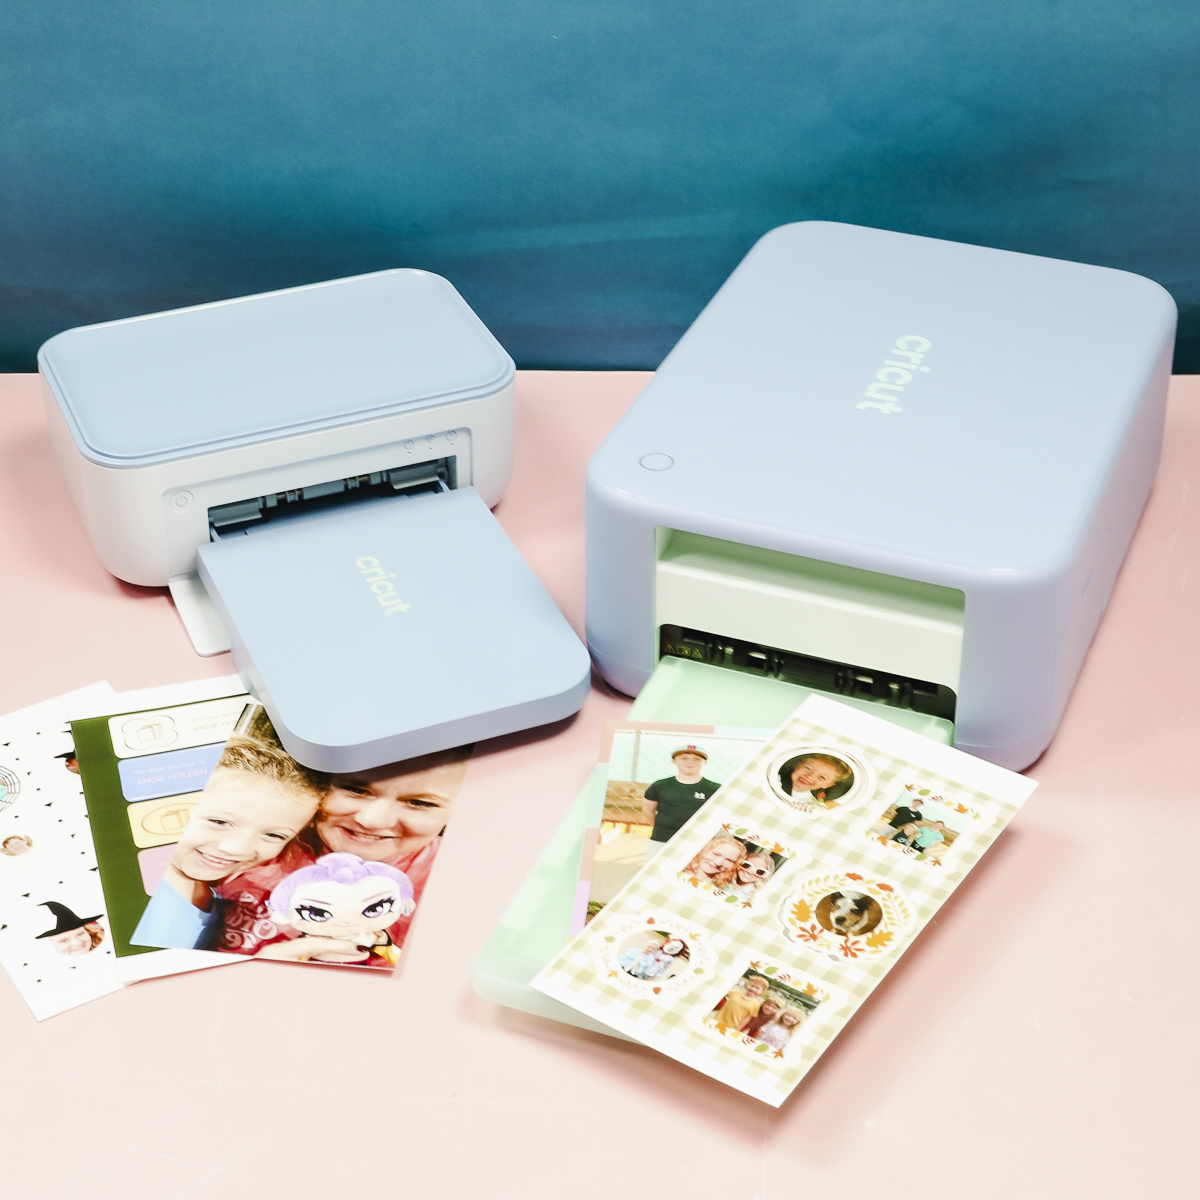
If you're a crafter who loves being able to print your own photos as you need them and want to be able to make stickers too, the Stickerpix Print may be right for you. If you've ever been frustrated with print-then-cut alignment, the Stickerpix Print + Cut could be exactly what you're looking for.
And if you love scrapbooking or journaling, I think you're going to love the convenience that both of these printers offer.
Cricut Stickerpix Print and Stickerpix Print + Cut
Before we get into the full tutorial, let's talk about what each of these printers can do and how they're different.
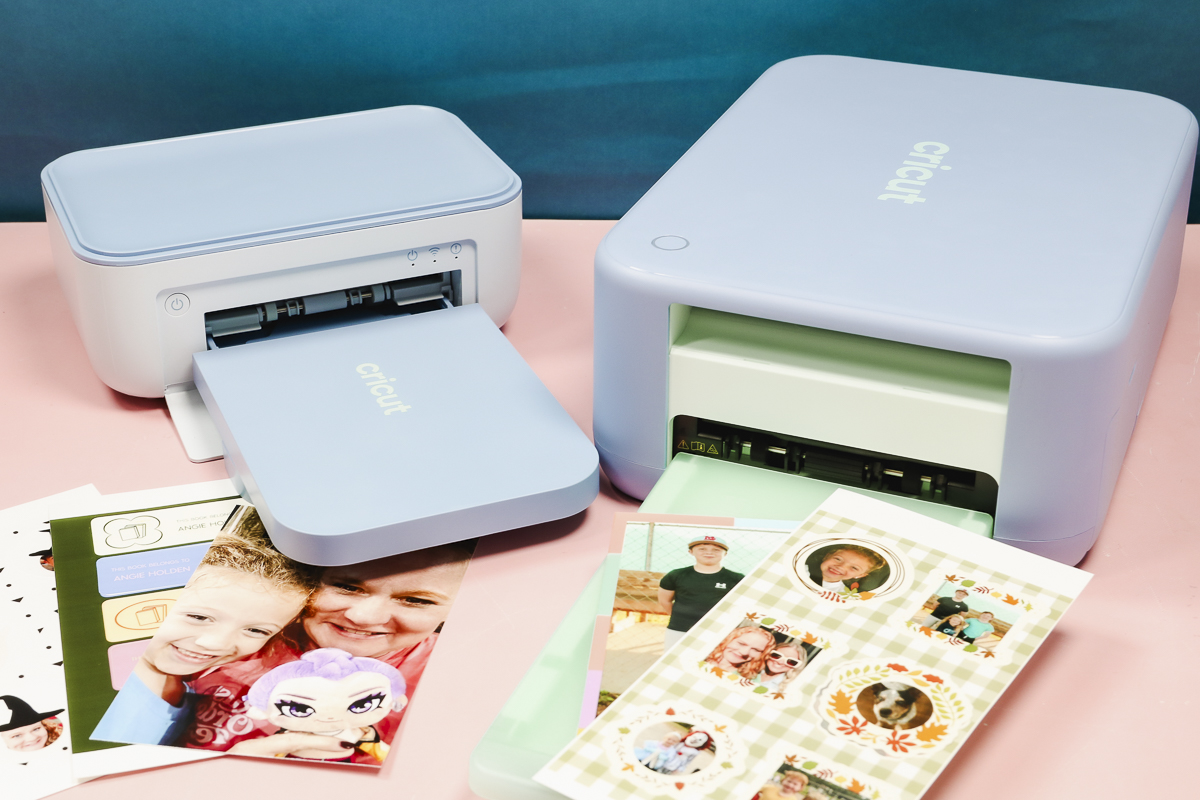
Both printers are dye sublimation printers. That means there is no ink to worry about refilling, getting clogged, or getting old.
If you've never used a dye sublimation printer, they use a multi-pass process that combines a film with special paper and lays down the ink one color at a time. In the first pass, it lays down the yellow; in the second pass lays down the magenta; in the third pass lays down the cyan; and in the last pass applies a laminate that adds gloss to the print, protects it from fingerprints and scratches, and helps it be more water-resistant.
To use both of these printers, you'll use the Cricut Design Space App. I love this because you don't have to learn a new program, and if you have Cricut Access, you can use all of those designs for your stickers and prints.
Buy the Cricut StickerPix Printers here!
Stickerpix Print
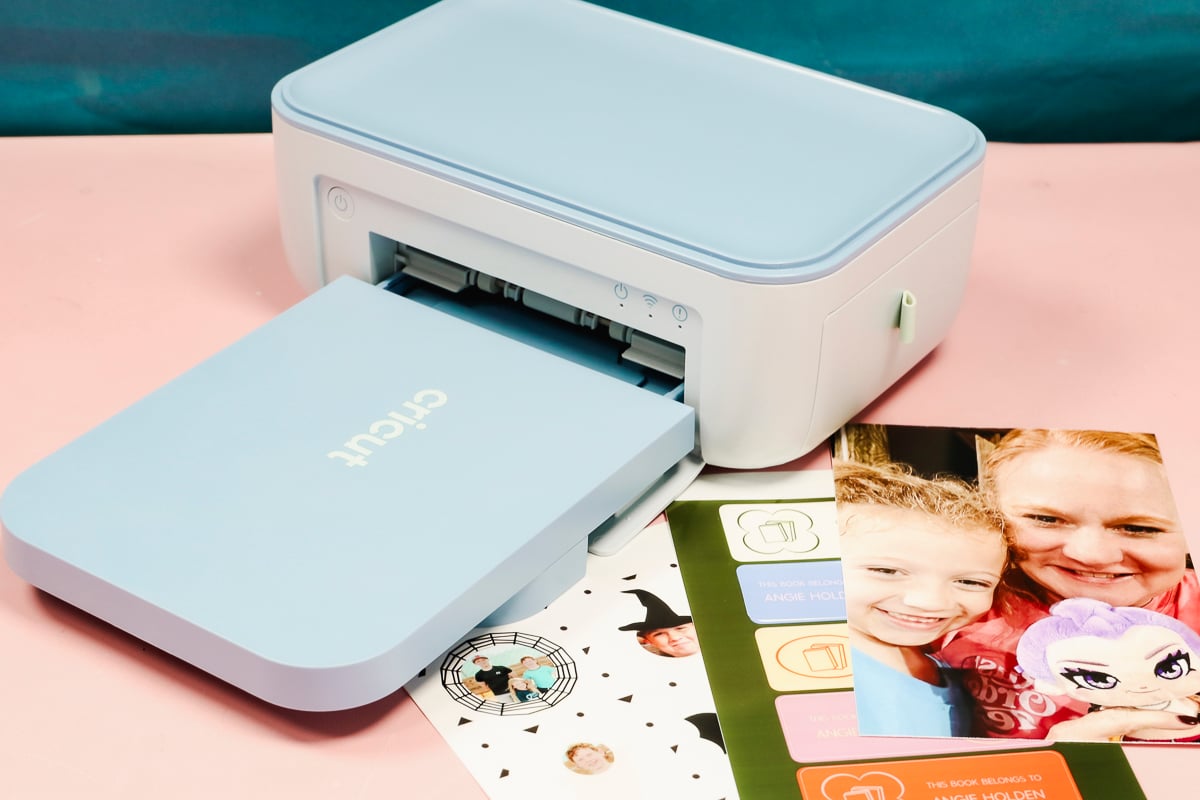
With the Stickerpix Print, you can print high-quality 4×6 photos, and you can print images onto pre-cut sticker sheets to produce custom stickers, photo stickers, and labels.
Stickerpix Print + Cut
Stickerpix Print + Cut can do everything the Stickerpix Print can do, and it has an actual cutting blade inside the printer, which allows it to create very precise stickers, perfect for all of your crafting needs.
As of writing this tutorial, I did not see an option in Design Space to use the pre-cut sticker sheets with Stickerpix Print + Cut. To get that look, you'd have the blade in this machine cut the stickers out for you.
Neither machine requires any type of cutting mat or heat press.
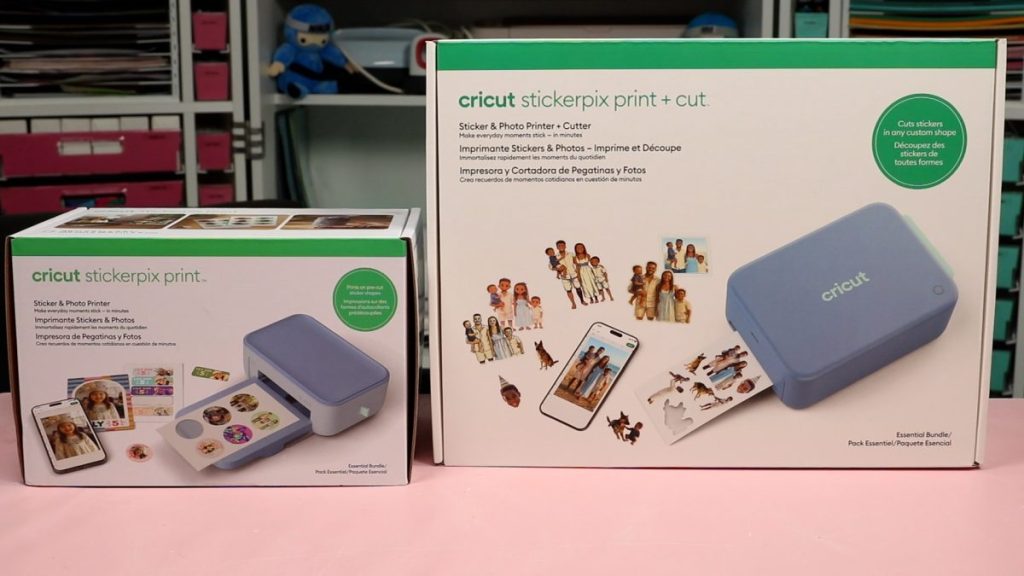
What Comes in the Box
Before I get into what comes in the box, I want to mention that for both printers, I got the Essentials Bundle. Depending on how you purchase the printer, what is included may be different than what I show here.
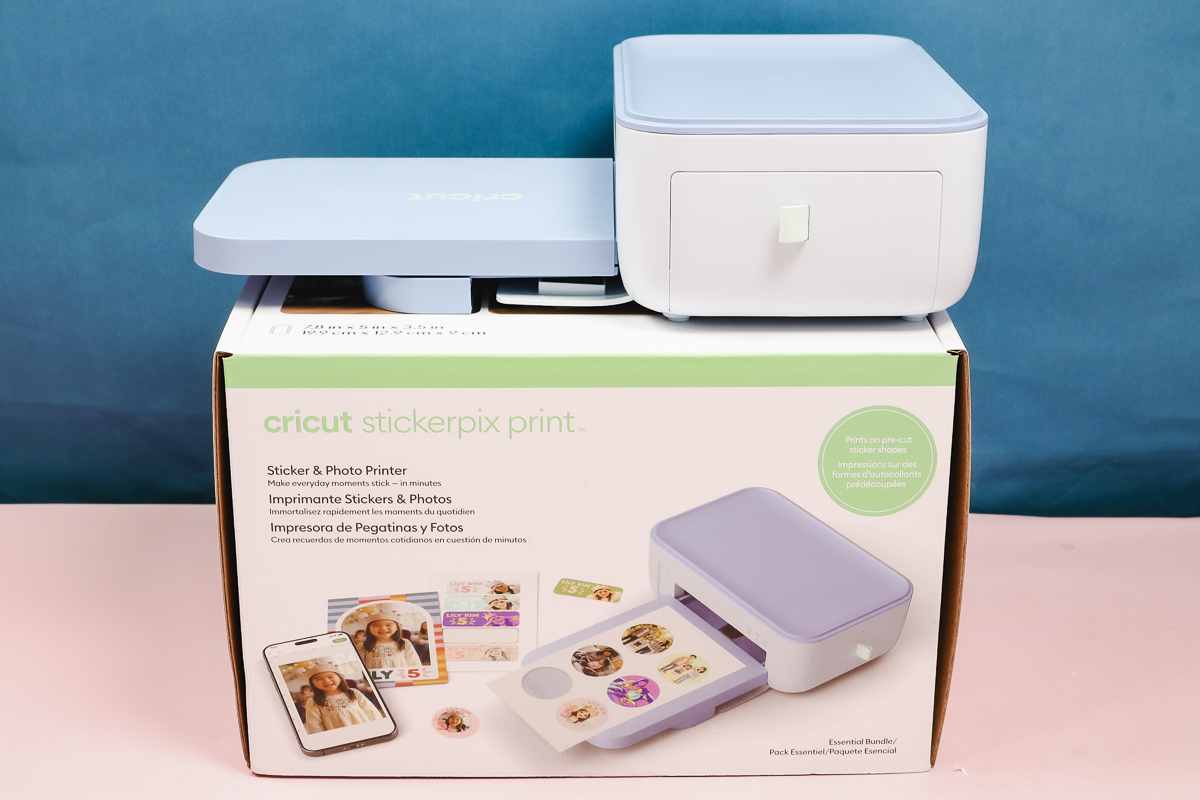
Stickerpix Print Essentials Bundle
When you open the box, there is a setup guide and a user manual. There is another box that includes the power cord, print cartridge, and a variety of printable materials.
At the bottom of the box is the printer itself. That was everything in this box.
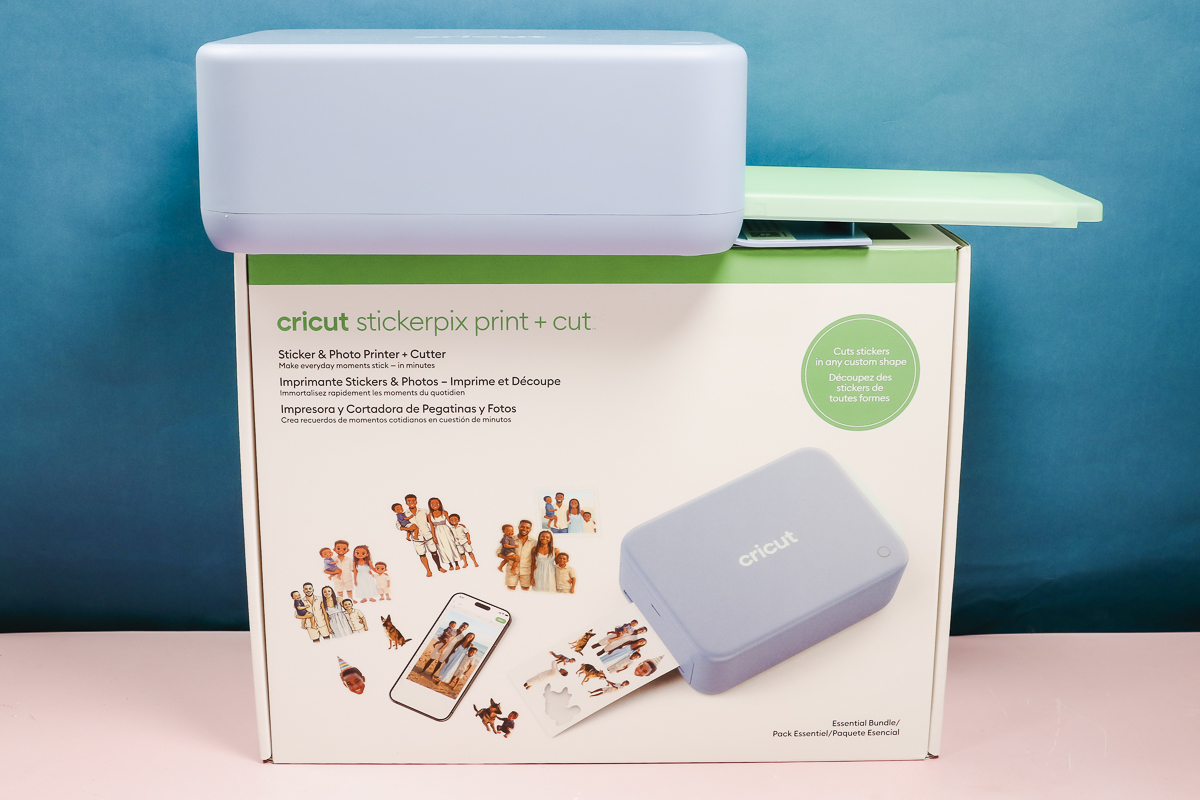
Stickerpix Print + Cut Essentials Bundle
The Stickerpix Print + Cut is boxed differently but includes a similar collection in the box.
You'll find the user manual and setup guide, power cord, print cartridge, and printable materials.
The Print + Cut Stickerpix is larger than the Stickerpix Print but prints on the same-sized materials.
Stickerpix Materials + Ink Cartridge Bundles
For both Stickerpix machines, when you purchase the materials, they will come bundled together with both the ink cartridge and photo paper or sticker paper.
How much you print per sheet doesn't make you go through the film faster or slower. Every print is going to use a full print's worth of ink and laminate. This can be nice because you always know exactly how much each print is going to cost you. It may frustrate you, however, if you don't do a full print on each page.
Buy the Cricut StickerPix Printers here!
Cricut Stickerpix Print Machine Setup
Because the Stickerpix Print + Cut can do everything the Stickerpix Print can do, I'm going to start with the Stickerpix Print setup.
Make sure to open up the machine and remove all packing materials.
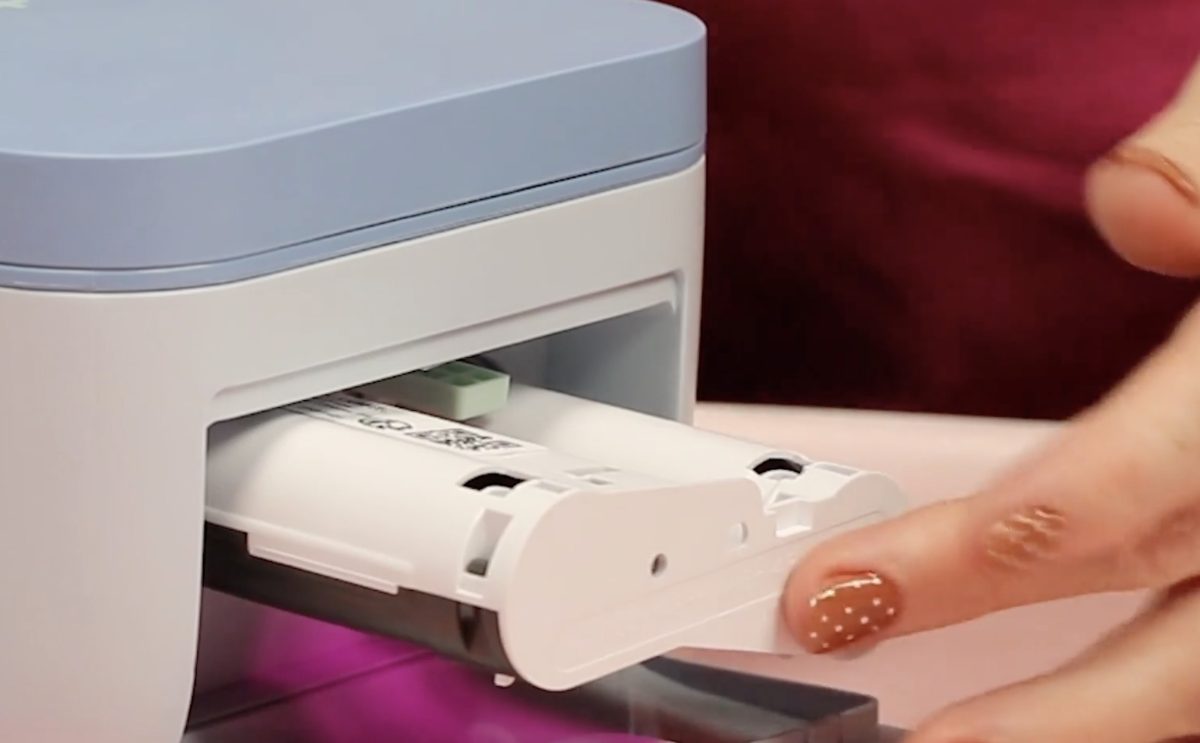
Open the door on the side of the machine and load the print cartridge into that slot with the label facing up. Push it in until it locks into place, and close the door.
The material tray is stored on top of the printer when not in use. Lift it off the printer, slide the end off the tray, and fold it under. This end helps support the tray while it's in use, so make sure you have it set up correctly.
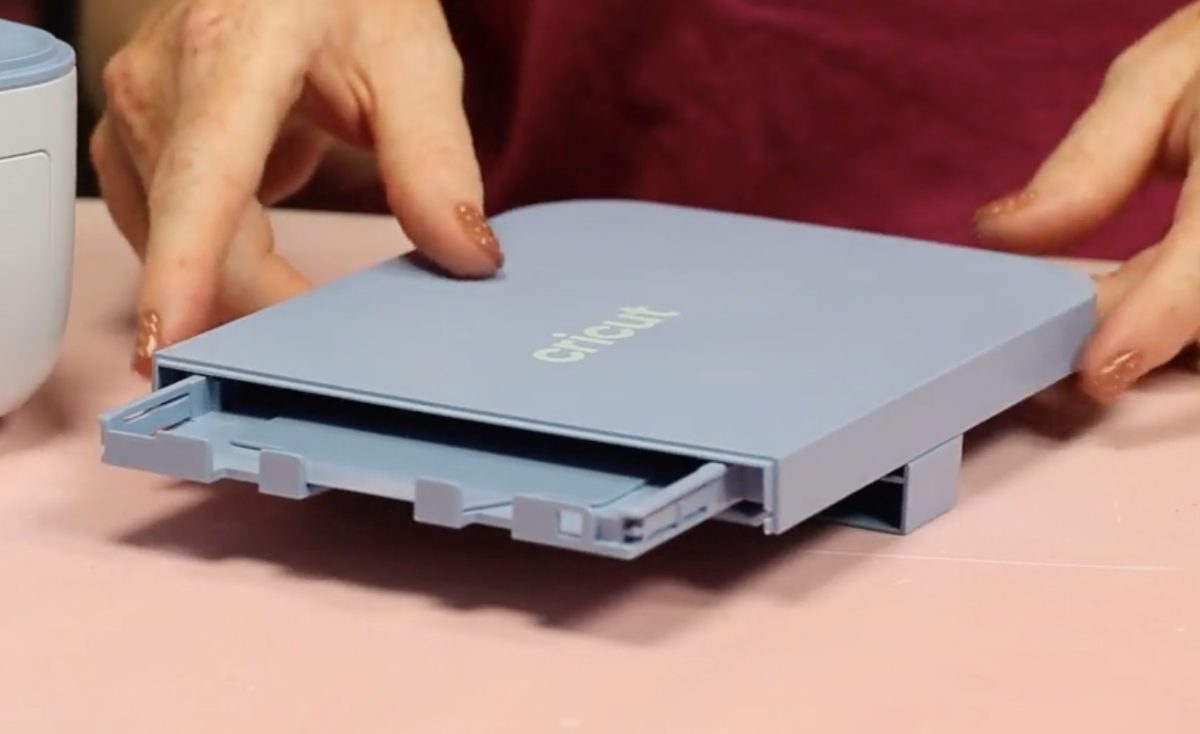
To load the material into the tray, open the material tray and place the material print side up.
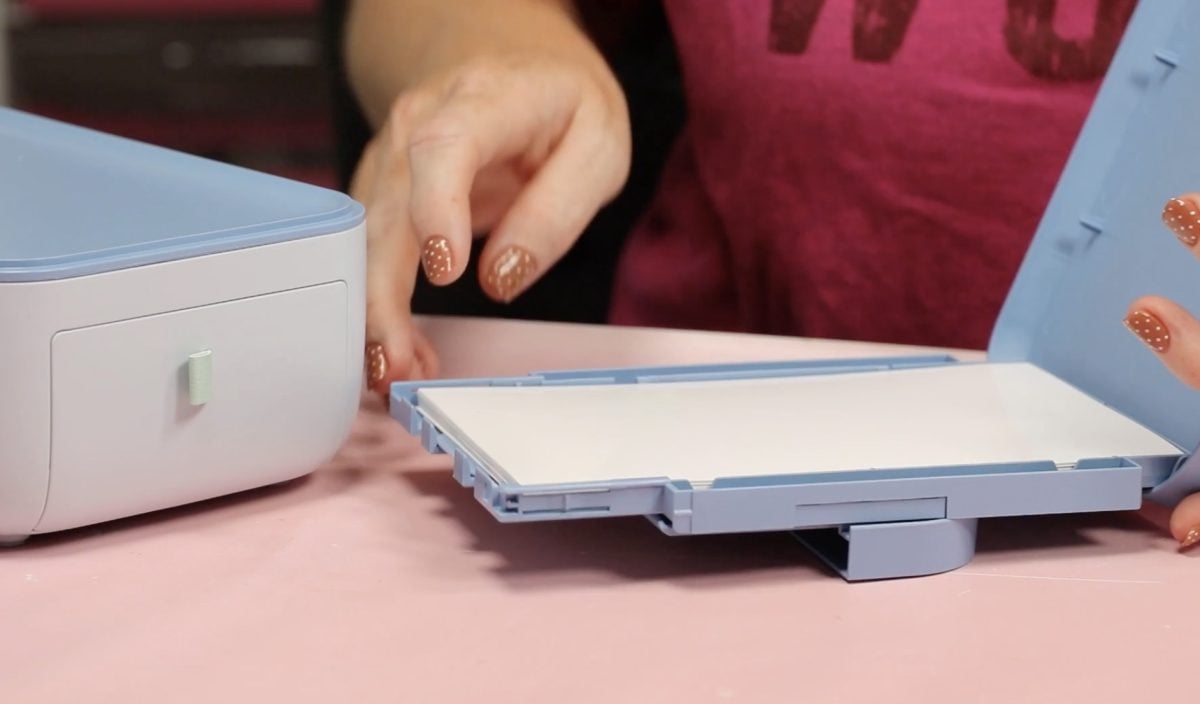
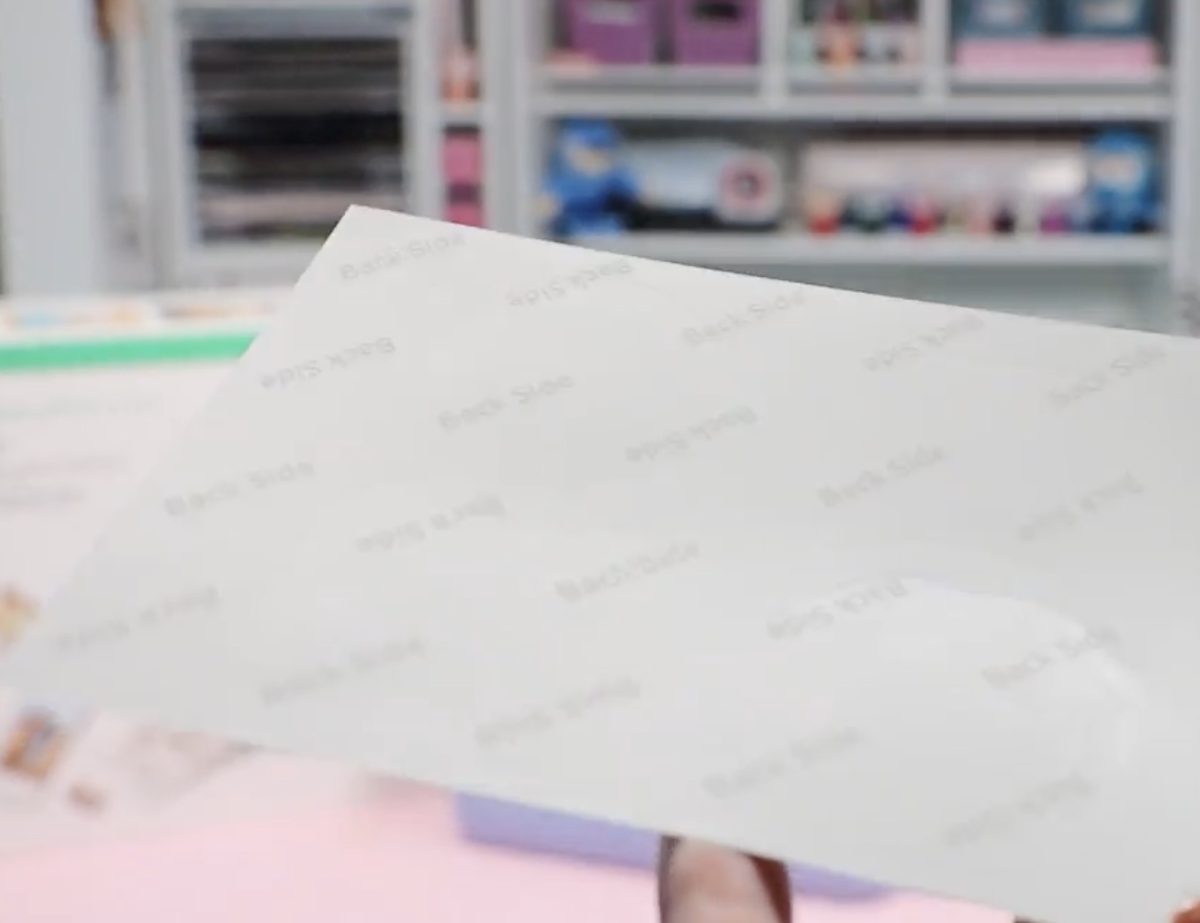
All of the materials have a watermark-type logo on the backside of the material. Make sure you don't touch the top of the material; if you do, fingerprints can show up on the finished print.
The maximum capacity for photo prints is 18 sheets of photo paper.
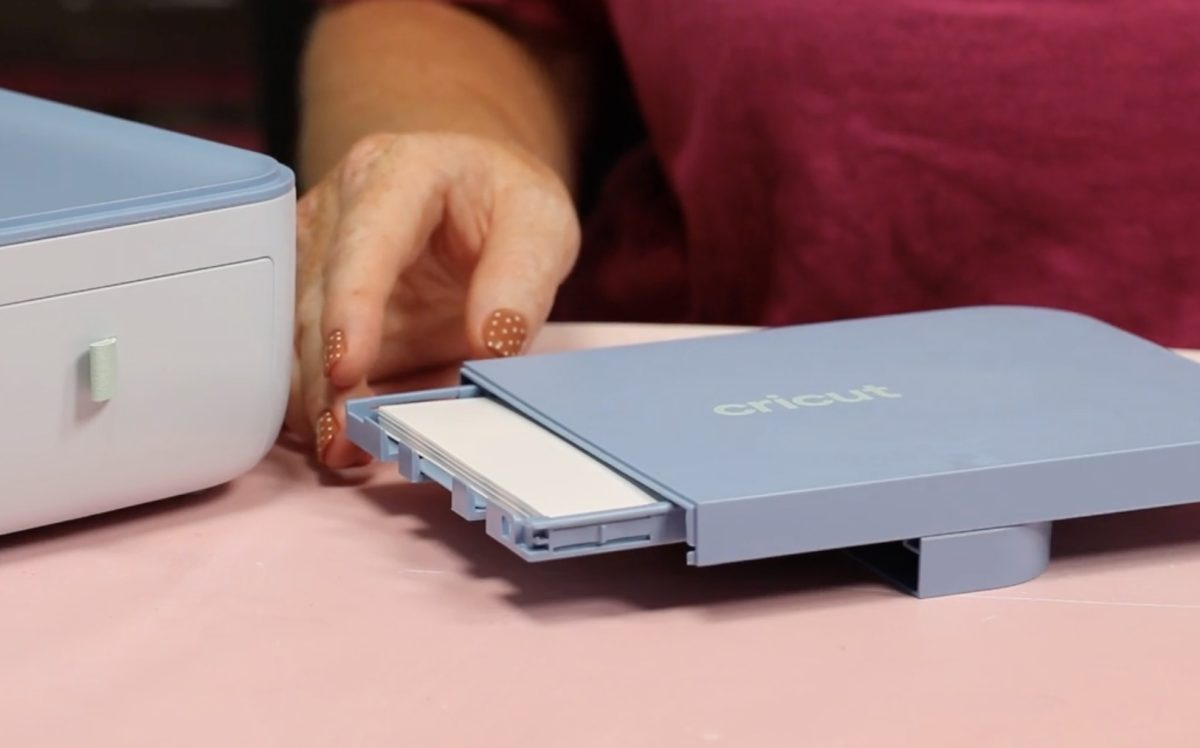
If you're using pre-cut sticker sheets, load them into the material tray one sheet at a time to ensure the best alignment with the pre-cut stickers.
Open the door of the printer and load the material tray into the material tray slot and press it until it snaps into place.
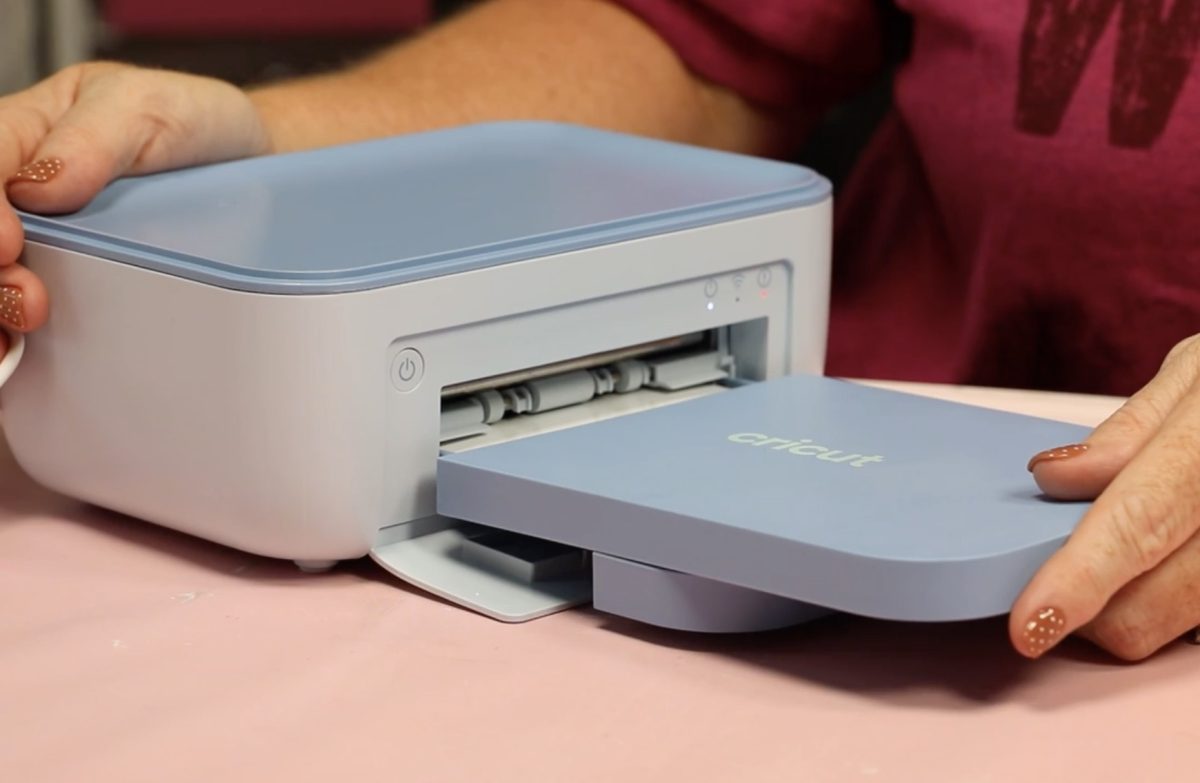
Make sure you have 4 inches in front of the printer and in the back.
Connect to Design Space
If you haven't already plugged in the printer and powered it on, do that now.
Open Cricut Design Space and select Set Up a New Machine. Design Space will walk you through the entire setup process.
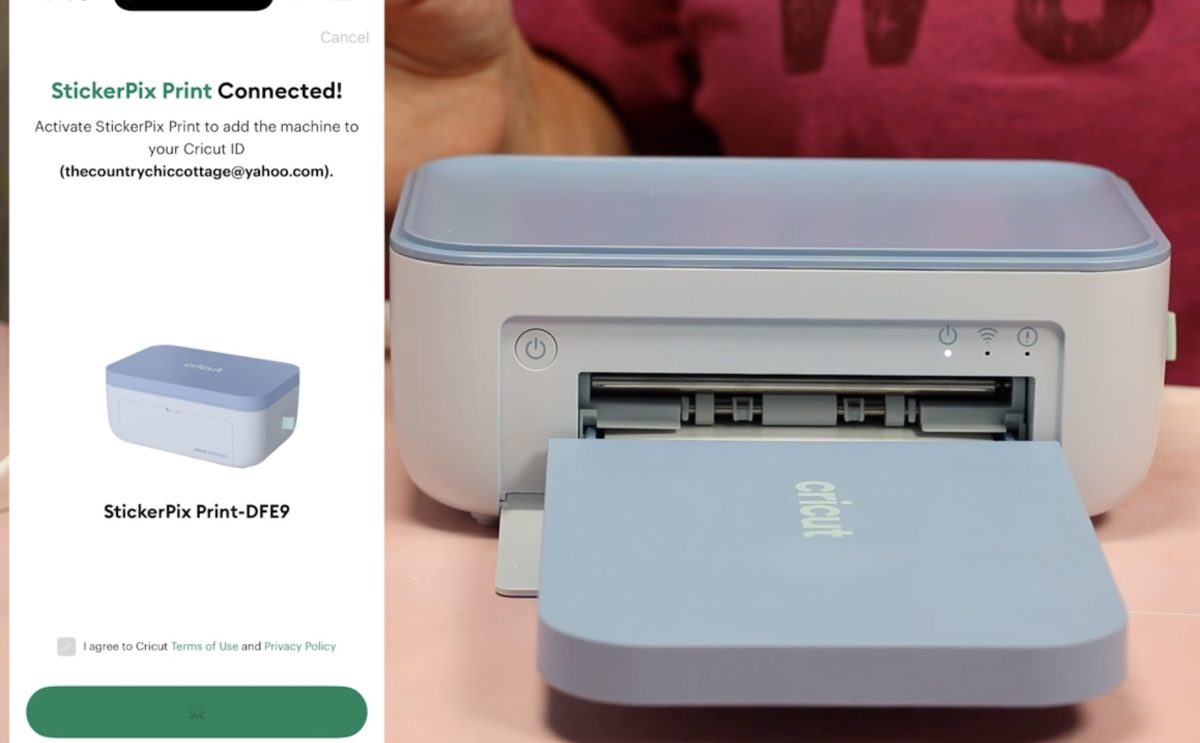
This machine uses WiFi instead of Bluetooth to connect, which is different from other Cricut machines. During the setup process, there is likely to be a Firmware update that needs to be done before you can use the printer.
When you have everything setup you can make your first project.
In Design Space, there are options you can choose, such as Stickers, Labels, Photo Prints, and Cards & Invitations.
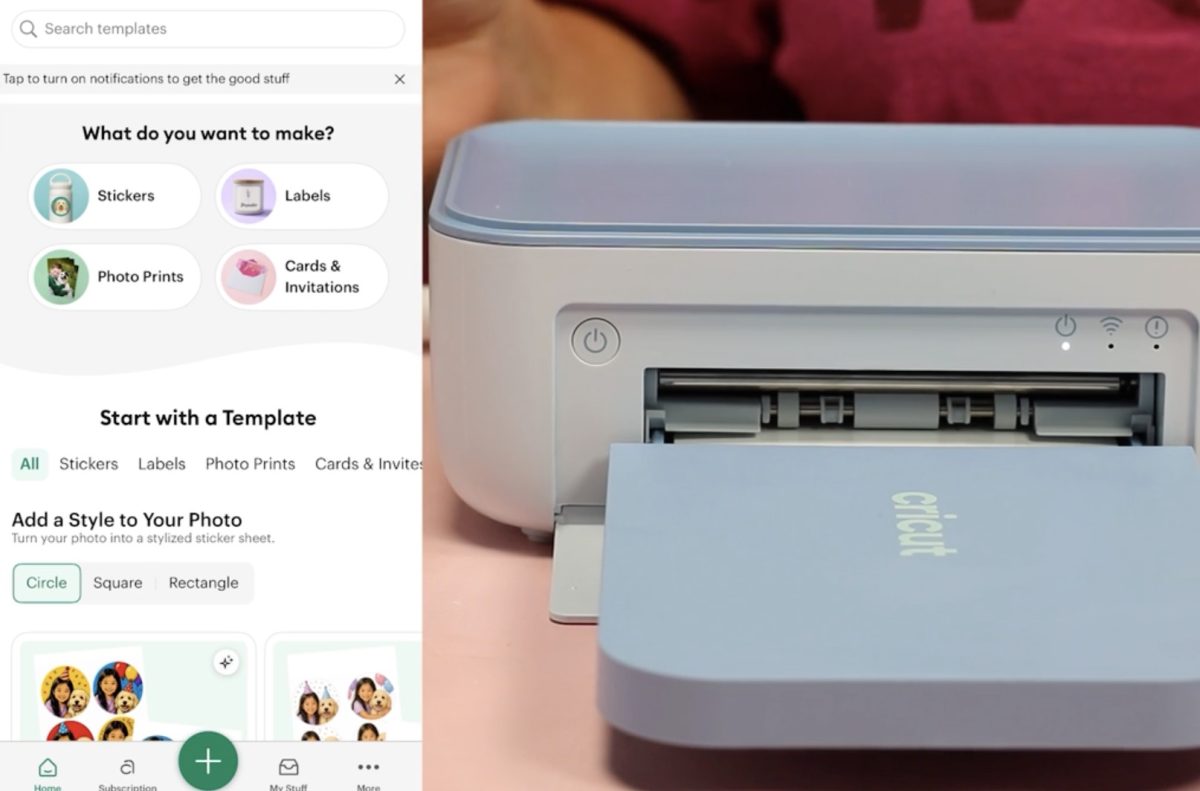
Print a Photo with the Stickerpix Print
The first thing I want to do is test the print quality, so I'm going to print a full 4×6 photo. Find the photo on your device and load it into Design Space.
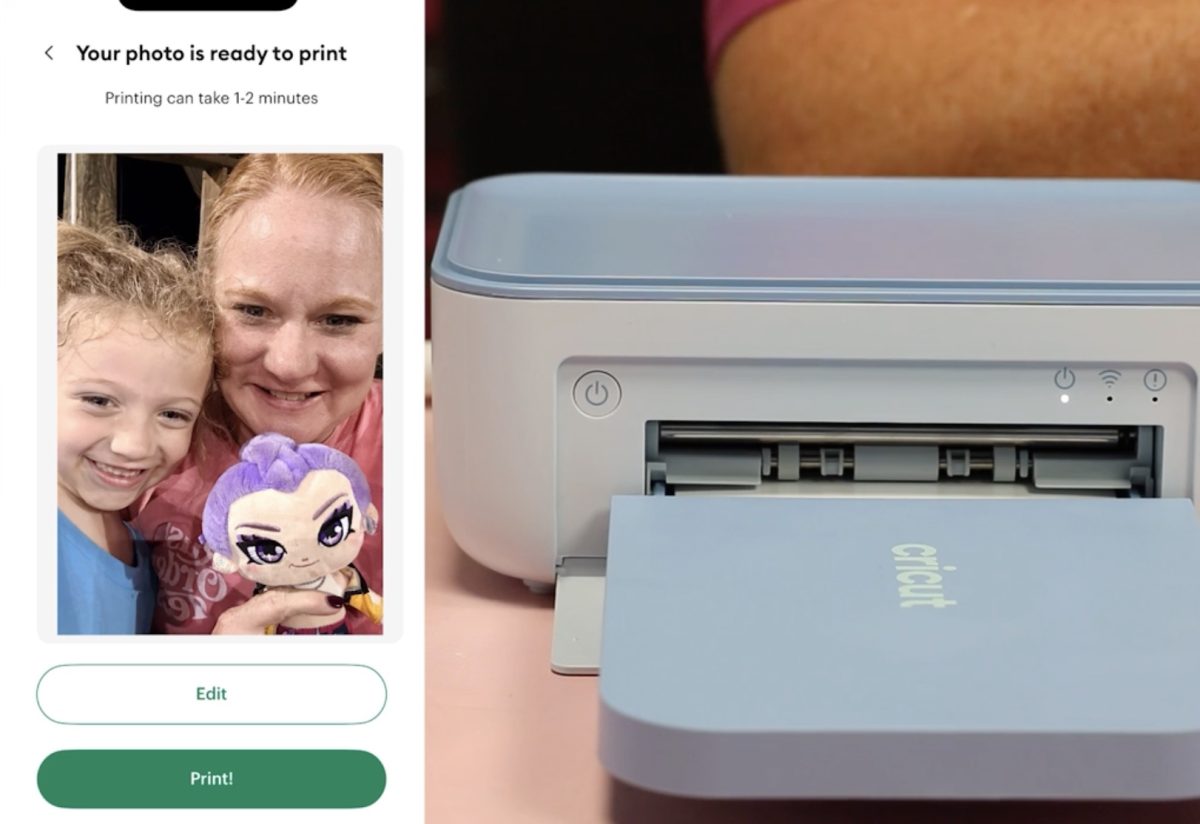
From here, you can edit it with any of the included editing tools. Because I want to see how it prints without changing anything, I am printing it as is. Load the correct material into the material tray. The photo paper does not have an adhesive back, as the sticker and label papers do.
As the printer prints, you'll see the photo move in and out of the printer. First, it will print yellow; next, it will print magenta; after magenta, it will print cyan; and then it will apply the laminate on top.
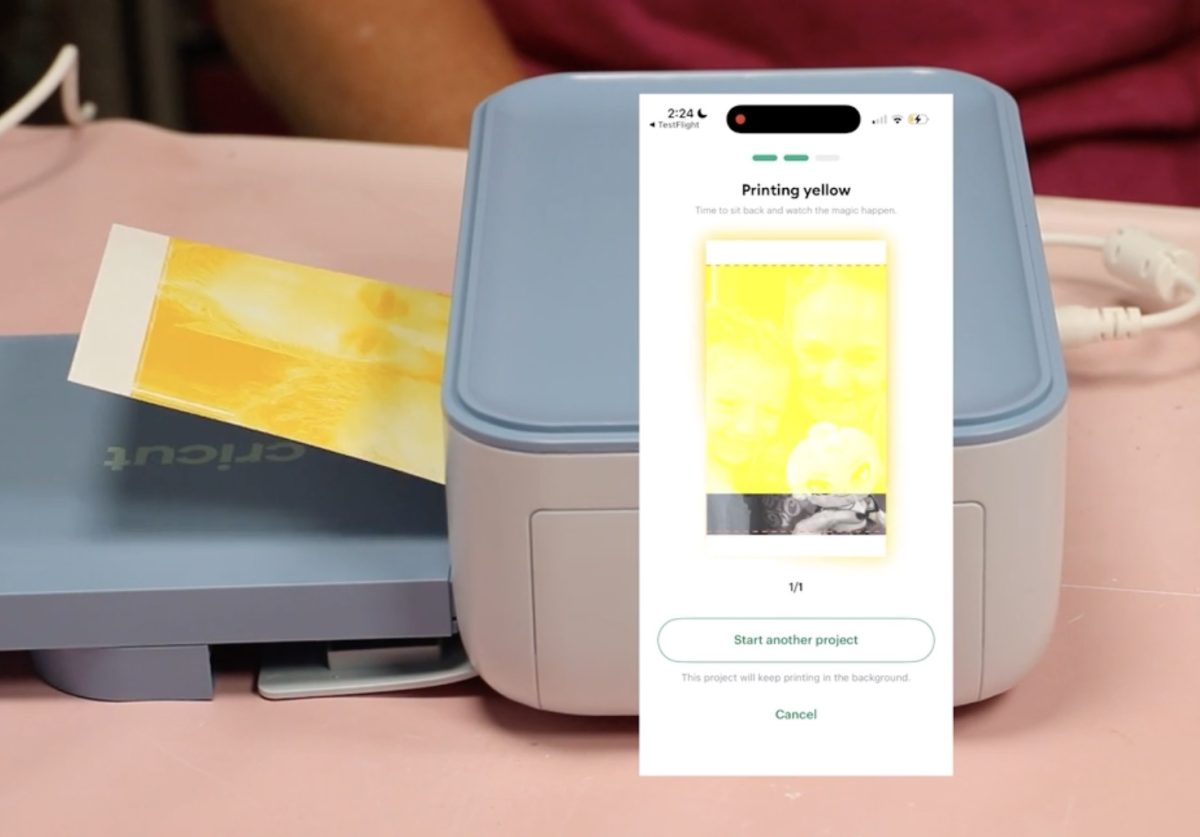
You can watch the printing process right in Design Space.
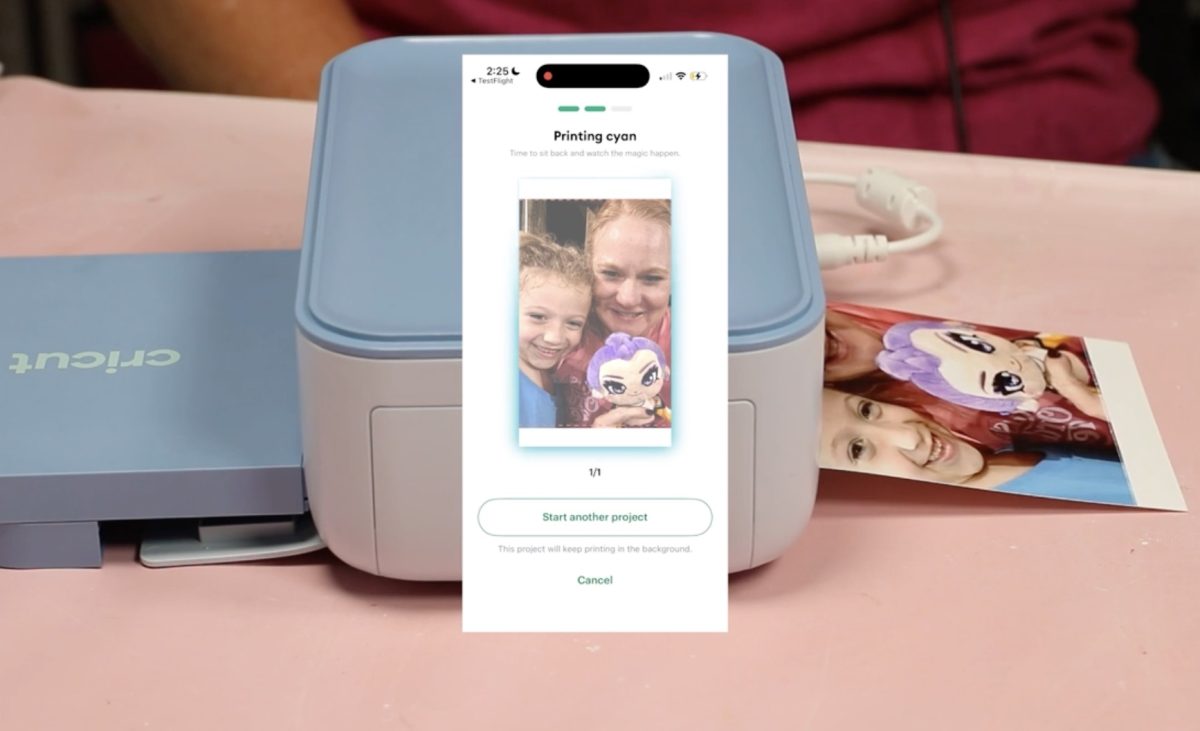
When it's done printing, the photo will come all the way out of the printer.
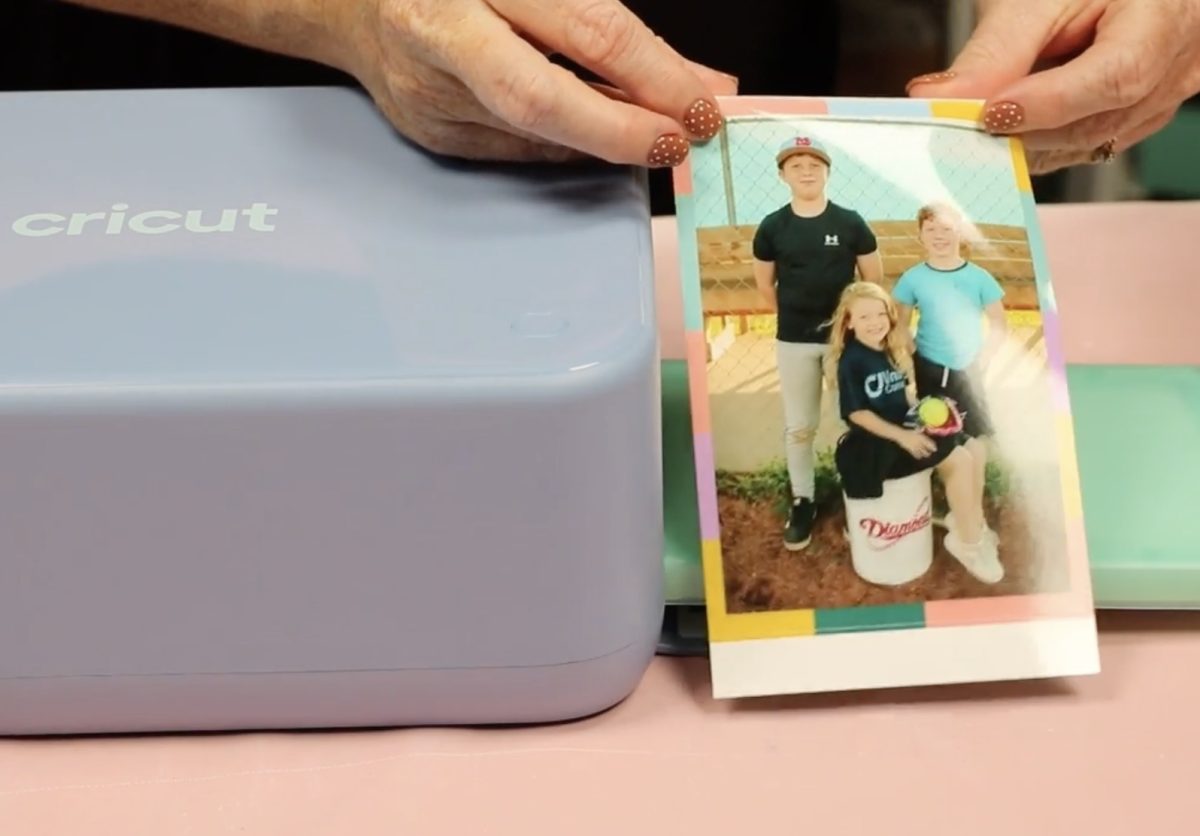
The 4×6 photo prints have a perforated piece on both the top and the bottom. Those areas are not printed. Fold them over to easily tear them away from the print.
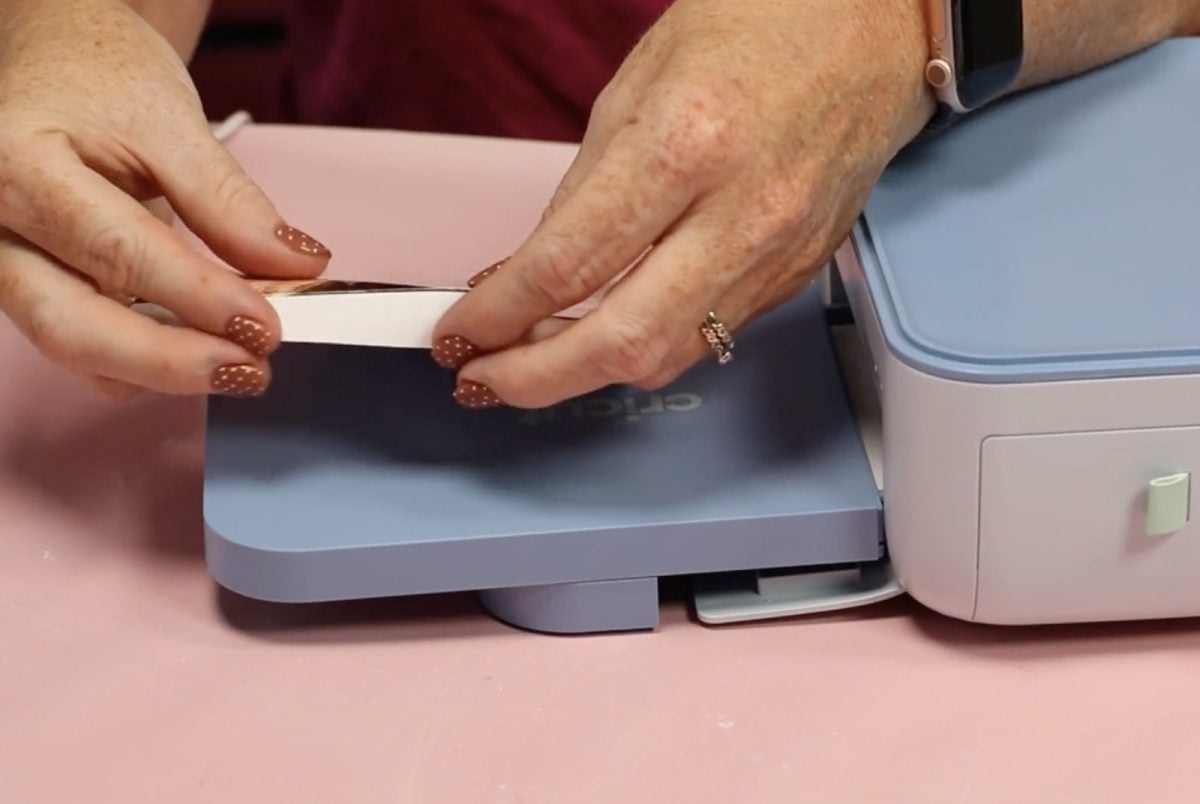
The photo quality of this print is fantastic. It's glossy and vibrant, and I'm really happy with the results.
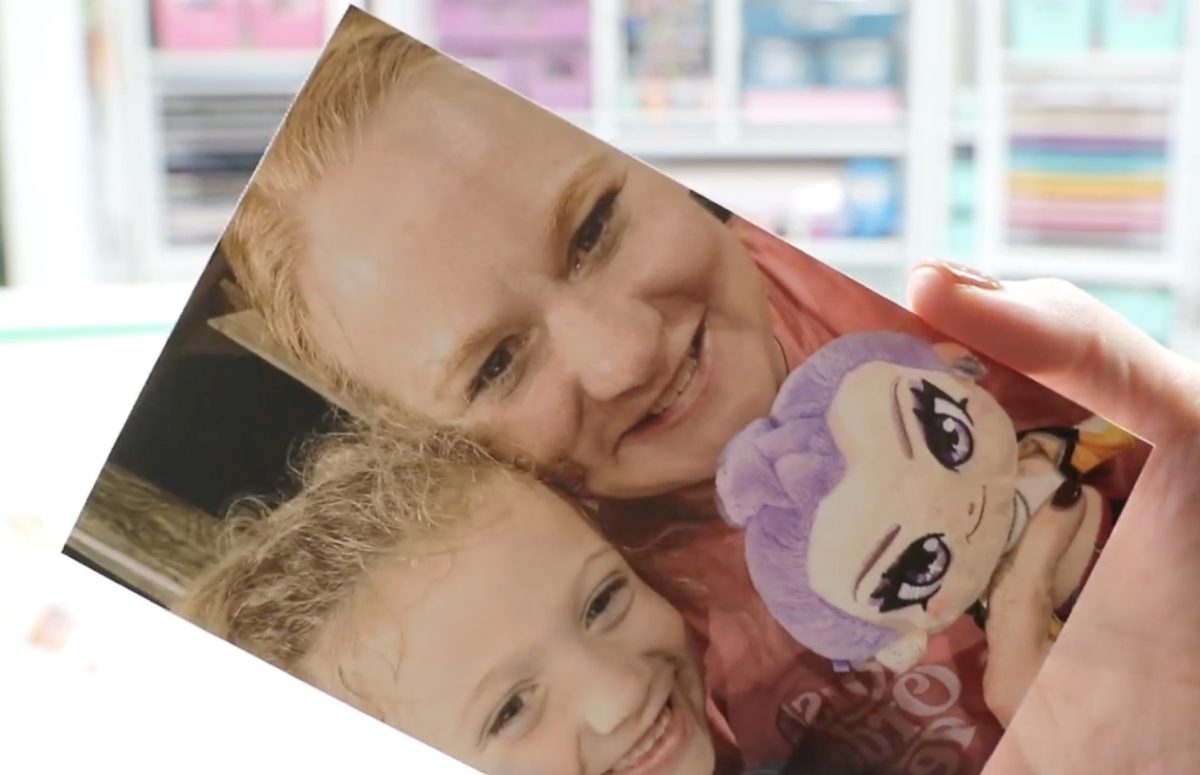
The only thing I am unhappy with is that you can feel the perforated edge. I have used other sublimation dye printers that have that perforated piece, and this feels similar to those.
One other thing to note: the photo paper has a watermark on the back. This helps ensure you print on the correct side. You can't see the watermark through the print, but all of your prints will have that watermark if it bothers you.
Print a Sticker Sheet with Stickerpix Print
Next, I am going to test making a couple of sticker sheets. First, I am going to make some circle stickers; then I'm going to make rectangle labels.
In Design Space, select Stickers and choose the sticker sheet you want to use. First, I'm using the circle sticker sheet and have it loaded in the printer.
I scrolled through the templates to find one I liked. I found a Halloween template I liked, and it's a fun option because I can actually click on the images, select Fill, and upload a photo to the different designs. Resize the photos so they fit the design the way you like it.
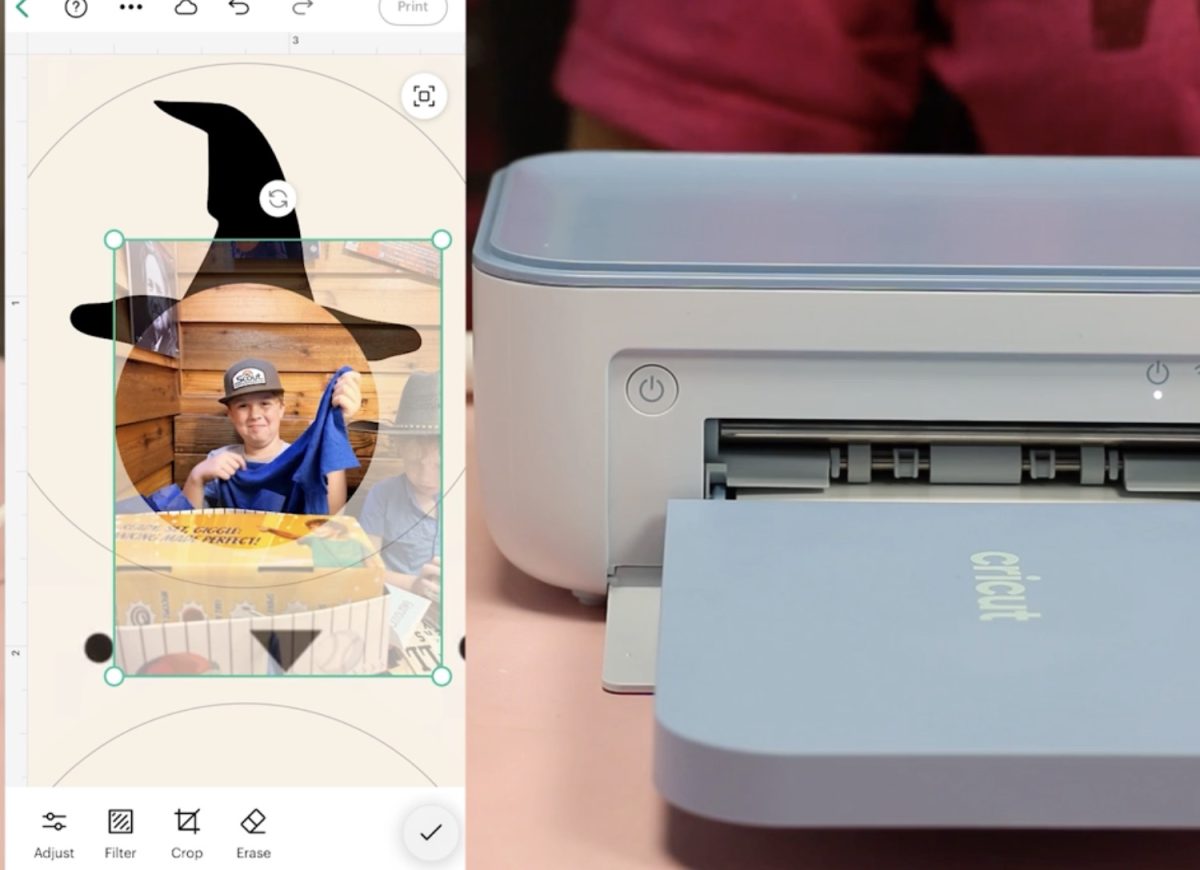
Design Space will remind you to load only one sticker sheet into the material tray. Loading one sheet at a time helps ensure the best alignment for your images on the pre-cut stickers.
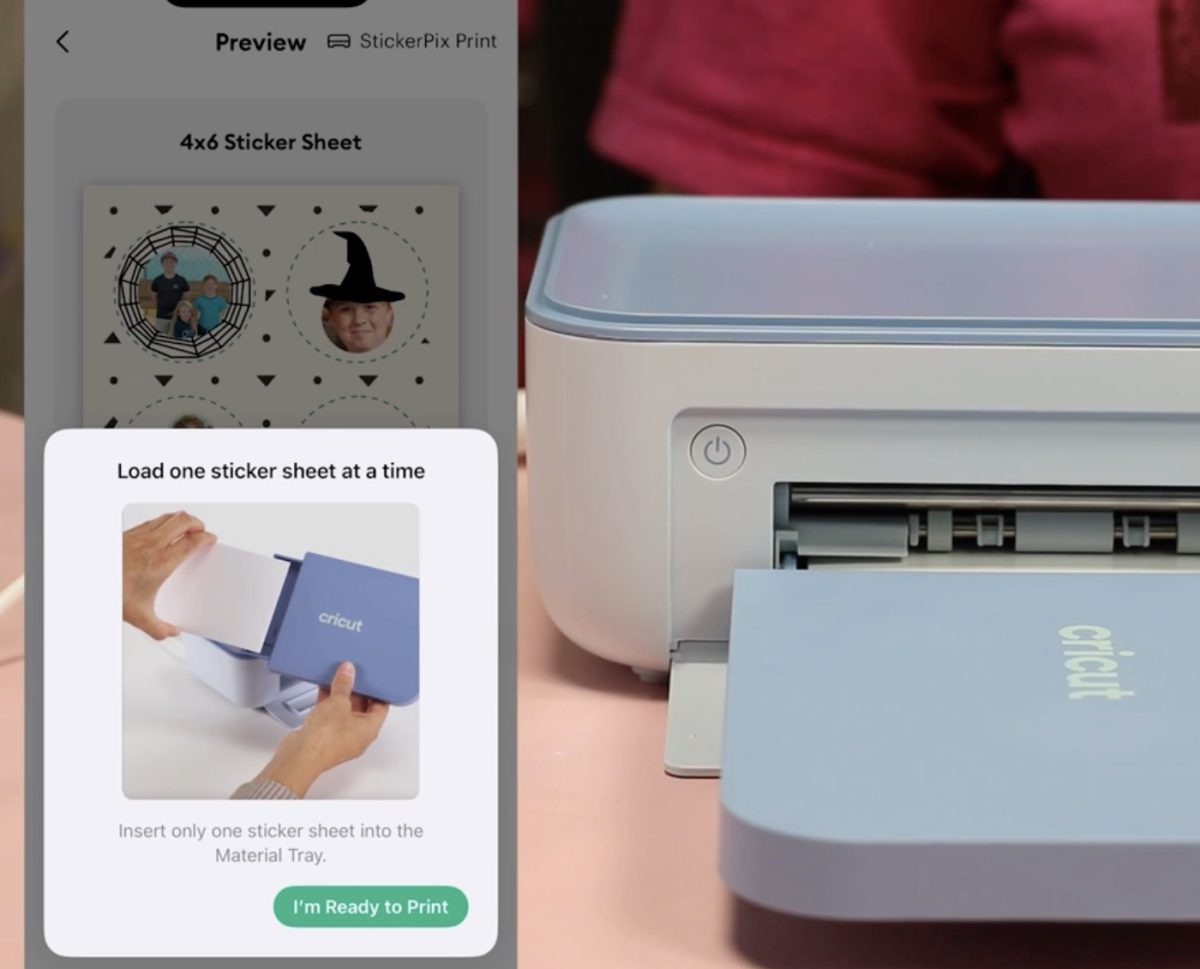
Click Print, and it will send the design to the printer. Make sure the sticker type you selected in Design Space is the same as the material you load into Stickerpix.
There is no cutting required with these prints. As soon as the laminate layer is done, your sticker sheet is complete.
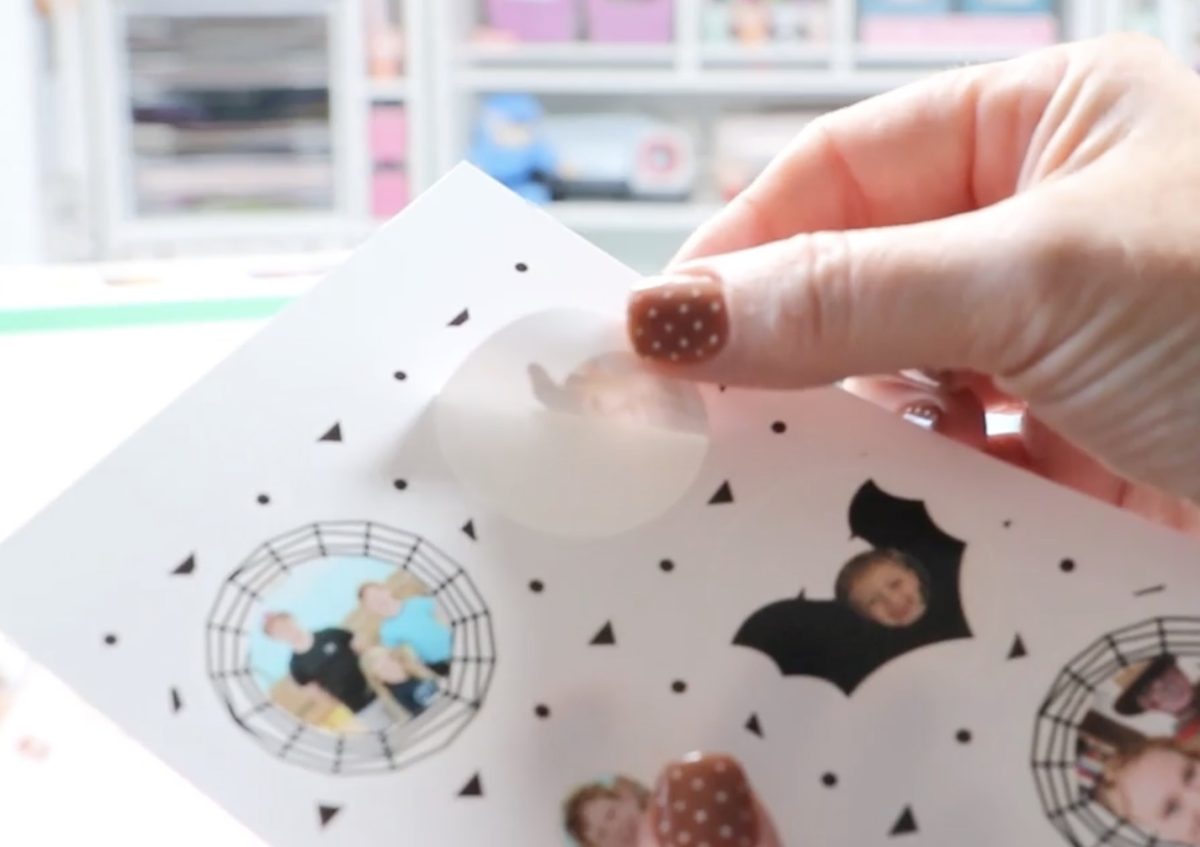
These turned out so good. The designs are located perfectly on the stickers. The stickers peel back from the sheet easily, and they were so easy to make.
There is a watermark on the back of the sticker paper.
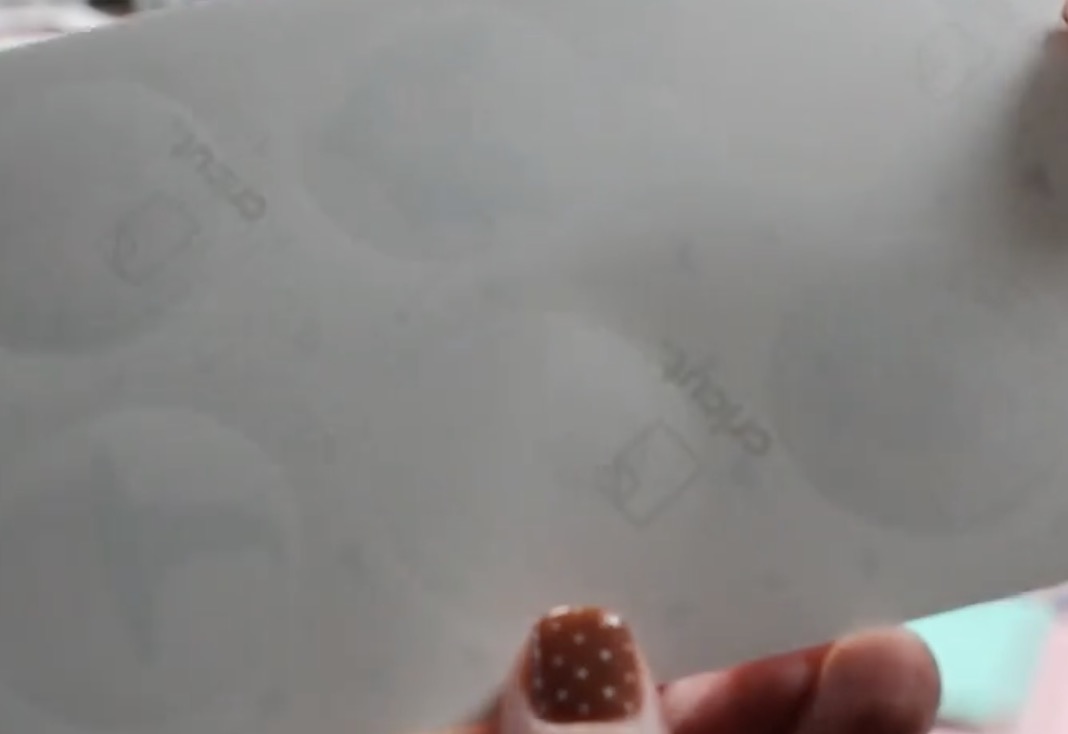
There is no perforation on these sticker sheets, but there is still a white section on both the top and the bottom of the print. If you want those sections removed, you'll need to cut them off with scissors or a paper trimmer.
Print a Label with the Stickerpix Print
While the photo projects are fun, you don't have to use photos with the Stickerpix Print.
This time in Design Space I chose labels and I chose the rectangle label sheet.
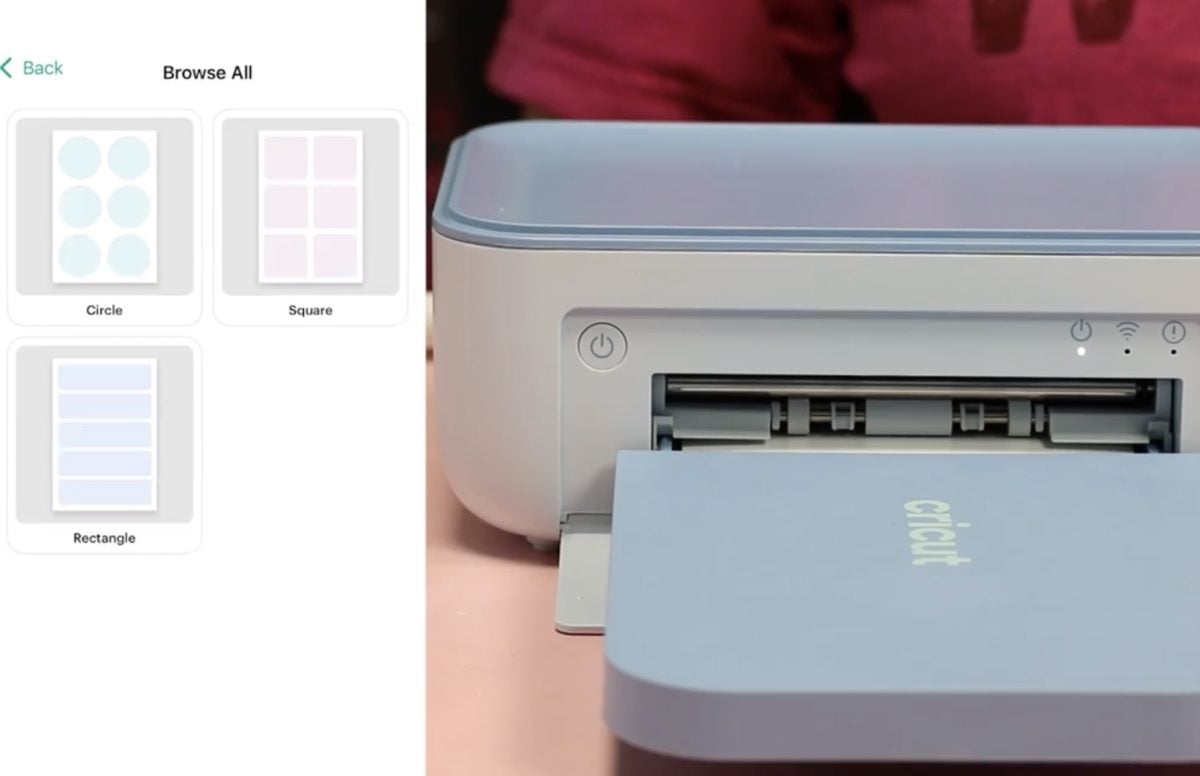
For the labels, I found a fun book-themed label template. The great thing about these label templates is that I can change the text and any of the colors.
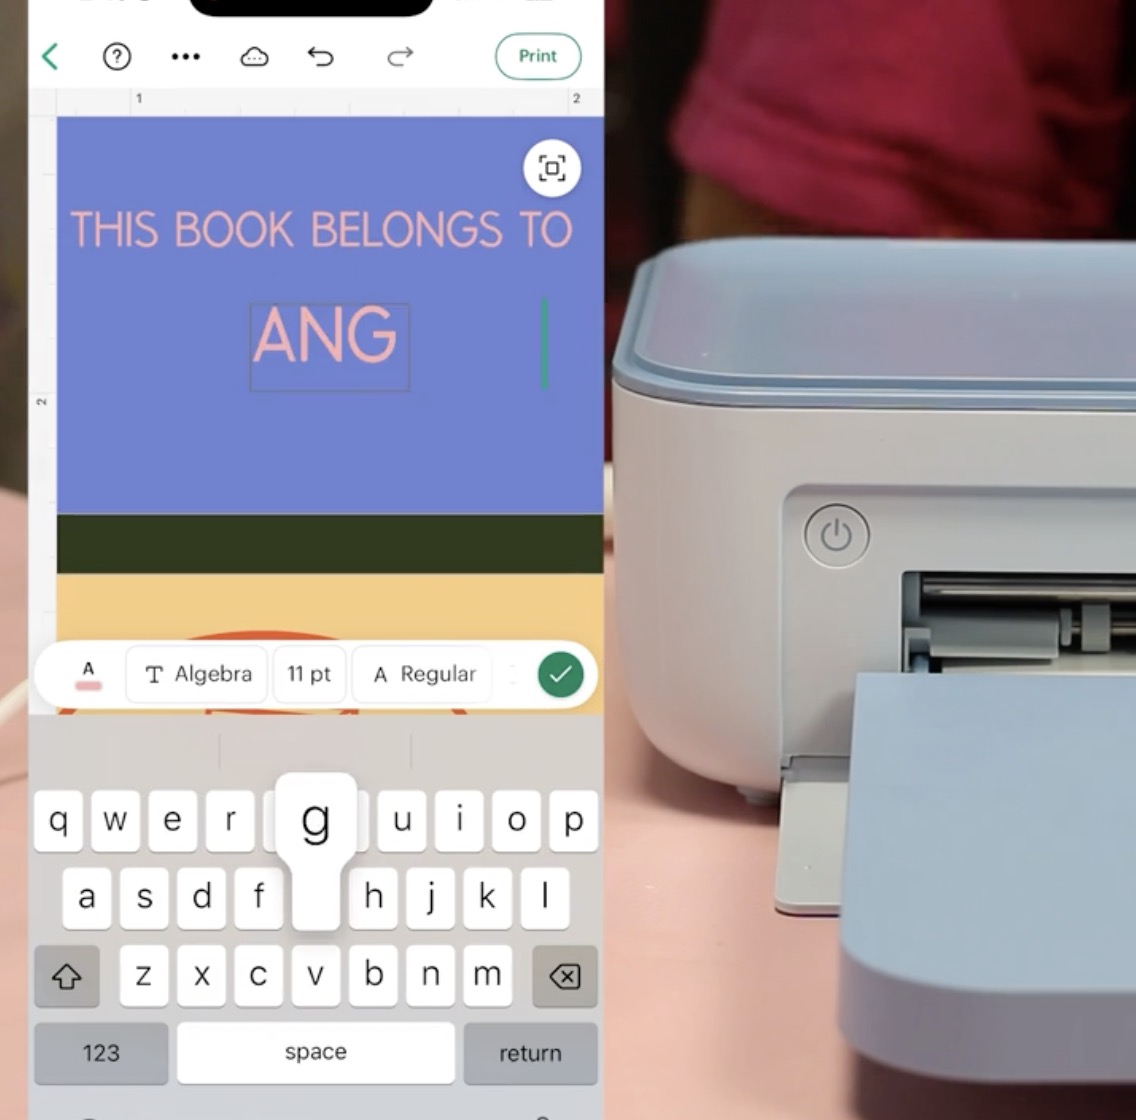
When I had everything how I wanted it, I clicked Print in Design Space, and it sent the design right to the printer.
These labels turned out so good. I love how easy they were to make, and now I have labels I can add to any of my books.
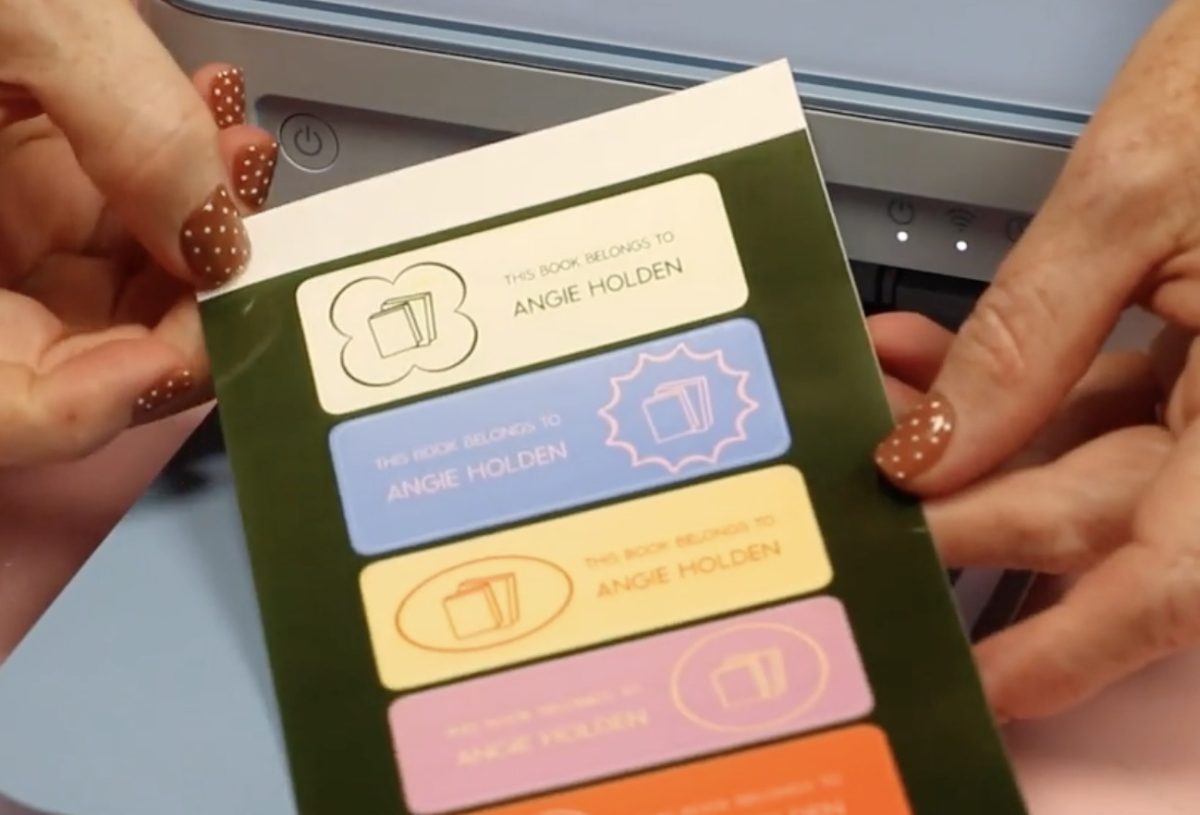
Even though the Stickerpix Print doesn't have the ability to cut, I was still able to create a variety of projects with it. From high-quality photo prints to stickers and labels, I am able to easily create different projects using the Stickerpix Print printer.
Buy the Cricut StickerPix Printers here!
Cricut Stickerpix Print + Cut Setup
First, open the door on the side and load the cartridge into the machine with the label side up. The material tray for this machine is inside the machine.
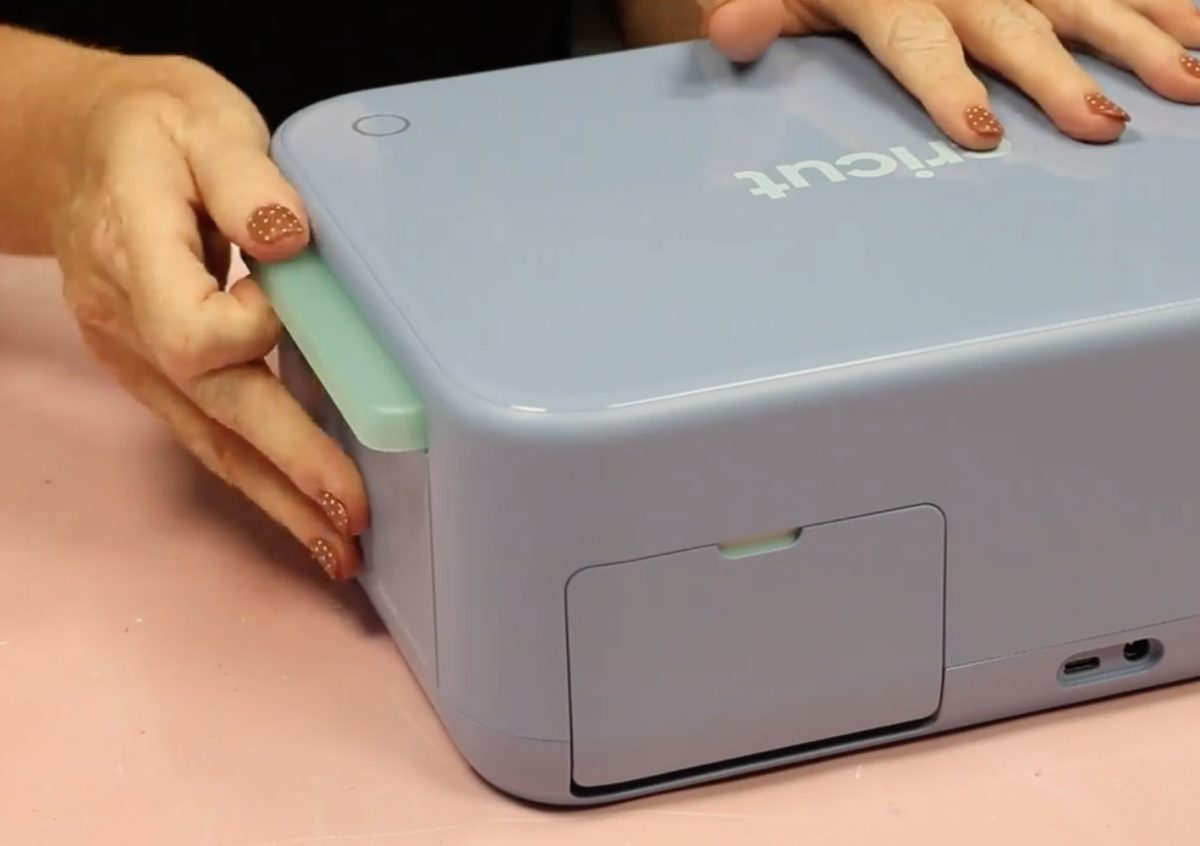
Open the door, remove the tray, and load the material into the tray with the printable side facing up. When you remove the tray, the lid pops open, and you can load 18 sheets of material into the material tray.
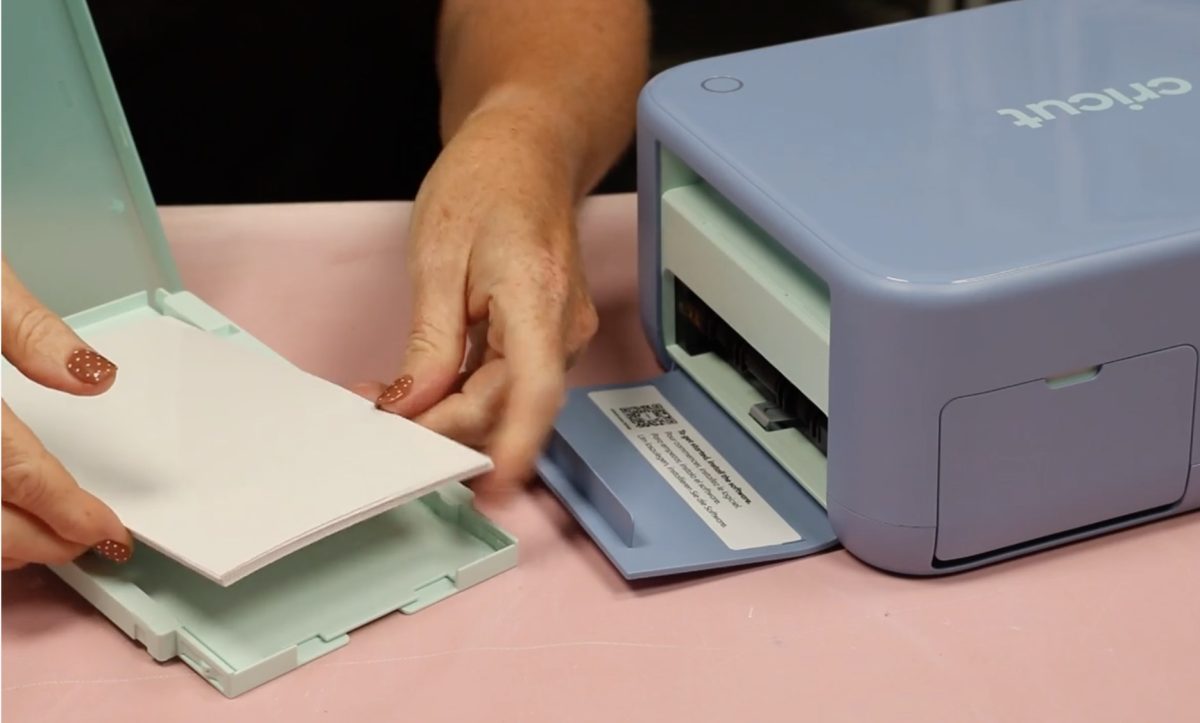
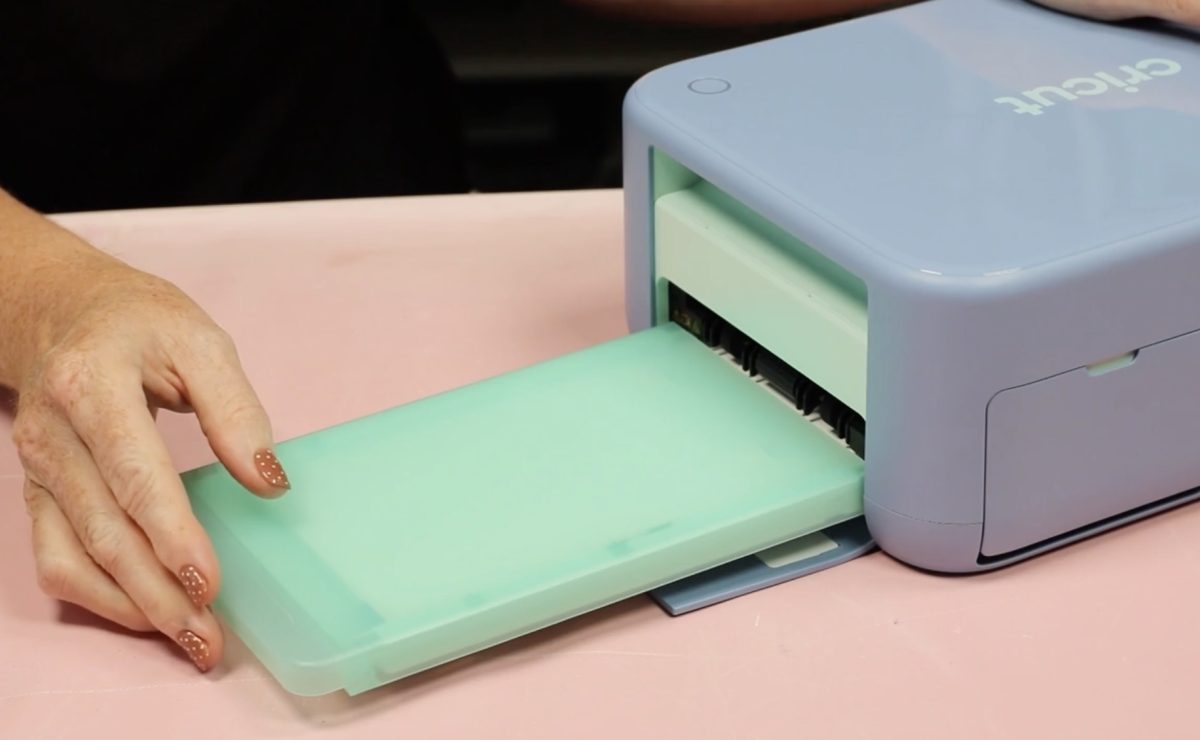
Load the material tray into the material tray slot and push it into place until you hear it click.
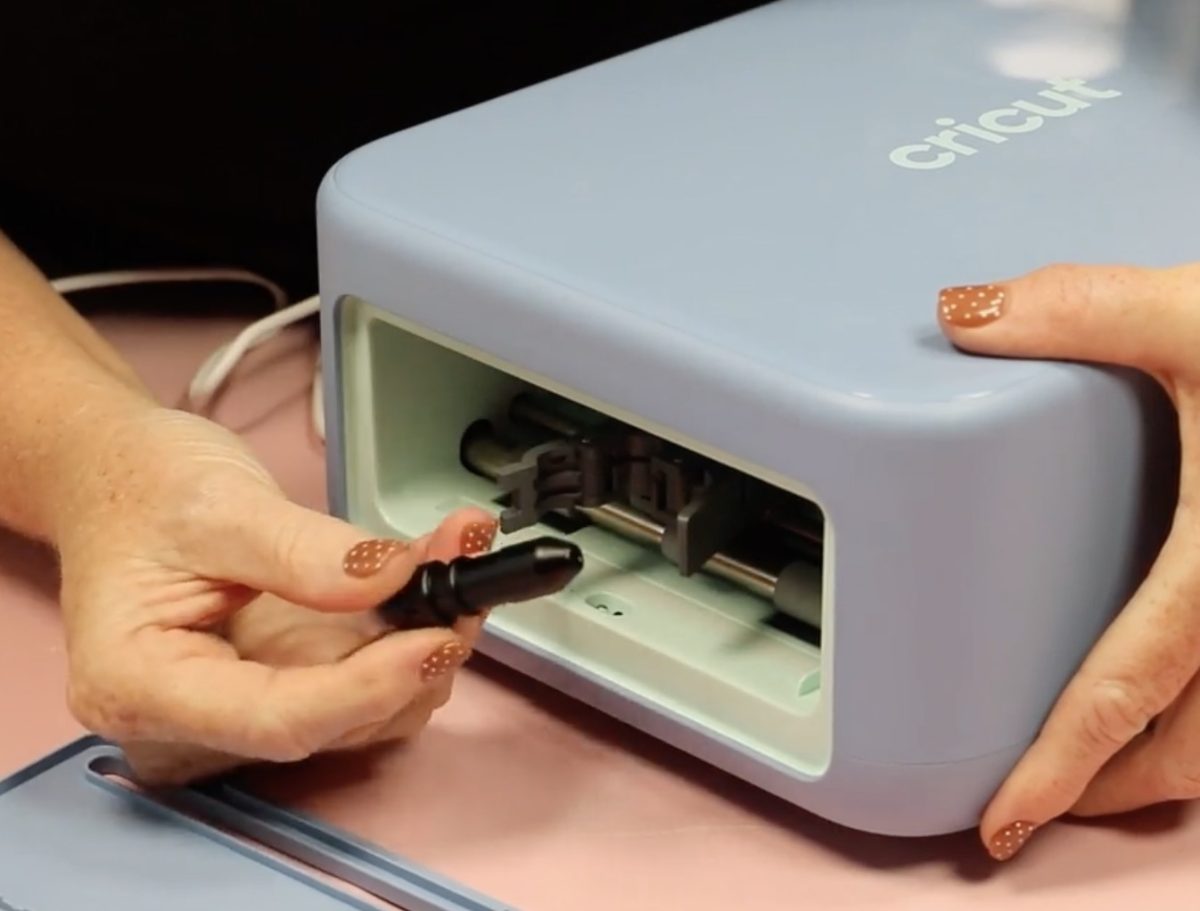
On the backside of the printer, there is another door. This is where the blade is. If you need to replace the blade, open that door and change it out. The process is similar to changing the blade in a Cricut machine.
Make sure the printer is sitting on a stable, flat surface with 12 inches of open space in front of and behind it. Plug it in, press the power button, and head to Design Space to finish the setup process.
Connect to Design Space
The setup process is very similar to setting up the Cricut Stickerpix Print; this printer, however, uses Bluetooth to connect.
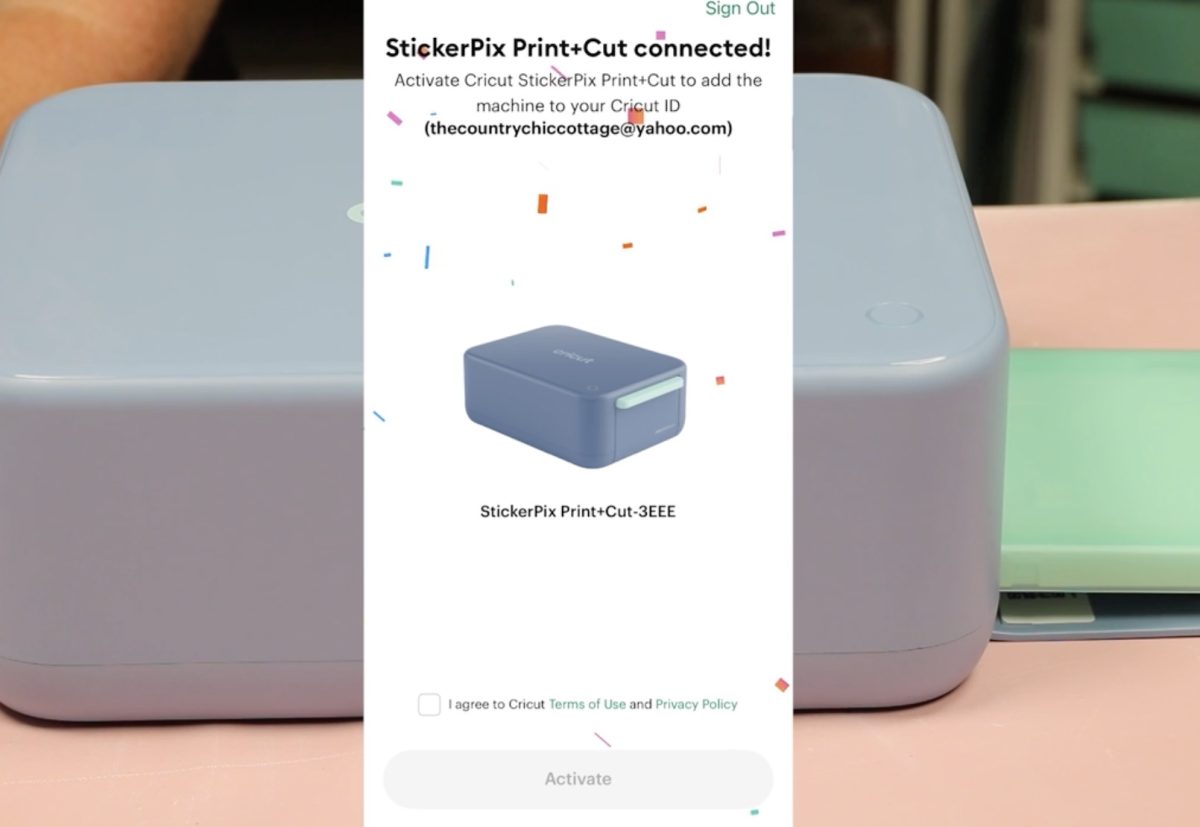
Just like with the other printer, there was a firmware update that was needed. Once that was done, I was able to jump in and start printing.
Print a 4×6 Photo with the Cricut Stickerpix Print + Cut
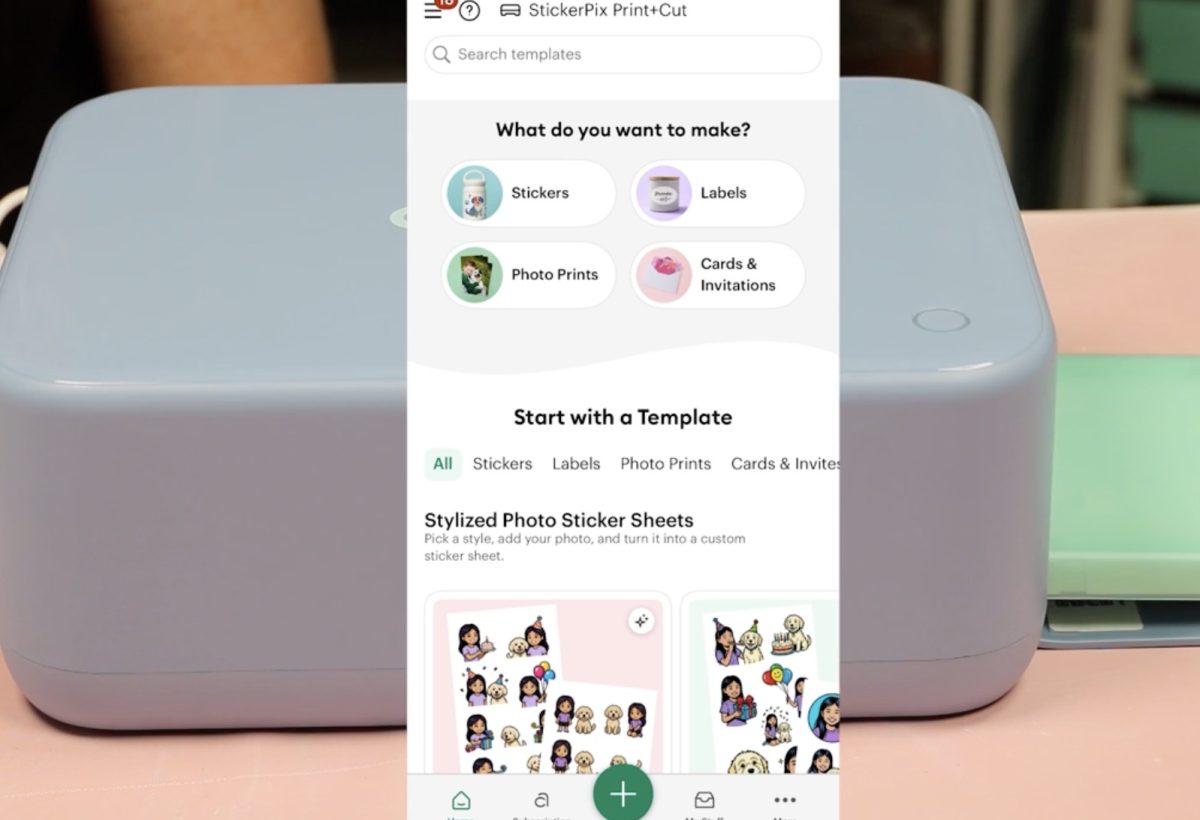
To print a photo I am going to select Photo Prints as the print option and then upload a photo from my phone.
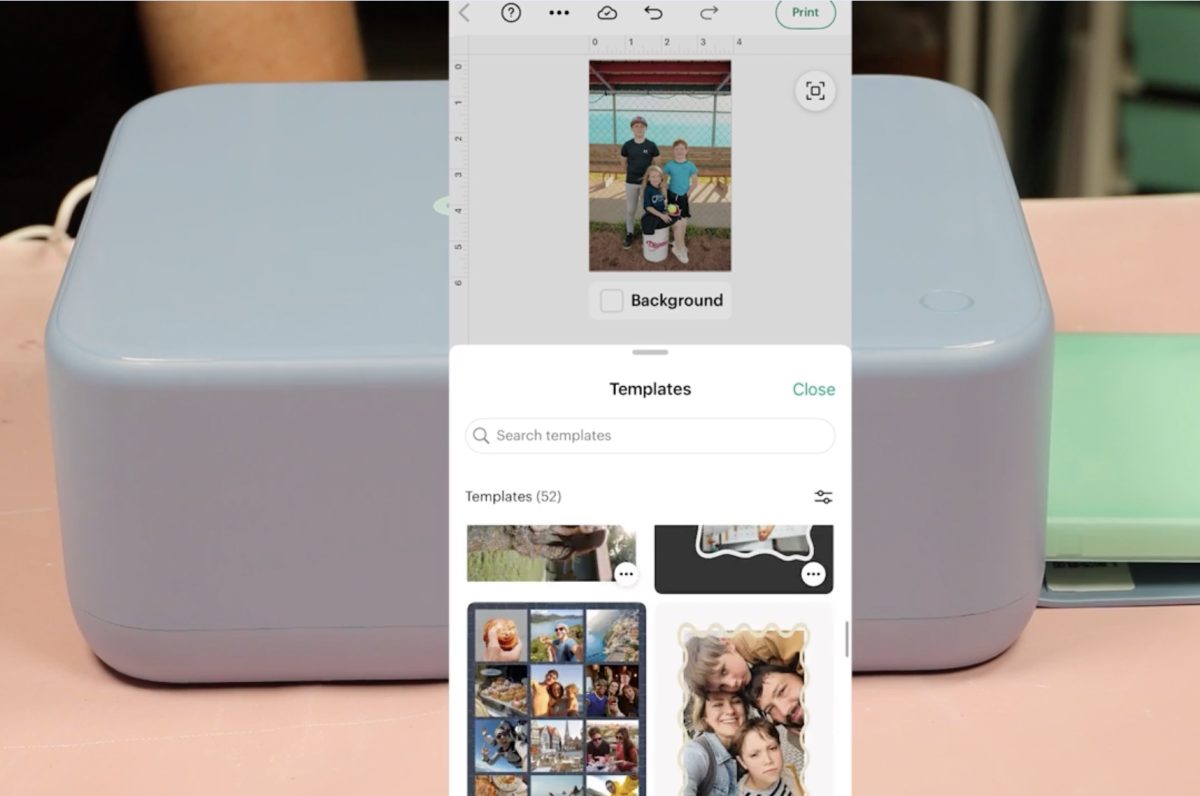
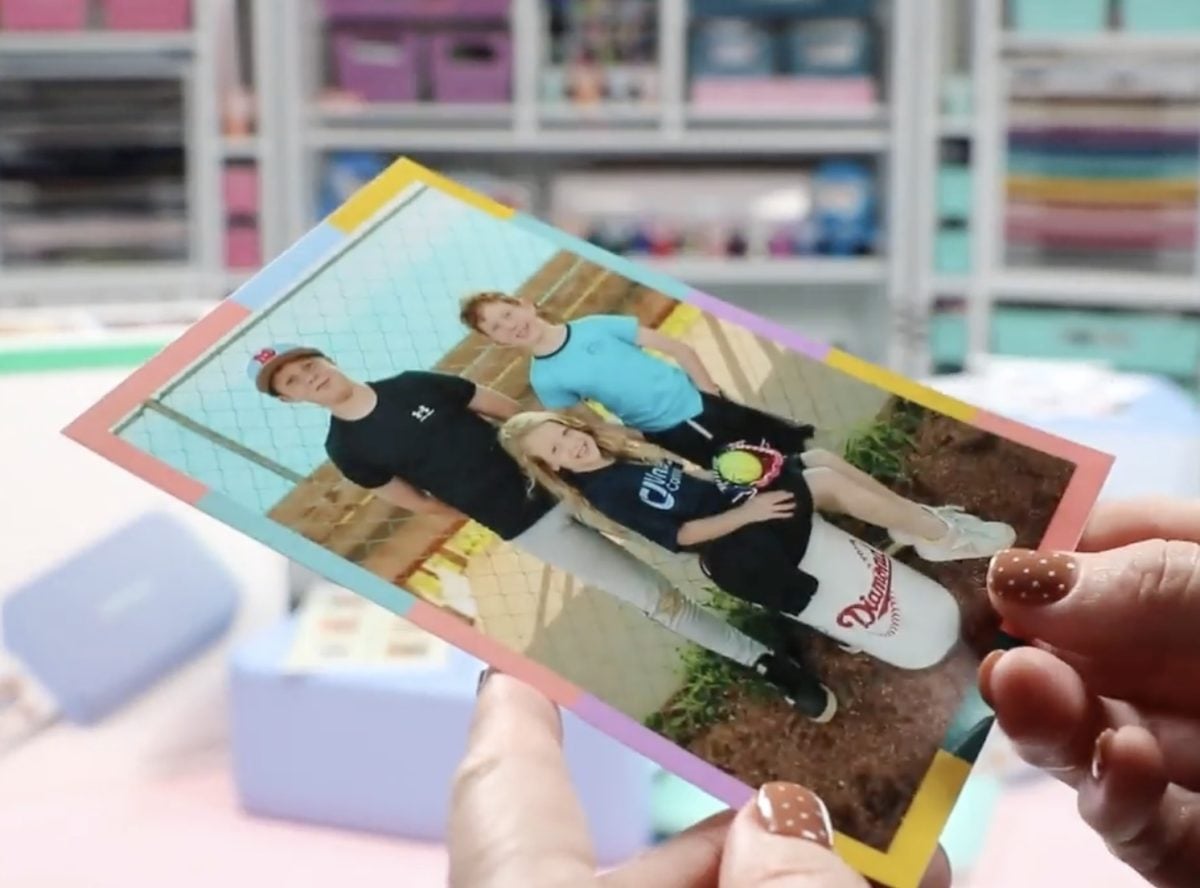
I want to test printing a photo with an added frame this time. To find a frame I liked, I clicked on the templates and then searched for Frame.
I found one that I liked and changed the colors to ones I liked better. You can also click on the photo itself and resize it to show more or less of the frame.
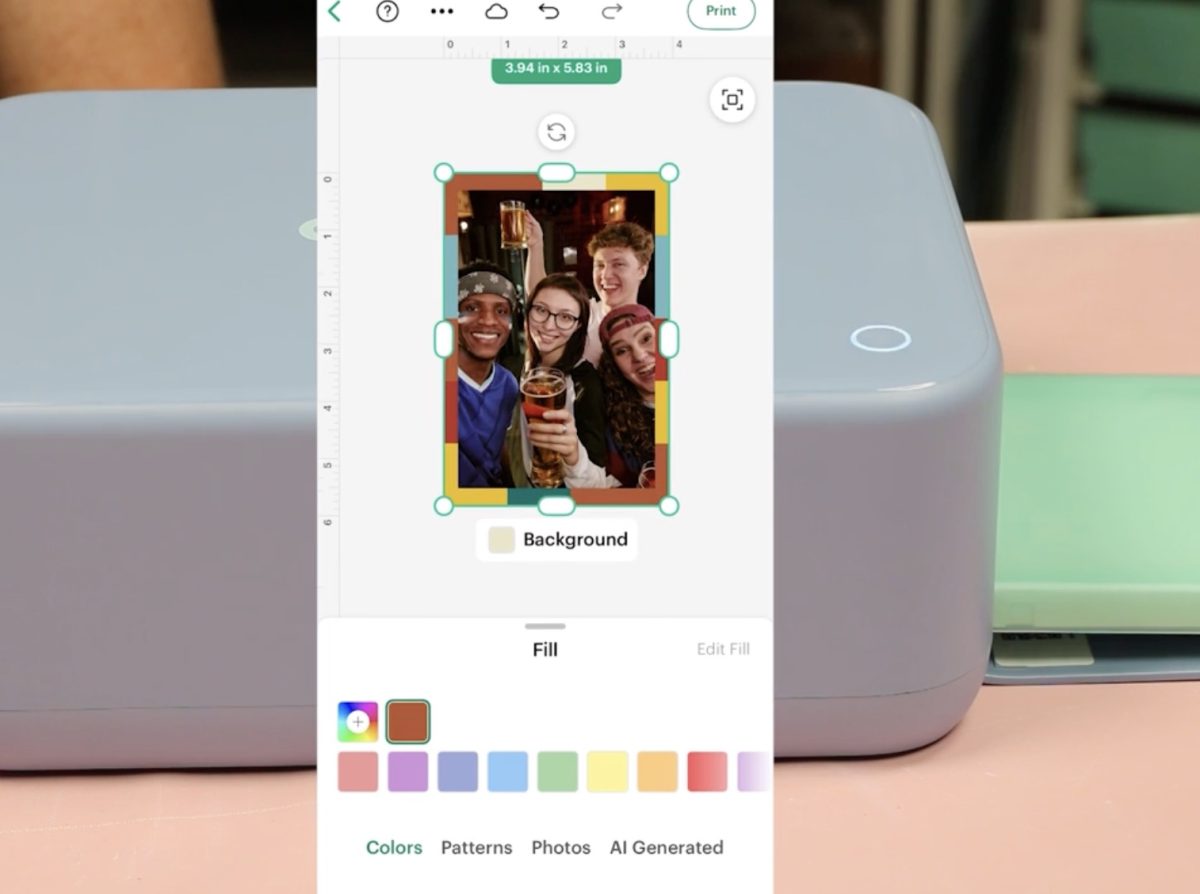
Click Print, and the photo will be sent to the printer. It's going to print the exact same way the other Stickerpix Print printed. It'll go through all the different colors and laminate and then spit the print out of the printer.
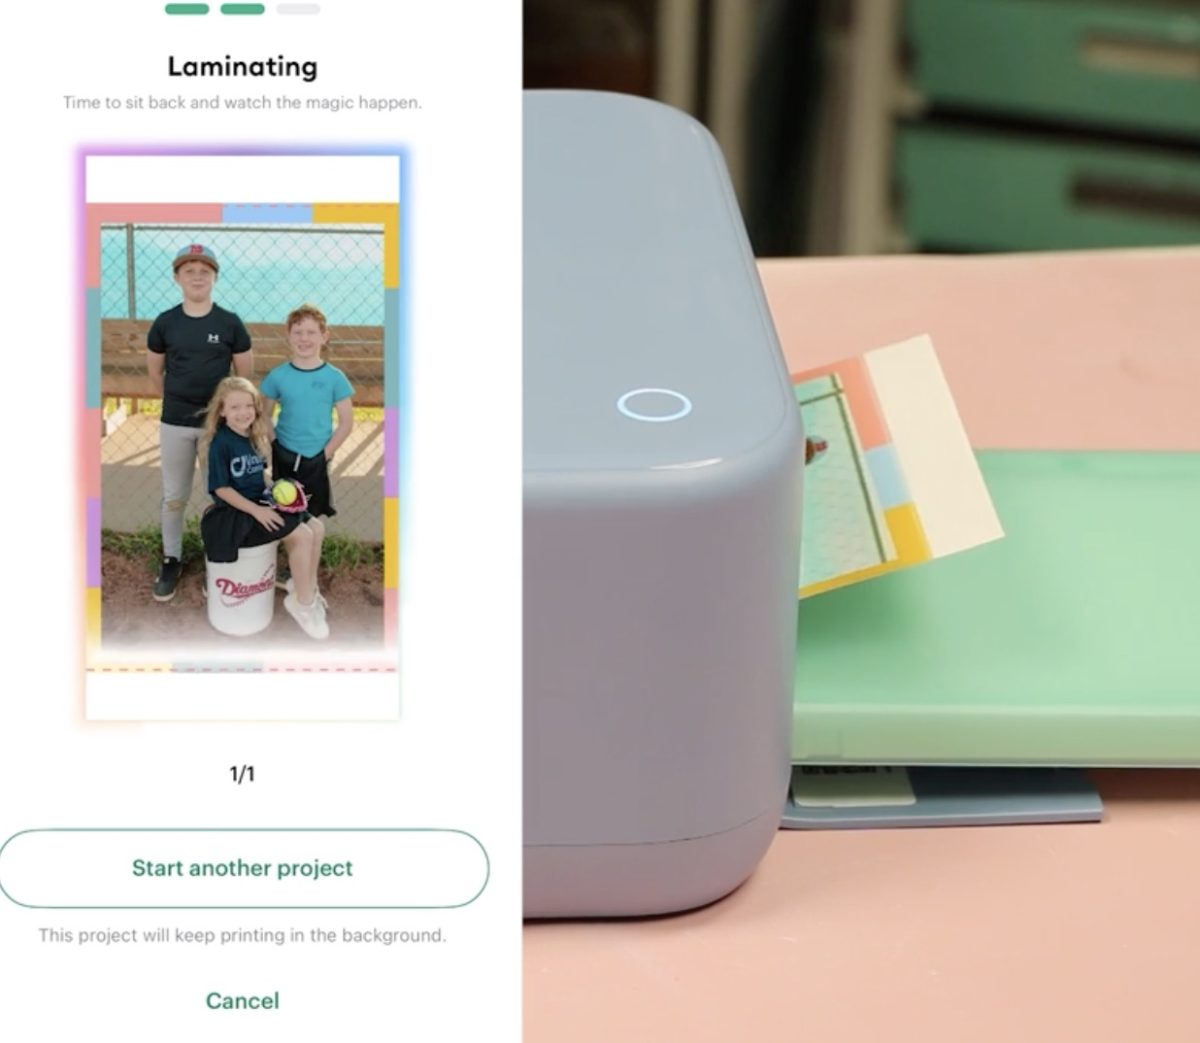
Just like the other printer there is a perforated tab on the top and bottom you can fold to remove and the print looks fantastic.
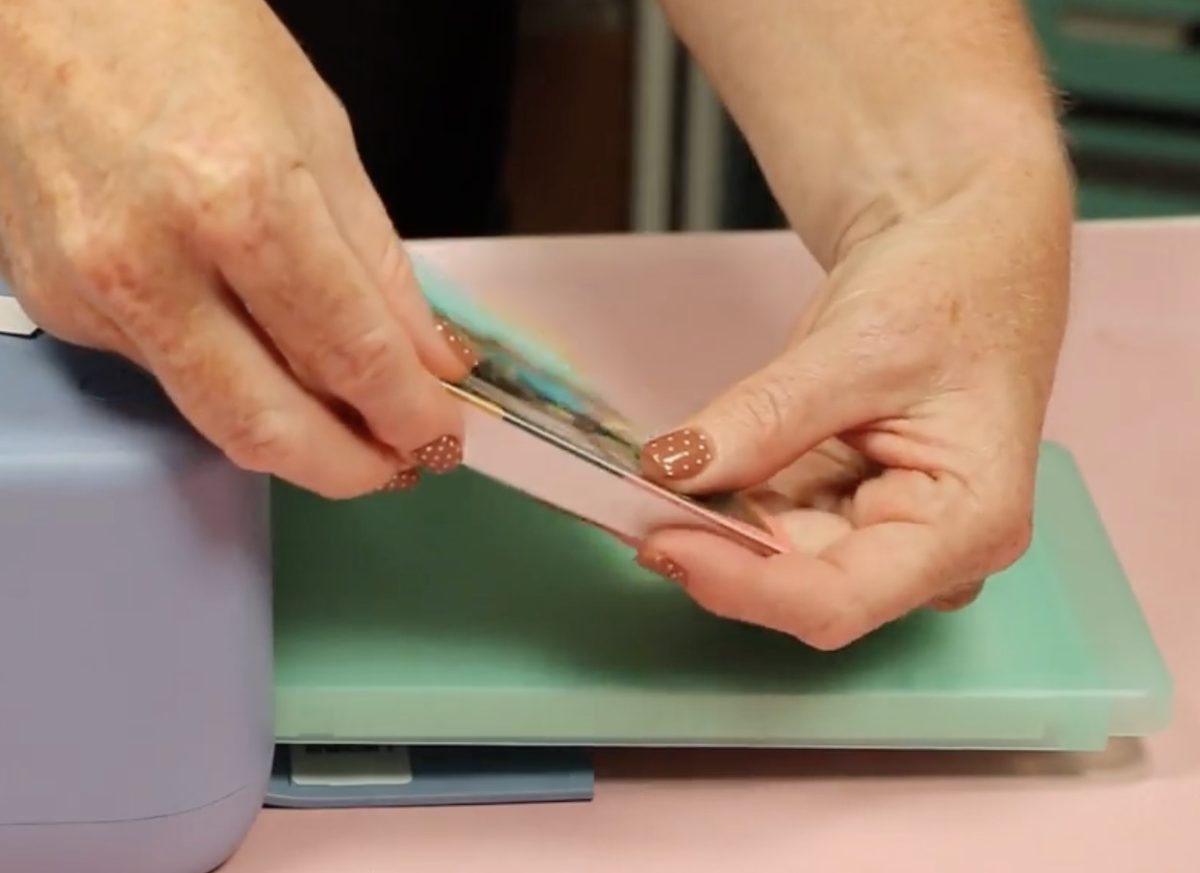
This is a high-quality photo print. I can still see and feel that perforated edge, and there is a watermark on the back of the print, just so you're aware of those two things. That doesn't change with this printer.
Make Custom Stickers with the Cricut Stickerpix Print + Cut
There was no difference between the two printers when printing photos. The difference is the ability to make stickers that are customized, and you aren't limited to the pre-cut sticker sheet shapes.
Choose a Sticker Design
In Design Space, select Stickers as the print option and scroll through to see if there is a template you like.
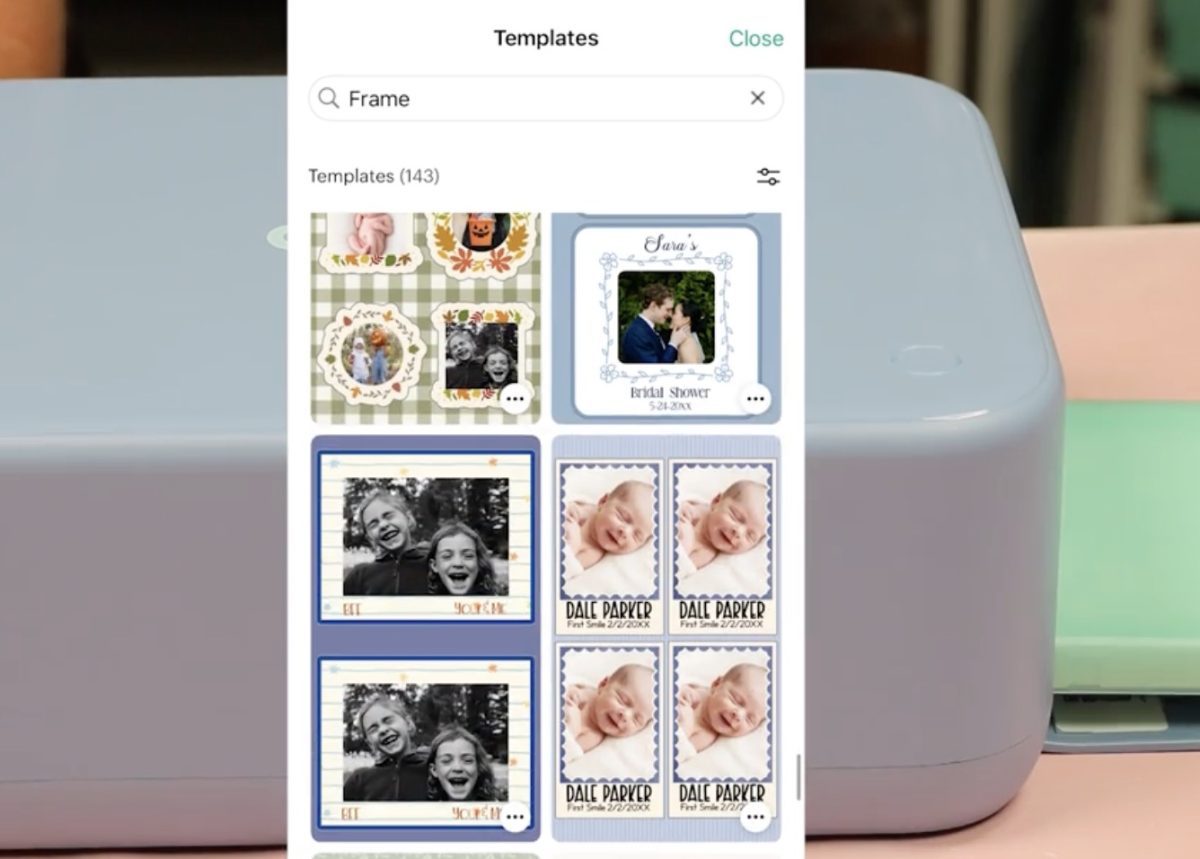
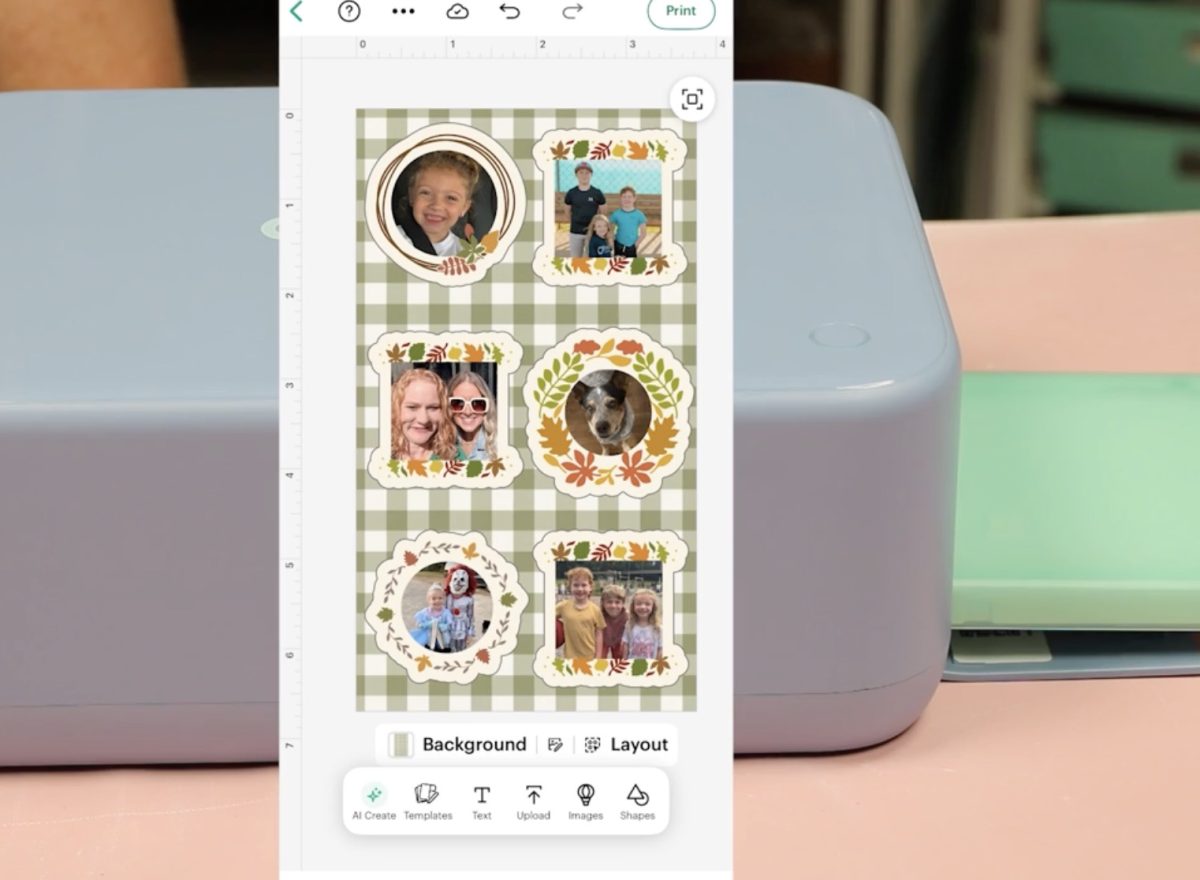
I found a template that allows me to add photos to the sticker and has an intricate cut line to follow.
Add Photos to the Sticker Designs
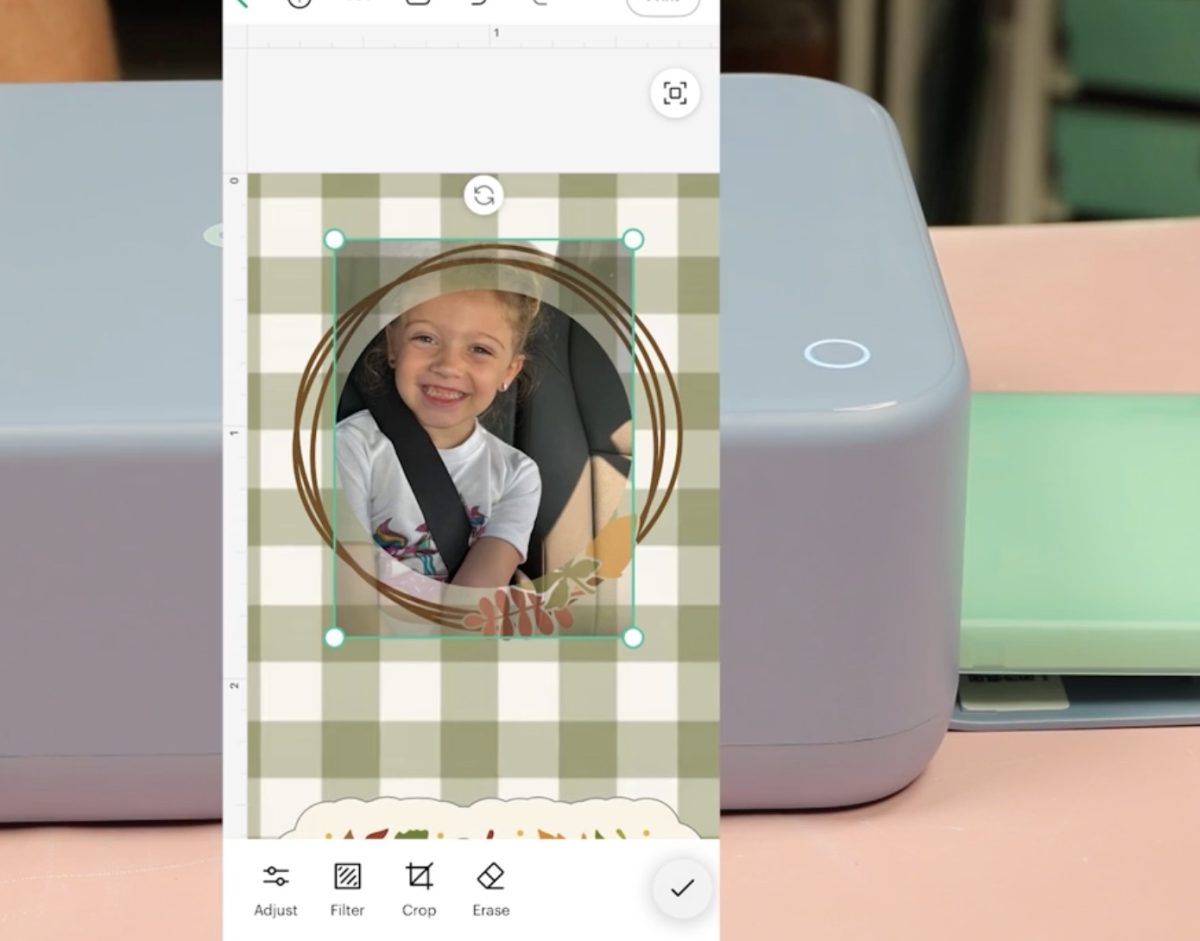
In each of the stickers I added a photo and resized them so they fit the stickers exactly how I wanted them.
Print + Cut the Sticker Sheets
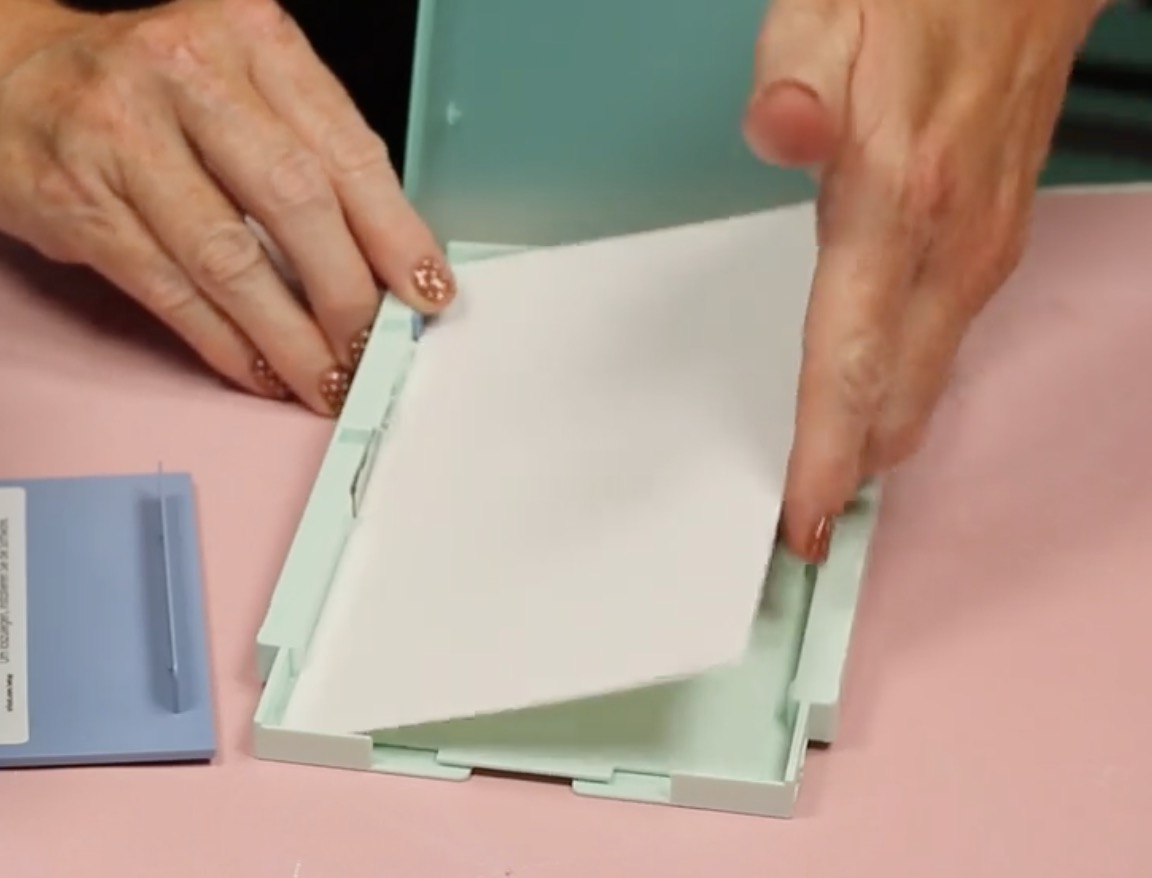
Load the Sticker Paper into the material tray. The photo paper does not have an adhesive back, but the sticker paper does.
The Stickerpix will print and laminate the design first, and then it will pull the sticker sheet all the way into the printer, and it will come out the other side, and the blade will cut out the stickers.
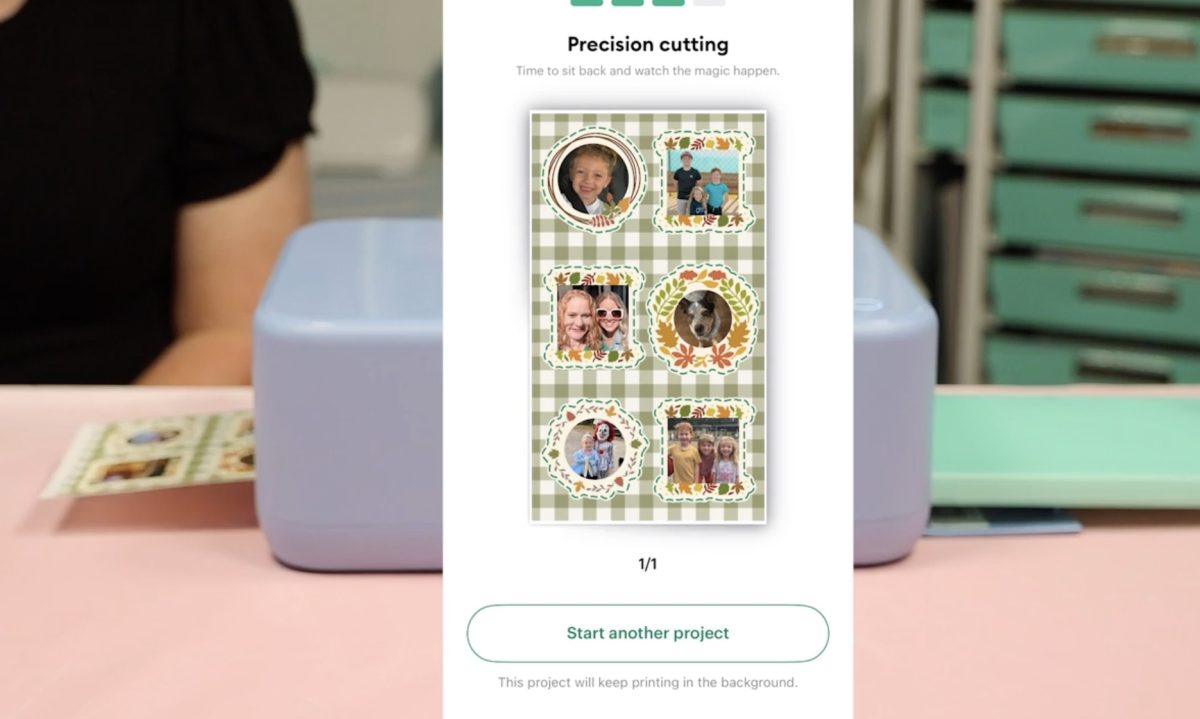
When it's done, the sticker sheet is ready to go, and you can remove it from the printer.
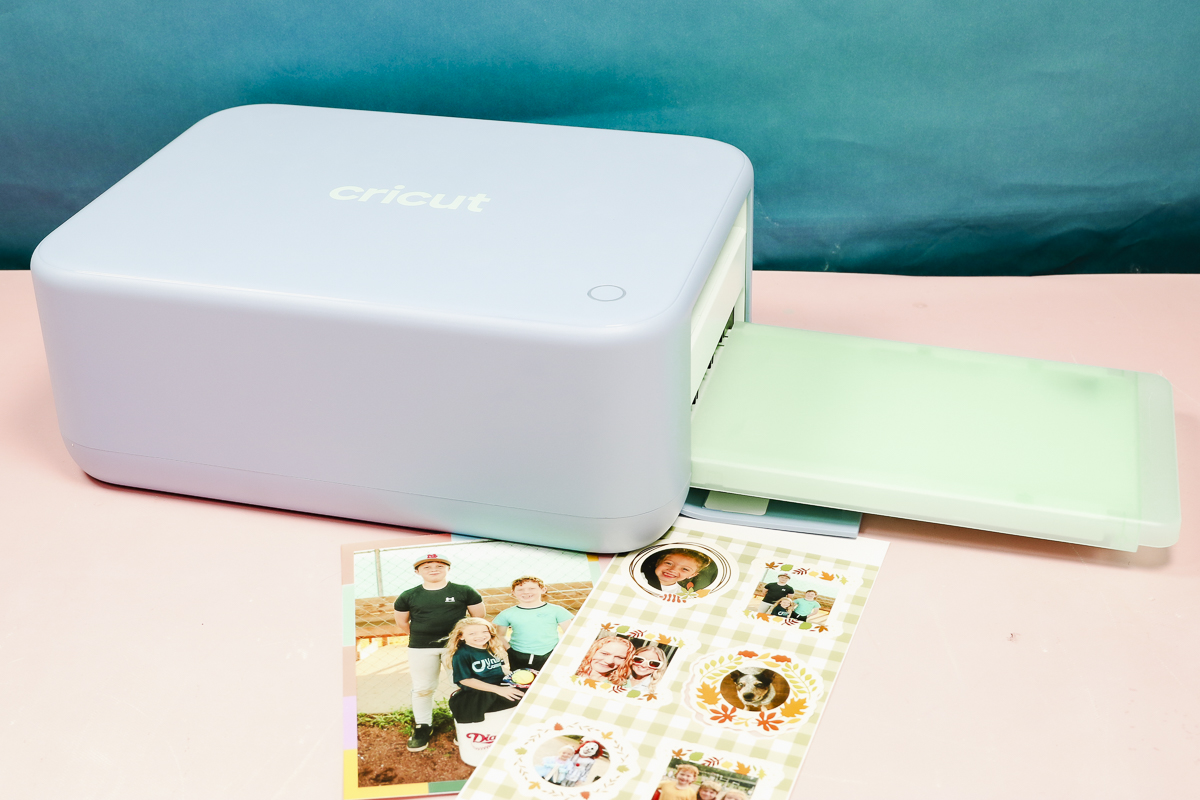
Close Up of the Finished Sticker Sheet
I am really impressed with how this sticker sheet turned out. The print is perfect, and the cuts are lined up exactly.
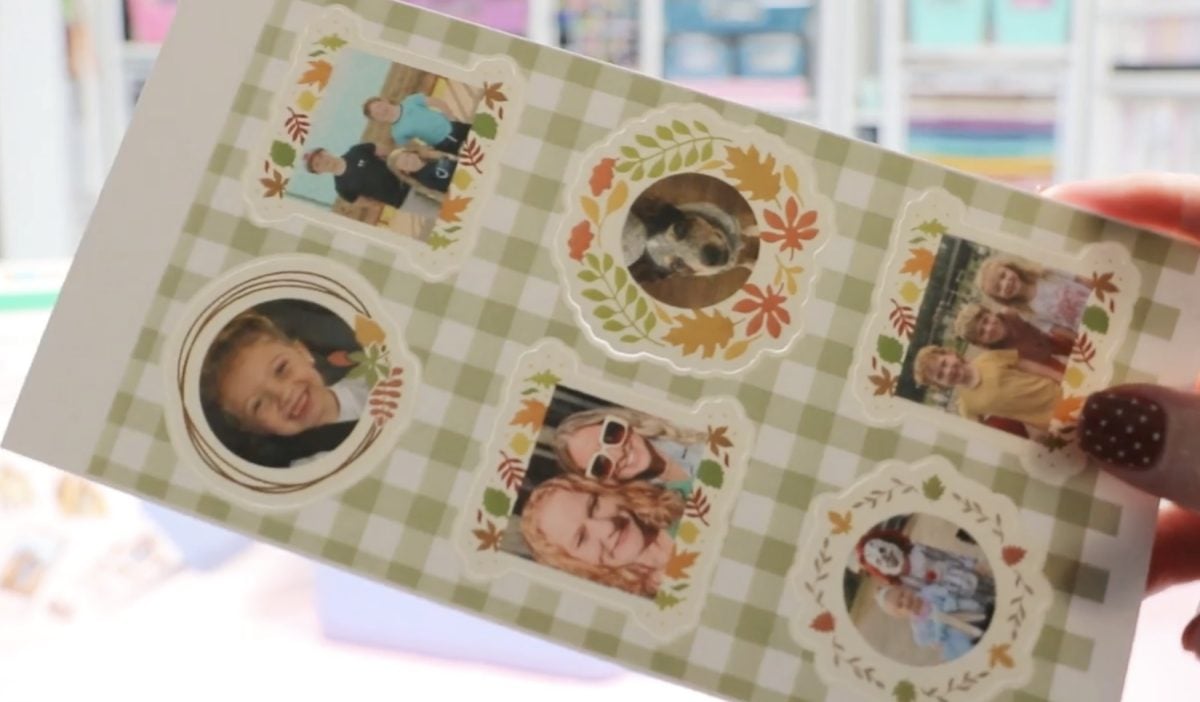
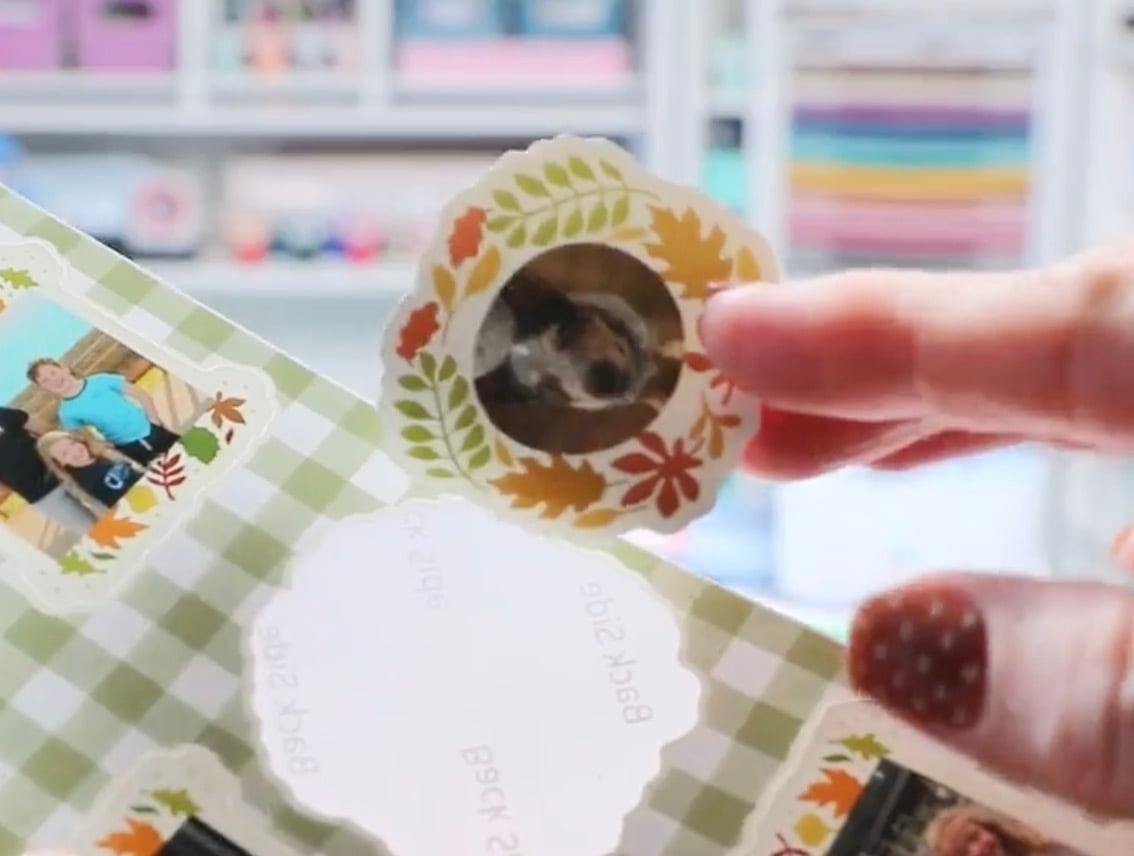
Because you print and cut all in one machine, the cut lines are perfect all the way around the stickers.
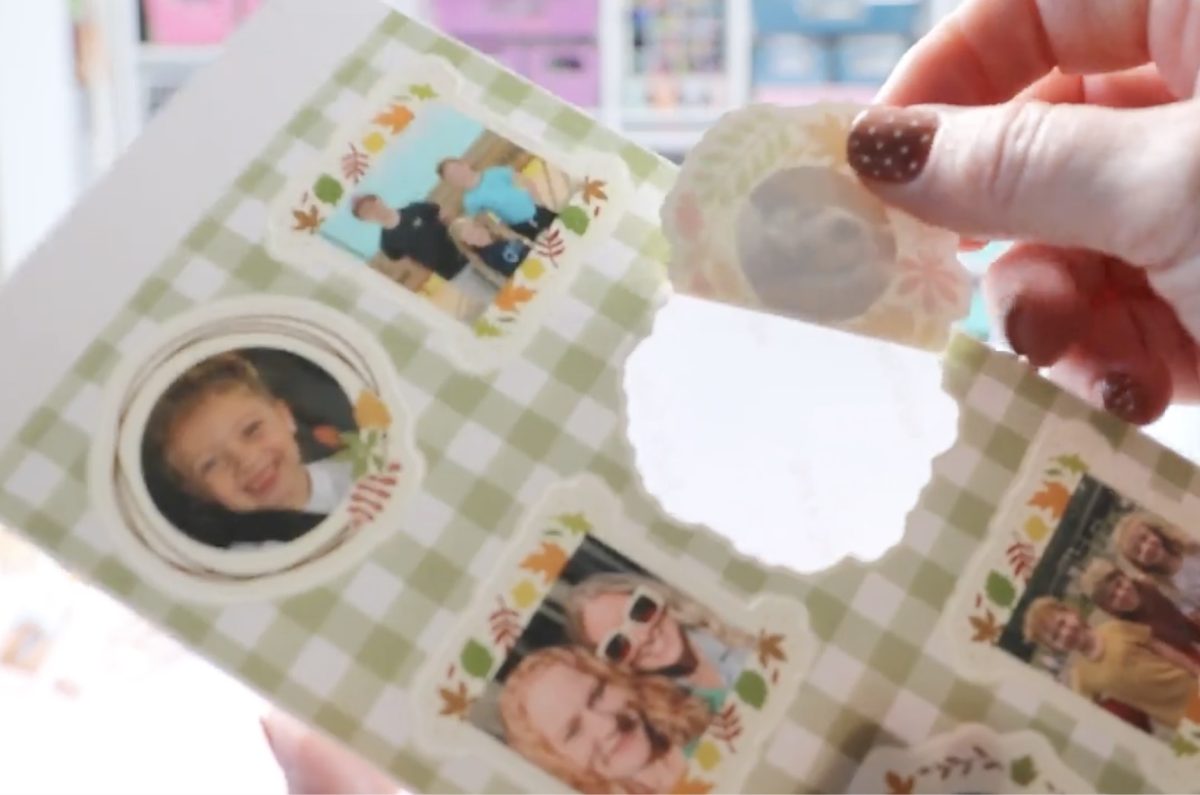
There are white tabs on the top and bottom of the sticker sheet. These don't fold off like the sticker sheets. If you want to remove them, you'll need to cut them off.
I also want to note that the backer of the sticker sheet is a little transparent. This is different than other sticker papers I've used.
One other thing to note. For the stickers I printed today, I did not use the AI option to turn photos into cartoon-style images. You can do that in Design Space, but it uses AI credits. If you want to use that feature, you will need to have AI credits to use.
Buy the Cricut StickerPix Printers here!
Cricut Stickerpix Print and Print + Cut Pros and Cons
The pros and cons are the same for both printers, so I'm going to combine them for this section.
Cricut Stickerpix Pros
When it comes to listing the pros, the list is going to be long:
High-Quality Photo Prints:
I can't say enough about how great I think the prints are on both the photo paper and sticker paper. The colors are vibrant, there are no lines, and thanks to the laminate, they are nice and glossy when they're complete.
Maintenance-Free Printing:
Because these are dye sublimation printers, you don't have to worry about clogs, running out of ink, or not using the printer for an extended period of time.
Easy to Use:
I was really impressed with how easy both of these are to use. I used the Design Space App, and Design Space walked me through every step; from start to finish, I had prints and sticker sheets in just a couple of minutes.
Clean cuts with both the pre-cut sheets and the Print + Cut sticker sheets:
Whether you're using the pre-cut sticker sheets with the Stickerpix Print or the Print + Cut option in the Stickerpix Print + Cut, you'll see that the stickers are easy to remove because the cuts are clean through the adhesive material and not through the backing.
Durable Prints:
The lamination step in the printing process makes these stickers incredibly durable. I tried scratching them on all of the different papers, and they didn't scratch at all.
Lots of Customization Options:
In any design, you have the option to add a photo, a pattern, or a color. You can add/change text, change the colors of pre-made templates, and you can change the thickness of the border on the Print + Cut stickers. You can also use the AI feature to change your photos to a more drawn or cartoon look if you'd like.
No Additional Tools Required:
Other than maybe a pair of scissors to cut the white bands on the sticker sheets, you don't need additional tools with these printers. No mats, no weeding or scraper tools. Nothing else is needed.
Convenience:
No more waiting for prints or stickers in the mail. No more driving to town to pick up prints. If you want to print a photo or a sticker sheet, you can do it in no time with these printers.
Cricut Stickerpix Cons
I don't feel like there are a lot of cons for these printers, but there are some things I want to make sure to call out so you're aware of them.
Cost per print:
If you're comparing the cost per print to what you may get at your local drug store, the cost is going to be higher. I did a comparison, and I found the cost to be very comparable to other dye sublimation prints, but that cost is going to be higher than ordering from somewhere that prints thousands of prints per day.
Perforated edge on photo prints:
I don't love that you can see and feel the perforated edge on the 4×6 prints. Again, I feel this is standard with these types of prints. I think it has to do with how they move through the printing film. I did want to note it here.
White band on sticker sheets:
The white band on the sticker sheets, like the perforated piece on the 4×6 prints, was another thing I wasn't a fan of. If you want to gift or sell these sticker sheets, you'll either need to cut those off or figure out a way to add your pricing or label to those areas.
Watermark on the back:
Personally, the watermark on the back of the prints didn't really bother me, but I know some people sell their sticker sheets and don't like watermarks. I think it makes it easy to ensure you're printing on the right side of the paper.
Limited options:
Earlier, I mentioned ease of use as a pro, and that is because there is not a lot to these printers. You can either print photos or print stickers, and that makes it easy. You may find that to be a con. Maybe you wish they could do more, or offer more sizes. I think whether it's a pro or con will depend on what you plan to use the printers for.
Who are the Cricut Stickerpix Print and Stickerpix Print + Cut For?
I feel like both of these printers are perfect for someone who is looking for a photo printer that allows them to print high-quality photos at home but wants the printer to be able to do a little bit more.
When I think about who is a perfect candidate for these printers, I think of scrapbookers and journalers. People who use a lot of photos and who may want to create a custom sticker to go along with what they're journaling about or for their scrapbook page.
I also can't stop thinking about how fun these printers would be to have at parties. Design Space is a free program. You could have these printers out and let people create their own photos or stickers, and they can print them right there to go along with the project they're making.
If you're a traditional Cricut crafter who cuts paper and a lot of other materials and doesn't use a lot of photos or stickers in your projects, these printers are probably not right for you.
Where to Buy Cricut StickerPix
The only thing left to ask yourself is, “Is one of these Stickerpix printers right for you?” At launch, the Stickerpix Print has an MSRP of $169, and the Stickerpix Print + Cut is $299.
Buy the Cricut StickerPix Printers here!
Comparing both of these to similar printers, I feel like that is a very comparable price point. Other print + cut printers I've used in the past print on a label-type material. They are much more expensive, and you have to manually add the laminate layer between the print and cut steps.
I do want to say I've only scratched the surface with what you can do with these printers. I printed photos and made a couple of sticker sheets and a label sheet. There is so much more you can do, and I can't wait to play with them both some more.
I hope I've answered the questions you have about the Cricut Stickerpix Print and Cricut Stickerpix Print + Cut printers today. If you have any additional questions, leave them in the comments, and I'll be happy to answer them for you.
I would also love to hear from you in the comments about what you'd like to see me try next. What are you excited about with these printers? Do you think they're right for you? Let me know in the comments, and I'll get to work figuring it out for my next tutorial.