

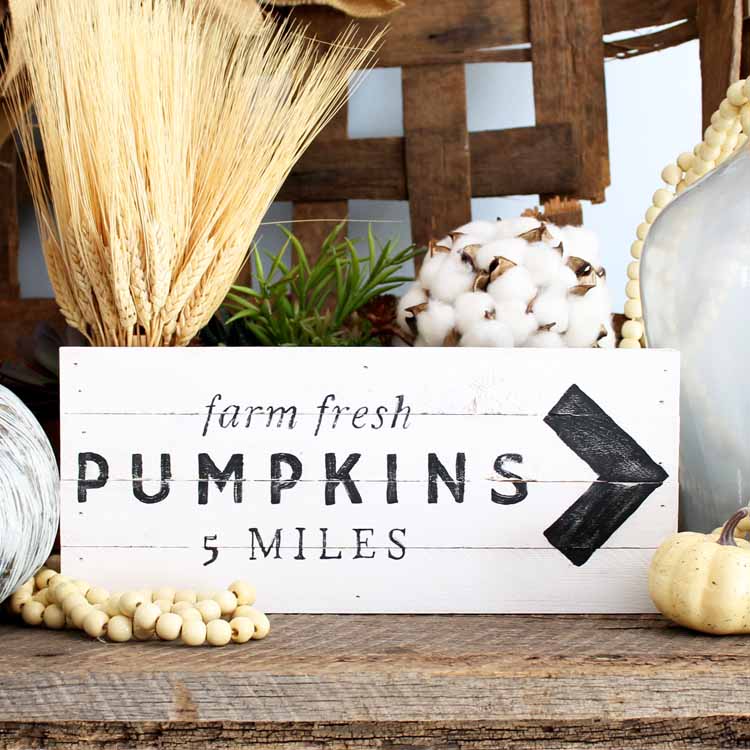
With our tutorial and free template, you can make an adorable DIY pumpkin patch sign for your home! This project is perfect for those wanting to add farmhouse flair to their homes this fall. Gather your supplies and get started making your own version today. A fall DIY pumpkin patch sign may just be what your mantel needs this season for that seasonal flair!
How To Make DIY Pumpkin Patch Sign
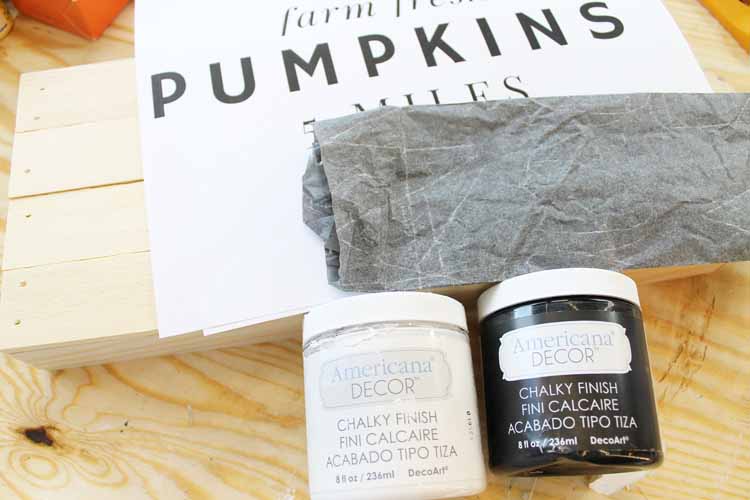
First, gather the supplies and print our template. Use the template to paint your design on the sign, or cut the design from vinyl with your Cricut machine!
Supplies Needed For DIY Pumpkin Patch Sign
- Wood Pallet Box—The wood pallet box I used in this project is no longer available. However, you can use any thin wood box or these unfinished wood canvas boards instead.
- Transfer Paper
- Americana Decor Chalky Paint in Black and White
- Paint Brushes
- Pencil
- Pumpkins Sign Template (follow the instructions below to download)
- Printer and Paper
- Scissors
- Tape
- Rag
Download Free Printable Template:
Sign up for the newsletter in the box below to get your free printable template. The file will then be sent to your email address. Look for a sign-up box with a picture of the file you want to download. If you already get our newsletter, just sign up again, as you will not be signed up for anything further.
Please note that this file is for personal use only. You can also contact me if you have any issues with your download or would like to use the file for commercial use.
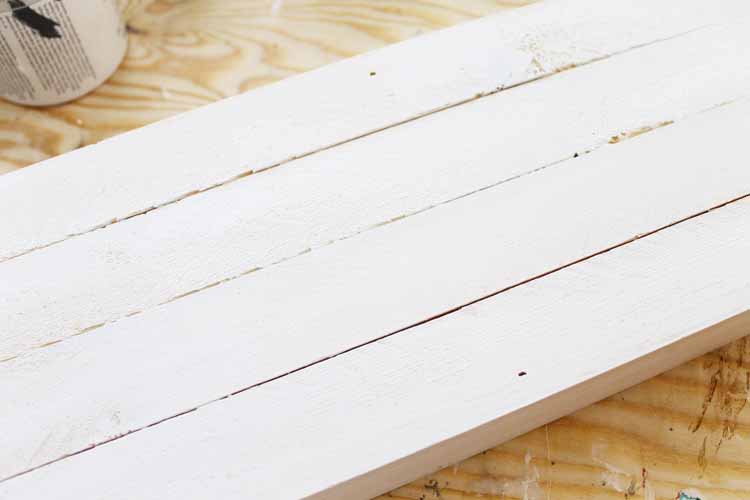
Step 1: Paint Wooden Sign
Start by painting your entire sign with white paint. Use a dry brush technique to leave the surface rustic with unpainted areas. You can also paint as usual if you don't want a more rustic appearance. A dry brush technique involves getting as little paint as possible on your brush and then rubbing it quickly over the surface.
Once you are done painting, allow your project to dry completely before continuing.
Step 2: Print Template
In the meantime, you can print your templates onto copy paper and cut them out, as shown below. Once they are dry, use tape to secure to the sign.
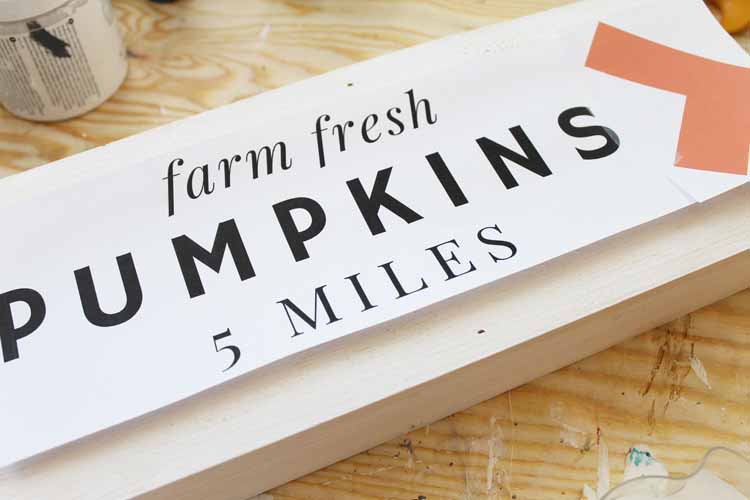
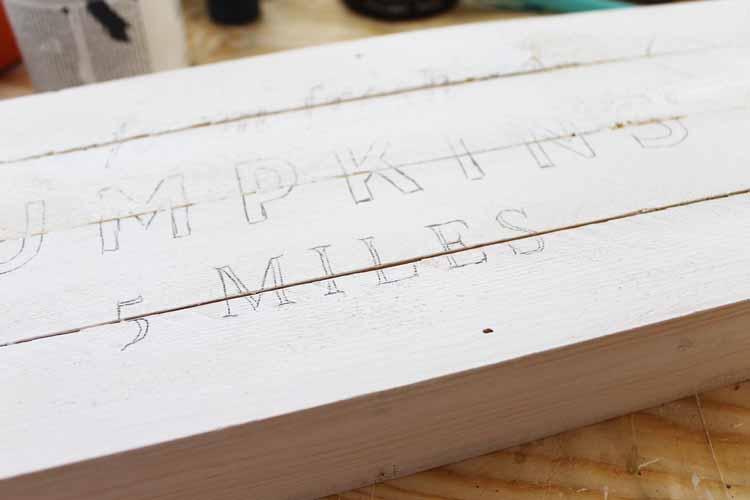
Step 3: Transfer Printable To Wooden Sign
Add transfer paper, shiny side down, under your template. Use a pen to trace around the entire template, then lift it from the surface. You will be left with a guide for painting your letters.
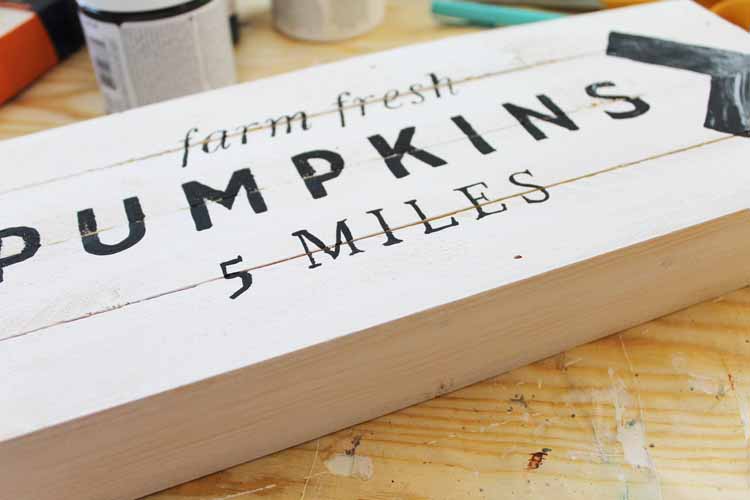
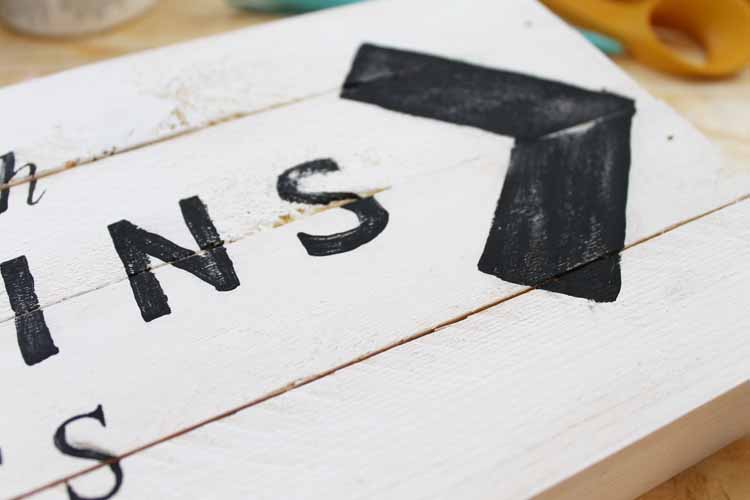
Step 4: Paint Sign
Then, use a small paintbrush and black paint to fill in all of the outlines as carefully as possible.
Step 5: Create A Rustic Look (Optional)
Want a more rustic look? Once the paint is barely dry, use a damp rag to rub away areas of paint.
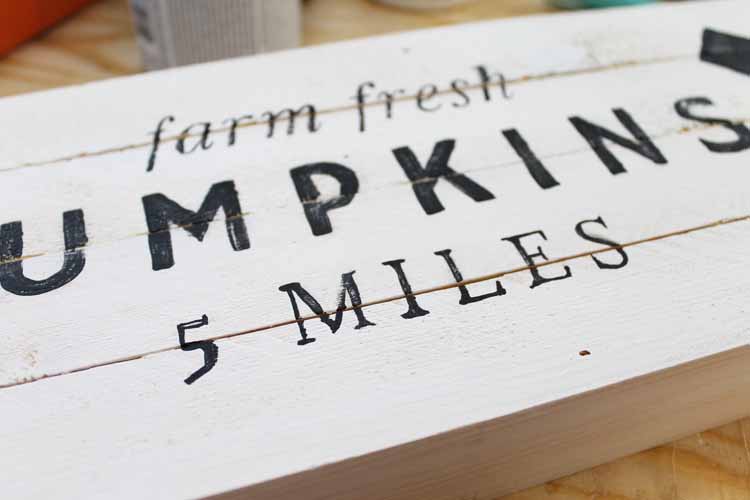
You can remove as much or as little as you like to give you that farmhouse feel to your pumpkin patch sign.
You could also try sanding the surface to get that rustic look, but I really like the damp rag method. It gives me just the right amount of rustic with very little elbow grease.
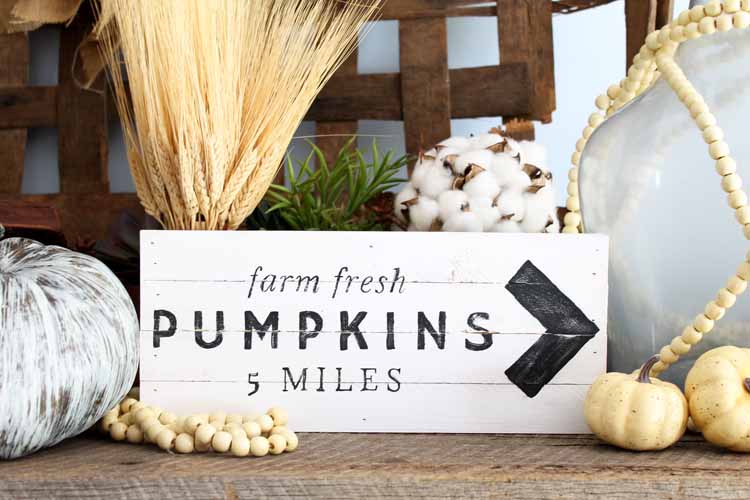
Allow your entire pumpkin patch sign to dry completely before adding it to your home. Mine ended up on my mantel, and I must say that I love the results!
FAQs About DIY Pumpkin Patch Sign
If you have questions about this DIY pumpkin patch sign, feel free to ask! If your question is not answered below, leave it in the comments.
How Big Is Your Wood Sign?
The wood sign I used for this project was 6×14 inches. However, you can adjust the printable to make your wooden sign as small or big as you want it.
I Don't Have Any Transfer Paper. Is There Another Way I Can Transfer This Printable To The Wood Sign?
Yes! If you don't have any transfer paper, you can use one of the following methods to add your printable to the wooden sign.
- Create Your Own ”Transfer Paper” – Print the printable out on regular paper, flip it over, and rub the paper with a pencil. Then, flip your printable back over, place it onto the wooden sign, and trace over it with a pen. When you do this, your image should transfer to wood!
- Cricut Machine – Upload your image to Cricut Design Space, cut it out of black vinyl, and add it to your wooden sign!
- Make A Stencil – Use your Cricut to turn this printable into a custom stencil that you can use over and over again!
What Cricut Machine Can I Use For This Project?
All of them! The Cricut Maker, Cricut Explore series, Cricut Joy, Cricut Joy Xtra, and Cricut Venture can all cut vinyl!
The only thing to keep in mind is that each Cricut machine is different regarding project size capabilities and the materials it can cut. So, depending on your project, you might need to resize the SVG file or cut it out using different materials.
Do You Have More Information About How To Add Vinyl To Wood?
Yes, I do! Check out the resources below to learn all about adding vinyl wood if you decide to use your Cricut machine for this project!
- Will Cricut Vinyl Stick to Wood? Which Type Should You Use?
- DIY Round Wood Door Hanger with a Cricut Machine – This project will show you how to add vinyl to wood.
- How To Use HTV On Wood With Your Cricut – This project will show you how to add HTV to wood.
5 More Fall Farmhouse Decor Crafts
Do you love this DIY pumpkin patch sign, and want more fall farmhouse crafts? Then check out the projects below!
- Farmhouse Fall Porch Decor: My Front Porch
- Farmhouse Fall Banner With Dollar Store Supplies
- Pumpkin Decor: Farmhouse Style Options
- DIY Farmhouse Sign for Fall
- Paper Mache Vintage Farmhouse Pumpkins


