
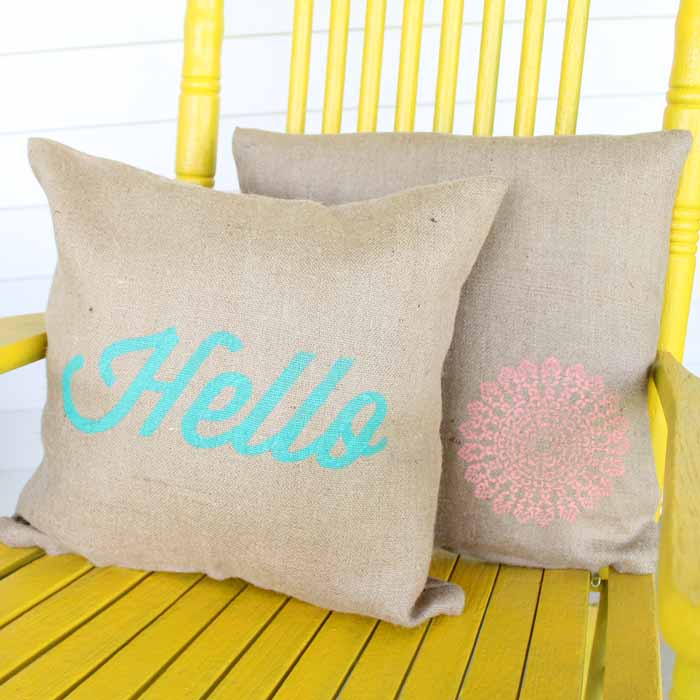
Create custom pillows for your home! These DIY decorative pillows are charming and can enhance the style of your front porch or living room. You can stencil them with any design you like. This craft takes about 15 minutes to complete, so gather your supplies and get started!
This week is Burlap Week, and we're sharing a new burlap craft that you can complete in just 15 minutes every day. Be sure to check out Day 1 and Day 2, and scroll to the bottom of this post for today's ideas from our blog partners.
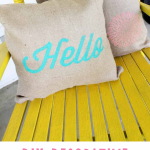
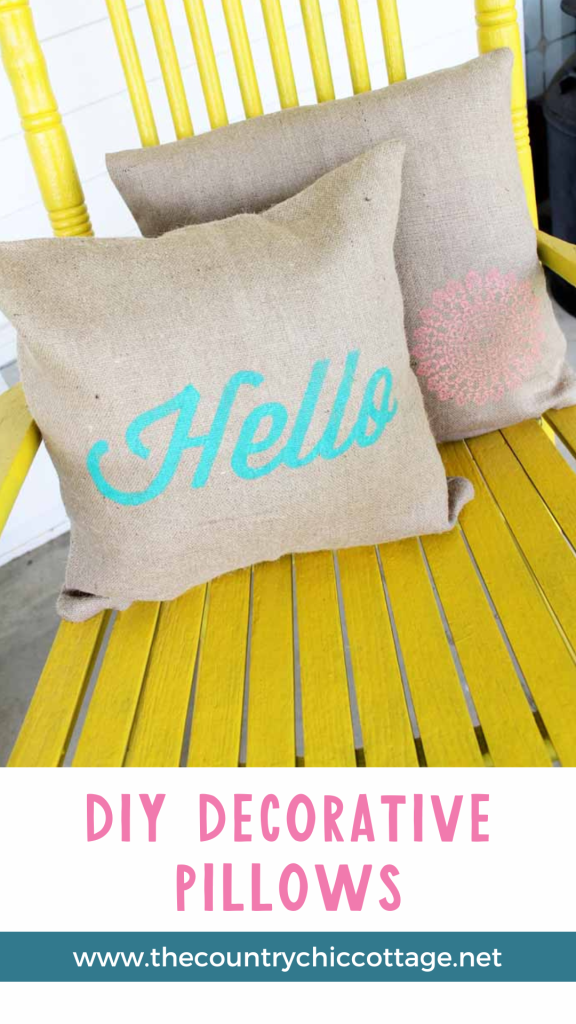
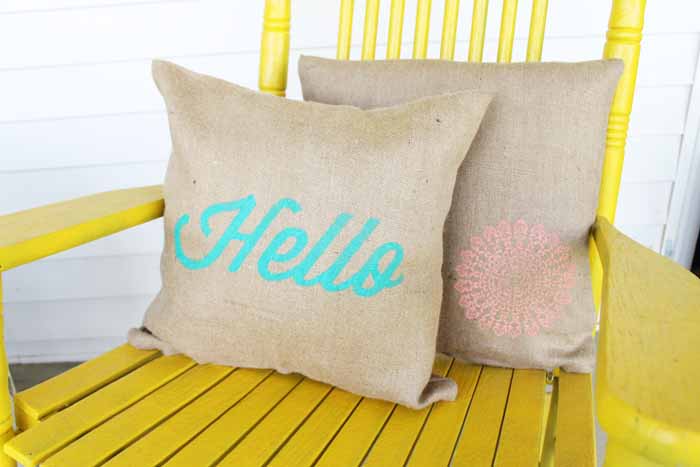
In my opinion, everyone needs some burlap pillows. With stenciled designs, you can create DIY decorative pillows in minutes for any room in your home. Plus, they are easy to make!
You can create similar crafts with grain sacks and outdoor pillows! These will look super cute on your porch or inside, too. You can add any quote or shape you like with your stencil. I used a shape and a “hello” to welcome visitors!
DIY Decorative Pillows
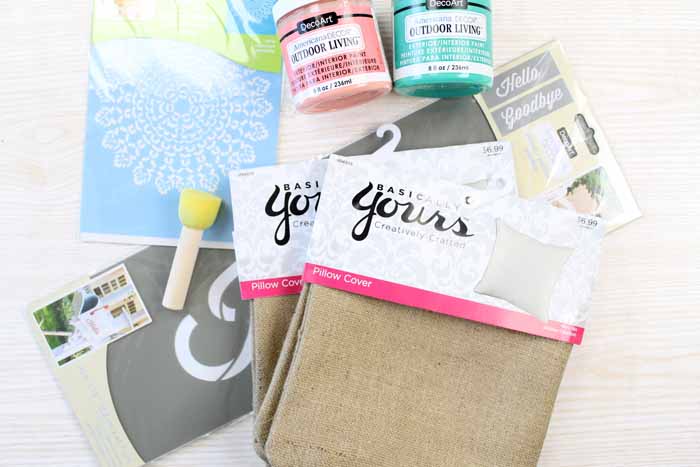
Supplies needed:
- Burlap pillow covers (I found mine at Hobby Lobby)
- Your choice of Stencil Vinyl
- Cricut Machine
- Outdoor paint in the colors of your choice (be sure to choose a good quality paint)
- Sponge pouncer brush
- Paintbrush
- Stencil adhesive
- Iron
- Scrap paper or cardboard
- Outdoor pillow forms
Ready to get started? Watch the video below, which shows just how to stencil on these burlap pillows.
Can't watch the video or missed some of the steps. Here are the instructions for you:
Step 1 – Make or choose the stencil
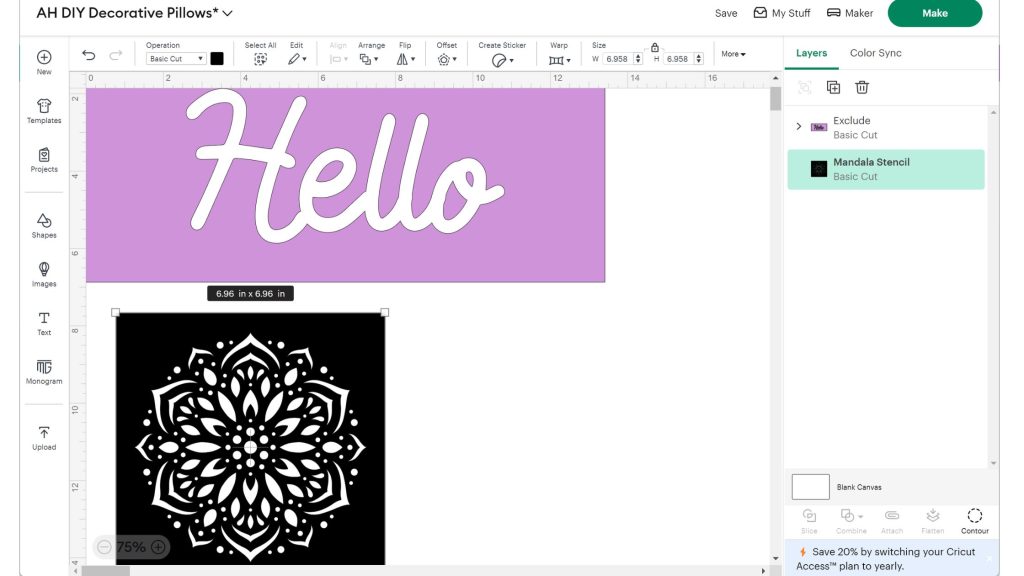
If you are using a premade stencil, you can skip to step 2. To create your own stencil, start by opening a blank canvas in Cricut Design Space. Next, search for the design you want to paint on your DIY decorative pillows. For example, I searched for “Hello” and later looked for “mandala stencil” to find suitable designs. Feel free to choose any design you like, but remember that since you are making a stencil, it's important to retain the insides of letters and other intricate details.
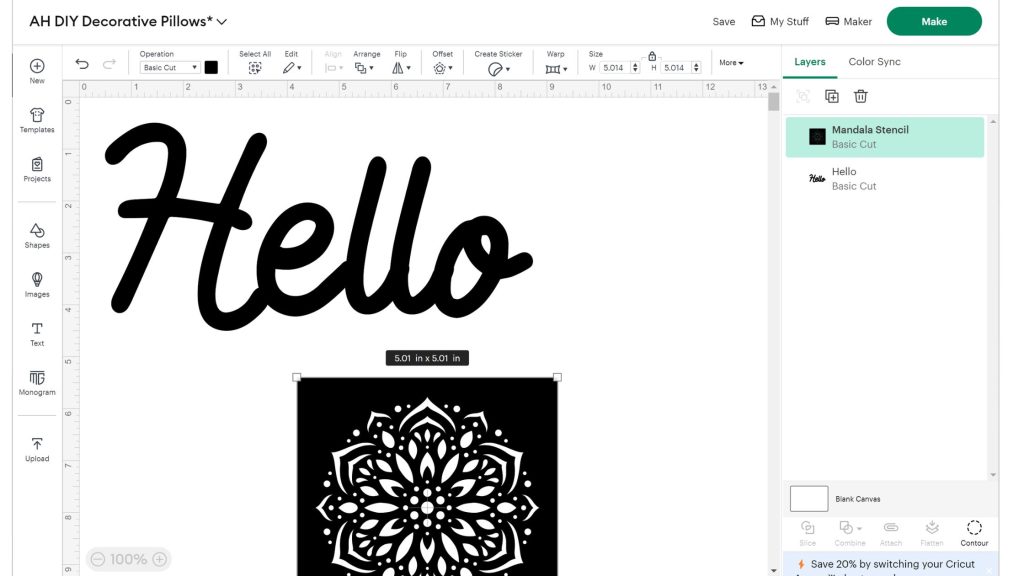
Then, to make cutting the stencil a bit easier, add a rectangle around the “Hello” graphic and select both the rectangle and the word. Then, click “Exclude.”
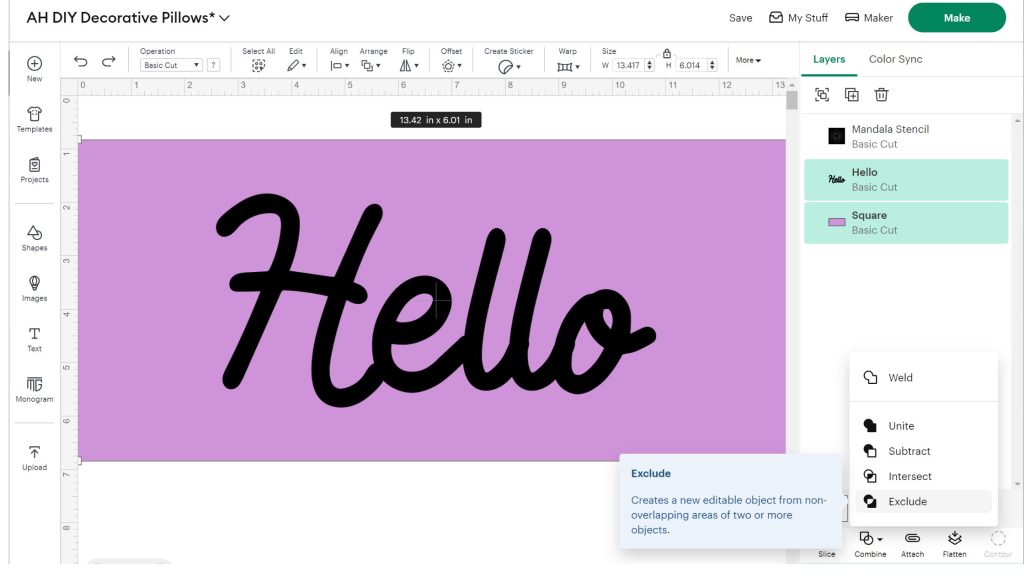
Now you have designs that are ready to be cut into stencils. You can see what I use to make stencils in this post.
Step 2 – Iron pillow blanks
Iron the burlap pillow covers to remove any wrinkles. Then, insert scrap paper or cardboard into the pillow cover to protect the back if any paint seeps through.
Step 3 – Prepare the stencils
If you are using a premade stencil, turn the stencil over to the back side. Spray the back thoroughly with stencil adhesive and allow it to dry completely. If you cut your own stencil, depending on your stencil material, you may not need to add an adhesive. Once dry, press the stencil into place on your pillow cover.
Step 4 – Add paint
Load up your sponge pouncer brush with your outdoor paint. If you plan to use these pillows indoors, you can use indoor paint or fabric ink instead of outdoor paint.
Then paint over the stencil, ensuring all areas are covered with paint. You may need to go over some areas twice.
Peel back the stencil immediately to reveal your design.
If you need to fill in the stencil lines, use a regular paintbrush for the best results. This is especially true of words or letters.
Step 5 – Finish the pillows
Allow the paint to dry completely. You may need to heat set it with an iron at this point, depending on the type of paint you purchased.
Remove the scrap paper from the inside of the pillow cover and add an outdoor pillow form. Now your pillow is ready to display!
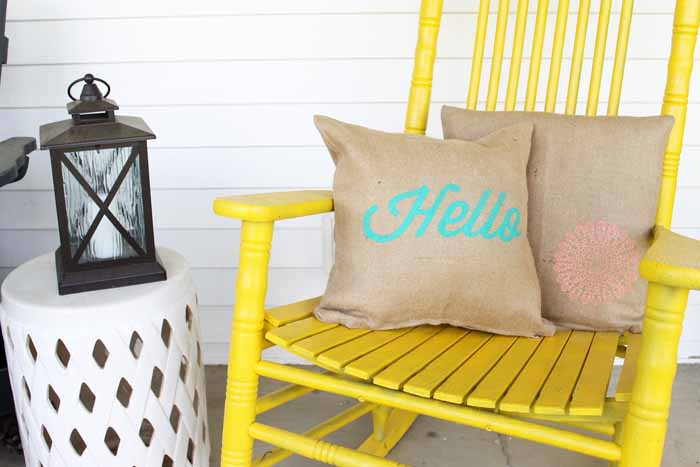
Add your burlap pillows to your outdoor decor! You'll love the look of these custom pillows, which you can create in just minutes.
What stencil will you add to your DIY decorative pillows? With your Cricut machine, you have endless possibilities to enhance any decor.
More Burlap Crafts
Love these DIY decorative pillows and want more ideas? Try the links below!


Whether you make burlap pillows or one of these other crafts, you might just be surprised at everything this fabric can do!


These burlap stenciled pillows are perfect for my wicker chair, I love them!!