

If you've ever been disappointed after peeling back the sublimation paper on a glass can, you are not alone. The combination of glass and sublimation often results in see-through results that don't look very good. If you're looking for ways to get brighter sublimation on glass, I'm here to help.
From washed-out colors to completely transparent designs, issues with sublimation on glass are common frustrations, and these tips and tricks can help. I'll also give you a non-sublimation option that will give you the brightest results even when using a light colored design.
I'm going to test regular sublimation, my tips and tricks for getting brighter sublimation, and we'll compare those results to UV DTF.
By the end of this tutorial, you'll know that settling for dull glass projects is no longer necessary.
Get Brighter Sublimation Results on Glass
The good news is, before we even begin, I can promise you that getting brighter sublimation results on glass is possible, and not as hard as you might think.
The brighter sublimation results are still sublimation ink, and sublimation ink is translucent. It also does not include white ink; any white sections of your design will be the color of your blank.
UV DTF ink is opaque and prints white along with the other colors.
To keep things fair, I'm going to use the same sublimation glass can blank for all three processes.
Supplies Used
- Order UV DTF Prints
- Design Used
- Glass Cans
- HTVRont A200 Auto Tumbler Press
- Brother Sublimation Printer
- Heat-Resistant Tape
- Heat-Resistant Gloves
- Tape Dispenser
- Heat-Resistant Mat
- Felt-Edged Scraper
I am using both sublimation and UV DTF for this test. With UV DTF, I could use any type of glass can. I have to have a sublimation blank for the sublimation prints.
If, after reading this, you decide UV DTF is right for you, the only supplies you'll need are the UV DTF print, a glass can, and the felt-edged scraper.
Method 1. Sublimation Glass Can
First, we're going to test two sublimation glass can options.
Step 1. Choose and Resize the Design
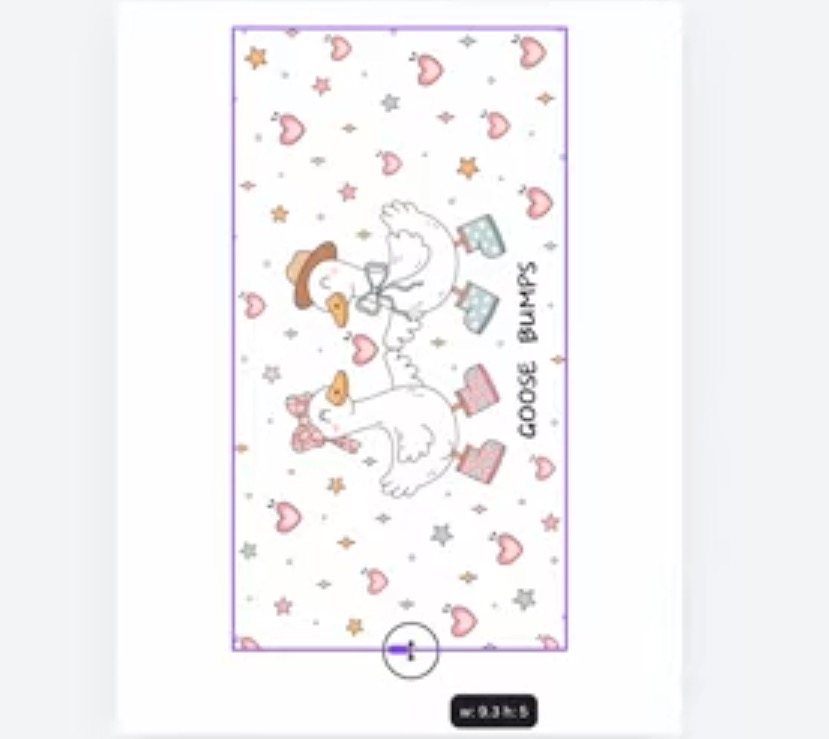
For the sublimation prints, I am using Canva to resize the Goose Bumps design I found on Creative Fabrica.
Open Canva, click Custom Size, and set the size to match whatever size your sublimation paper is. My paper is 8.5″x11″.
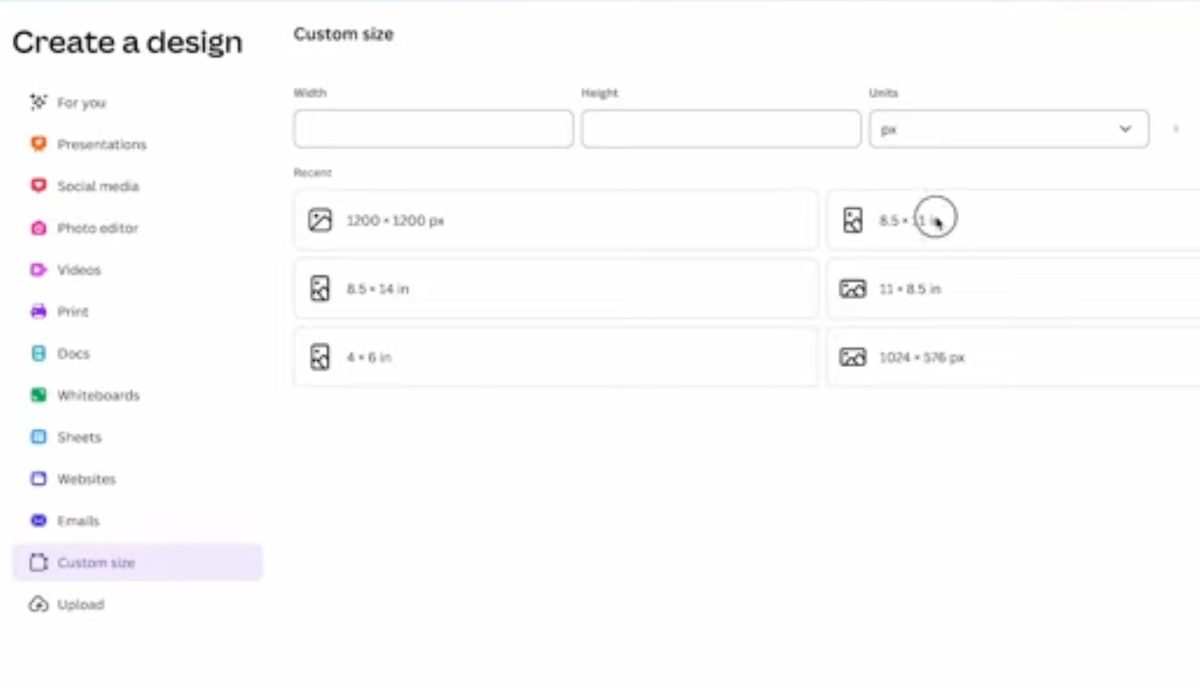
Upload the file and then select it to add it to the canvas.
I have found that glass cans all vary in size. I always measure my glass cans because assuming I knew the right size has burned me in the past.
Measure the width of the glass can.
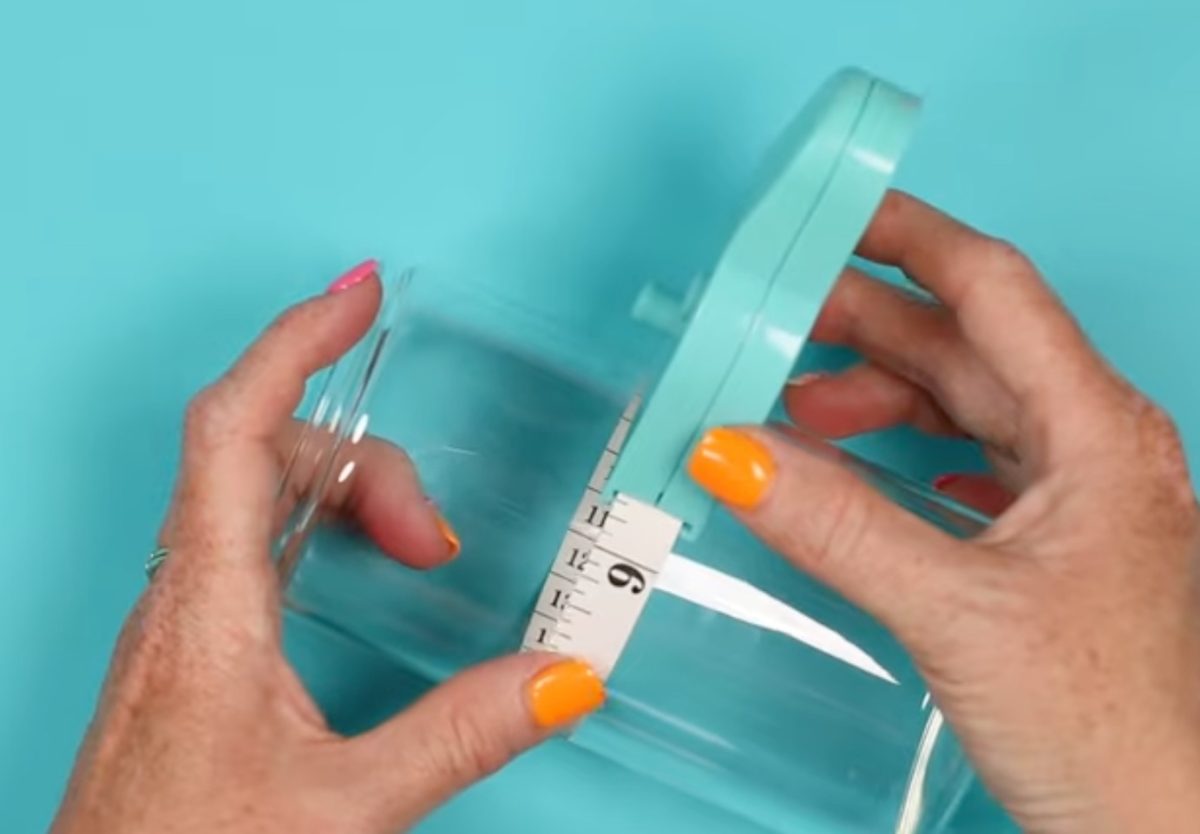
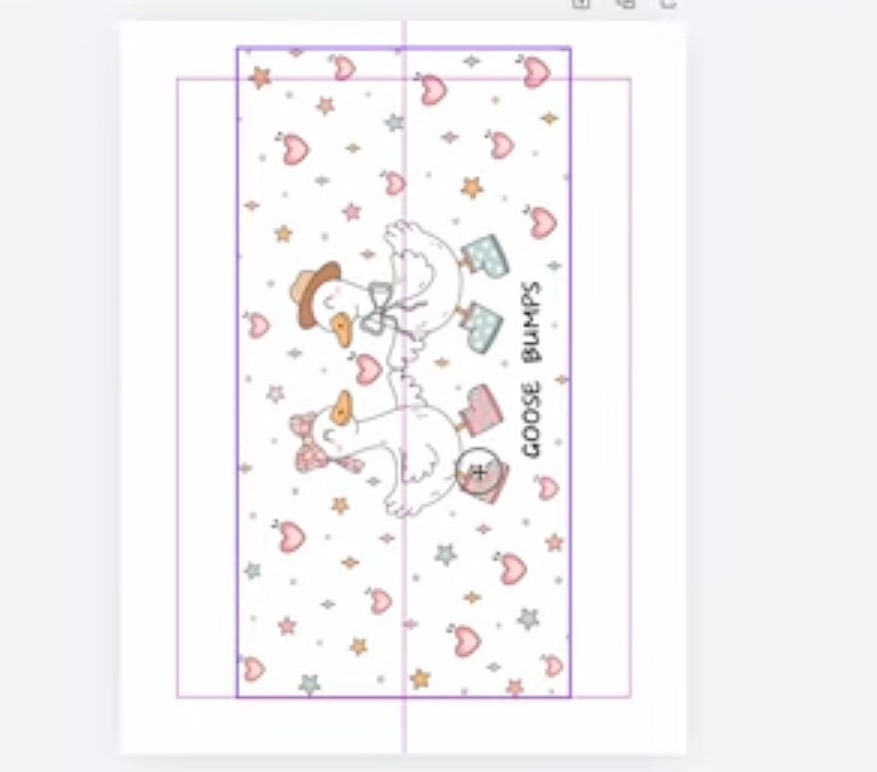
My glass can is 9 3/8 inches around, and I want the design to be about 5 inches tall.

Lock the ratio so the entire design resizes equally.
Resizing the design to 5 inches tall results in a 9.75-inch-wide design. I don't want to distort the image, so I am going to trim one edge of the design. That leaves me with two half hearts, but I think it'll be okay because of the all-over print, and it will be at the back.
Step 2. Print the Designs
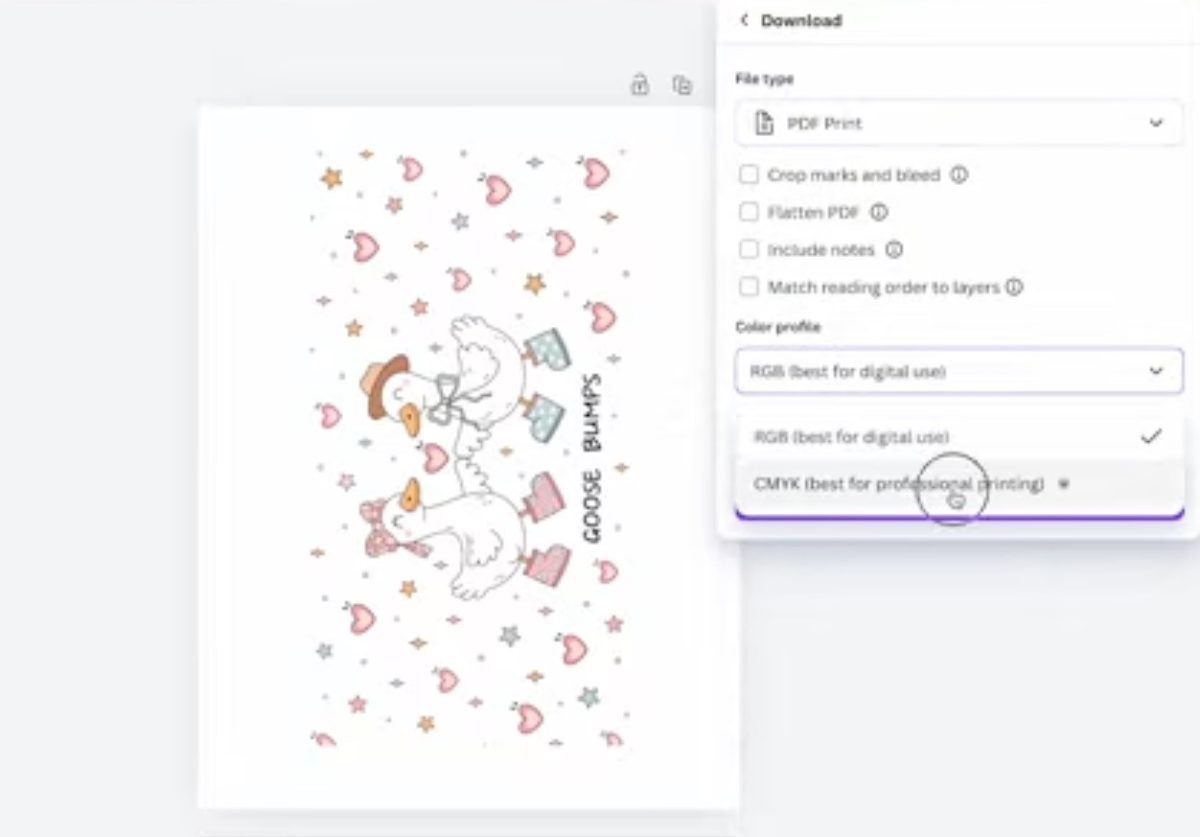
You cannot print directly from Canva.
Click Share and then Download. For my printer, the best option is PDF for Print, and I use the Color Profile CMYK.
Click Download, and the file will save to your computer.
Regular Sublimation Print
The first print will be the regular sublimation print. This is sublimation ink printed on sublimation paper from a sublimation printer.
For the regular print, I am going to print the design one time.
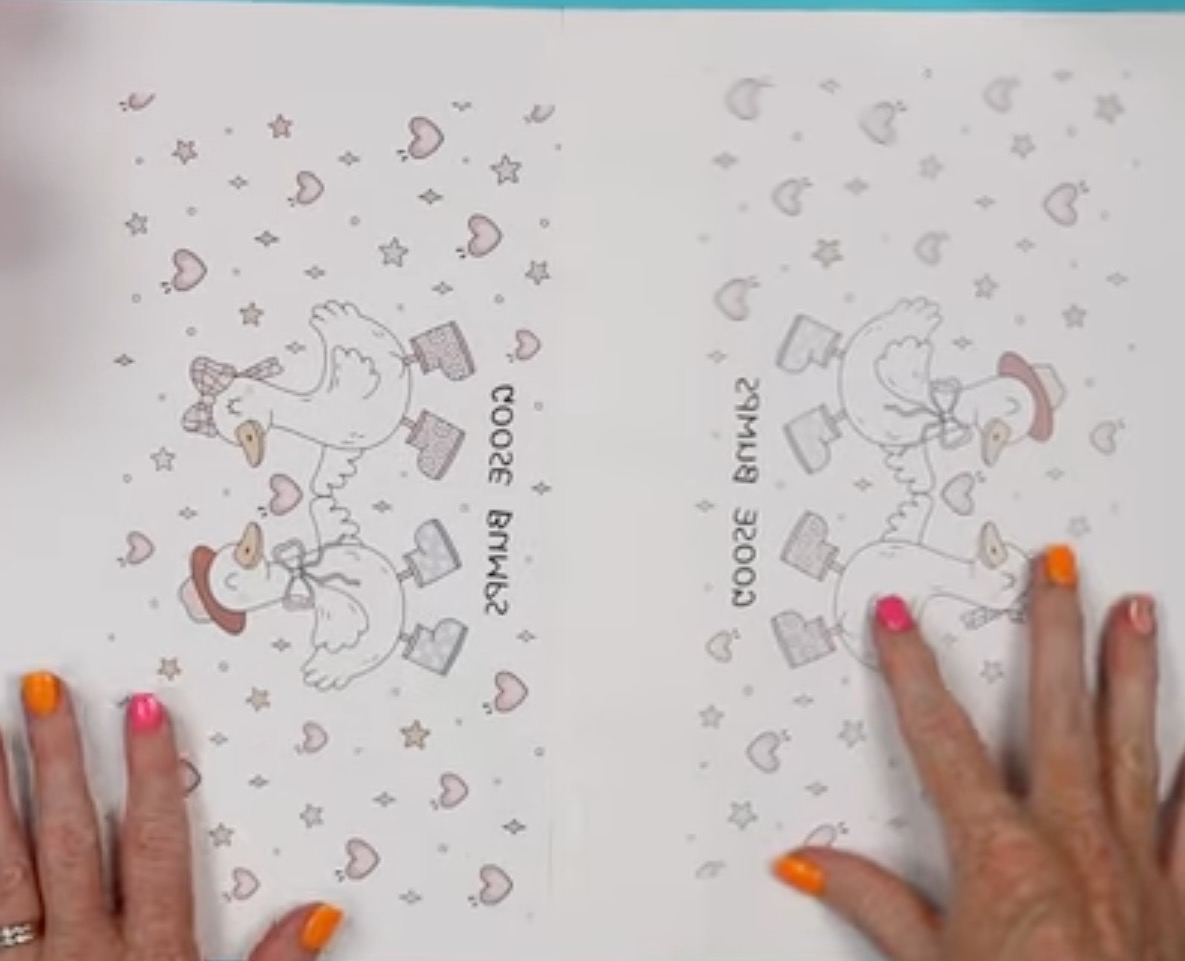
Brighter Sublimation Print
The second print will be the brighter sublimation print. For this process, we'll print the design once like normal and then load the same paper back into the printer and print the same design a second time right on top of the first print.
This will put double the ink on the print.
Below you can see both prints. Even on the paper, you can see there is a lot more ink on the page that was printed twice.
Step 3. Prepare the Glass Cans
For all of the projects, before we add the prints, we need to clean the glass cans. Use rubbing alcohol and a lint-free cloth or an alcohol prep pad to clean the entire surface.
Locate the Design on the Glass Can
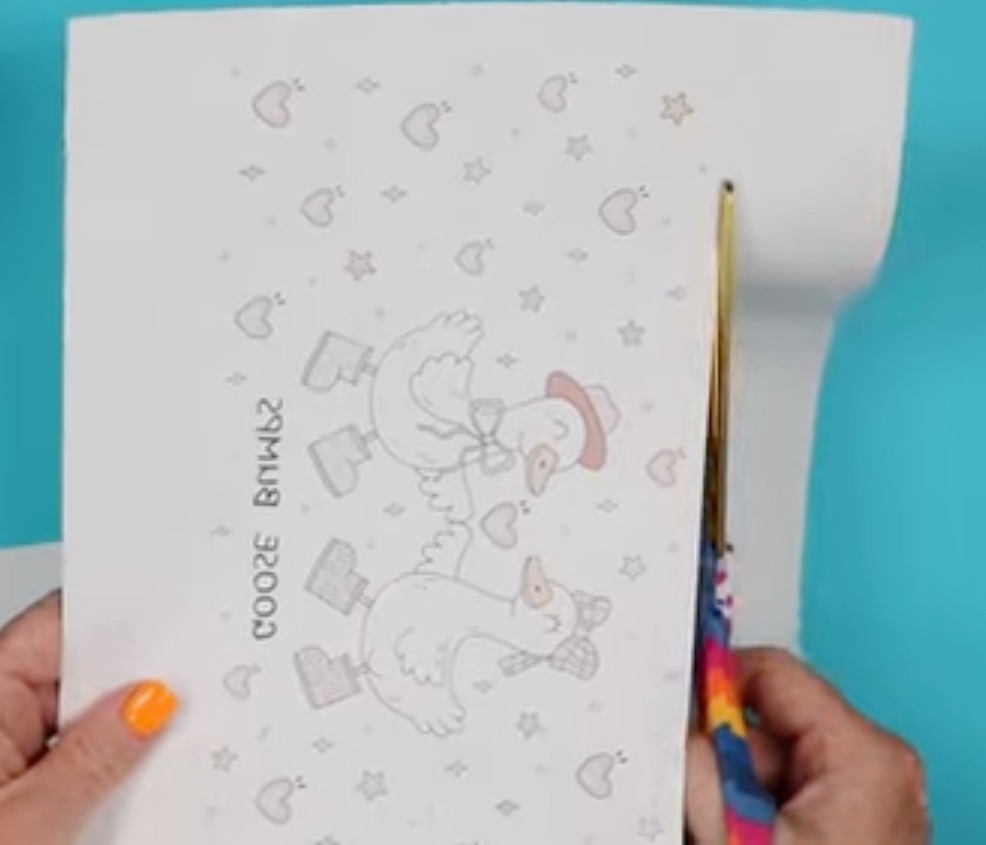
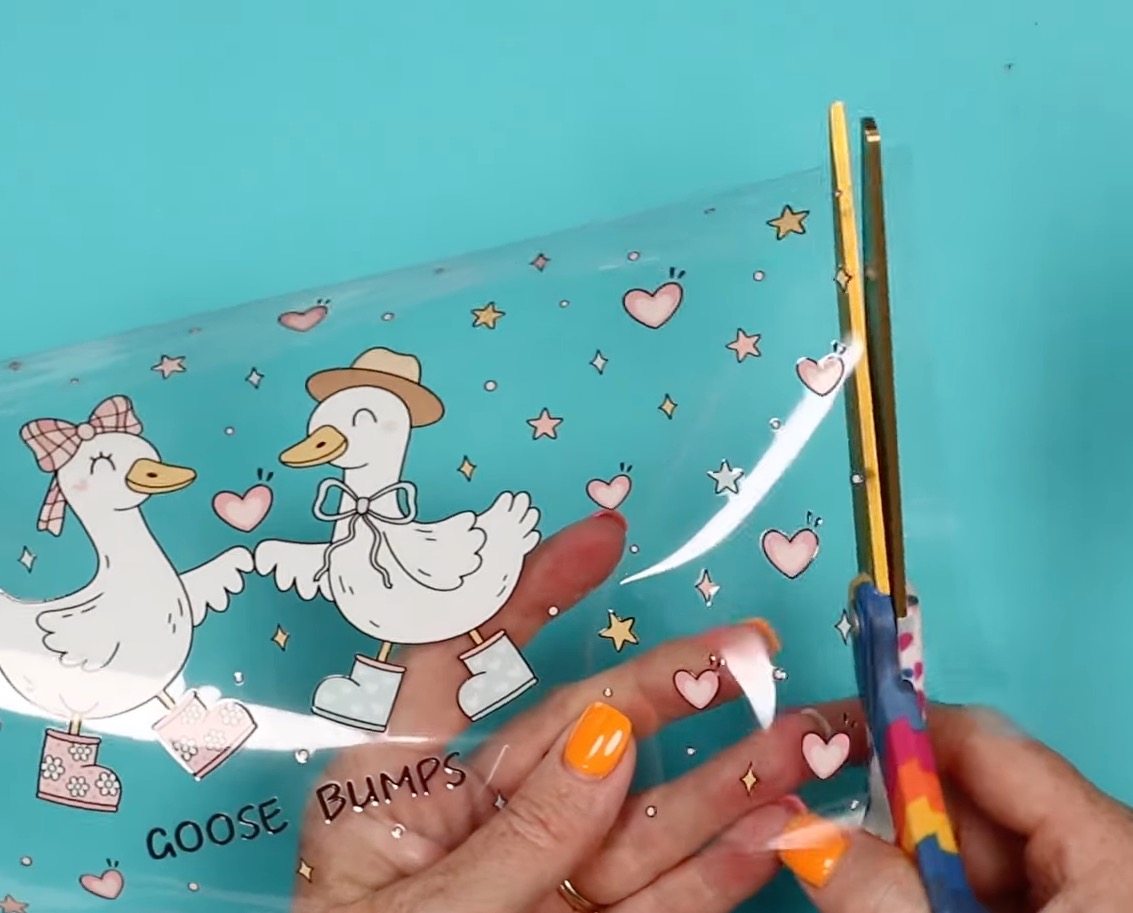
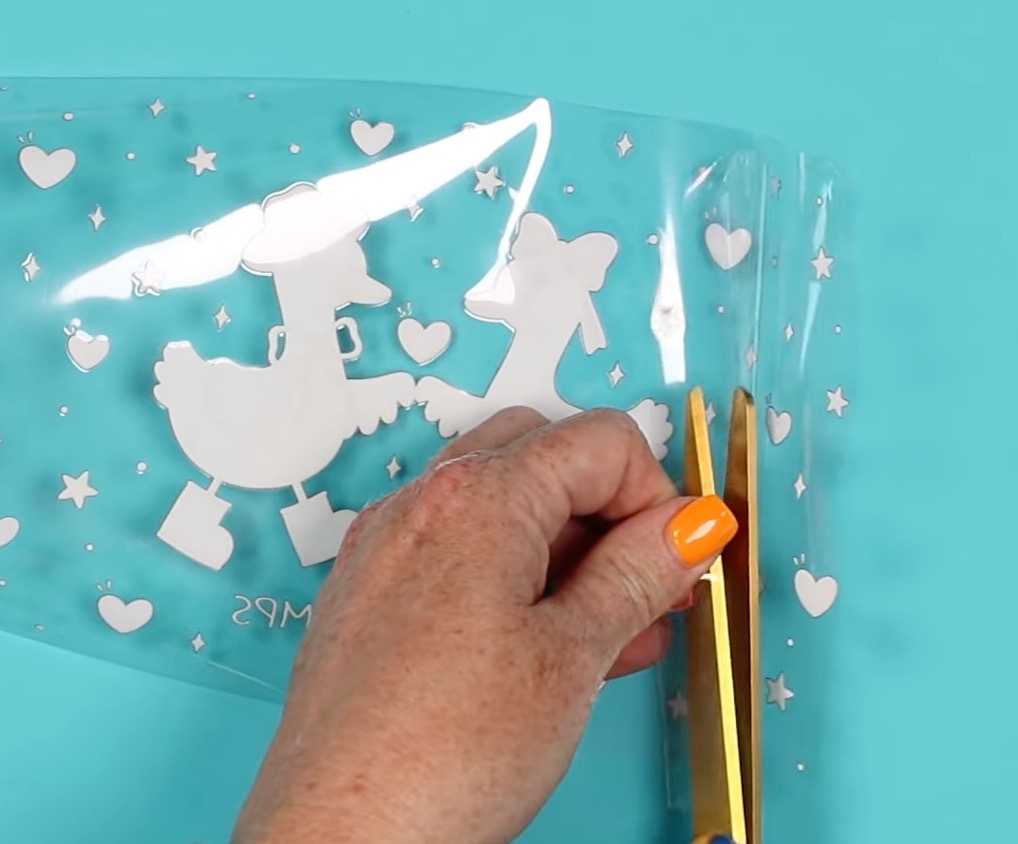
For both the sublimation prints, I trimmed the page around the design. I used scissors; if you want an exact straight line, you can use a paper trimmer.
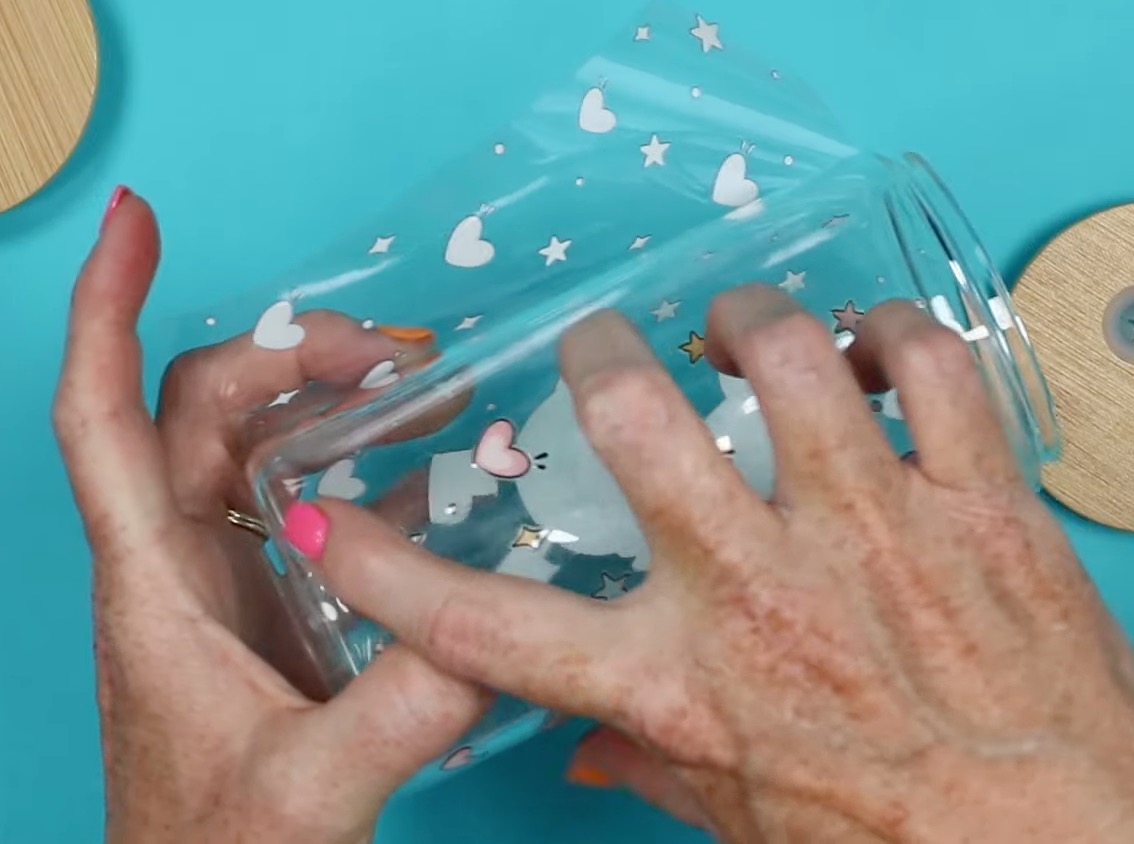
Wrap the print around the glass can with the ink side facing the glass.
My paper overlaps just a little bit. Because the background isn't a solid color, this is fine.
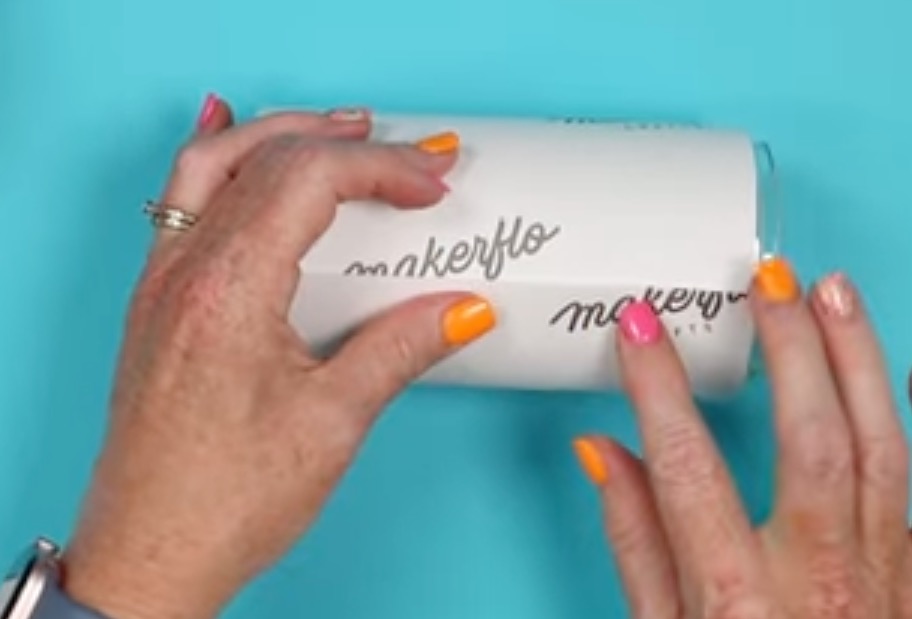
Tape the Print in Place
Make sure your print is lined up correctly and use heat-resistant tape to secure it in place along the seam.
I'm using a silicone wrap and tumbler press to press this, so adding tape along the seam should be enough.
If you're using a sublimation oven, you'll want to use more tape and a shrink sleeve.
Step 4. Apply Heat
I am using the HTVRont A200 Auto Tumbler Press today. If you're using a different press, follow the directions for the press you're using.
This tumbler press has inserts you use with the blanks.
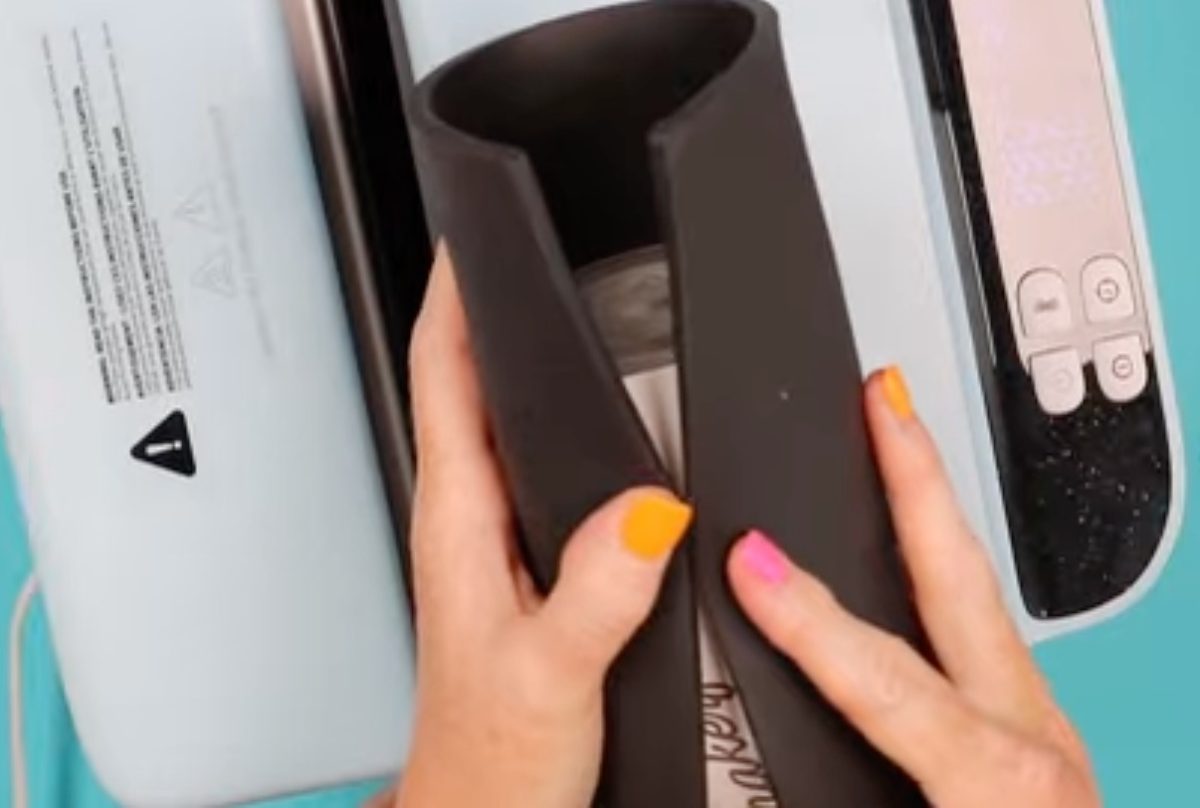
Wrap the appropriate-sized insert around the can and place the can in the press.
With this press, I have the temperature set at 390 degrees and the time set to 150 seconds. When the time is up, we'll rotate the tumbler and press for another 150 seconds.
Repeat this process for both sublimation glass cans.
Step 5. Allow the Sublimation Glass Cans to Cool
When the timer for the second press is up, remove the glass can and place it on a heat-resistant mat.
The next tip for getting the best and brightest sublimation transfer you can is to allow the glass to cool completely before removing the print.
This allows as much ink as possible to transfer to the glass.

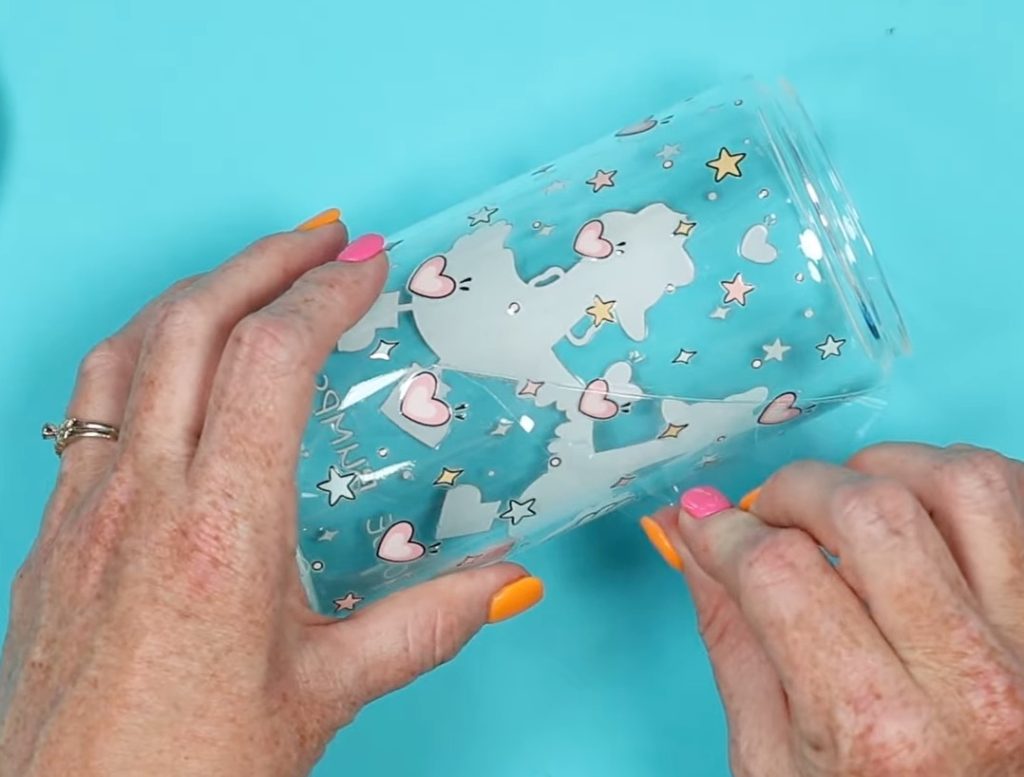
Step 6. Remove the Sublimation Print
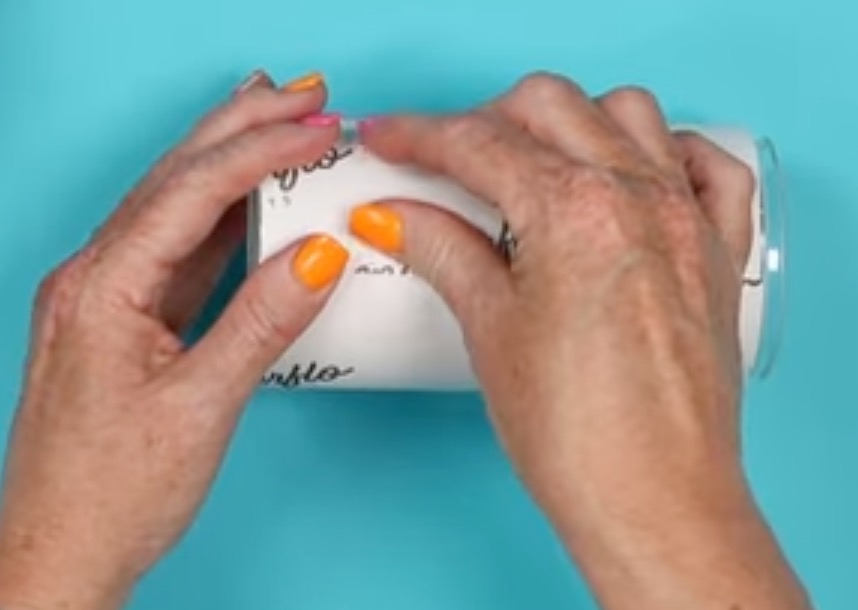
When the cans are cool, remove the heat-resistant tape and sublimation print.
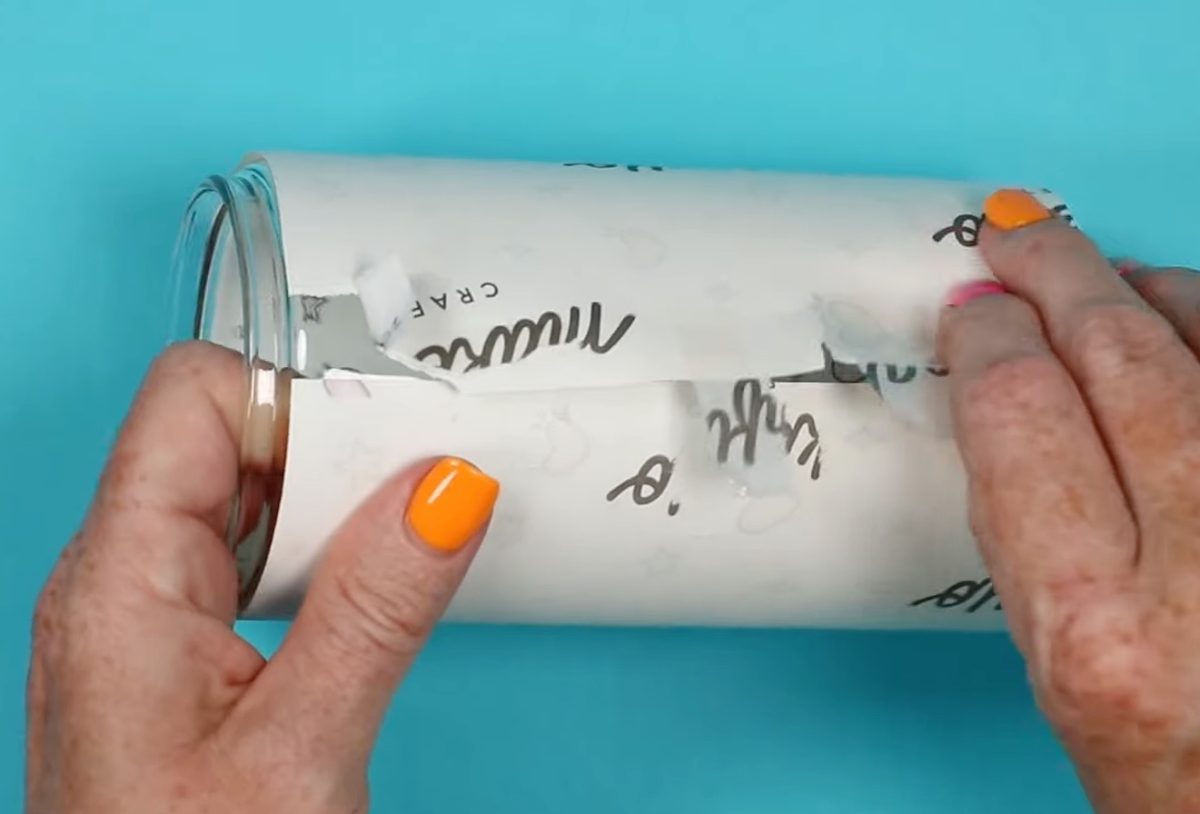
Because these are cool, you shouldn't need to use any tools. If you choose to use some type of tool, make sure you don't scratch the glass.
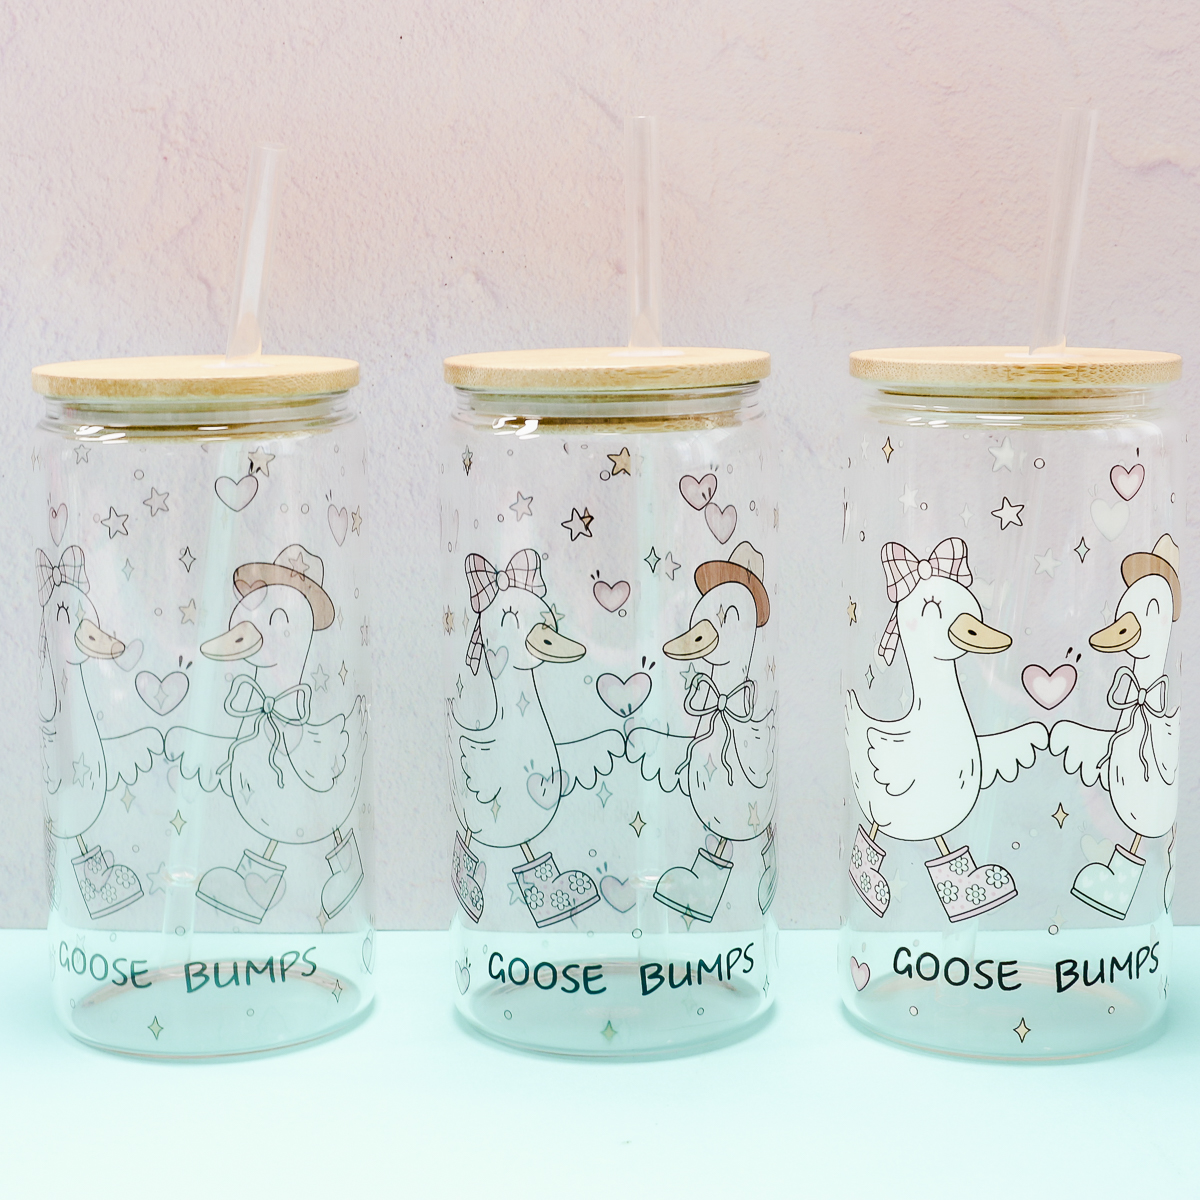
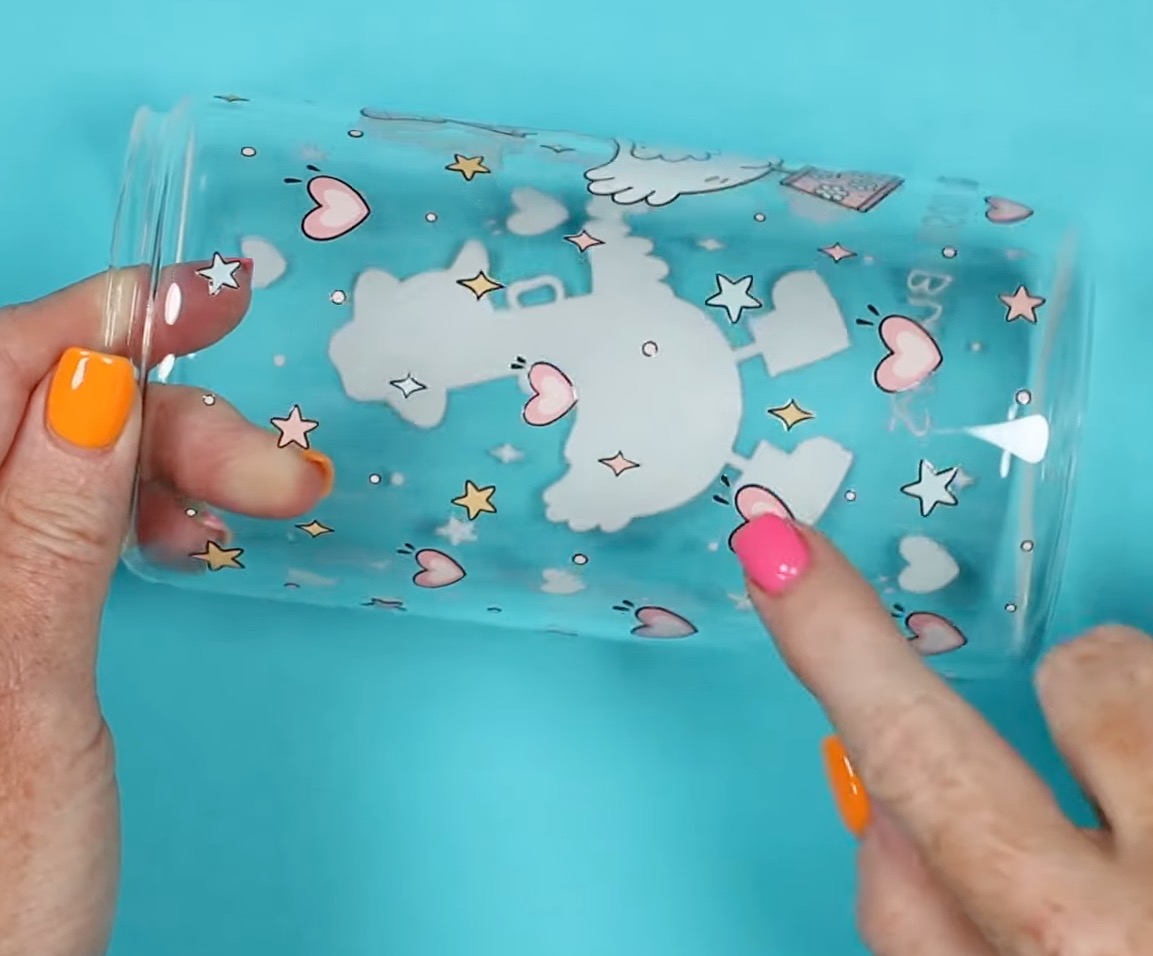
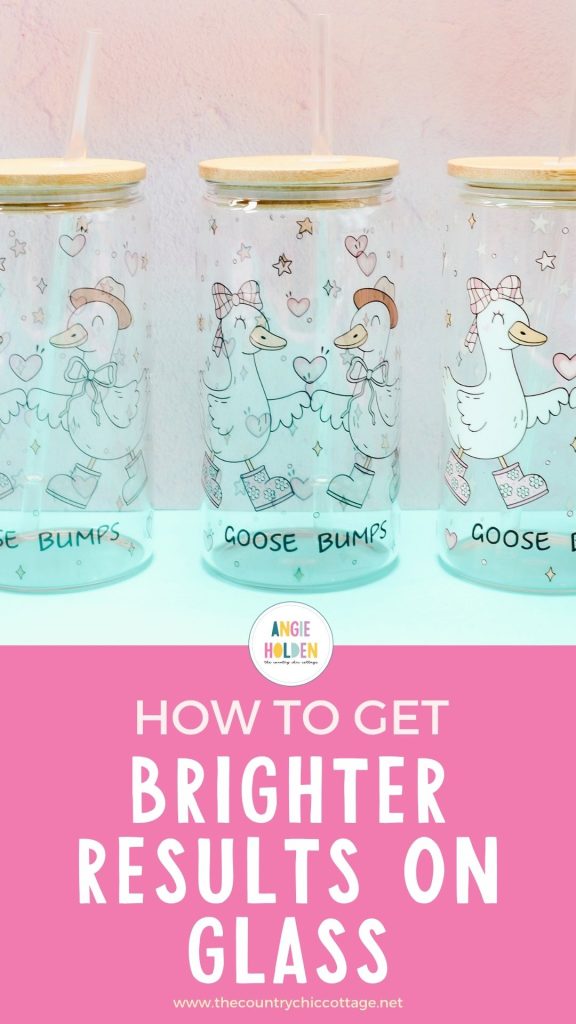
Step 7. Close-Up of Both Sublimated Glass Cans
Here we have both of our sublimated glass cans.
The can on the left had the print that was printed one time, and the can on the right was printed twice.
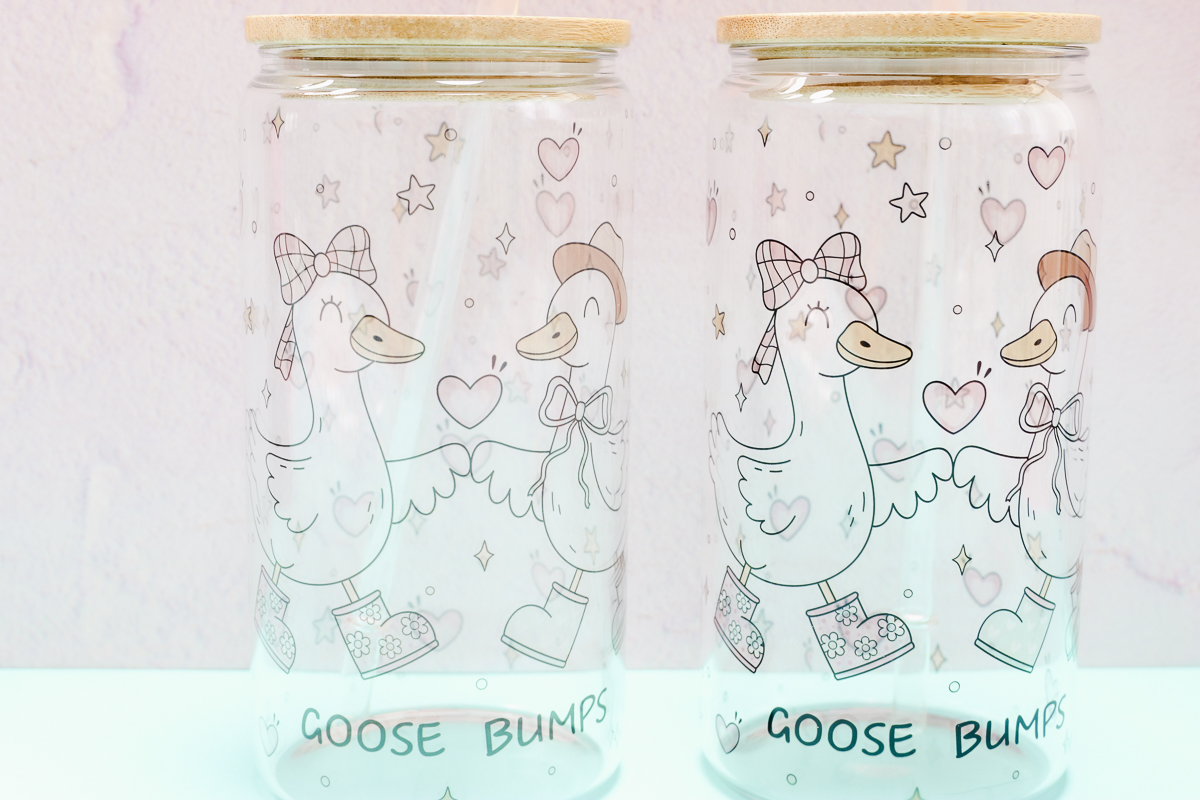
With the light colored wall behind them, you can see that both cans sublimated. The can on the right is much brighter.
Where there are colors, they are more vibrant. However, sublimation ink is translucent. Even where there is color, you can see the print on the other side right through it.
There is also no white. So the cute geese are only outlined. You don't see their white bodies.
If you have a sublimation printer and want to make glass cans, I definitely recommend printing twice and allowing the can to cool completely before removing the paper.
Method 2 – UV DTF Glass Cans
If you looked at the sublimation glass cans and want more. More colors, more vibrancy, and the option to have white ink. You're going to love UV DTF prints.
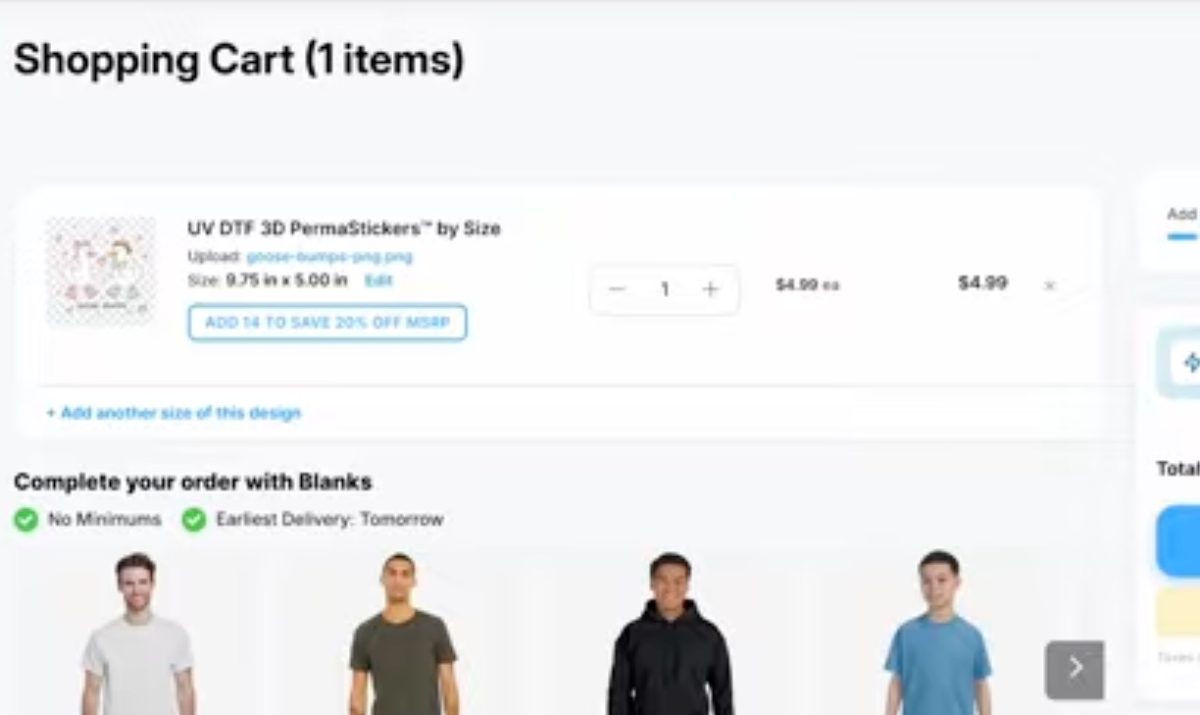
Step 1. Order UV DTF Print
I am ordering my UV DTF print from Ninja Transfers. They call them UV DTF PermaStickers.
I like to use the By Size option.
Upload the image, and you can resize the design right on the site if needed.
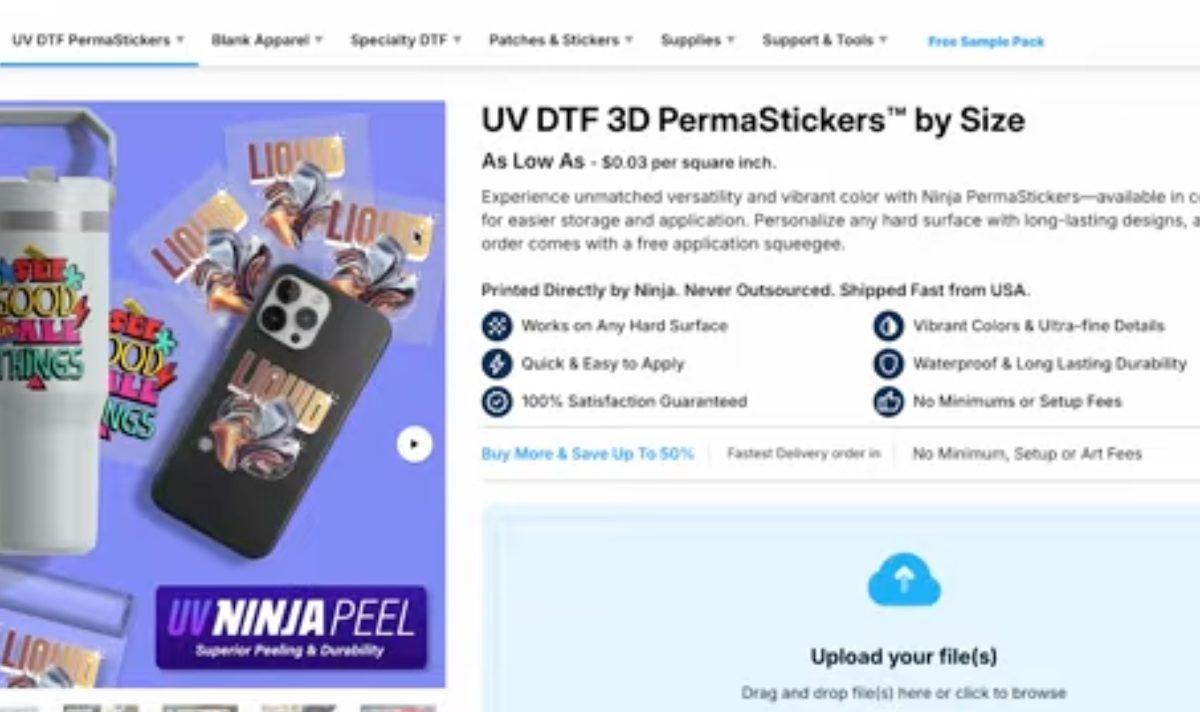
With the design uploaded, order the print, and it will arrive in a few days.
Step 2 – Apply UV DTF Print to the Glass Can
When the UV DTF print arrives, it's ready to apply to the glass can.
UV DTF is the stickiest sticker you can imagine. If you accidentally stick it somewhere you don't want it, it's nearly impossible to remove, and I haven't had success doing it without ruining the sticker.
Take your time during the application process so you don't stick it somewhere accidentally.
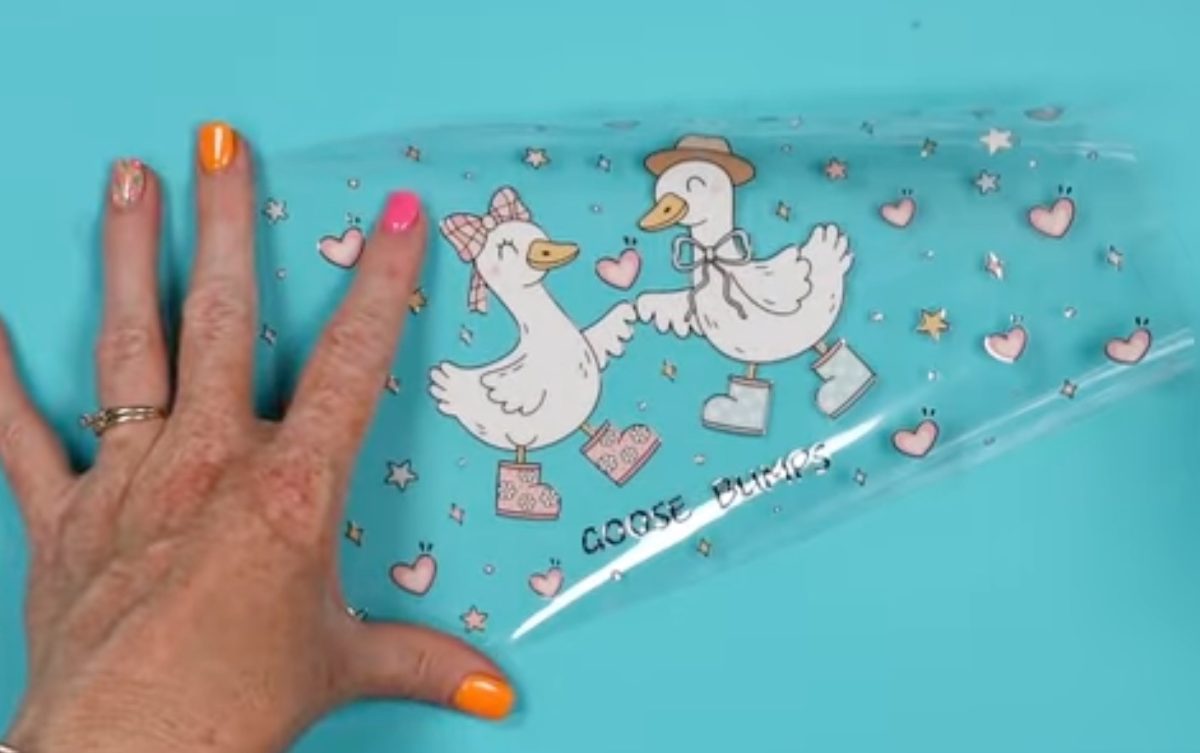
UV DTF comes in layers, and the application process is very similar to adhesive vinyl.
The UV DTF sticker is attached to a backing, and there is a transfer-type film on top of the sticker.
My sticker did come slightly oversized. I trimmed the excess film off both ends, and it fit my glass can perfectly.
Your order will also come with a felt-edged scraper tool that we're going to use to apply the UV DTF.
Peel one edge of the backing away from the UV DTF sticker. We're not removing it completely at this time.
Go slow; make sure the UV DTF sticks to the transfer film.
Use a pair of scissors to trim away some of the backing along one end.
Locate the UV DTF on the Glass Can
Be careful not to touch the exposed end of the UV DTF adhesive to anything until you have it located exactly where you want it.
Center the UV DTF print on the glass can. You can either hold it in place with your fingers, or use a little piece of tape at the top and bottom to hold it in place.
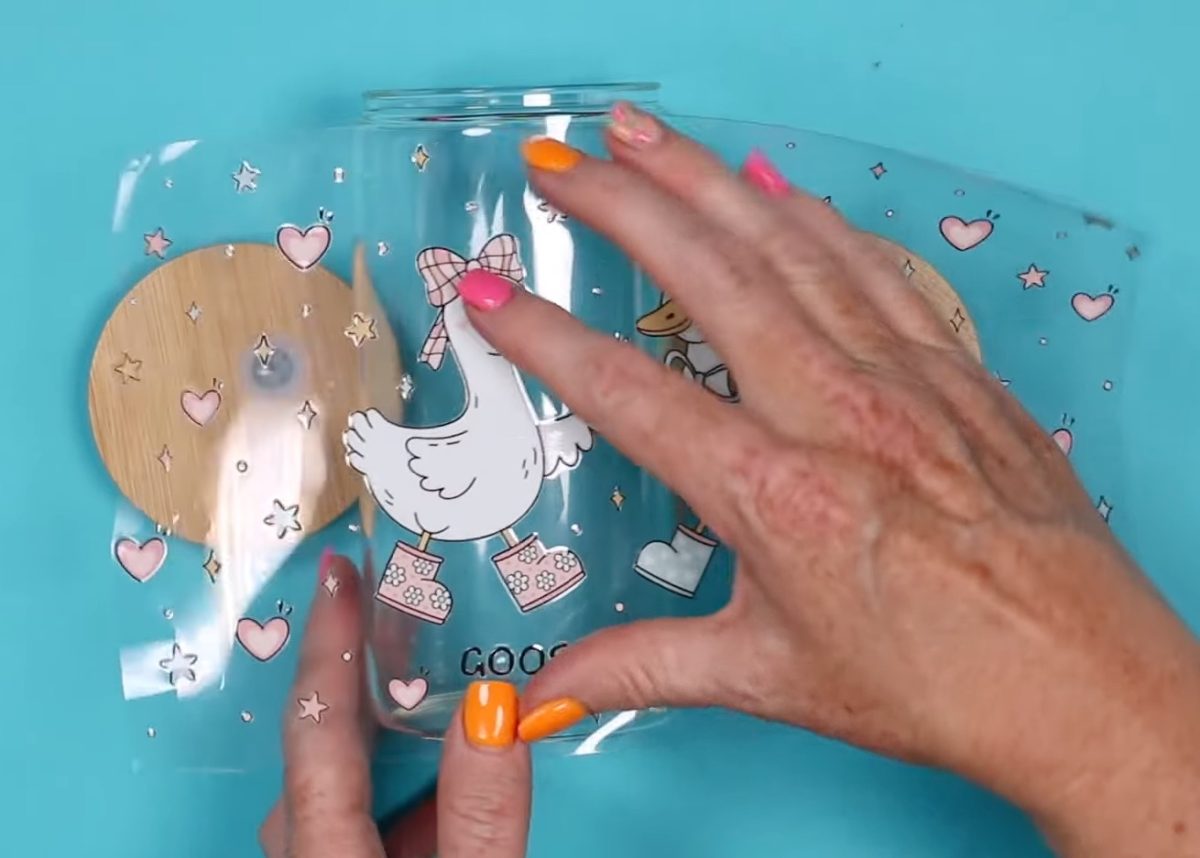
Rotate the glass can and UV DTF print, keeping everything straight, and secure the exposed adhesive edge to the glass can.
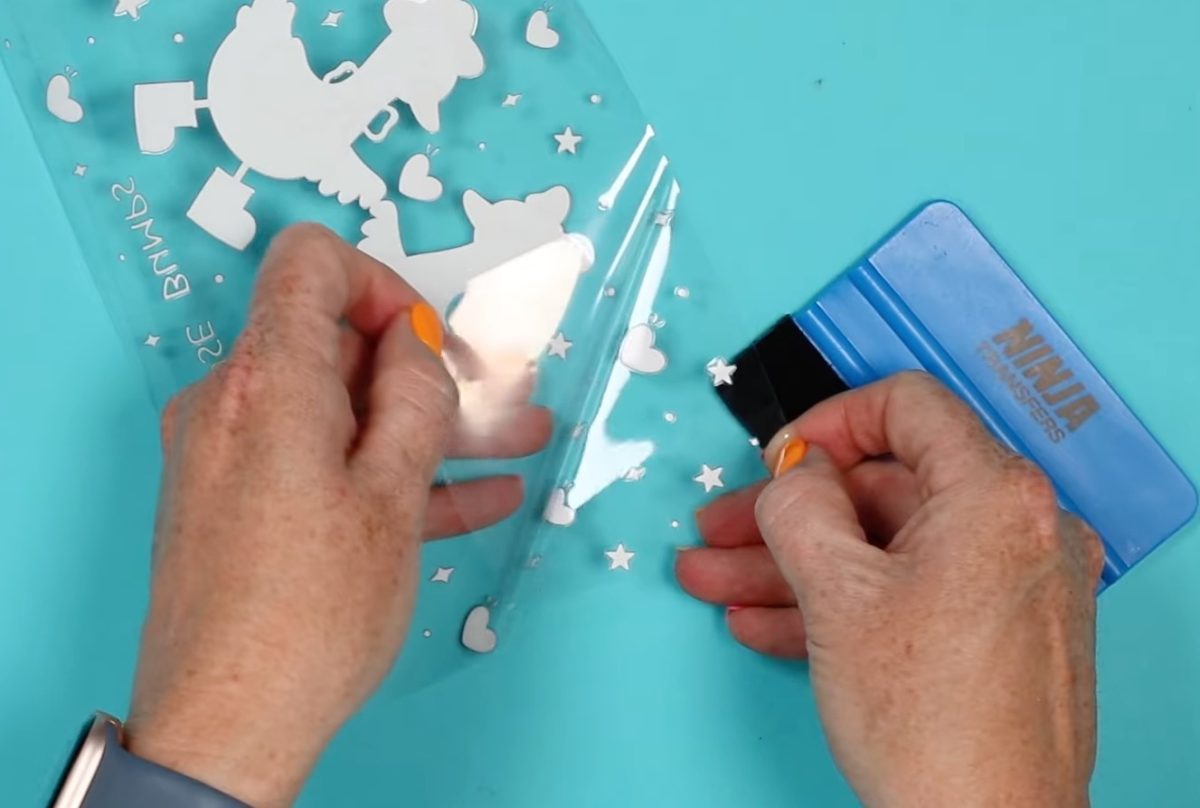
Burnish UV DTF on Glass Can
With one end of the UV DTF print secured to the glass can, flip the print back toward the adhesive end and, using a felt-edged scraper, peel back the bottom backer and smooth the UV DTF onto the glass can.
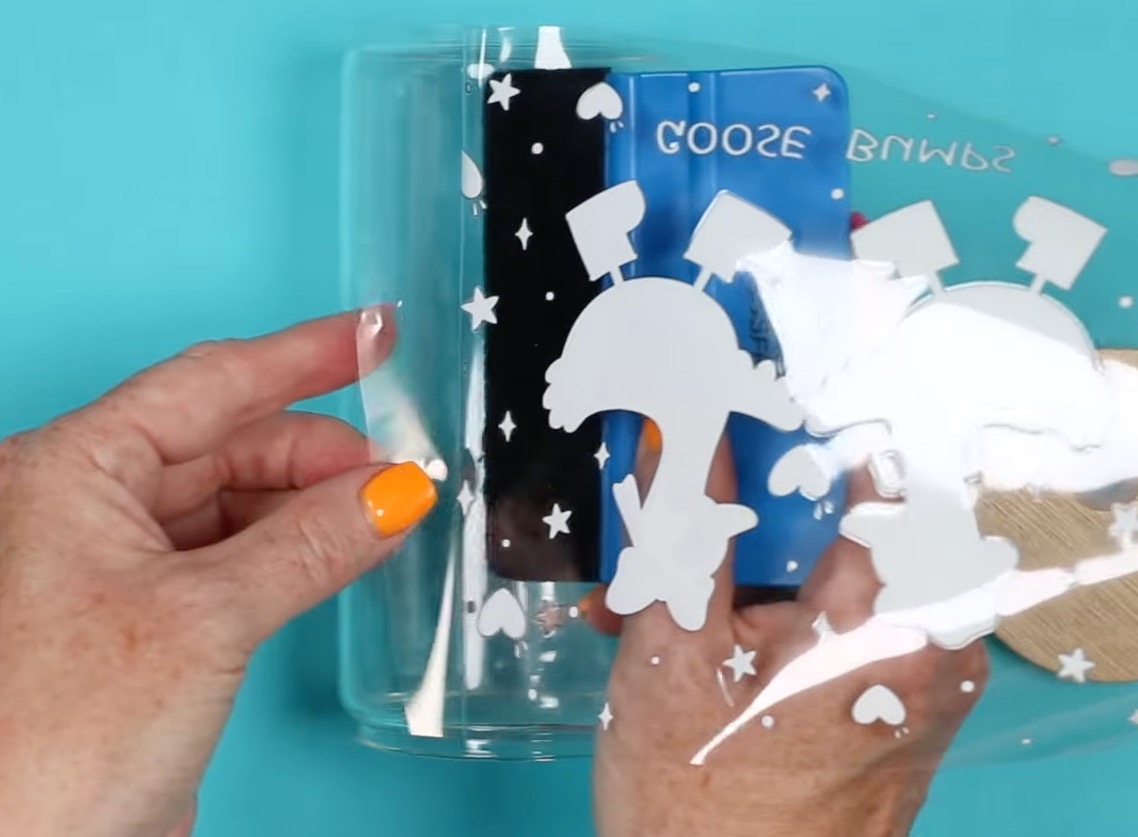
Work in small sections to prevent getting wrinkles or air bubbles in the print.
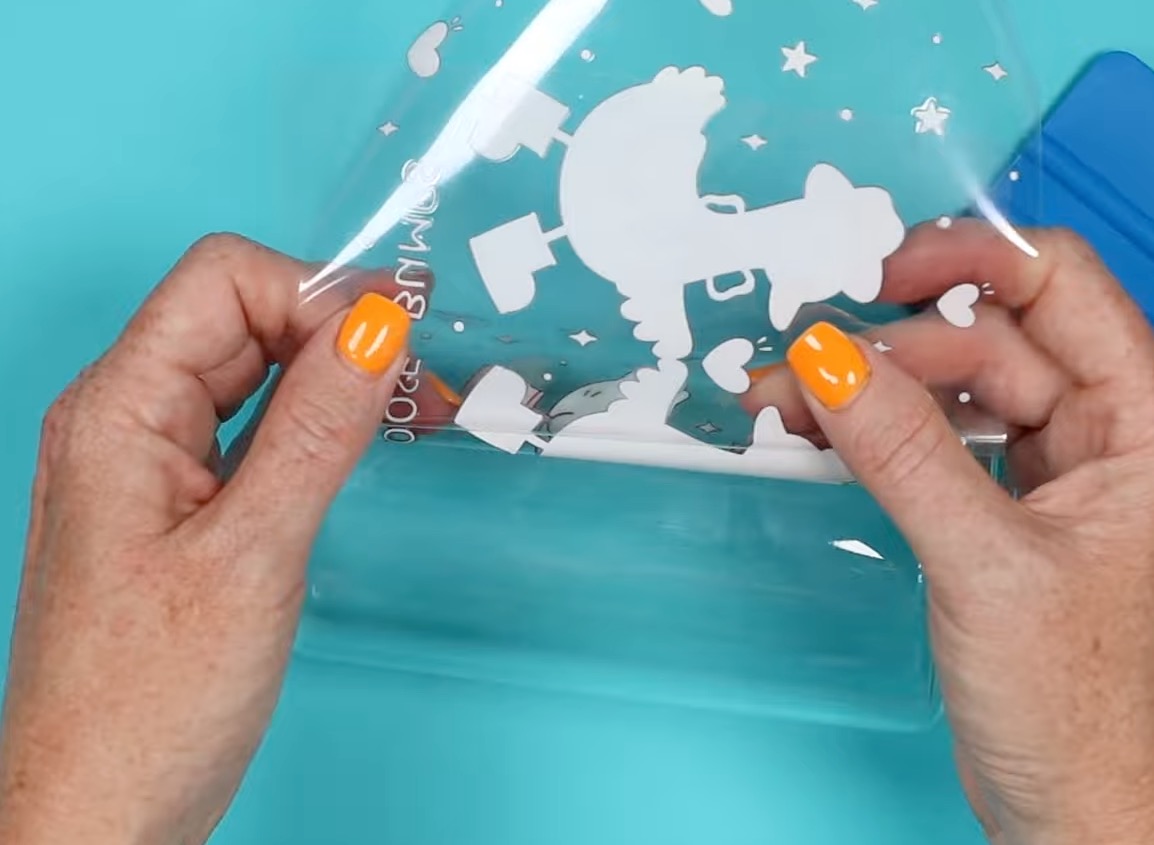
Pay attention to where the two ends meet. Make sure they don't overlap. If the carrier sheet overlaps, trim off the excess.
Remove the Transfer Film
Go over the entire surface with the felt-edged scraper, making sure the sticker is stuck to the glass can.
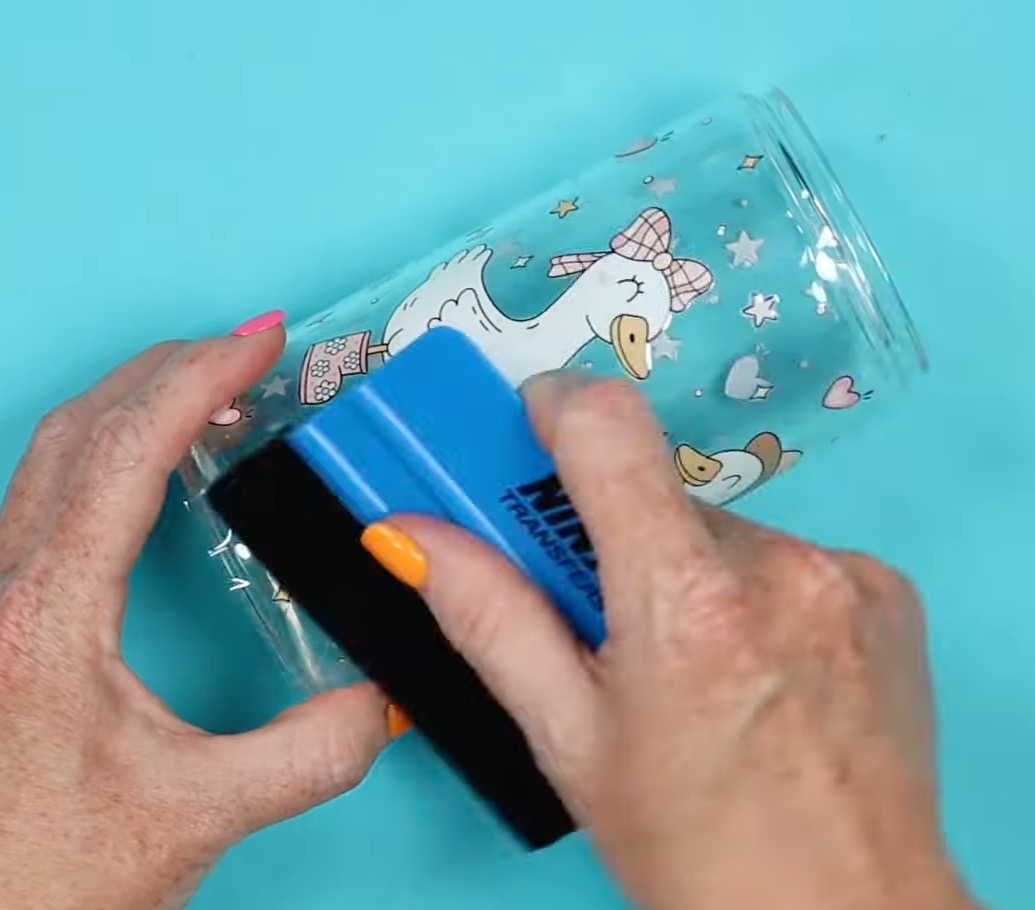
Pay close attention to the top and bottom. Since they're both rounded, we want to make sure the sticker conforms around the bend.
Spend time focusing on the thin lines like the letters, as those tend to stick to the transfer film.
Slowly peel back the transfer film, making sure the print is sticking to the glass can.
If the UV DTF isn't sticking, burnish it down more.
Post Burnish
With the transfer film removed, go over the whole surface with your fingers, pressing everything down and checking for anywhere the UV DTF may be lifting.
Note – I had some lifting, especially the tiny lines near the hearts. I think because this glass can has a sublimation coating and those portions are so tiny, I had to work with them to get them to stick, and I did lose a couple.
With the transfer film removed, the glass can is finished. There is no heating required; it's ready to use.

UV DTF and Sublimation on Glass Comparison
Let's look at all three of the glass cans we made today.
Here are all three options in front of a light colored background.
First is the regular sublimation print. This is one time through the printer, allowed to cool completely before removing the print. The design fully transferred, and the black looks really good.
Unfortunately, because sublimation ink is transparent, without the white behind it, it's very hard to see the design. With liquid in the glass, other than milk or another light colored opaque liquid, you won't really be able to see the design at all.
Next, we have the brighter sublimation glass can.
This is the print that we ran through the printer twice. You can see it is significantly darker than the regular sublimation. It is still translucent, but where there is color, especially darker colors, it shows up really well.
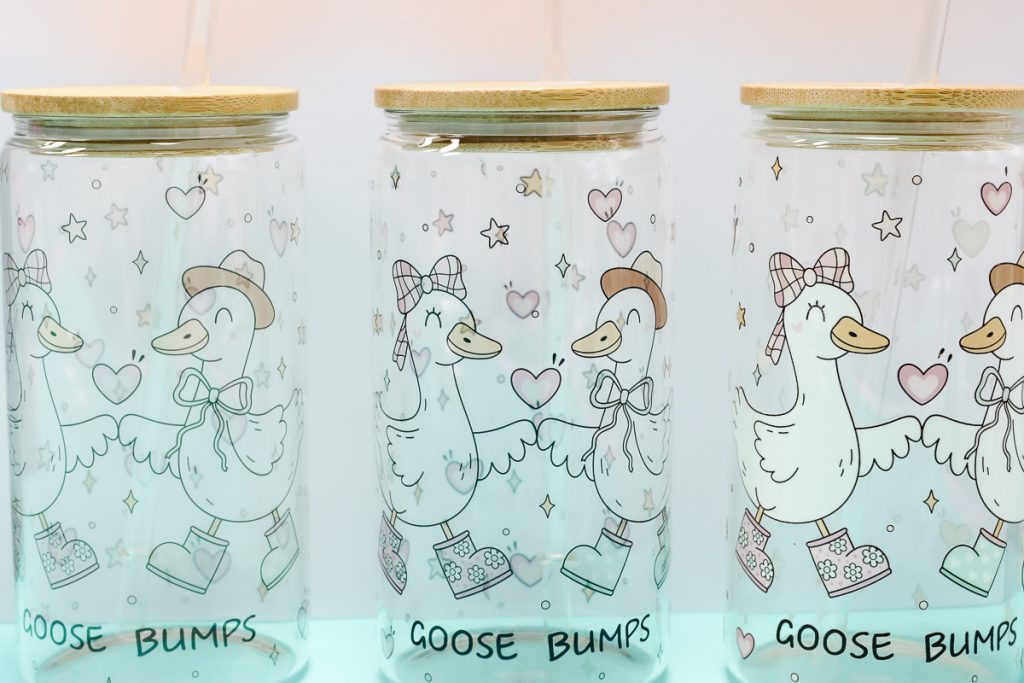
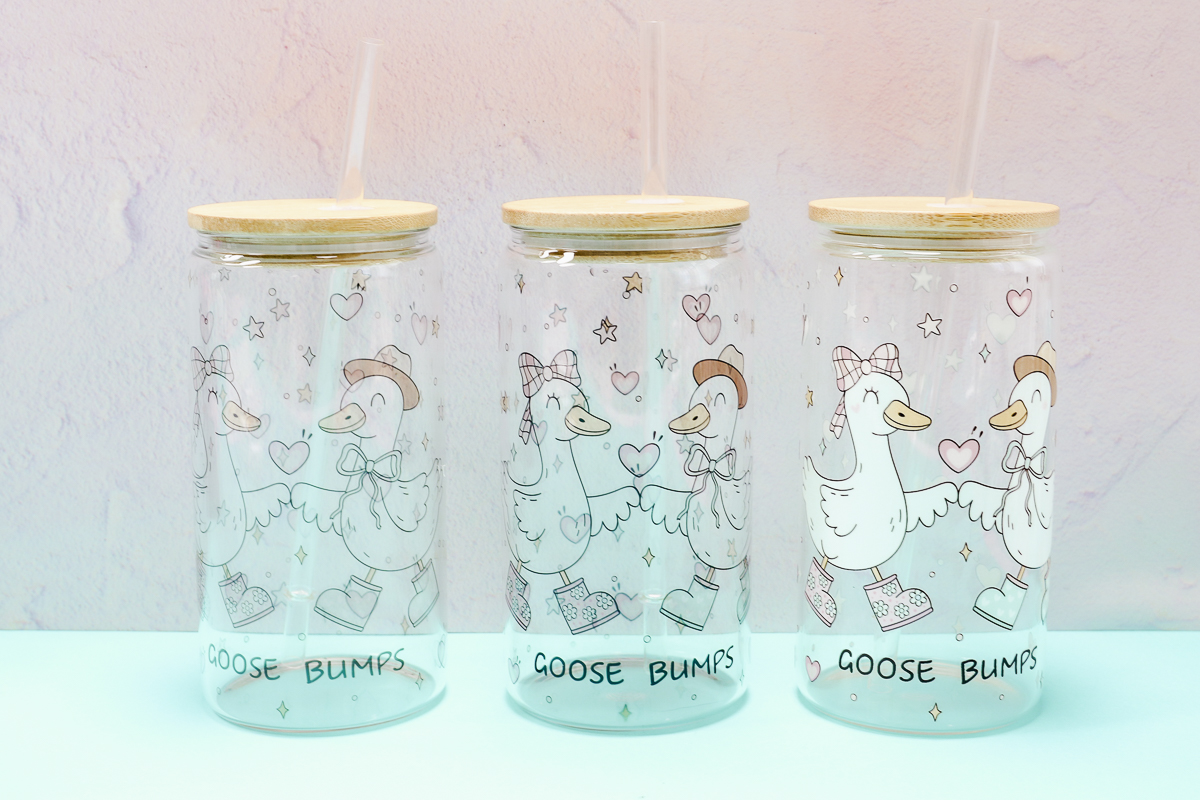
The final glass can has the UV DTF sticker on it. When it comes to vibrant, opaque colors, and white ink, this is the clear winner.
Add in that you can use any hard surface blank, and that you don't need special machines, UV DTF stickers can be for everyone.
Which Method is Right for You?
If you want to make glass projects with full-color designs that look professional, UV DTF is the way to go.
Yes, you have to order the UV DTF stickers, but you don't need a heat press, sublimation oven, special blanks, or a sublimation printer.
Glass projects made with UV DTF stickers can be done in minutes, making them great for last-minute gifts and small business owners.
If you already own a sublimation printer, heat press/tumbler press, and other sublimation supplies, continuing with sublimation may be the right choice for you.
Are You Ready to Get Brighter Sublimation Prints on Glass?
If you decide to move forward with sublimation, I highly recommend the double-print tip I shared today. The print is significantly darker and looks really good.
Make sure to test your time and temperature. Black sublimation ink sublimates last. If your black looks green, you haven't pressed long enough, or your temperature is too low. If the black looks brown, you pressed for too long or have the temperature too high.
You want the black to be as black as possible because that will help ensure your other colors have transferred as much as possible as well.
I hope I've answered any questions you have about how to get brighter sublimation prints on glass. If you have any additional questions, leave them in the comments, and I'll be happy to answer them for you.


I really enjoyed your video and feel as though I learned a lot. I’m definitely going to have to try UV DTF! I do have a question though. Is the DTF permanent and can it go in the dishwasher?
I think some people will put UV DTF on the top rack of a dishwasher. I would always recommend hand wash only for the longest lasting results 🙂