
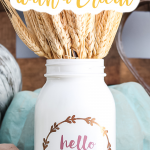
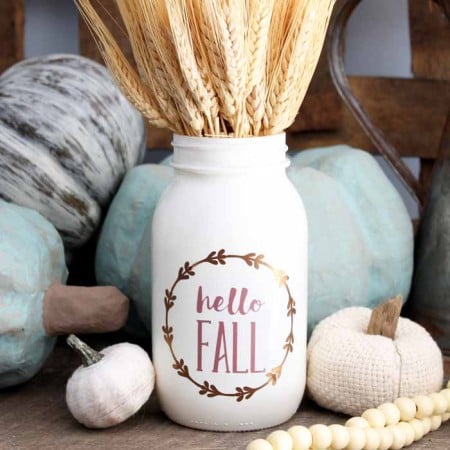
Add vinyl on mason jars to make some quick and easy decorative glass jars for fall. This simple technique will have you adding these jars all over your home. Welcome fall with a friendly greeting! Fall jars are my absolute favorite thing to decorate with. Plus, this technique of adding vinyl with your Cricut machine to the front is easy to do and can be completed in minutes.
This was originally posted on September 5, 2017, however, I am republishing with more information.
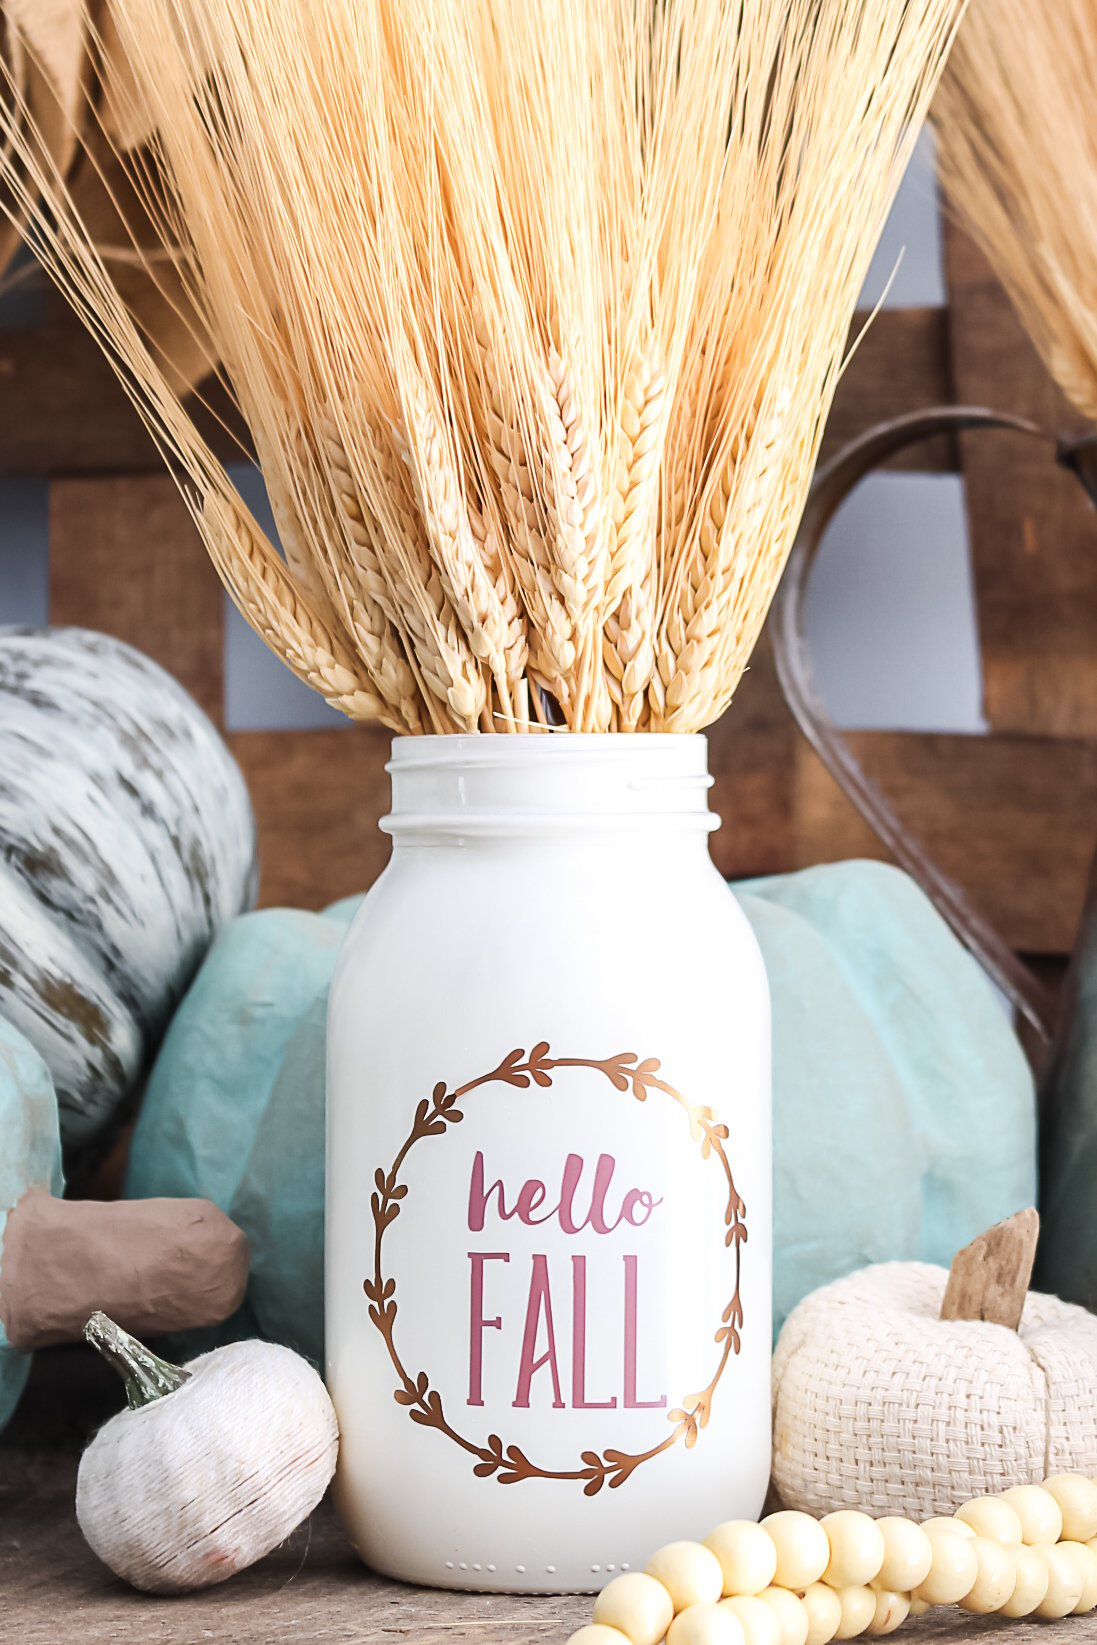
Decorative Glass Jars
To make this fall craft, we are going to use a Cricut and add vinyl on mason jars. This technique is easy and can be used for a variety of seasonal decor. This version is for fall but be sure to use the same idea to make jars for other occasions.
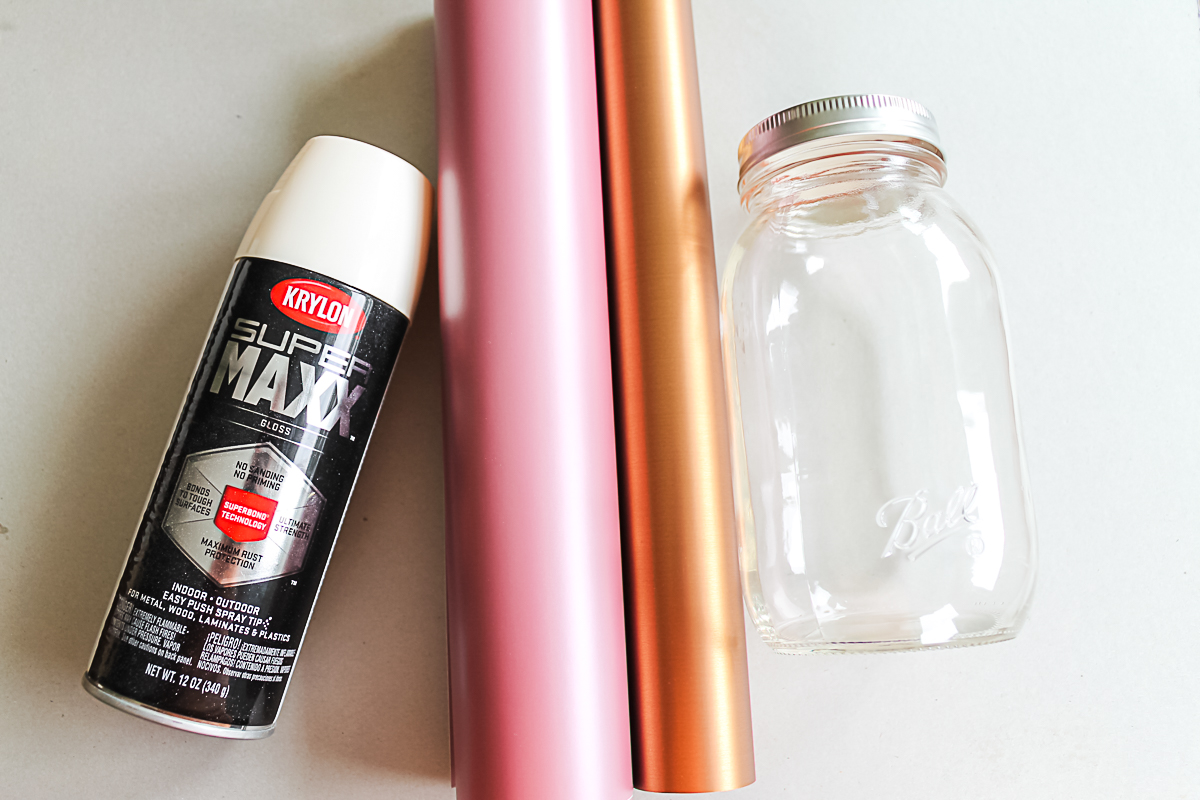
Supplies needed to put vinyl on mason jars:
- Smooth sided quart jar
- Spray paint
- Cricut Cutting Machine (This is the brand that will work with the file that I designed.) (Want to see the difference between the machines? I compared the Cricut Maker and Explore here.)
- Hello fall design (access it below)
- Vinyl in two colors (I used metallic)
- Transfer tape
- Weeding tools
Hello Fall SVG File
For those that don't have a Cricut or are having issues opening the design above, you can also get a free SVG file below that is similar to the one that I used. Just sign up for the newsletter below and the file will be sent to your email address. Look for a sign-up box below that has a picture of the file you wish to download than add your information. If you already get our newsletter, just add your information again as you will not be signed up for anything further. Once your sign up, check your email to get your file then use the instructions here to upload to Cricut Design Space.
Please note that this file is for personal use only. You can contact me for commercial use or if you have any issues getting the file.
How to Paint Mason Jars:
Start by painting the jar with spray paint and set it aside to dry completely. TIP: Paint the jar upside down to get completed coverage without getting paint inside the jar. You can also paint the inside of the jar if you prefer but I would not do that if you are going to use the mason jar as a vase. I like to clean my jars with rubbing alcohol before painting to make sure they are really clean.
TIP: Allow your jar to dry at least 24 hours to make sure the paint stays on when you apply the vinyl.
How to Put Vinyl on Jars:
Next, cut your designs from two different colored pieces of vinyl. TIP: You can use this tip to cut two different colors at one time with your Cricut machine. Be sure to size the design to fit the jar you are using before cutting.
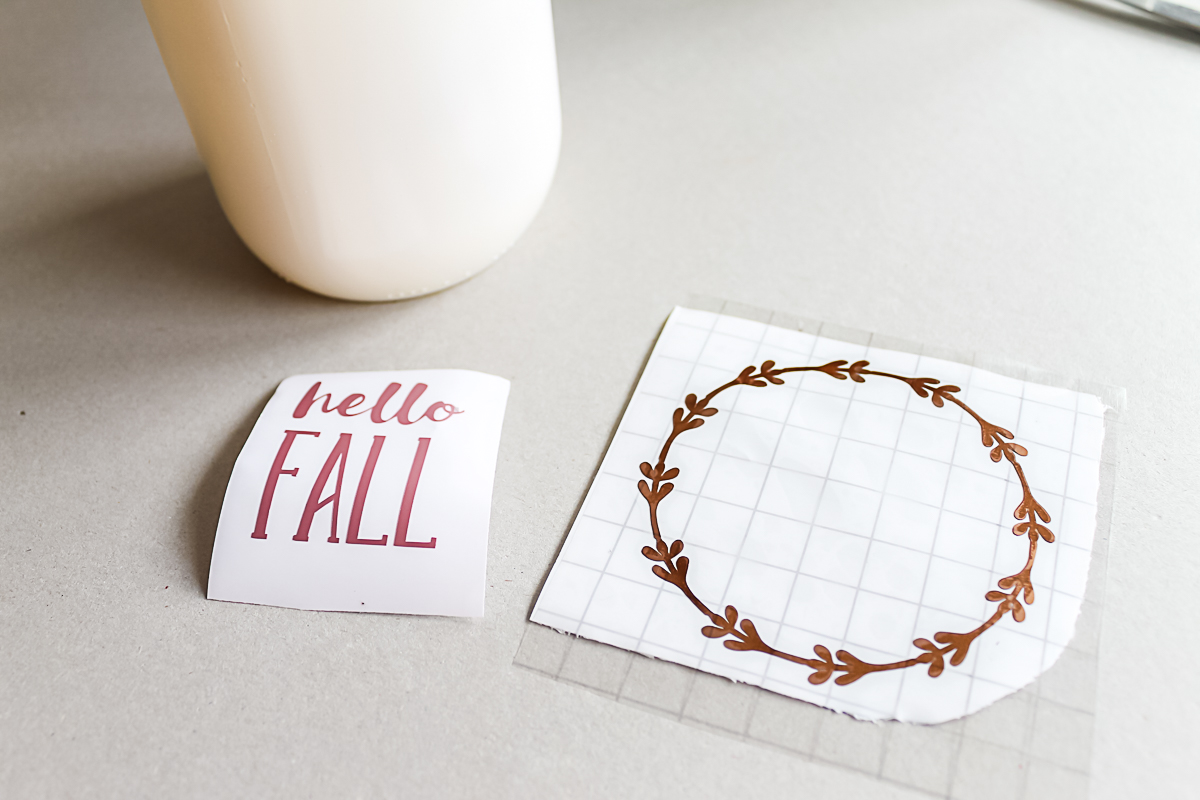
Weed your vinyl of any excess and middles in the letters. Apply transfer tape to the wreath first and remove from backing then center the wreath over the letters. You can see the basics of working with vinyl here. Press well and remove the backing from the letters as well. You are now ready to apply your words to the mason jar. You can see more tips and tricks for locating and layering vinyl here.
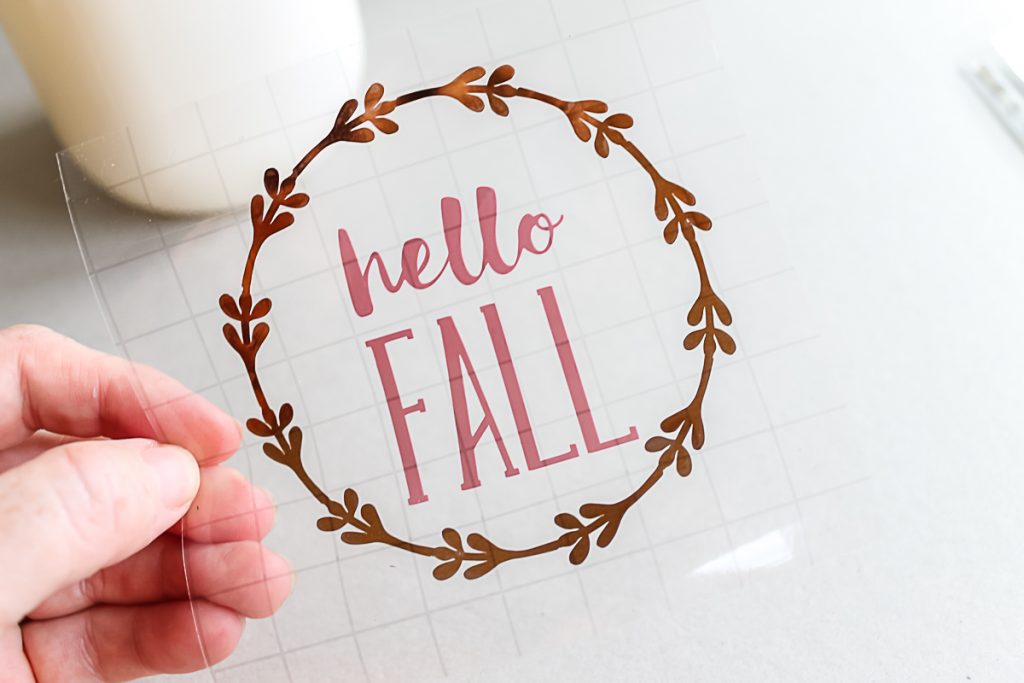
Center the design on the front of the jar and press well to apply. TIP: You can also slice the transfer tape around the edges so it will bend around the jar easier. You can see more about how to do that here. Carefully lift the transfer tape to remove and you are left with a gorgeous addition to your fall decor. NOTE: You will want to make sure your paint is completely cured before attempting to apply the vinyl. I recommend allowing it to dry for at least 24 hours before adding the vinyl to the jar.
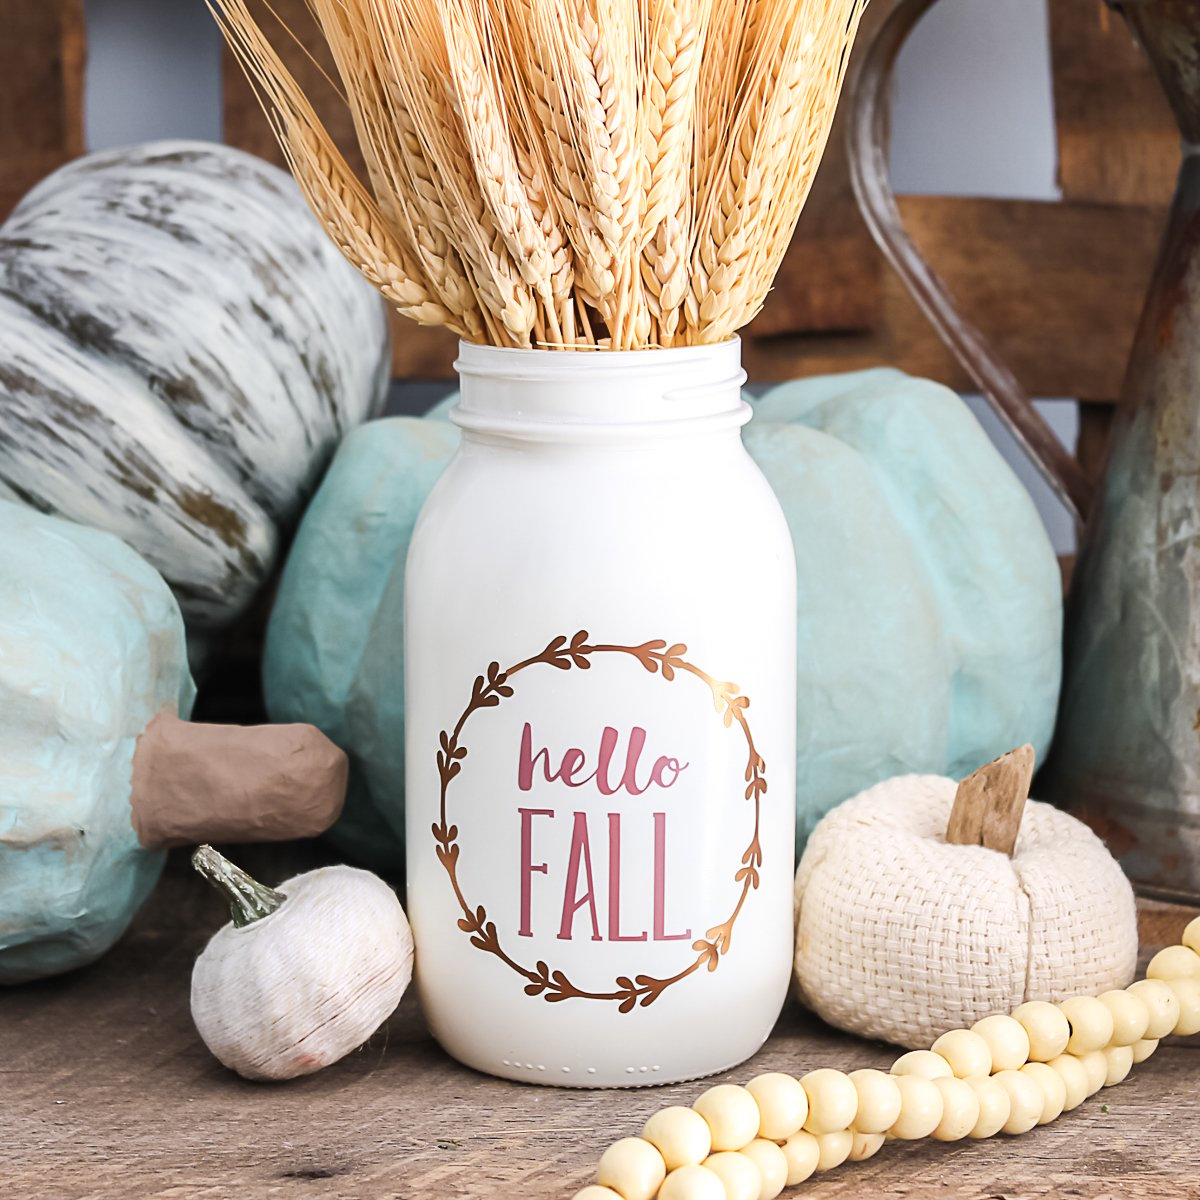
Using Your Decorative Glass Jars
How many of these decorative glass jars will you make for your home? They would also make great gifts or even a centerpiece for Thanksgiving. Give this quick and easy craft idea a try for your home! Adding vinyl on mason jars is super easy and is a great new craft to add to your home.

Want to get the same look in your home? Add some twine pumpkins, monk's cloth pumpkins, and rustic painted pumpkins to your home's decor. They go great with these decorative glass jars and you will love the look in your home!
Love this idea and want more? See the links below!

Want to print the instructions for adding vinyl on mason jars? Try the card below!
Supplies
- Smooth sided quart jar
- Cricut Cutting Machine
- Hello fall design
- Vinyl in two colors
- Transfer tape
Instructions
- Start by painting the jar with spray paint and set aside to dry completely. TIP: Paint the jar upside down to get completed coverage without getting paint inside the jar. You can also paint the inside of the jar if you prefer but I would not do that if you are going to use the mason jar as a vase.
- Next, cut your designs from two different colored pieces of vinyl. TIP: You can use this tip to cut two different colors at one time with your Cricut machine. Be sure to size the design to fit the jar you are using before cutting.
- Weed your vinyl of any excess and middles in the letters. Apply transfer tape to the wreath first and remove from backing then center the wreath over the letters. You can see the basics of working with vinyl here.
- Press well and remove the backing from the letters as well. You are now ready to apply your words to the mason jar.
- Center it on the front of the jar and press well to apply. Carefully lift transfer tape to remove and you are left with a gorgeous addition to your fall decor. NOTE: You will want to make sure your paint is completely cured before attempting to apply the vinyl. I recommend allowing to dry for at least 24 hours before adding the vinyl to the jar.


This is the PERFECT way to Welcome Fall! I LOVE IT!!!
So pretty! I love those metallic vinyls.
Such.a lovely centerpiece and/or decor idea!
Aww! So cute! Love this!
I would love for you to share this with my Facebook Group for recipes, crafts, tips, and tricks: https://www.facebook.com/groups/pluckyrecipescraftstips/
Thanks for joining Cooking and Crafting with J & J!
I love mason jars, and this craft is so cute! Thanks so much for the information about the cricut. I have been thinking about getting one.
Beautiful jar!
what a great idea, this looks like a perfect country craft to share with others. So glad you shared it with me. Please feel free to come visit us at http://shopannies.blogspot.com
What a cool way to add letters to a jar! Thank you for sharing on Merry Monday! Hope to see ya next week!
Kim
I love decorating and repurposing glass jars, too. Congrats, you’re featured this week at the This Is How We Roll Link Party.
When I open the design in cricut, only the “hello” and then the letter “F” appears?
Sorry. Cricut has been having issues when opening projects.