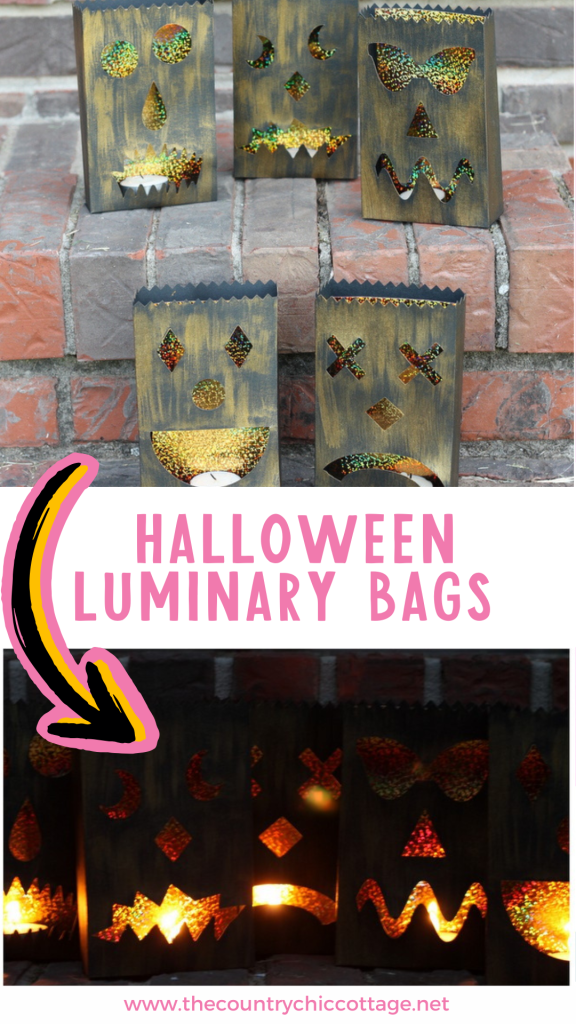
What do you do when you want to light up your porch for Halloween but don’t want plain old orange pumpkins? Grab some black card stock and metallic paint, and make these fun Halloween luminary bags! These are the perfect addition to your front porch for a Halloween party or to guide those trick-or-treaters.
Loving this idea? Be sure to check out even more Halloween crafts that can be made with your Cricut machine at the bottom of this post!
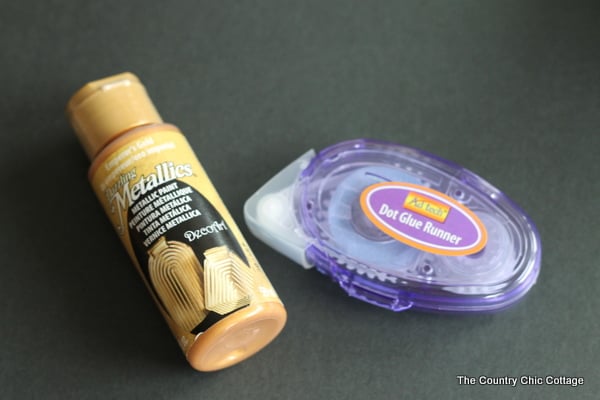
Supplies needed
To make your own Halloween luminary bags you will need:
- Cricut Machine
- Black cardstock in 12 x 12 sheets (1 per luminary)
- Gold iridescent poster board
- Gold metallic paint
- Paintbrush
- Dot Glue Runner
- Scissors
- Ruler or straight-edge
- Pumpkin face files (download below)
- Battery-operated tea lights
Free Pumpkin Faces Download
Sign up for our newsletter below to download all five of the pumpkin faces. The files will then be sent to your email, where you can download and upload them to your Cricut machine. Be sure to look for a subscriber box with a picture of the pumpkin faces.
Remember that these files are for personal use only. Please contact me if you have any issues with your download.
Halloween Luminary Bags Instructions
Getting this to cut correctly with a Cricut takes a few steps. But I took the liberty of figuring out an easy way to do it for you. Here are some screenshots to help.
Step 1 – Upload faces
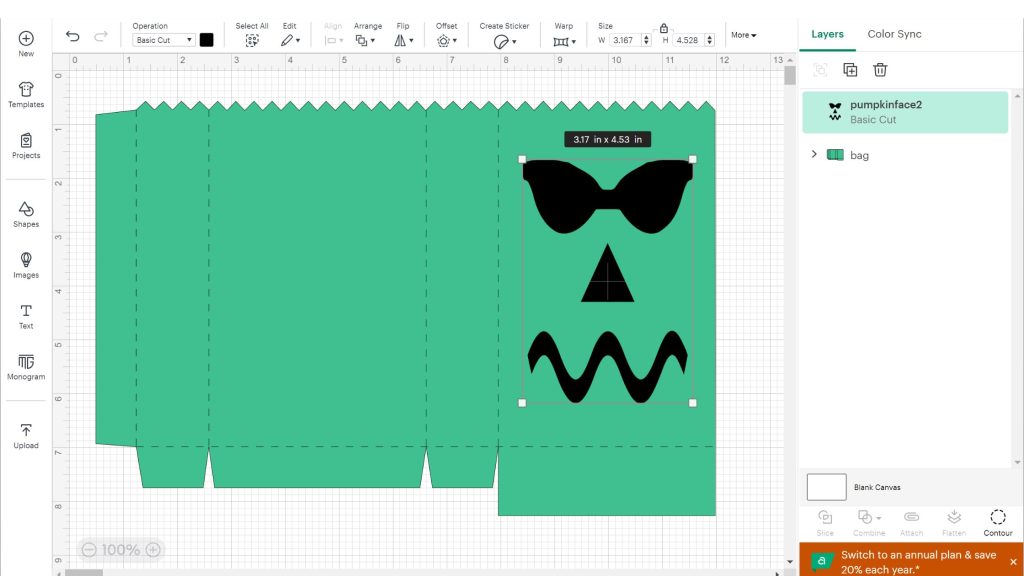
Upload those pumpkin face images that are linked above into Cricut Design Space. You can see how to do that in this post. Add one of the pumpkin faces to your mat, then insert a stock image from Cricut (search for “bag” to get the green image below).

Step 2 – Resize images
As shown in the screenshot below, you can resize the bag to about 11 ½ inches wide and then place the face over the bag pattern. Move the face to where you want it and resize it to get your desired look. Get the proportions right between the two images so the face is in the right location when you put the bag together.
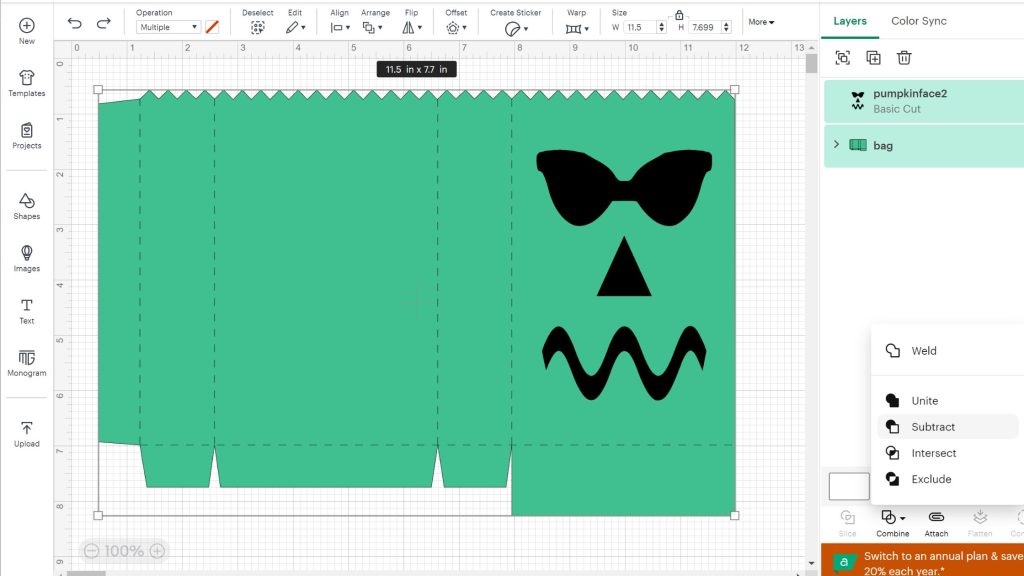
Step 3 – Combine the images
Next, we will need to cut the face out of the bag.
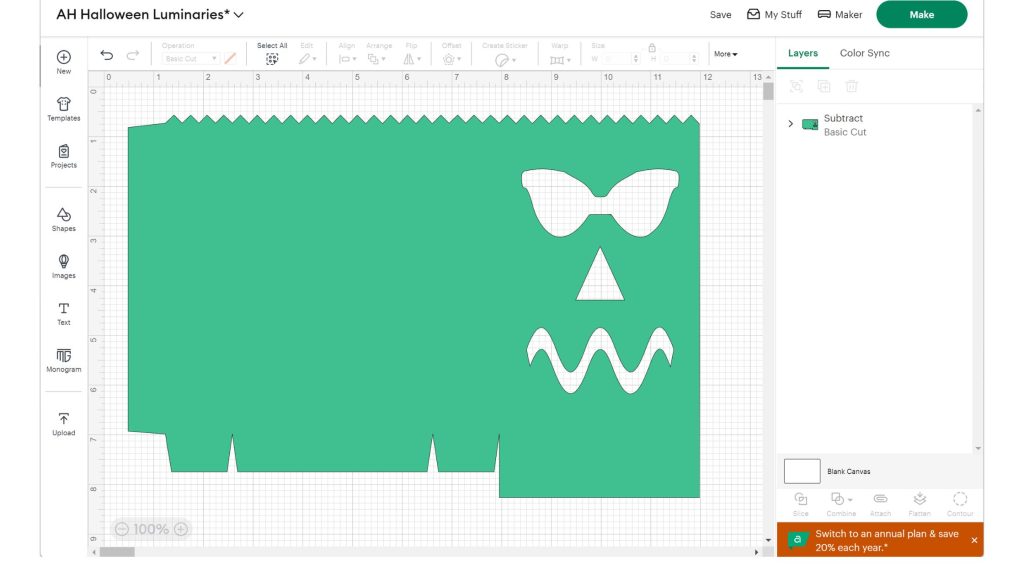
Hold down the Shift key and select the bag and face from the layers panel on the right, or click on Select All from the menu at the top of the screen. Then click Subtract from the combine menu on the bottom right of the canvas.
Step 4 – Sliced results
Your screen should now look like the image below.
Using this method, we lose the score lines on the bag for folding; however, I will show you in the tutorial below how to fold the bag accurately without them.
Step 5 – Ready to cut
Resize your entire image to about 11 ½ inches wide, then hit the Make button.
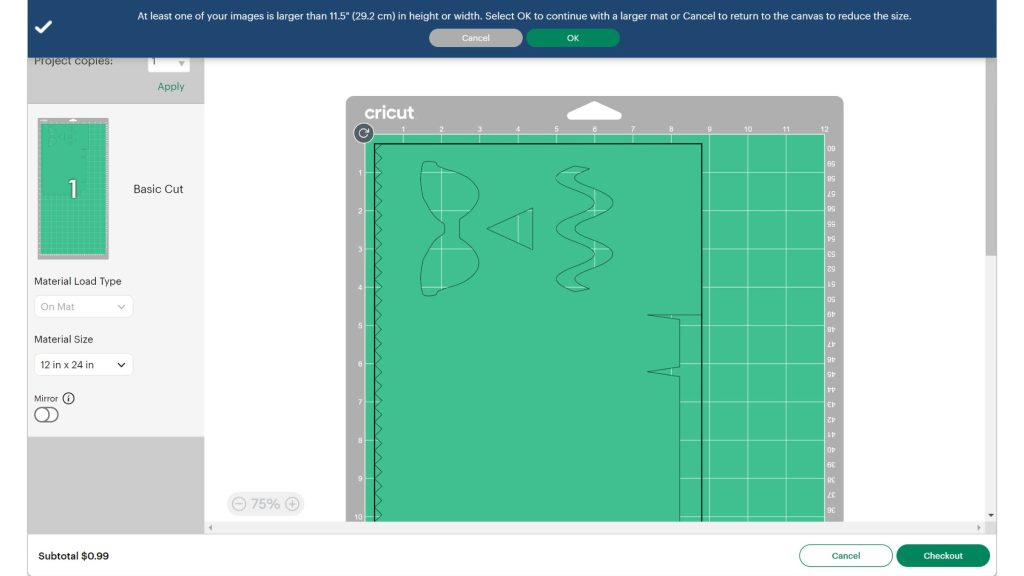
If you get the error message on the screen below, you have sized the bag too large, and it won’t fit on your 12×12 piece of cardstock. Go back and slightly reduce the size, and it will fit on your mat.
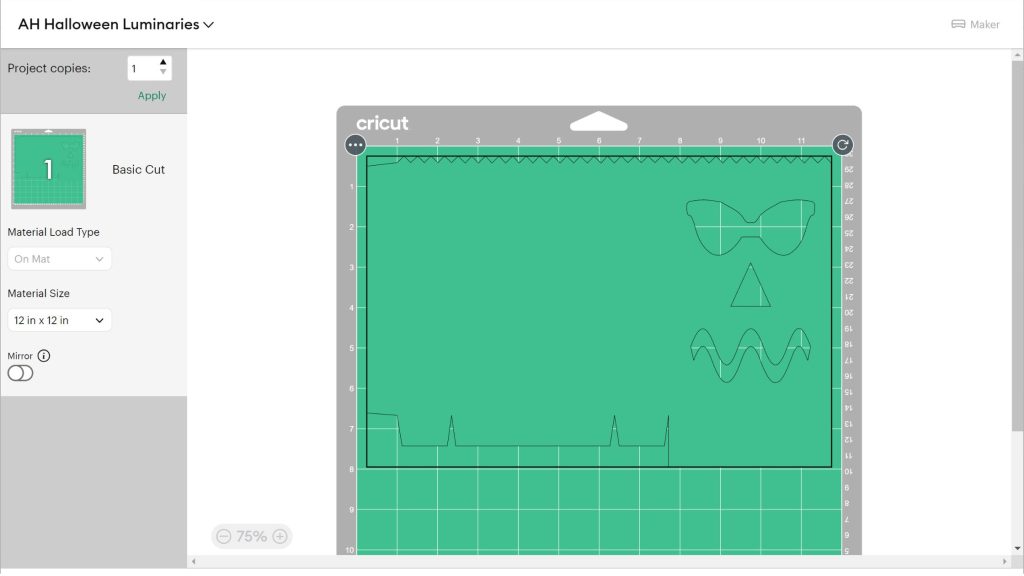
Once you have everything sized correctly and click Make, your screen will look like the below image. You are ready to cut your black card stock into Halloween luminary bags.
Repeat these steps for each pumpkin face to get all the looks I show below.
Step 6 – Add paint to cardstock
Once you have your bag cut with your Cricut, it is time to turn that plain black cardstock into something fabulous!
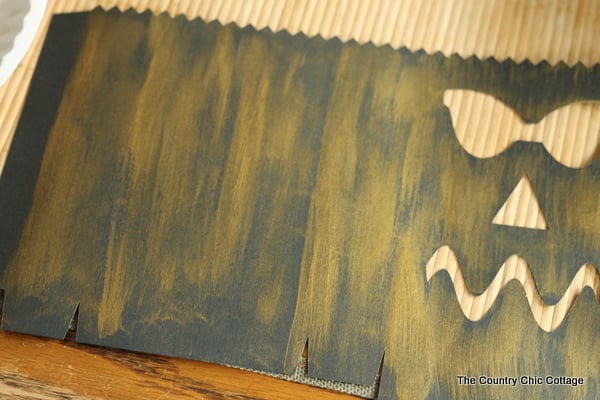
Grab a paintbrush and your metallic paint. Apply a very little paint to the brush and then quickly apply it to the surface of your bag.
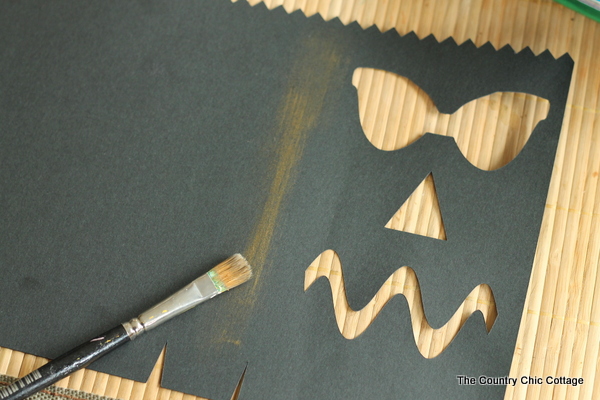
You will end up with the metallic streaked look similar to the image below.
Step 7 – Fold the bag
Next, it is time to fold the flat paper into a luminary bag.
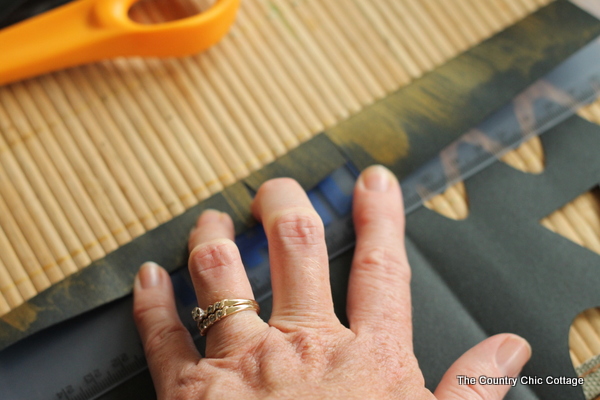
Use a ruler or straight edge to keep the lines straight, then fold over as shown below. Once you have a fold, remove the ruler and press firmly to crease well.
Repeat at each “V” in the bottom of the bag. Be sure to keep your folds straight!
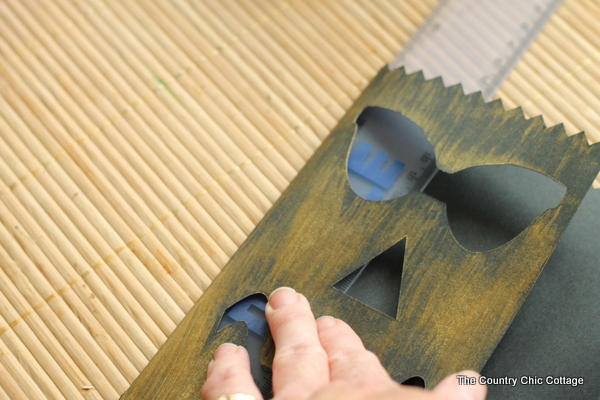
Now, you can fold on all of those creases, and you have something that starts to look like a bag. However, there is a slight issue we have to correct. The last flap on the bag (where we will glue in a second) shows through the pumpkin face.
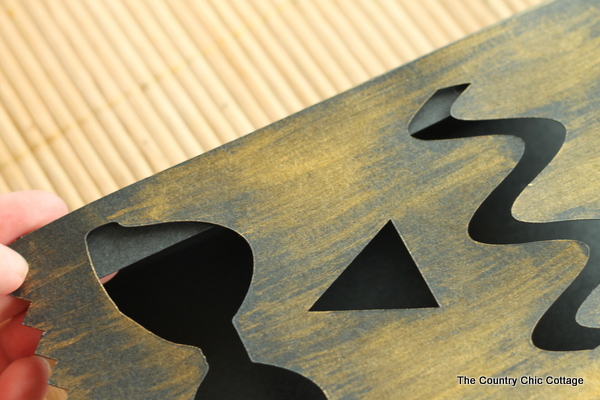
Just cut away part of that flap with scissors, as shown in the image below.
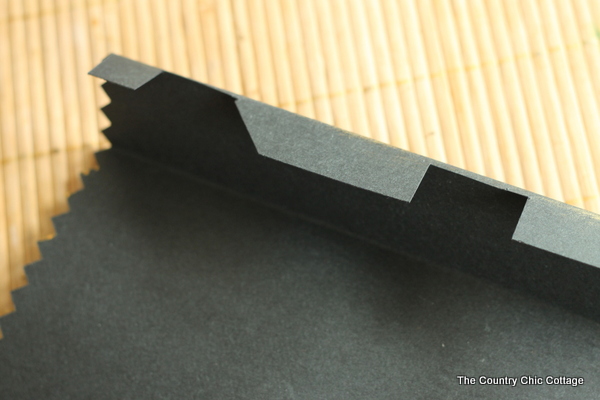
Finally, you need to use the same ruler to fold over the bottom of your luminary bag. Repeat with the ruler, remove it, and then crease well.
The fold should be across the TOP of all the Vs in the bottom of the bag.
Step 7 – Assemble the Halloween luminary bags
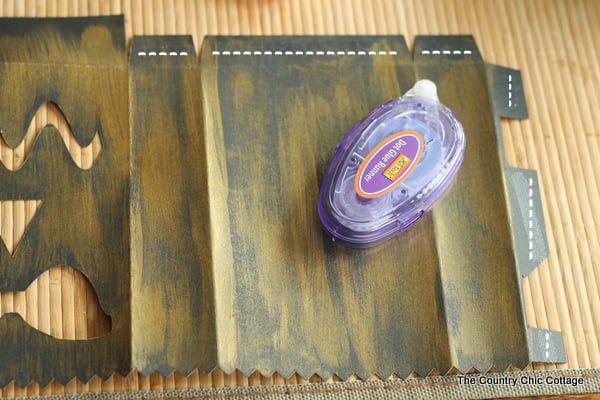
It is now time to assemble these fun Halloween luminary bags. Apply the dot runner to the areas shown with white lines in the image below. Then, fold your bag and press to adhere well.
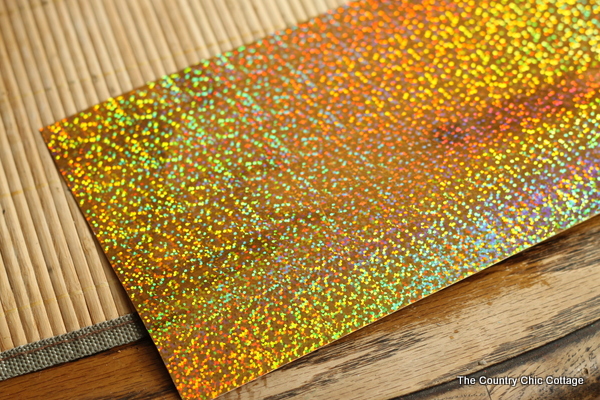
I wanted a little something extra in the backs of the bags to help bounce the light. I had a gold iridescent poster board from the dollar store. Just cut it to the size of the back of your bag and use the glue runner to glue it into place. This would also work using some glittery cardstock or even a sparkly gift bag.
Make one or more of each face, and you will have an entire porch filled with scary, smiling, glowing faces.
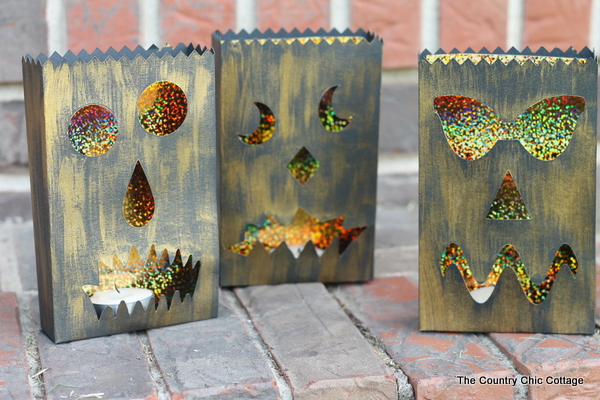
PLEASE NOTE: I recommend using battery-operated tea lights in these Halloween luminary bags.
My images are taken with real candles, but ONLY because I was right there and could watch the bags.
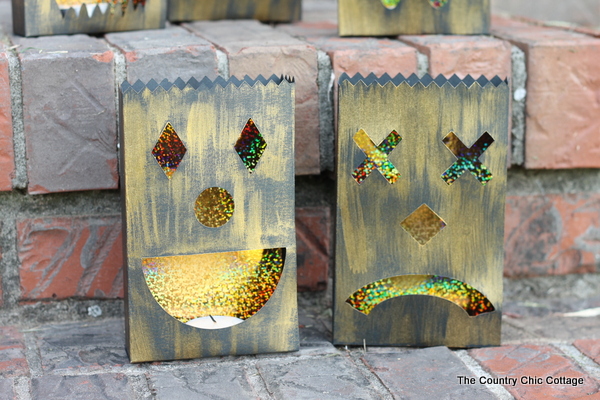
The gold paper on the back of the bags makes them amazing. The light scatters off the poster board, and they glow even more at night.
Be sure to pick up the supplies to make your own Halloween luminary bags, which you can then add to your fall decor. This is a fun project to light up the night on Halloween!
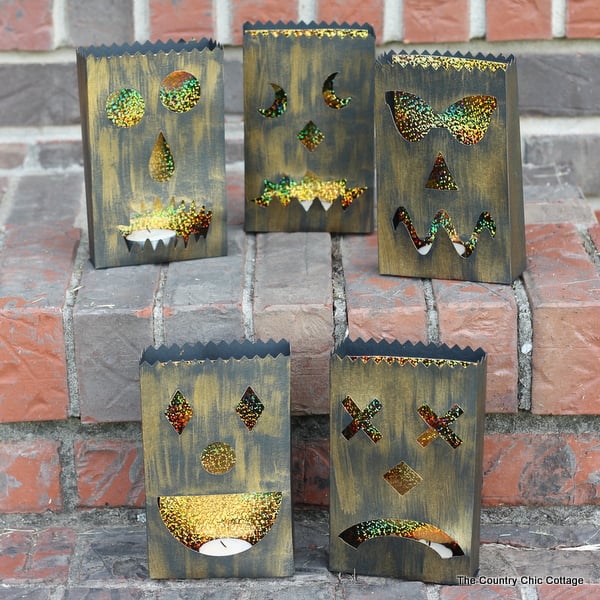
Halloween Luminary Bags Safety Tips
Fire safety should never be taken lightly. Unchecked candles or lights can cause fires, especially during the holiday season. So it’s important that when you make these Halloween luminary bags, you keep these safety tips and precautions in mind.
Use a glow stick or LED candle instead of real candles.
Upgrading to LED or battery-operated candles is the perfect way to make this craft safe. There’s no risk of a fire starting from the rechargeable “flame” in the candle. Make this project and use it worry-free by adding LED candles to your supply list. These candles provide a glowing, cozy atmosphere without the risk of fire or other dangers of burning traditional candles.
Place luminaries away from flammable surfaces or objects
Avoid putting your completed project near an edge where it could fall over or on top of flammable surfaces. Ideally, you want to place luminaries on concrete or another non-flammable surface. You will also want to ensure it’s not near shrubs, dry leaves, or other items that could gather heat and eventually catch fire.
Keep children and pets away from the luminaries.
Keep your luminaries out of reach of little hands and pets, and do not let them play or run around near the luminary bags. The last thing you want is for your little one to topple over the luminary bags.
Don’t leave candles burning overnight.
Whether you take my advice and use flameless candles or not, you still do not want to leave your luminaries running. At the night’s end, ensure every luminary candle is extinguished.
Wind is an enemy
Fire departments do not recommend lighting candles or using luminaries when it’s windy. The wind can blow the flame hard enough to touch the luminary bag or topple over your flameless candle.
Be prepared
It is in your best interest to always be prepared. So, when you use luminaries or light candles regularly, it’s best to have a fire extinguisher or hose nearby.
Remain Vigilant
Do not leave the lit luminaries unattended. Even if you are using flameless candles, you should always keep an eye on them.
More Cricut Halloween Ideas
Love this idea and looking for more great projects to make? Try the links below as well!




I’m excited to whip out my Explore this weekend to get some Halloween decorating out! Love this idea!!
Really nice idea for the Halloween decorations. I still can’t believe the summer is gone!! Catherine
Adorable! 🙂 A Cricut Explore is on my wishlist!
Angie, I LOVE this project!!!! My kids would adore this. 🙂 Your Cricut is amazing!
Love the bags. I need to make something like this for my walkway!
I really love those!!! They are so beautiful! hugs, Patty
Whoa! These are awesome. Your painting technique is fantastic!
These are so creepy cute! I think I’ll make some for the kids this year.
I love the gold inside, making it shine so well when lit up! the bags are adorable!