

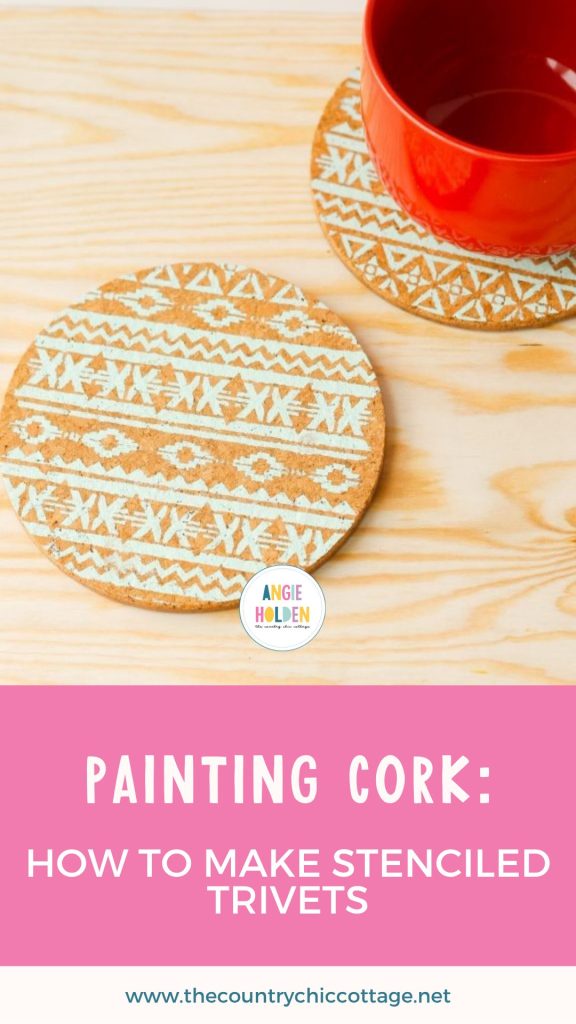
Painting cork is such a fun and easy way to make custom gifts for your friends and family! This is because cork is inexpensive to purchase, easy to paint, and can be customized in a variety of ways to make gifts. Don't believe me? Then check out today's project where we are making stenciled trivets using our Cricut machine!

How To Make A Cork Trivet
We are continuing with handmade gift week and these stenciled trivets. These are super simple to make and will be great wrapped under the tree for anyone who loves to cook. Grab some trivets and paint, plus the stencil of your choice to complete this look. You can choose the stencil and paint color that will go in the kitchen of your gift recipient.
Supplies Needed For Painting Cork Trivet
- Cricut Machine (see the difference between the machines in this post)
- Vinyl, stencil vinyl, or stencil film
- Transfer Tape (if not using stencil film)
- Weeding tools (if not using stencil film)
- Cork trivets
- Paint in your choice of colors (I used the Americana Chalky Finish in Refreshing)
- Americana Matte Spray Sealer
- Stencil brush
NOTE: If you don't want to use your Cricut machine to make a stencil, you can use a store-bought stencil for this project instead.
Step 1: Design Your Stencil
Log in to Cricut Design Space and either design your own stencil from scratch or search for a stencil template.
Step 2: Cut Out Stencil
Once you have your design sized, cut it from adhesive vinyl, stencil vinyl, or even stencil film to make a reusable stencil. I've been making stencils using my Cricut for a while now. If you want more info on creating your own stencils, you may find this post helpful.
Step 3: Weed The Stencil
After you cut your design, weed out any parts you want to paint onto your cork trivet. If you are using stencil film, the excess pieces will stick to your mat, eliminating the need to weed.
Step 4: Add The Stencil To Your Cork Trivet
If you are using adhesive vinyl or stencil vinyl, cut a piece of transfer tape to help place the stencil on your cork trivet.
If using stencil film, spray the back of the stencil with removable stencil adhesive (do this outside!). Then lightly tack it to the cork trivet.
Step 5: Paint Stencil Design Onto Cork Trivet
For either stencil type, place a small amount of paint on your brush and begin painting in an up-and-down motion (this motion is not brushing up-and-down but dabbing up-and-down). You can always add another layer of paint after the first pass. You don't want too much paint on your brush, as it may seep under your stencil and bleed onto your surface.

Step 6: Peel Off Stencil
Peel away the stencil as soon as you are done painting. Allow paint to dry and cure completely according to package directions. Then spray with a few coats of sealer. Allow to dry.

Once your sealer is dry, this handmade gift is ready for gift-giving! Grab some paint and stencils and make these stenciled trivets for everyone on your gift-giving list.
More Handmade Gift Ideas
If you love the idea of giving a handmade gift, be sure that you don't miss any of our handmade gift week. Start with our spicy gift basket from day 1.

Also, check out these 60 handmade gift ideas for adults. You will definitely find ideas here for everyone on your gift-giving list!

FAQs About Painting Cork & Making Stencils
Here are answers to some of the most common questions I get about painting cork and making stencils. If your question isn’t listed, feel free to drop it in the comments, and I’ll be happy to help!
What Cricut Machine Can I Use To Make A Stencil?
You can use the Cricut Maker or Cricut Explore series machines.
What Materials Can I Use To Create A Stencil?
You can make a stencil in a variety of ways depending on your preference or what you have on hand. Below are a few options.
- Stencil vinyl is specifically designed for creating stencils with your Cricut machine and is self-adhesive.
- Removable adhesive vinyl has a sticky backing and should peel back easily from your project.
- Permanent adhesive vinyl is also sticky, but it creates a stronger bond with any surface to which it is added.
To learn more about each of these materials, you can check out our ”The Best Material for Making Stencils on a Cricut” blog post.
Don't love these materials? You can also check out the posts below on other types of stencil materials that you can use.
Do You Have Any Tips For Using Stencil Film?
I highly recommend taking the time to be mindful of your design when using stencil film. Remember to either use a stencil font or add in “tabs” to hold things like the centers of letters in place. You may want to cut a test stencil from copy paper to make sure your stencil is correctly designed before cutting from the film. That way, you get the mistakes taken care of on paper instead of the much more expensive stencil film!
Do You Have Any Tips For Preventing Bleeding Under The Stencil?
Below are a few tips that I recommend for preventing paint from bleeding under your stencil.
- Use a stencil brush. I like to use a pouncer brush.
- Do really light coats of paint. Three light coats are better than one heavy coat!
- Ensure your stencil is sealed around its edges. Take the time to burnish the edges. If there is a gap, the paint will seep through.
- Always paint with the stencil brush in an up-and-down motion. If you use a side-to-side motion, you risk forcing the paint under the stencil.
- Remove the stencil by peeling it up from one edge and peeling it across.
5 More Cork Crafts
Did you love learning about painting cork trivets and are looking for more cork crafts? Then check out the projects below!
- DIY Cork Coasters with Mason Jar Lids
- Custom Cork Coasters with Vinyl
- DIY Cork Board with Cricut Iron-on
- Wine Cork Succulent Magnets
- Christmas Tree Wine Cork Ornaments Kids Craft











I love these. They are so pretty. I’d love for you to link up to our link party, Tips and Tricks, tonight. http://fearlesslycreativemammas.com/2015/11/tips-and-tricks-link-party-40.html
What a cute idea! I love how easy this is but it looks awesome. I just pinned this. Stopping by from the One Project at a Time link party. Thanks for sharing!
What a great idea and they turned out so cute! This year I’ll be making handmade gifts too so I’ll be sure to check out your projects!
This is a lovely creative idea 🙂
Thanks for linking up 🙂
Great idea for cute gifts! This is my first year making gifts and these are perfect!
Simple, fast gift ideas are the best. I love these Angie. I have also decided that I am still really into tribal prints today 🙂
This is so neat! Thanks for sharing it! Please feel free to hop on over and check out my site, I have a link-up going on right now and would love to have you join! 🙂
Love this!!! Will be giving these a try!!
Found this at Create & Share DIY Party
I love these! I need to make some for myself!
Tania
Great gift idea! Love it.
I love all these unique gift ideas!! Thanks for sharing on the #SmallVictoriesSundayLinkup!
Absolutely beautiful! I happily pinned your project! 🙂
This is a great handmade gift – love it! I will be featuring your post in this week’s Home and Garden Thursday, Kathy
These are so pretty! Thanks so much for linking them up with us at Best of the Weekend. I’m featuring them on Friday night at the next party!
These are really cute. Great job. I think they would make a great gift. Thanks for linking up with Small Victories Sunday.
Love handmade gifts, this one is awesome! First time here you have a pretty blog.
Love this idea! You have a double feature this week! I feature this and your lovely mug at our weekly link party. http://www.thelifeofjenniferdawn.com/2015/12/diy-kitchen-gift-ideas-and-little-bird.html