
If you’ve ever wondered whether a heat press is worth it, you’re in the right place! While I often talk about the Cricut EasyPress, today I’m diving into full-sized heat presses — what they are, how they work, and how to use one. These machines are great for everything from shirts to mugs and hats. I’ll walk you through the process, and if you’re still deciding between a heat press and an EasyPress, I’ve got a full comparison post to help you out!

How To Use Heat Press Video Tutorial
Let's fire up this heat press! I thought the best way to explain this was a video, as it would be hard to explain in text. Just watch the video below for everything you ever wanted to know about how to use a heat press.
Can’t watch the video or missed some of the information? I have everything you need to know below as well, so just keep reading.
Heat Press Unboxing
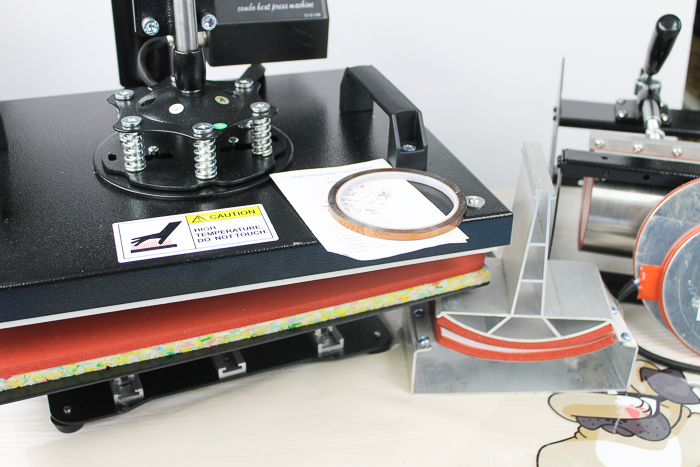
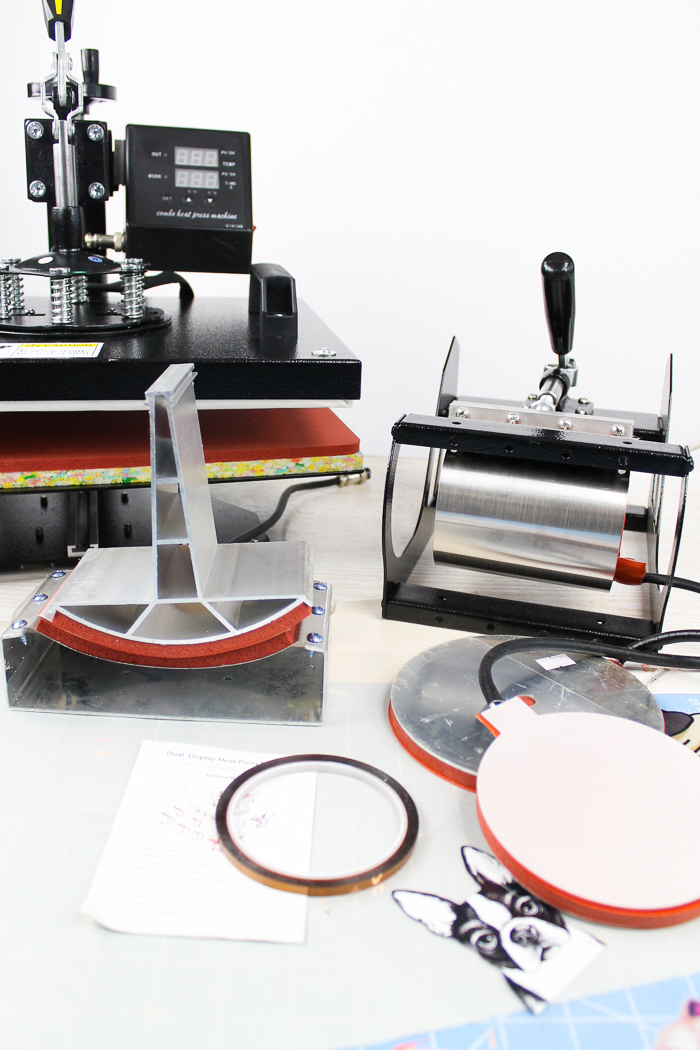
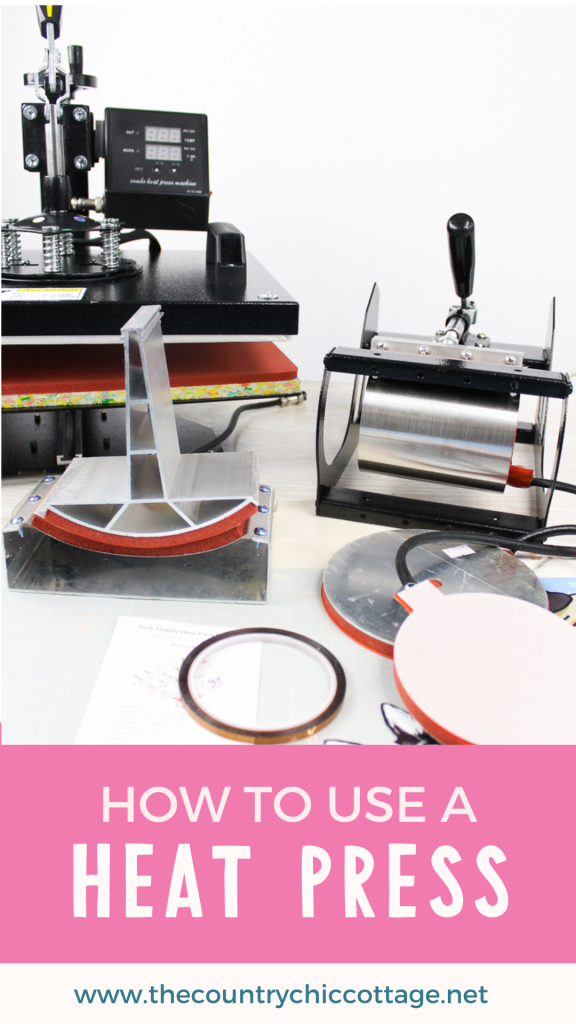
The heat press I am using for this post is the CO-Z 5-in-1 Heat Press. I took some pictures when opening the box so you could see what to expect. On top, there were some sample pieces for iron-on projects.
NOTE: The CO-Z 5-in-1 (shown in this post) is currently sold out. However, you can get the CO-Z 8-in-1, which is the same brand but just a different size. Also, if you are looking for more heat press options, you can check out this one from VEVOR or this one from BetterSub.
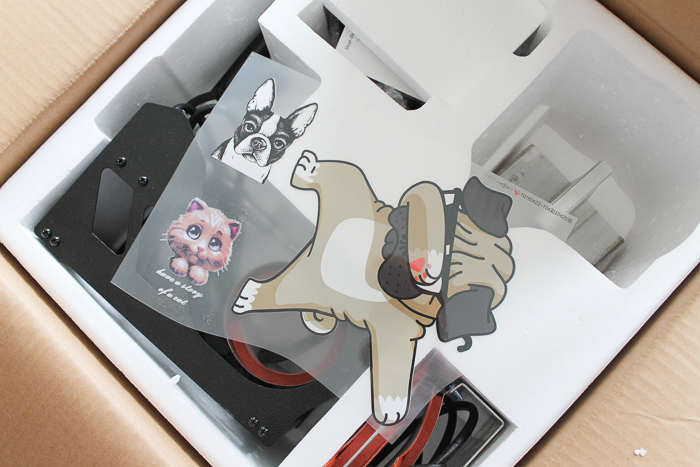
The first layer in the box contained the attachments for the heat press, including:
- Mug press
- Hat press
- Plate press (2 sizes)
- Heat-resistant tape
There was also a small instruction booklet. Actually, the lack of instructions on this model is what compelled me to write this post. I had to piece together instructions from various sources to use the machine.

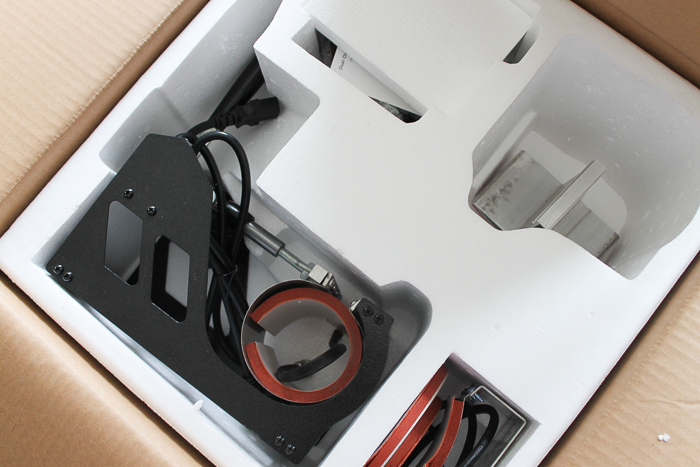
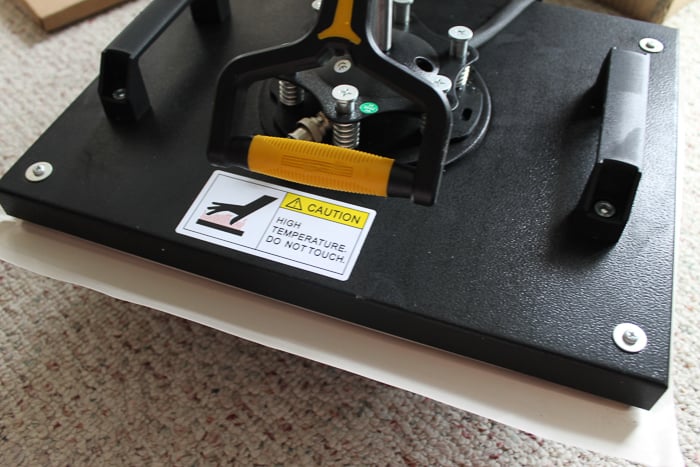
I removed the top layer, and the bottom contained the actual heat press. It came almost fully assembled. The control box needed to be added to the side, and one handle added to the top. It was super simple to put together. I will say that the shipping weight on this is 40 pounds so it is not light! It is definitely not very portable either.
How To Use A Heat Press (CO-Z 5 in 1)
While fairly easy to use, it does take a significant amount of time to switch between the accessories. You will also need a lot of space to operate this machine. I would also encourage you to take extreme safety precautions for yourself and anyone in the room. This machine gets extremely hot, both on the plates and the external surfaces.

Not sure which heat press is for you? Heat Press Roadmap has your answer! This extensive course is designed to guide you on your journey to deciding on the best heat press for your needs, space, and budget.
Join Angie Holden and Cori George as they explore 17 heat presses in 27 videos. Get the details and sign up for Heat Press Roadmap here!
Project Test Results
Below are the results from my testing of different project types using the CO-Z 5-in-1 Heat Press.
T-Shirts
The application of heat transfer vinyl to a shirt was basically flawless. I could see this being a huge draw to anyone who makes shirts to sell. This machine produces top-quality results consistently and easily.

I am actually going to run a few comparison tests by washing some shirts, so be sure to stay tuned for those!

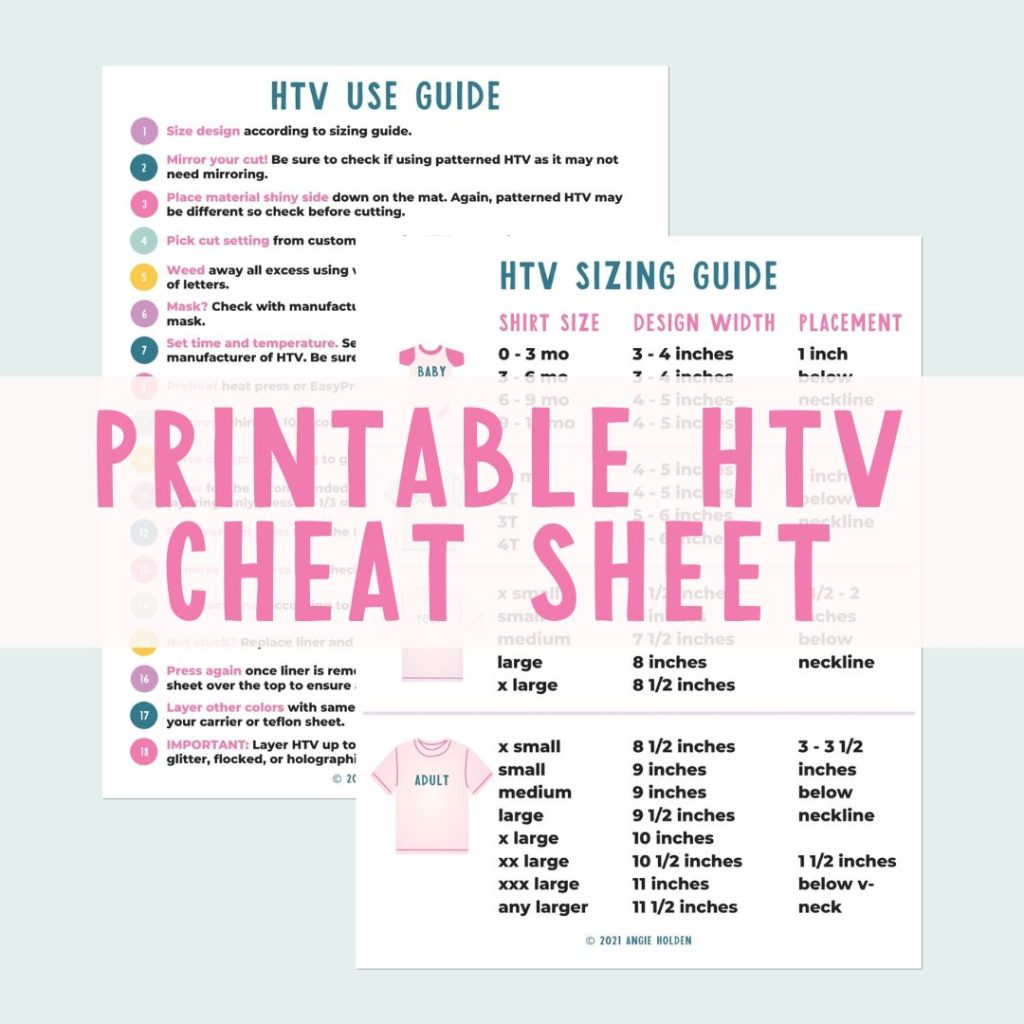
Free HTV Cheat Sheet
Get your FREE Printable HTV Cheat Sheet now! This guide has sizing and position recommendations for infant through adult shirts as well as a handy HTV use guide. Print this double sided guide and put it by any heat press you own!
Hats
I also loved the results on hats. The downfall is changing the machine from shirts to hats. As mentioned in the video, I left the shirt press to cool for at least 45 minutes, and it was still warm to the touch. Then you have to switch out the top and bottom plates to make hats.

The results were really great, though, and this machine is definitely a must if you are going to make hats to sell. If you are looking for a cheaper alternative, if you only want to make a few for gifts, or want to learn more about hat presses, check out my Hat Press Comparison video!

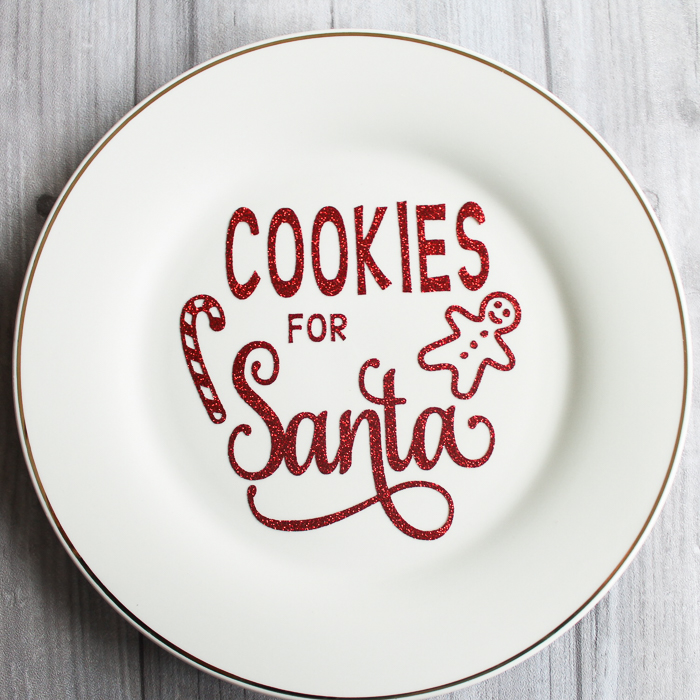
Plates
So, I wasn't as impressed with the results on plate projects. I found it fairly inconsistent, and I had to press several times to get the one plate I did make. This is the only thing I know of, however, with a circular plate for pressing, so it may be the best option for those pressing a lot of plates.
Mugs
The mug press can actually stand alone, so there is no need to change over anything. I had to press the mug several times to get it to work, but overall, the results seem fairly good. To see some more in-depth tests on these mugs, check out our Vinyl or Heat Transfer Vinyl on Mugs? Which is Better? blog post.
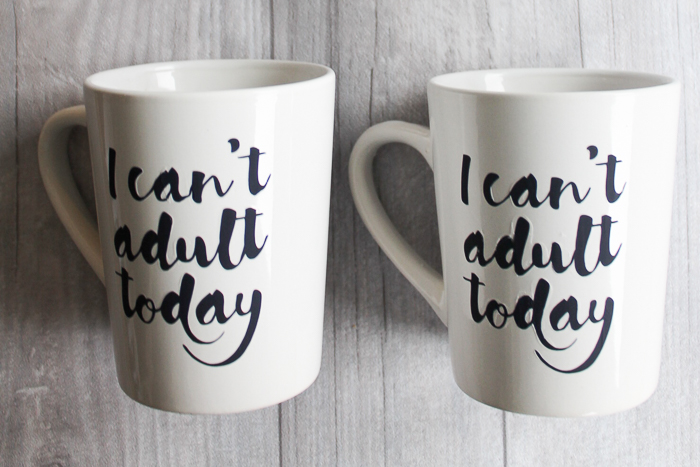
I prefer not to have separate attachments for each mug type. For instance, straight mugs require one attachment, while tapered mugs need another, and so on. Storage is always a concern for me, and having to store multiple attachments would be cumbersome.

Final Thoughts On Heat Press
I hope this helped you learn more about your heat press options. Once you master the press and controller, the operation is not that difficult. If you are making items for sale, it is definitely a must! Just be sure you have the space for operation, and build in extra time for switching between pressing attachments.
Always exercise caution when using your heat press, and ensure that little ones are kept away from the machine. If you have any questions about using a heat press, feel free to leave a comment below. I will either try to answer your questions or conduct a few experiments for you!
FAQs About How To Use A Heat Press
Here are answers to some of the most frequently asked questions I receive about using a heat press. If your question isn’t listed, feel free to drop it in the comments, and I’ll be happy to help!
Heat Press
Below are questions about the CO-Z 5-in-1 heat press!
How Do You Set The Pressure?
Turn the knob to add or take away pressure.
How Do You Know What Temperature To Set For The Different Materials?
I literally just googled time and temperature settings, since there doesn't seem to be a ton of information on how to do them. However, if you are looking for a starting point, you may want to check out our Heat Press Temperature Guide!
When You Get Your Press Up To Temperature And Raise The Press Up Does Yours Drop In Temperature?
Yes, it will drop.
I Noticed That My Heat Protective Sheet On The Top Platen Has Some Wrinkles Which Sometimes Transfer To Bigger Heat Transfers. Any suggestions, please?
That is frustrating! Maybe try laying another sheet over the top before pressing and see if that prevents it.
Can You Print With Sublimation Paper To Use For The Press Or Does It Have To Be On Vinyl?
You can use either.
Heat Transfer Vinyl
Below are questions about heat transfer vinyl!
What Type And Brand Of Transfer Are You Using? Assuming Regular HTV For Shirt And Hat? What Do You Use On The Plate And Mug?
Here I am using regular HTV on all of them. To learn more about heat transfer vinyl, check out my Heat Transfer Vinyl or Iron On Basics video!
What Are Those Clear Sheets That You Print Your Design On Called And Where Can I Find Them?
I am using heat transfer vinyl cut on a Cricut.
Items Made Using Heat Press
Below are questions about the items made using the heat press!
I Do Not See You Using A Teflon Sheet Or Parchment Paper On The Mugs. I Thought It Would Stick To The Machine If You Didn’t Use Something With The Vinyl. Is This True?
Yes! The HTV I was using had a protective sheet.
Do You Need Special Tape For The Mugs When Pressing?
Yes, you will need heat-resistant tape to hold your print on!
Is The Vinyl Dishwasher And Microwave Proof?
This is HTV, and it is really not dishwasher or microwave-proof.
Is It Safe To Eat From The Plate Or Is It Decorative?
The plate is for decorative purposes only!
Heat Press and Iron-On Resources & Projects
Did you love learning about how to use a heat press, and are now looking for more resources and projects? Then check out the links below!
- 5 Heat Press Hacks to Try Today!
- Heat Press Troubleshooting: Checking the Temperature
- How To Use Iron-On Vinyl
- Everything You Need to Know About Heat Transfer Vinyl
- Over 60 Iron-On Crafts
- Pet Fashion: DIY Personalized Pet Shirt


What temp did you use for plate and mug press?
You will need to look up the time and temperature for the HTV you are using as they are all different.
So, do you have a review for this heat press now that you’ve used it for a while? I’m trying to decided on one. I currently use the easy press but love the siser stretch which needs more pressure and they discourage use with the easy press
I don’t really use it often enough to do a full review. I hate to say it works great for a long time when I only use it occasionally.
Does the protective white paper need to stay on the press when being used?
When you use it, you do need to add a layer between any sublimation print and the heat press to keep ink from the surface.
Thanks!!!
Do you have a template of time and temp for the different items like mug, keychain, tshirt, coasters and others?
Try this: https://www.thecountrychiccottage.net/heat-press-temperature-guide/