
We’ve all been there — a misplaced design, a typo, or a heat press mistake. Luckily, I’ve discovered a way to remove heat transfer vinyl from fabric so you can fix your project instead of starting over. This is truly a must-have for Cricut crafters, and I’m excited to show you how it works in today’s tutorial!
How to Remove Heat Transfer Vinyl Video Tutorial
Want to see how to remove heat transfer vinyl? Just watch the video below.
Can't watch the video or need more explanation? You can also see the written instructions below.
Vinyl Lift-Off
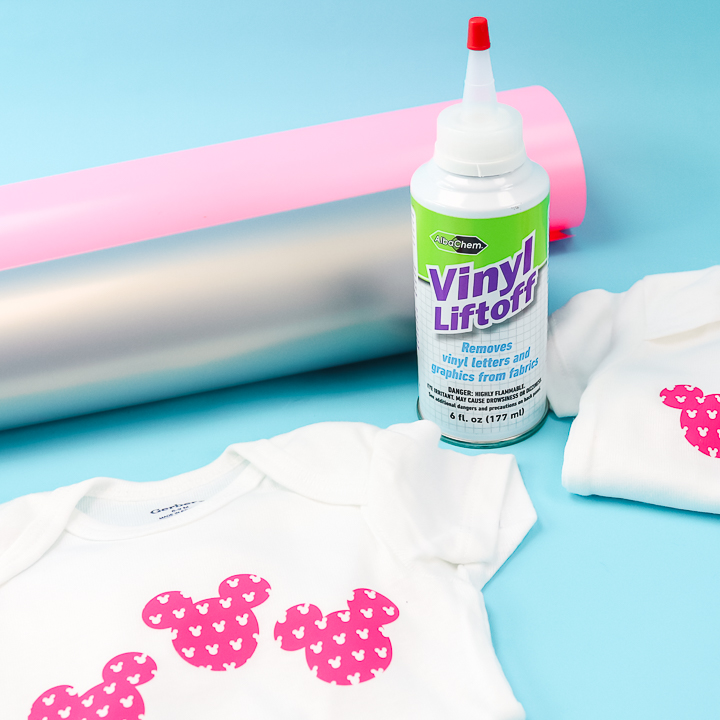
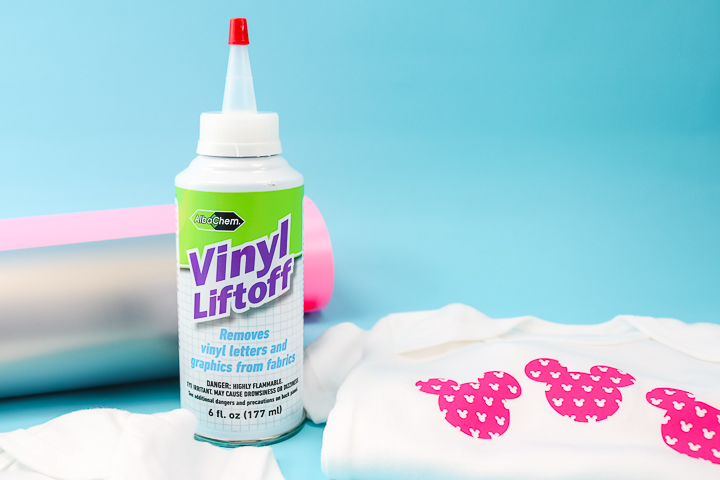
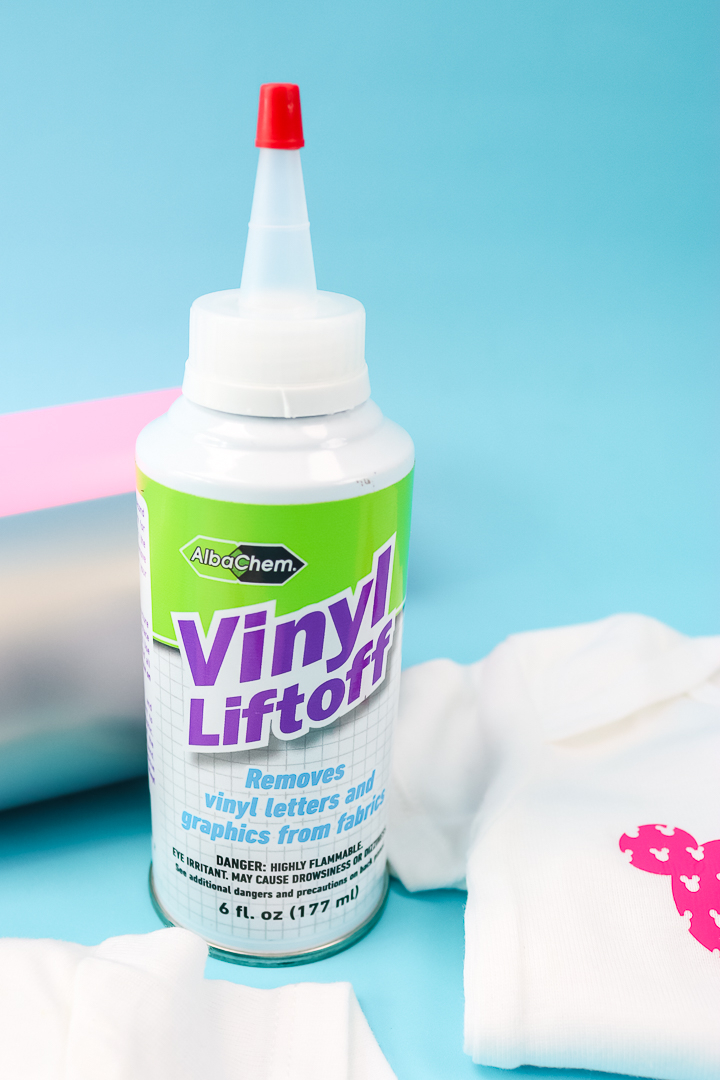
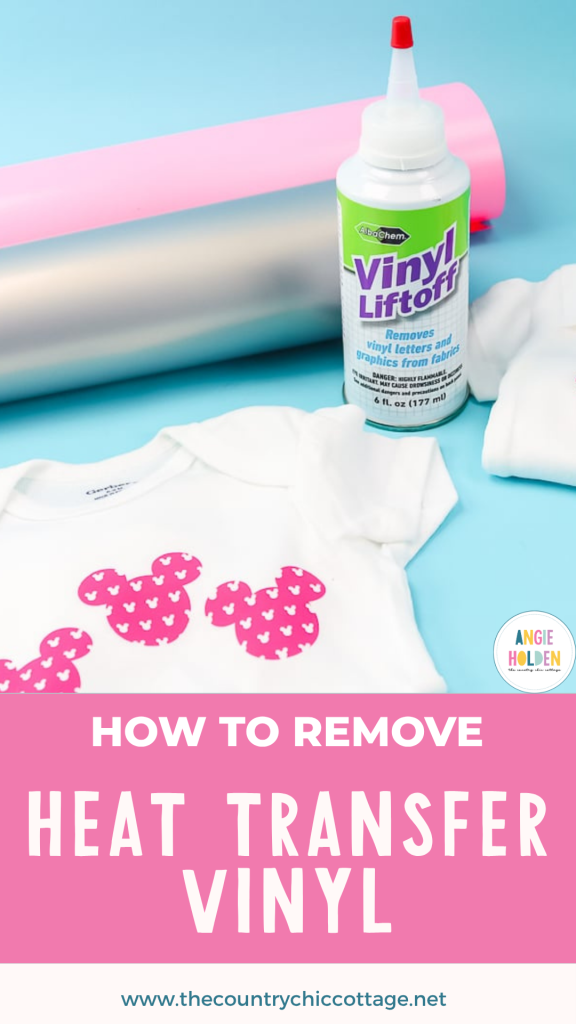
The product I am using to remove my HTV is Vinyl Lift-Off from AlbaChem. This product will remove vinyl letters and graphics applied with heat to fabric surfaces. It literally works in just minutes, and you will be ready to add your replacement HTV just as quickly.
How To Remove Heat Transfer Vinyl
Now that you've seen the product I’m using, I will show you how to use it to correct HTV (heat transfer vinyl) mistakes. First, make sure to follow all package directions, wear protective gloves, and work in a well-ventilated area. You can see how to use this product in the video above, or you can follow the instructions below!
Supplies Needed For Removing Heat Transfer Vinyl
- Vinyl Lift-Off
- Fabric with heat transfer vinyl applied
- Rag
- Q-tips
- Protective gloves
- Heat transfer vinyl to add once the old is removed
Step 1: Gather Materials
Gather any materials where you have made a mistake when applying your heat transfer vinyl. I will note that this product works better on light-colored fabrics. You will want to put on your protective gloves before starting and work in a well-ventilated area.

Step 2: Apply Vinyl Lift-Off
Apply the Vinyl Lift-Off to the back of the piece you want to remove. Apply as little as possible, letting it drip onto the surface and using a Q-tip to spread it around. Stretch your fabric to start loosening the HTV. I suggest putting an old rag under your fabric to catch any excess.

Step 3: Pull Off HTV
Pull off the HTV after a few minutes. It may come off in pieces. Apply more Vinyl Lift-Off to the back, if needed. You can also add some to the front with a Q-tip if any adhesive residue remains after removal.
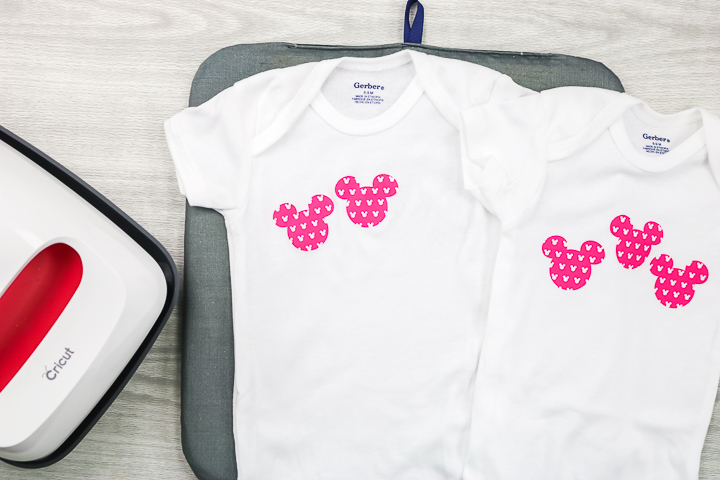
I probably used 7 drops total to remove this Mickey head, so it doesn't take much!
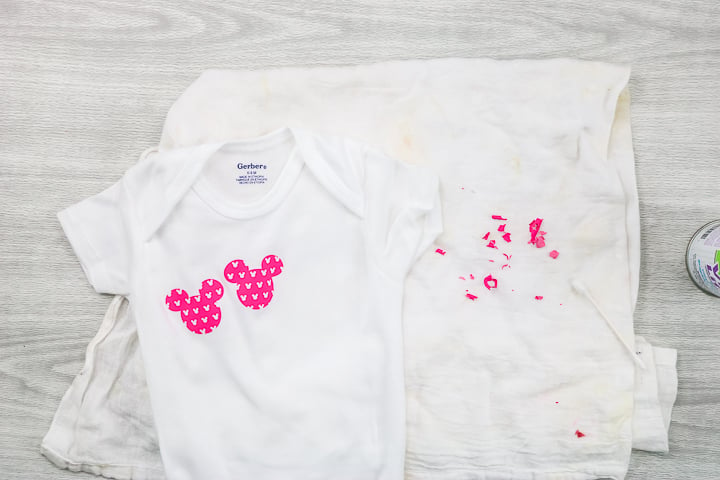
Note: I also used this on a tea towel. The HTV had been on this towel for over 6 months. The regular HTV removed just fine; however, the patterned version did stain my towel. It was also harder to remove. So, note that not all HTV products will be removed as successfully as others.

Step 4: Allow Fabric To Dry
Once your HTV is removed, allow your fabric to dry completely.
Step 5: Apply Replacement Vinyl
Then just use the same application methods as before to apply new HTV to your fabric. It will stick the same way it did when you first applied it.

So, now you know how to fix all of those heat transfer vinyl mistakes. I, for one, hated making a mistake on an iron-on project because it always meant throwing away my shirt or other fabric. Not anymore! Vinyl Lift-Off to the rescue!
I hope this tutorial will help you save your projects as well. After all, we all make mistakes sometimes, and it is nice to have something to fall back on to help you fix those inevitable goofs. Be sure to save this tutorial for how to remove heat transfer vinyl for when those mess-ups happen to you.
FAQs About How To Remove Heat Transfer Vinyl
Here are answers to some of the most frequently asked questions I receive about removing heat transfer vinyl. If your question isn’t listed, feel free to drop it in the comments, and I’ll be happy to help!
Does Vinyl Lift-Off Not Need To Be Washed Off?
It says it does not, according to the instructions, and it worked fine!
Can You Use This Product With A Cotton/Polyester Blend?
Yes, you can!
Will It Work With A Color Fabric?
Yes, it will!
Can You Use Vinyl Lift-Off Store Bought Sports Jerseys?
I have tried it on store-bought items before, with mixed results, and ruined some.
Does This Product Leave Residue Or An Odor?
It actually did not! I was surprised!
When You Washed The Towel Did The Stain Come Out?
No, it did not.
6 More Heat Transfer Vinyl Resources
Did you love learning about all the ways to remove heat transfer vinyl, and are looking for more heat transfer vinyl resources? Then check out the blog posts below!
- How To Use Iron On Vinyl (a.k.a., Heat Transfer Vinyl)
- What is HTV? What Materials Can You Use It On?
- HTV: Warm Peel vs Cool Peel
- Adding Heat Transfer Vinyl to Hats
- How to Apply HTV on Cardstock
- How to Use Printable Heat Transfer Vinyl


Hello ,,do you have any free coloring pages i can have ,,the coloring is helping me relax morerite now ,,my health is not the greatest so i really enjoy the coloring,,if you do can you please send me some,,,thank you so much …
Try this link! https://www.thecountrychiccottage.net/25-free-adult-coloring-pages/