
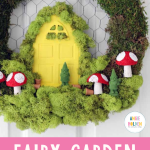
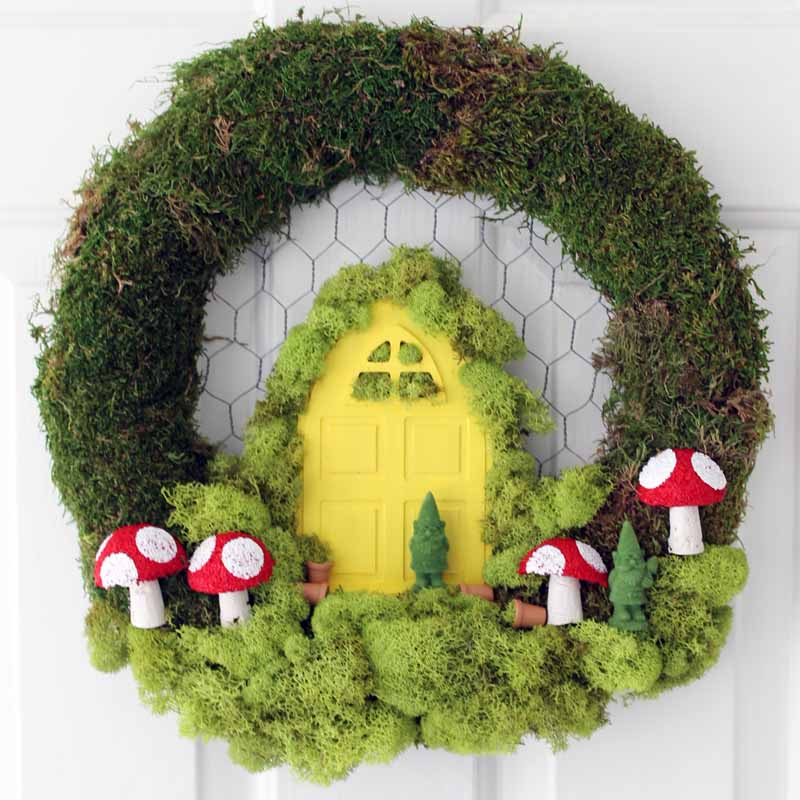
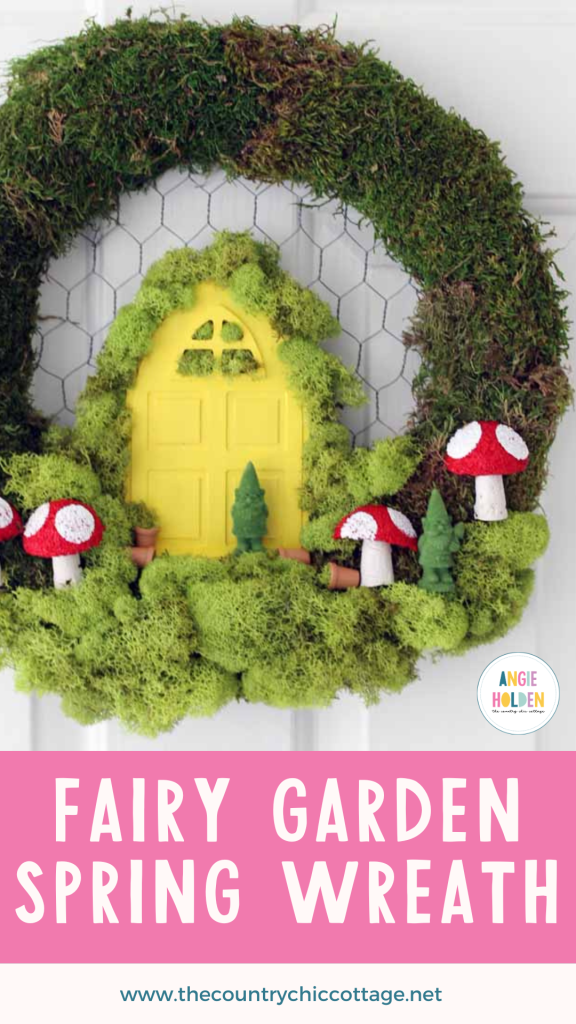
Bring a touch of fairy tale magic to your decor and welcome guests with this captivating wreath! This delightful project features a whimsical mushroom fairy garden that adds charm and wonder to your home. Best of all, it’s easy enough for anyone to create, making it a perfect activity for all skill levels.
Also, today's project is a fantastic way to use up any leftover moss if you made my Marbled Eggs on a Moss Easter Wreath or Fairy House Mason Jar projects!
How To Make A Fairy Wreath
I LOVE making spring wreaths. There's something about watching the weather turn from the dreary winter into spring that gets my creative juices flowing. I want to celebrate spring and add a touch of it everywhere I look!
I've made a large variety of spring wreaths over the years, from my Fly a Kite Spring Wreath from Socks to my Tulip Wreath for Spring (and more!). Now, I'm bringing a fairy garden spring wreath idea to life.
If you stroll through my spring wreath collection, you'll see that this new design is truly unique and eye-catching, bringing a breath of fresh air to your home!
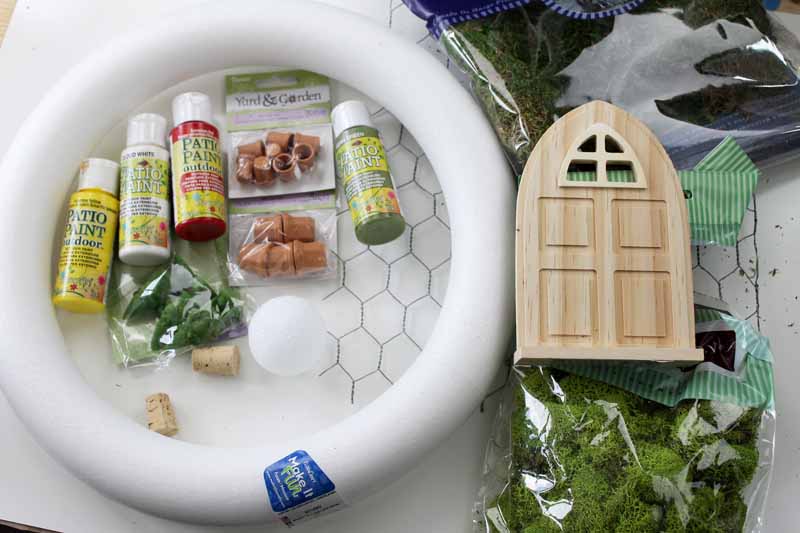
Supplies Needed To Make Fairy Wreath
- Patio paint in Fern Green, Geranium Red, Cloud White, and Sunshine Yellow
- Foam wreath form
- Chicken wire
- Unfinished Fairy Garden Door
- Moss (2 types)
- Foam ball
- Wine corks
- Paint brush
- Fairy Garden Miniatures (any that you love)
- Round foam brushes
- Serrated knife
- Craft knife
- Wire cutters
- Hot glue and glue gun
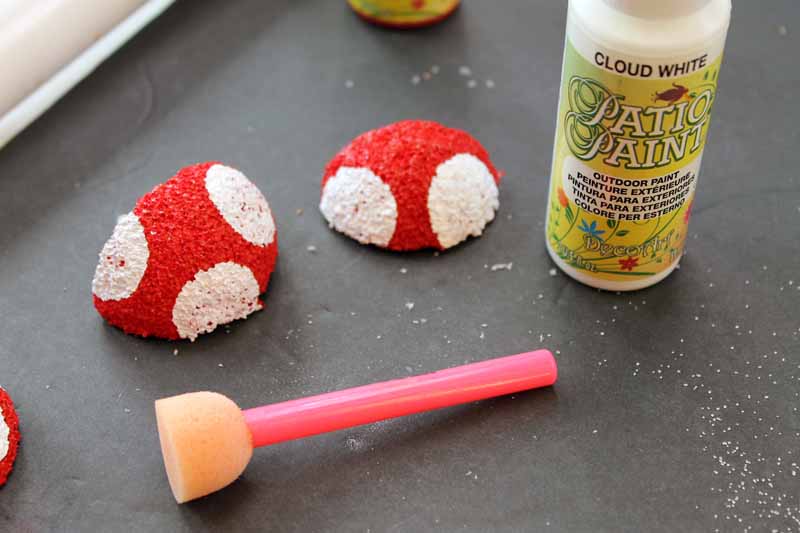
Step 1: Cut & Paint Styrofoam & Wine Corks
Start by making your mushrooms. Cut a styrofoam ball into fourths with your serrated knife. Paint with the red paint and then allow it to dry.
Cut wine corks in half with a craft knife. Paint white and allow to dry.
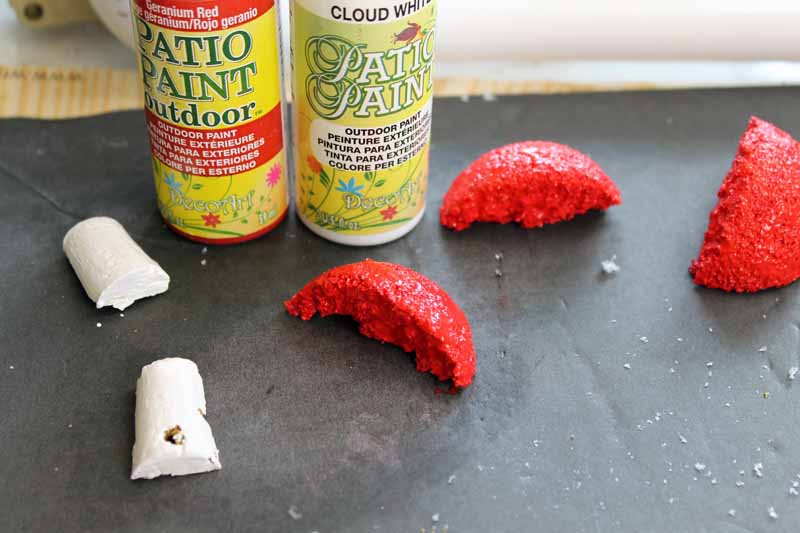
Once dry, add white circles to your mushrooms with a round sponge brush.
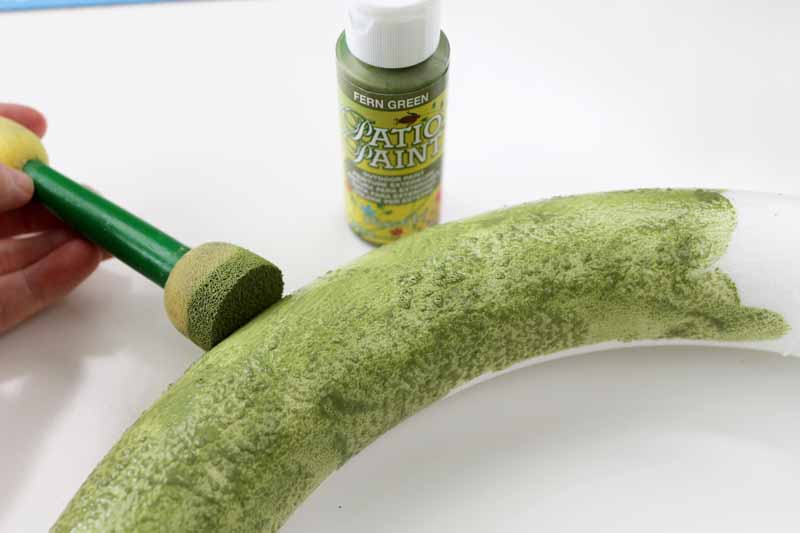
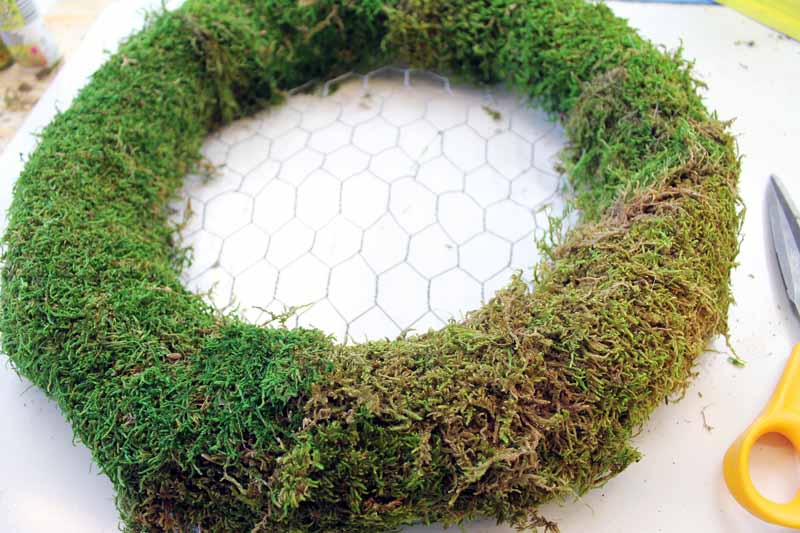
Step 2: Paint Wreath Form
Paint your wreath form green with the round paint brush. This will add a textured look to the wreath and prevent any visible white from gaps in the moss covering the form.
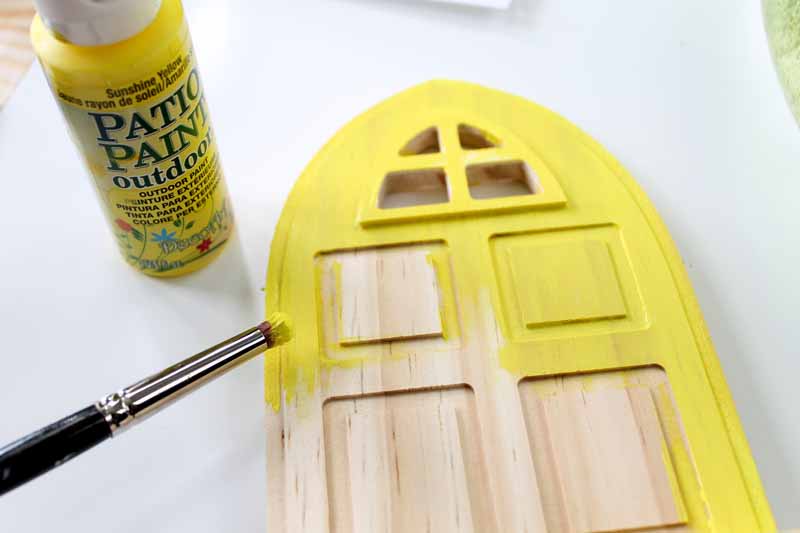
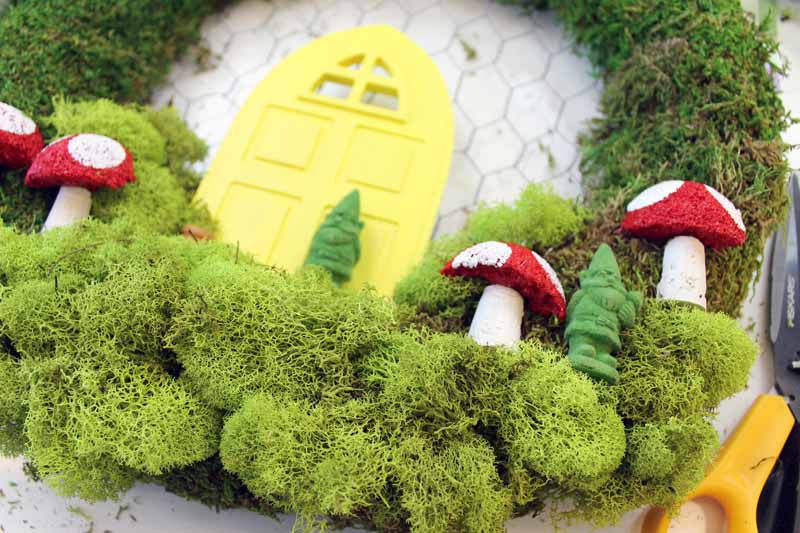
Step 3: Paint The Fairy Door
Next, paint your fairy door! I applied several coats of yellow paint to achieve good coverage. Make sure to paint thoroughly, especially if you plan to use this wreath outdoors.
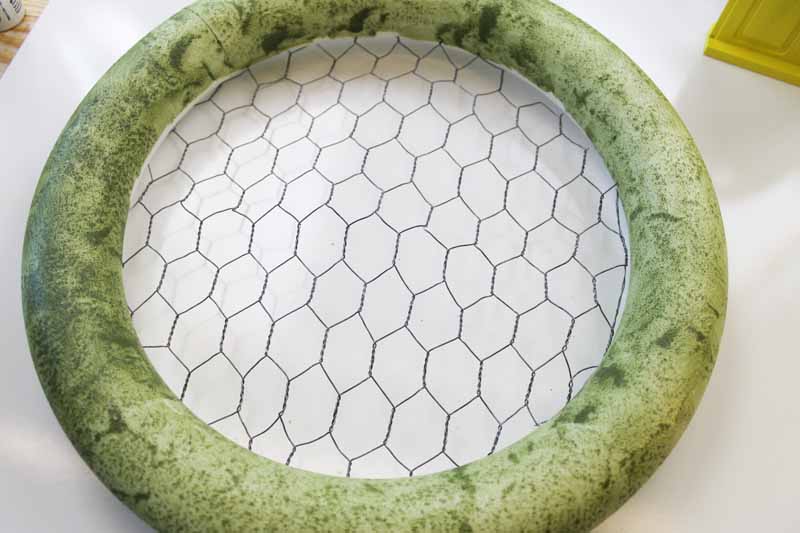
Step 4: Add Chicken Wire To Wreath Form
Once your components are dry, you can begin to assemble your wreath.
Start by using wire cutters to trim a piece of chicken wire to fit the back of the wreath. Press the wire into the wreath form and use a bit of hot glue to secure it in place.
NOTE: You may want to wear protective gloves for this step because the wire is sharp. Ouch!
Step 5: Glue Moss To Wreath Form
Then, use sheet moss to cover the entire wreath. Secure it in place with hot glue.
Step 6: Glue Fairy Elements To Wreath
Now it's time to start layering on your fun fairy garden elements!
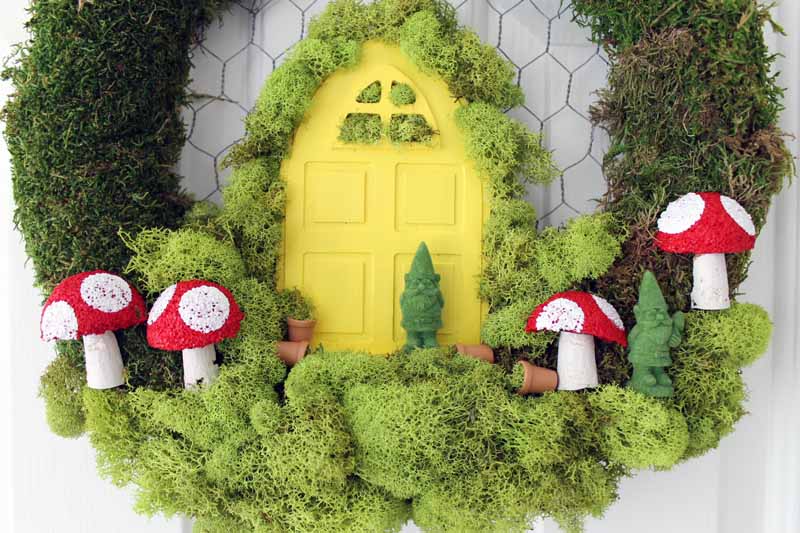
I used the second type of moss on my wreath to make everything stand out. The miniatures you choose for your wreath are completely up to you (I used some clay pots and mini gnomes). Then, add on your mushroom pieces and fairy door to complete the look.
Secure everything in place with hot glue.
NOTE: I also added moss around my door and in the window to give the wreath a complete look. You can add as much or as little as you would like to your version. DIY spring wreath ideas are meant to be vibrant and customized!
Once completed, all that is left is to hang it on your front door!
Keep this one up all summer if you'd like. Spring wreath ideas that transition seamlessly into summer are my favorites!
I hope y'all enjoy this fairy garden spring wreath idea and will make one for your home as well. Spring crafting is a great way to celebrate the changing seasons and to keep the kids busy, too!
FAQs About Fairy Wreath
Here are a few common questions that I often see readers asking about making this fairy wreath. If you have a question, please check if I’ve already addressed it below. If you don’t see your question listed, please leave it in the comments!
Can I Change The Size Of This Fairy Wreath?
Yes, you can! However, if you change the size of the wreath, you might need to adjust your fairy supplies to be bigger or smaller, depending on the wreath size you are using.
Can I Use A Grapevine Base Instead Of The Foam Base?
That's a great idea! You can absolutely use a different base for this wreath to create a unique and personalized look for this design. If you do that, you may want to avoid putting some of the moss at the top so that the woody grapevine wreath shines through.
Where Can I Find Fairy Miniatures And Decor For This Fairy Wreath?
You can find fairy miniatures and decor at your local craft store, on Amazon, and even at Dollar Tree.
What Other Ways Can I Personalize And Change This DIY Spring Wreath Design?
There are so many ways to take this basic idea and make it uniquely your own! You could:
- Use a different wreath base
- Use different moss
- Change the color of the door
- Choose a different door style
- Use different miniature fairy items
- Use a different material for the backing (instead of chicken wire)
The sky's the limit – let your imagination soar, and you can come up with amazing creations.
5 More Spring Wreath Crafts
If you love this fairy wreath, here are some other spring wreath crafts that you won’t want to miss!
- Coffee Filter Spring Wreath
- Easy Spring Embroidery Hoop Wreath with Your Cricut!
- Spring Burlap Wreath
- Easy Spring Wreath: Front Door Decor
- Burlap Bee Spring Wreath


Such a cute idea and with all the fairy things at Michaels this would be so much fun
This is adorable I love it!!! Very well done, thanks for sharing!
This idea is too cute! A door on a door, sounds like something you’d encounter in Wonderland. 🙂 Excellent tutorial, too.
Super cute wreath! I love the yellow door and mushrooms!!! Pinning!
This is adorable! I was so happy to see it linked up this week so I could share it! Yay! Pinned & sharing!Thank you for sharing on Merry Monday! Hope to see ya next week!
Kim
Awesome project! I selected this wreath to be featuring this wreath this weekend on our HIH. Be sure to check out this week’s party and my social media channels to see your feature! Have an awesome weekend!
Angie, this wreath is so sweet. Thanks for sharing it at Happiness is Homemade.Great instructions.
This is such a cute idea! It made me smile and it’s sure to make visitors smile when they come to your door!
Wow just gorgeous!
What size foam wreath did you use?
I think a 10 inch but I am not sure.