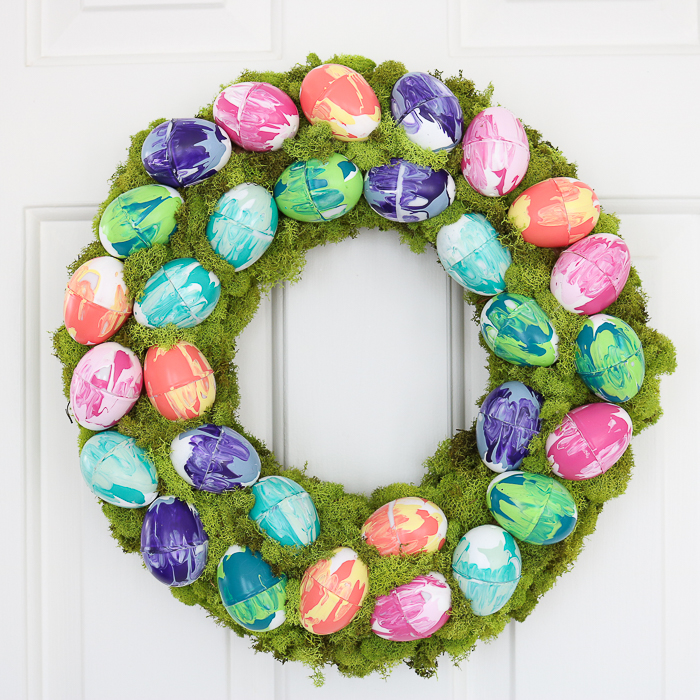
Making an Easter egg wreath with marbled eggs is easier than you think! Learn how to make marbled eggs with marbling medium and acrylic paint. Then, attach them to make this moss-covered Easter egg wreath. These easy marbled eggs can also just be used as decor around your home.
Easter Egg Wreath Painting Video:
The video below shows the entire process of making these marbled eggs and adding them to the wreath.
Can't watch the video or missed some of the steps? Just follow along with the steps below!
How To Make Marbled Eggs For Easter Egg Wreath
This Easter egg wreath will look great on your front door this spring! Wreaths are perfect for adding a festive touch to the outside of your home without spending a whole lot of time. Plus, this craft is inexpensive and easy to make.
I've made many different versions of Easter wreaths and painted eggs. This project uses a marbling medium to give them a marbled look.
Painted eggs are so easy and make for excellent Easter decor! Add them to a pretty bowl with some moss, and you've got a quick springtime decoration. If you love painted eggs, try your hand at the faux cement easter eggs or decoupage a few dozen eggs. You could even let the kids hunt these and add them to their Easter baskets.
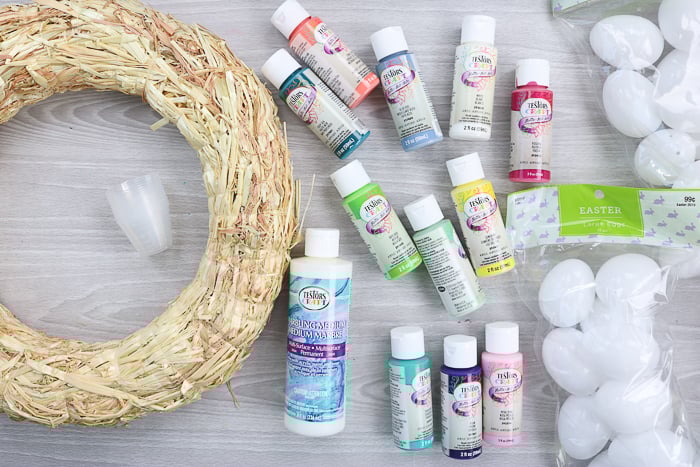
Supplies Needed:
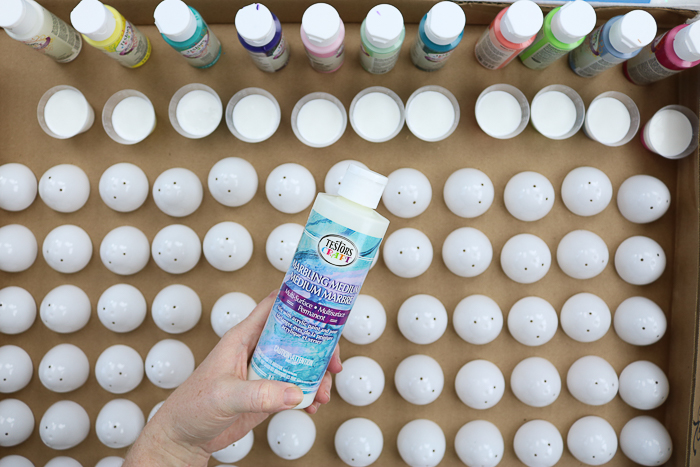
- Marbling Medium
- Testors Acrylic Paint (in a wide variety of colors)
- Plastic eggs (I used white ones like these)
- Wreath form (mine is straw-covered like this one, but yours does not have to be)
- Disposable plastic cups
- Craft sticks
- Cardboard
- Hot glue and a glue gun
- Moss (reindeer moss is my favorite)
- Craft knife
How To Marble Eggs For Easter Egg Wreath
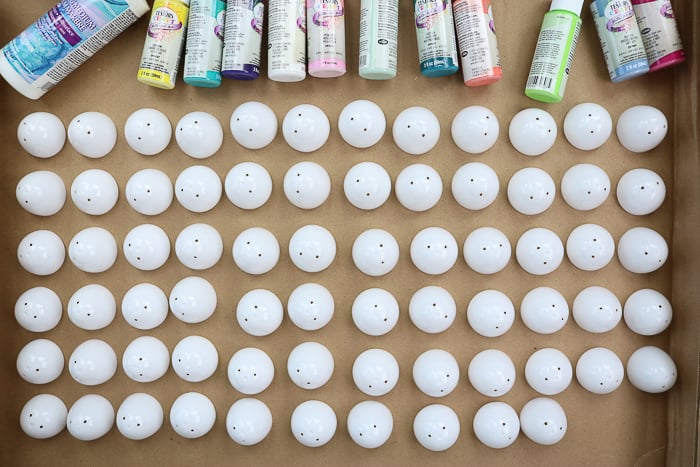
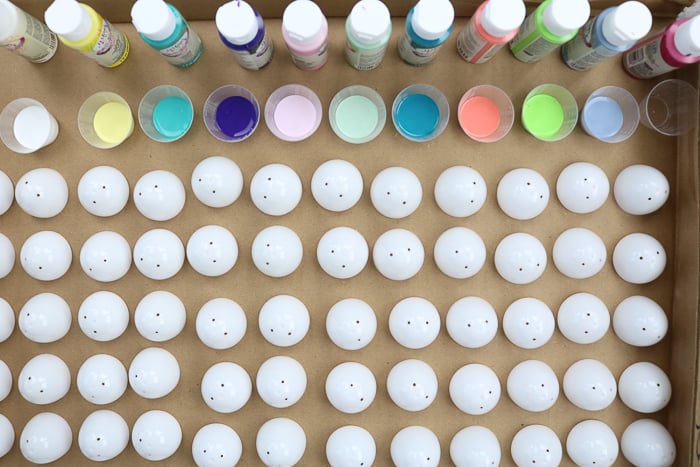
Step 1: Separate Plastic Eggs
Start by separating your plastic eggs into halves and place those on a large piece of cardboard. The paint will run everywhere, so you need a large piece, and if it has sides, it is even better.
Step 2: Pour Paint Into Disposable Plastic Cups
Shake your paint and marbling medium well before continuing with steps 2 and 3.
Pour paint into disposable plastic cups. You will be mixing this with the marbling medium. The ratio is 1 part paint to 1 part marbling medium. The cups I am using have measurement marks, but you can eyeball them as well.
Step 3: Pour Marbling Medium On Top of Paint
Pour the marbling medium right on top of the paint in the cups.
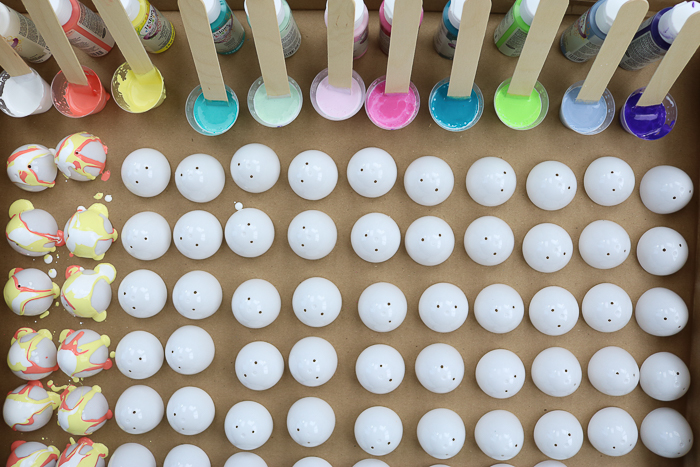
Step 4: Mix Each Paint With A Craft Stick
Mix each well with a craft stick. Allowing the paint to sit a bit before pouring will reduce the number of bubbles when adding to the eggs.

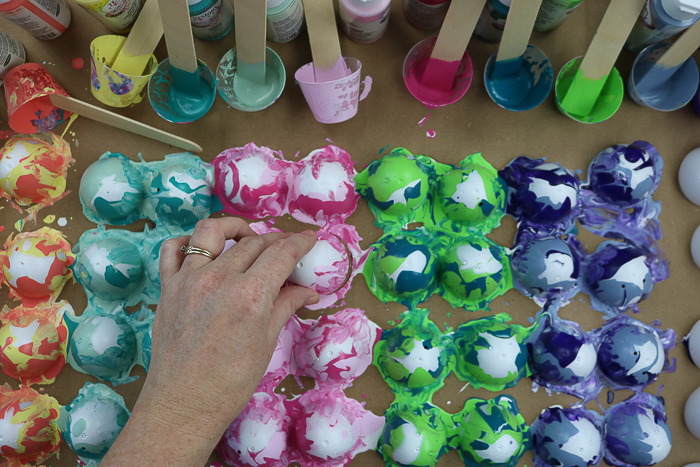
Step 5: Pour Paint Onto Eggs
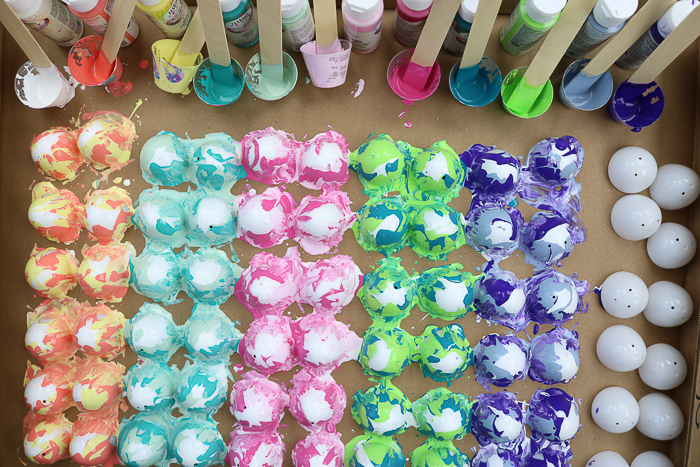
Once your paints are mixed, you can start to pour onto your eggs. You can do this however you want. I am adding two colors per egg along with some white. You can pour some and then pick the eggs up and tilt them to make the paint run. You can also use an extra craft stick to pick up the excess paint that falls off the egg and add to some of the bare spaces.
The goal is to get close to complete coverage on each egg half. This is also a great craft for kids, as they will love getting messy. Once you have finished, there will be paint everywhere. Allow your eggs to dry overnight.
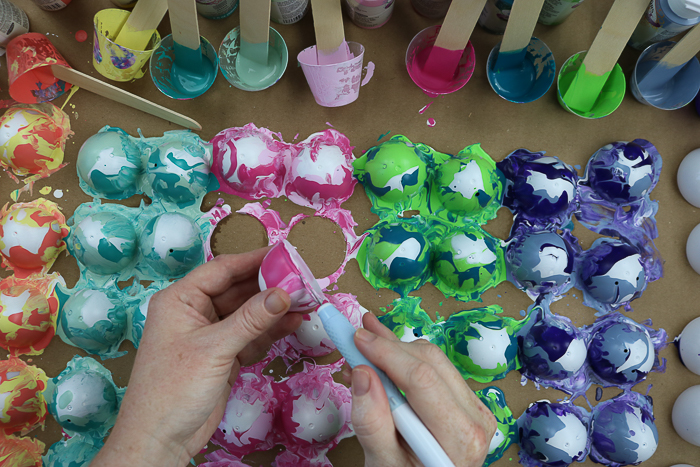
Step 6: Trim Off Excess Dried Paint
Then, use a craft knife to cut the dried paint all the way around the outside of each egg half.

Then remove each half from the cardboard.
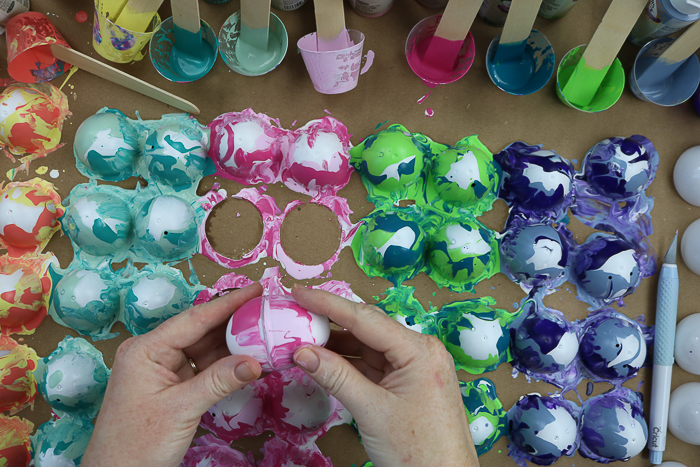
Step 7: Assemble Egg Halves Together
Remove two halves then try to assemble them together.

If you have trouble with the two fitting, you may have to use the craft knife to remove excess paint from around the lip of the bottom half.
Then combine the two and continue with your marbled Easter eggs.
Once you have a collection of marbled eggs, you can add them to a wreath or just display them in your decor around your home.

How To Make a Marbled Easter Egg Wreath
If you would like, you can turn your marbled Easter eggs into a wreath. You will need a wreath form of some type. We will be covering it with marbled eggs and moss. You may want to cover it with something like fabric before starting. Mine is already covered in straw, so I just dove right in. This covering will ensure that your form does not show through when your eggs and moss are in place.
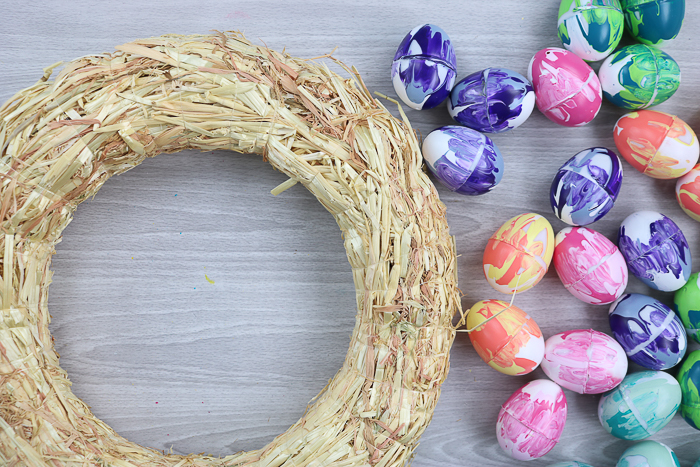
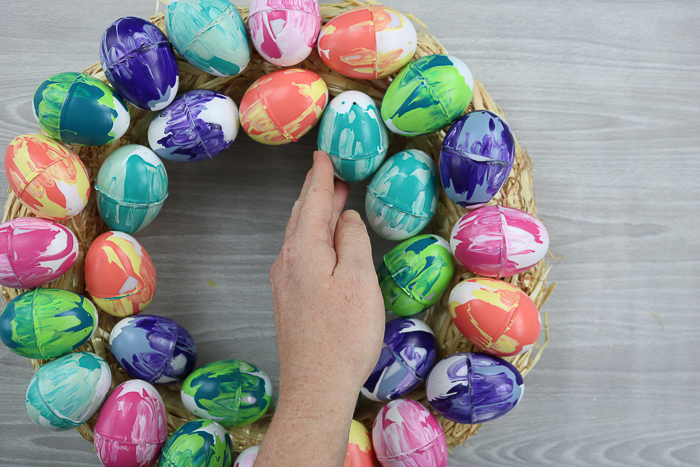
Step 1: Hot Glue Eggs Onto Wreath
Use hot glue to secure each egg to your wreath form.
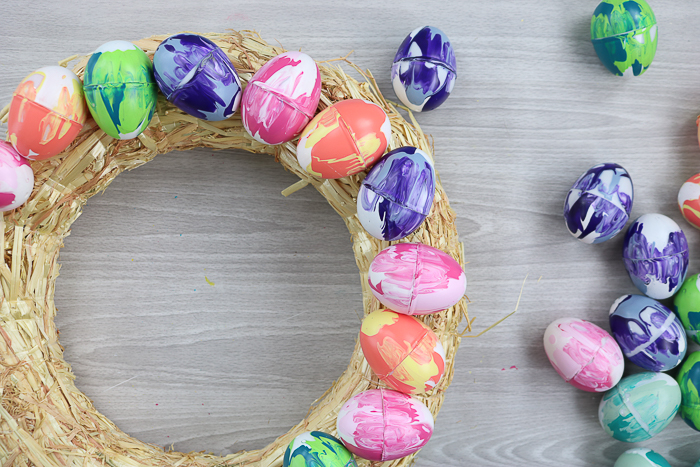
I made enough marbled eggs for two rows, but you can make as many or as few as you would like.
Once everything is hot glued into place, you could leave the wreath like this however, if you feel that it needs a little something more.

Step 2: Add Moss To Wreath
Just add in moss around the eggs with hot glue.

Add moss around the inside as well as the outside of the wreath to complete the look.

Turning marbled eggs into a wreath is super simple and will look amazing as spring decor around your home.
Now that you know how to make marbled Easter eggs, you can use this same tutorial to marble other things as well. Once you start, you won't be able to stop!
FAQs About Easter Egg Wreath
Here are the answers to some common questions I often get about this project.
Is This Project Messy?
Yes! As I mentioned above, this project gets messy, and you need to leave it dry overnight. So, make sure you take time to create a workstation that protects your table or countertop. A large cardboard box with sides works get for this project!
Do I Really Need To Shake All My Paint Well?
Yes! This step is easy to overlook, but even if all your supplies are brand new, it's crucial to do so that you can get the best marbling effect.
Can I Use Other Types Of Glue For This Project?
You can, but I think hot glue is the winner in this project! It makes the project easier to put together and will give the eggs and moss a strong hold.
If you are looking to find the right glue gun for you and your projects, check out my Best Glue Gun for Crafts blog post.
Can I Use Regular Colored Eggs For This Project?
Yes, you can, but some of the colors might show through. This would give you a different look and still be very cute. However, if you want a ”pure marble effect”, I would personally use the white eggs.
The Paint Did Not Cover My Eggs Completely, Can I Still Use Them?
Yes, you can! If the paint doesn't completely cover your eggs, that's okay! Each egg will look different, which is part of the fun of this project. Also, if you don't like that side of the egg, you can always glue it facedown to your wreath, so the pretty side is facing up.
How To Plan Your Own Testors Crafternoon
Maybe you want to make your Easter egg wreath or some marbled eggs with your friends and family. Well, it is time to plan a Testors Crafternoon!
Order your supplies then gather together for an afternoon of crafting. In this case, you can probably do some eggs as well as some of our Pot Decoration Ideas in one day.
Start by spray painting the pots and set them aside to dry. Then head inside and start marbling eggs. When the marbling is complete, you can then finish the painting of your pots. Then send everyone home with a completed pot or two, along with some marbled eggs that still need to dry. Then can finish the eggs at home and add them to a wreath if they wish.
Don't want to have them complete their wreath at home? Then plan TWO Testors Crafternoons! One where you marble the eggs and the other where you make the wreath. Twice as much crafting fun is never a bad thing! Y'all enjoy these easy marbled eggs and make a gorgeous wreath for your front door this spring.
Also, if you are looking for more Testors projects besides this Easter egg wreath, check out the projects below!