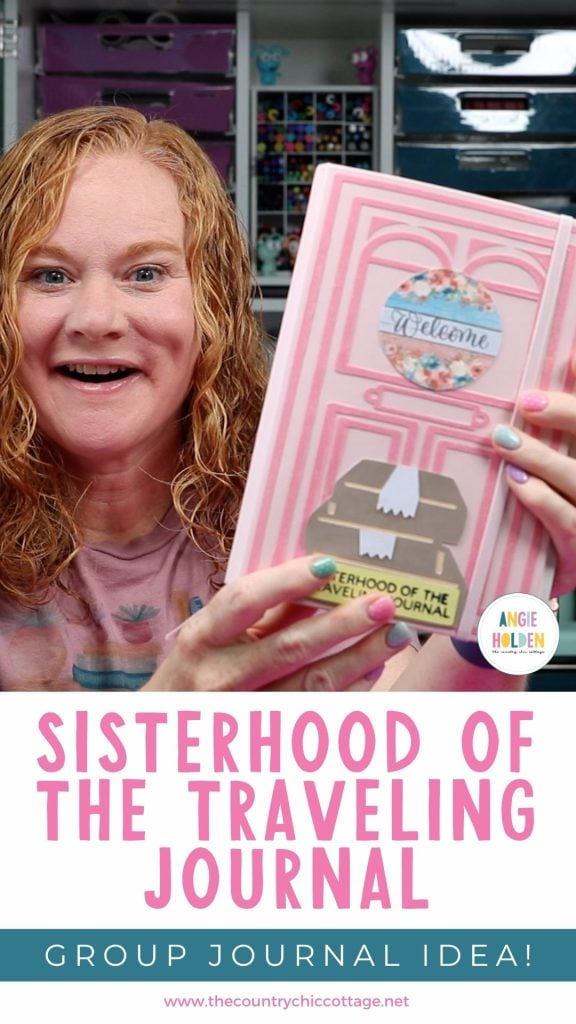
Have you heard of traveling junk journals? If you're looking for a fun project to do with a group, or looking to find a group to craft with, a traveling junk journal may be exactly what you need.
Each junk journal is different. There are no requirements; they're perfect for using up scraps and old supplies, and it's so exciting to see each of the different journals.
Traveling junk journals are about creating a shared experience. As the journal travels from person to person, you get a glimpse into their crafting personality and the opportunity to get to know them better.
Click play on the video below to see the journals I've created.
How to Make a Traveling Junk Journal
If you've been interested in junk journals at all, you probably know that no two are alike.
I'm sharing my journals as an inspiration to help you get started on one of your own.
What is a Traveling Junk Journal?
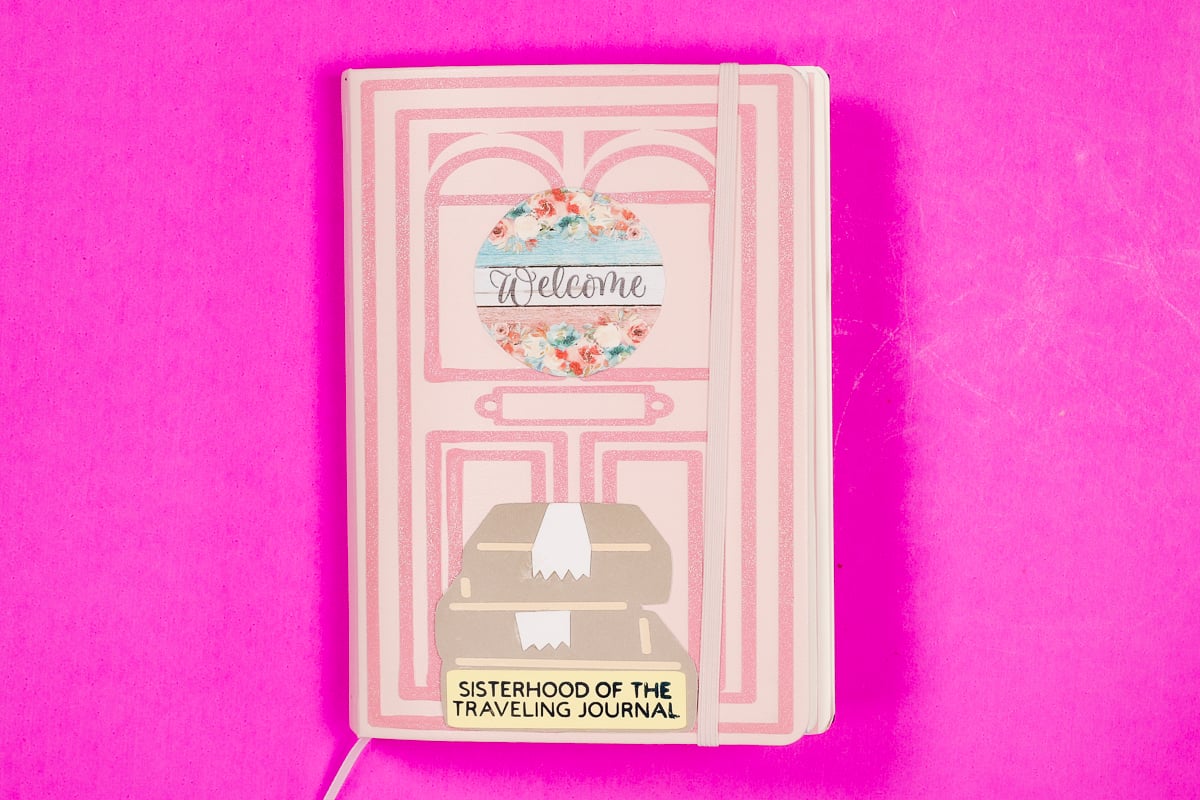
Have you ever heard of the book and movie The Sisterhood of the Traveling Pants? That is basically what a traveling junk journal is.
It's one journal that is passed from person to person in a group, and each person fills out parts of the collaborative pages and adds pages of their own.
The difference between the traveling journals and the traveling pants is that, with the journals, each person creates their own journal, so in the end, each person has a completed journal that has been passed to everyone in the group.
Note – Despite its name, you don't have to use junk to create your journal. You can use scrap materials, recycled materials, or even new materials if you'd like.
Supplies Used
One of the best parts of junk journaling is using supplies you already have on hand.
I'm sharing some of the supplies I used. You do not have to use the same supplies for your junk journal.
- Journal
- Cardstock
- Cricut Machine
- Brayer
- Washi Tape
- Patterned paper
- Stickers
- Stamps/Ink
- Stencils
- Fabric or textured materials
- Photos and printed images
- Envelopes, pockets, and tags
- Pens/Markers
Dry adhesive/Paper Glue/Hot Glue Options:
Step 1: Choose Your Journal
The first step to creating a traveling junk journal is to decide on a journal.
You can purchase a journal or make your own. There are a lot of different options, from spiral-bound to a regular book binding style. There are also a lot of sizes, from 8.5 by 11 to pocket-sized and 60 pages to 200 pages.
You'll want to make sure the journal is sturdy. As pages are added, journals can become thick and heavy, so durability matters.
Journals that have an elastic band can help keep them closed, even when they're filled to bursting.
I also look for journals that have blank pages. I feel more creative with blank spaces. If you're planning to completely cover every single page, you may not care if they have dots or lines, but someone else who gets the journal may not want to cover the entire page.
Step 2: Pick a Theme
I don't know about you, but having a theme can really help my creativity. Sometimes having a lot of options is overwhelming to me.
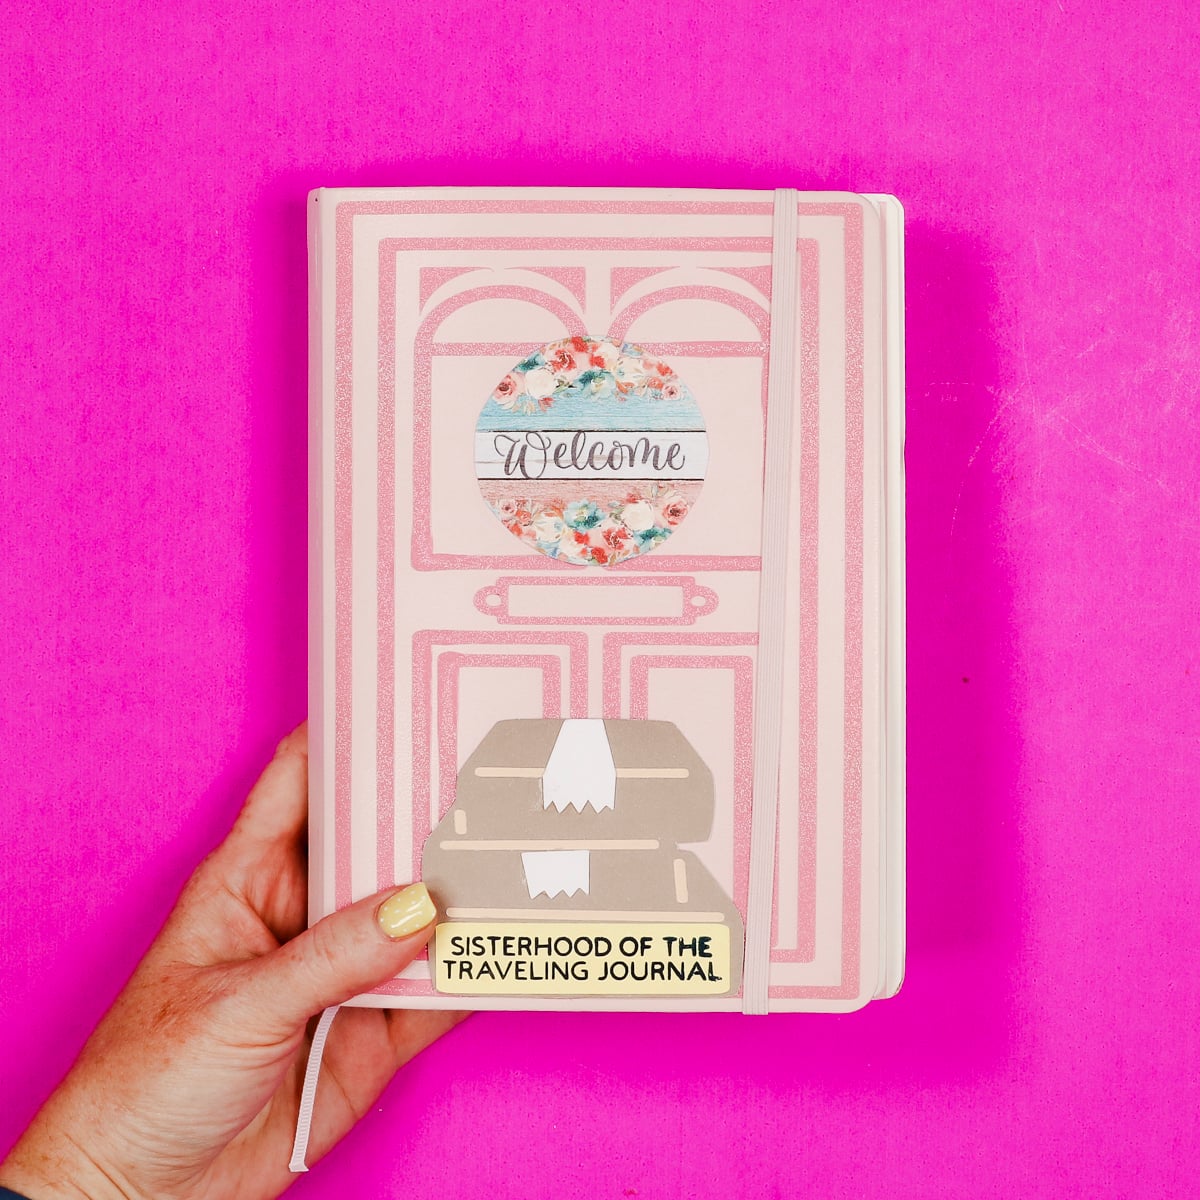
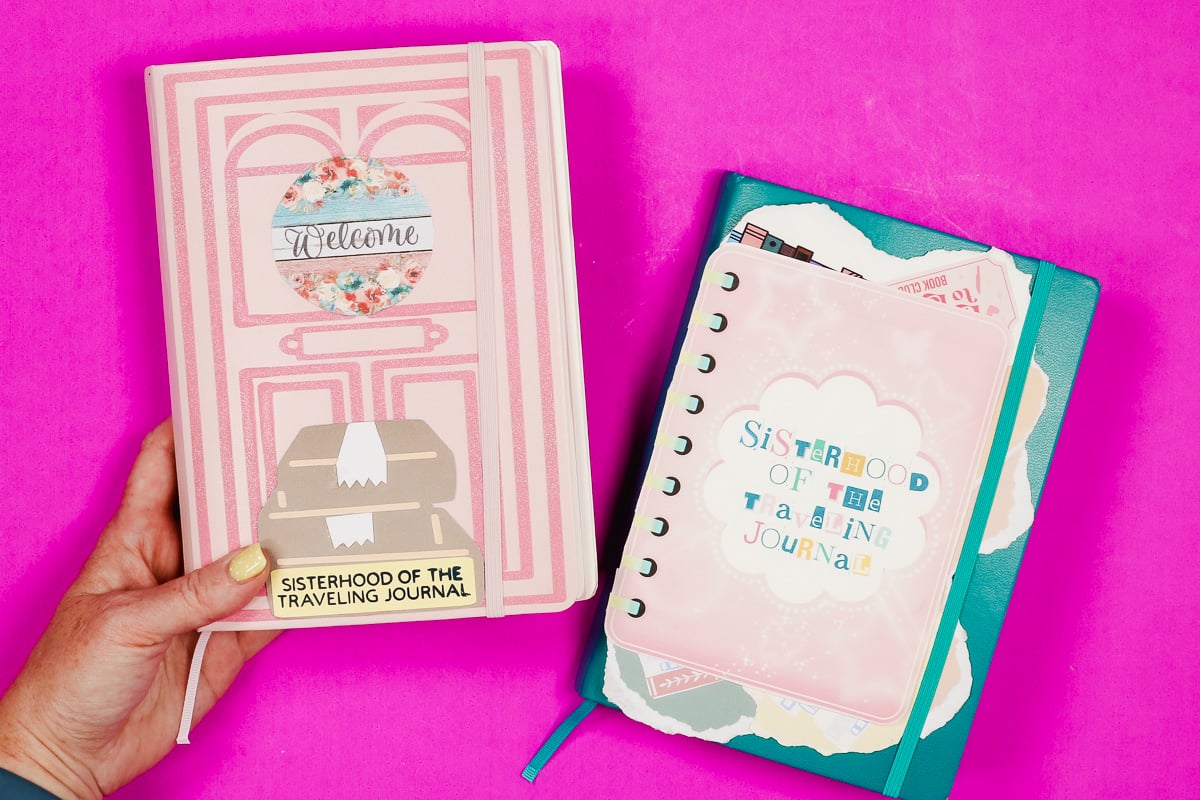
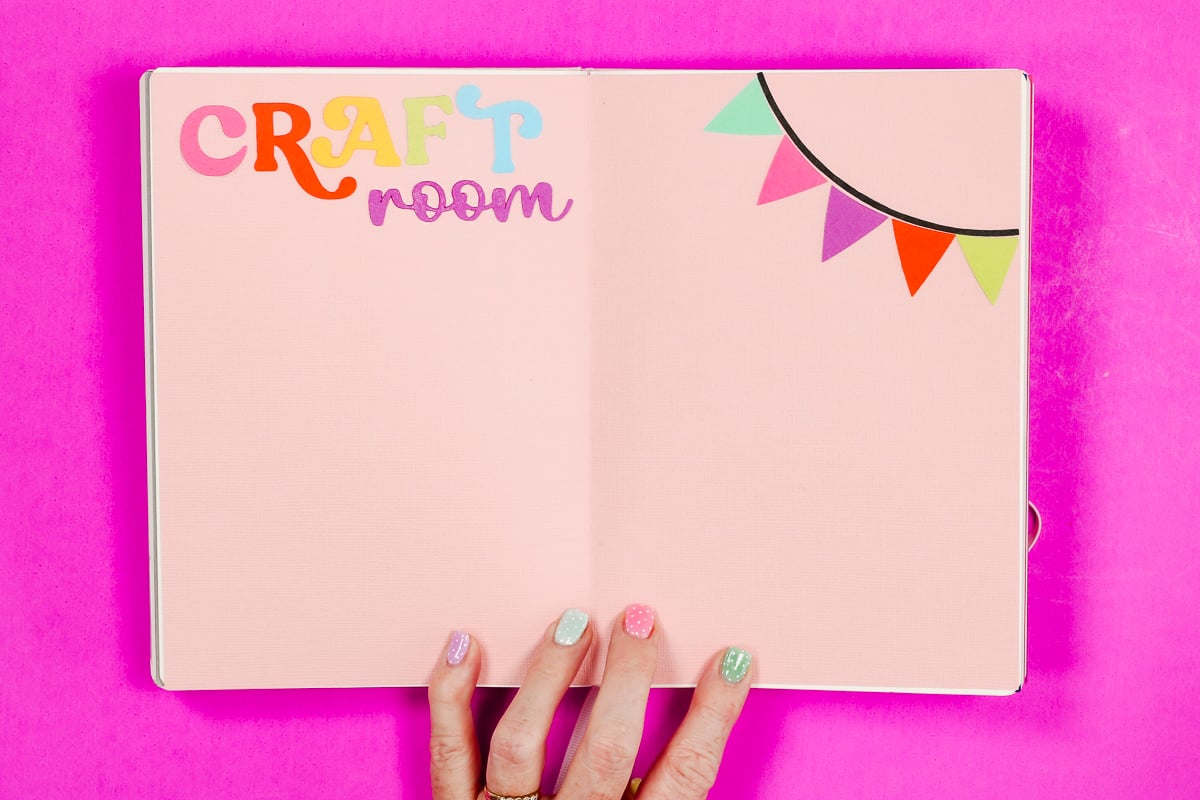
Decorating the cover of traveling journals can help introduce the theme before you even open the book.
Having a theme isn't required, but it can make your journal feel more cohesive and help you decide on the supplies you want to use.
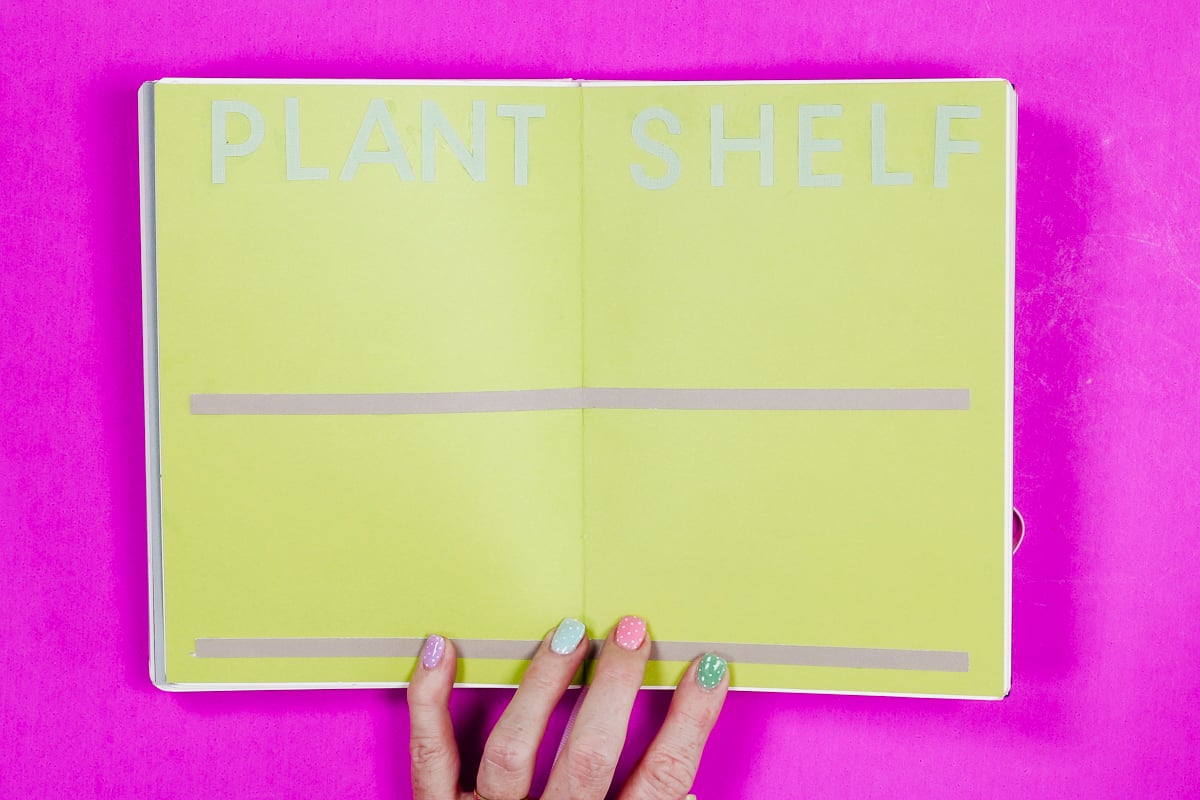
Some theme ideas include:
- Book club or reading theme
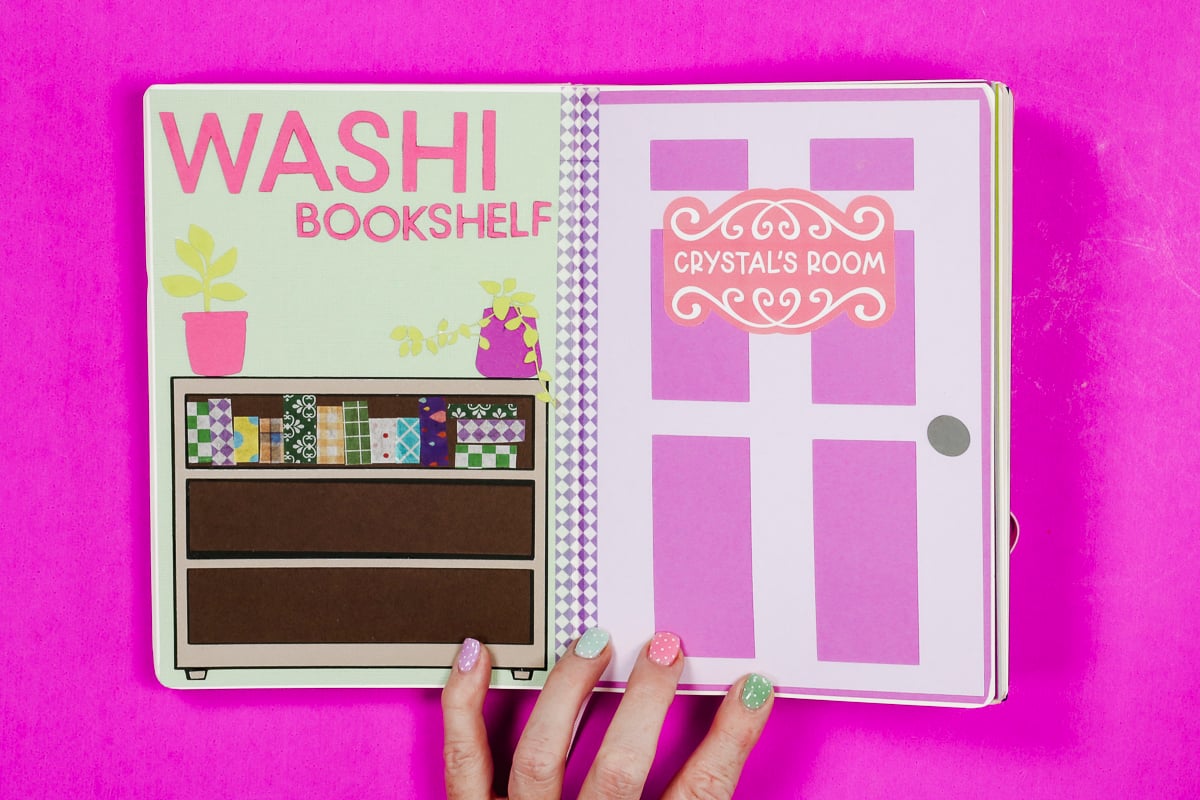
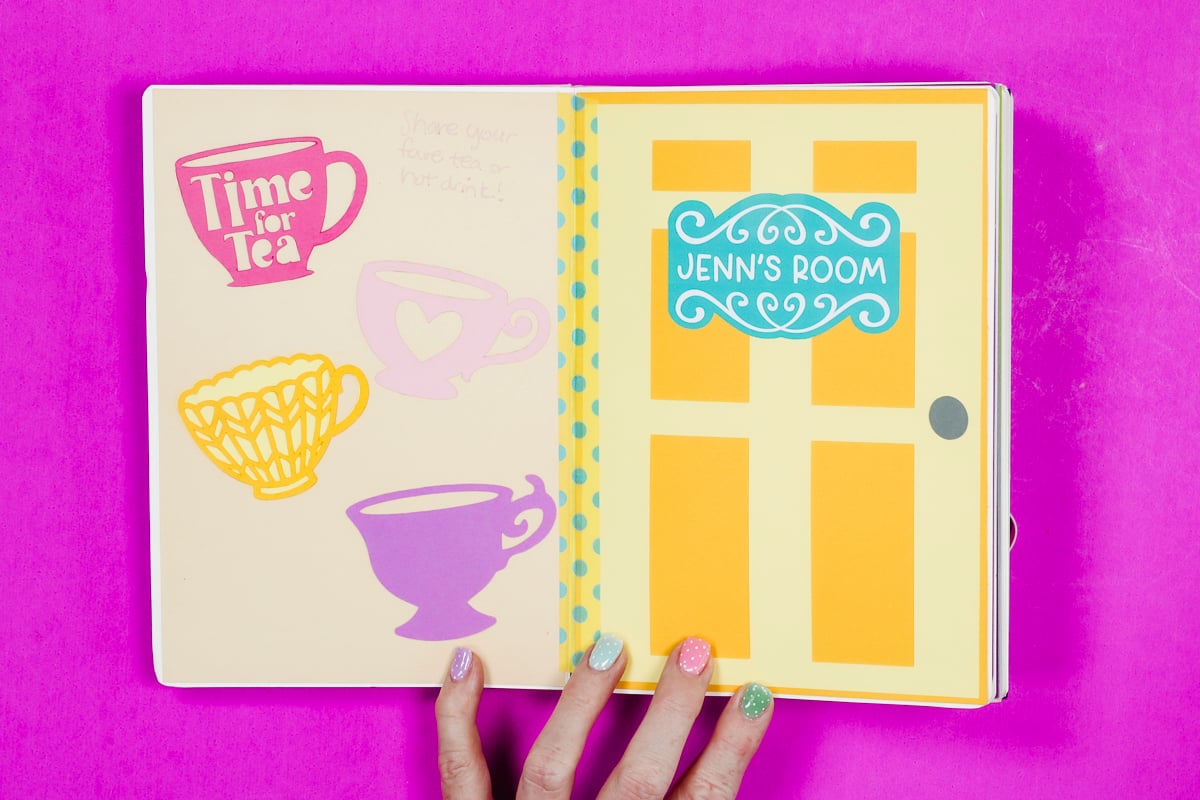
- Home or “rooms of a house” concept
- Seasonal or travel themes
- Friendship or memory journals
- Colors
- Outdoors
- Movies or Characters
- History/Time Periods
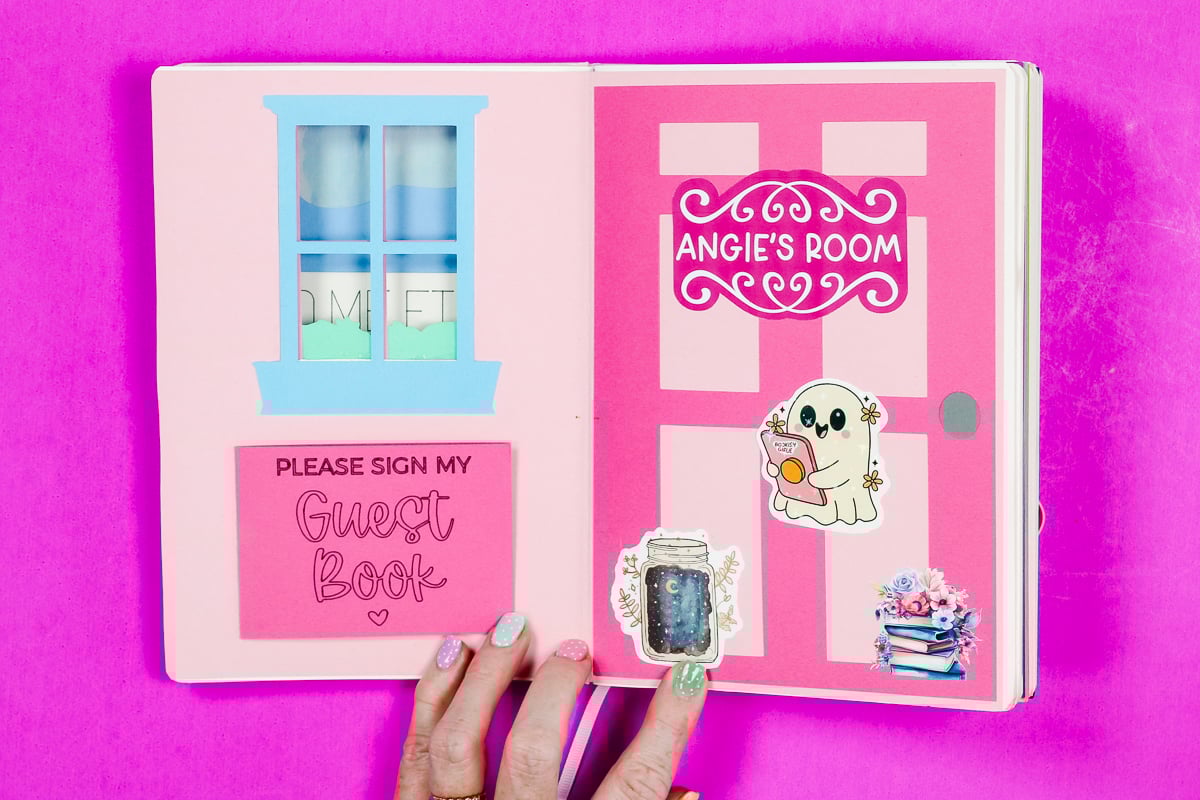
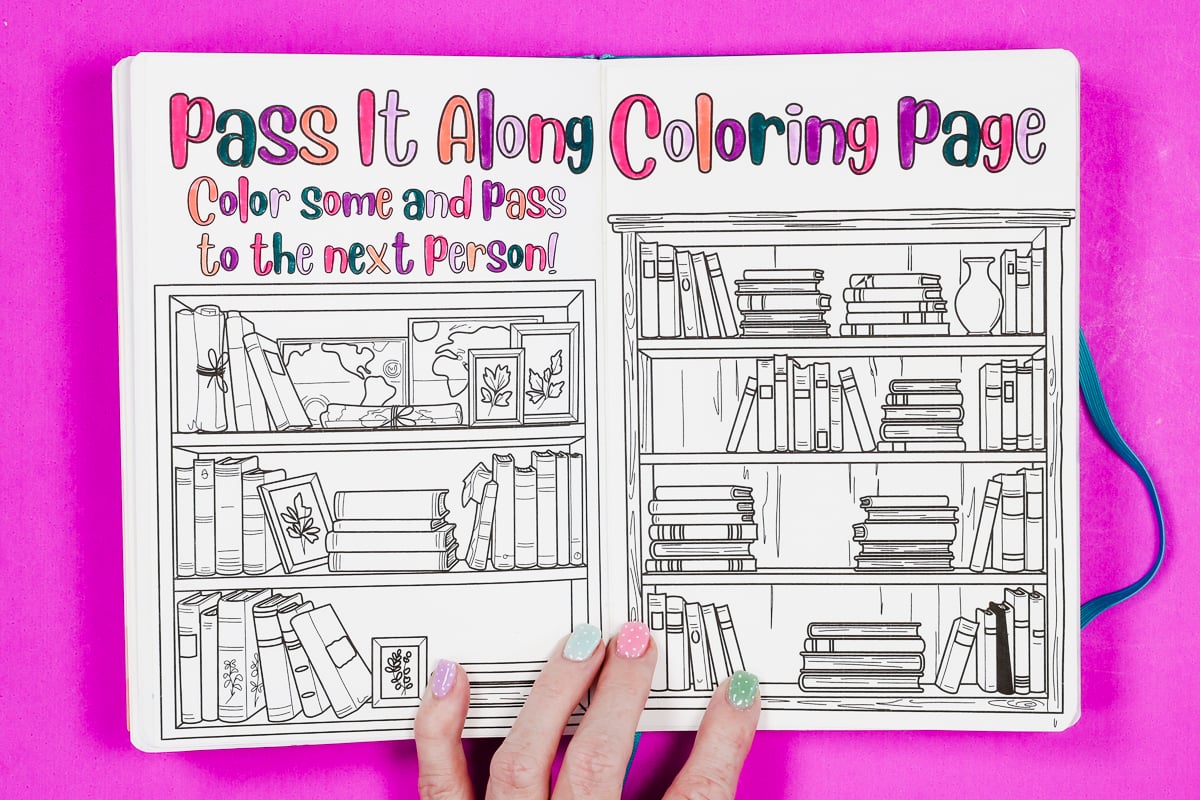
A home-themed journal may include a front door and different rooms as page layouts.
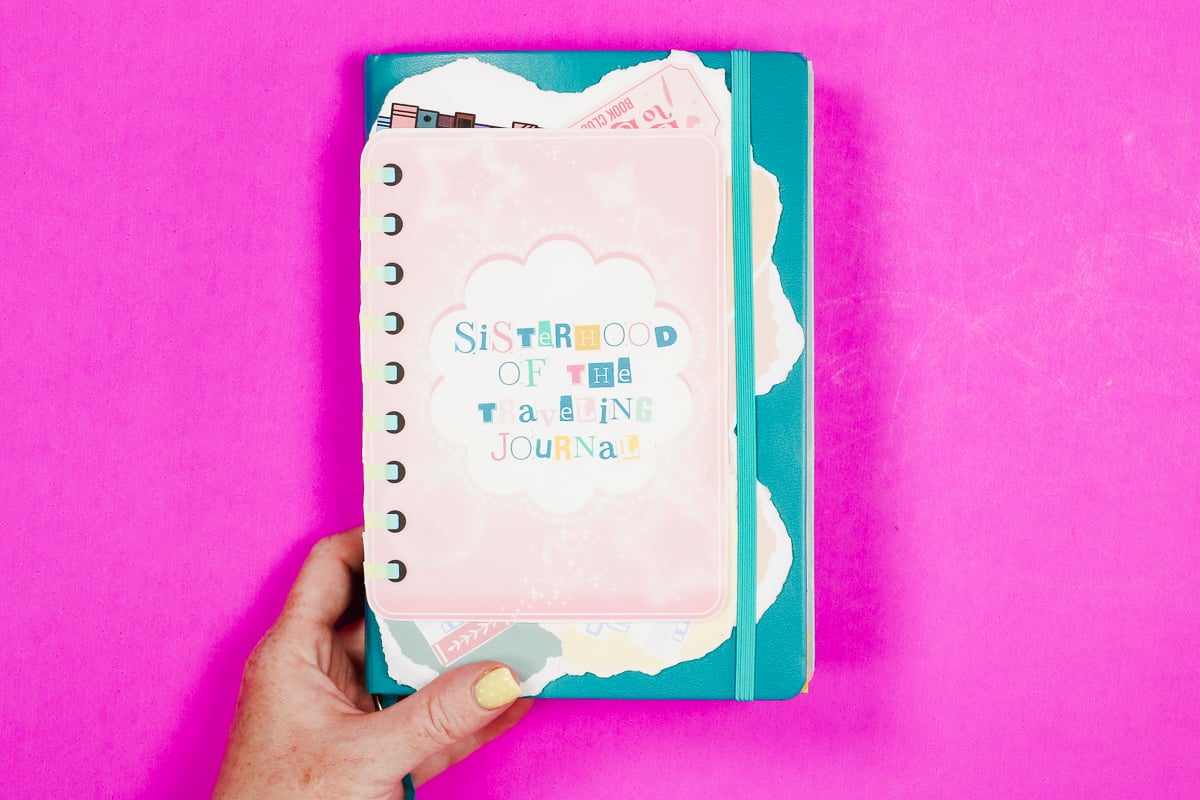
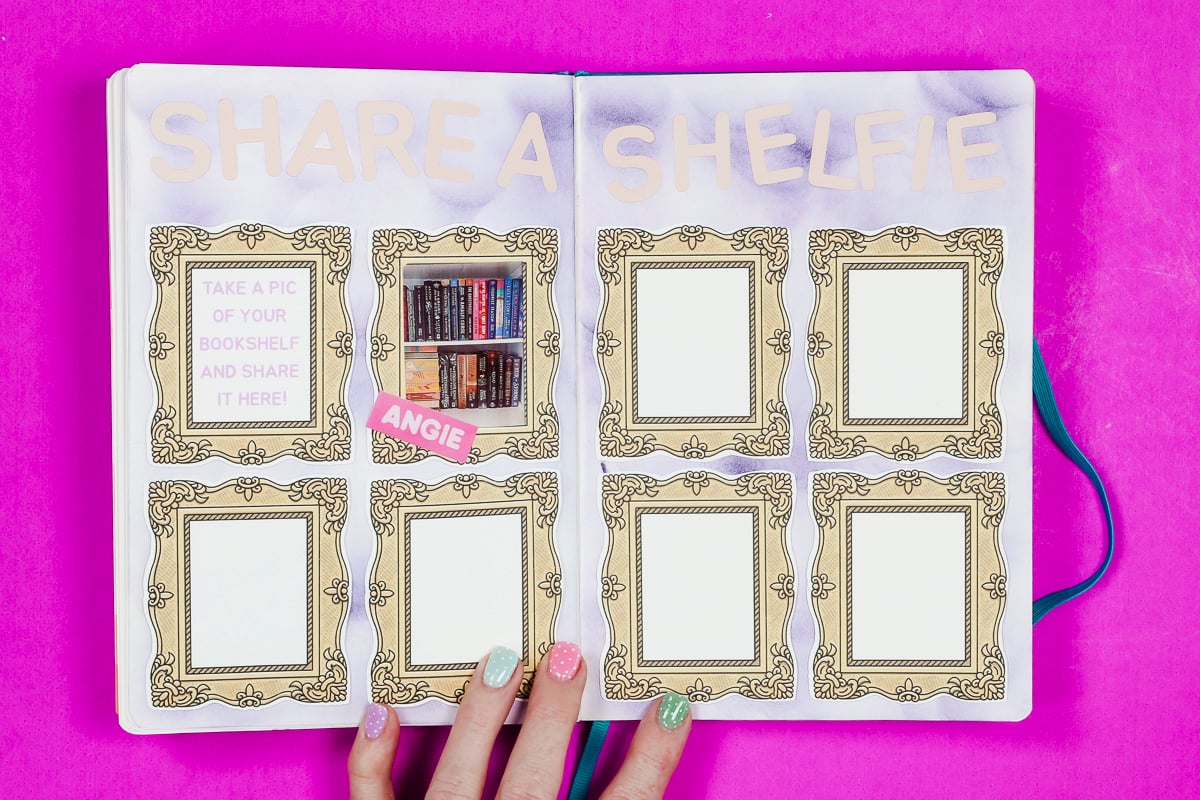
A book club or reading-themed journal may include bookshelves, layouts that look like bookstores or libraries, and even bookmarks.
There are so many different options; the ideas listed above are just the tip of the iceberg.
Step 3: Plan Your Pages
Before you send the journal, you're going to get it started. The number of pages you fill out will be determined by how many people are in the group and how many pages are in the journal.
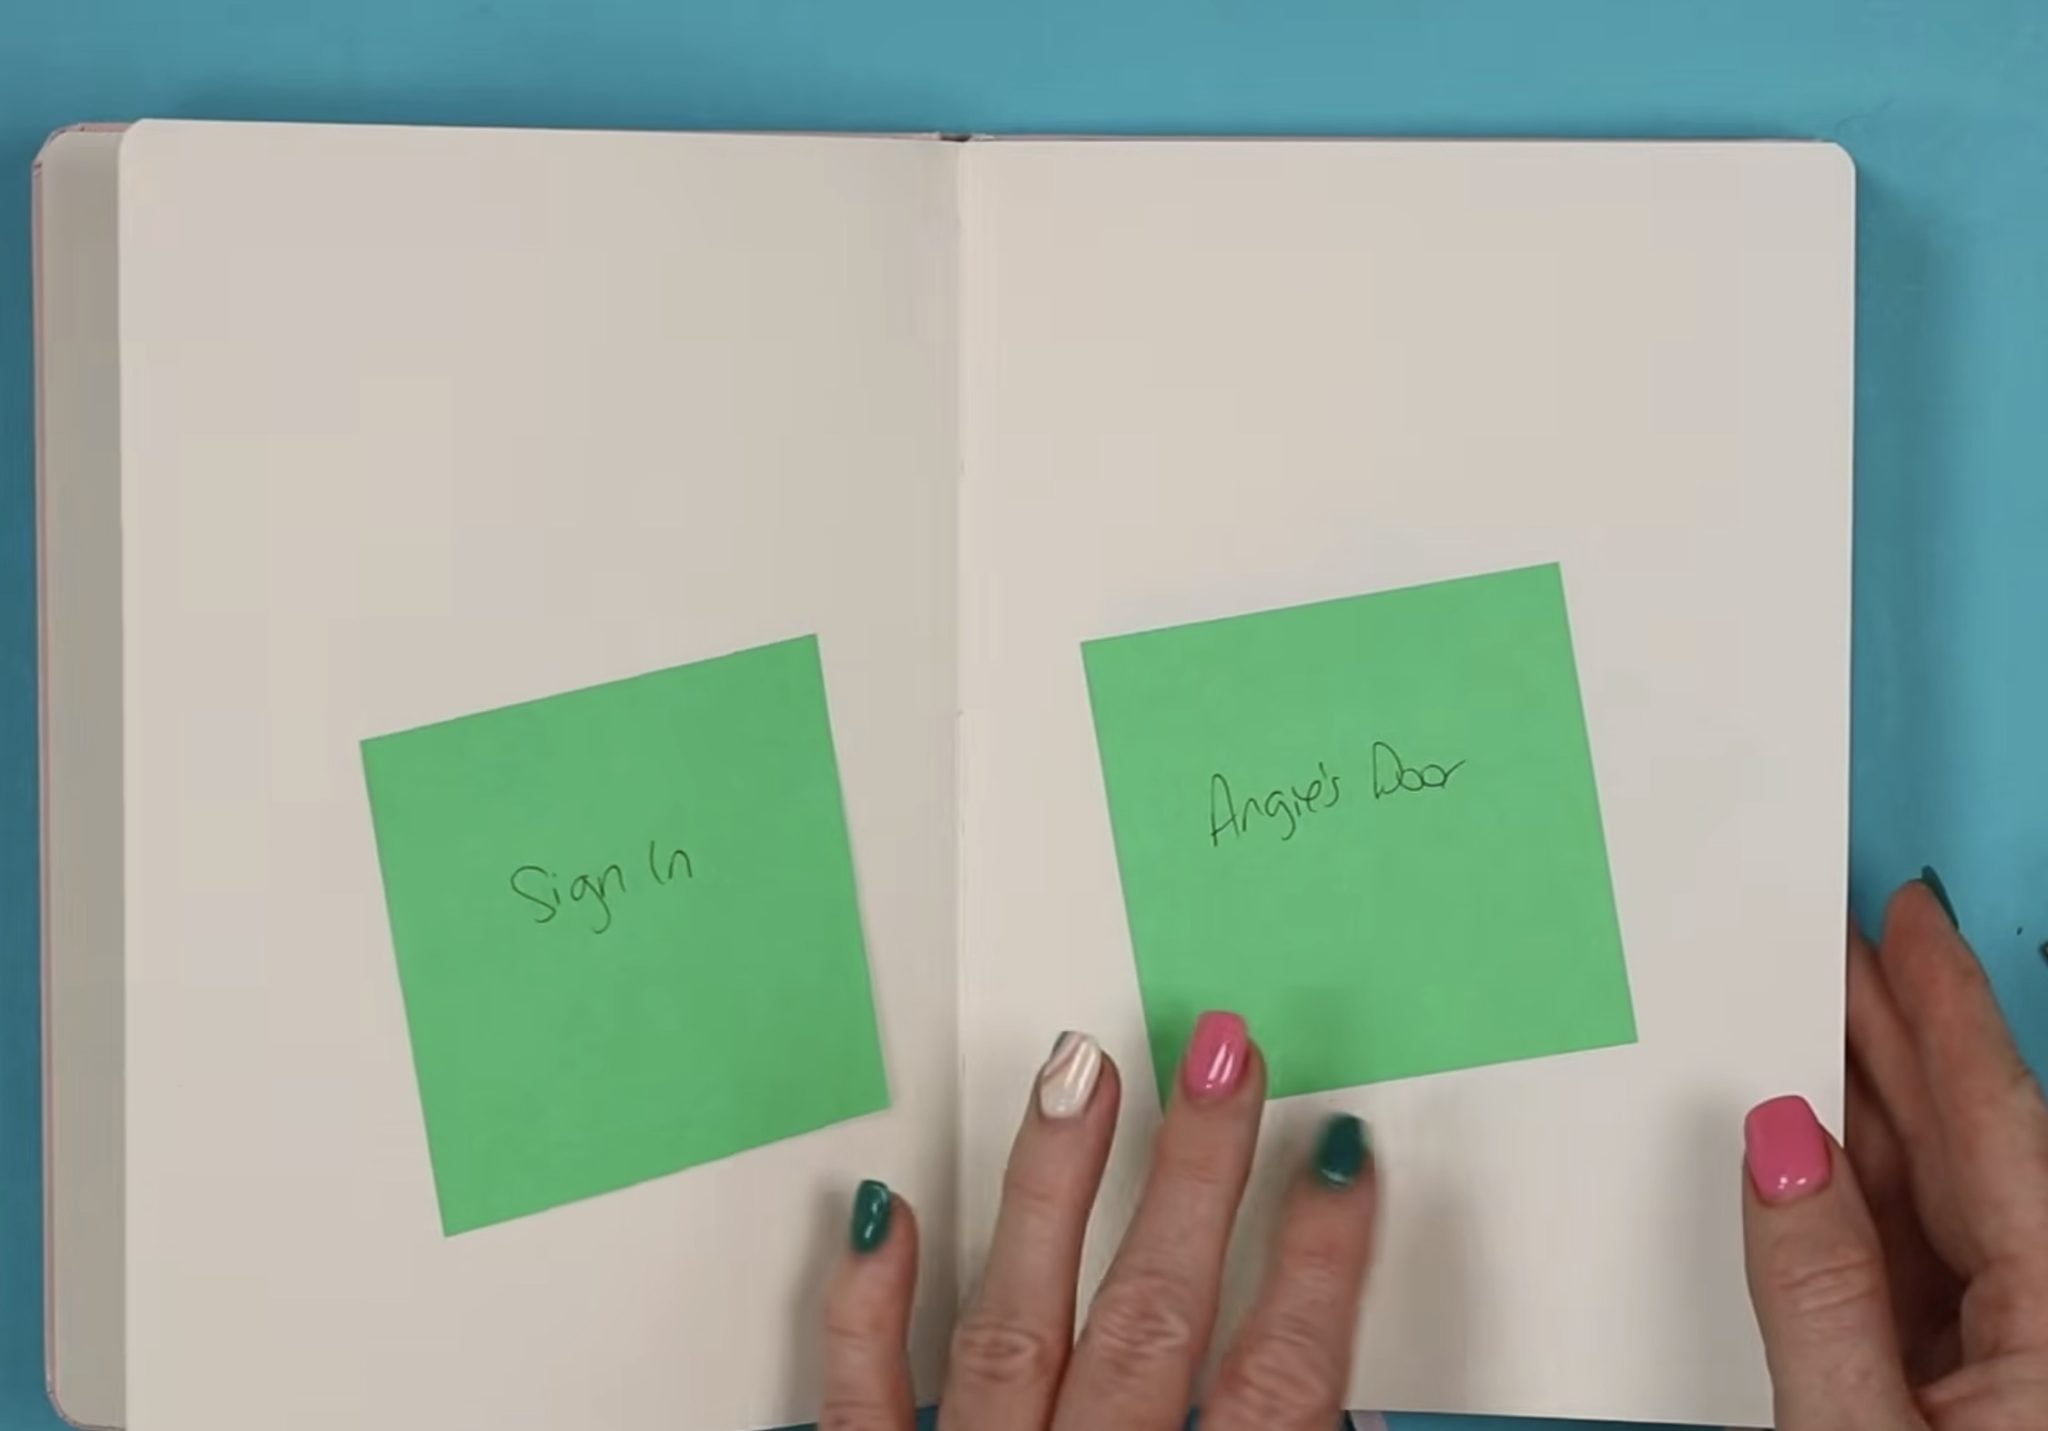
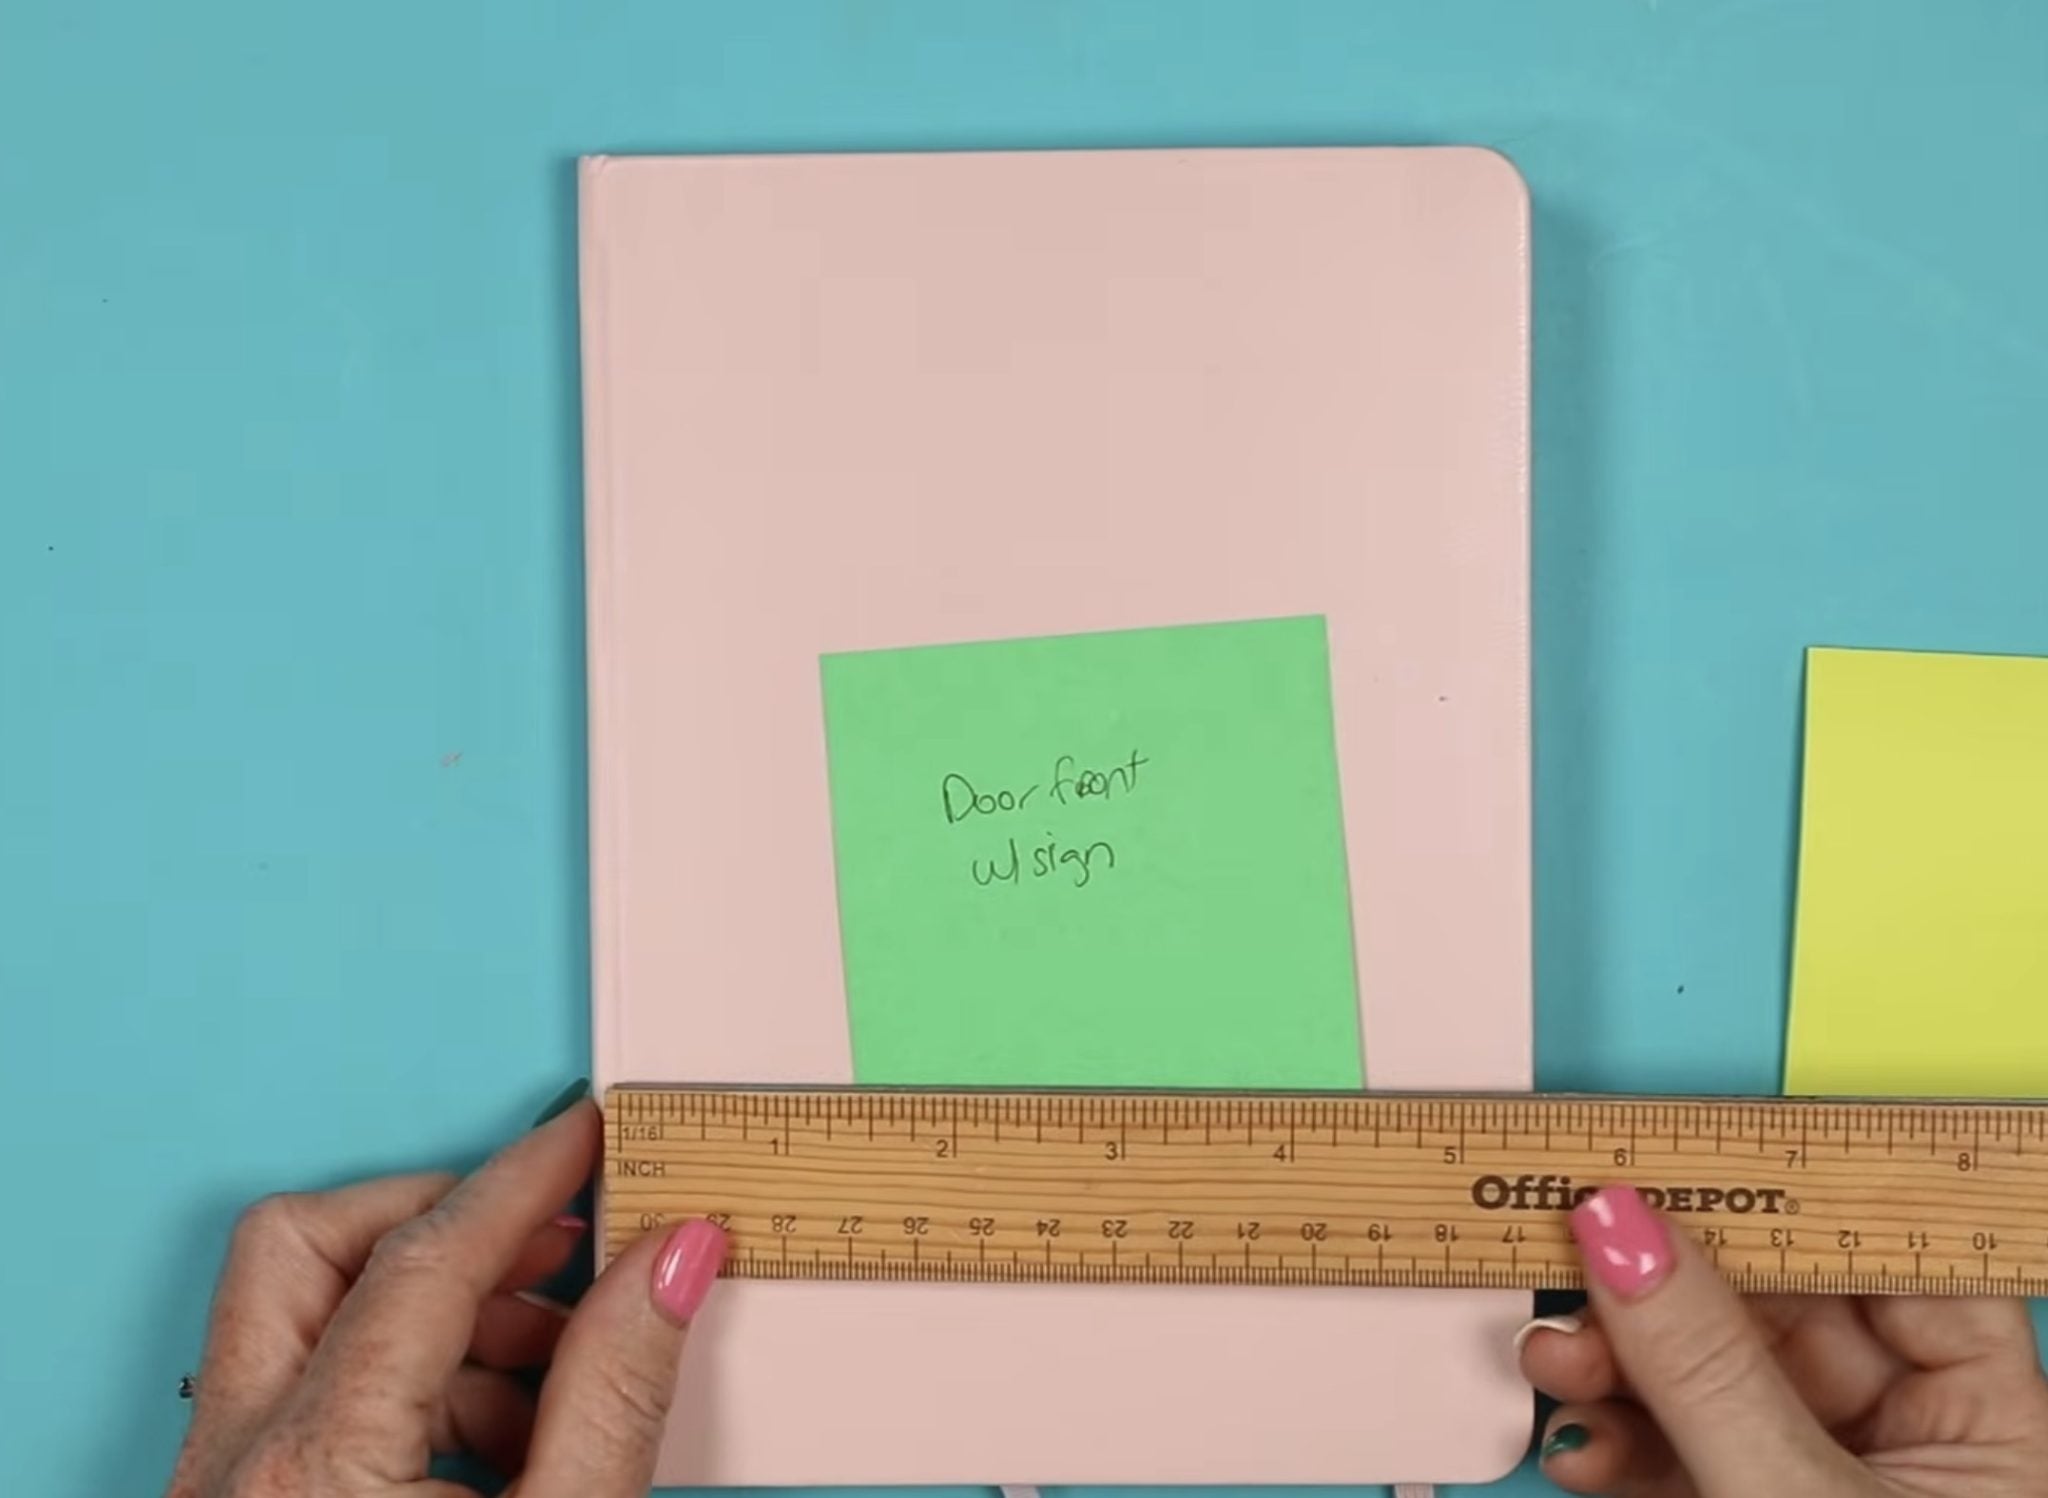
I found using post-it notes helped me decide how many pages I wanted to keep free for each person, and I could arrange my layout ideas before starting to ensure it would look like I wanted when I was finished.
Since I wanted to use my Cricut to create some of my layouts, I measured the height and width of my journal so I could ensure the designs I created in Design Space would fit.
Pages that are often included at the start of the journal:
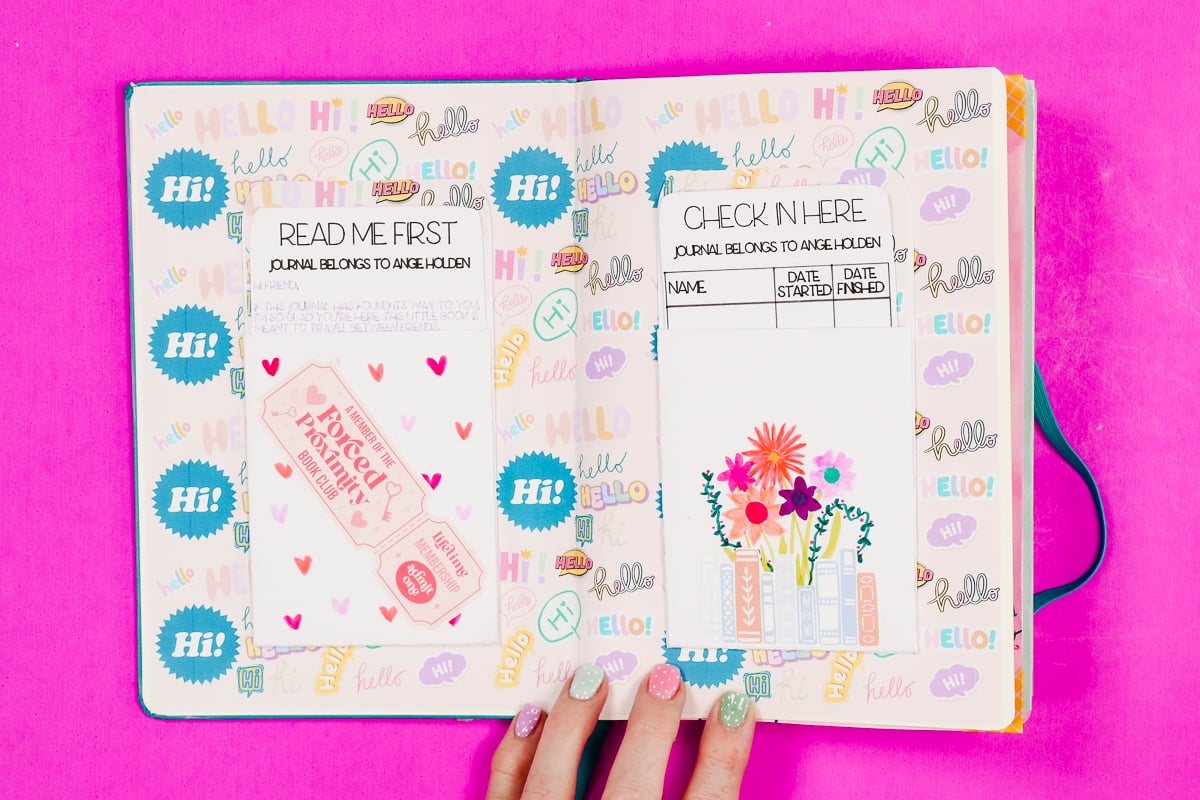
- A “Read Me First” introduction. This page can explain the interactive pages and the rules for transferring the journal.
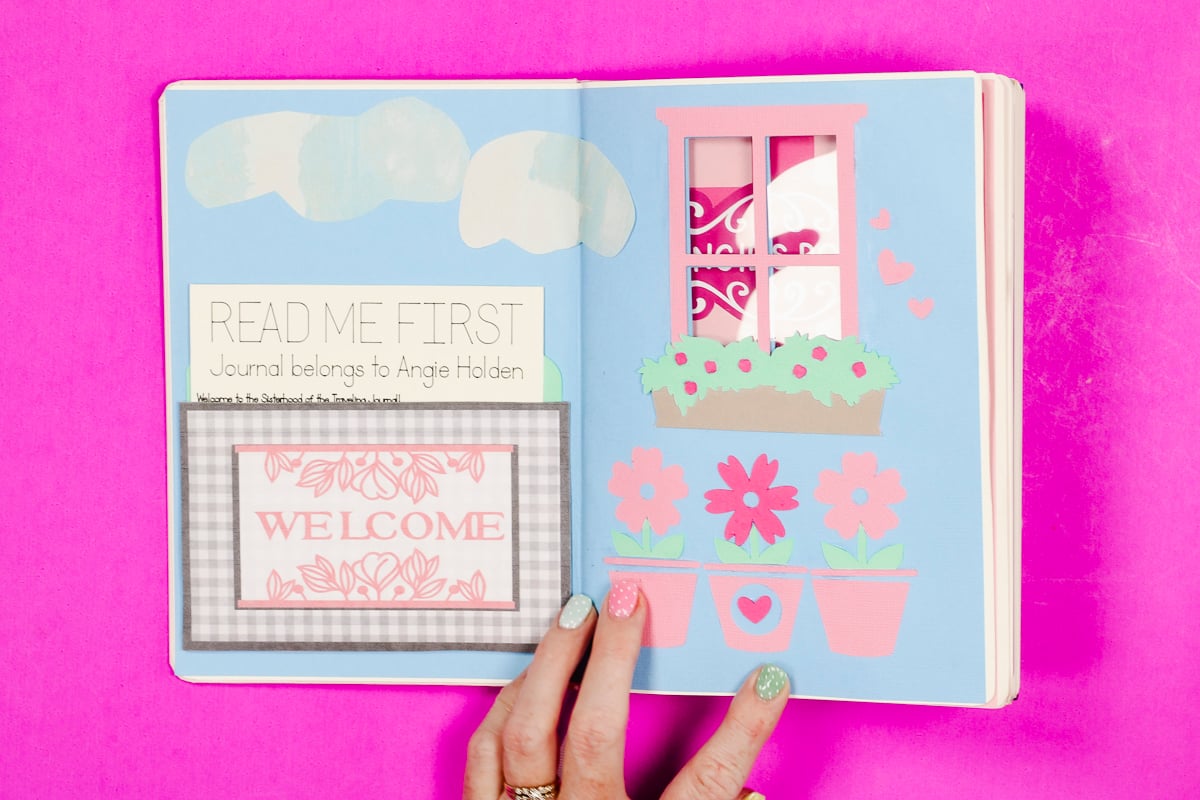
- A welcome or sign-in page. Here, everyone will sign in and can include the dates they have the journal, and where they are from.
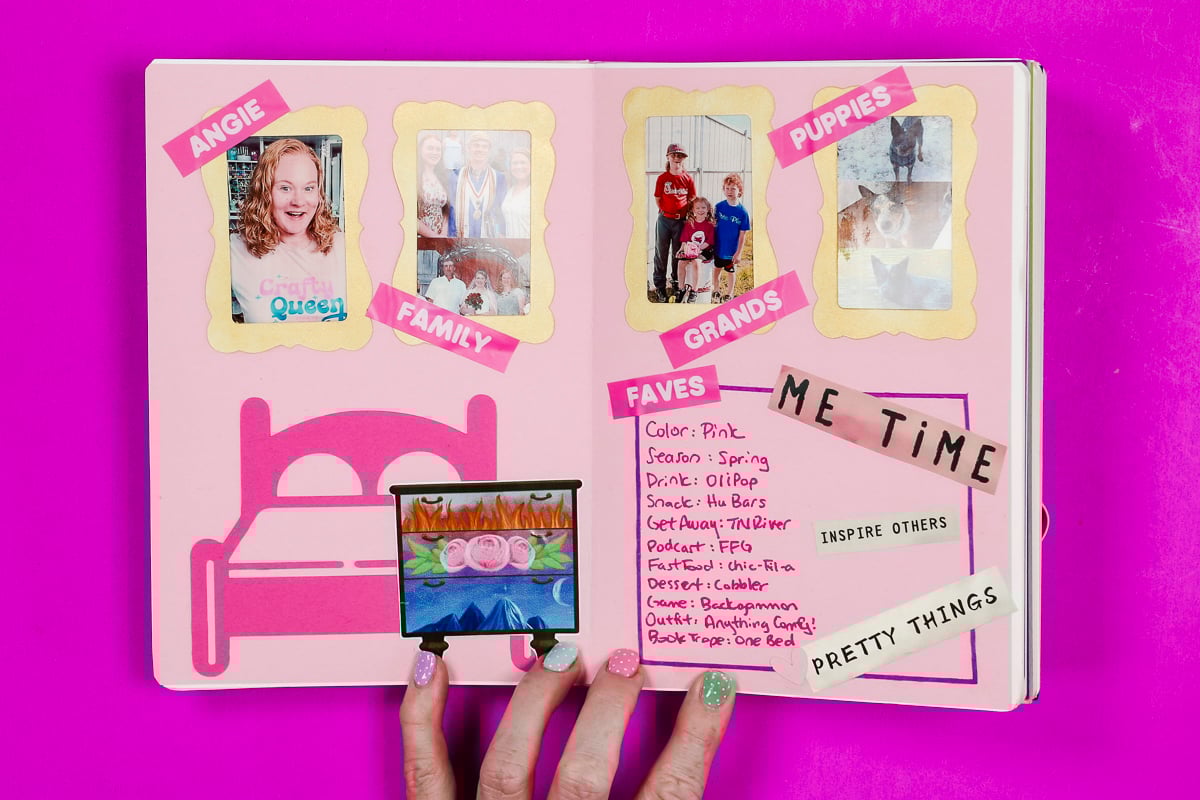
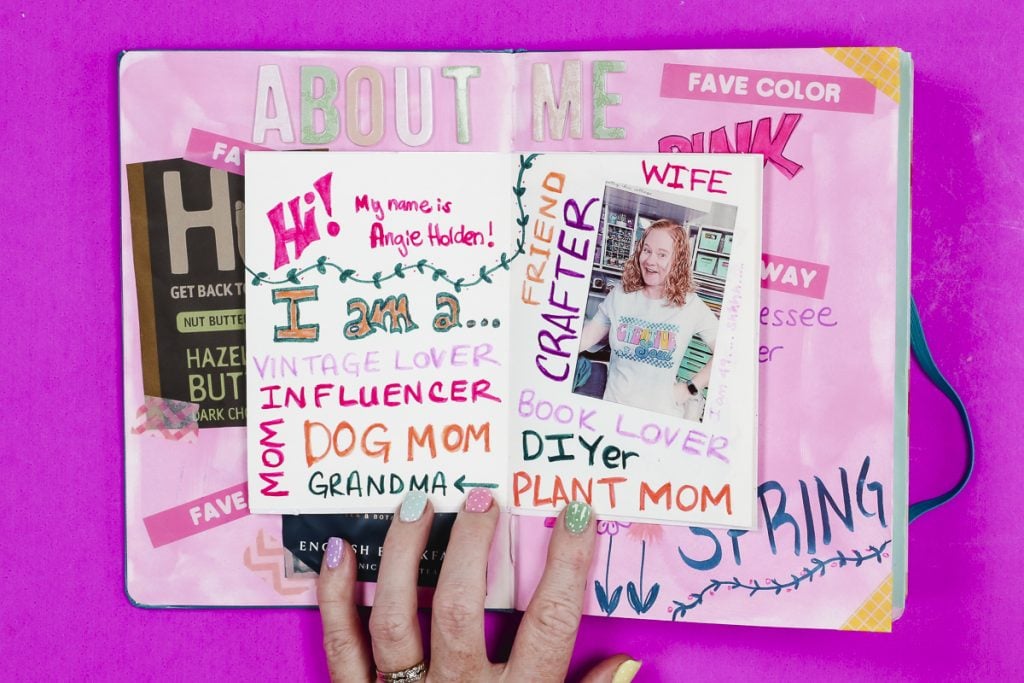
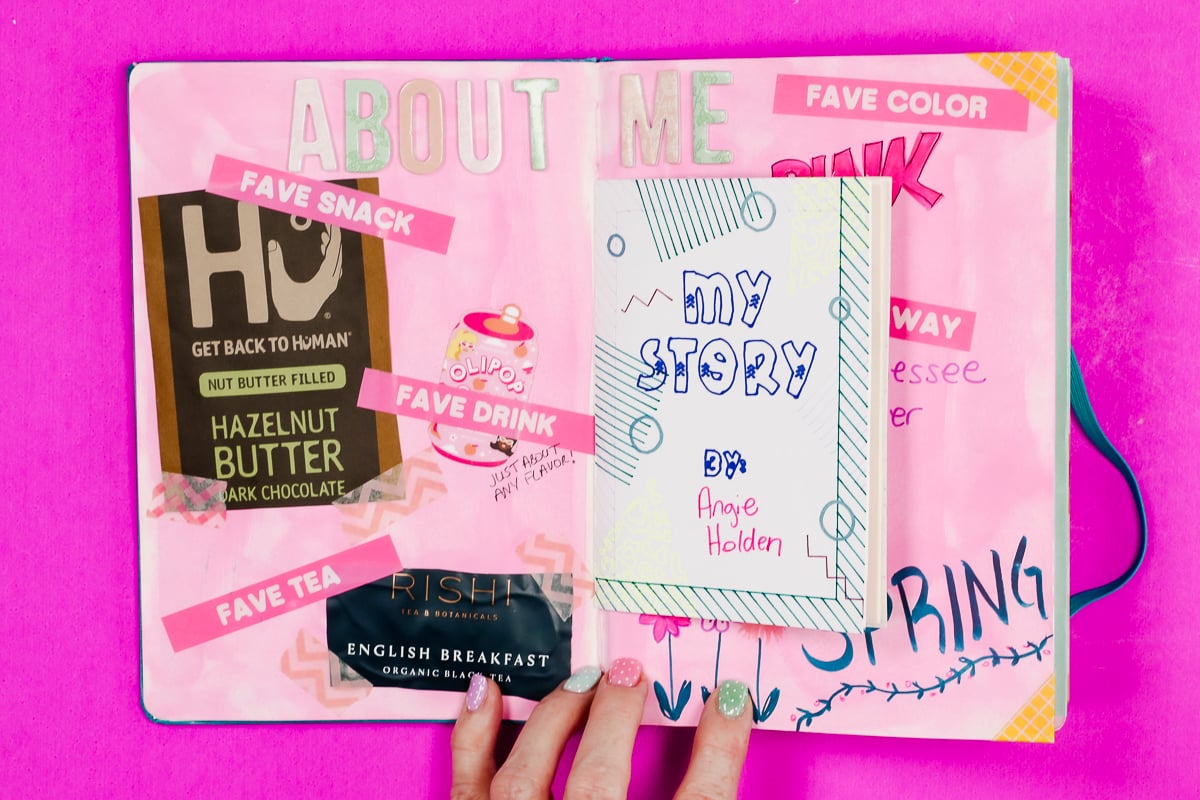
- An “About Me” section – share as little or as much as you'd like about you and your life.
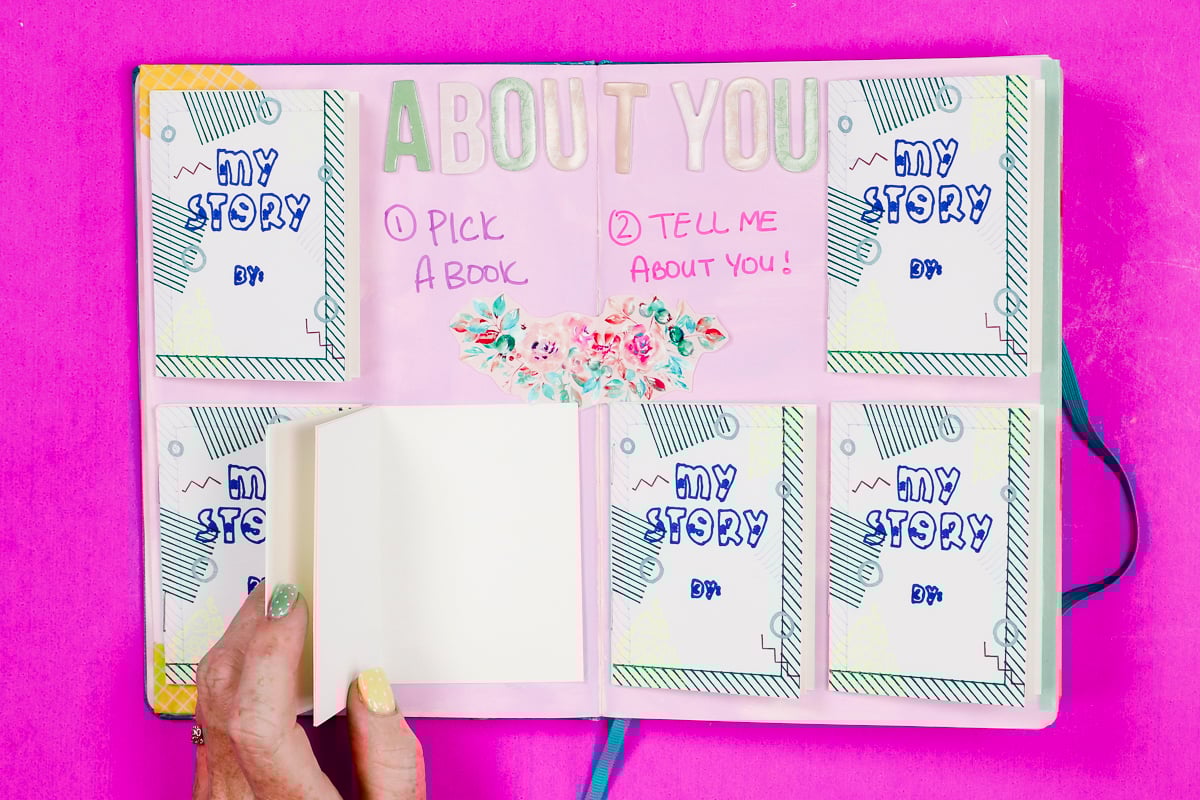
- Interactive prompts for others to fill out. Ideas for these can be found below.
Interactive Journal Pages:
Favorite books, shows, or recipes
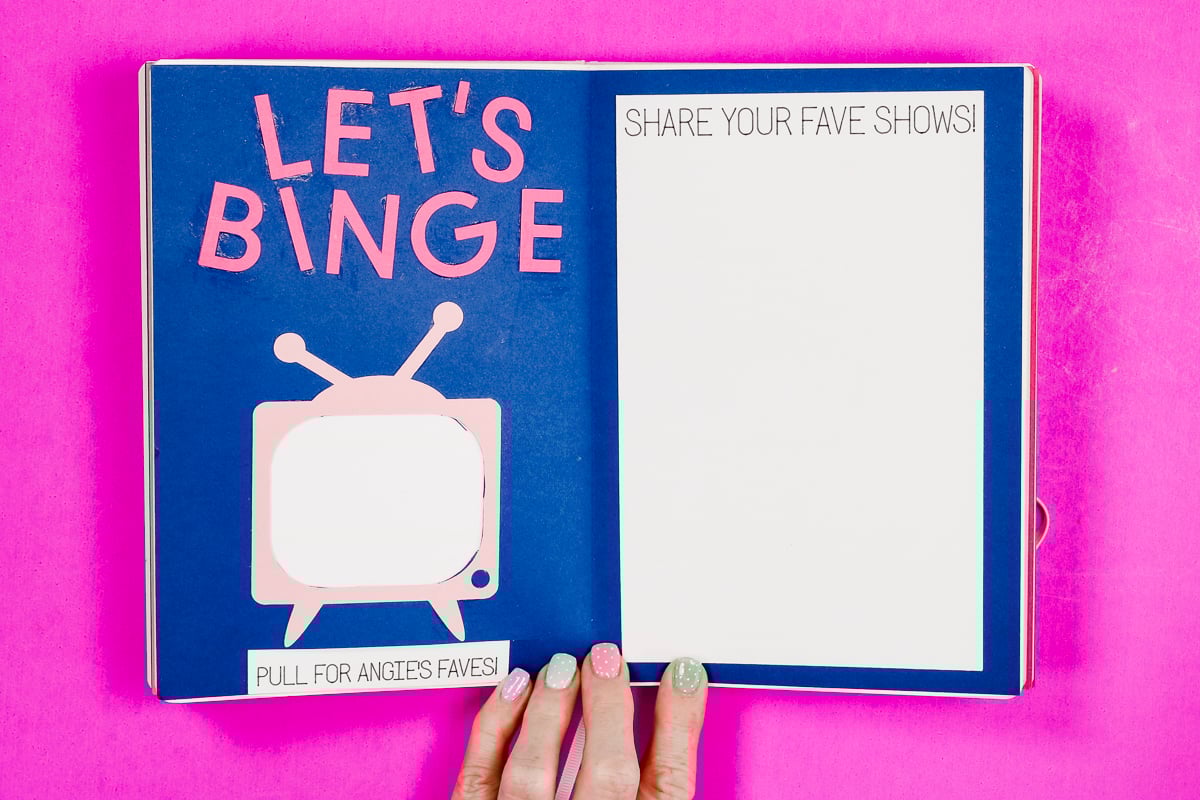
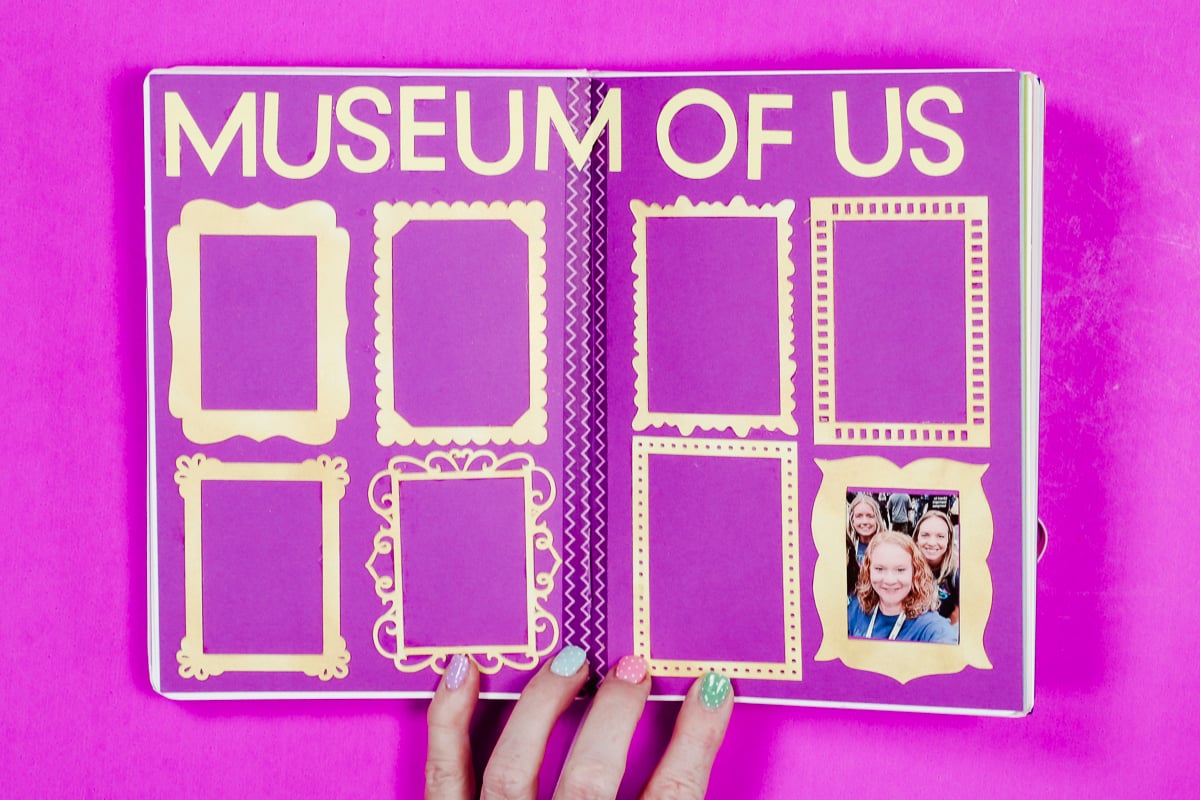
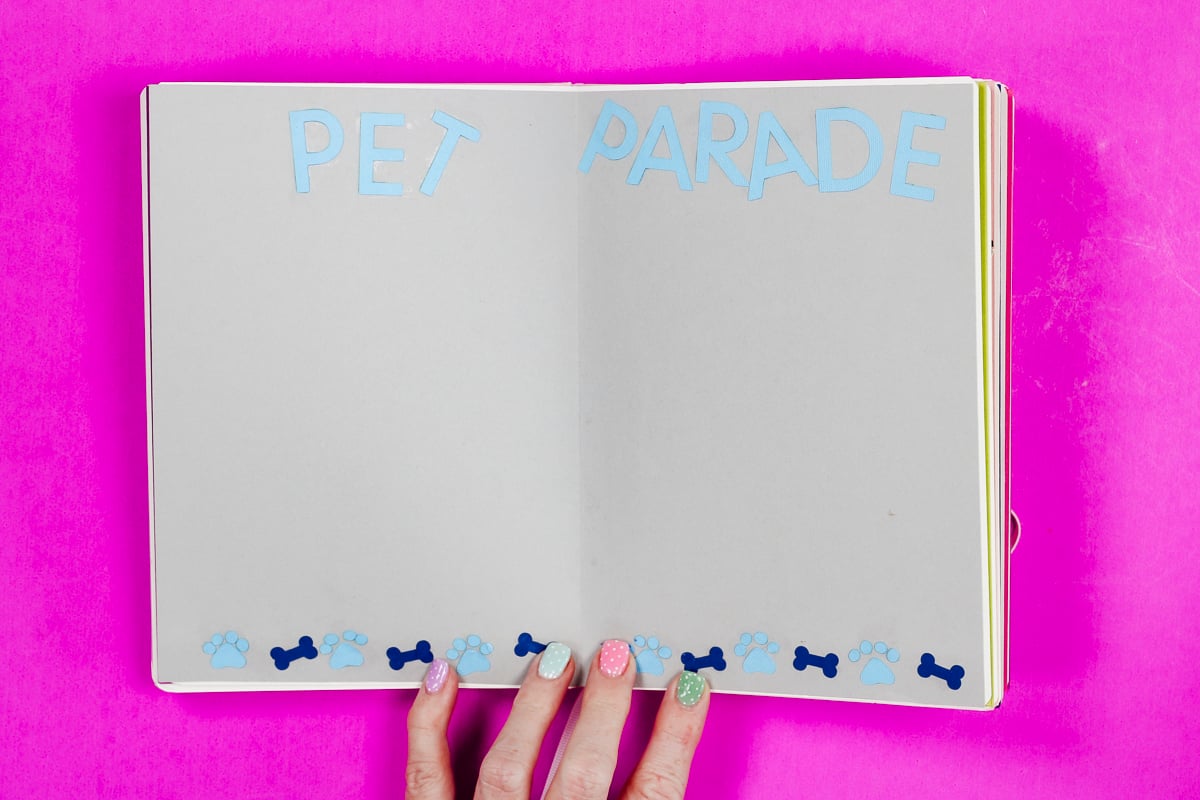
Photo pages (pets, homes, hobbies)
Sticker or washi tape collections
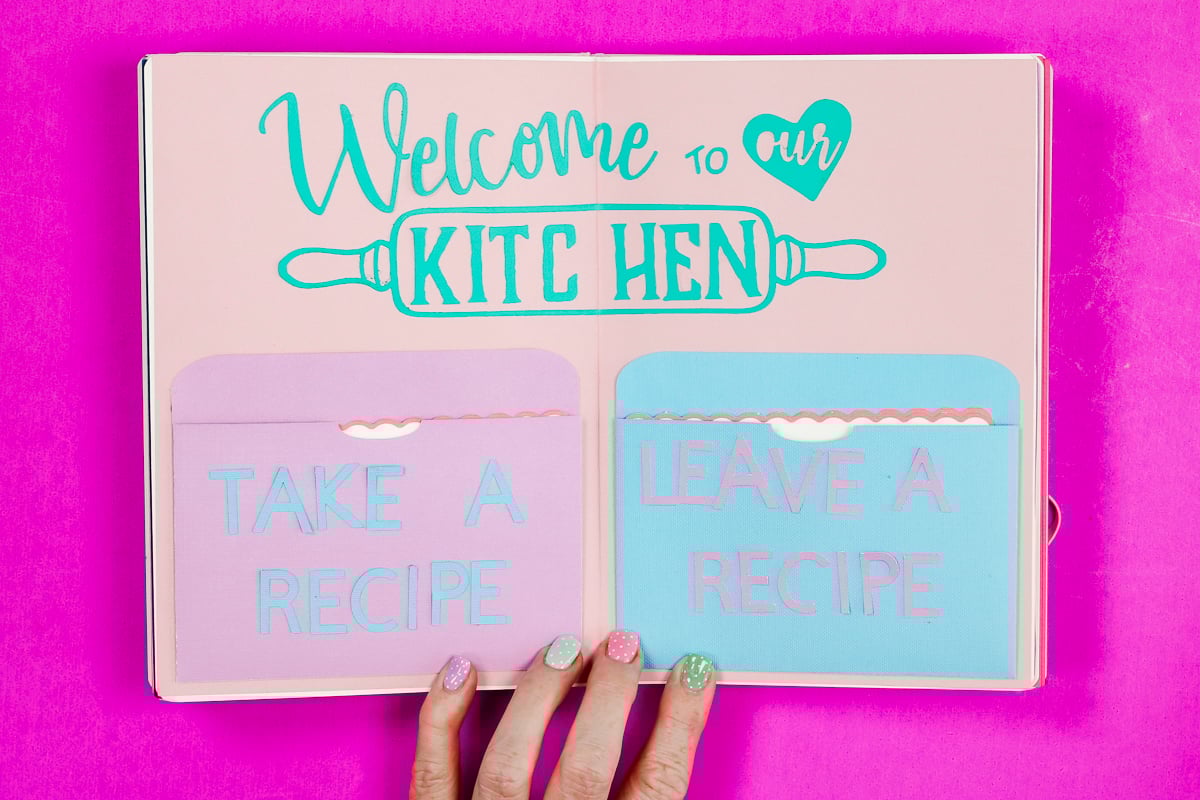
“Take one, leave one” swaps (recipes, stationery, bookmarks, stickers)
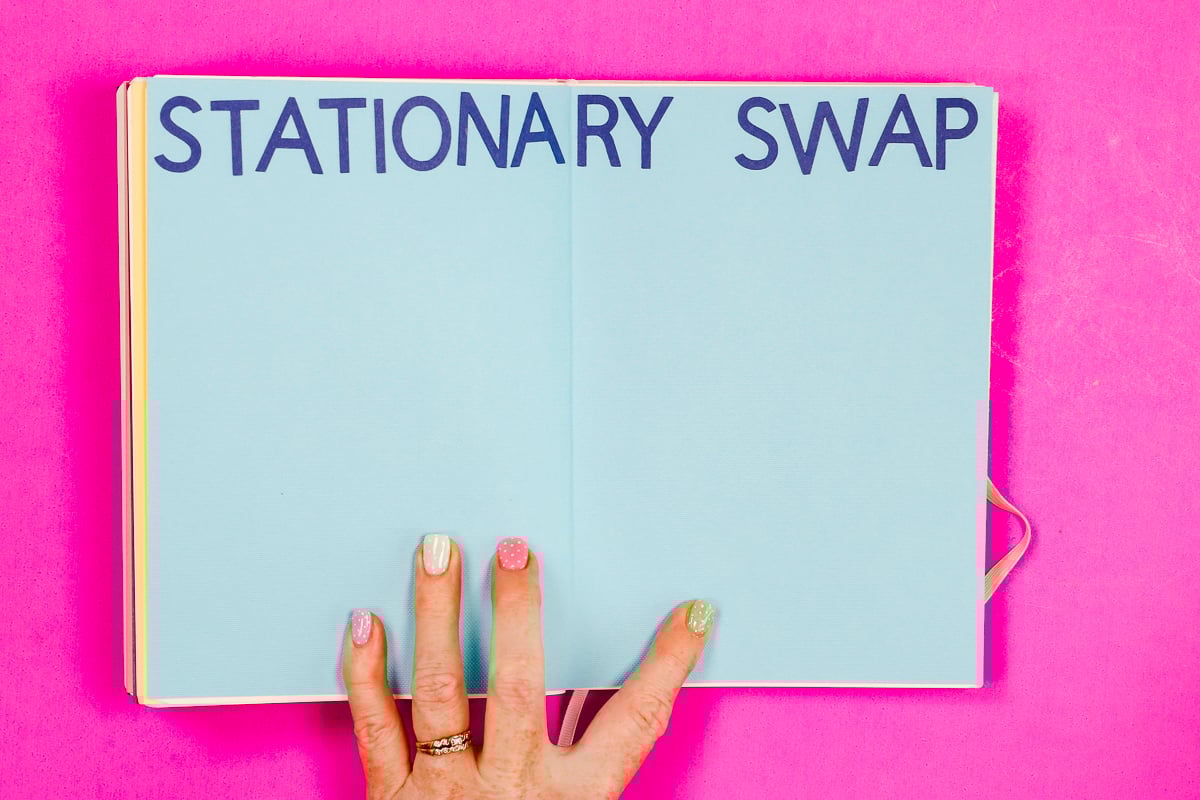
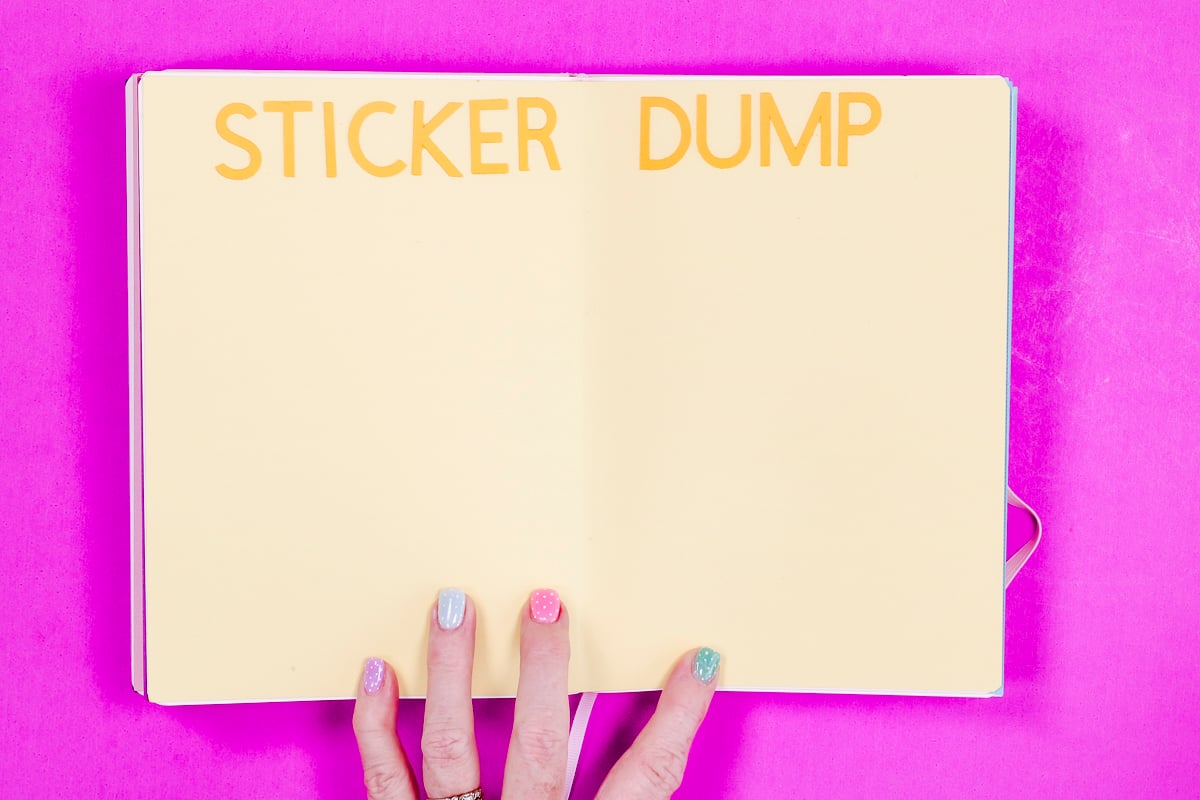
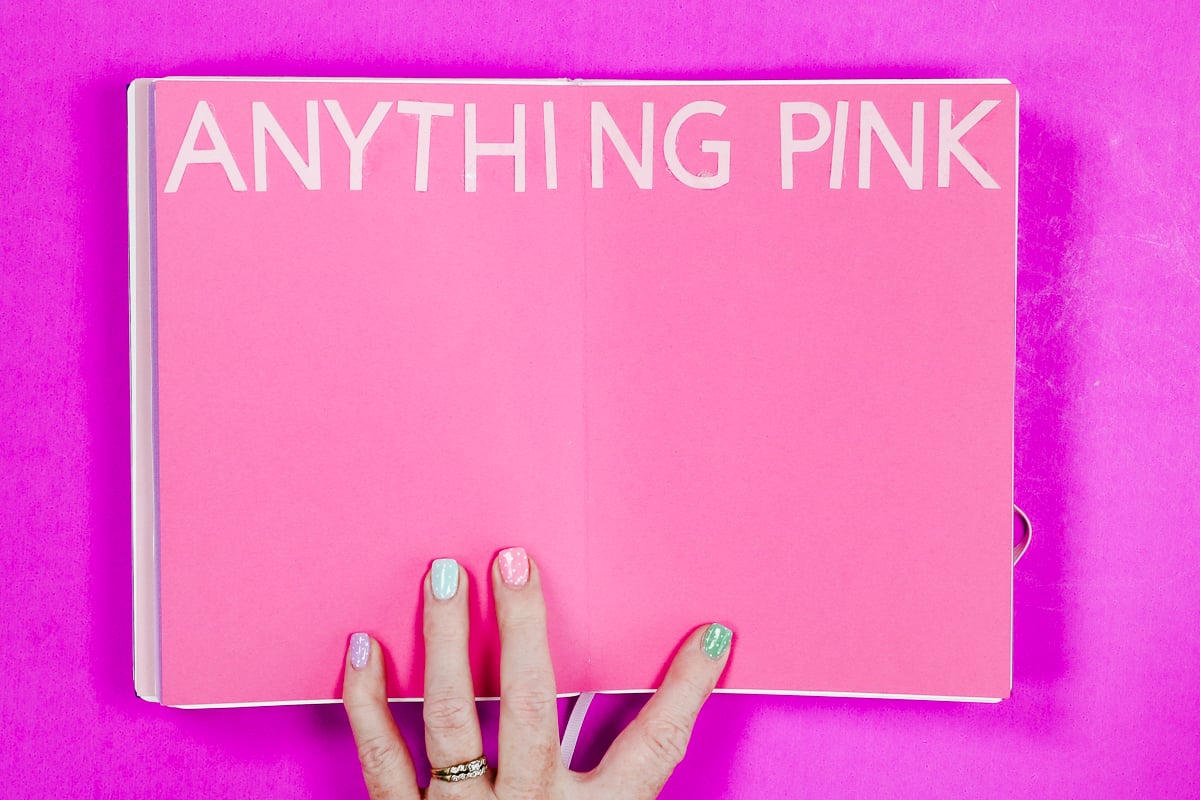
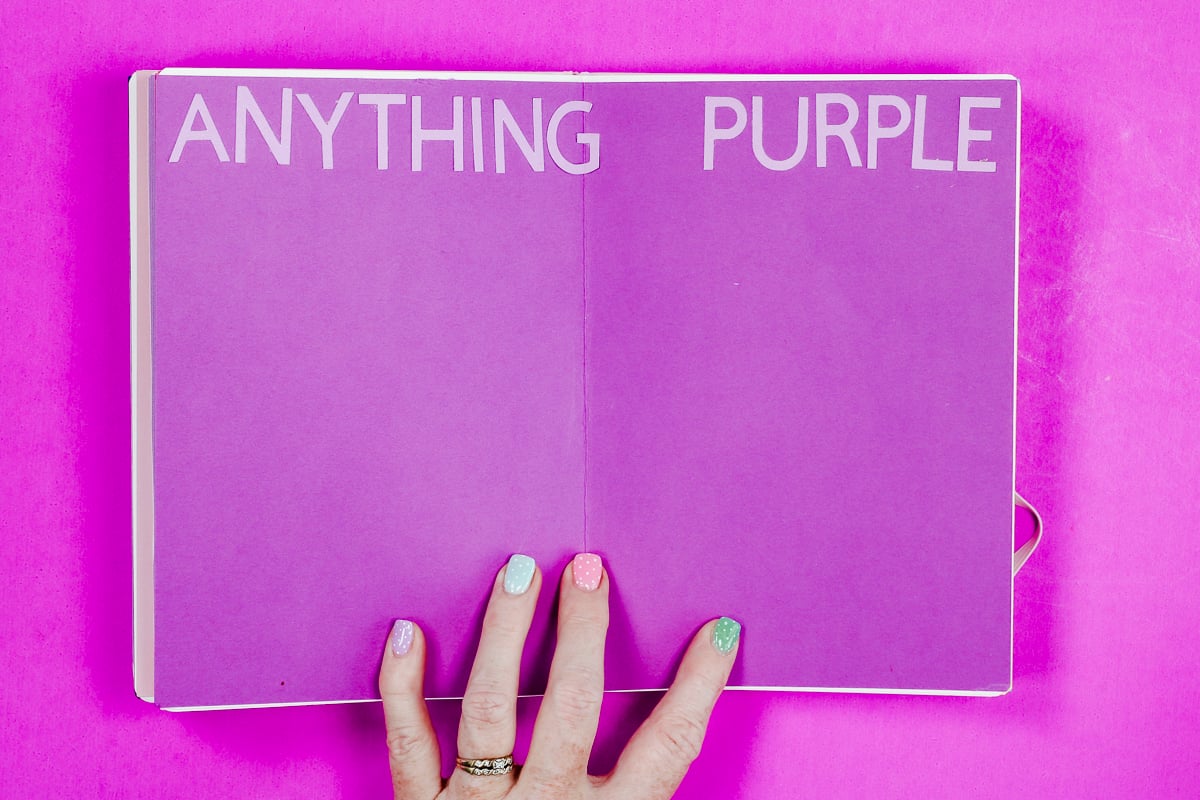
Color Dump pages
For these pages, everyone adds things that match a certain color; they can add anything: wrappers, stickers, flowers, etc.
Drink Order/Favorite Drink
Once you get started, it's easy to keep going. Don't forget to leave plenty of blank pages in the back so others can add their own ideas and designs.
This is probably my favorite part of the traveling junk journal. I can't wait to see what everyone adds to my journal when I get it back.
Step 5: Get Creative with Layouts
In the journaling world, you’ll often hear the terms “layouts” or “spreads.” These refer to how your pages are designed.
This is where you can really let your creativity shine. Don't get scared by the word ” junk ” in the name. If you're not interested in collecting items that would normally be thrown away, you can use regular scrapbooking/journaling supplies to make your journal.
It's okay to have a planned-out junk journal; I even decorated the back of my journal to make it cohesive from front to back.

I used my Cricut for a lot of my pages and had so much fun creating the layouts using scrapbook paper scraps I had on hand.
Note – If you'd like to see how I created some of my pages, I walk you through the steps in the video at the top of this post.
- Add pockets with hidden notes or letters
- Create flip-up elements or pull tabs
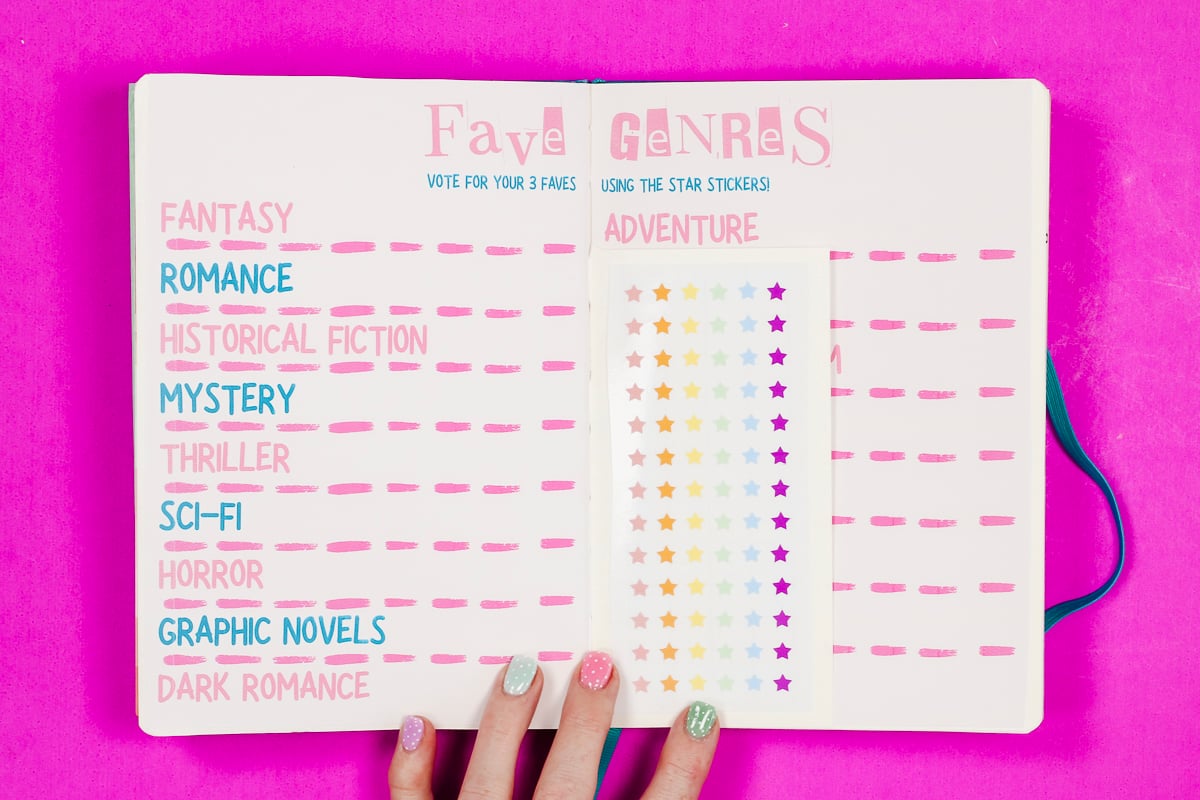
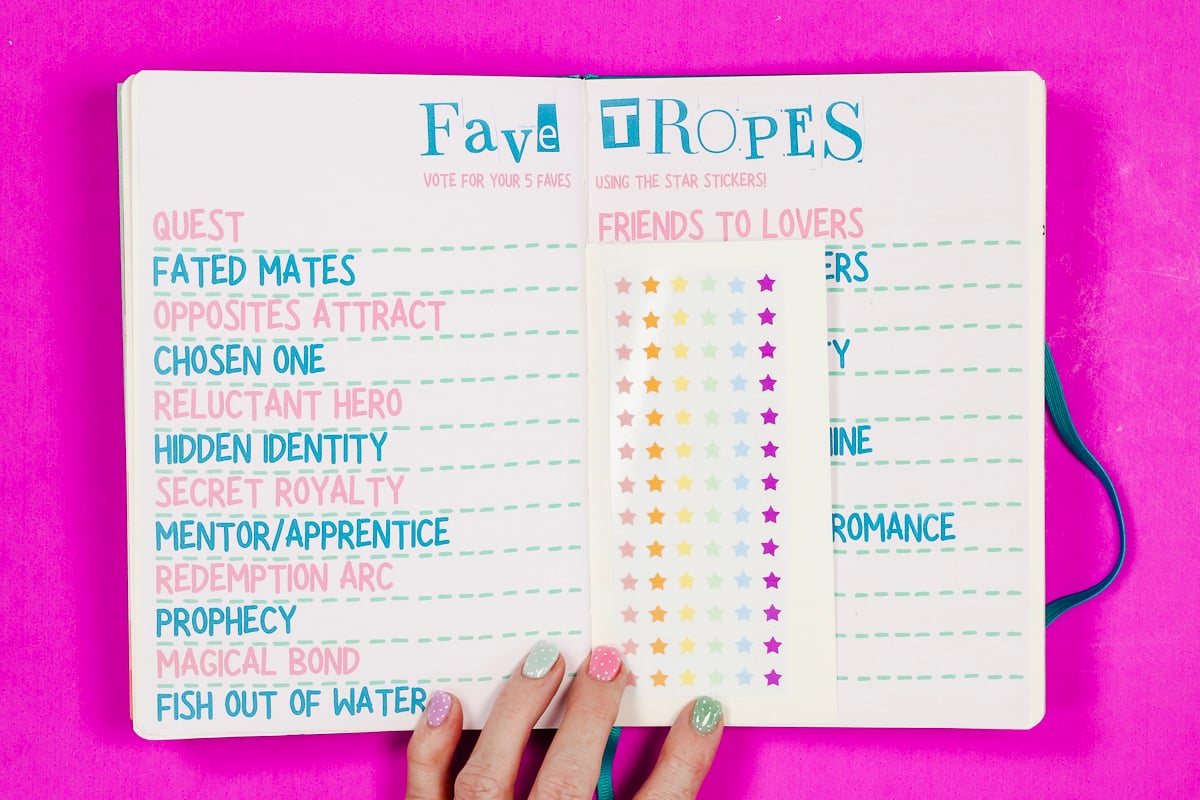
- Design interactive pages like voting charts or checklists
- Include windows, vellum overlays, or layered textures
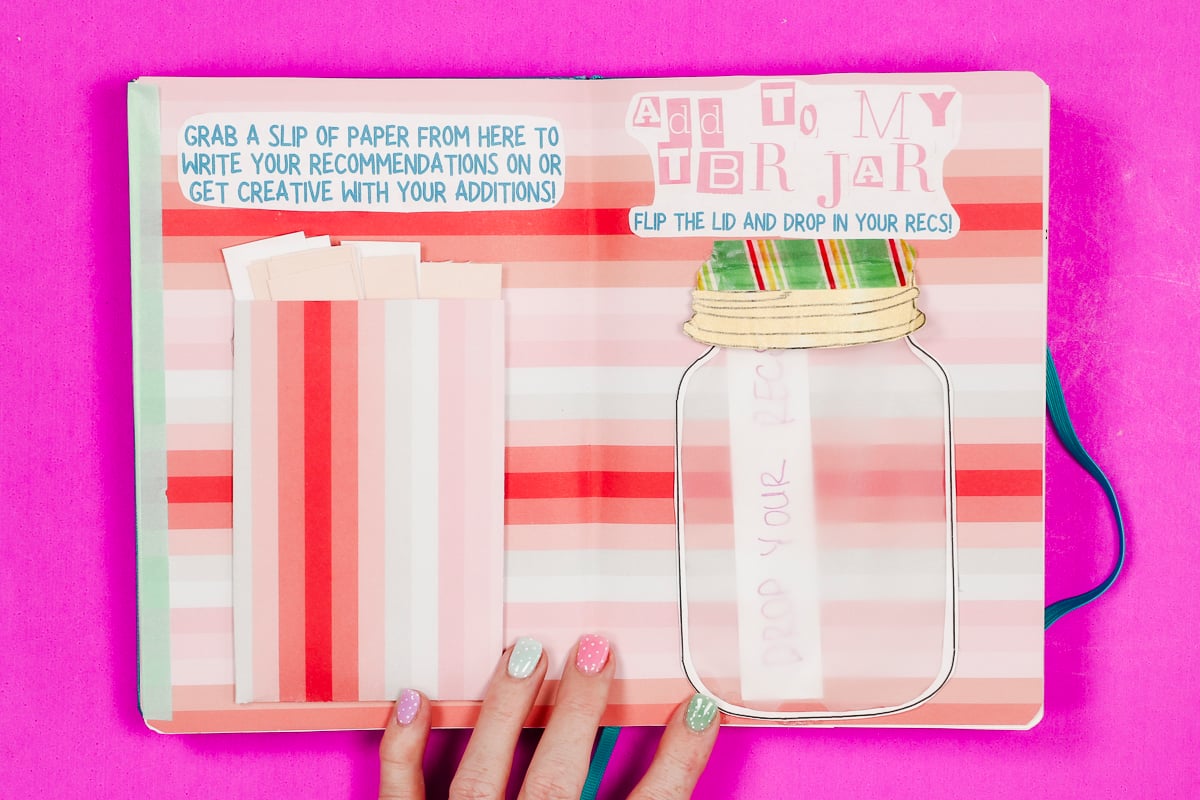
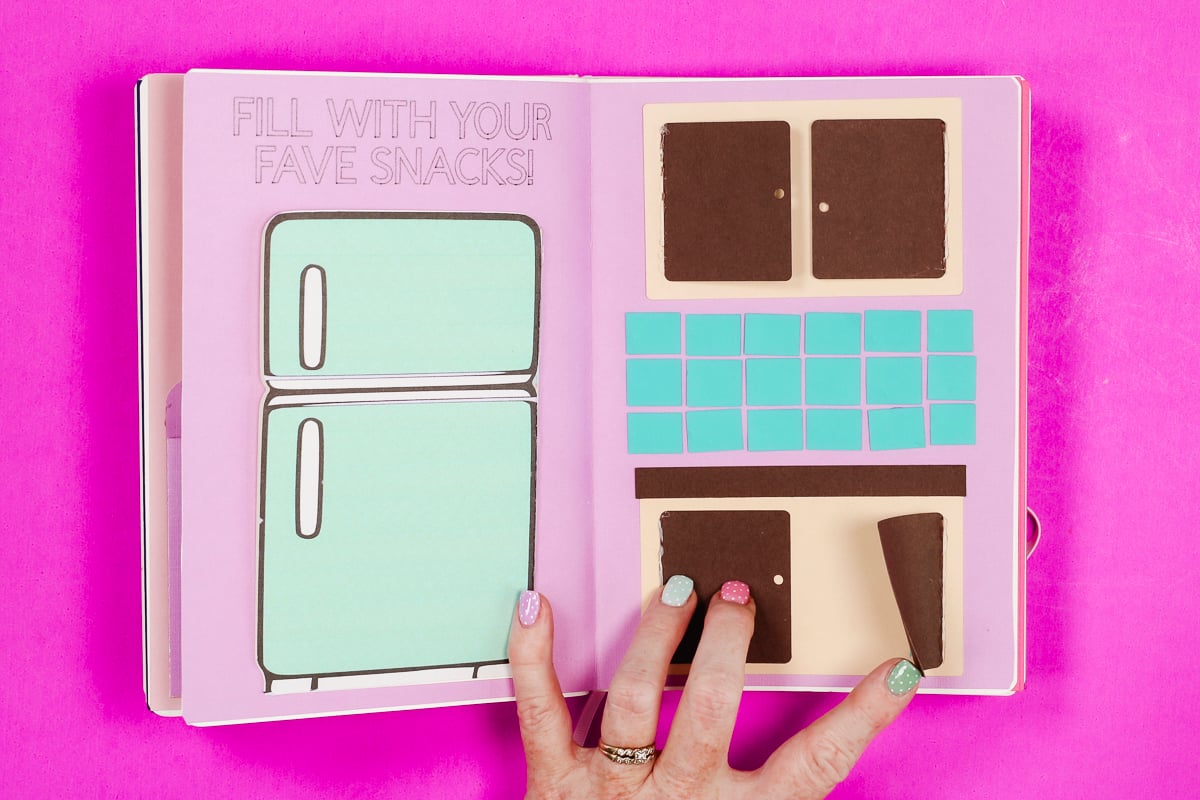
For example, you might create a “welcome mat” pocket that holds a letter for the next person, or a “fridge” page where participants list their favorite snacks.
Step 6: Send It on Its Journey
When you have your journal set up, it's time to send the journal on its journey.
As it travels from place to place, each participant will:
- Fill out the interactive pages
- Add their own layouts and creativity
- Send it to the next person in the line
The number of people in these groups can vary. I have one group that is only three of us, and the other has seven.
Smaller groups allow for more pages per person, while larger groups create a wider variety of contributions.
Tips for Success
- I like to start at the front of the journal and work my way to the back. This allows me to move the post-it notes as needed if I decide to change my layout order.
- It can also be helpful to decide at the start how many pages you want each person to have to decorate and block those off at the end of the book.
- It was important to me to use photo-safe materials so the time and effort I put into making the journal would last. Looking for things that say “archival safe” is the best way I have found to find the right materials without having to read all the small print. If you want your traveling journal to be photo-safe, make sure you include that information in the journal instructions.
- Making these journals should be fun. Remember, there is no right or wrong way, so don't overthink it. Just dive in.
- It's okay to mix planned layouts with blank pages that you or others will add elements to. You don't have to do all of the layouts the same way.
- Don't have too many rules. Remember, this journal is going to pass through many hands. Part of the fun is seeing the creativity of each person, and we don't want to limit that with a lot of rules.
- If you're worried about having too many pages or your book becoming too bulky, you can glue pages together. This will also make the pages sturdier, which is nice when we're adding a lot of elements to them.
Are You Ready to Make a Traveling Junk Journal?
Traveling junk journals are more than just a craft; they're a way to connect with others.
These journals allow us to share parts of our lives while learning about others in a fun, creative way.
I've seen people do these journals with a close group of friends or family members, and I've seen them done with strangers.
If you don't have a group to exchange journals with, jump online. Many people want to join a group and are looking for more people to get one started.
I hope I've answered any questions you have about starting your own traveling junk journal. If you have any additional questions, leave them in the comments, and I'll be happy to answer them for you.