
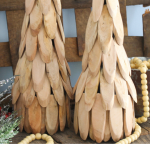
Do you want to add unique farmhouse-style decor to your home this holiday season? Then make this easy wooden Christmas tree. It's an eye-catching craft project that will look fantastic anywhere, and you will receive tons of compliments from friends and family!
If you've been around this site for any time, you know I'm all about beautiful farmhouse decor. Their natural, rustic vibes make my soul sing!
The holiday season is an ideal time for displaying rustic elements. If you love incorporating natural components into your everyday decor, displaying them during the holiday season is just as lovely.
I have a wooden Christmas tree project you can make in just minutes to go with this theme. I love how it looks in my rustic farmhouse-style decor – it fits right in.
Wooden Christmas Tree Video Tutorial
I thought a video might be the easiest way to show you how to make this wooden Christmas tree. You can even make this project by following along with the video.
If you can't watch the video or missed any steps, below are the instructions. The process is quick and simple, meaning you can complete several of these quickly!
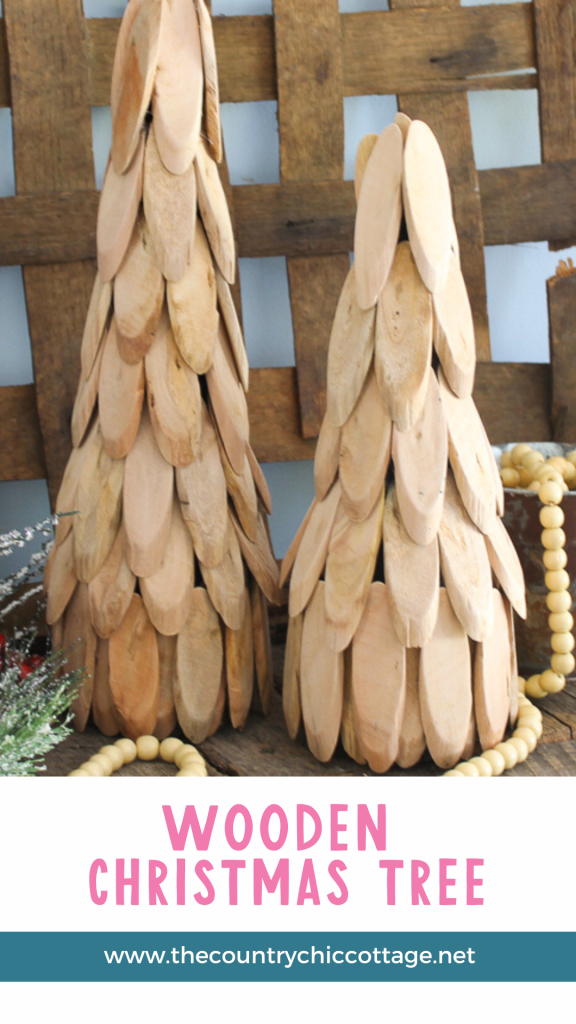
How To Make A Wooden Christmas Tree
These wooden Christmas trees are great for your home but also great for giving as DIY gifts and even selling. So grab your supplies and start making as many of these cute trees as you like!
Planning to use farmhouse-style decor? Embrace it in everything from your front porch Christmas decorations to your table centerpieces and settings and even the rest of your Christmas Decor!
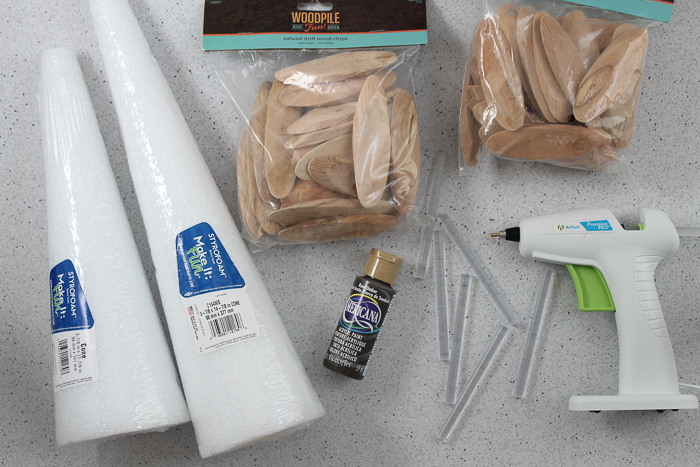
Supplies Needed To Make Wooden Christmas Tree
- Wood slices (these are from Hobby Lobby, and two trees of this size will need three bags) (here is a similar version on Amazon)
- Foam cones (any size)
- Hot glue and a glue gun
- Brown paint
- Paintbrush
Step 1: Paint Foam Cones
Paint the entire cone with the brown paint and set it aside to dry. This is just so any area that might show through your wood slices is not white.
Step 2: Hot Glue Wood Slices To Foam Cones
Then, start at the bottom and add your wood slices with hot glue. I had to do a double row at the bottom of each one to cover up the foam.
Step 3: Keep Gluing Wood Slices
Continue up the tree with single rows of wood slices hot glued into place.
Step 4: Create Wood Piece Top
Once you get to the very top row, hot glue the wood slices to each other to cover the top of the foam cone and create the cone shape out of wood pieces.
Step 5: Display Wooden Christmas Tree
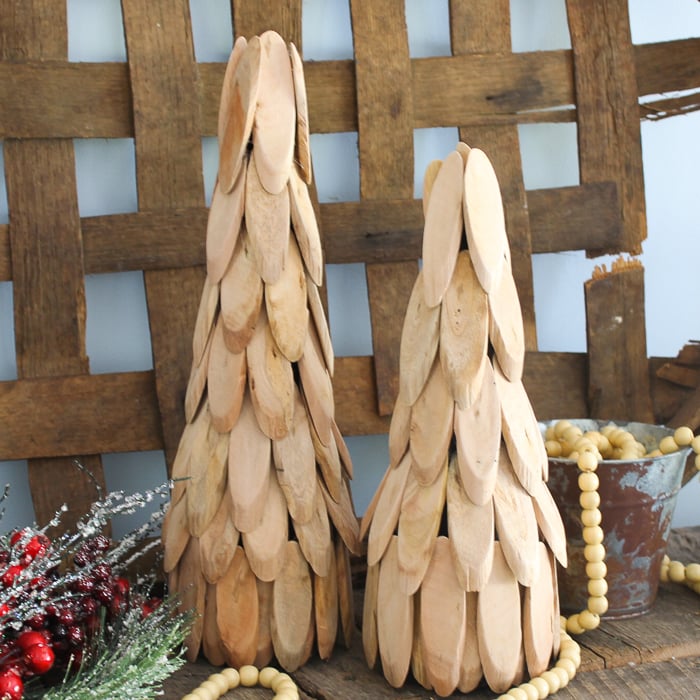
Once your glue is cool, your wooden Christmas tree is ready for display around your home!
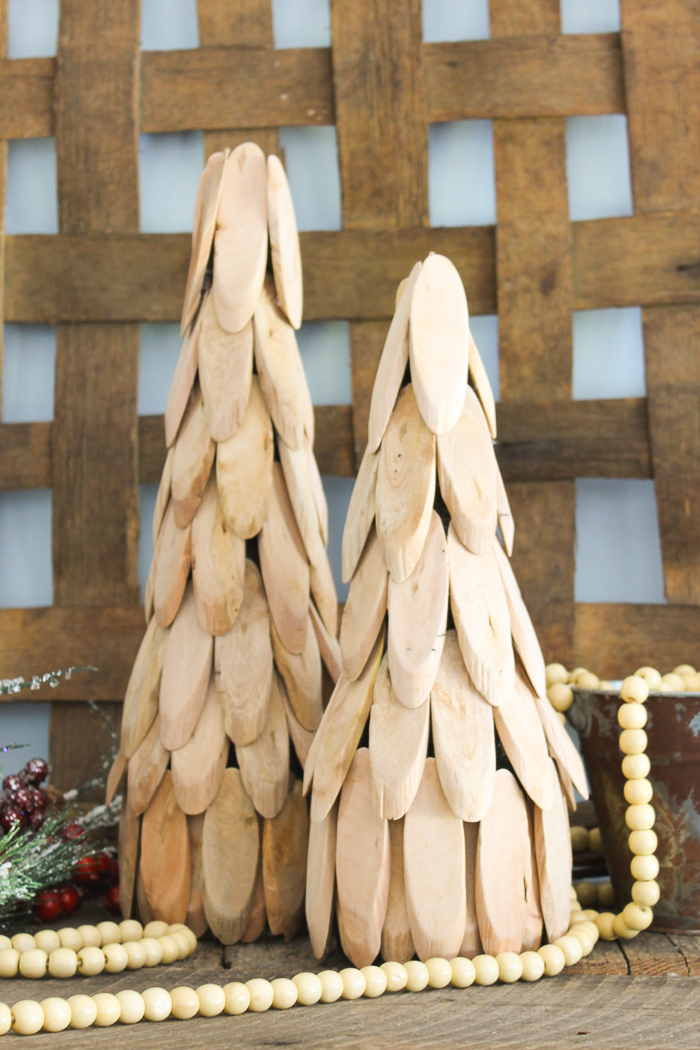
I love the rustic look of these trees and how great they look on my mantel.

You could create a wooden Christmas tree forest if you would like! After all, these are so easy to make that you might want to make a bunch!
FAQs About Wooden Christmas Tree
Here are a few common questions that I often see readers asking about making wooden Christmas trees. If you have a question, please check if I’ve already addressed it below. If you don’t see your question listed, please leave it in the comments!
Where Did You Get Your Wooden Slices?
I got my wood slices from Hobby Lobby but you can find a similar version on Amazon.
Could I Paint Or Stain The Wood Slices?
I didn't stain or paint the wood slices because I like the raw, natural look that the unpainted wood slices provide. However, if you wanted to stain the wood green (or another color), you could still get a great rustic look!
Can I Use A Different Kind Of Glue?
If you don't have hot glue, you could use craft or super glue for your wooden Christmas tree. Just make sure to adjust dry times based on the type of glue you use.
Could I Add A Star On Top?
Yes, you can! I like the look of the rustic trees on their own, but you can add a star on top if you like. – Imagine how cute a wooden star would be!
Add these wooden Christmas trees to your holiday craft list this season! You'll love seeing your handcrafted trees around your home.
7 Holiday Crafts
Did you love this wooden Christmas tree, and want more holiday crafts? Then check out the projects below!
- Christmas Jars Nativity Scene
- DIY Christmas Card Holder with the Cricut
- Country Wreath with Wood Decor
- DIY Rustic Felt Christmas Tree
- Table Decoration Ideas for Christmas
- Rustic Wooden Reindeer Centerpiece
- Rustic Christmas Ornaments from Wood Spools


These are adorable! Your photos/styling is perfection too!
Did you do a video on doing the tree’s ?? They are really neat !
yes you can watch the video in the post above!