
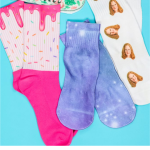
Are you ready to create customized sublimation socks? I am going to teach you how to create sublimation socks in various shapes and sizes using whatever size sublimation printer you own. If you're new to sublimation, make sure you check out my Beginner's Guide here. Then grab your supplies to make your own custom socks in minutes!
Sublimation Socks Video Tutorial
Have you ever seen those customized socks with faces all over them? It could be people's faces or pets. I'm going to teach you how to make those and others today. Just click play on the video below to watch me create a variety of socks with a sublimation printer.
Can't watch the video or miss some of the information? You can follow along below as well!
How To Make Sublimation Socks
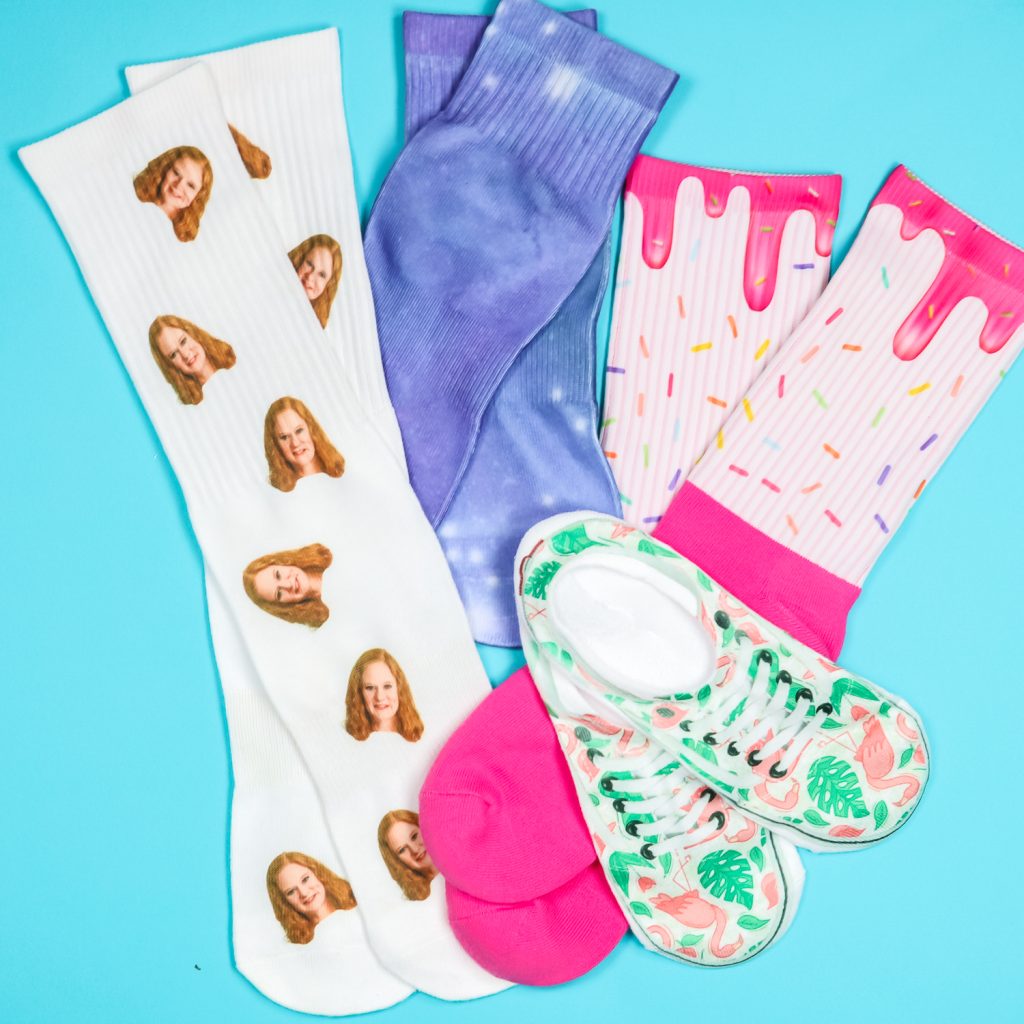
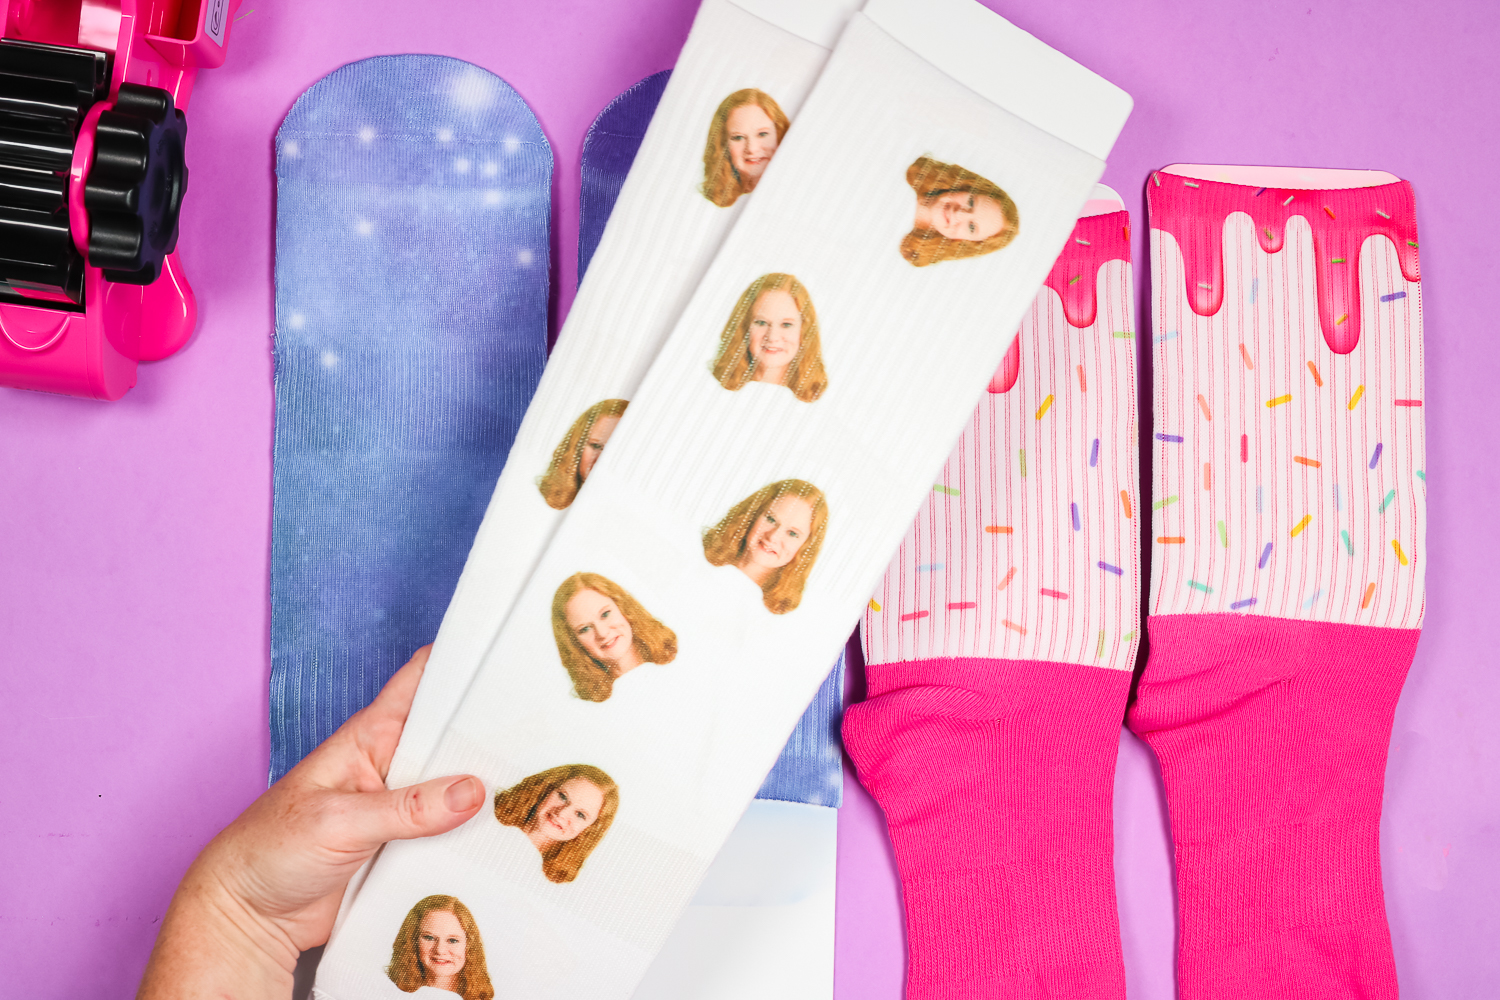
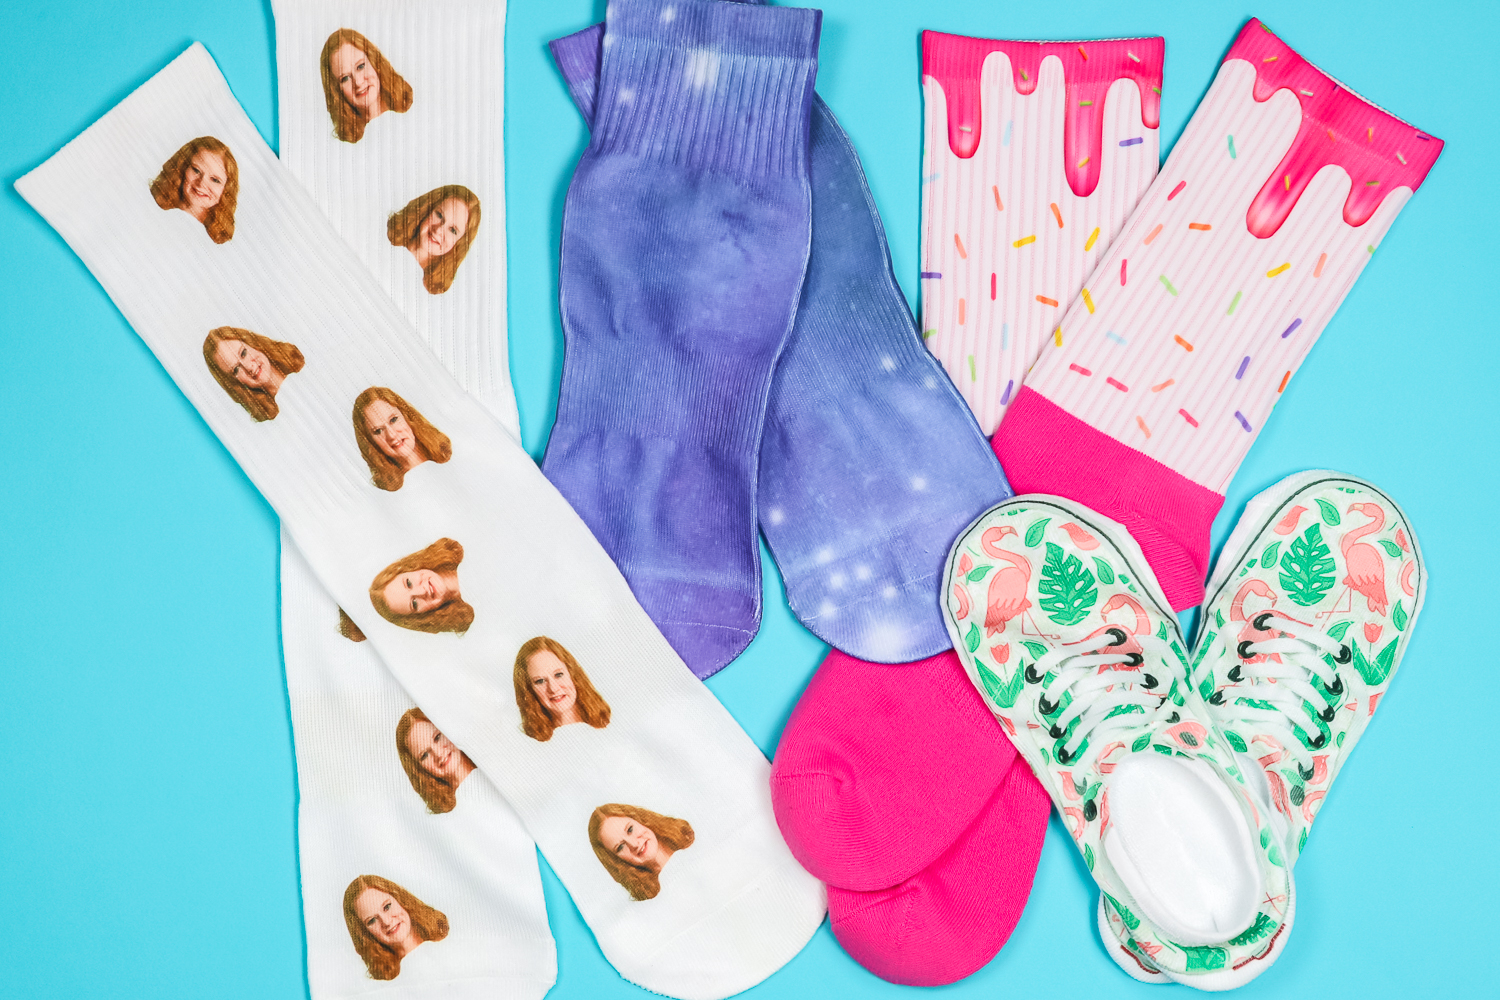
As I mentioned earlier, I will show you how to create various types of sublimation socks. Specifically, I'm going to show you how to make a pair of galaxy socks, donut-themed socks, a pair of socks that look like sneakers, and a pair with faces all over it.
You can recreate all of these socks using the supplies listed below, or you can use today's tutorials as inspiration for creating your own socks.
Let's get sublimating!
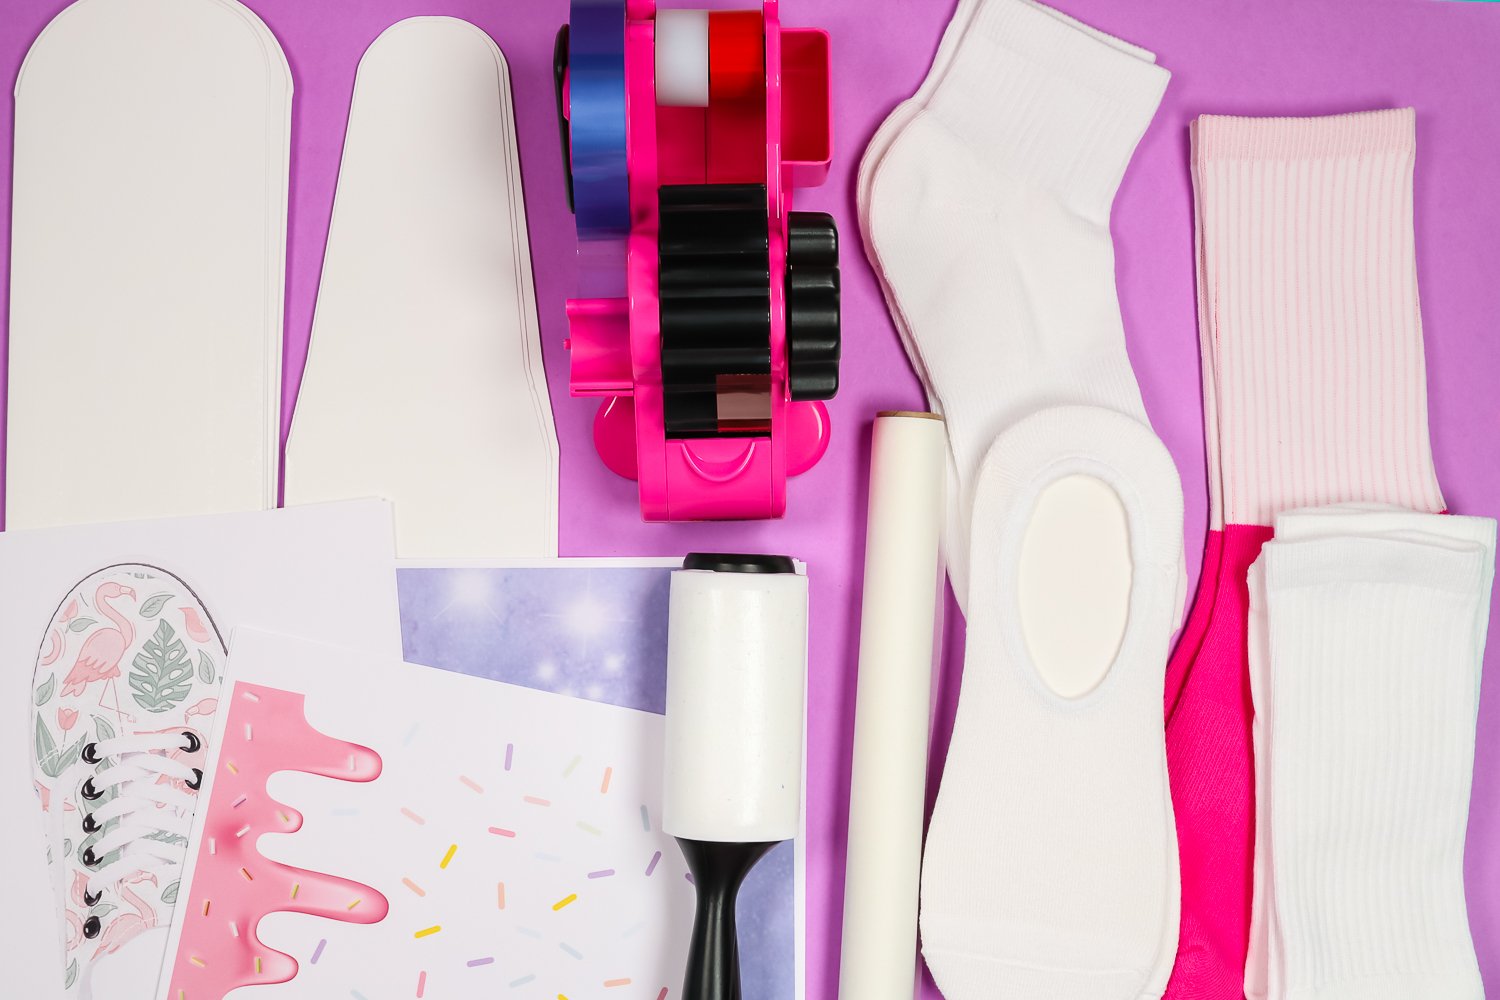
Supplies Needed For Sublimation Socks
Supplies Used:
Blanks Used:
Forms Used:
Designs Used:
- Donut
- Sneaker Design
- The design I used in this tutorial is no longer available. However, here is a similar design that you can use instead.
- Galaxy
How To Find Sublimation Sock Blanks
I have looked at several different brands of sublimation socks and even purchased polyester socks, but the truth is, I haven't liked any of them. They're not good socks, and I personally wouldn't wear them, so I didn't want to recommend them.
Recently, I found the Silky Socks brand of sublimation sock blanks. They offer a variety of different socks, some of which feature cotton bottoms, allowing you to enjoy the benefits of a cotton sock combined with a polyester sublimatable area that can be customized. Even the socks that are completely polyester are good, thick socks. I would actually wear these socks, which is why I decided to teach you how to customize socks with sublimation.
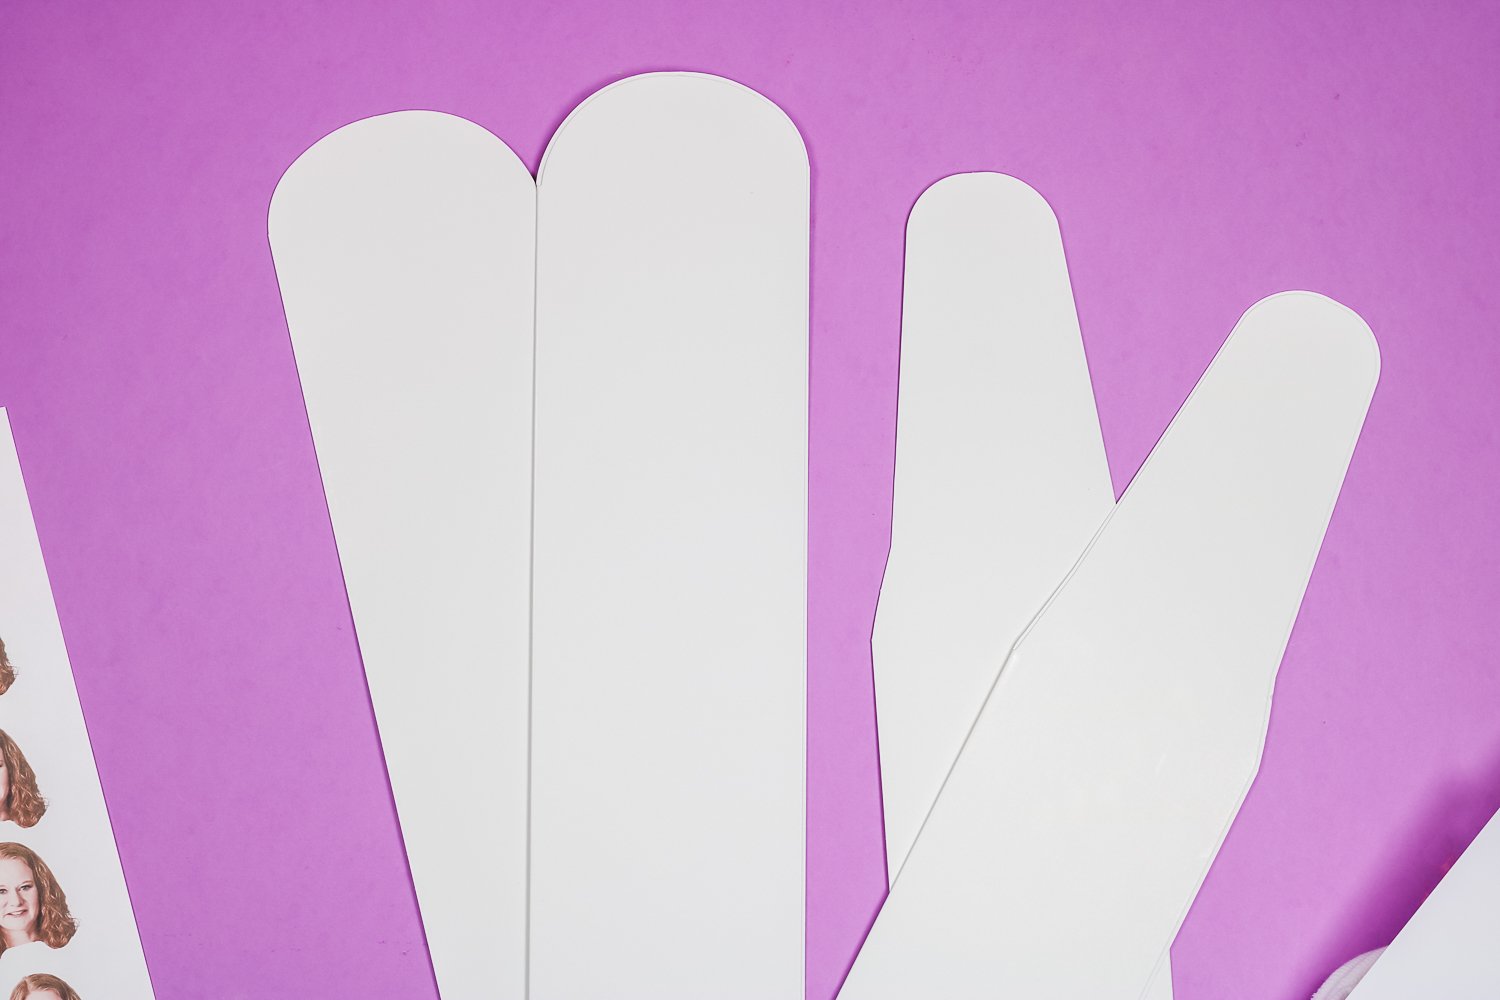
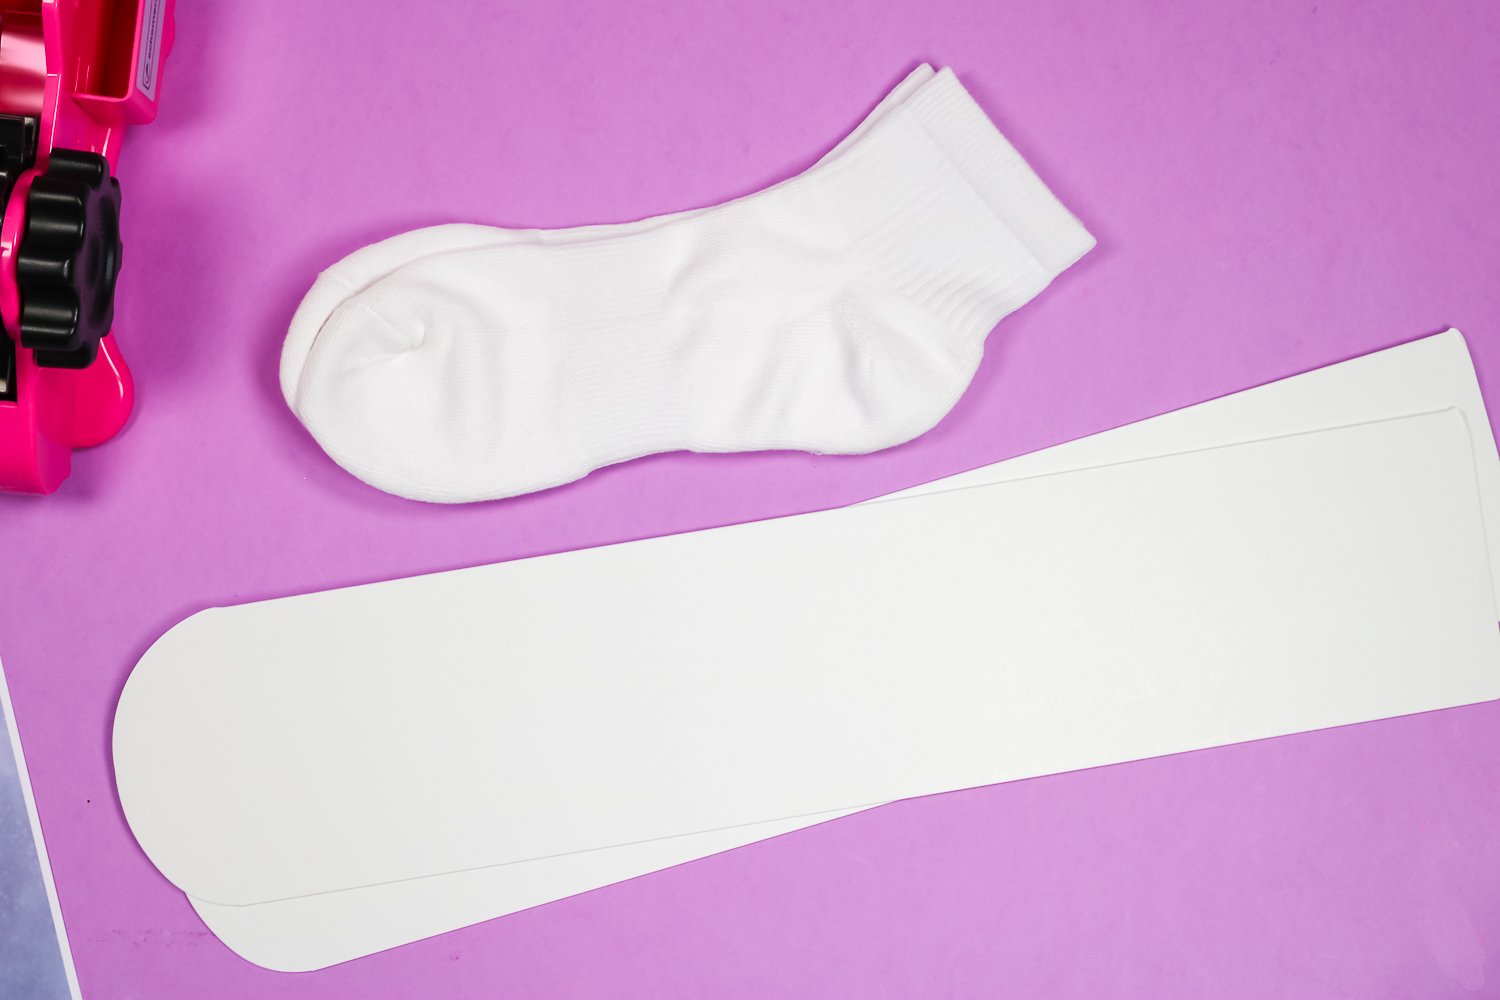
Sublimation Sock Form
To create sublimation socks, you will need a sock form. Some socks come with a form already inside, but others don't. Make sure you check the description for your socks, and if you need to purchase a form separately, get that before you begin.
Of the socks I purchased, only the no-show socks came with the insert inside. The inserts I list above can be used for multiple projects, they are not just one-time use. Depending on the sock size and shape, different inserts are available for use.
I will be using a long one with a rounded end; the other is tapered and works well with crew socks. You want to ensure that you leave the form in the sock for at least 30 seconds after removing it from the heat.
Sublimation Sock Designs
For my socks, I chose a print for each type of sock, based on its style. I am limited in size by my sublimation printer. The largest size I can print is 8.5 x 14 inches. My longer tube socks are too long for my printer without having to try to match up the print.
For the long socks, I chose to create a fun all-over face design. You can do this with people, pets, sports, whatever. For the other socks, I used a ruler to measure the sock and then resized the design to fit.
Using Canva To Create Sublimation Designs
I am going to use Canva to design socks with faces on them. Open Canva and create a design in a custom size. Set the size to match the size of the sublimation paper you have for your printer. Upload the picture you want to use, add it to the design, and then crop it to the desired portion of the image.
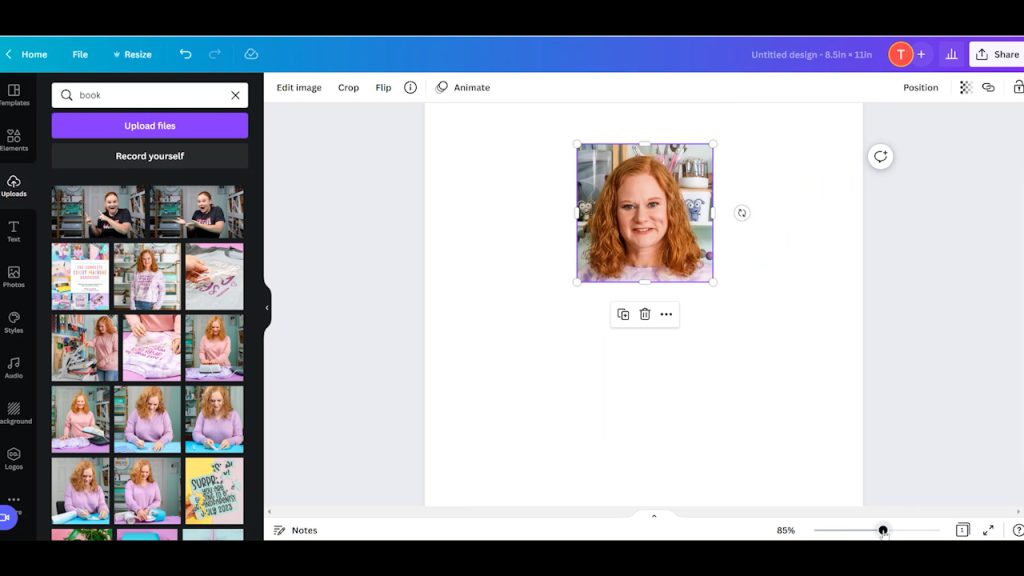
Click “Edit Image” and then click “Background Remover.” This will attempt to remove the background from your image. Depending on the background, you may need to clean it up further. To do that, you can click the eraser and adjust the brush size and erase whatever you don't want to have printed.
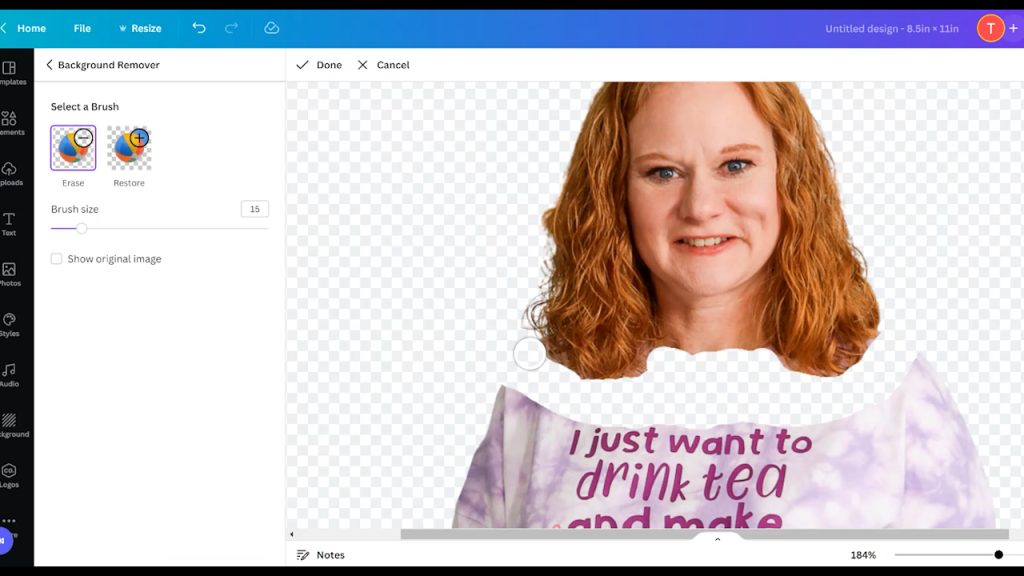
Once you're done erasing, click “Done” and then “Apply”. Once you have cleaned up the image, you can resize it to any desired size. I am resizing my image to 2×2. You can have different-sized images and make your design however you like. From there, we can duplicate the image to fill up the canvas.
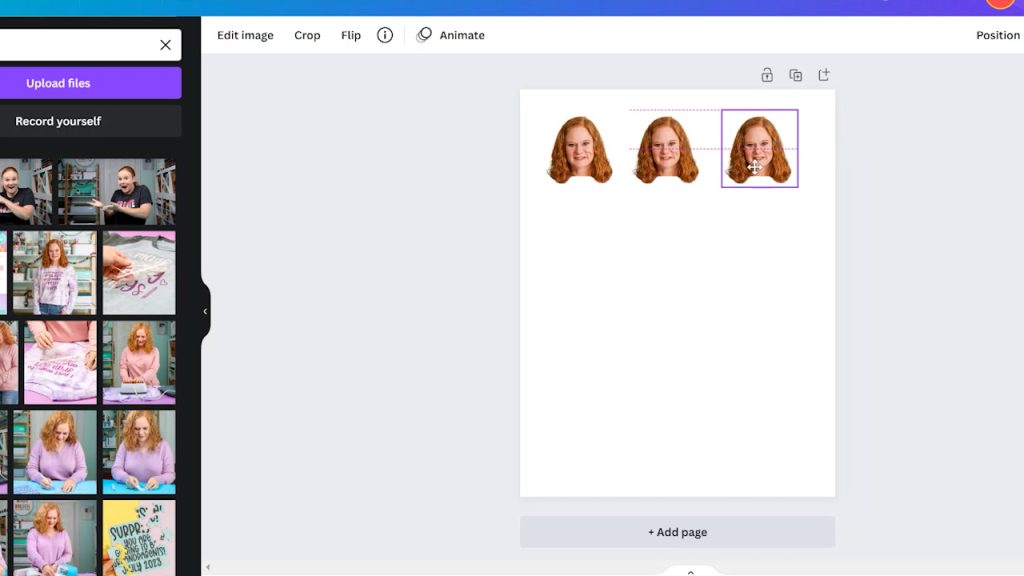
Once the paper is filled up, name your design, and then download it as a PNG file. If you have the premium version of Canva, you can download it with a transparent background and then click “Download”. You'll use a different program to print the design from your computer. You can see more about printing to your sublimation printer here.
Mirror Your Image
If your image has any directional elements, make sure to mirror it before printing. With my no-show socks, I wanted them to look like a pair of shoes, so I mirrored only one of the images before printing.
How To Create Sublimation Socks
Use your sublimation printer to print out all your designs. You will need to lint-roll all of your socks to prepare them for the sublimation print. If you're concerned about moisture, I recommend pre-heating the socks before adding the sublimation print.
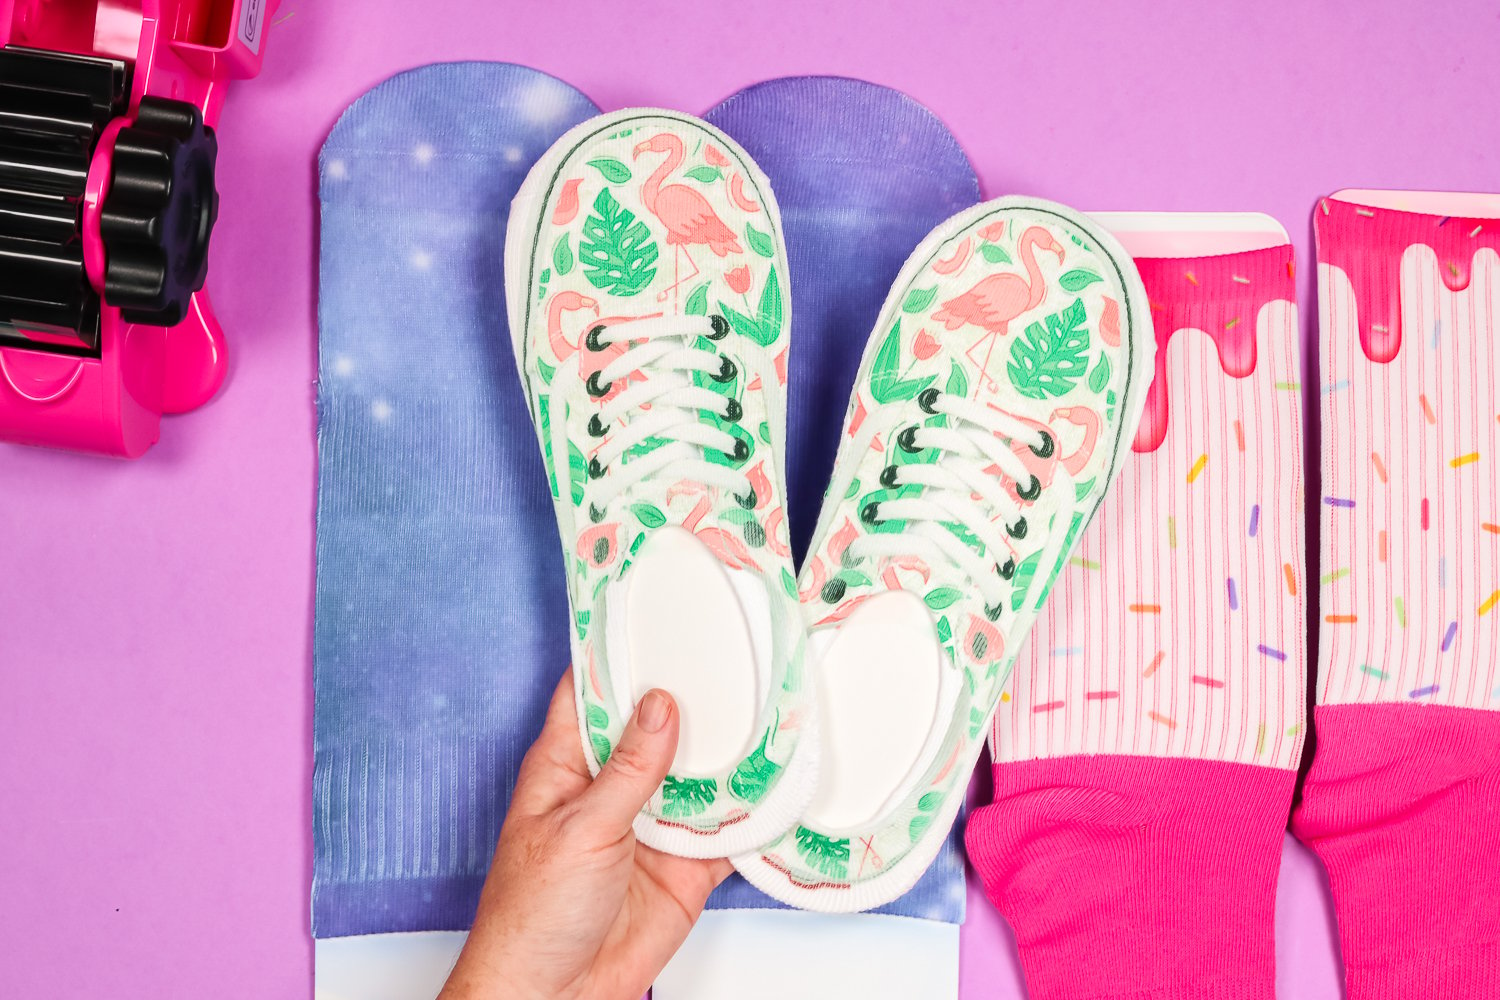
Sublimation No-show Socks
Print your sublimation design and ensure the socks are smooth and lined up on the form. With these socks, I am only sublimating the top of the sock. I mirrored the design for one sock so that they would look like a matching pair of shoes.
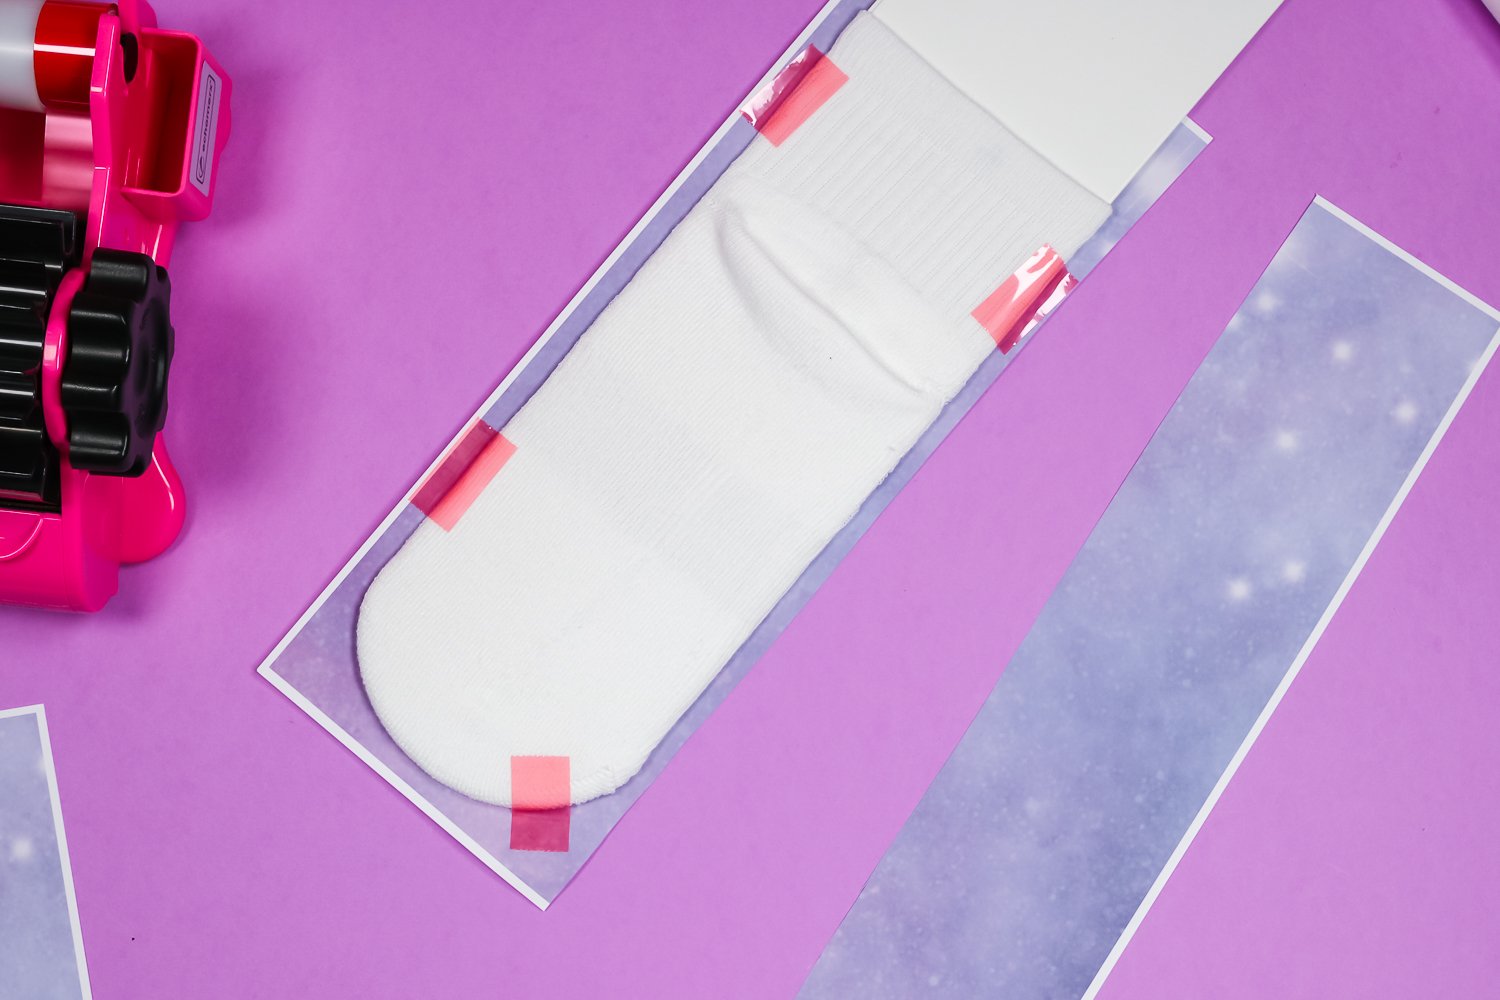
Place the sock, with the form inside, top-side down, on the printed image. The design won't fit perfectly on the sock, so I will line it up by eye.
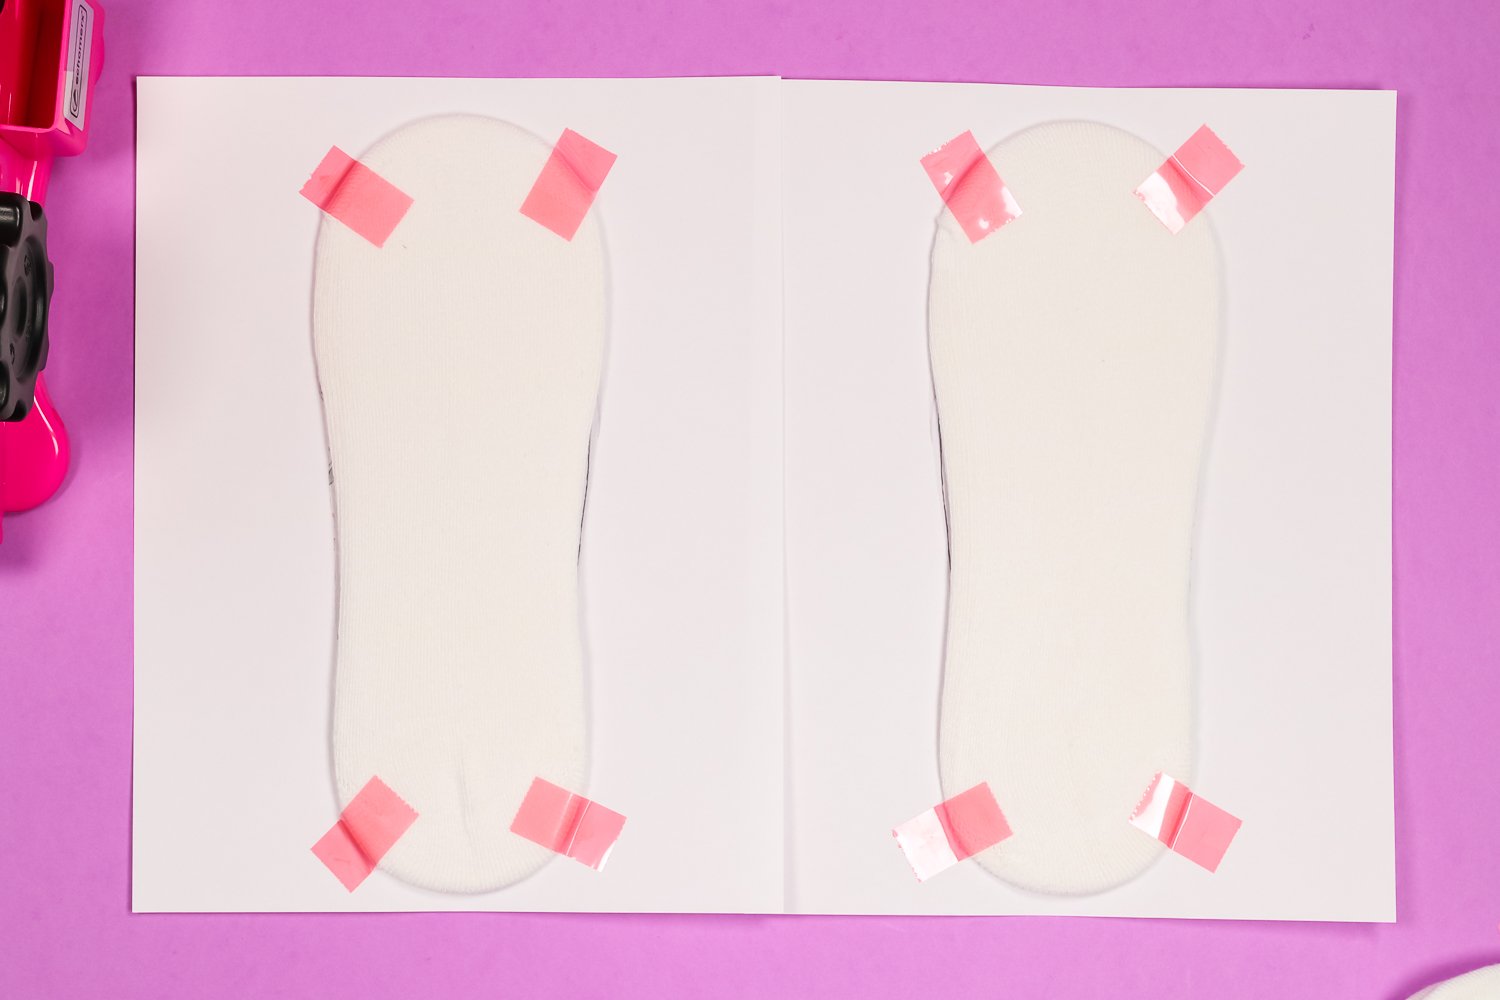
Use heat-resistant tape to hold the socks in place. I am using my AutoPress and pressed these at 400 degrees for about 40 seconds with medium pressure. Add protective paper to both the top and bottom of your socks, and when the time is up, peel the design off while it's still hot.
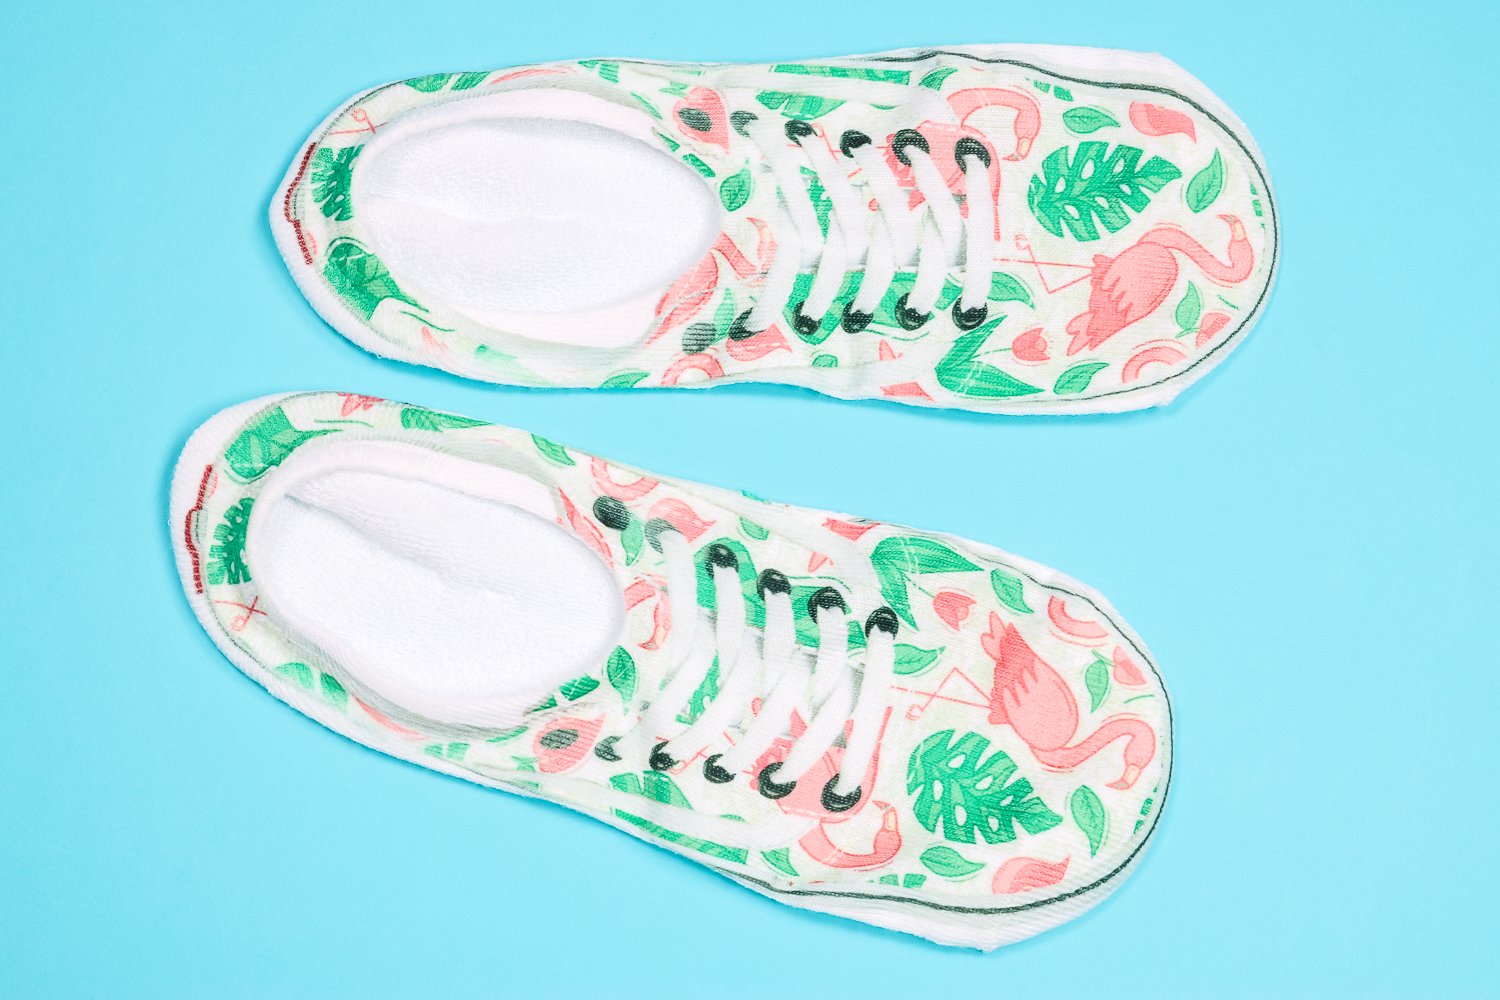
As you can see, my design doesn't extend completely edge to edge, but when viewed from the top, you'll see a cute Converse shoe design.
Sublimation Crew Socks
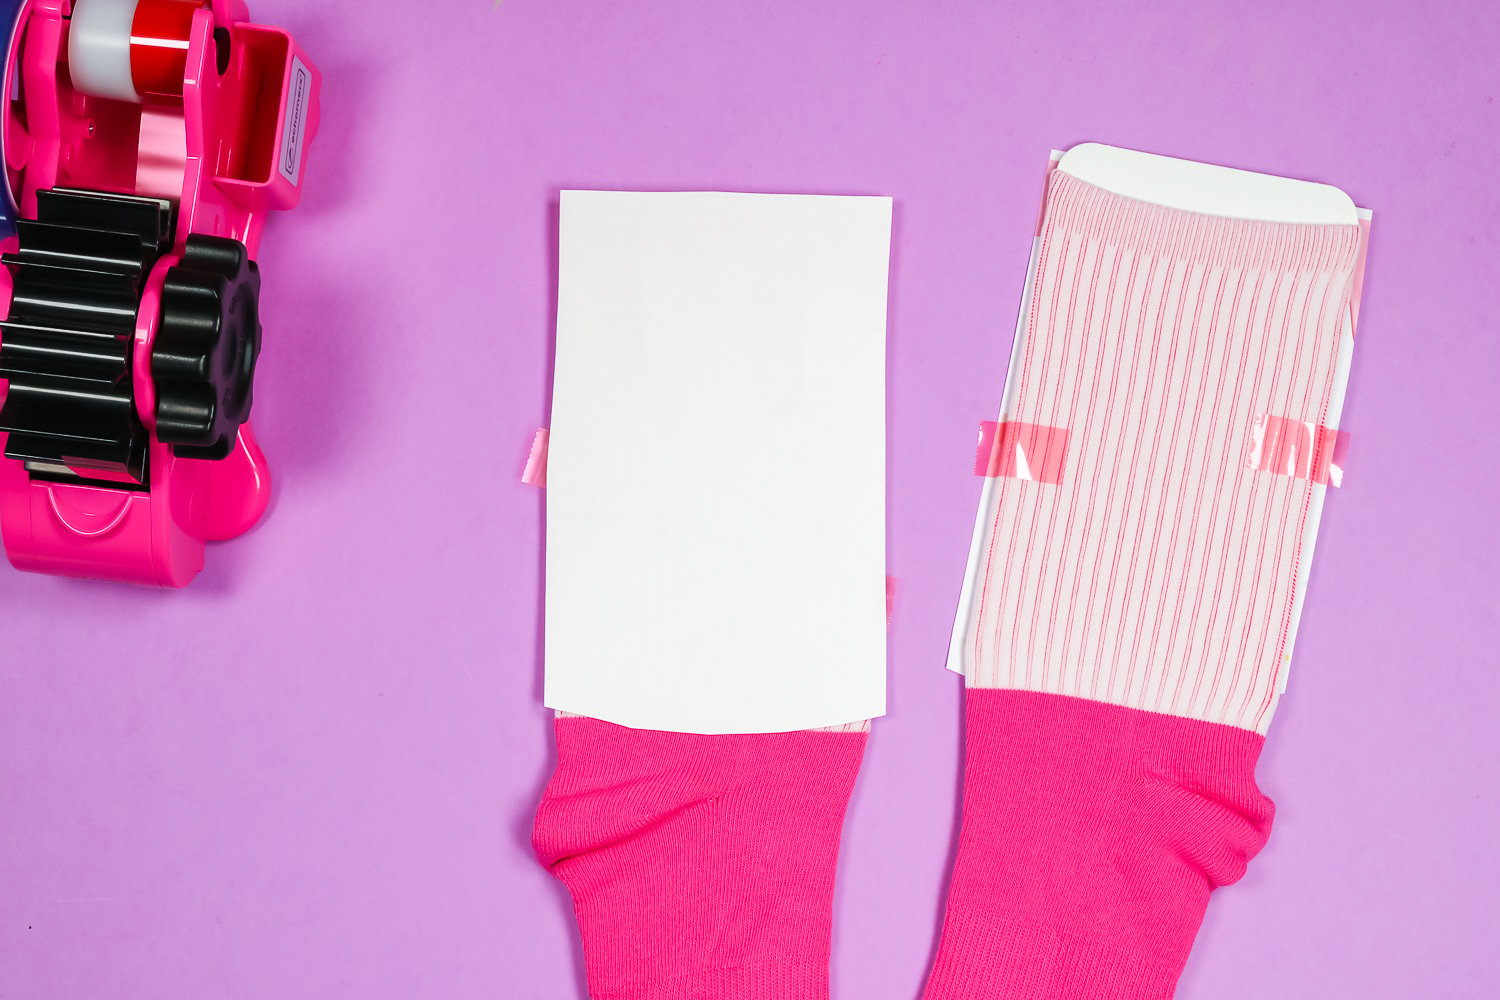
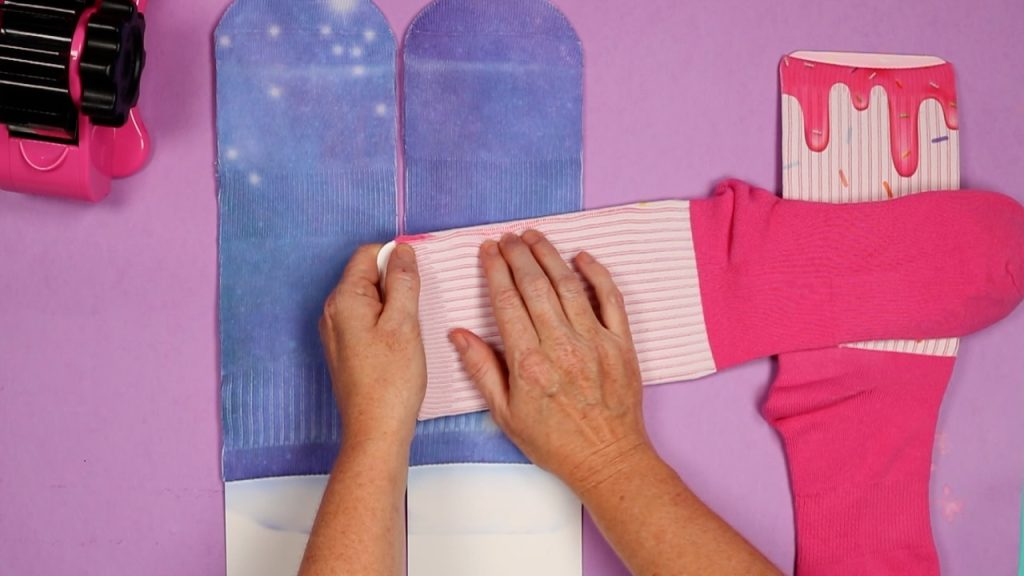
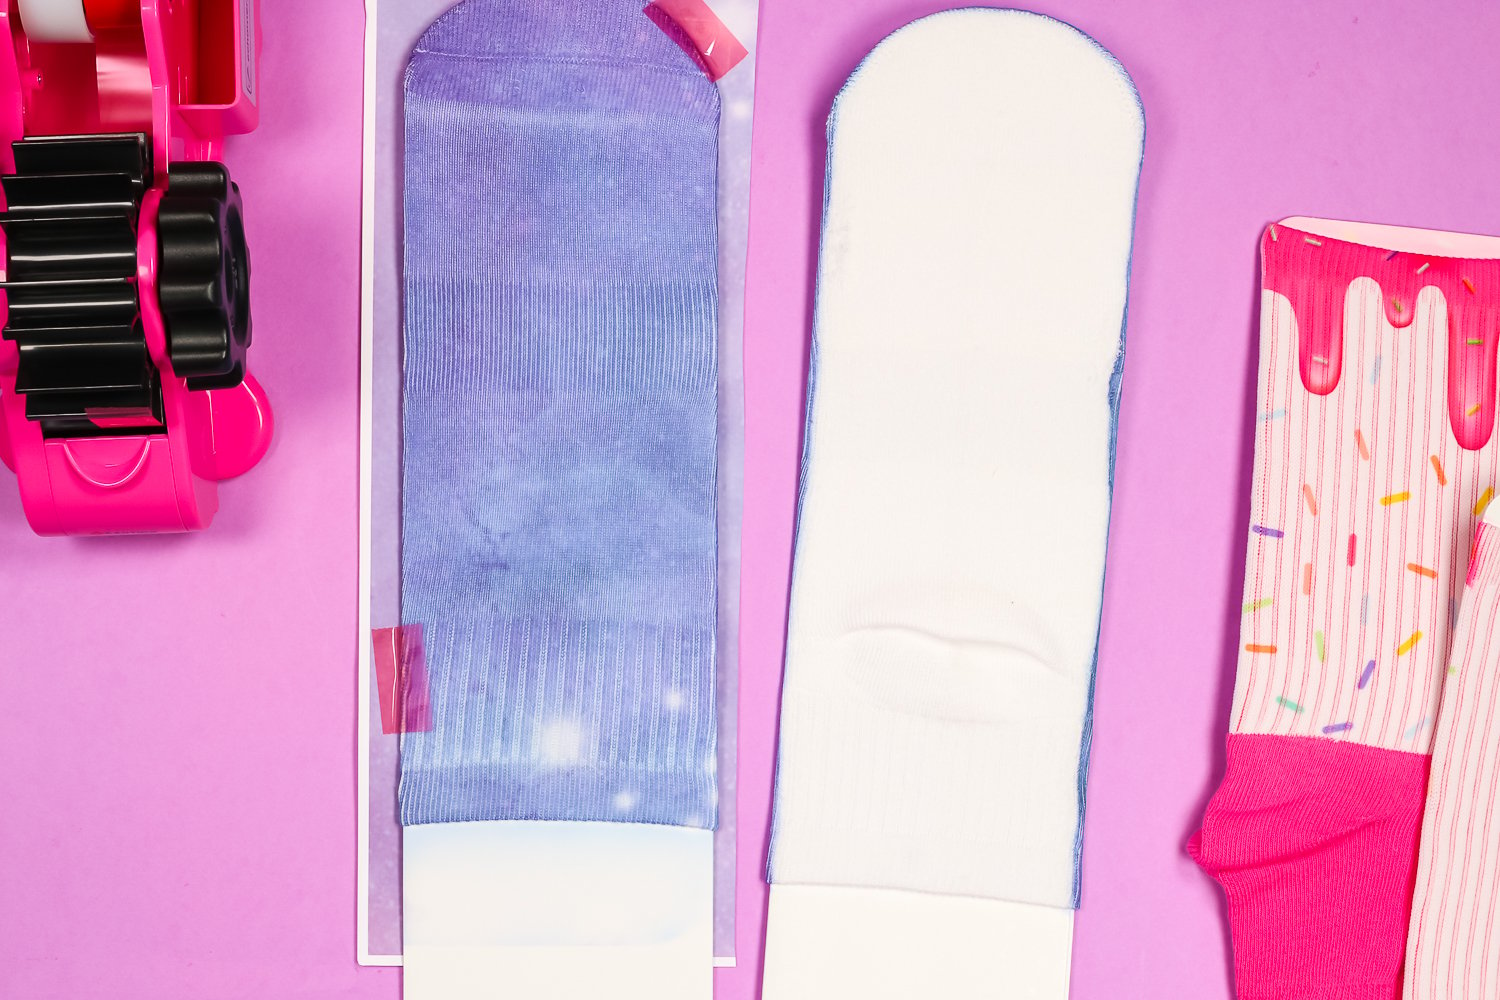
These socks are so fun. They come in a variety of colors, but I chose pink for my project. The bottom of the sock is made of cotton, and the top is made of polyester. I chose a fun sprinkle donut image for these socks. I printed my image a little larger than the sock itself, so I will get it in place and then cut away the pieces I don't want.
The tapered sock form fits this sock really well. Once it is inside, straighten out all the ribs on the sock, both front and back. I left a small section of the form at the top of the sock to prevent the image from bleeding through. With the form inside the sock, it stretches slightly, allowing the print to fit within the lines. As a result, when worn, you won't have white lines in the middle of your print.
Add the design to one side of the sock just like we did on the top of the no-show socks. Because I printed it oversized, I need to trim anything that runs onto the bottom of the sock. Because the bottom of the sock is cotton, it's likely that any sublimation print will wash out. If you don't want to take that chance, trim your design so it doesn't touch the cotton area.
Add a couple of pieces of tape to hold the design in place long enough to transfer it to the heat press, and then add protective paper to the top and bottom. Then apply the heat press according to the instructions for the sock and remove the sublimation print.
How To Create A Seamless Design
To add a design to the other side and prevent any blank space where the design meets, flip the sock over and then roll the sides toward the middle just a little so that the design can be seen from the top. Doing this will allow you to line up a sublimation print on the other side so that it sits right on top of that small part of the image that is visible.
Then, when you press it a second time, it will layer on top of that small strip of your design, creating a seamless sock.
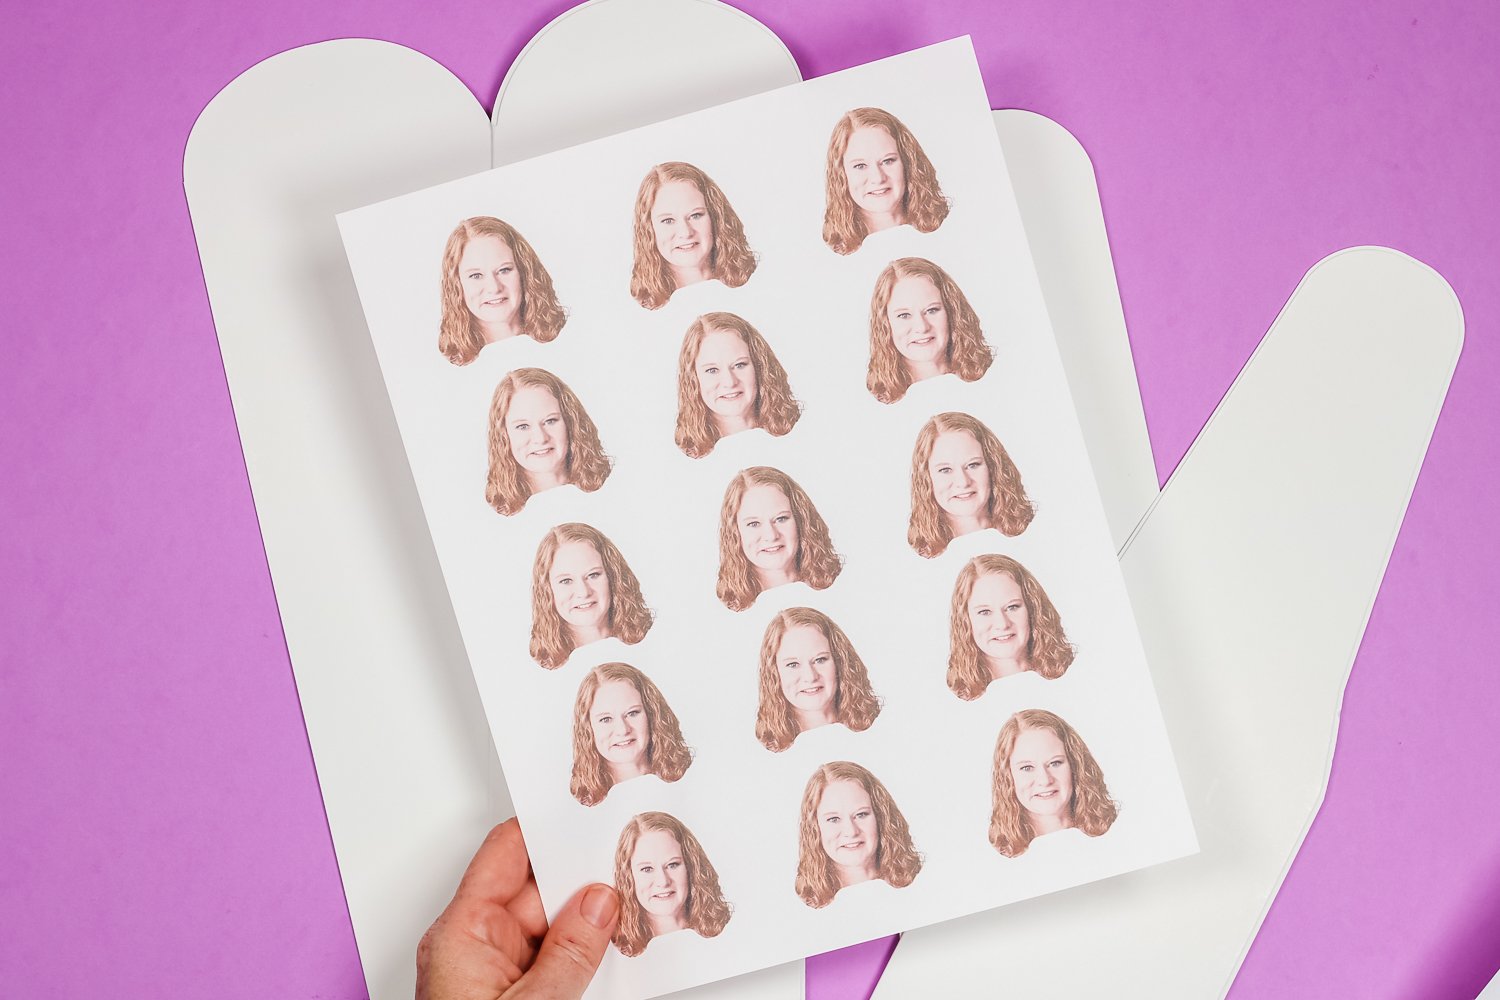
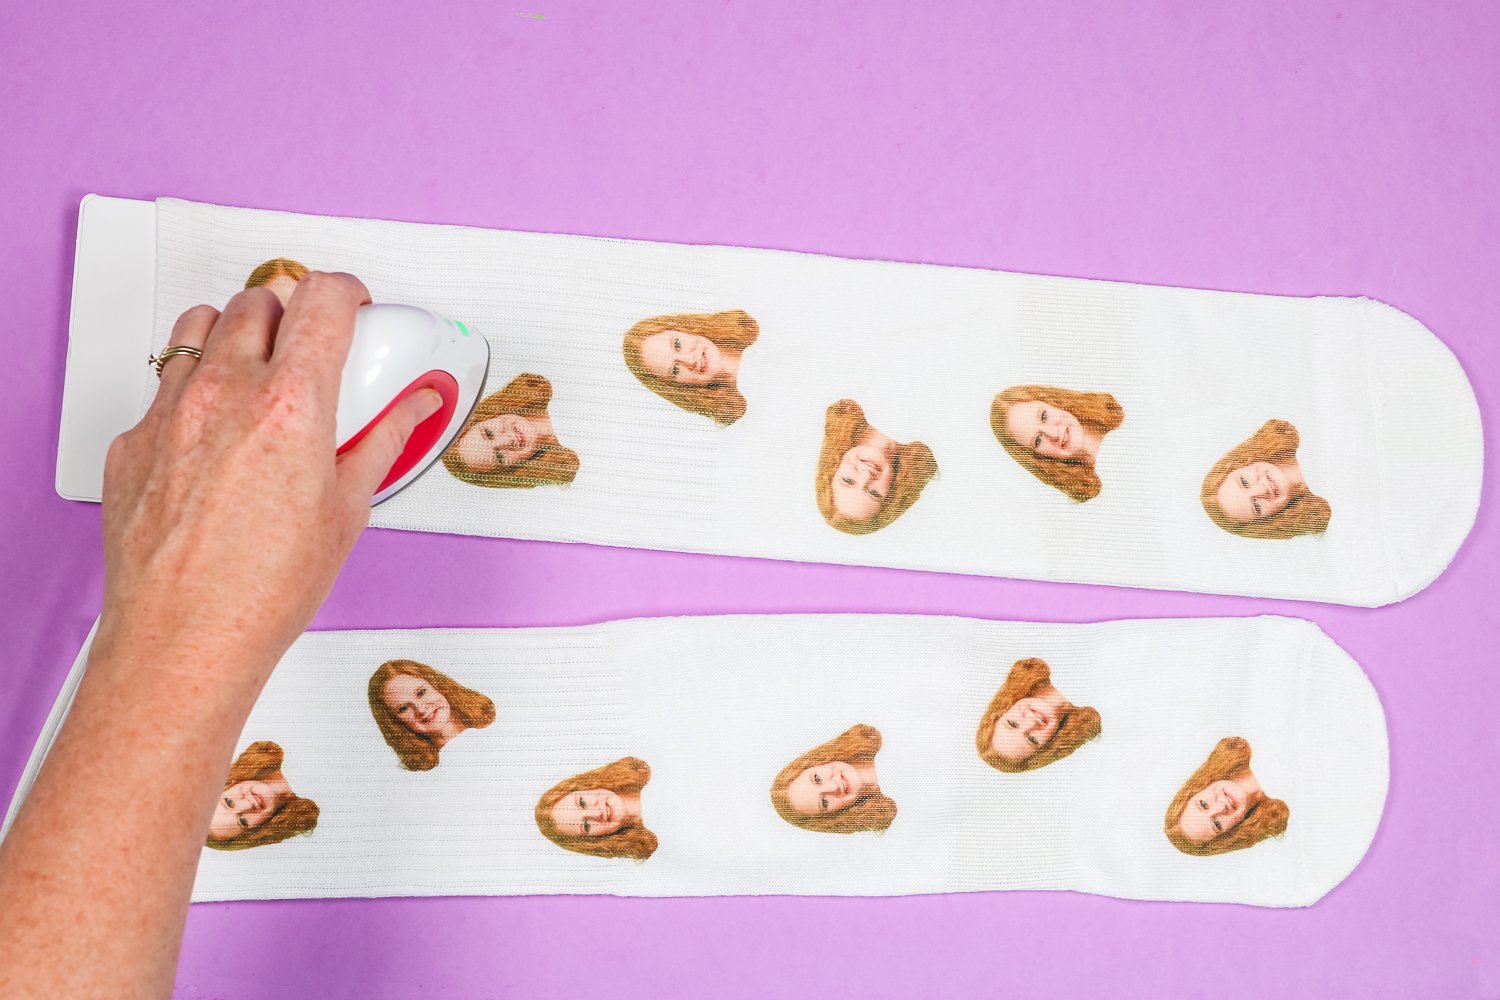
Sublimation Tube Socks With Faces
Add the long sock form to your tube sock, making sure the toe of the sock is straight along the end, and then straighten out all the ribs as we did before. Lint roll the entire sock and pre-press as needed. Because I don't have a printer large enough to print an image that will cover the whole sock at once, I decided to add faces.
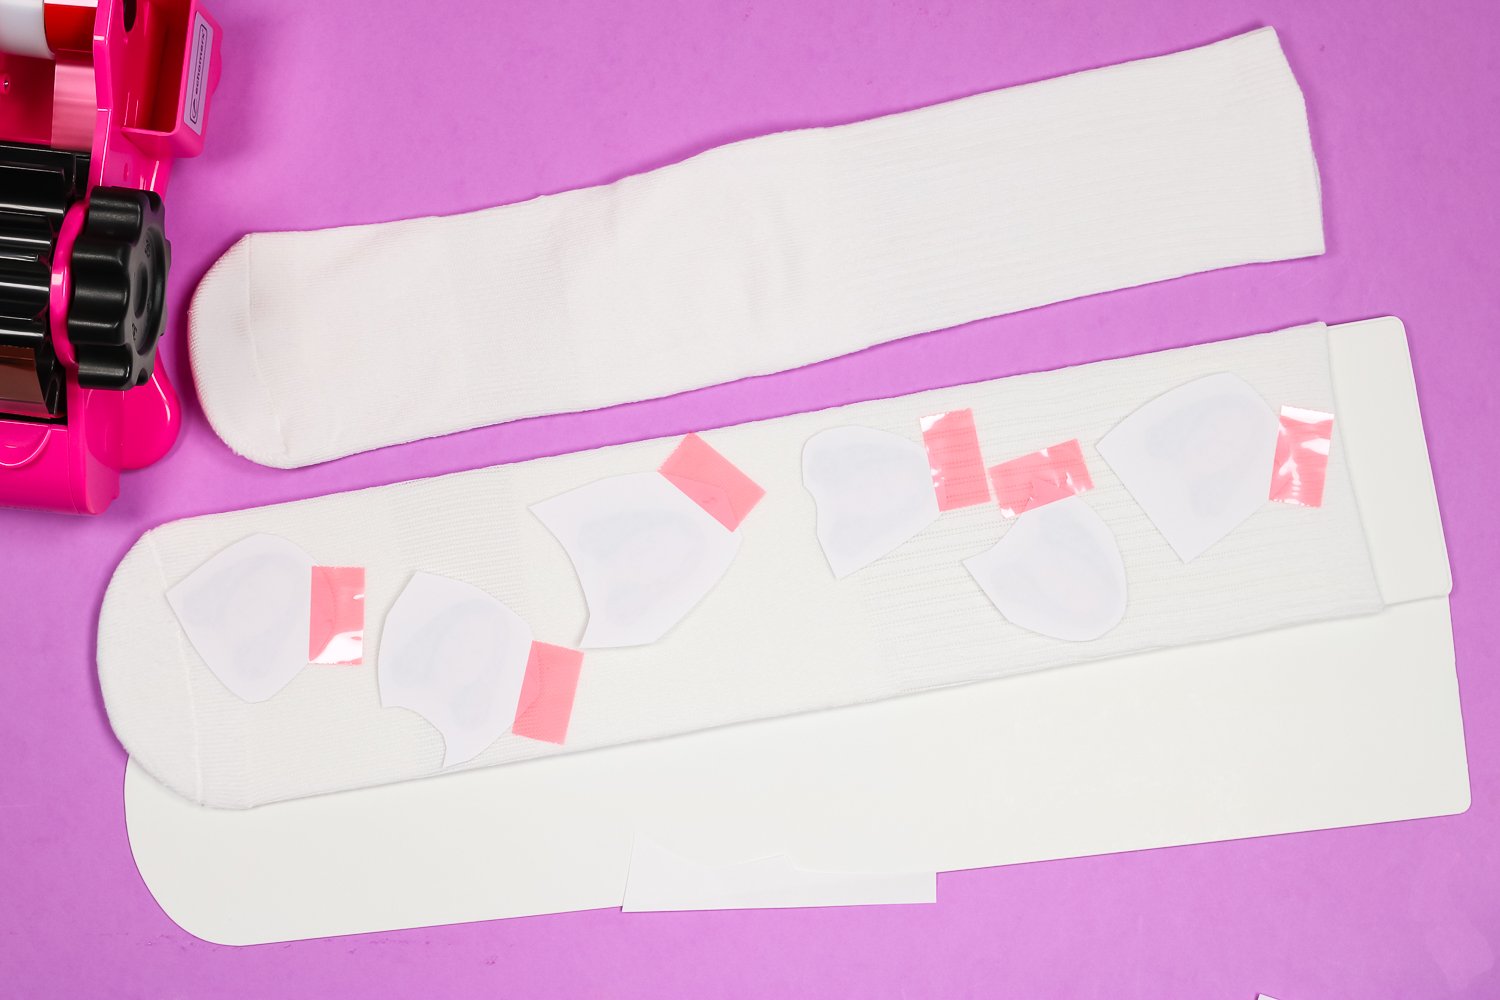
Cut the faces out and, using heat tape, place them randomly all over the sock. Add protective paper over the top of and under your socks. Use your heat press to press the first side and then remove the prints. Once the first side is done, without removing the form, add prints to the other side and press again.
With the form inside, you can see that the socks are slightly stretched, allowing the print to appear in the ribbing of the socks. This will help prevent white lines from appearing on your print when you wear the socks.
Removing Heat Press Marks
If you notice your tape left heat press marks on your socks, you can use your EasyPress Mini to press them out. Keep the sock on the form and go over the marks with your EasyPress Mini. As long as you don't keep the heat in one place too long, it won't affect your design. The marks on the top of these socks came out really easily with just a little heat from the Mini.
Off the form, you can see that the image scrunches back together a little; that's what we want, so it doesn't stretch out weirdly when it's worn. The heat press marks didn't come off completely from the bottom of the socks. You may want to skip the bottom or make a large print so you don't have to add tape. You can also try sublimation spray adhesive instead of tape.
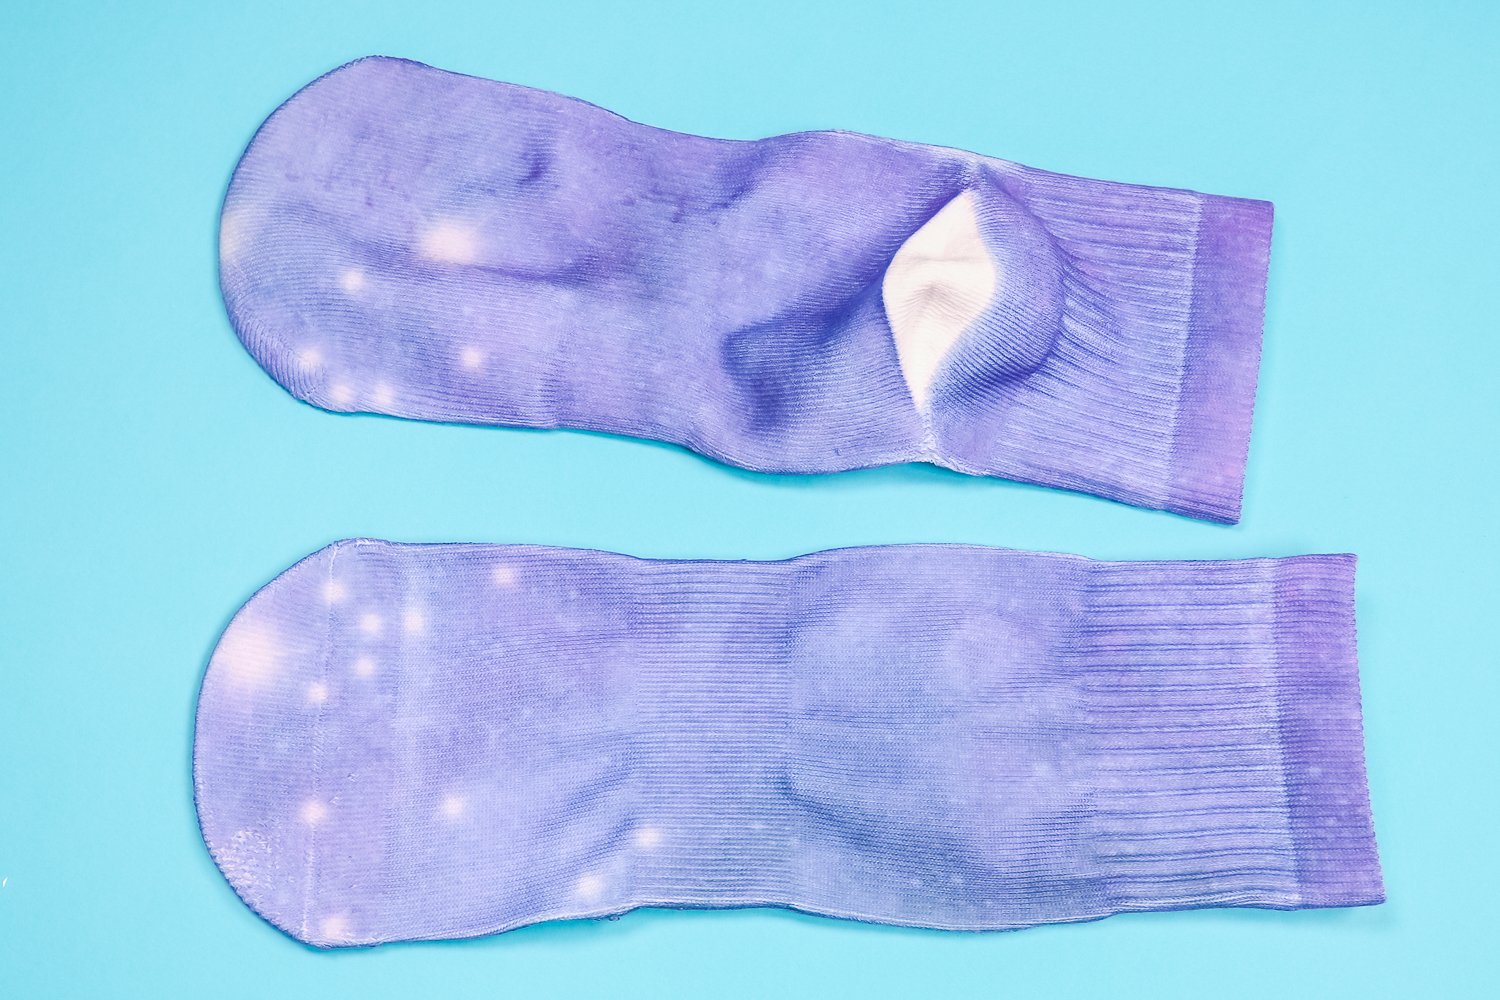
Sublimation Ankle Socks
These ankle socks are small enough that I can do an all-over design with my 8.5×14 print. These socks came folded on the side. You can try pressing them like that, but I am going to use the long sock form and press it as a top and bottom. This way, any seams are on the sides of the sock instead of the middle of the top.
I printed 4 copies of my design on 8.5×11 paper to create an all-over print on these socks. I am going to add the image to the top, just like we did with our no-show socks. Make sure everything is lined up and straight, and using heat tape, hold the sock in place. Press for the appropriate amount of time with protective paper on top and bottom.
To press the bottom of the sock, we need to roll the sock so you can see a little of the image all the way around. You can see in the photo below that there is just a little purple all the way around. We also need to decide how we want to handle the heel of the sock. Just remember that whatever area is folded down won't sublimate. I am folding my heel so the white area will be centered on the heel.
Tape the sock onto the design, use protective paper above and below, and press for the recommended amount of time.
Once we're done pressing, you can see the white area left from folding the sock on the heel. How you decide to fold the heel is up to you; I like this look.
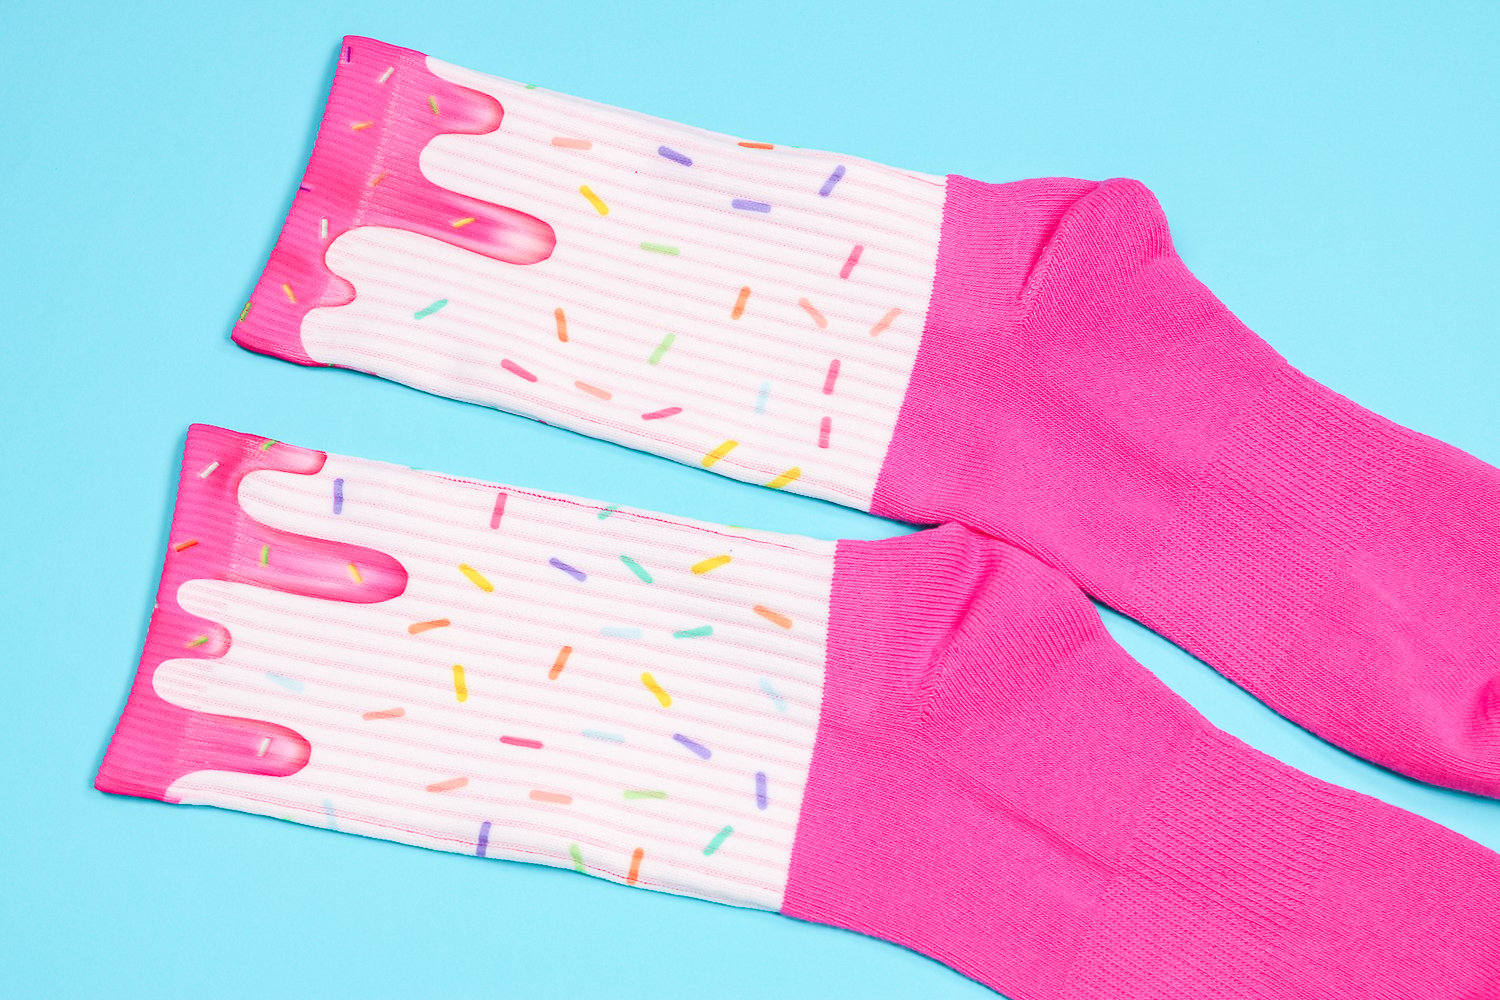
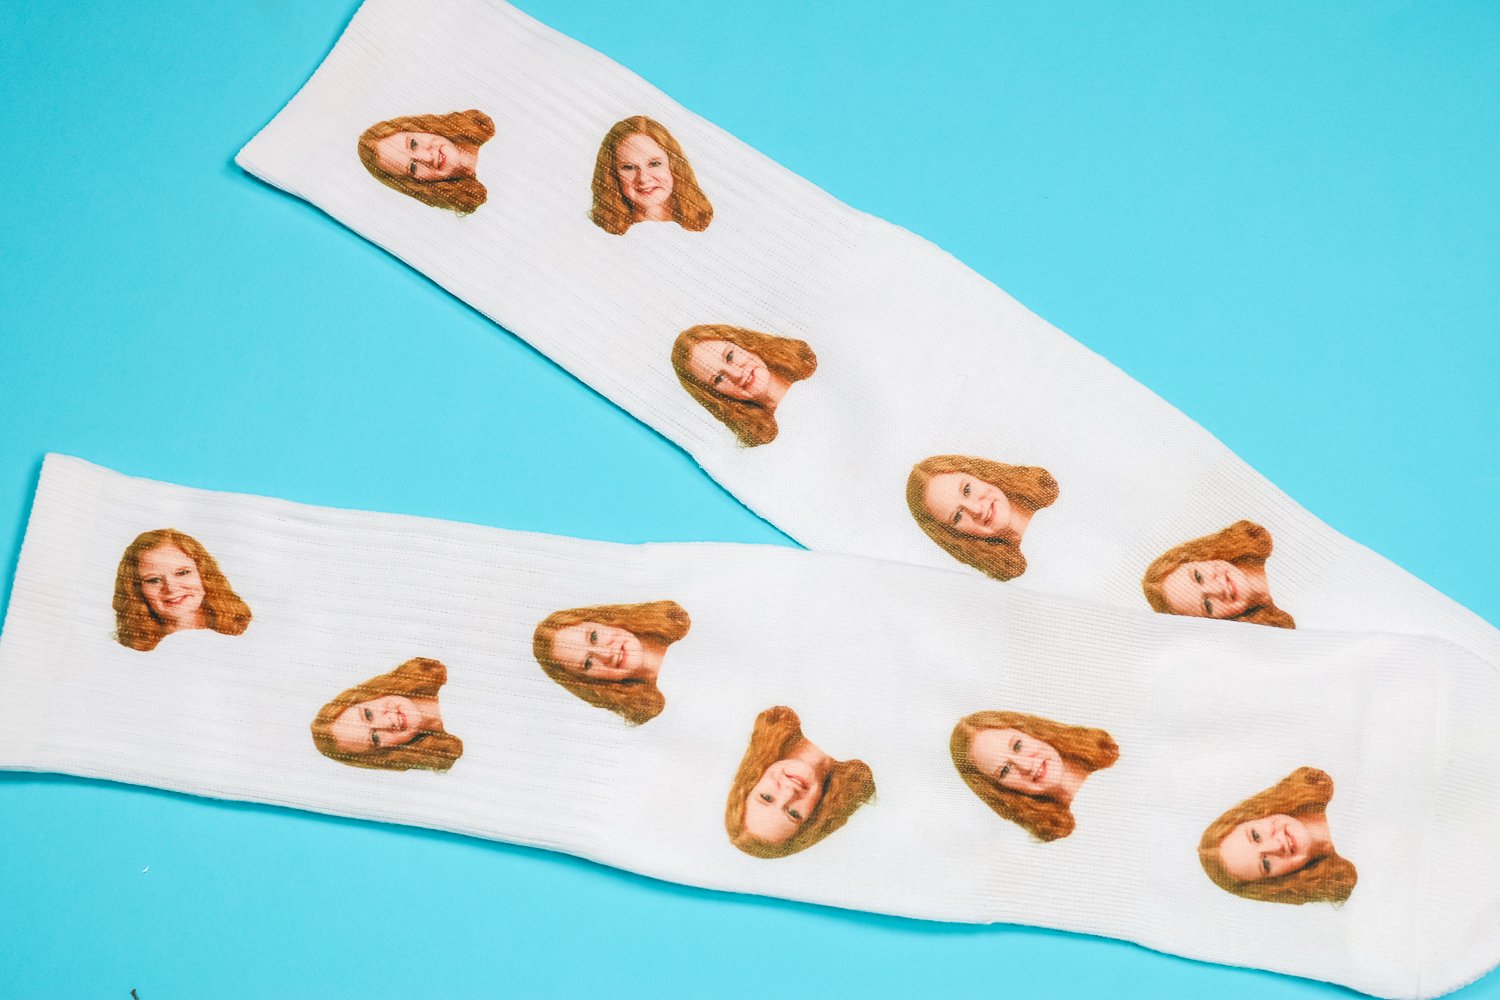
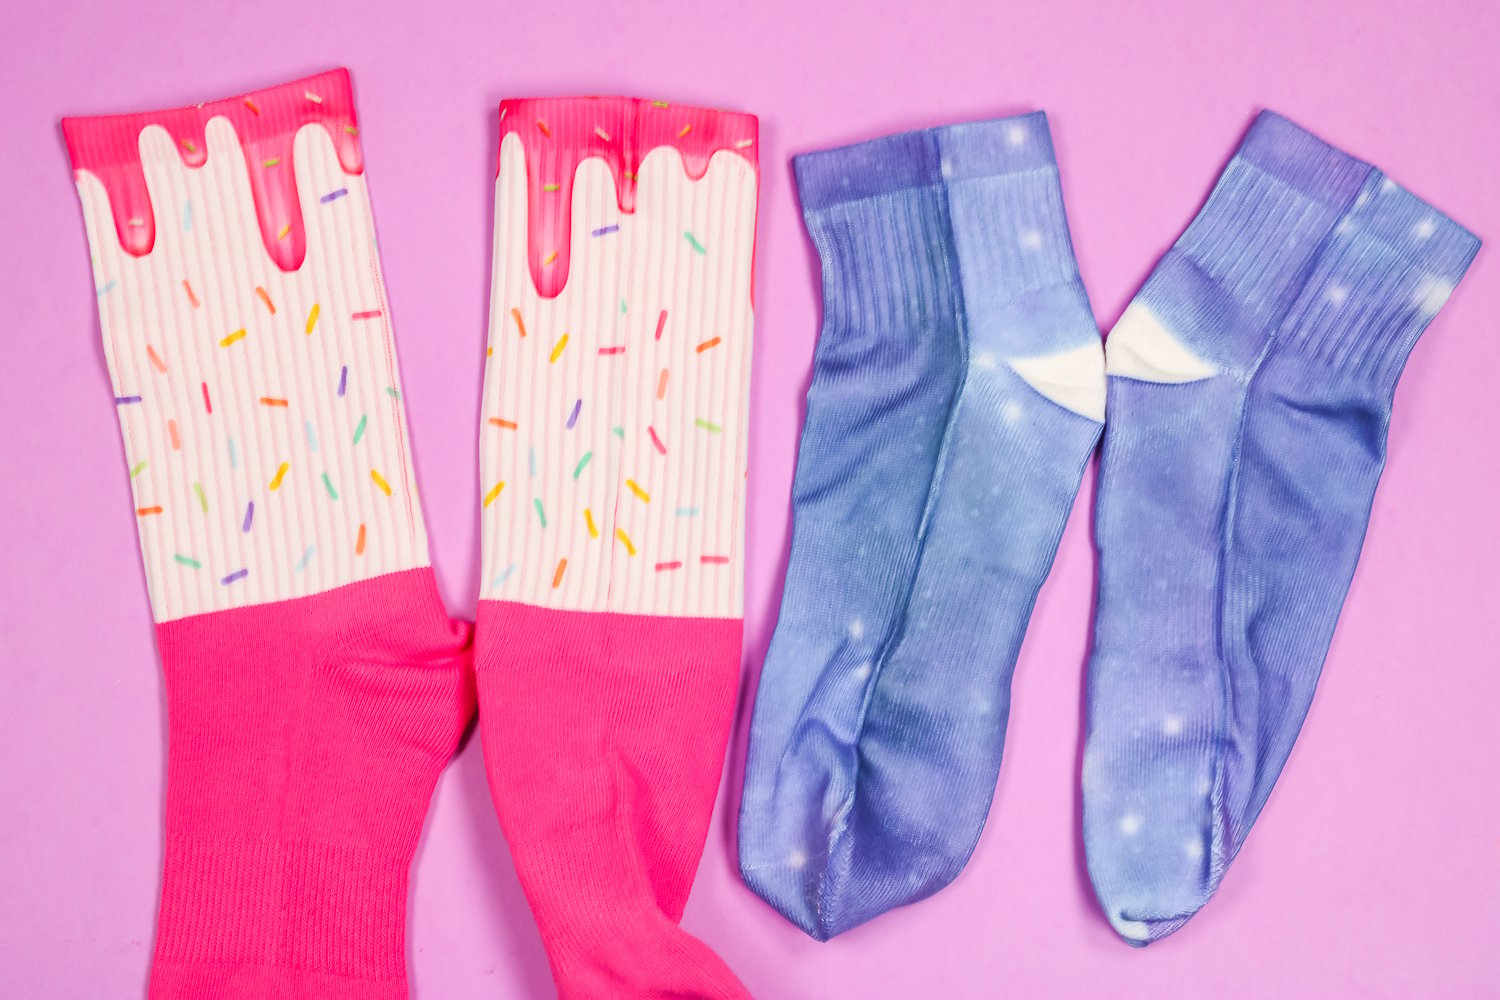
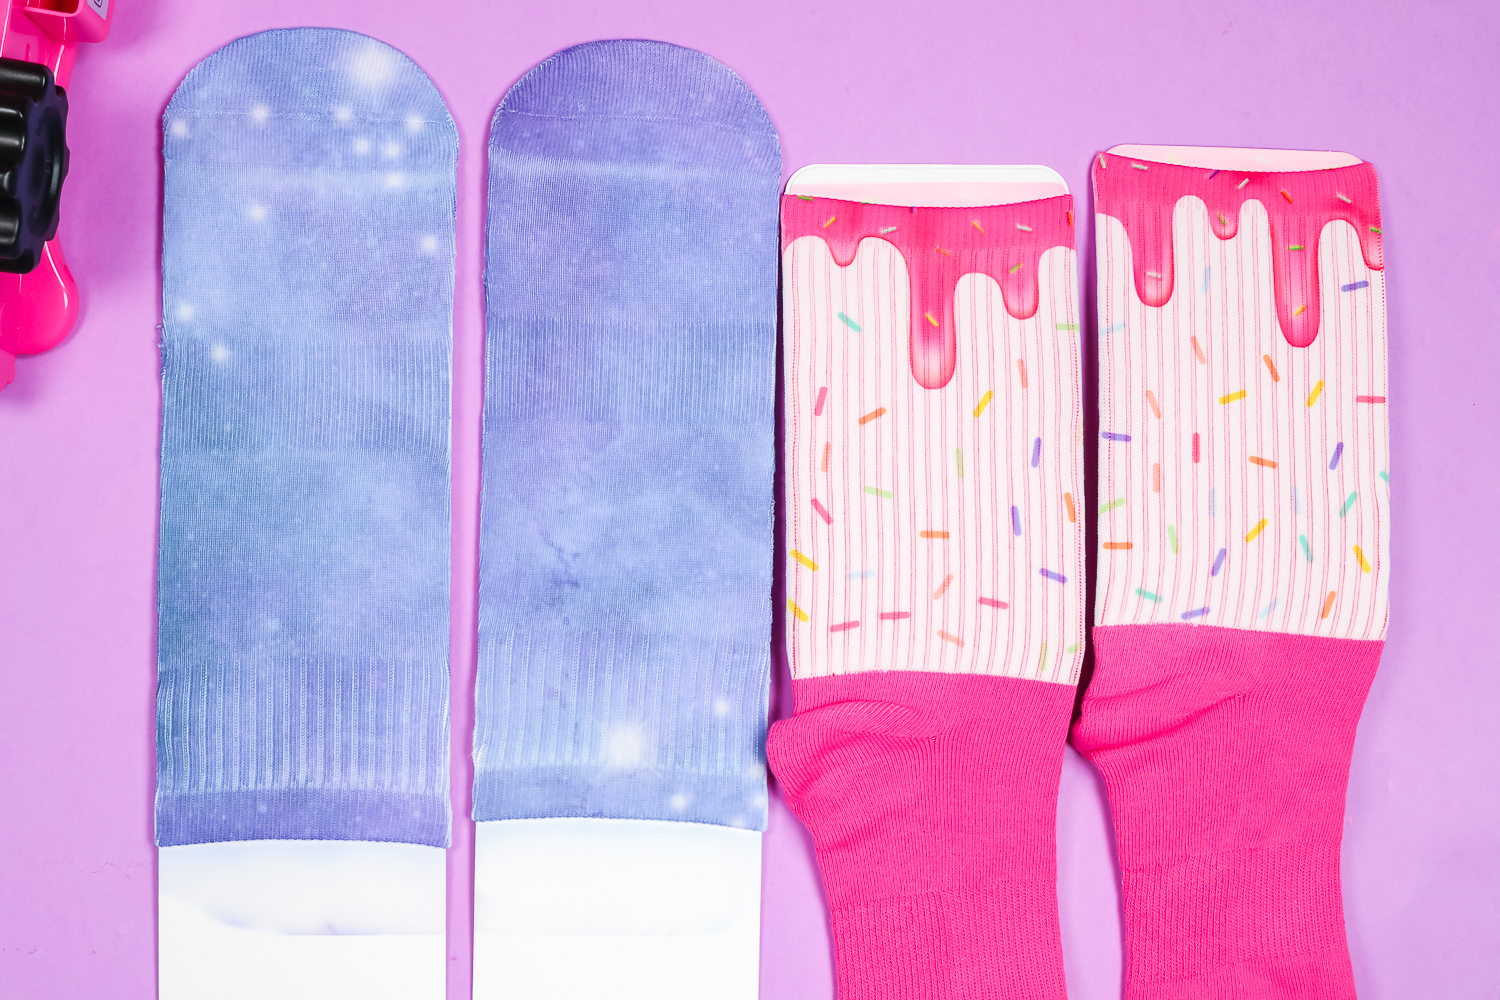
Finished Sock Seams
In the photo below, you can see where the seams of the design lined up. By rolling the edges just a little, we created seamless images with no blank space on the seams. They turned out so good!
On the galaxy socks, the seam is on the sides. On the sprinkle socks, it is right down the middle. You can't really tell on either pair of socks at all.
Tips and Tricks for Sublimating on Socks
While making all these different socks, I learned a few things. Here are my best tips and tricks just for you.
Be Careful Of Ink Transfer
With the socks in the photo below, the sock form comes up above the top of the sock. Depending on your image, the ink may transfer onto the sock form. I will mark my forms for the sock I used so I can ensure that future socks don't get ink transferred to them. You don't want future socks to go past the ink line from previous socks.
You also want to make sure to use protective paper on the top and bottom when pressing. You will probably be using oversized prints for these socks and do not want ink on your heat press.
Watch For Press Marks
I had no problem removing the press marks from the top of my socks, but the bottom is more cushioned, and the tape marks didn't come out completely, even with running the EasyPress Mini over it.
You can prevent this from happening by avoiding placing images on the bottom of the sock or by making the image big enough that you can tape the image to the protective paper instead of to the sock itself. It is on the bottom of the foot, and it did press mostly out, so it's not noticeable; it's just something to be aware of.
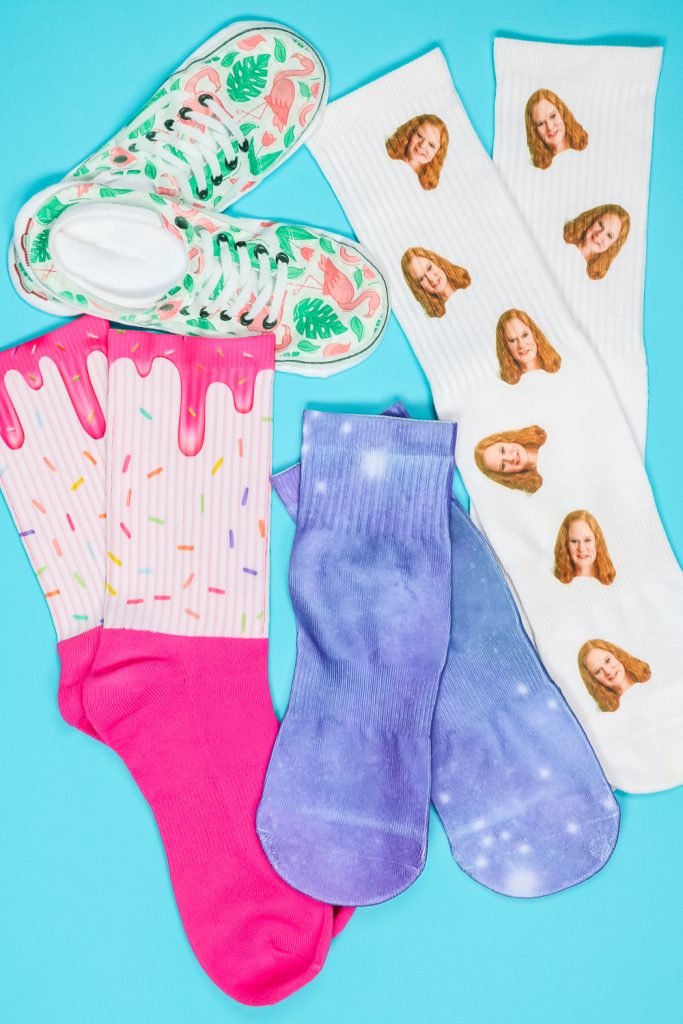
Which Of These Do I Like The Best?
I love these socks. They're so much fun! I'm glad there are finally sublimation socks I will actually wear. I'm not sure I can pick a favorite pair. I love the look of the tennis shoe design, and there are a lot of fun options for the holidays on Etsy.
I think my favorite pair to wear is the cotton bottom ones. Personally, I like thick socks, and these are comfortable, and I like that I can customize the top. I like that I can sublimate the entire ankle sock. The galaxy pattern is really cool, but you could use any full design you wanted.
I think the all-over face socks are my favorite design. The crew socks are probably my favorite to wear, but the face socks are so fun. They make a great gift; they could be a funny gag gift, or you could do something more serious.
I hope you found this tutorial on making customized sublimation socks helpful. If you have any questions, please leave them in the comments, and I'll be happy to answer them.
FAQs About Sublimation Socks
Here are a few common questions that I often see readers asking about making these sublimation socks. If you have a question, please check if I’ve already addressed it below. If you don’t see your question listed, please leave it in the comments!
Where Are The Pink Socks From?
They are from Silky Socks!
For The No Show Socks, What Measurements Did You Use? In Canva, I Put 9.5 Inches Tall By 4 Inches Wide, And I Filled Up The Whole Size Of The Paper. What Am I Doing Wrong?
I used around that size, I think. I would measure the sock since they may vary. Maybe make sure your paper size is correct. A 9.5 x 4-inch print should not fill up an 8 1/2 x 11 inch paper.
What Temperature And How Long Do You Press These At?
I would follow the directions from the company where you purchase your socks.
When It Comes To Matching Seams, Would It Not Be Better To Lay The Sock Slightly Askew When Sublimating One Side And Then Roll Them The Other Way? That Way, You're Not Bunching Them Up When It Comes To Printing The Next Side.
You can definitely play with different methods.
Can you use Spray Instead of Tape?
You can! I haven't had much luck with the spray, so I'm taking a break from trying. I will go back eventually!
I Did My First Sublimation on Socks, and It Turned Out Green. Do You Know Why That Would Happen?
Usually, green indicates that you need more time or temperature.
Why Does It Say ”Any Printer”?
I meant that to be any-sized sublimation printer.
5 More Sublimation Crafts
If you love these sublimation socks, here are some other sublimation crafts that you won’t want to miss!
- How to Make Sublimation Flip Flops
- How to Make Sublimation Jewelry
- How to Make Sublimation Baby Onesies
- How To Make A Sublimation Magic Sequin Pillow With Free Sloth Sublimation File
- How to Make a Sublimation Tote Bag


