
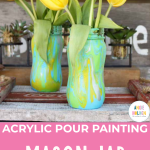
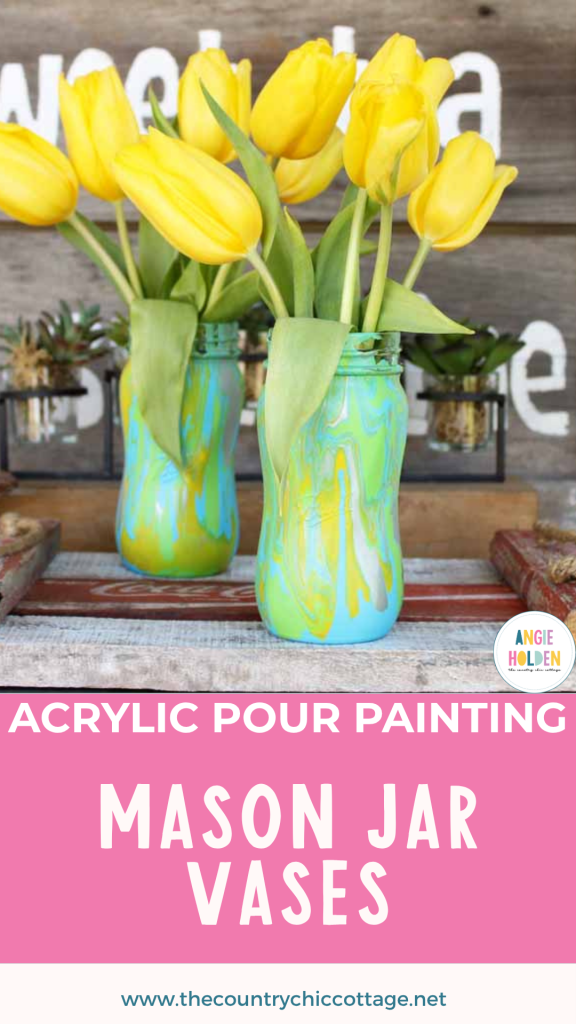
Acrylic pour painting isn't just for canvas projects anymore. You can use this beautiful acrylic pouring technique on mason jars to create unique projects just like the one I'm showing you today!
Acrylic pouring is a technique that you may have seen on canvas or maybe on candles. It's been around for quite a while at this point and creates stunning pieces of decor very easily.
Did you know that you can use this same paint pouring technique on any surface? Yes, even on mason jars and other glass items, thanks to the incredible versatility of acrylic paint! I even have a new product for you that makes this project even simpler. You're going to be amazed at how well it works.
Note: This post is also a part of mason jar week where several other bloggers and I shared fun and easy mason jar crafts all week. There are so many fun mason jar craft ideas to try!
Supplies Needed For Acrylic Pour Painting Project
If you've ever tried acrylic pouring before, you know that all you need are your paints of choice, the medium, and any tools you want to help you achieve the look you're seeking.
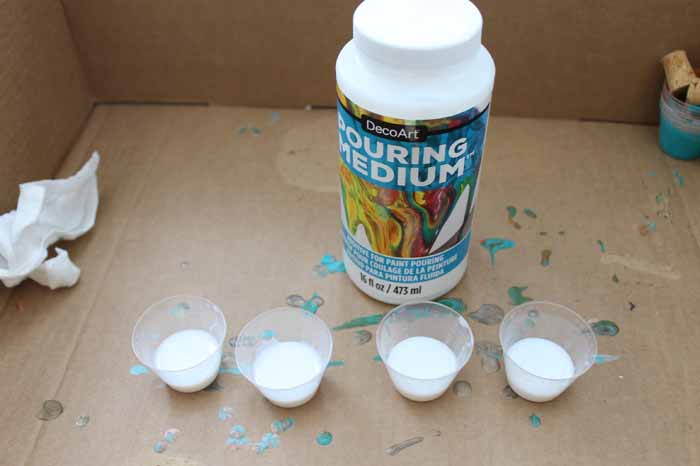
Remember I mentioned that I have a new product to introduce in this project? It's this Pouring Medium from DecoArt, which thins the paint and allows it to flow across a surface easily. You'll get more of those amazing streaks and swirls of color that look so striking!
It's also super easy to use, doesn't alter the drying time or the color, and it's perfect for acrylic pouring on any surface.
Here's your list of supplies for this project:
- Spiral jars (or any other mason jar)
- DecoArt Pouring Medium
- Acrylic paints (in any colors you love – I like to add a metallic to my pours)
- Plastic cup (this will get ruined so make sure you can throw away)
- Wood craft sticks
- Small cups
- Box

How To Do The Acrylic Pour Method On Mason Jars
I think you'll be surprised at how simple the process of acrylic paint pouring is to accomplish! Here's what you need to do.
Step 1
Start by adding the pouring medium to small cups.
Step 2
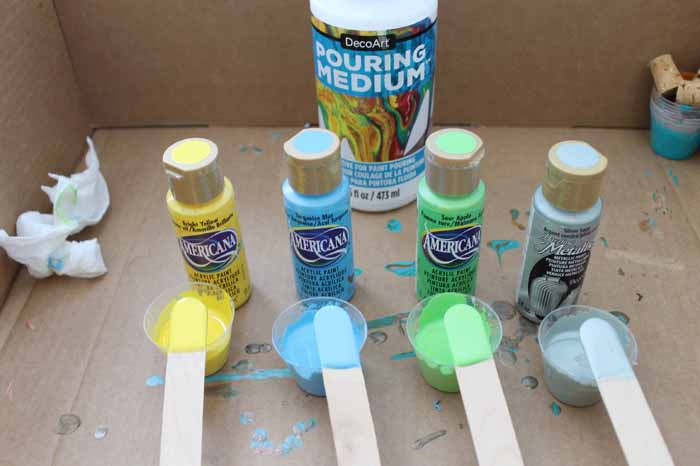
Add your paint to each cup and mix well.
For acrylic paint, try a 1:1 ratio for your paint to pouring medium mixture. You can change it up if the mix seems too thick or thin.
PRO TIP: I like to use craft sticks for this portion to help guide the paint and work inside of a box to control any spills.
Step 3
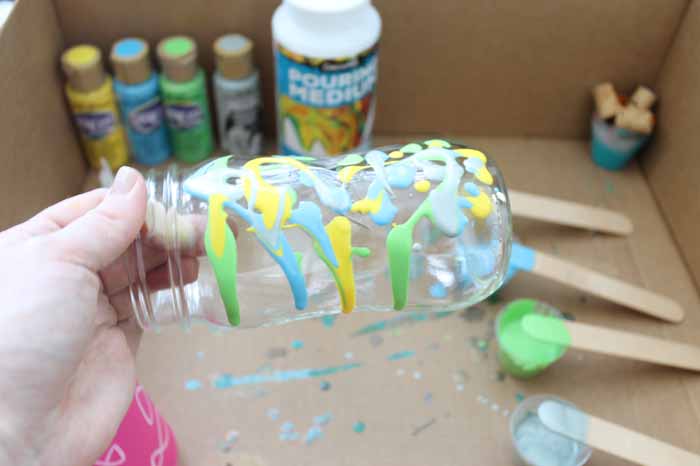
Use the craft sticks to start adding paint to your mason jar. You can use any colors that you like on your jars and use as many different colors as you would like to use. The more, the merrier!
Step 4
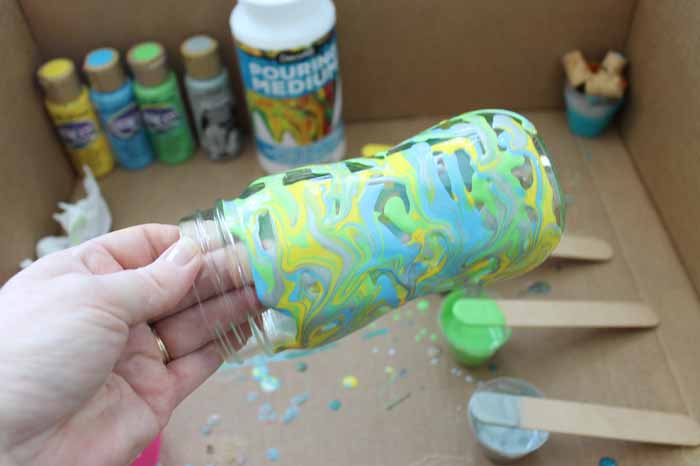
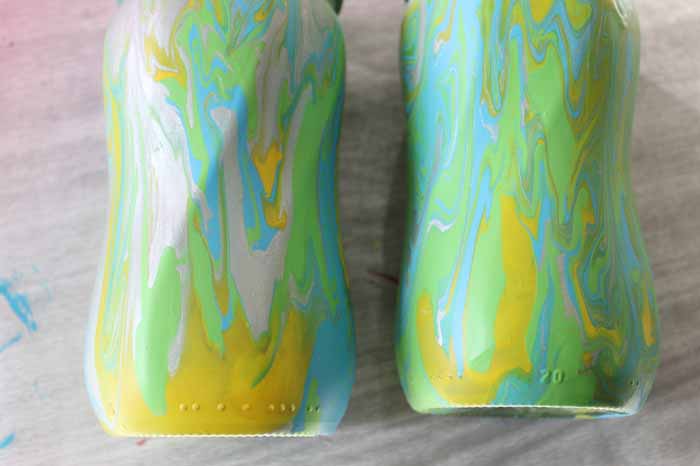
Keep adding the paint and tilting the jar until you get complete coverage.
Tip: You can use your craft stick to move some of the paint to cover gaps.
Step 5
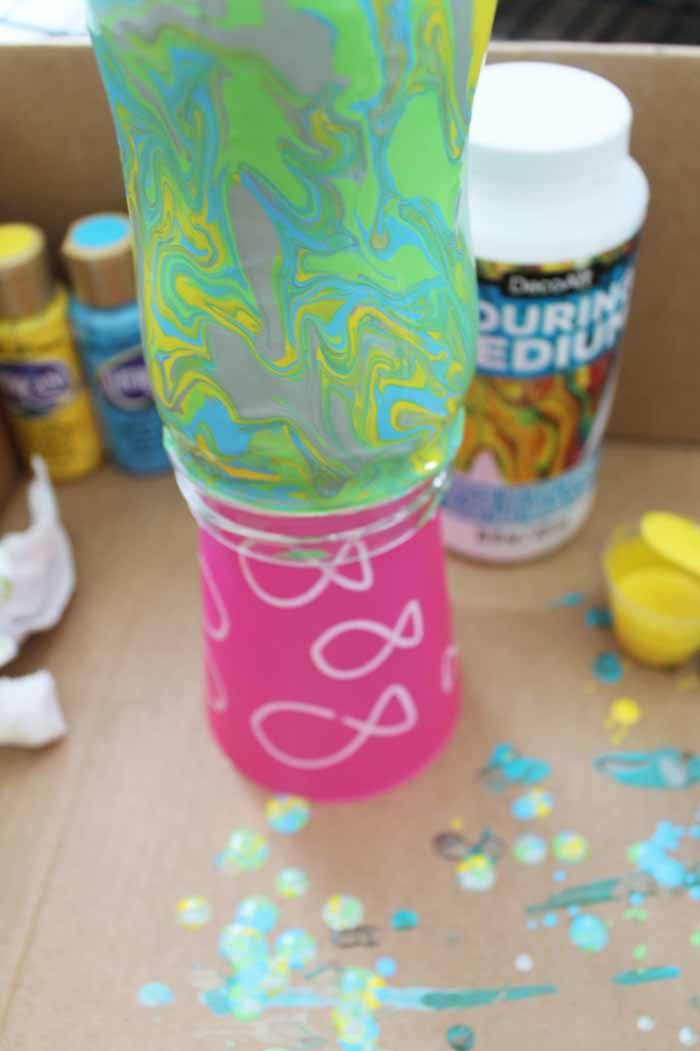
Once covered, add your jar upside down to a plastic cup.
Please note: The plastic cup will get paint on it and be ruined, so it is best to use something that you don't care about or can throw out.
Step 6
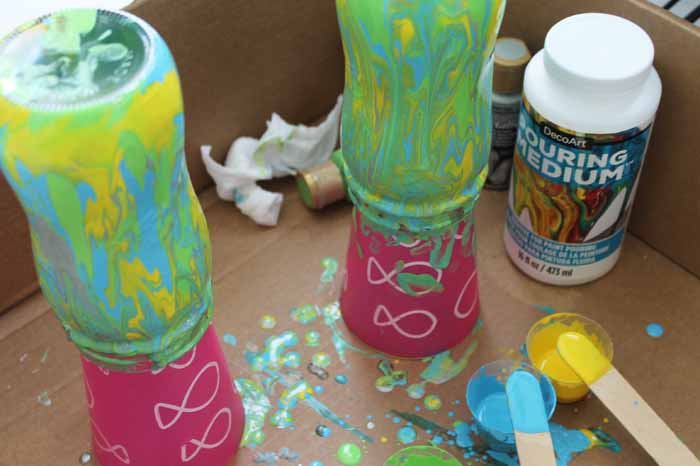
Repeat these steps for as many jars as you would like. Allow them to sit overnight to dry completely.
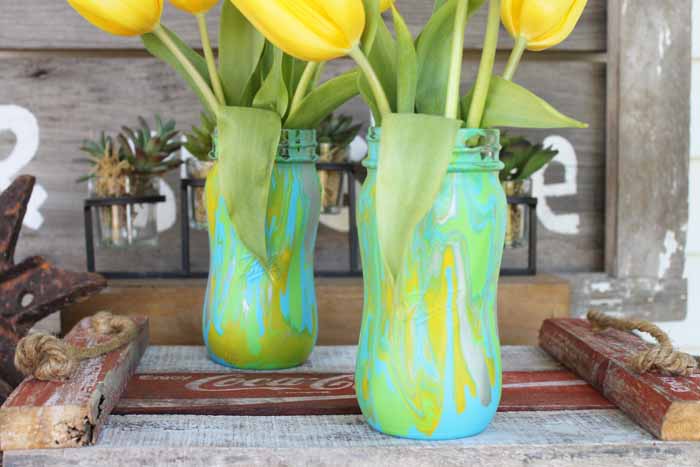
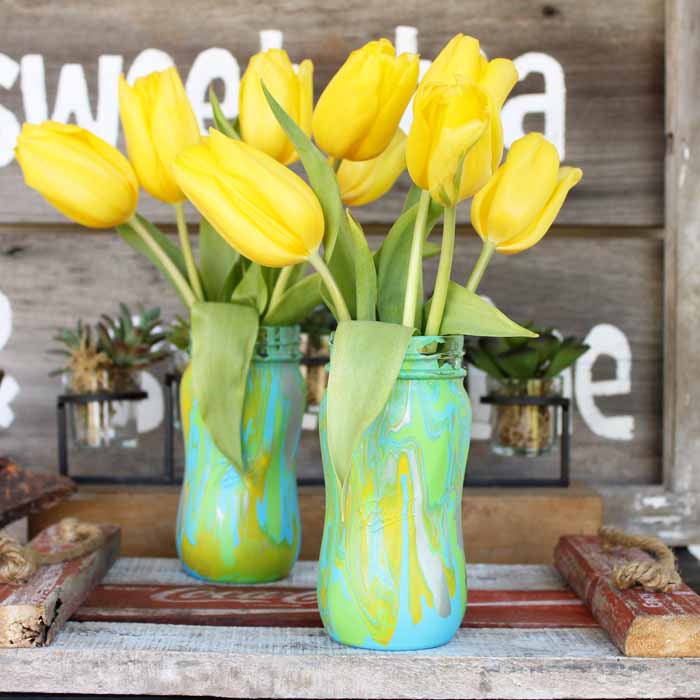
Step 7
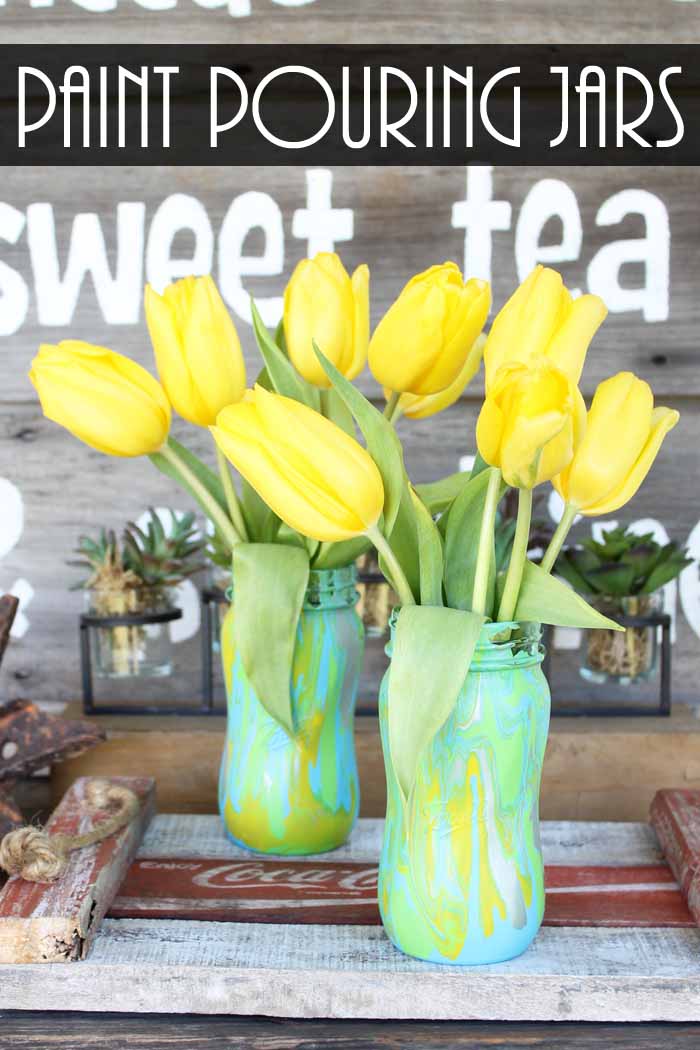
Remove the jars from the cups and trim away any excess drips from the top of the jars. Then, sit back and proudly gaze at your acrylic pouring vases and the beautiful painting effect you made!
Aren't they fun?
Acrylic Pour Painting For The Win!
I absolutely love how these jars turned out! They make the perfect spring vase for all your spring blooms.

The spiral jars were a fun twist to this acrylic pour painting project, but you can use any jars that you love. A glass vase would even work.
What will you try using acrylic pouring on? Whatever surface you try, I know it will look amazing when you're done! Let me know in the comments down below.
More Fun Ideas
Want some more idea for crafts with jars or painting? Check out these ideas:
- Decorating Jars Five Ways
- Mason Jar Herb Planter
- Sea Glass Mason Jar
- How to Make Beautiful Sea Glass Painted Mason Jars
- Marbling Craft with Epoxy Resin
- Marbling Paint Technique Used on Wood

Supplies
- Spiral jars or your mason jars of choice
- DecoArt Pouring Medium
- Acrylic paints in any colors of your choice
- Plastic cup this will get ruined
- craft sticks
- Small cups
- Box
Instructions
- First, add your pouring medium to your plastic cups.
- Add the paint to each of your plastic cups with the pouring medium.I think a 1:1 ratio works best, but if you think the paint seems to be too thick or too thin, feel free to adjust that ratio slightly.
- Use the craft sticks to start adding paint to your mason jar. Get some paint on your stick and hold the stick over the mason jar, allowing the paint to drip off the stick and down onto the glass jar.
- Tilt the jar up and down, and side to side to allow the paint to run all over the sides. Keep adding the paint and tilting the jar until you get complete coverage.
- Once your mason jar is completely covered, turn it upside down and place it on top of a plasic cup which will act as a stand to allow your paint to dry. Please note that the plastic cup will get paint on it so use something you don't mind getting ruined.
- Repeat this process for any additional jars and allow all jars to sit overnight to dry completely.
- Carefully remove the mason jars from their plastic cup stands and gently remove any excess paint that dripped down over the top of the jars.


I love those twisty style jars!
I love this technique and the final results are FABULOUS!!! Thanks for sharing Angie! It was great spending the week with you!!! Hugs…
so pretty
Ohhh, those jars are neat. And I love the yellow tulips in them.
How lovely, they look like so much fun to make. Pinning.
But acrylic paint peels right off of glass. Are you sealing these?
I literally had these for years and never had an issue. I have many painted mason jars and the paint doesn’t come off.