
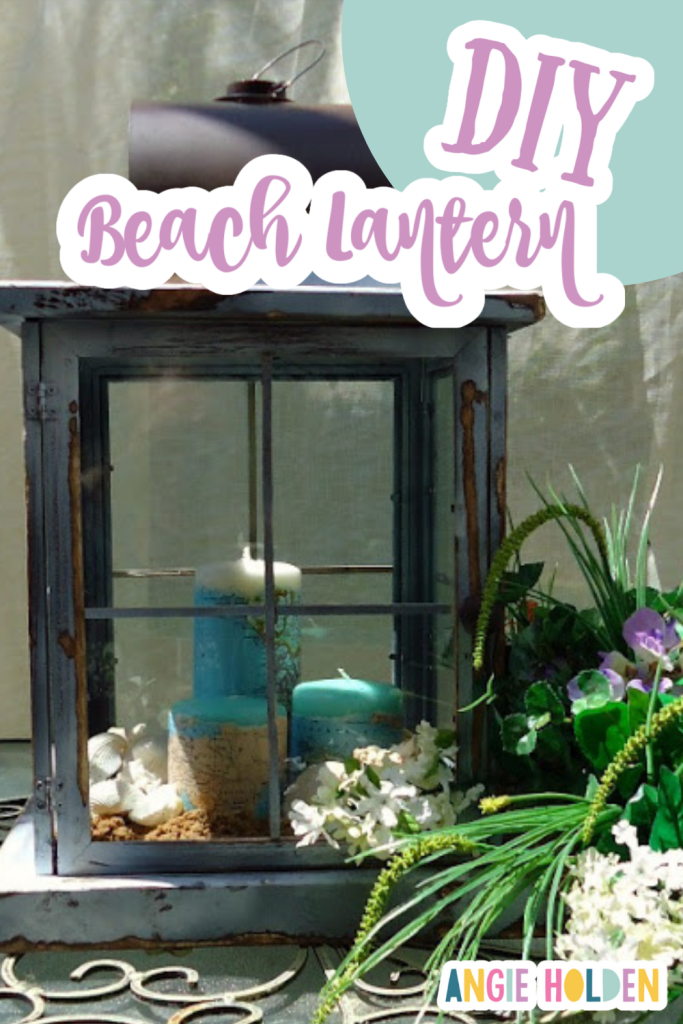
Wendy from Craft Goodies is here today to show you how to make your own DIY lantern with inexpensive Dollar Store frames! Break out your picture frames and prepare to be amazed!
OH! How I love the beach! I look forward to our annual beach vacation all year long and love to sprinkle coastal decor throughout our home.
I'm excited to have Wendy here today showing us how to create a one-of-a-kind DIY lantern. This project is perfect for any home and easier to make than you may think.
Note: If you love beach and nautical decor, be sure to also check out my DIY Beach Decor Using Rope, Starfish Craft: Easy Beach Wall Art, and Beach Themed Shadowbox Art ideas!
Ok, here's Wendy!
Introducing Wendy
Hi! It's Wendy from Craft Goodies here. Thank you, Angie, for having me!
My blog is my escape from my real life of running 5 little girls around town and trying to keep up with my husband’s crazy busy work/school schedule. On it, you’ll find everything I love – good food, fun projects (some of my own and a few borrowed from others), snippets of my family life, and any and all other craziness I can write about.
I started my blog as a way to keep in touch with my crafty friends after a big move from Washington state to Southern Texas. It has grown into a place where I love to be, and my kids think it’s pretty cool that their mom has a “job”.
If you ever stop by and check me out, you’ll find that I am by far a girl that loves her power tools and a good wood project. I’ve been drooling over DIY lanterns for a while now, so the opportunity to share it with Angie's readers was the perfect chance to tackle it.
How To Make A DIY Lantern
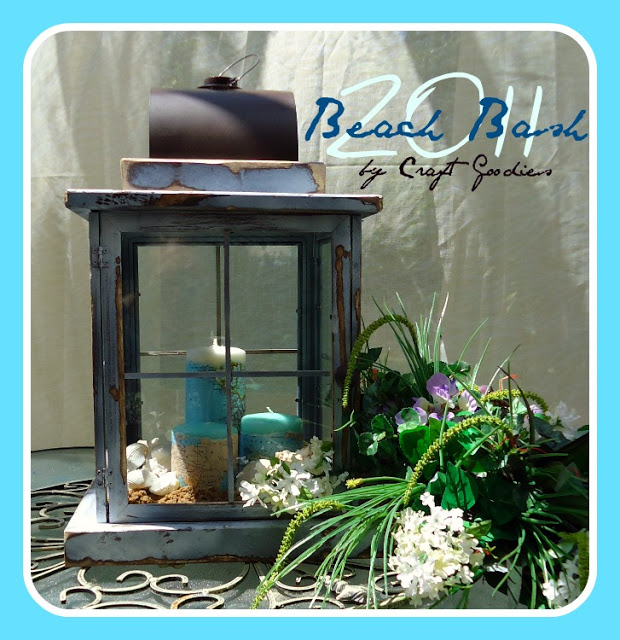
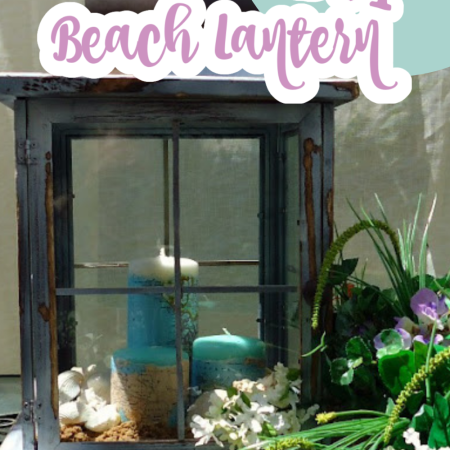
Ok, here's the fun part where I show you how to make your own beach lantern.
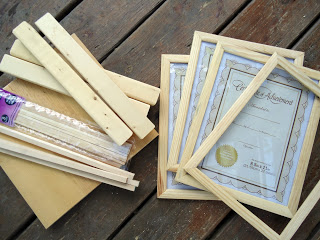
Supplies Needed
- 4 8×10 picture frames with glass (These came from my local dollar store)
- Square dowel pack
- 1×2 furring strip (6 ft board is plenty long!)
- 1×3 furring strip
- 1×12 pine board cut to square (wood is funky! actual size is 11.5×11.5)
- (2) 3/8″ square poplar dowels
- 6-inch metal roof shingle
- Metal shelf support ring (this came in a set)
- 2 hinges (these come in a pack of 4)
- Wood glue
- Finishing nails
- Hammer
- Paint
- Sandpaper
- Miter saw or miter box
- Hand saw
- Drill
Instructions
Here's the process I used to make this lantern. Just follow these step-by-step instructions to see for yourself.
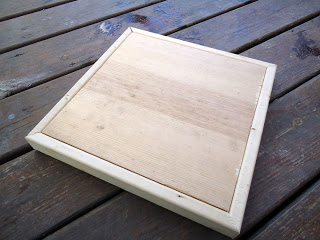
Step 1 – Make the base
Cut the 1×2 to make a frame around the 12×12 inch board.
The ends are mitered at 45 degrees, and each piece is 11.5″ long on the short side. Glue the pieces into place with the wood glue and then secure with a few finishing nails.
Step 2 – Connect The Frames
Remove the glass from the frames and set it aside.
Cut the 3/8″ dowels into four pieces that match the length of the picture frames. Glue a dowel onto each side of two frames, then glue the third frame in between them to form a “U” shape.
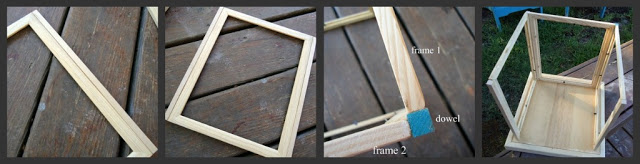
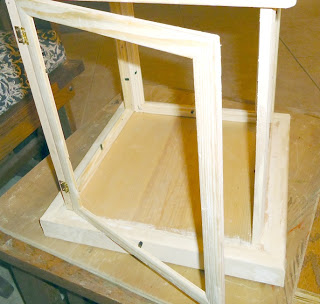
Once they are dry, attach the fourth frame using the hinges. You’ll add a handle later. Center the frames onto the base. Glue the three “U” frames into place, leaving the door free to open and close.
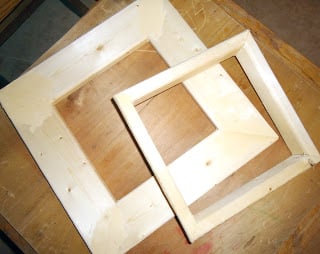
Step 3 – Make The Lid
Make two more “frames”, one from the 1×3 with each piece (short side) measuring 6 3/4″ long and one from the 1×2 with the pieces measuring 6 1/2″ long. Set the two frames aside.
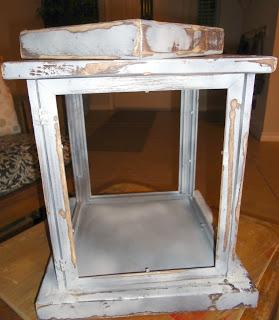
Step 4 – Paint The Lantern
I wanted that chippy, peeling “I’ve been at the beach for a long time” look. So I started with a base coat of dark brown and topped that off with white. Then I sanded the crud out of it!
You could add a layer of stain to enhance the look even more. I liked it as it was, so I just added a coat of varnish. Set aside to dry.
You can learn more about making a chippy paint finish.
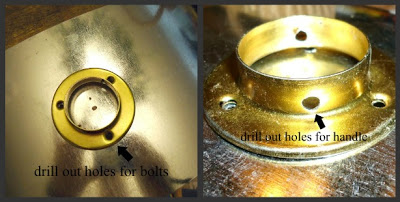
Step 5 – Assemble The Metal Lid
Center the shelving support onto the shingle and mark the holes with a marker.
If you want to add a hanging loop, drill two holes into the shelving support bracket. Otherwise, drill out the holes marked on the shingle, line the bracket back up, and add nuts and bolts to hold it in place.
Spray paint both sides dark brown.
Pretend the pictures all match up. I went about it the hard way and painted after I assembled the entire lid piece.
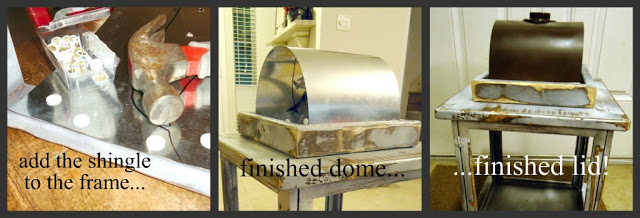
Center the shingle onto the inside of the smallest frame and nail it into place. Repeat on the opposite side to form the metal dome.
Glue the small frame onto the larger frame and add a few nails. Then glue that onto the picture frame square, being sure to NOT glue the door. I added a few nails here for strength.
Step 6 – Paned Windows
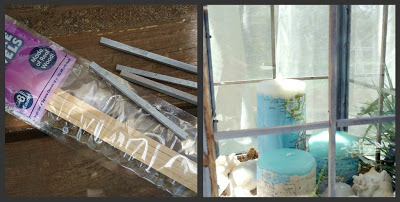
Cut 4 of the dowels to fit the inside of the frame’s length, which should be 10.5″. Cut the remaining dowels into eight 3 7/8″ pieces for the cross-sections.
Paint the dowels to match the lantern. While they dry, replace the glass in the frames.
Glue the dowels onto the glass to create the panes-one long and 2 small pieces per frame.
Step 7 – Finish It Up
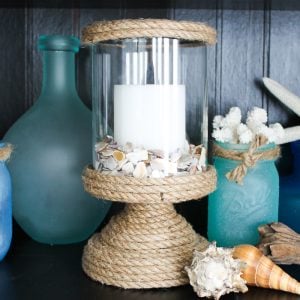
Add a wire hanger if you drilled holes for it, and glue a small seashell or wood bead to the door for a handle.
Tuck in a few pillar candles, sand, and some great shells inside, set back, and enjoy the view!
FAQs
Here are a couple of questions that I see readers ask about making this DIY lantern. Please check to see if I’ve already answered it below if you have a question. Don’t see it? Leave it for me in the comments!
Could I use an old lantern instead of building one?
Depending on the lantern, yes. But, it might actually take more time and work to convert an old lantern into this project. It just depends on what your lantern looks like. The advantage of making this project from scratch is that you have full control over the final product – and it doesn't really take all that long to do.
What else could I add to my DIY lantern to make it look beachy?
Some of my top choices would be a sea star or a conch shell or coral (whatever you have) and some rope. But really, you could add anything that reminds you of the beach! If you love dolphins or mermaids, add them too.
AH! I can almost smell the ocean air now…so much fun! Thank you for letting me share my little piece of beach heaven with you all.
Thanks so much, Wendy!! I love this project!!! And I am NOT just saying that cause you used my maps!
More Beach-Themed Crafting Inspiration
Love this post and want more ideas? Try the links below!


Supplies
- 4 8×10 picture frames with glass I picked these up at the Dollar Store
- Square dowel pack
- 1×2 furring strip a 6' board is enough
- 1×3 furring strip
- 1×12 pine board cut to square
- 2 3/8″ square poplar dowels
- 6-inch metal roof shingle
- Metal shelf support ring
- 2 hinges
- Wood glue
- Finishing nails
- Hammer
- Paint
- Sandpaper
- Miter saw or miter box
- Hand saw
- Drill
Instructions
- Make the base. Start by cutting the 1×2 board to make a frame around the 12×12 inch board.Miter the ends at 45 degrees. Each piece should be 11.5″ long on the short side. Glue the pieces in place and secure them with a finishing nails.
- Remove the glass from the frames and set it aside.Cut the 3/8″ dowels into four pieces that match the length of the picture frames. Glue a dowel onto each side of two frames. Then glue the third frame in between them to form a “U” shape.After they have dried, use the hinges to attach the fourth frame. Center the frames onto the base and glue the three “U” frames into place. Make sure to leave the door unglued so it can open and close.
- Make the lid. Cut 6 3/4″ long pieces of the 1×3 with each piece to make another "frame". And make one more "frame" from the 1×2 with the pieces measuring 6 1/2″ long. Set them aside.
- Paint the lantern. Paint a base coat of dark brown then add a layer of white. Take some sandpaper and sand off some of the white paint to create that aged, chippy look.
- Assemble the lid. Start by centering the shelving support on the shingle and mark the holes with a marker.Drill the hole marks on the shingle. Use nuts and bolts to attach the bracket and hold it in place. Spray paint both sides dark brown.Form the metal dome by centering the shingle onto the inside of the smallest frame and nailing it into place. Then do the same thing on the other side.Glue the small frame onto the larger frame and secure it with a few nails. Next, glue that part onto the picture frame square. Do not glue the door! Add a few nails for additional strength.
- Make the paned windows. Cut 4 of the dowels to fit the inside of the frame’s length (should be 10.5″). Cut the remaining dowels into (8) 3 7/8″ pieces for the cross-sections.Paint the dowels to match the lantern. Replace the glass in the frames while you wait for the paint to dry.Glue the dowels directly onto the glass to create the panes (1 long piece and 2 small pieces per frame).
- Glue something onto the door to act as a handle. A small seashell or wood bead would work well!Fill your lantern with some sand, shells, and pillar candles then sit back and enjoy the view!


I made a custom tin lantern after some light wielding work out of a car’s carborator. Used some blow-torch, power saw and some screws via the tools online selection.
QUESTION: You wrote, “Center the shingle onto the inside of the smallest frame and nail into place. Repeat on the opposite side to form the metal dome.”. I assume you nailed on the inside. But when you have to bend the sheet over and put other side into the inside of the other side of the smallest frame, how do you get your hand inside the dome you’ve just created and nail the other side of shingle into other side of frame?
Thanks, can’t wait to try this as I had the idea myself but couldn’t figure out how to do the top!
Elaine
Nail the shingle to the small frame before adding it to the large frame and the lantern.
This is amazing! How much did it cost for the supplies? (Sorry if I missed it in the post!) I’m always on the lookout for amazing DIY’s that are super cheap.
Sorry! This post is a few years old so I am unsure of cost!
Where can I find the wood frames at the dollar store ours Carey’s only plastic once…..
You may have to try Walmart or another store near you then.
Thank you .. I also checked dollar general but I couldn’t find one….. I guess I have to check Walmart …….
I wanna make them so bad…….
Did you go to the dollar tree for yours ? Sorry that I am asking so much questions….
I know I have seen similar ones at Walmart. Not sure exactly where these were purchased.