
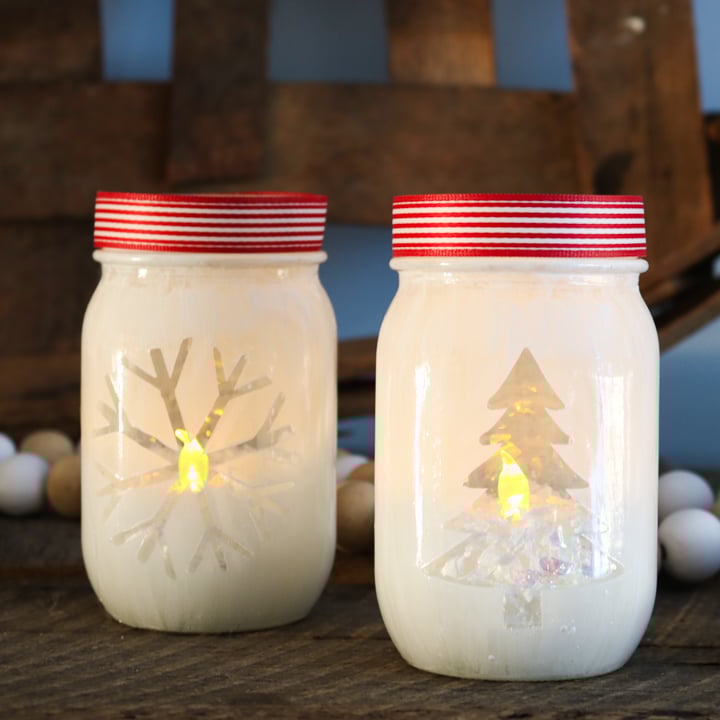
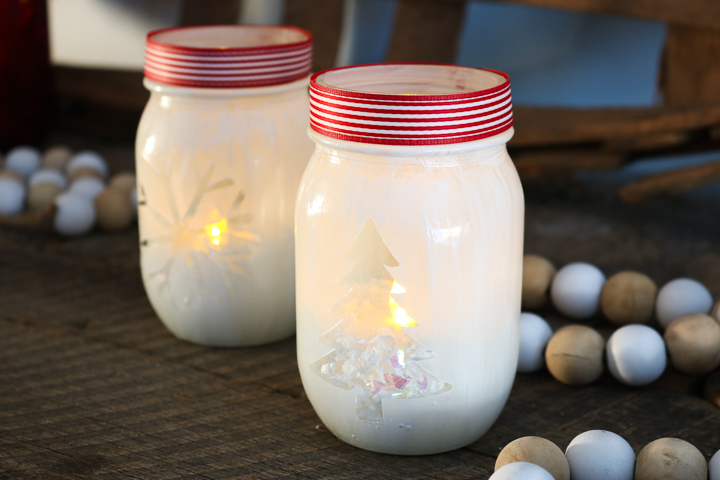
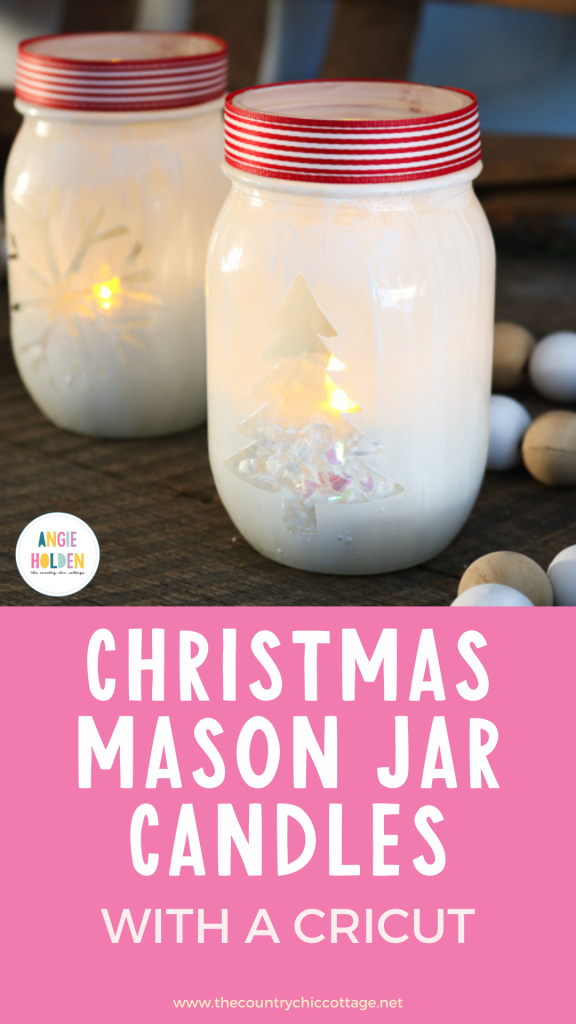
These Christmas mason jar candles are a simple and festive project you can still make this holiday season. Using a Cricut and a bit of paint, they come together quickly and look beautiful displayed around your home. Make a set to use as a holiday table. The soft glow from the tea lights adds the perfect finishing touch.
Christmas Mason Jar Candles Video Tutorial
You can watch the easy process of making these Christmas mason jar candles below.
Can't watch the video or missed some of the steps? We have the instructions below for you as well.
How To Make Christmas Mason Jar Candles
If you've been around here long, you know how much I love to combine mason jars with candles! This is because mason jars are so versatile and make great candle holders! I've used this combo to decorate for all seasons, including spring, summer, and fall.
However, today, we are focusing on Christmas!
So, fire up your Cricut machine and use it to make these Christmas tea light holders from mason jars. These easy-to-make mason jar crafts are perfect for your holiday decor. Plus, they are so easy to make with a little adhesive vinyl and some glass paint. I added a Christmas tree and snowflake to my jars, but you can choose from 9 different free Christmas SVGs to add to the front of yours!
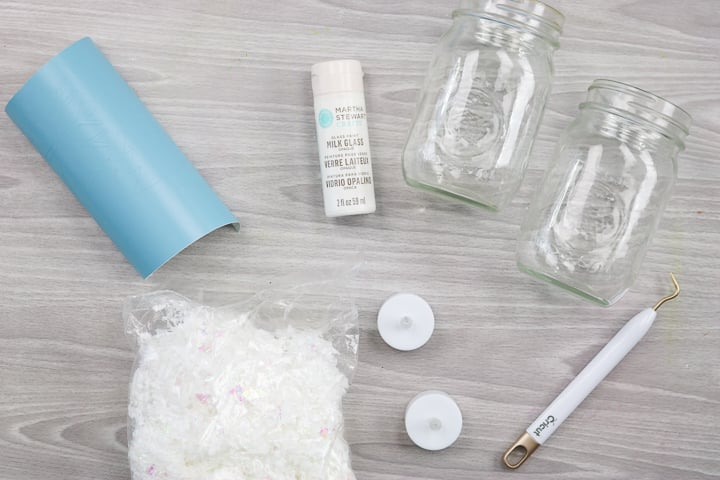
Supplies Needed To Make Christmas Mason Jar Candles
- Pint-sized mason jars with at least one smooth side
- Milk glass paint in white
- Battery-operated tea lights
- Cricut machine
- Christmas shapes SVG file (you can click here to download it for free)
- Vinyl (in any color)
- Weeding tools (optional)
- Craft knife
- Ribbon
- Hot glue and a glue gun
- Paintbrush
- Fake snow
- Scissors
Step 1: Choose An Image For Mason Jars
Choose the images you want for the front of your mason jars. We have nine images that you can choose from here.
Step 2: Download SVG & Upload It To Your Cricut Machine
Download the SVG for the shapes and upload those to your Cricut machine. You can see how to do that here.
Step 3: Resize Images To Fit Your Jar
Resize the images once imported to fit on the front of the jars that you are using.
Step 4: Cut Images From Vinyl
Then cut the shapes from vinyl. It does not matter what color vinyl you use, as we will be using these for masking only.
Step 5: Weed Vinyl
Weed out all excess vinyl from your design. If you have not worked with adhesive vinyl before, you can find a tutorial on it here.
Step 6: Add Vinyl To Mason Jar
Then peel and stick the shapes onto the front of your mason jars. Be sure that the mason jars are clean and dry. I like to wipe mine with rubbing alcohol. Burnish the vinyl well to ensure it is stuck. You can use an old gift card for this.
Step 7: Paint Mason Jar
Then, paint over the entire jar with your paint. You will go over the top of the vinyl as well. Set the jar aside and allow the paint to dry completely. You will also want to follow all the instructions on the jar of paint that you are using.
NOTE: Do NOT remove the vinyl masking while wet. You want to leave it on the jar.
Step 8: Paint The Mason Jar Again
Once dry, paint over the entire jar again. This may or may not be needed depending on the paint you are using. You want the paint to be slightly see-through so the light can shine through.
Allow this second coat of paint to dry completely, and again, do not remove the vinyl masking while the paint is wet.
Step 9: Remove Vinyl Masking
Now it is time to remove the masking. Use a craft knife to cut around the edge of the masking, separating the dried paint from the vinyl.
Then start lifting the vinyl. Slowly lift, ensuring that the paint lifts with the vinyl. Once you have the masking removed, you can scrape away any paint that seeped under your masking with the edge of your craft knife.
The painted portion of your jars is now complete! The instructions on your paint may call for curing it in the oven if used on glass. This is really not needed in this case, but you can do it if you wish. Just be sure to do it now before you add any embellishments.
Step 10: Add Ribbon To Jar Lid
Grab some ribbon and add it to the top of your jars. Cut the ribbon to size with scissors, then use hot glue to secure it around the tops of your jars. Be sure to pick a ribbon that matches your holiday decor.
Step 11: Add Fake Snow & A Battery-Operated Tea Light To Your Jar
Then just add in some fake snow and your battery-operated tea lights. Real tea lights will NOT work with these jars, so be sure to pick up some faux ones.
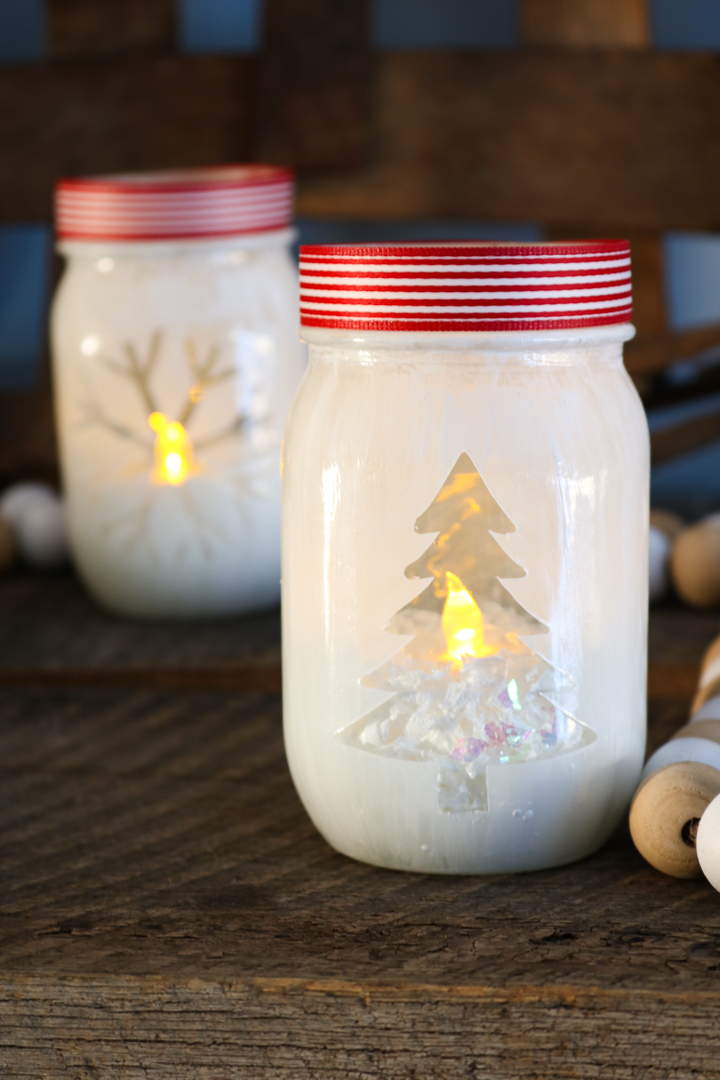
Now that your Christmas mason jar candles are complete, all that is left is to put them on your mantel or on the center of your table. You will love the glow from the front shape and through the paint.
I told you these were easy to make with your Cricut! And they are oh so pretty! You can also change this project up for any season. You can use the snowflake and blue ribbon for winter. Or even use a heart and a pink ribbon for Valentine's Day. So many options and so little time! Y'all enjoy!
FAQs About Christmas Mason Jar Candles
Here are answers to some of the most frequently asked questions I receive about these Christmas mason jar candles. If your question isn’t listed, feel free to drop it in the comments, and I’ll be happy to help!
What Cricut Machine Can I Use For This Project?
All of them! The Cricut Maker, Cricut Explore, and Joy series, as well as the Cricut Venture, can all cut SVG files and vinyl!
Can I Adjust The Size Of These Christmas Mason Jar Candles?
Absolutely! You can make these Christmas mason jar candles in any size that you like. However, the only thing to remember is that you will need a fake tea light that fits inside your chosen mason jar.
Where Can I Find The Free Christmas SVG Shapes?
You can find our free Christmas SVG shapes that you can use for this project by clicking here!
Can I Use A Different Color Of Paint?
Yes, you can! I liked the look of the white paint, but you can use any paint color that matches your decor.
5 More Christmas Mason Jar Crafts
If you loved learning how to make these Christmas mason jar candles and want even more Christmas mason jar crafts, then check out the projects below!
- DIY Nativity Scene Made With Christmas Jars
- Mason Jar Lid Snowman
- Mason Jar Christmas Craft Snow Globe Toppers
- Christmas Treat Jars-Cute Mason Jar Crafts for Kids
- Mason Jar Advent Calendar


Don’t have a cricket machine what can I make design with
The designs are pretty simple. You could download the images and then trace them onto vinyl and cut out the design with scissors 🙂