
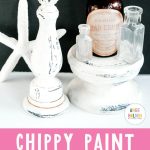
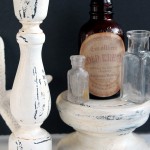
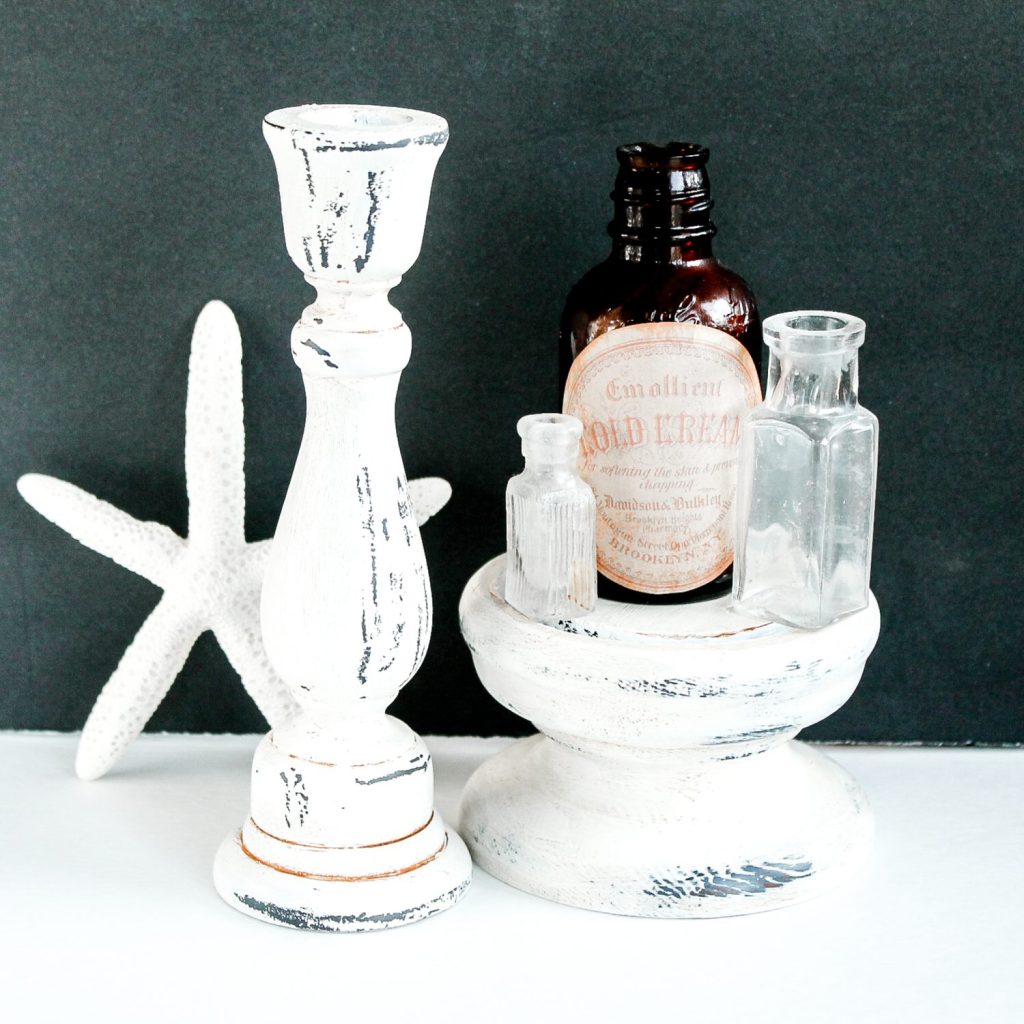
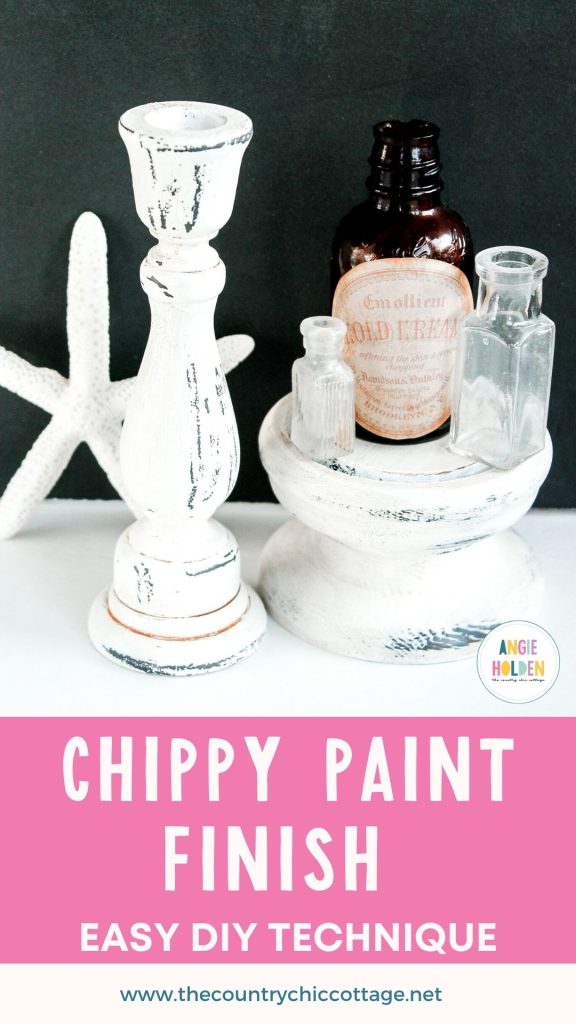
Sometimes, all you want is a beautiful painting technique with that special rustic element you seek in your home décor. Well, today’s project has you covered. Learn this simple technique- a gorgeous chippy paint finish! It will give you that rustic farmhouse look you crave!
I LOVE the chippy paint finish. It gives the impression that an item is old and rustic, which makes it perfect for modern farmhouse decorating.
You can buy items with a chipped paint finish, but since the chippy paint look is popular right now, you'll pay more than you may want to.
Did you know that you can create a chippy paint finish at home?
I am going to share with you an easy technique for creating a lovely, rustic, farmhouse finish on everything from furniture to accessories!
If you love playing around with painting techniques, check out how to Use Crackle Medium With Chalky Paint, Crackle Finish Table Top, and Rust Effect Paint for a Rustic Finish on Any Surface.
How To Create A Chippy Paint Finish
Here are the supplies you'll need to gather and the steps you'll need to follow to create this chippy paint technique.
Supplies Needed
The supplies might surprise you but you will get great results from this technique. I've included some handy links to help you find some items faster and easier.
If you have any old candles around your home, save them! Yep, we will be using them as one of our supplies to create a chipped paint finish.
- Items you want to paint
- Old candles
- Americana Décor Chalky Finish
- Paint for your top coat (in a light color)
- Blow dryer
- Duct tape
- Americana Décor Crème Wax (in Golden Brown)
- Old rag
Project Instructions
The process is much easier than you may realize! Just follow these step-by-step instructions, and in a short time, you'll have a chippy paint finish yourself!
Step 1
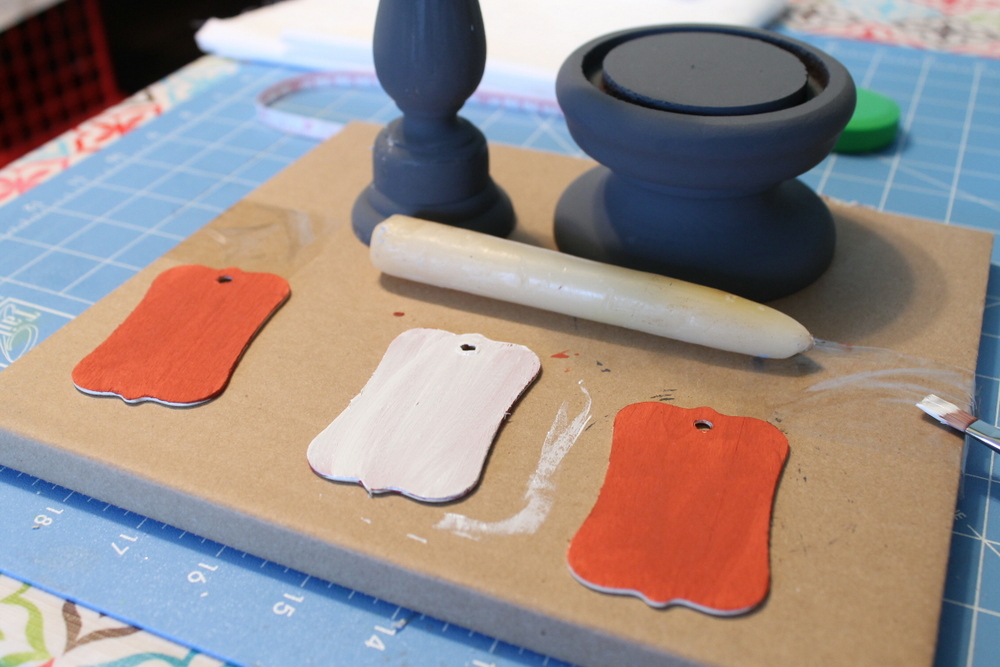
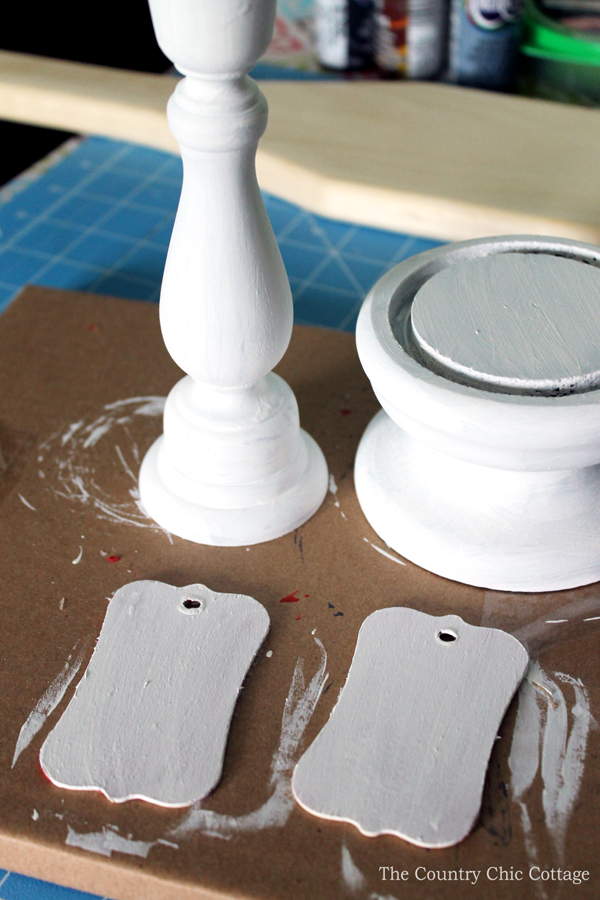
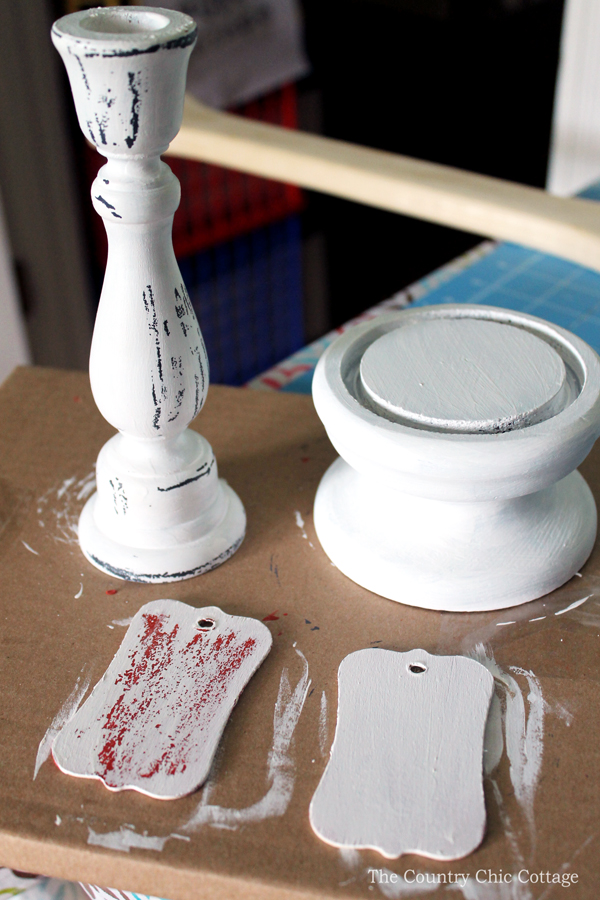
Grab the item you want to paint. If it's already painted a dark color, you're good. Or, give your unfinished pieces a dark coat of paint.
The dark paint is important because it will be your “undercoat” and it will show through once we complete this method. Pick a color you like!
I am using Americana Décor Chalky Finish for these examples.
Step 2
After the undercoat is applied and has fully dried (for chalky finish please wait 2 hours), rub a candle all over your project.
This is the secret trick to creating a chippy paint finish! The more candle wax you apply, the more rustic the final finish so please keep this in mind.
Step 3
Apply a light-colored topcoat to your project right over the top of the candle wax. You can apply as many coats here as you desire.
It took two coats for me to get the look I wanted on these pieces.
Allow the paint to dry again for at least the full amount of time recommended on the package (extra drying time won't hurt anything).
Step 4
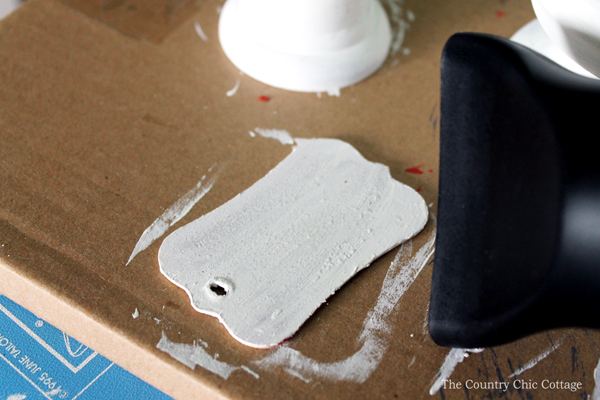
Are you ready to get a chipped paint finish with no sanding and no mess?
Grab your blow dryer and heat up your project. You may even start to see some bubbling of the candle wax under the surface of the paint. That is completely normal and will enhance the chippy paint effect.
You only need to blow dry your piece for a few minutes in order to soften that wax under the paint.
TIP: If you are using this method on furniture, work in small sections with the technique and repeat the steps over and over as you work across the surface.
Step 5
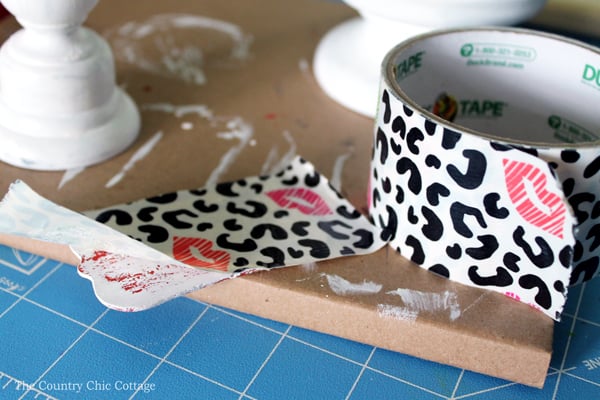
You will need tape with a strong adhesive for this next step, which is why I recommend using duct tape. Painter's or masking tape just won't work.
Stick the tape to the surface, press down, and remove. This can be done quickly as there is no reason to leave the tape on for any amount of time.
NOTE: Use a new piece of tape each time you do this part because you will lose adhesive strength when you remove the tape.
Step 6
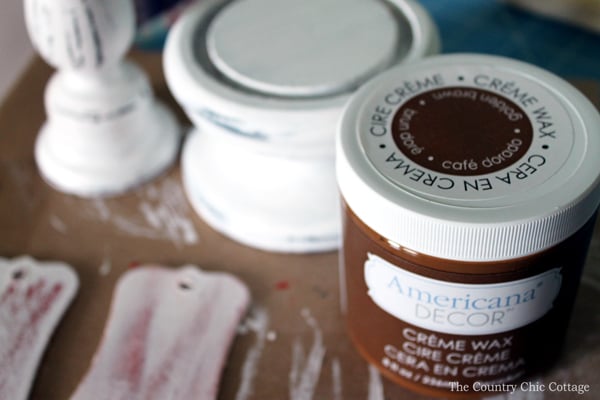
I used a coat of Americana Décor Crème Wax in Golden Brown over my final projects to add the final touch of my desired rustic vibe.
Just apply then buff off with a cloth according to the package directions.
That's it! Isn't it easy to create a beautiful, rustic chippy paint look?
Chippy Paint Technique vs No Distressing
If you need to create this look to make your objects look old and rustic, check out the comparison image below.
The pieces on the left below have been distressed using this technique. The pieces on the right have no distressing.
You can see how the candle wax makes the surface appear that it has chipped off over time to give it a rustic and weathered look that's perfect for modern farmhouse-style decor.
FAQs
Here are a couple of questions that I see readers ask regarding how to add some chippy paint technique like this one. If you have a question, please check to see if it's already answered below. Don't see it down below? Leave it for me in the comments!
Can I use any type of paint for this chippy paint technique?
Yes! I used Americana Décor Chalky Finish for these examples, but any paint will work. The type of paint you use doesn't matter as much as the candle wax.
Can't I just sand the paint off my pieces to create that chippy paint affect?
This method requires no sanding, so it saves you some elbow grease and eliminates the mess that you have to clean up. It also gives you a completely different look than sanding alone does.
Below is a comparison shot of distressing with the candle wax method and distressing with sanding alone. You can see the differences in the image below and pick which will look best with any rustic painted projects that you are planning.
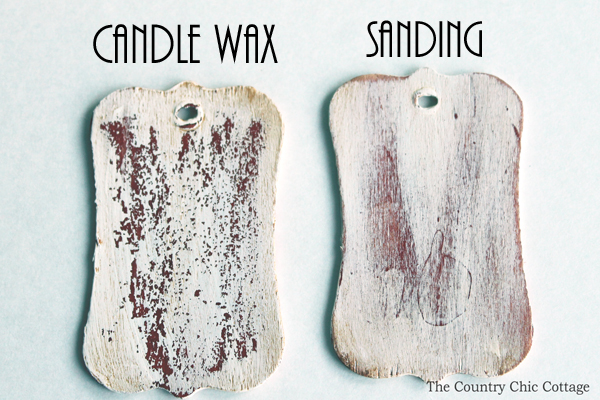
You can also see the comparison in the image below with a few candle holders. I used candle wax on the one on the left but just sanding on the right version. The looks are very different but both have rustic chippy goodness!

Create a chipped paint finish on your next project with candle wax (or just by sanding). Either way, if you are going for a rustic, farmhouse vibe, you'll want to try this technique. Plus, you'll get so many compliments on how amazing your decor is, but only you will know the secret!
More Fun Painting Techniques To Try
If you love this technique and want to expand your skills even further, check out these other posts!


Can I use regular acrylic instead of chalk paint ?
Yep! That should work fine!
Hello 👋
What happens if I put white first as the base, than wax than Black????? Would that work and look ok since the base is lighter than the top coat? Thanks
Sure! The white will just show through the black which would be a different look but cool all the same!
I’m confused– do you use the blow dryer after the last coat and then use the tape to take off paint where you want to have the worn look? I’m not sure where the tape comes in during the process.
Use a blow dryer after the last coat has dried. Then use the tape to pull up that paint and softened candle wax.
Could you use any type of wax? Does it specifically have to be candle wax?
I have not tried any other type so I can’t comment to how it will work!
This is a Great way to use up all of my used wax tarts that have lost their scent,,just put them in a ziplock for this,
and it works with a pleasant smell as a Bonus,,SOY based tarts Do NOT work as well…
I have tried so many methods to get a chippy paint/distressed look. And none of them achieved the look I wanted, until yours. Thank you for sharing this. It works great and I love how my chest turned out!
Can you use acrylic paint for the topcoat instead of chalk paint?
Yes, I used chalk paint but you can use any type of paint you want 🙂