
I took an old armoire and turned it into a vintage chalk paint cabinet. Use this painted armoire tutorial to refinish an old piece of furniture that you have!
I love all things old and vintage. I usually prefer to leave the original paint finish on an antique piece of furniture when I can. However, there are times when you have a piece that's been abused and needs a total makeover. And today's tutorial shares the perfect example with you.
There's a vintage cabinet that my husband's family has had for many years. At some point, someone tried to repaint this armoire. Unfortunately, it was a huge paint failure, and I had been waiting for the perfect time and inspiration to save this piece. The time finally arrived, and I was ready to tackle this task!
Today I'm so excited to share with you how I took old, abused vintage cabinets and gave them a much-needed facelift so that they became wonderfully rustic chalk paint cabinets with stenciling.
But, since this is a vintage cabinet, I didn't follow the exact same process that I used for my DIY Chalky Painted Nightstand.
Note: If you love refinishing furniture, I have more to share that may inspire you! Be sure to check out How To Refinish Wood Furniture, How to Use Colored Stain, and Stenciled Bookcase with Chalky Finish Paint.

A Look At My Painted Armoire
I owe y'all all the details on the vintage cabinet I refinished with chalk paint. I originally posted this over on Mom It Forward, but I want to share it here, too with a few more details in case you missed it.
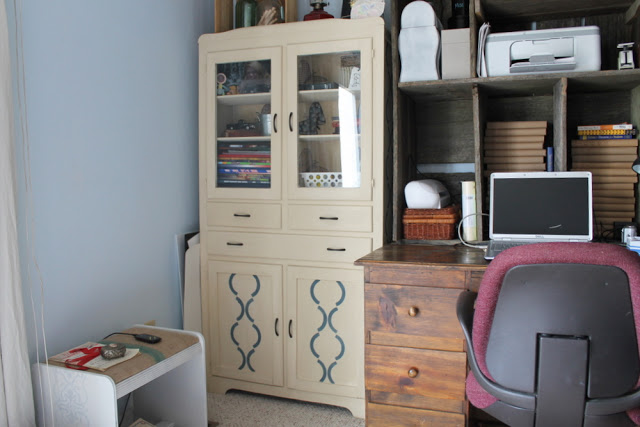
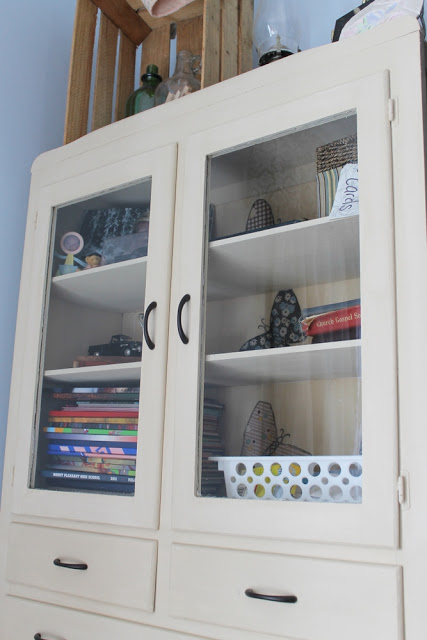
Before we dive into the process, let's start with before and after pictures! Here is my after:
And the (aaackkkk) before….
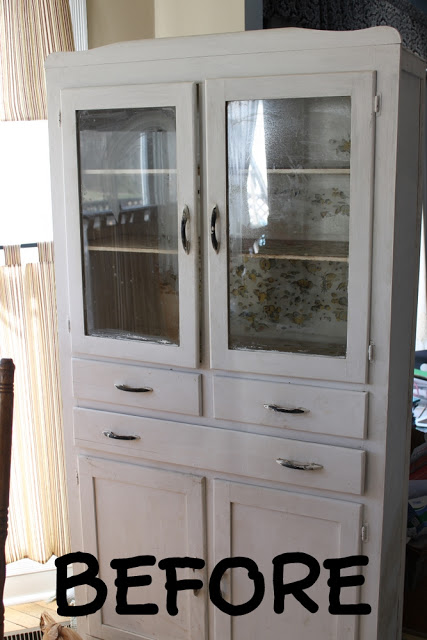
The paint job was awful and DIRTY! I tried to strip the paint off of the cabinet hardware – unfortunately, it was a failure. Check what I did and what went wrong!

I had to order all new hardware. The spacing on the original holes was very odd, so I ended up finding what I needed on eBay.
The handles were the perfect shape, the color was what I wanted, and best of all…the price was right!
This poor cabinet had so much potential, but it ALSO had broken handles, tons of dirt, contact paper galore, AND a very bad paint job. I had my work cut out for me.
I even pulled off some of the faded 80s contact paper before I snapped these pictures. Fortunately, unlike the paint on the hardware, I found a super easy way to remove contact paper!

A Design Solution For The Inside Of The Painted Armoire
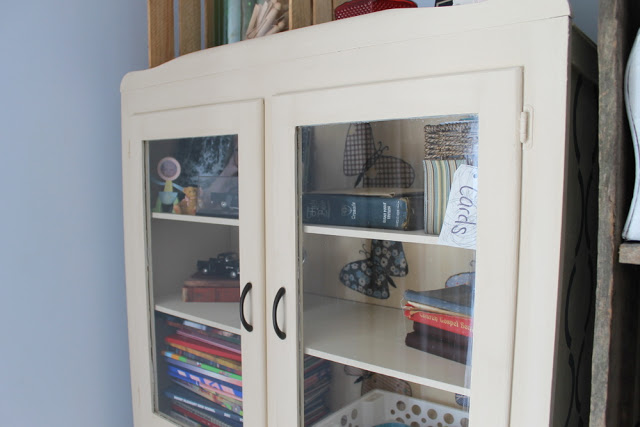
Now let's talk about the inside of the cabinet before we dive into the refinishing process. I had this vision of adding something behind those glass doors to give this painted armoire even more personality.
Then, I saw this tutorial over on Pretty Handy Girl on how to add fabric to the back of cabinets. I had found my solution! Brittany's tutorial is super easy to follow, and this design is temporary, so it can be applied and removed easily.
It is really perfect for a vintage piece that you don't want to harm. I will offer some instructions below, but head on over to Pretty Handy Girl for even more pictures and step-by-step instructions!
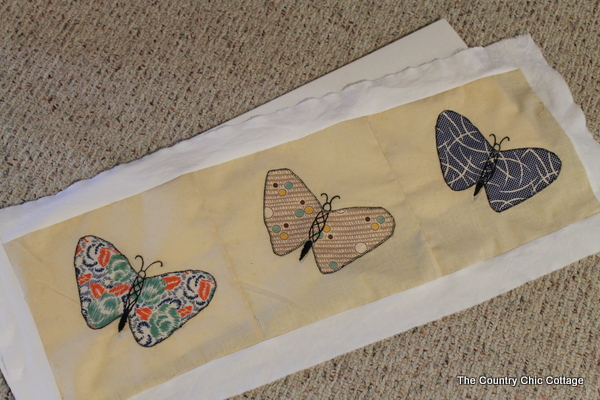
For my “fabric back”, I wanted to use vintage quilt squares. That is more my style and fits the vintage vibe of the cabinet.
So, I gathered up some quilt squares that I have been saving for a special project. (Many thanks to Tricia and Gina for the squares!). I sewed the squares together and added filler strips to some of them to give them something to wrap around the foam board.
The squares were almost the perfect size. This meant I had no fabric left to wrap around some foam board and secure. These filler strips worked perfectly for that. Check out the refinishing process below for more details.
How To Refinish Chalk Paint Cabinets
Here is the process I used to refinish this armoire. I'll go into more detail about a couple of the elements down below the process.
Supplies Needed
Here's what you'll need in order to refinish an armoire like this one.
- Antique armoire
- Chalk paint – in “oatmeal”
- Clear wax
- Stencil – I used the large Deco Damask
- Stencil brushes
- Paintbrush
- Rags
- Hardware
- Foam board
- Fabric (sewn quilt squares)
Instructions For Refinishing A Painted Armoire
Just follow these directions to refinish your own antique piece!
Step 1
The first step was to thoroughly clean the piece.
Step 2
Next, remove the hardware and repaint the entire piece. I used chalk paint so that I wouldn't need to sand the piece down before painting (a huge time saver!).
I used two coats (the second being very light) and let them dry completely.
Step 3
After the paint was dry, I added a coat of clear wax and applied it to both the inside and outside of the cabinet due to its overall condition.
Step 4
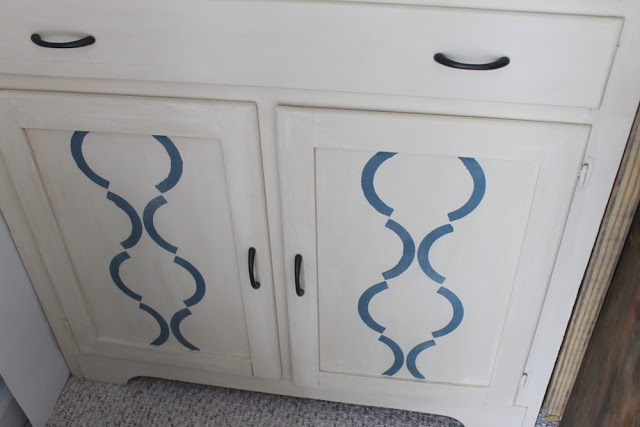
I added the stencil from Royal Design Studio down the center of each door, and I mixed up a custom color for the paint. I used stencil brushes from Royal Design Studio for the painting.
Step 5
After the paint in the stenciled area was dry, I rubbed on some clear Annie Sloan wax slightly to give the stenciled area a little wear and tear, so it looked more vintage (or at least older than a week!).

Step 6
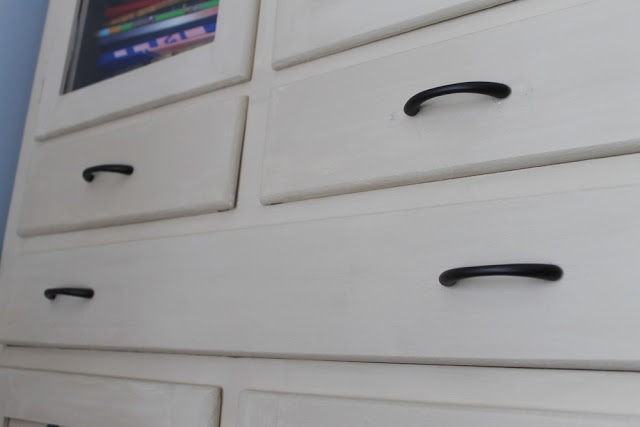
The painting and stenciling were a breeze compared to finding the hardware. Unfortunately, I realized (AFTER I finished painting) that the handle holes were a very rare size but found some I liked on eBay.
I loved the dark handles on the white paint with the original piece, and I was fortunate to find a dark finish in the new handle style to keep the same feel.
I added the new handles to the chalk paint cabinet. Love!
Step 7
I used fabric-covered foam board in the back of this cabinet. It is very easy to apply and can be changed easily. Here's what I did.
First, I sewed my quilt squares.
Then I cut the foam board to the exact size of the back of the cabinet.
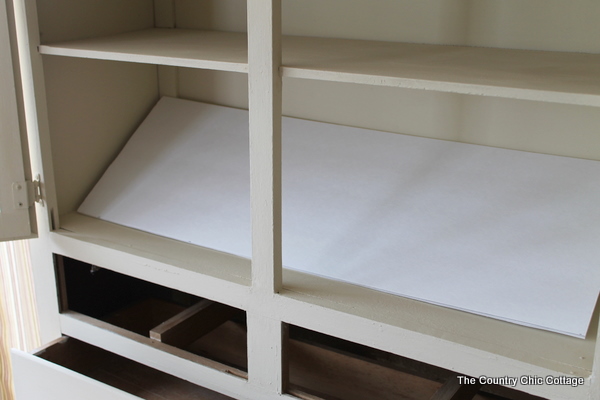
Next, wrap the fabric (or quilt squares) around the foam board and secure it with tape in the back. Pop the board into place. The tight fit will hold it securely without any glue or tacks or anything! And it's super easy to change out on a whim.
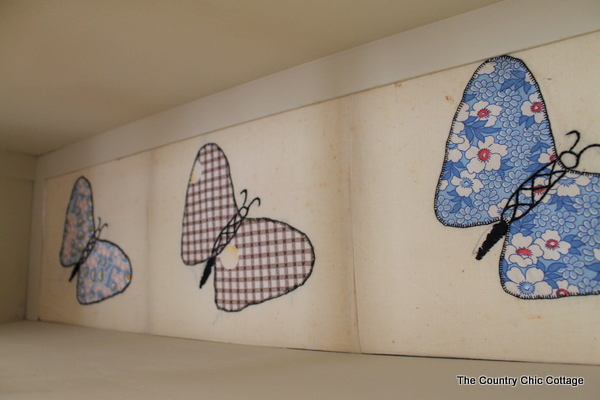
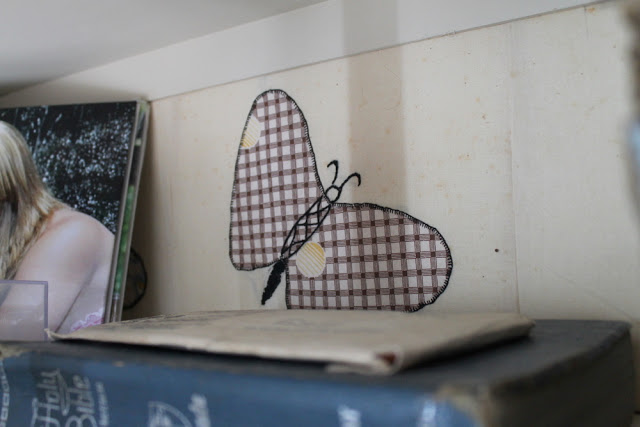
The butterflies are all made with different fabrics. I tried to coordinate them somewhat with my living room colors.
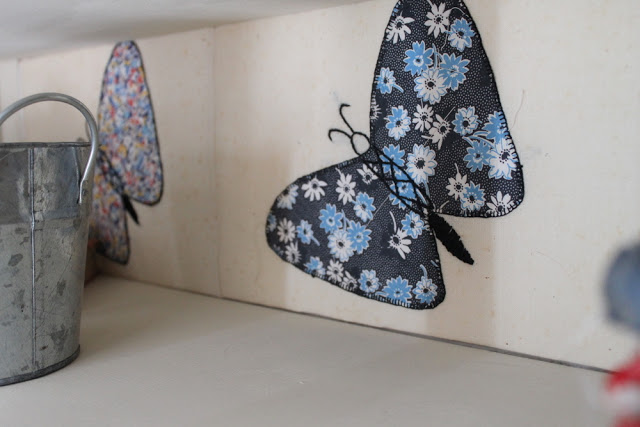
The fabric is sort of discolored with age — which I adore! It is the perfect addition to this cabinet.
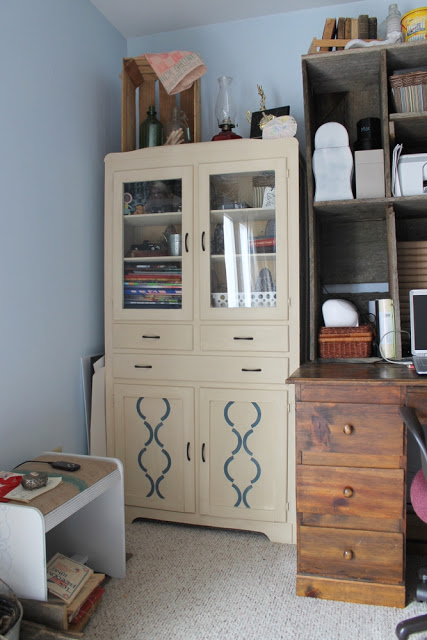
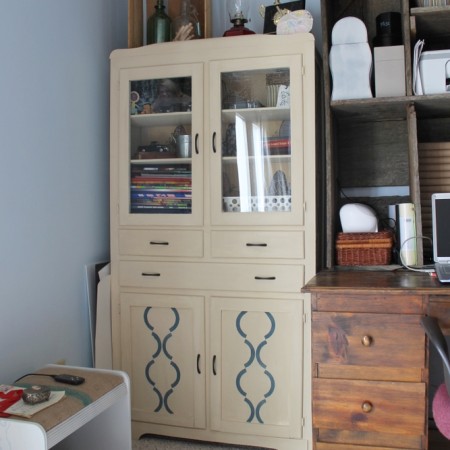
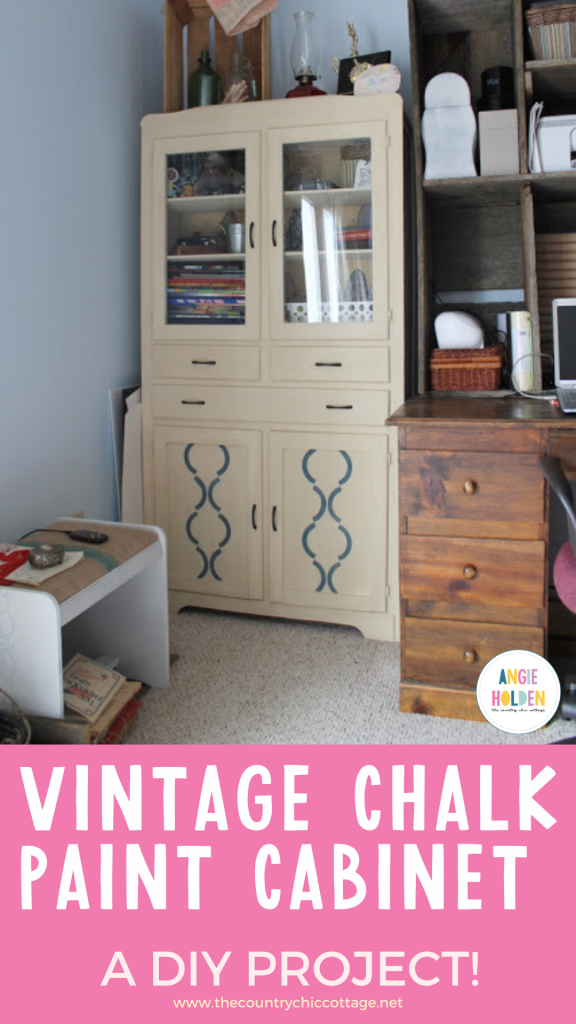
That's it! My “new” chalk paint cabinet is complete!
The cabinet is now in the office area of my family room. It's the perfect light shade to offset the dark of my barn wood desk hutch. I am using the cabinet to organize office and school supplies.
Plus, I had to add a few vintage pieces to complete the look!
Notes And Tips:
I used Annie Sloan chalk paint for the creamy off-white on the cabinet (it was an “oatmeal” color). My wonderful friend Gina over at The Shabby Creek Cottage had some extra that she let me borrow.
The only possible downside is that you have to wax over the paint with Annie Sloan wax. So, it does require an extra step. However, it's worth it. Hands down, it was the best paint I have ever had the pleasure to use.
The stencil itself was very well constructed, and the packaging for shipment was amazing. The instructions were super simple to follow, and I was stenciling in no time at all. I love how easy they make it to repeat your stencil pattern for as long as you need.
Chalk Paint Tips
I learned quite a few things as I worked with the chalk paint. Initially, I was unsure if chalk paint was worth the money before I started this project. Now I know it is!
Here are observations and thoughts:
- You use MUCH less paint than you do when working with regular paint. Gina gave me a partially used pint. There was a little less than 1/2 of the pint left when I gave it back to her. So, I got two coats on a very large piece of furniture with less than 1/2 a pint of paint. That is amazing by itself!
- The coverage is beyond anything I have ever used before. This piece was a mess. I did clean it well, but there were aged stains that just were not going anywhere. The chalk paint completely covered them. It worked like magic, and I couldn't believe it.
- This is the first time I have ever painted a piece of furniture that I felt the finish was even close to being professional. I did use a really good brush with the paint. But, I know that my skills as a furniture painter did not improve that much. It was the Annie Sloan paint magic that made the finish as amazing as it was.
- It is there to stay! I would never say it is impossible to scratch, but I will say that I feel the quality of the finish is stronger than with regular paint.
The cabinet is now in my living room next to my desk with my barn wood hutch. I am using it to store school and office supplies, and I love the look and feel it really gave to this corner!
FAQs
I know that people often have questions about refinishing furniture. Here are a few that I've seen several readers ask about this painted armoire project!
Does chalk paint last on furniture?
Yes! Chalk paint is my favorite to use on furniture because it doesn't require sanding or priming, and it lasts a long time. It is recommended to add a protective top coat to seal the paint and protect the color (and refresh it once in a while). I used wax, haven't reapplied it, and my refinished armoire still looks great!
What are the disadvantages of chalk paint?
Although I love using chalk paint, it does have a few drawbacks to consider as costs more than other paint, dries slowly, requires a protective wax top coat, chips easily (without the top coat), and can have unsightly brush marks sometimes.
I used a high-quality paintbrush and was careful as I painted to make sure I was creating an even coat of paint. I don't have any unwanted brush marks.
And yes, the wax top coat is an extra step, but even doing that step saves me time over sanding and priming the furniture before painting!
All in all, I prefer the process of using chalk paint on furniture over regular paint, and I love the rustic quality that it adds too.
More Inspiration From The Country Chic Cottage
If you love this chalk paint cabinet project and want more ideas, check out these other popular posts:


Supplies
- Old armoire
- Chalk paint
- Clear wax
- Deco Damask stencil
- Paintbrush
- Rags
- Foam board
- Fabric
- Hardware
Instructions
- Thoroughly clean the furniture.
- Remove the hardware and repaint the entire piece. You may need two coats of chalk paint. Let each coat dry thoroughly.
- Add a coat of clear wax. Let dry.
- Add the stencil from Royal Design Studio to the center of each door and use stencil brushes for the painting.
- After the paint in the stenciled area was dry, rub on some clear Annie Sloan wax and rub it on to make it look more vintage.
- Add the new hardware to the chalk paint cabinet.
- Create the vintage-looking decoration for inside the hutch and add it.


Hi Angie, The cabinet turned out wonderful and I love the stencil. Thanks for linking to the Open House party. Hugs, Sherry
Stopping by from the Open House Linky Party! http://queenofsavings.com
Angie, you worked magic on your cabinet! I love that you used vintage quilt squares to back it–what a cool look. And I’ve been wondering if ASCP was worth the price–thank you so much for giving us the lowdown on that.
Great job! Thanks so much for linking to Grace at Home! I really appreciate it.
I think your cabinet is really darling! Thanks for sharing the progess with us. 😉
Love your cabinet, it does brighten up the corner!
debbie