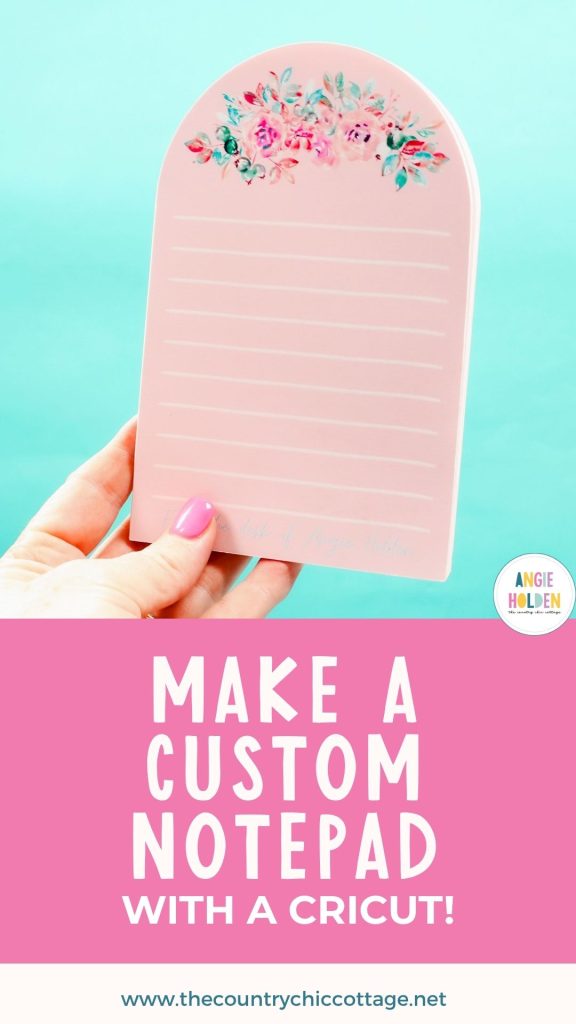
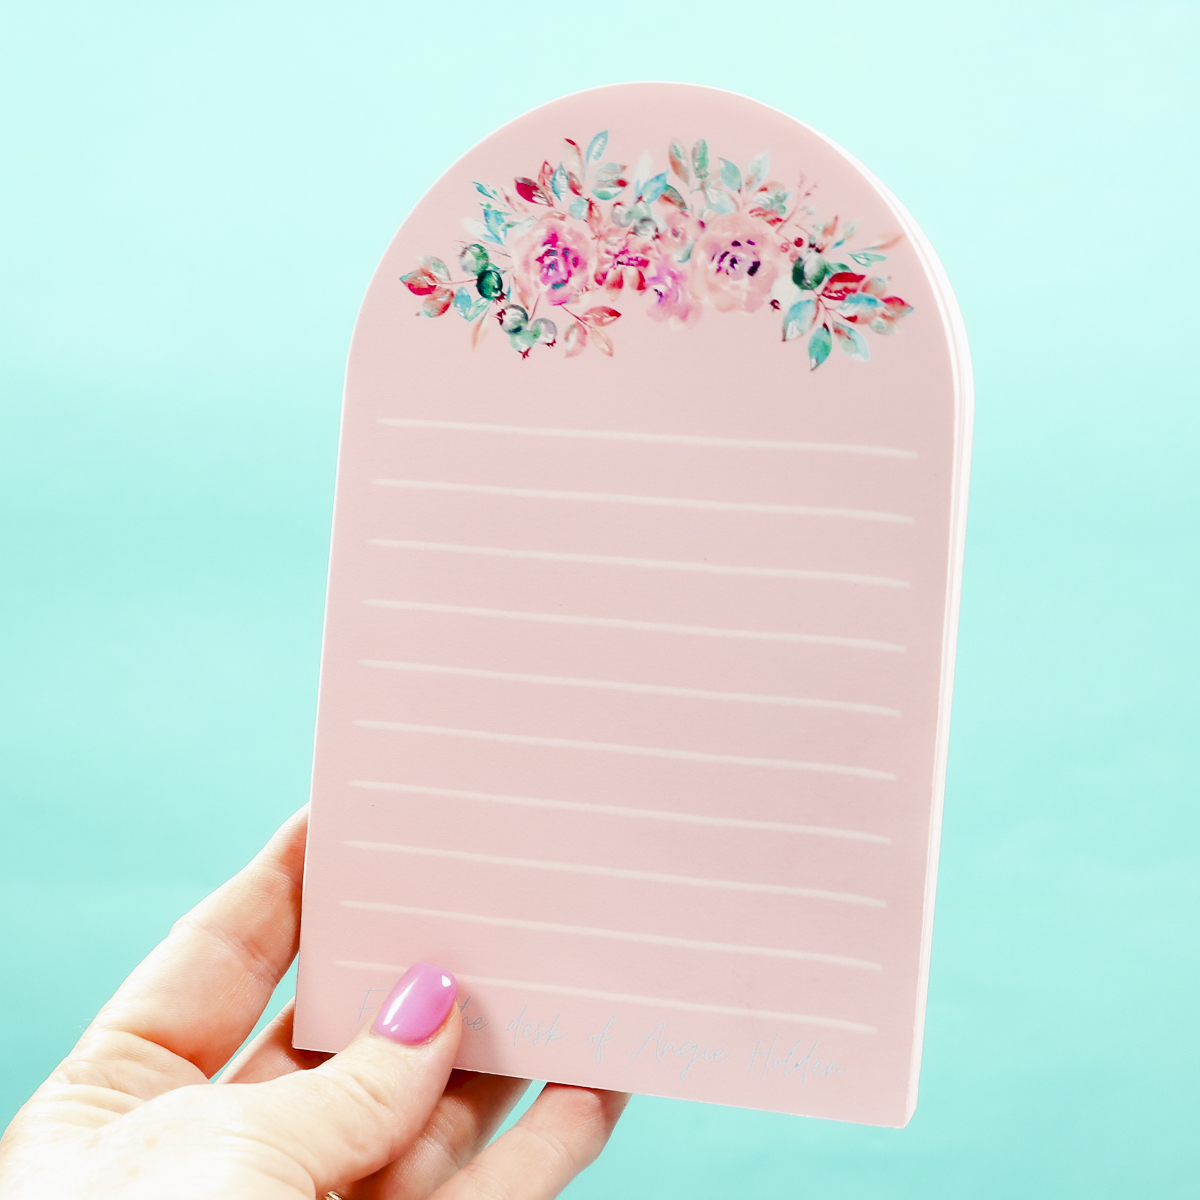
It's been a while since I've been so excited about how well a new project turned out. I have been interested in making custom notepads for years, and I finally learned how to make them with a Cricut, and they turn out perfectly.
If you love notebooks and notepads half as much as I do, you're going to love being able to make exactly what you want with your Cricut machine.
If you're new to using your Cricut for Print Then Cut, I have a guide that will help get you started.
Print Then Cut can be done on every Cricut machine except the original Cricut Joy. If you have an Explore Air 2 or older machine, you will want to be careful when using colored paper. The sensors on older machines can have a hard time reading the registration marks on colored paper.
How to Make Custom Notepads with a Cricut Machine
Depending on the type of crafter you are, it's possible you already have everything you need to create your own custom notepads with your Cricut.
The one thing you may not have is, in my opinion, the most important thing. You are going to need padding compound. This is the flexible adhesive we're going to use to stick the pages together.
Supplies Used
- Free Notepad Template
- Cricut Machine – Any Cricut machine except the original Joy.
- Printer (You can make these notepads using any type of printer. As long as it can print on the type of paper you choose, you can use it.)
- Paper (The type of paper you use is completely up to you and the type of notepad you want to make. Personally, I don't like really thin copy paper, so my paper is a little thicker than that.)
- Brayer
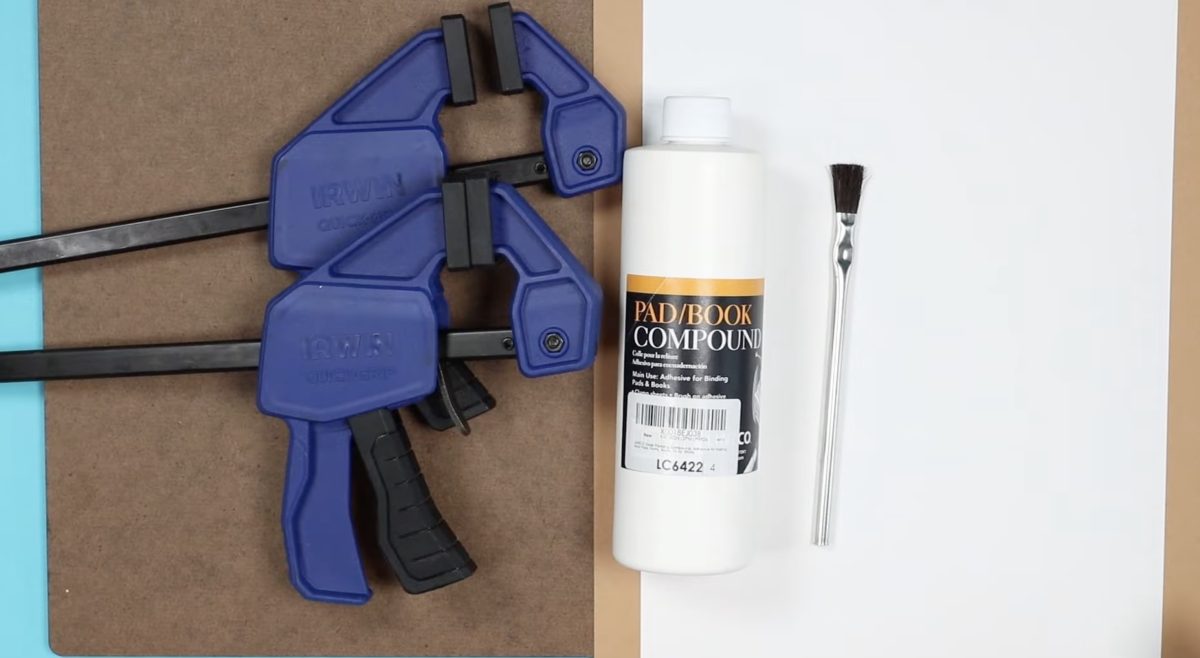
- Padding Compound
- Clamp
- Disposable Paintbrush (Used to apply the padding compound. The padding compound can dry quickly, resulting in ruined paintbrushes.)
- Chipboard/Kraftboard
NOTE: You may also want something to put on the top and bottom of the notepad to tighten the clamps onto. Depending on the clamp you use, it could leave an indentation in the paper.
Step 1: Create the Design
The first thing we need to do is create the design. You can either start from scratch or use the free template I have linked above.
Open the template, and you'll have an editable project in Canva. Within Canva, you can click on the different elements and change colors, move around elements, and even swap out designs. You can even change the shape if you don't like the arched top.
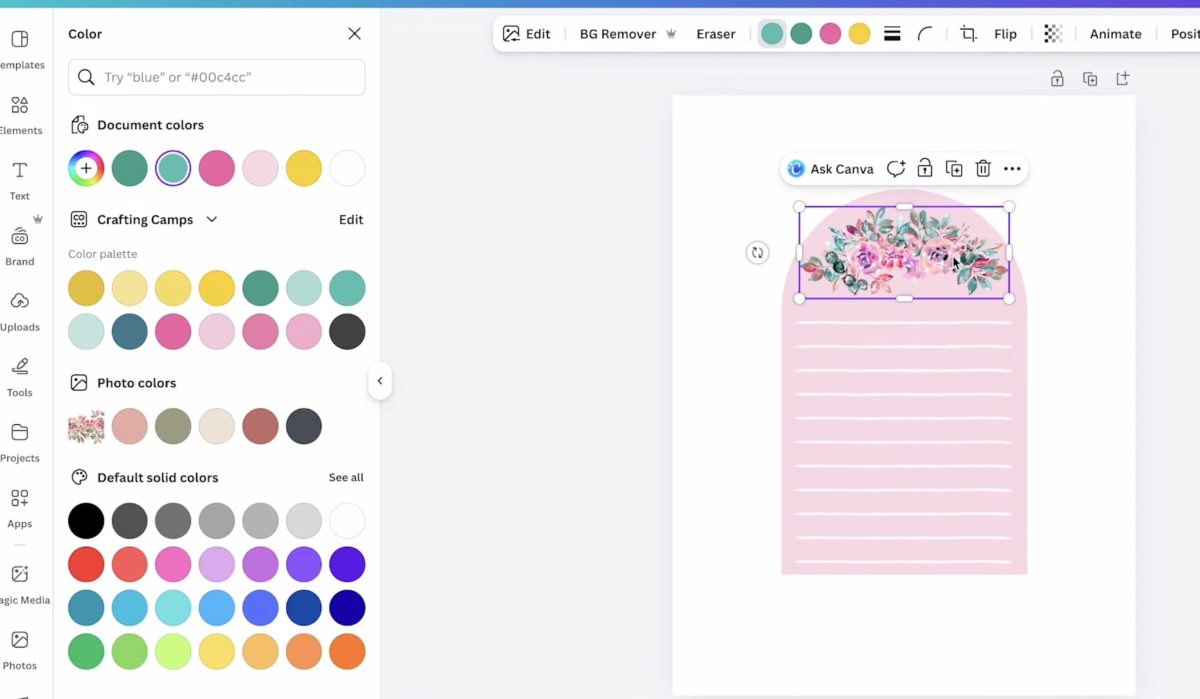
If you like my design but don't like the colors, you can even change the colors of the lines and the colors of the flowers.
To really make the project personal, you can add text. I love adding From the Desk of with the name at the bottom of the design.
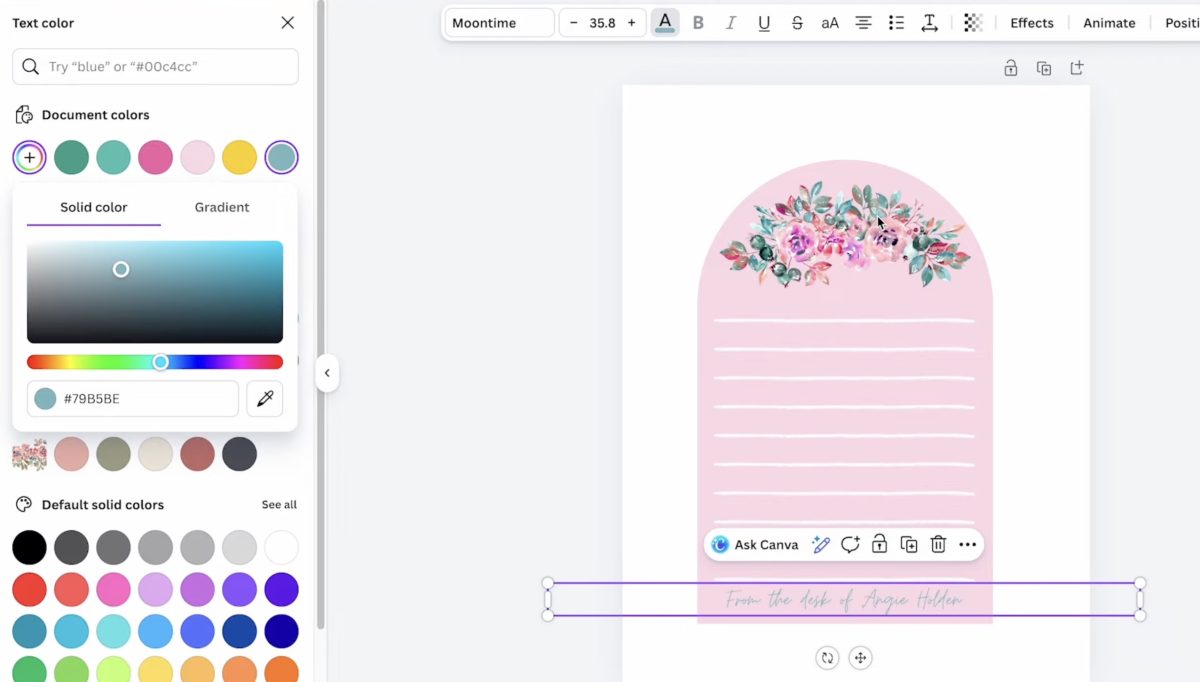
The options are really endless.
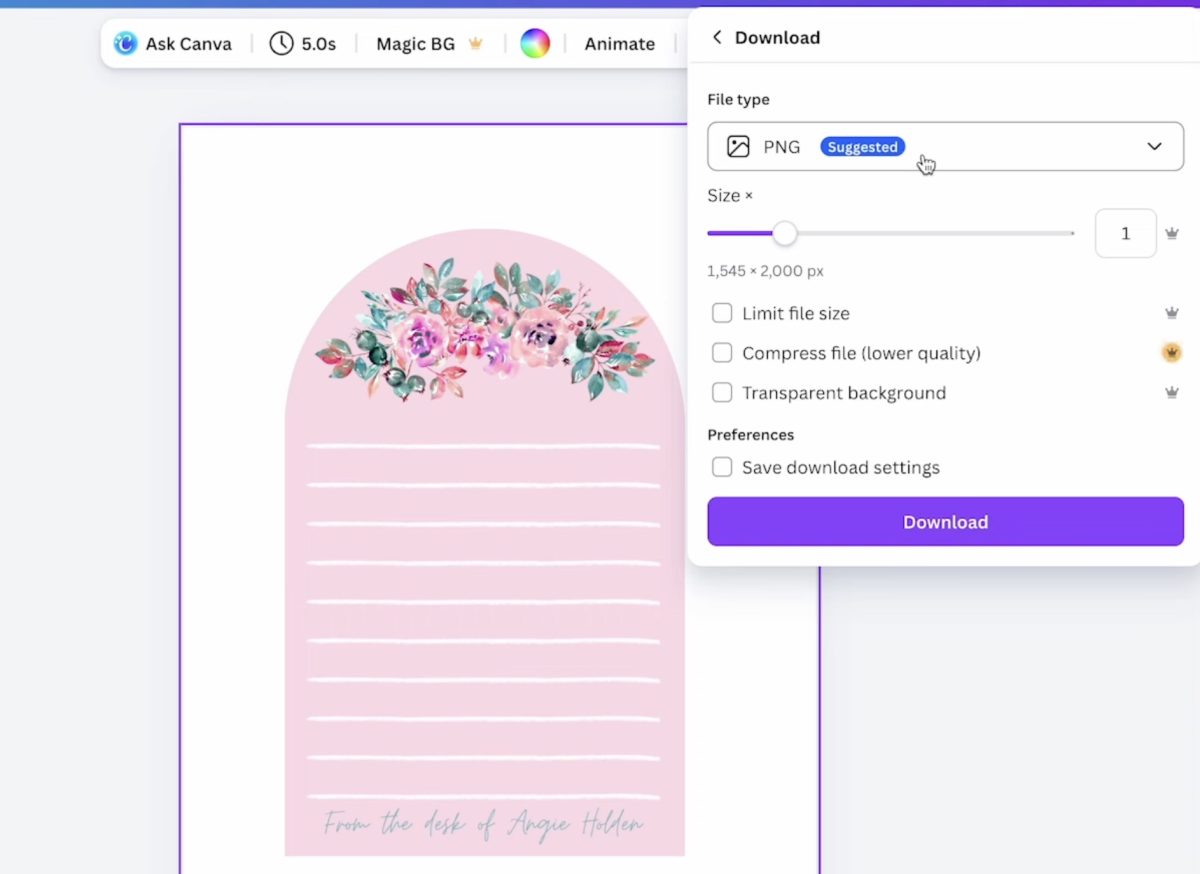
When you have the design how you want it, click Share and then Download. I like to download as a PNG file. If you have a paid account, you can download it without a background. I am going to download mine with the background so I can show you how to remove the background in Design Space.
Step 2: Adjust the Design in Cricut Design Space
Now, we're ready to work in Design Space.
Open Cricut Design Space and select Blank Canvas.
Upload the Design
Click Upload, Upload Image, and find the image on your device. Click Continue, and now you'll see it on the upload screen.
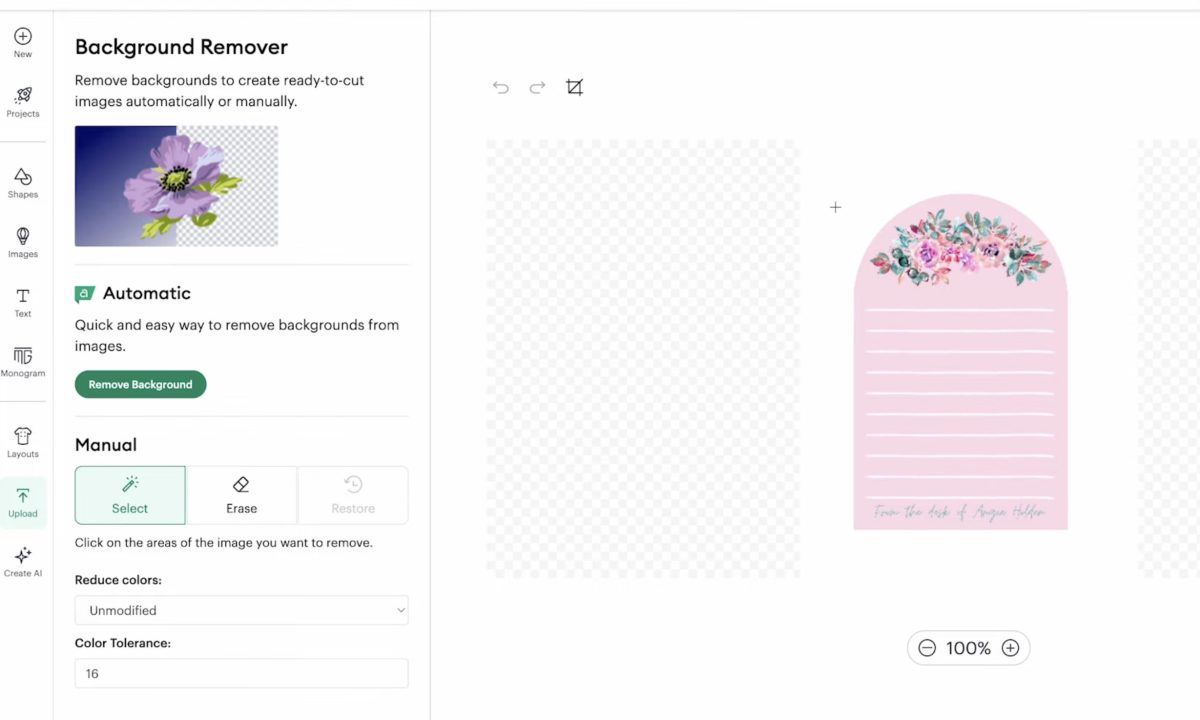
At this point, we want to remove the background. You can do this by clicking anywhere on the background, not the image. You should see the background become checkered white and grey; that means it's been removed.
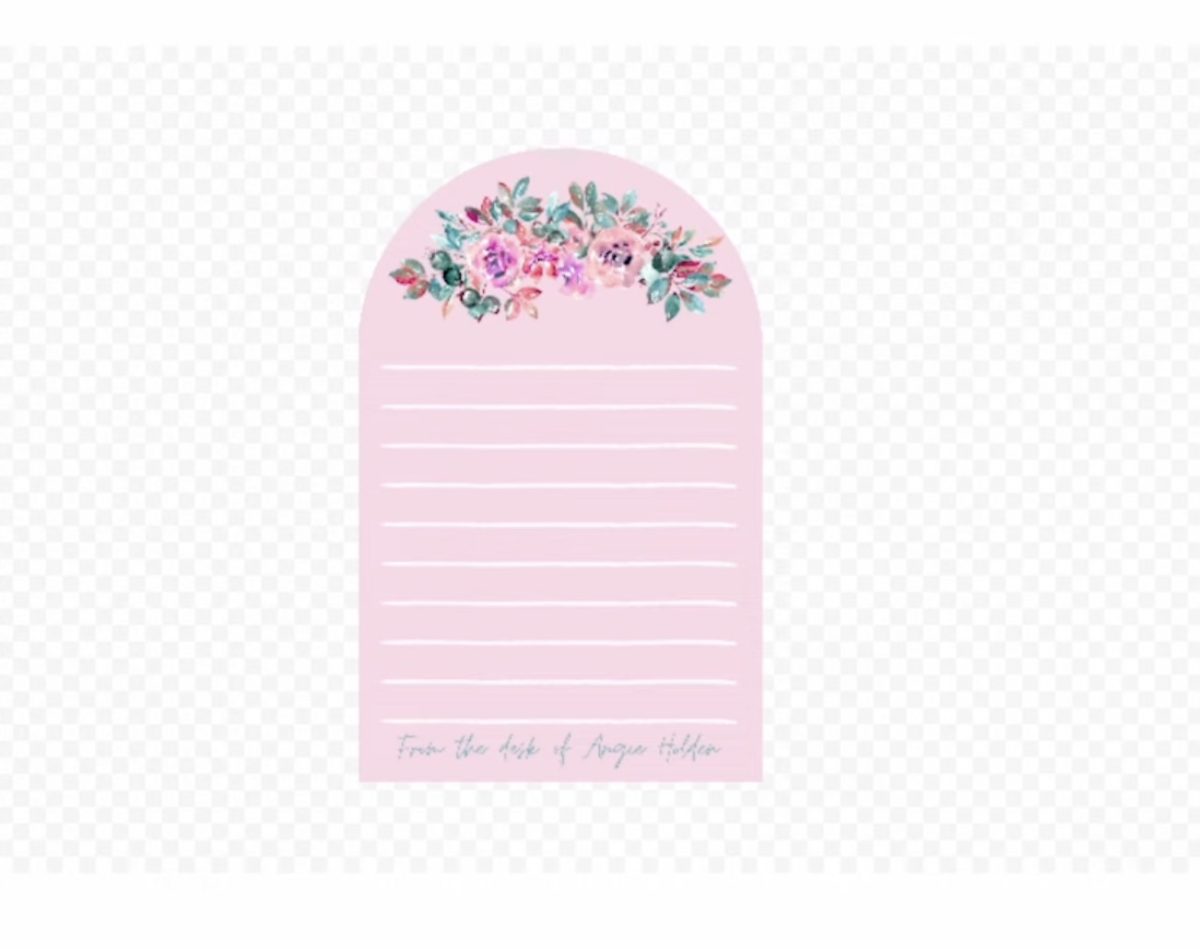
When you have the background removed, click Apply, and Continue.
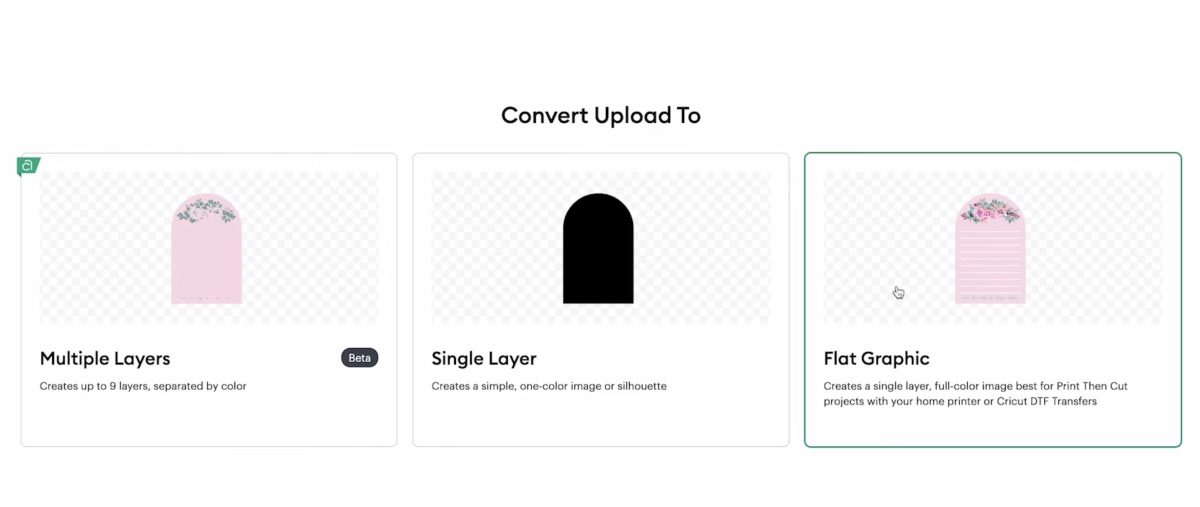
Make sure you choose Flat Graphic as the upload type. This will bring the design in to be used with Print Then Cut, which is what we want. Click Upload, and now you'll see the image in your Uploads.
Resize the Design
Add the design to the canvas so you can resize it to whatever size you want it. The Cricut machine you're using will dictate how large you can print.
Make sure the lock is clicked before resizing. If it isn't locked, when you resize, it will distort the image.
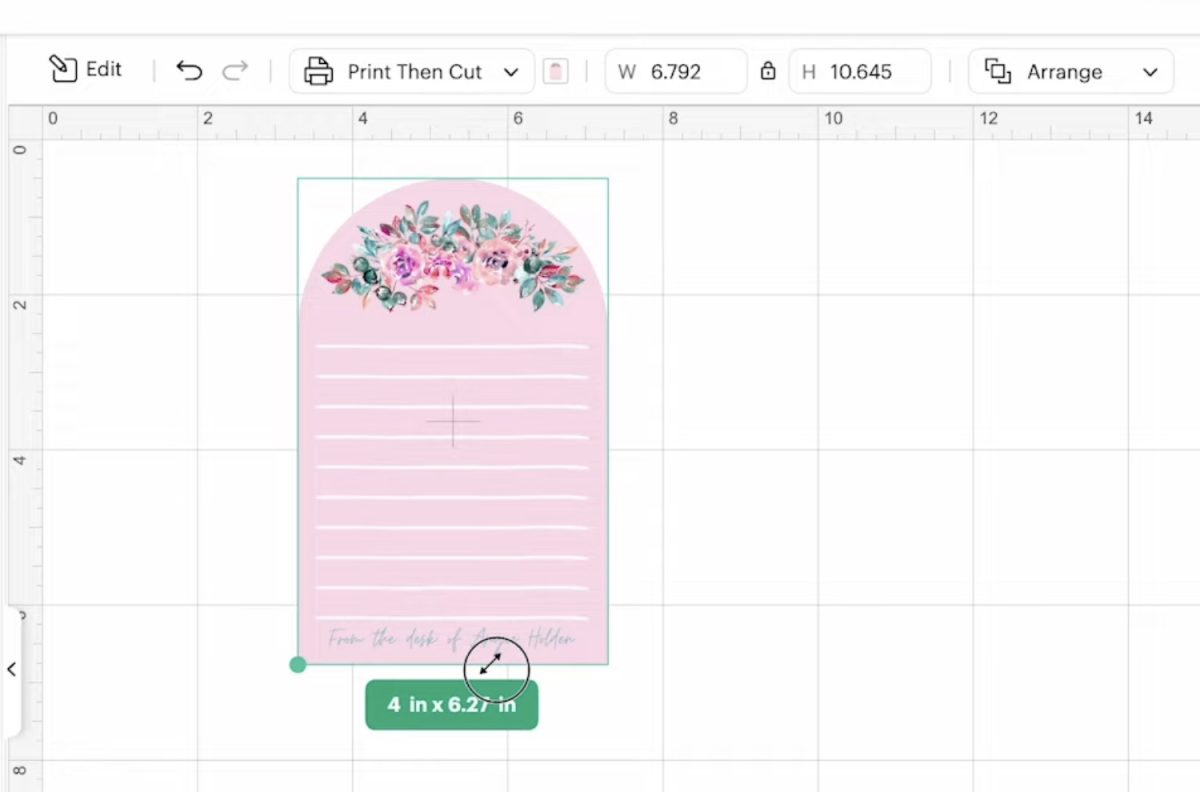
I want my design to be 4 inches wide. I will be printing on an 8.5 by 11 sheet of paper, and with that width, I can print 2 on each page.
Now, we're ready to send it to the printer.
Step 3: Print the Design
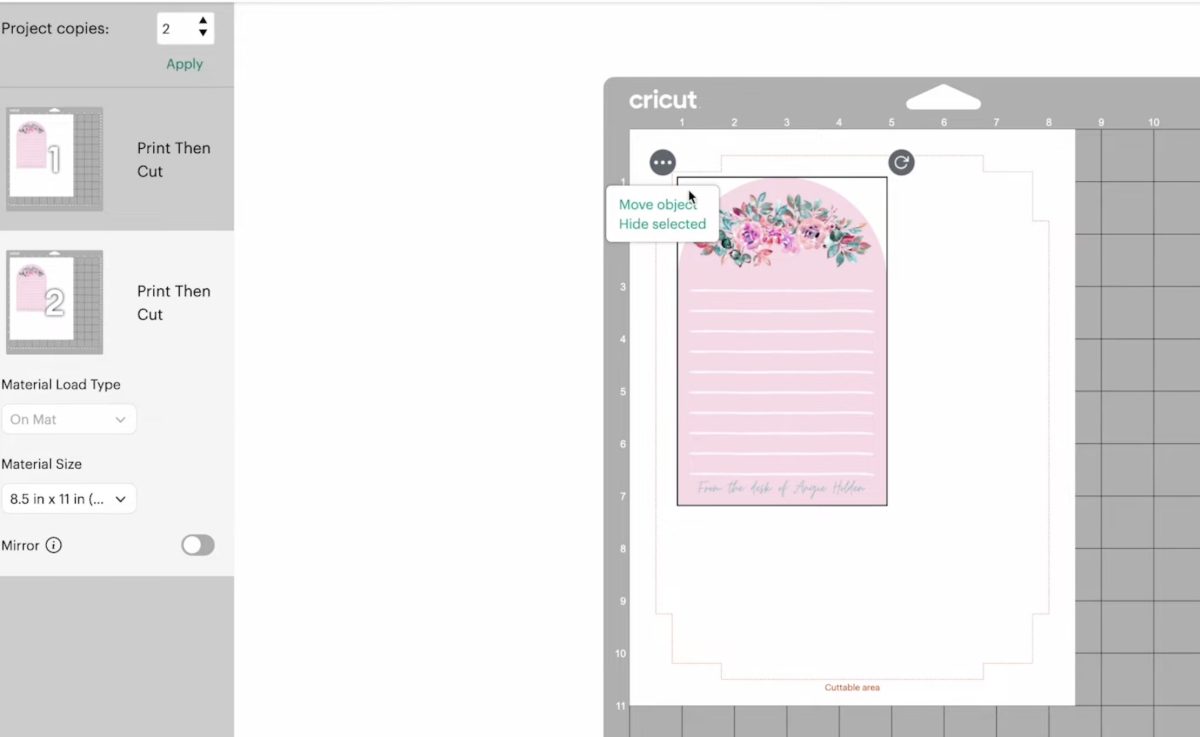
Click Make, and on the mat screen, adjust how many to print.
At the top of the screen, increase the number of copies to 2. Now, Design Space doesn't think I can print 2 on one page, but I know I can.
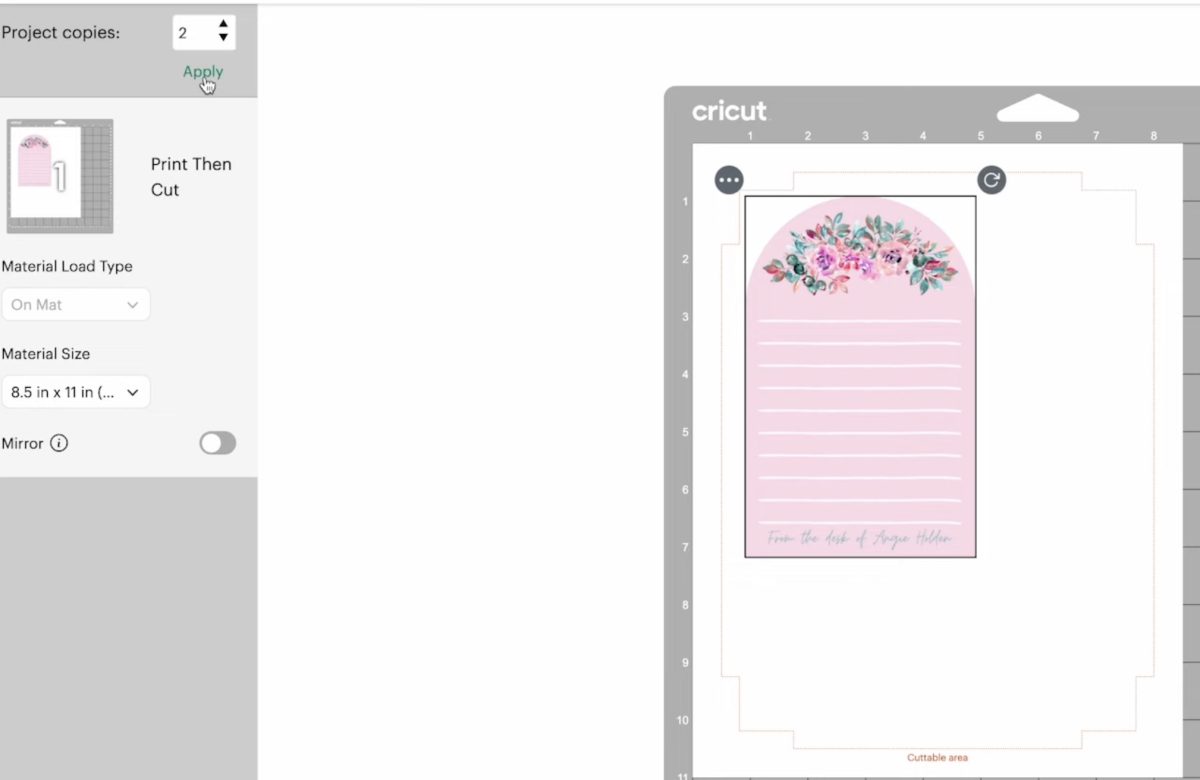
Click on the 2nd mat and click on the design. You'll see 3 dots in the upper corner; click on that, and you'll see Move Object. When you click that, you can move it to the first mat.
Now, we can rotate the designs so they fit side by side, and we can print two on one sheet of paper.
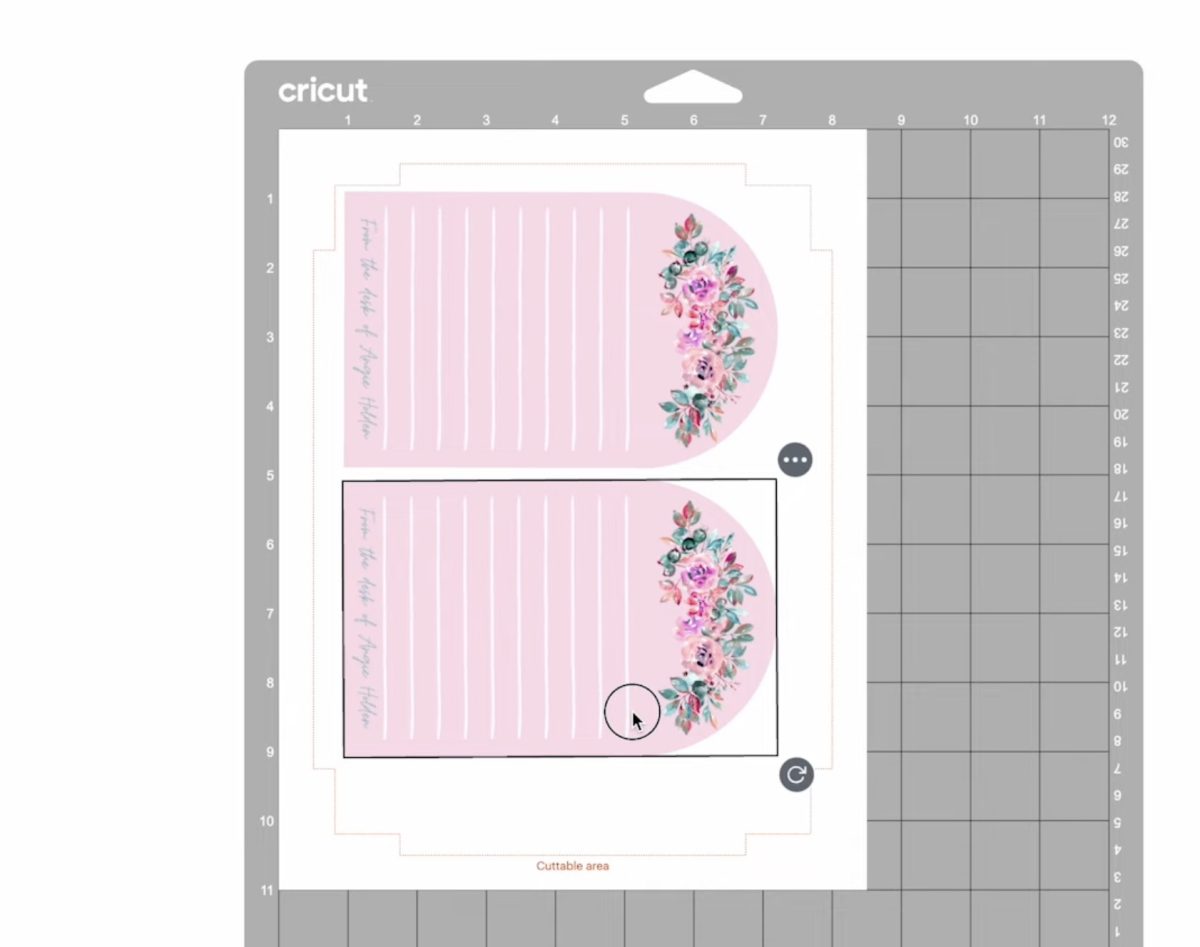
With it laid out correctly, click Continue. Choose Send to Printer, and since the design has a colored background, I am going to make sure Bleed is turned on. This will help ensure the design looks really good even if your calibration is off just a little bit.
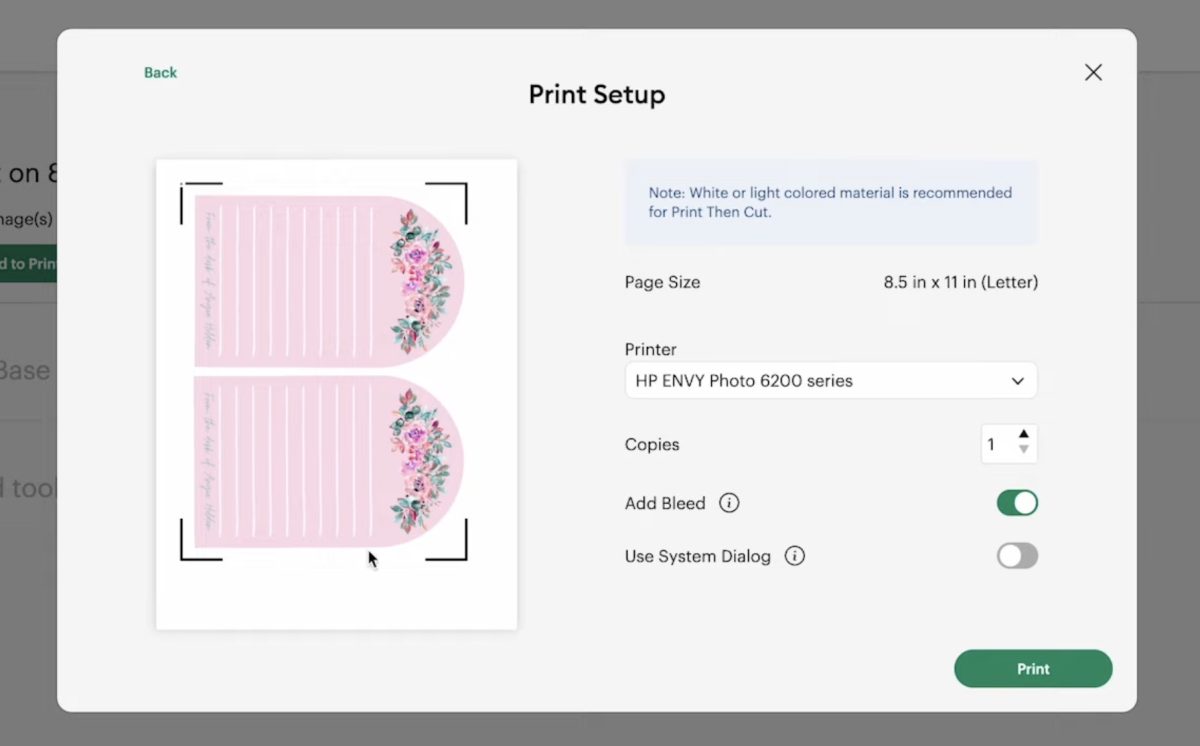
Click Use System Dialogue and Print. This will open a different printing box (check behind the Design Space window if you don't see it; sometimes it pops up behind it).
Here you can adjust your print quality settings and tell it how many pages to print. This will be dictated by how many pages you want your notepad to have. If you want a 30-page notepad, you'll need to print 15 pages.
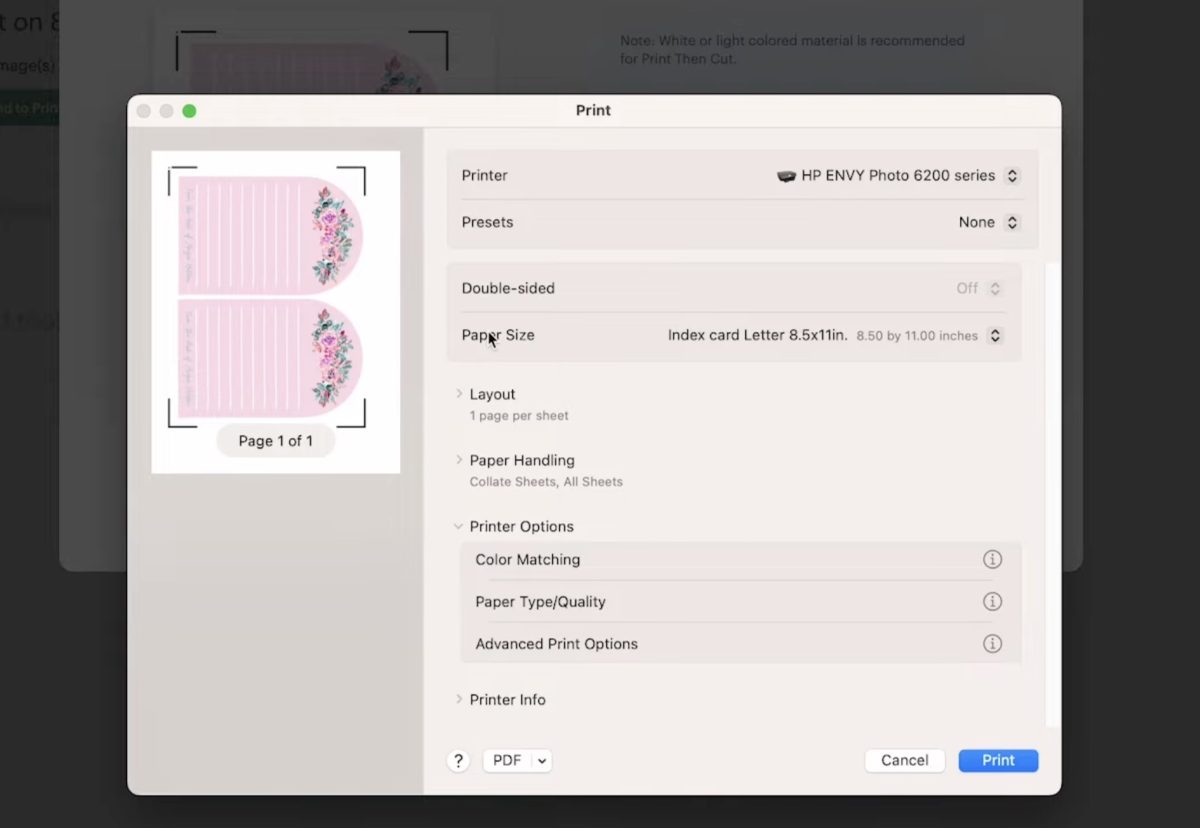
Click Print and the pages will be sent to the printer.
Step 4: Cut Out the Notepad Pages with a Cricut Machine
Place the printed design on the cutting mat with the small arrow in the upper left-hand corner. Use a brayer to secure the paper to the mat.
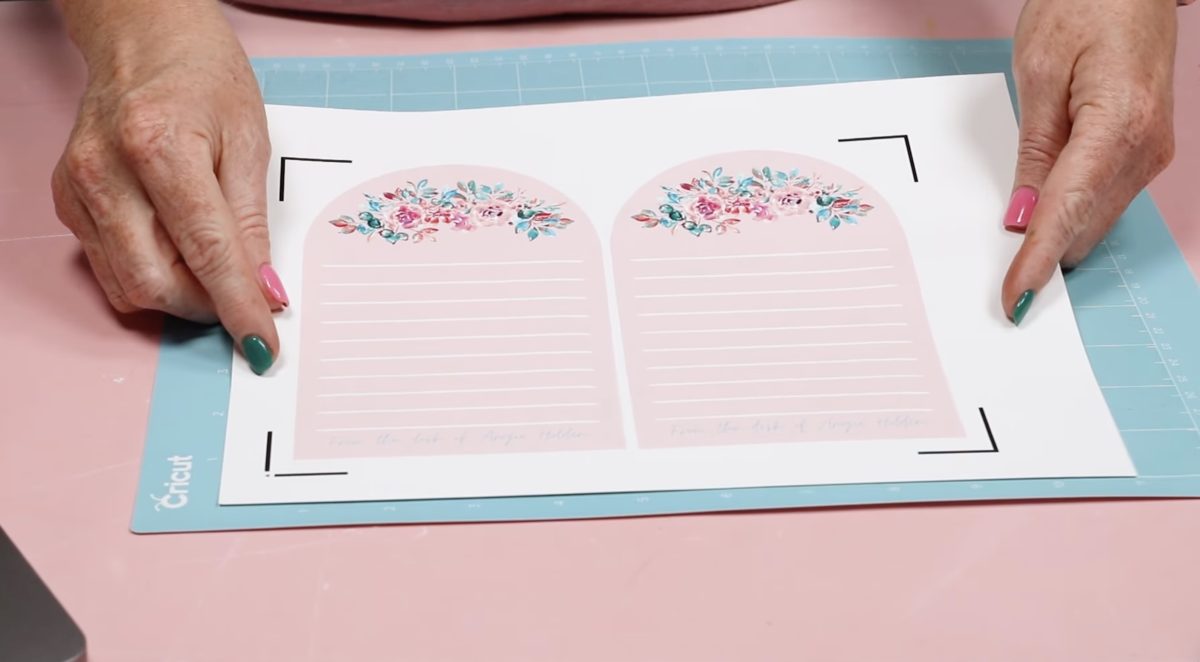
Load the mat into the machine, with a fine-point blade installed. First, the machine will read the registration marks, and then it will cut out the notepad pages.
When it's done cutting, remove the paper from the mat. I recommend flipping the mat over and gently rolling the mat away from the paper. This will keep the paper from curling up.
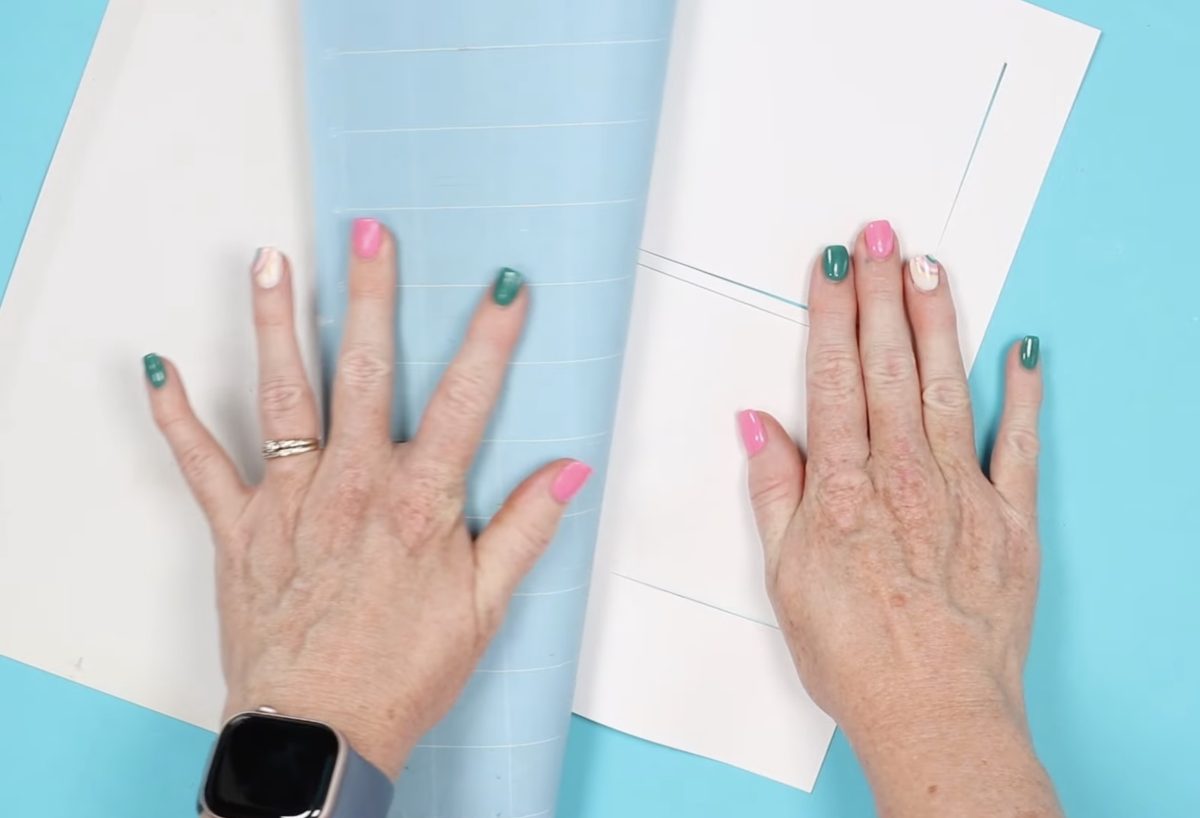
The cuts look really good; turning the bleed on is a good idea anytime your design has a colored background.
Repeat this process for each page.
Step 5: Cut Out the Notepad Backer
I like to have a firm backer for my notepad. To make that, I am going back to the Design Space canvas, and from here I am going to duplicate the design and change it from a Print Then Cut to a Basic Cut.
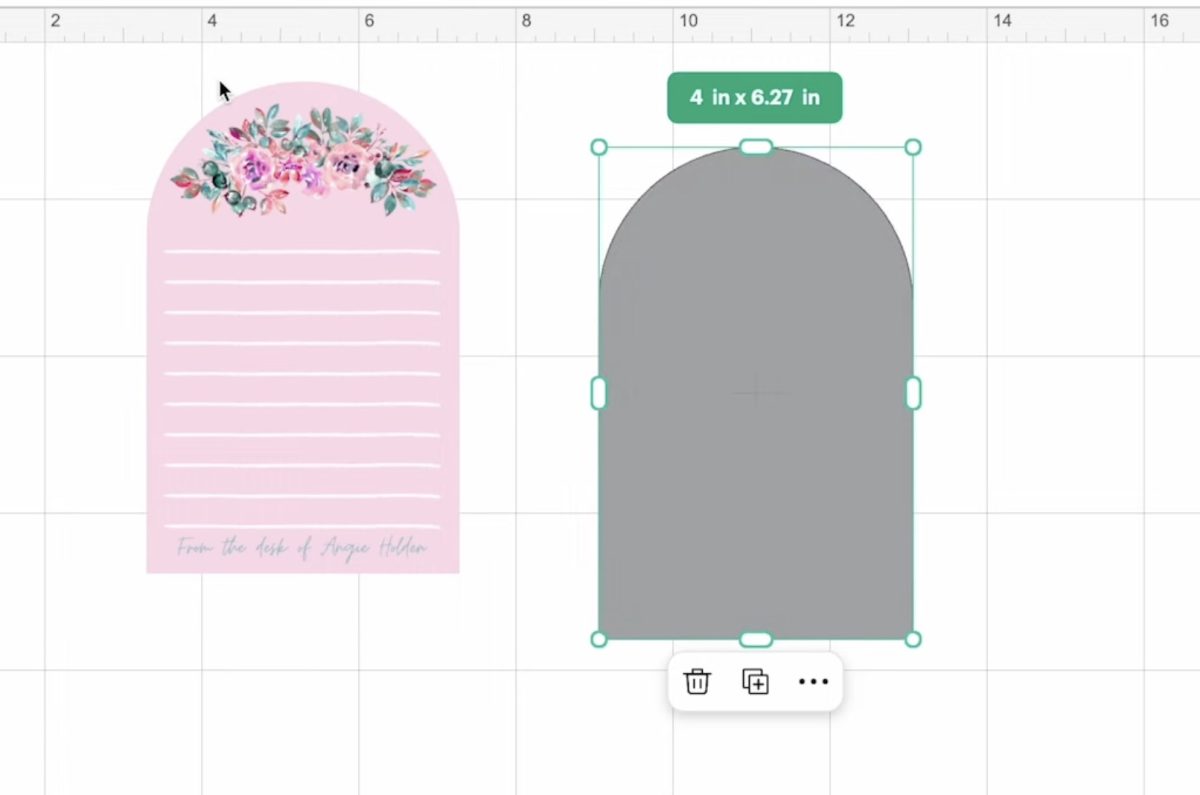
This will tell the Cricut to just cut around the outside of the design.
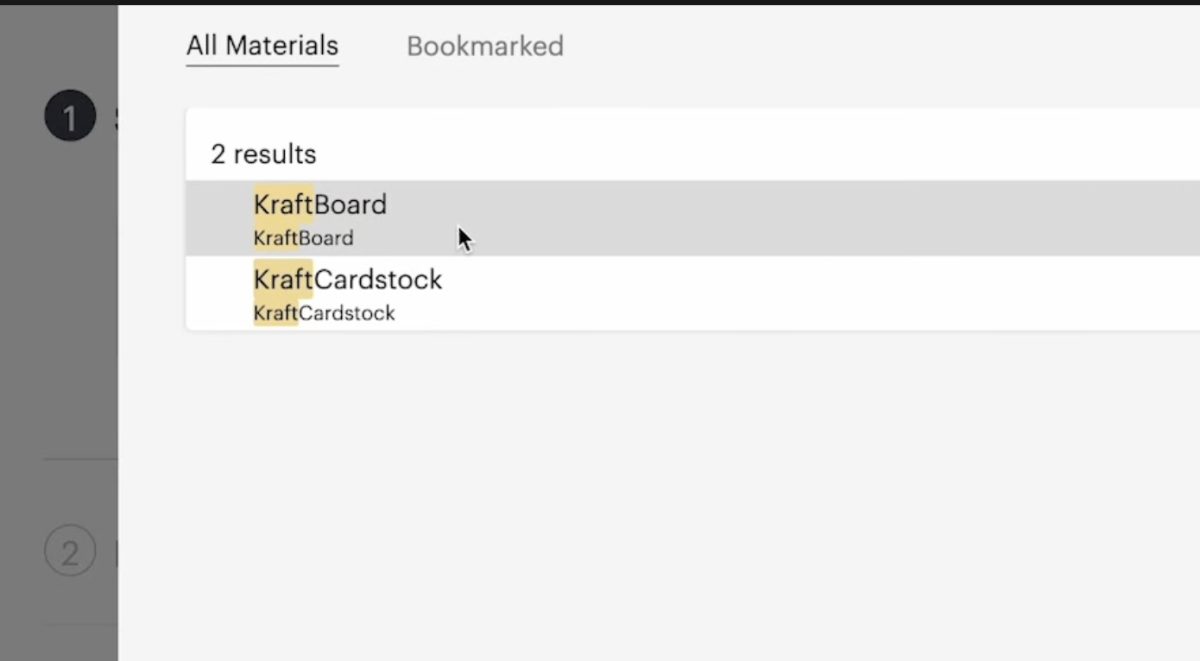
Click Make, then add the material to a cutting mat. I am using Kraftboard for my backer, so I've selected that material setting, and now I can load the mat into the machine.
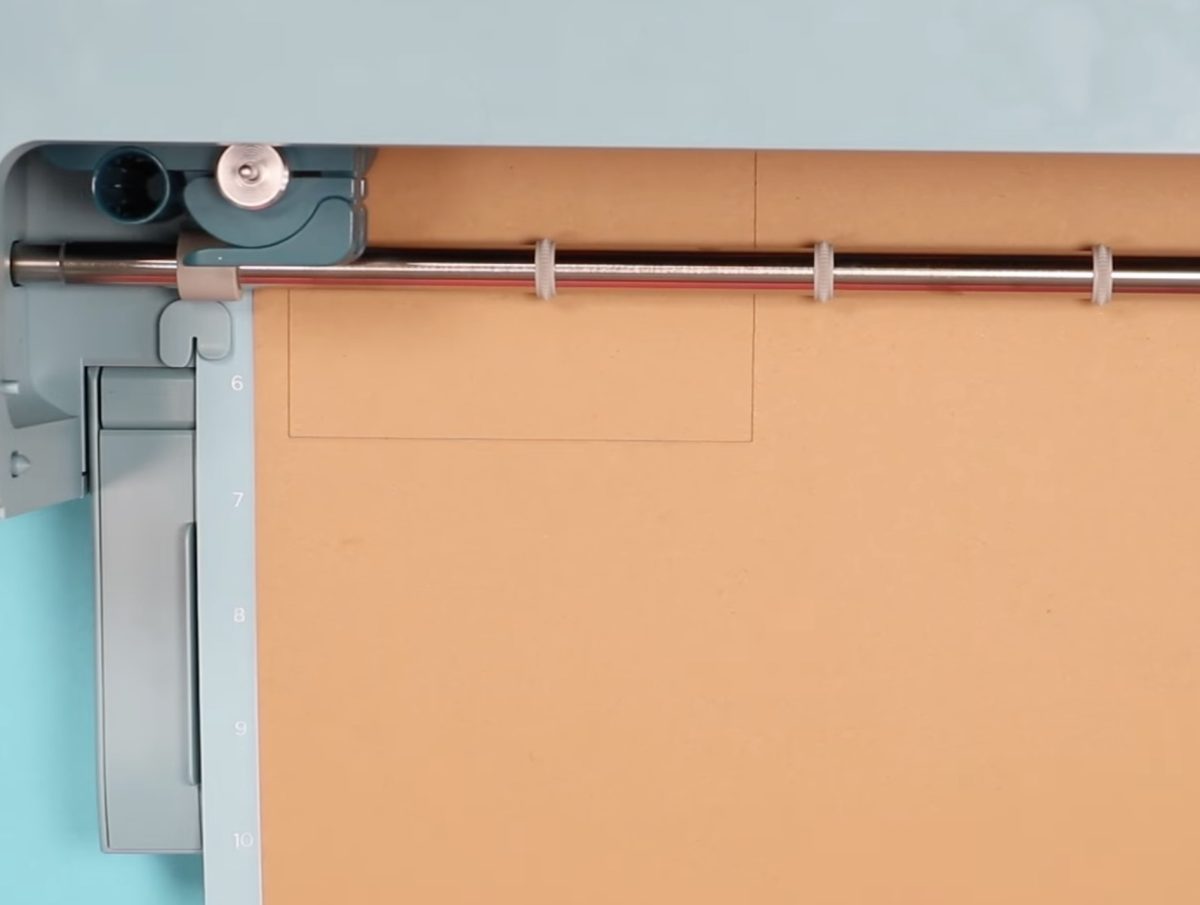
Allow the machine to cut it out, and when it's done, remove the material from the mat.
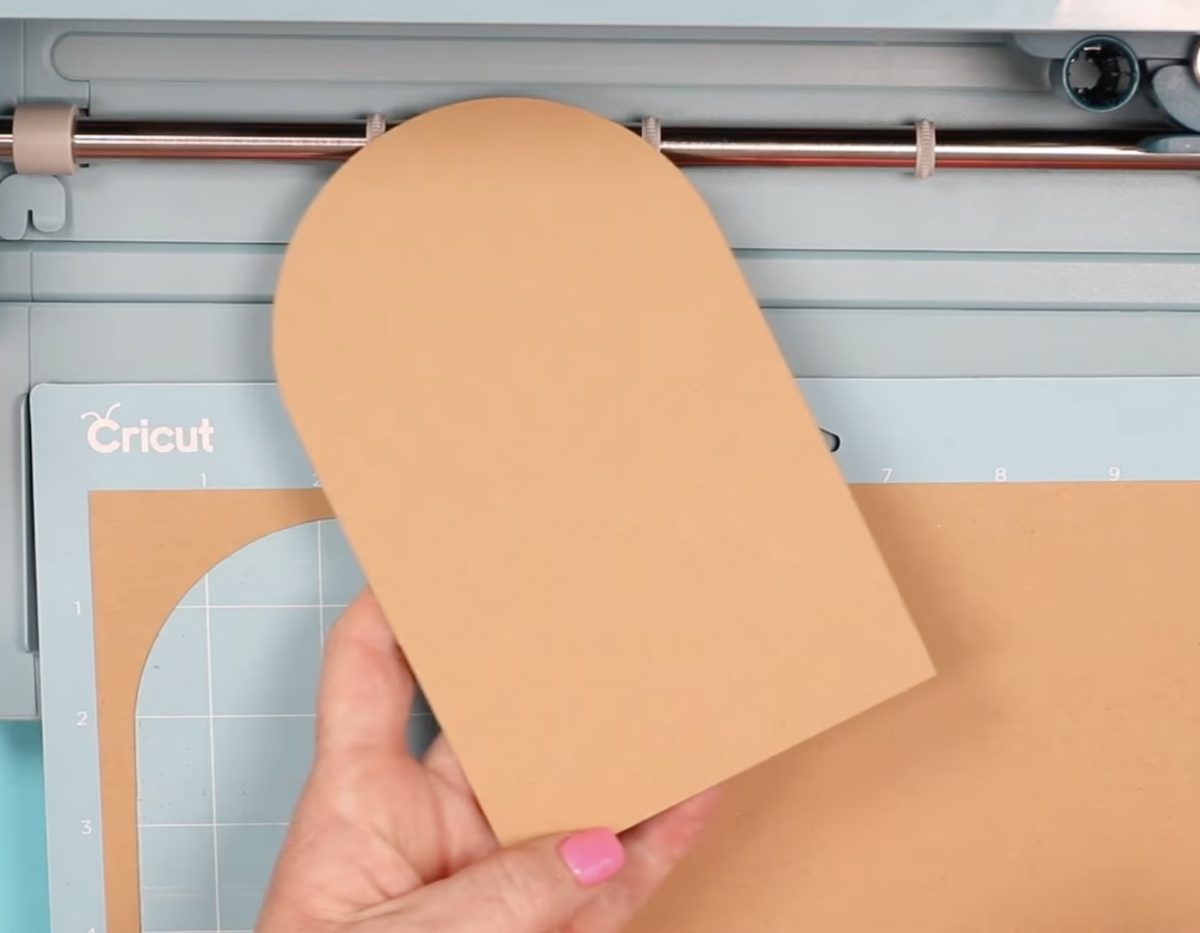
Now we're ready to assemble the notepad.
Step 6: Assemble the Custom Notepad
I am going to add the padding compound to the left side of my notepad. Depending on the shape of your notepad, you can choose where you want it. We want to be able to easily tear off each page, and the arched top would make that difficult.
Grab the backer piece and all of the notepad pages and stack them up so they're aligned perfectly top to bottom and side to side.
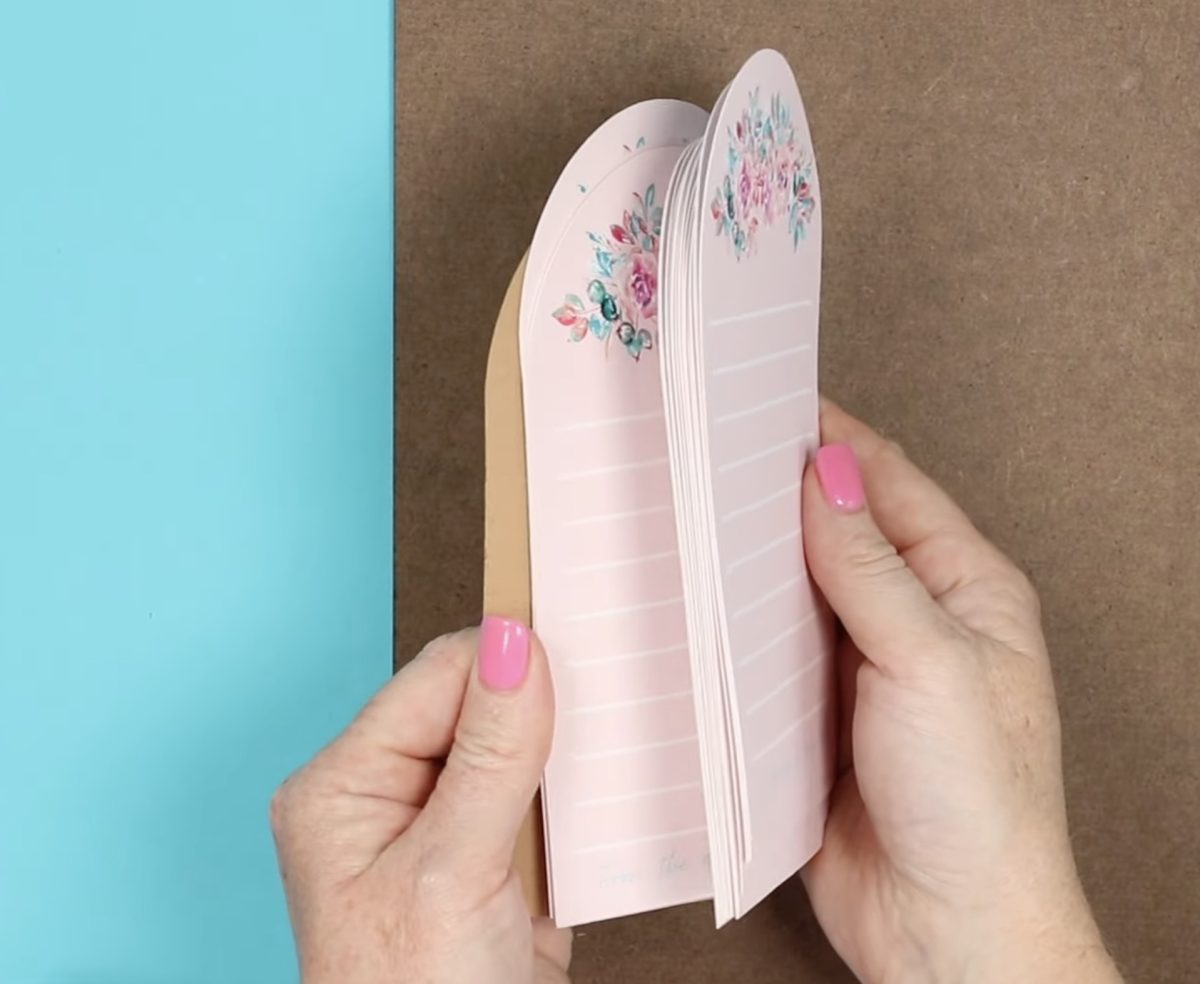
Add a board to the bottom and top of the stack with the side you're adding the padding compound to sticking out just a little bit. This will make it easier to apply the padding compound.
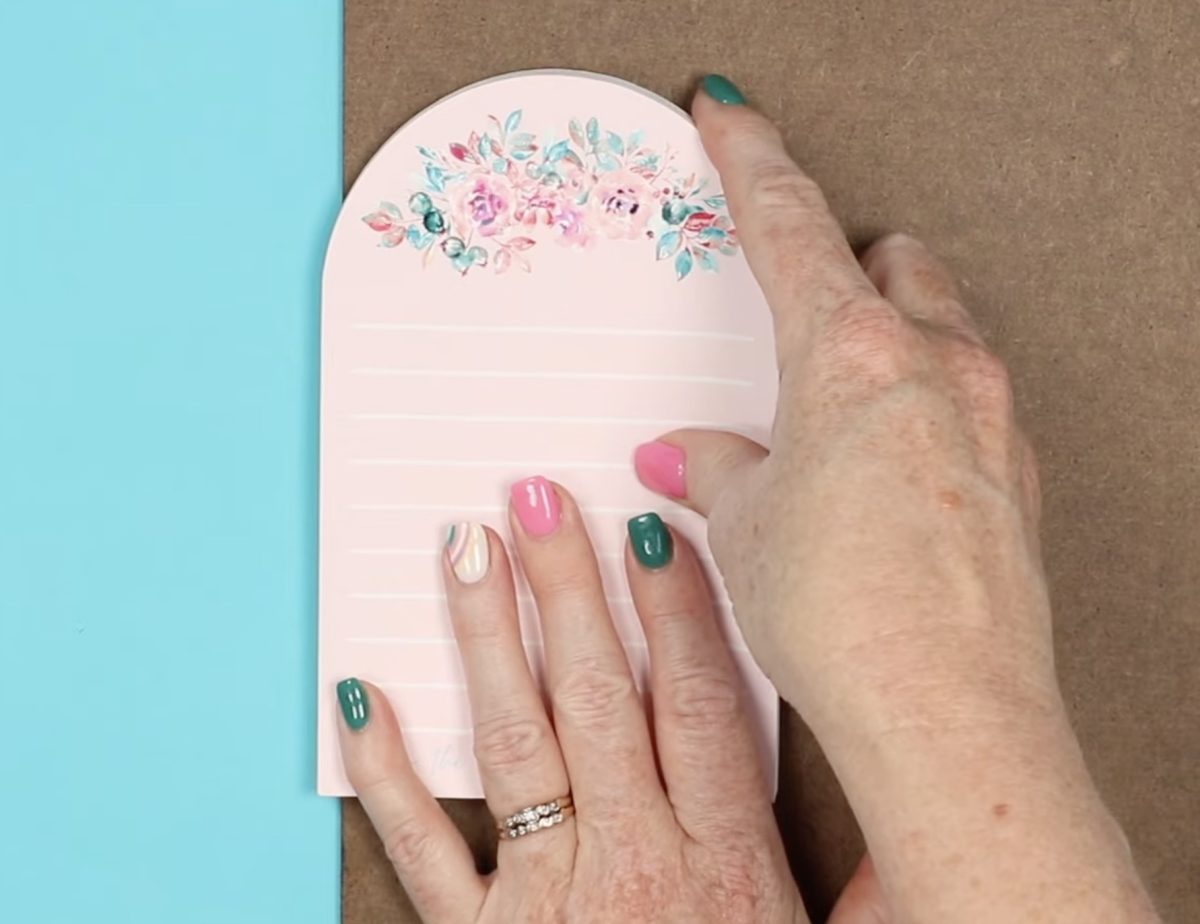
Make sure everything is lined up, then we are going to secure it with clamps.
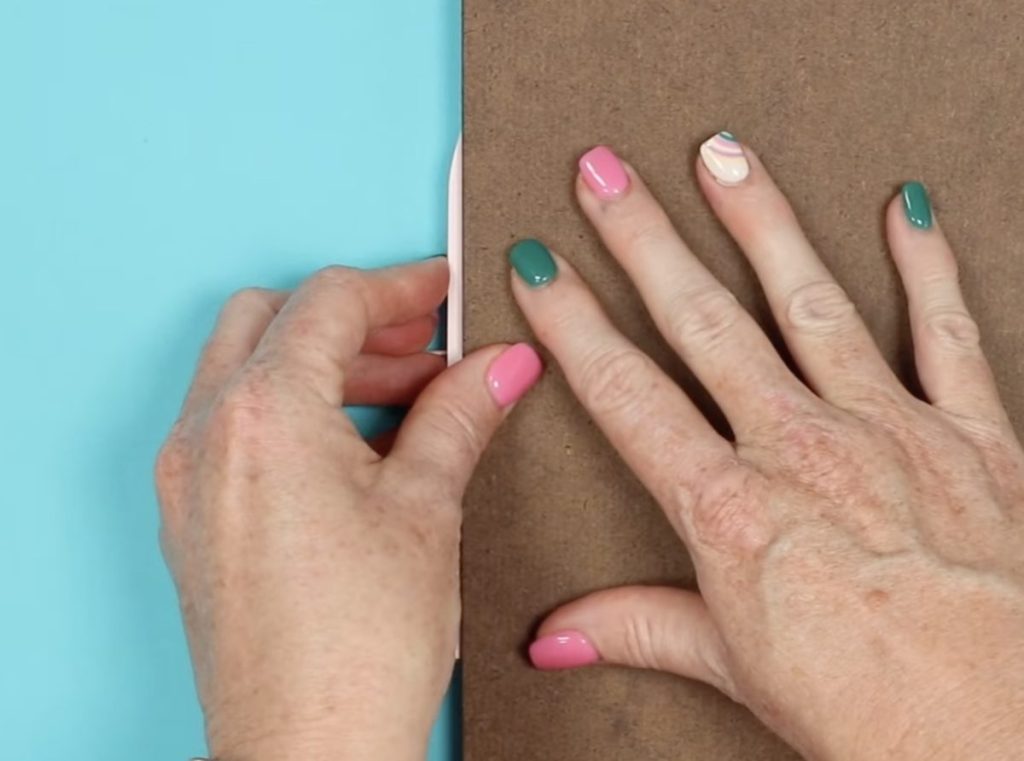
Try to keep the clamps out of the way of where you need to apply the compound.
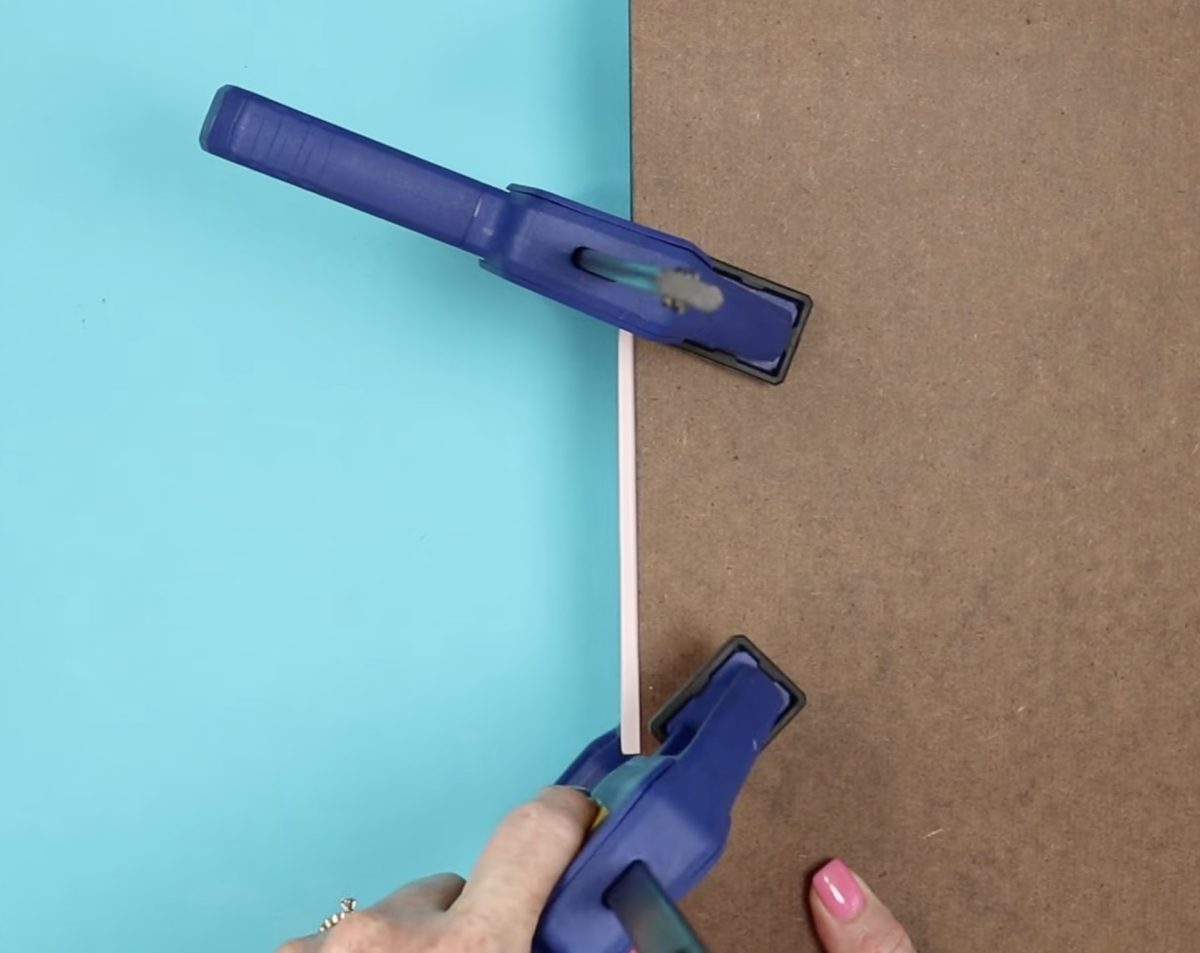
With everything secure in the clamps, we're ready to add the padding compound.
Apply the Padding Compound
I've found that a little bit of this padding compound goes a long way. Using a small disposable cup and a disposable paintbrush, apply a light to medium coat of compound from top to bottom on the straight side.
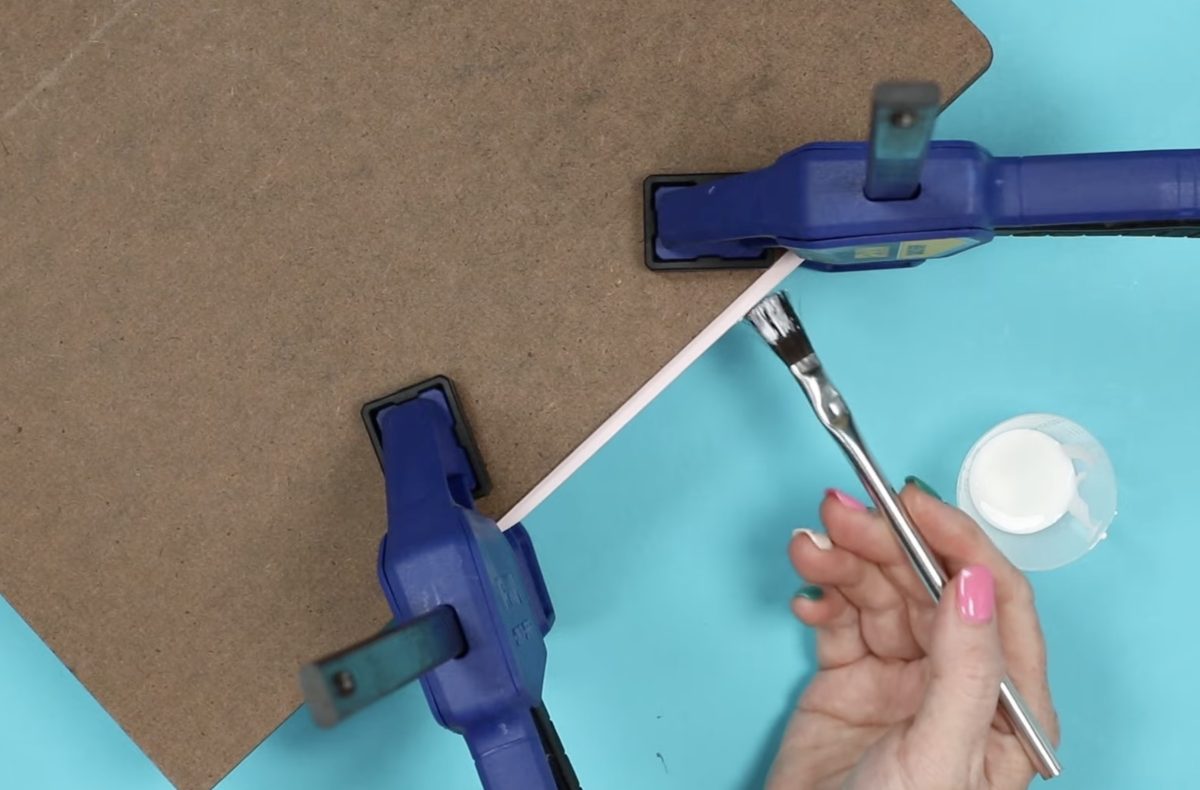
Make sure that you get the compound on the backer and all of the pages, including the very top sheet.
I went from the bottom of the arch all the way to the bottom of the page. You want to apply just enough that they are all covered with the compound.
I found that the compound I used dried pretty quickly. Keep it in the clamps until it is completely dry. When it's dry, remove the clamps, and we can see how well it worked.
Step 7: Enjoy Your Custom Cricut Notepad
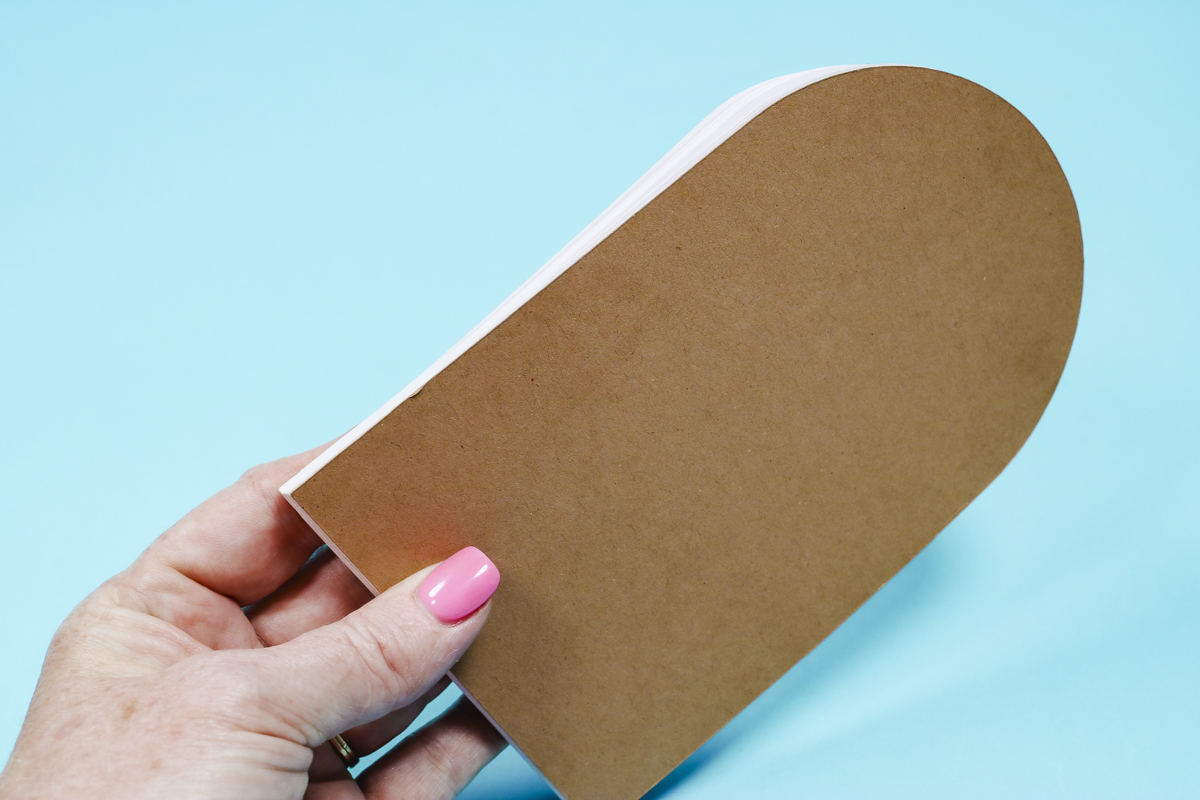
Now for the moment of truth. I'm actually really impressed; the padding compound held this together really well.
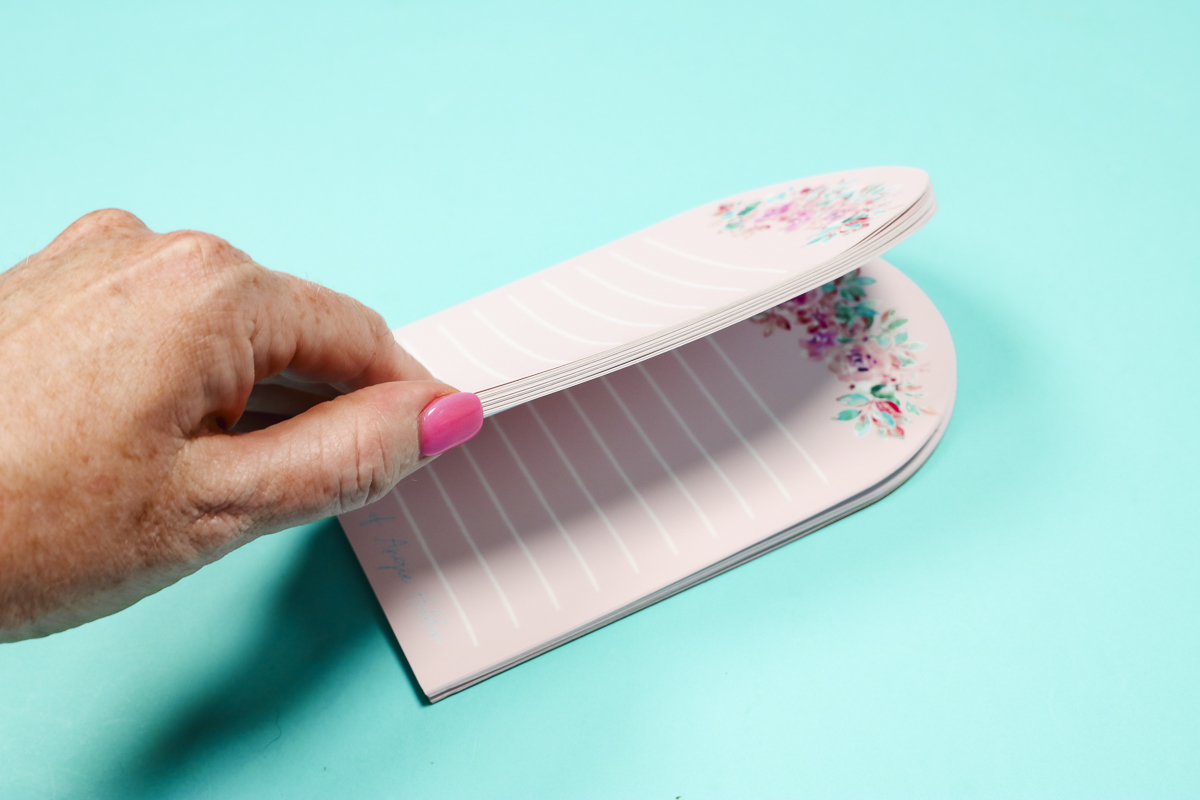
I can easily flip through the pages, and it doesn't fall apart.
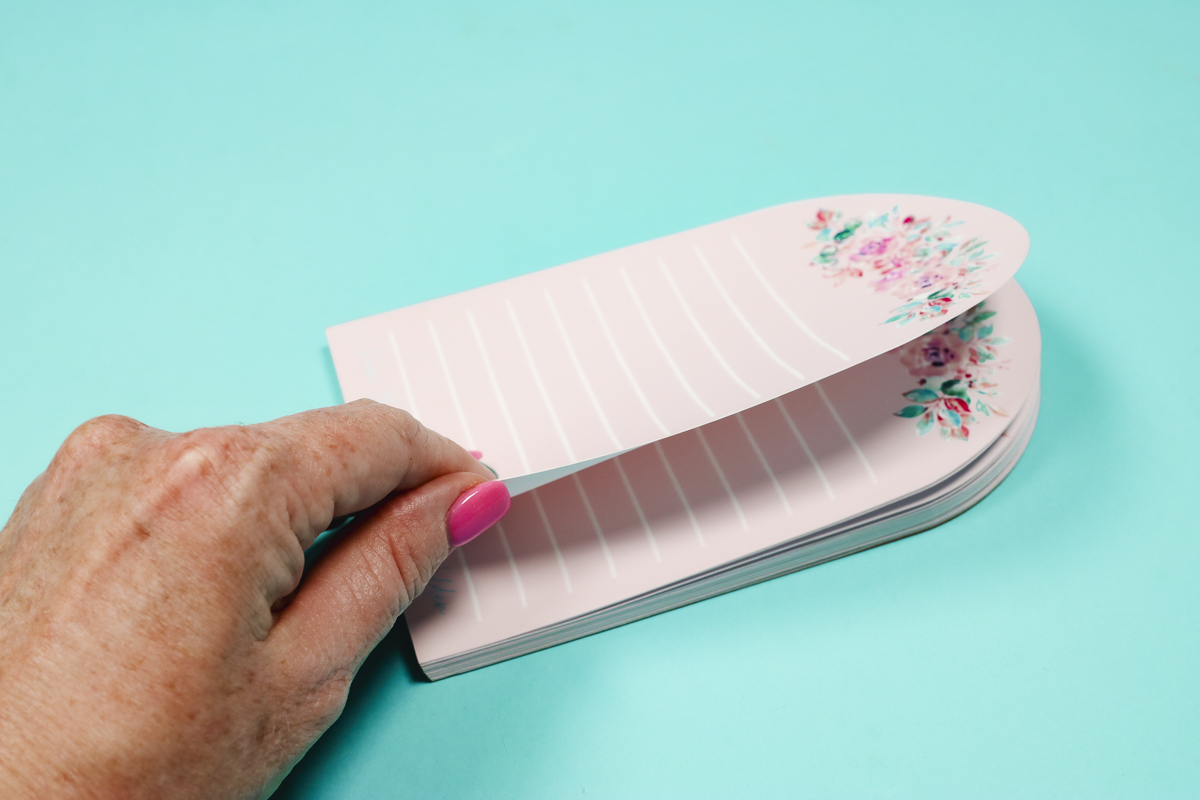
When I'm ready to tear off the page, it peels off just like a regular notepad.
This turned out fantastic. I'm really excited. I love the shape, the florals, my name at the bottom, and of course the fact that it is all stuck together like a notepad you'd buy in a store.
If you're looking for a great way to make custom notepads, using your Cricut and Print Then Cut will guarantee each page is the exact same size, every time.
Are You Ready to Make Your Own Custom Notepads with a Cricut?
Now that you know the basics, there is nothing stopping you from making your own custom notepads.
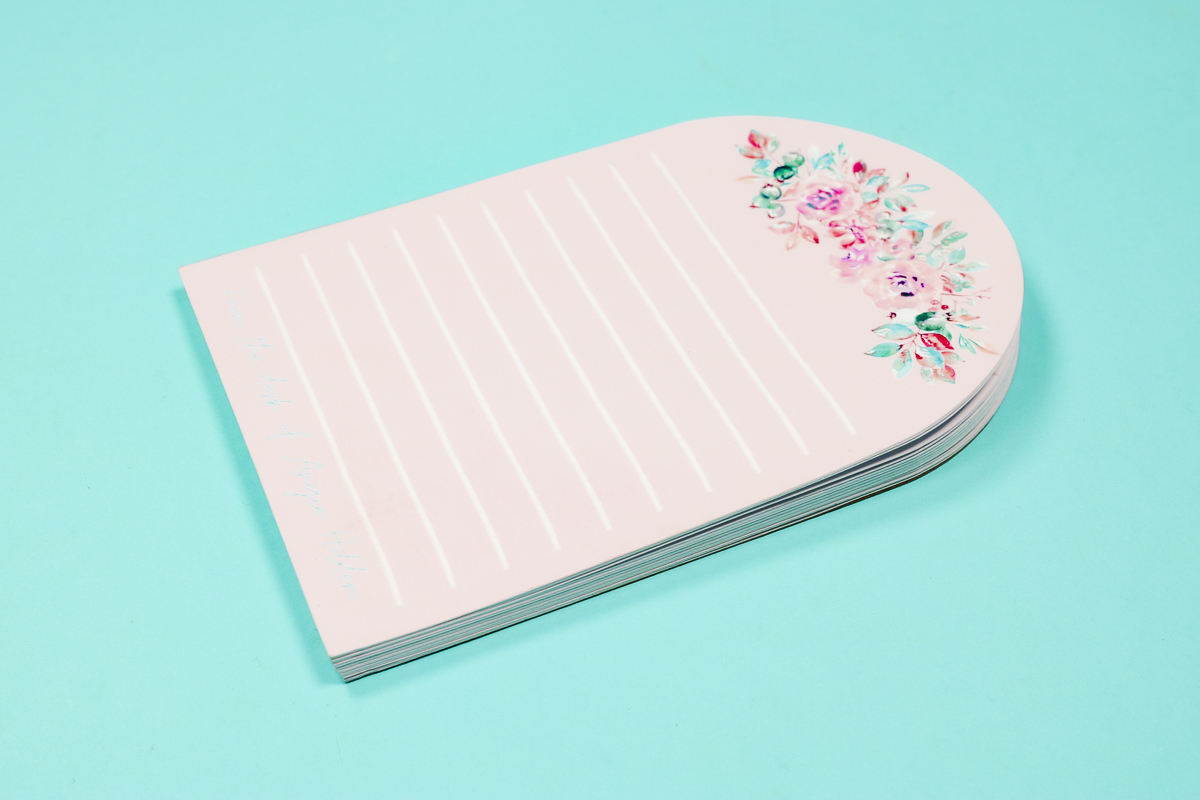
I think these would make an amazing gift for any person and any occasion. Change the shape, change the colors, customize with their name or a favorite saying. I wasn't kidding when I said the options are endless.
I hope I've answered any questions you have about making custom notepads with a Cricut machine. If you have any other questions, leave them in the comments, and I'll be happy to answer them for you.