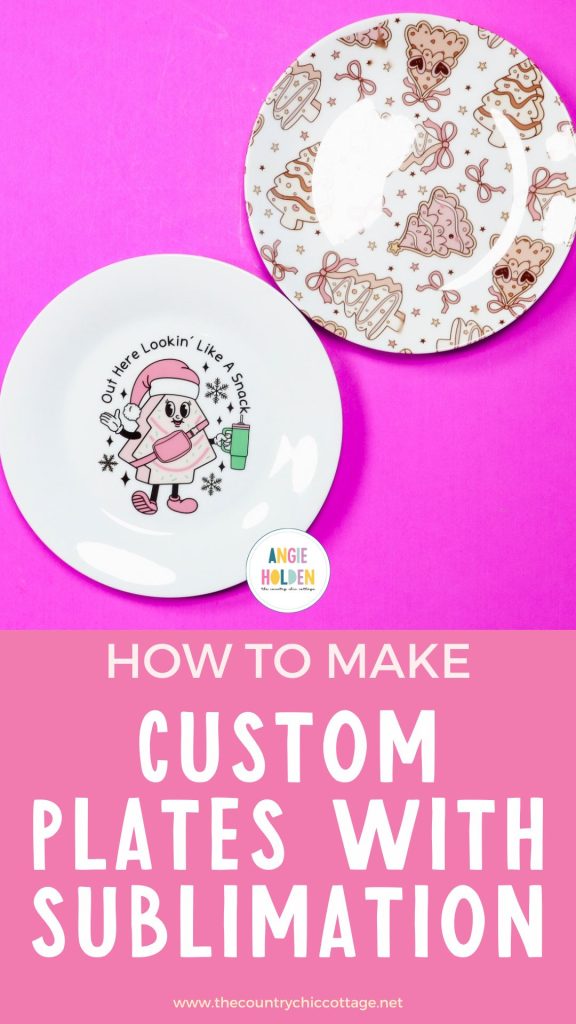
Sublimation plates have been on my craft to-do list for years! I finally tackled making my own custom plates using the vacuum tray in the PYD Life sublimation oven, and I'm so excited to show you how to make your own.
Custom sublimation plates are perfect for the holidays, birthdays, and even as home decor. If you're new to sublimation, my Sublimation Beginner's Guide is a great place to start out.
To make these plates, you need a sublimation print and a sublimation blank. Regular printers with regular ink and a regular plate from the dollar store won't work.
You can watch me make these plates from start to finish by pressing play on the video below.
How to Make Holiday Sublimation Plates
These plates turned out so cute. There is definitely a learning curve, and I'm going to share all my tips and tricks to make sure you get them right the first time.
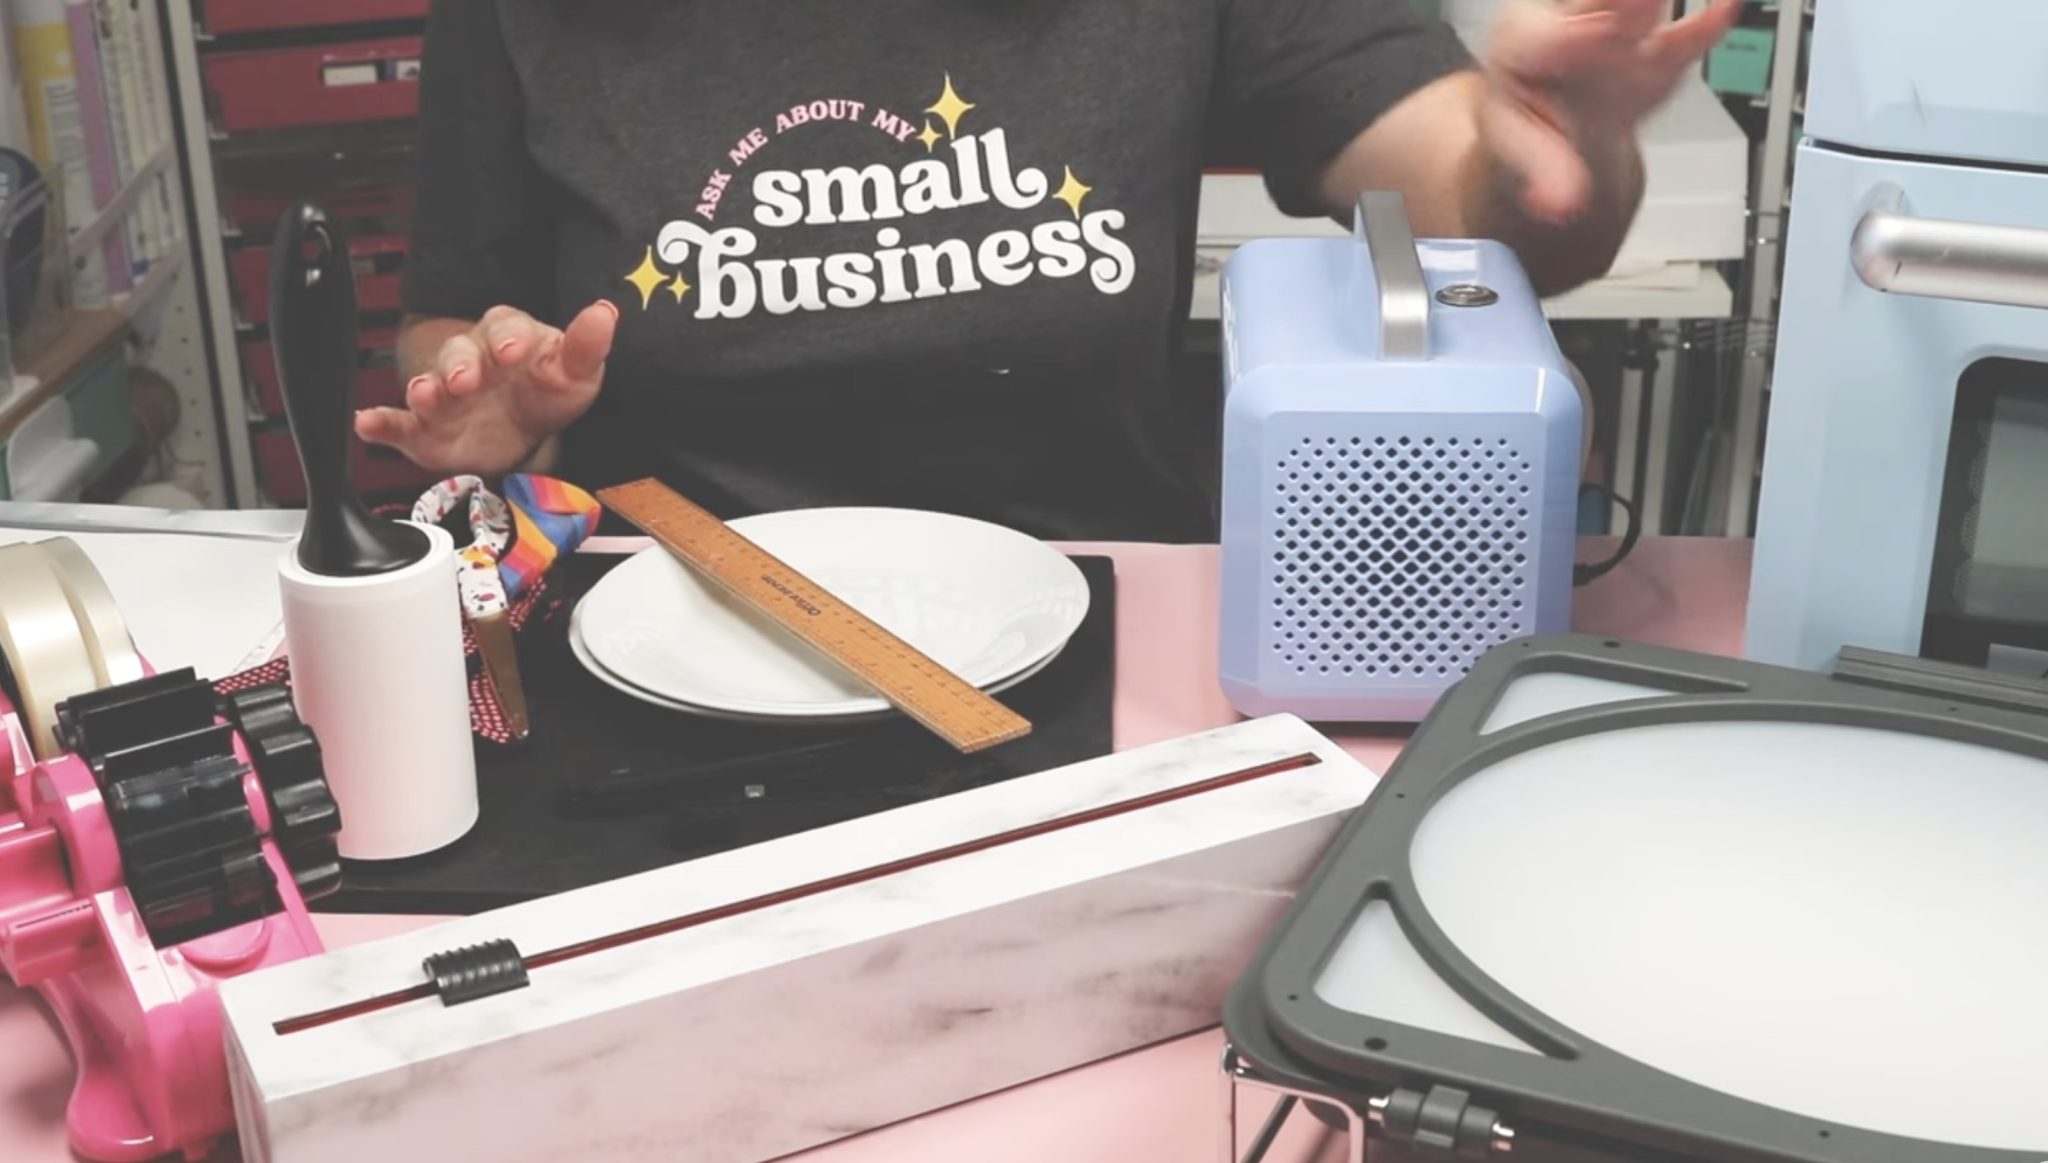
Supplies Used:
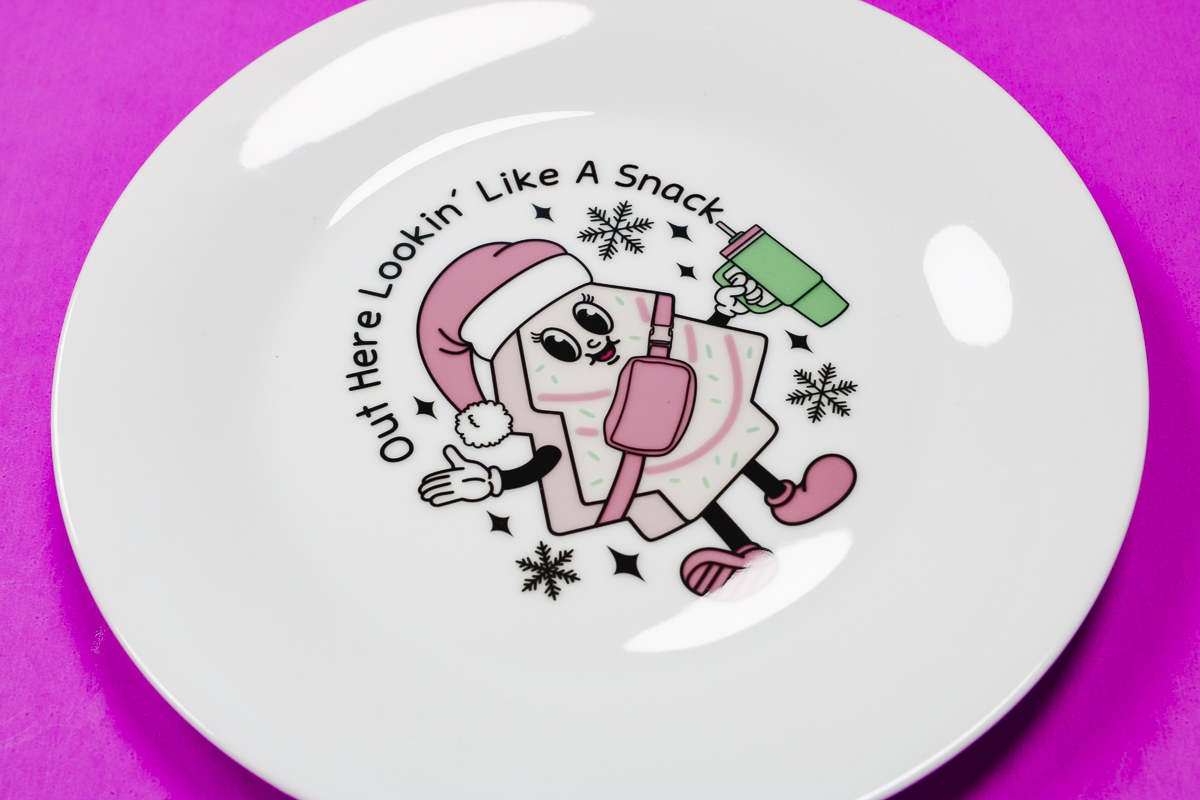
- Lookin' Like a Snack
- Tree Cake Pattern
- Plate 1
- Plate 2
- PYD Life 3D Vacuum Sublimation Tray
- PYD Life 25L Oven
- Brother Sublimation Printer
- Sublimation Paper
- Lint Roller
- Heat-Resistant Tape
- Heat-Resistant Gloves
- Tape Dispenser
- Heat-Resistant Mat
- Protective Paper
- Paper Dispenser
IMPORTANT: You will need a sublimation printer, sublimation ink, and sublimation paper, or you can get a sublimation print from someone else.
I am using the PYD Life sublimation oven with the vacuum tray. This limits the size of the sublimation plate to no larger than 8 inches. I did try the HTVRont phone case press, and these plates were too big. It may work on a smaller saucer-sized plate.
Note – Shrink Wrap will not work for this project. It pulls tight across the rim of the plate, but does not add pressure to the entire plate surface.
Step 1. Create Design in Canva
The first thing we need to do, after gathering the supplies, is create the design so it will fit the plate. I am using Canva to create my designs.
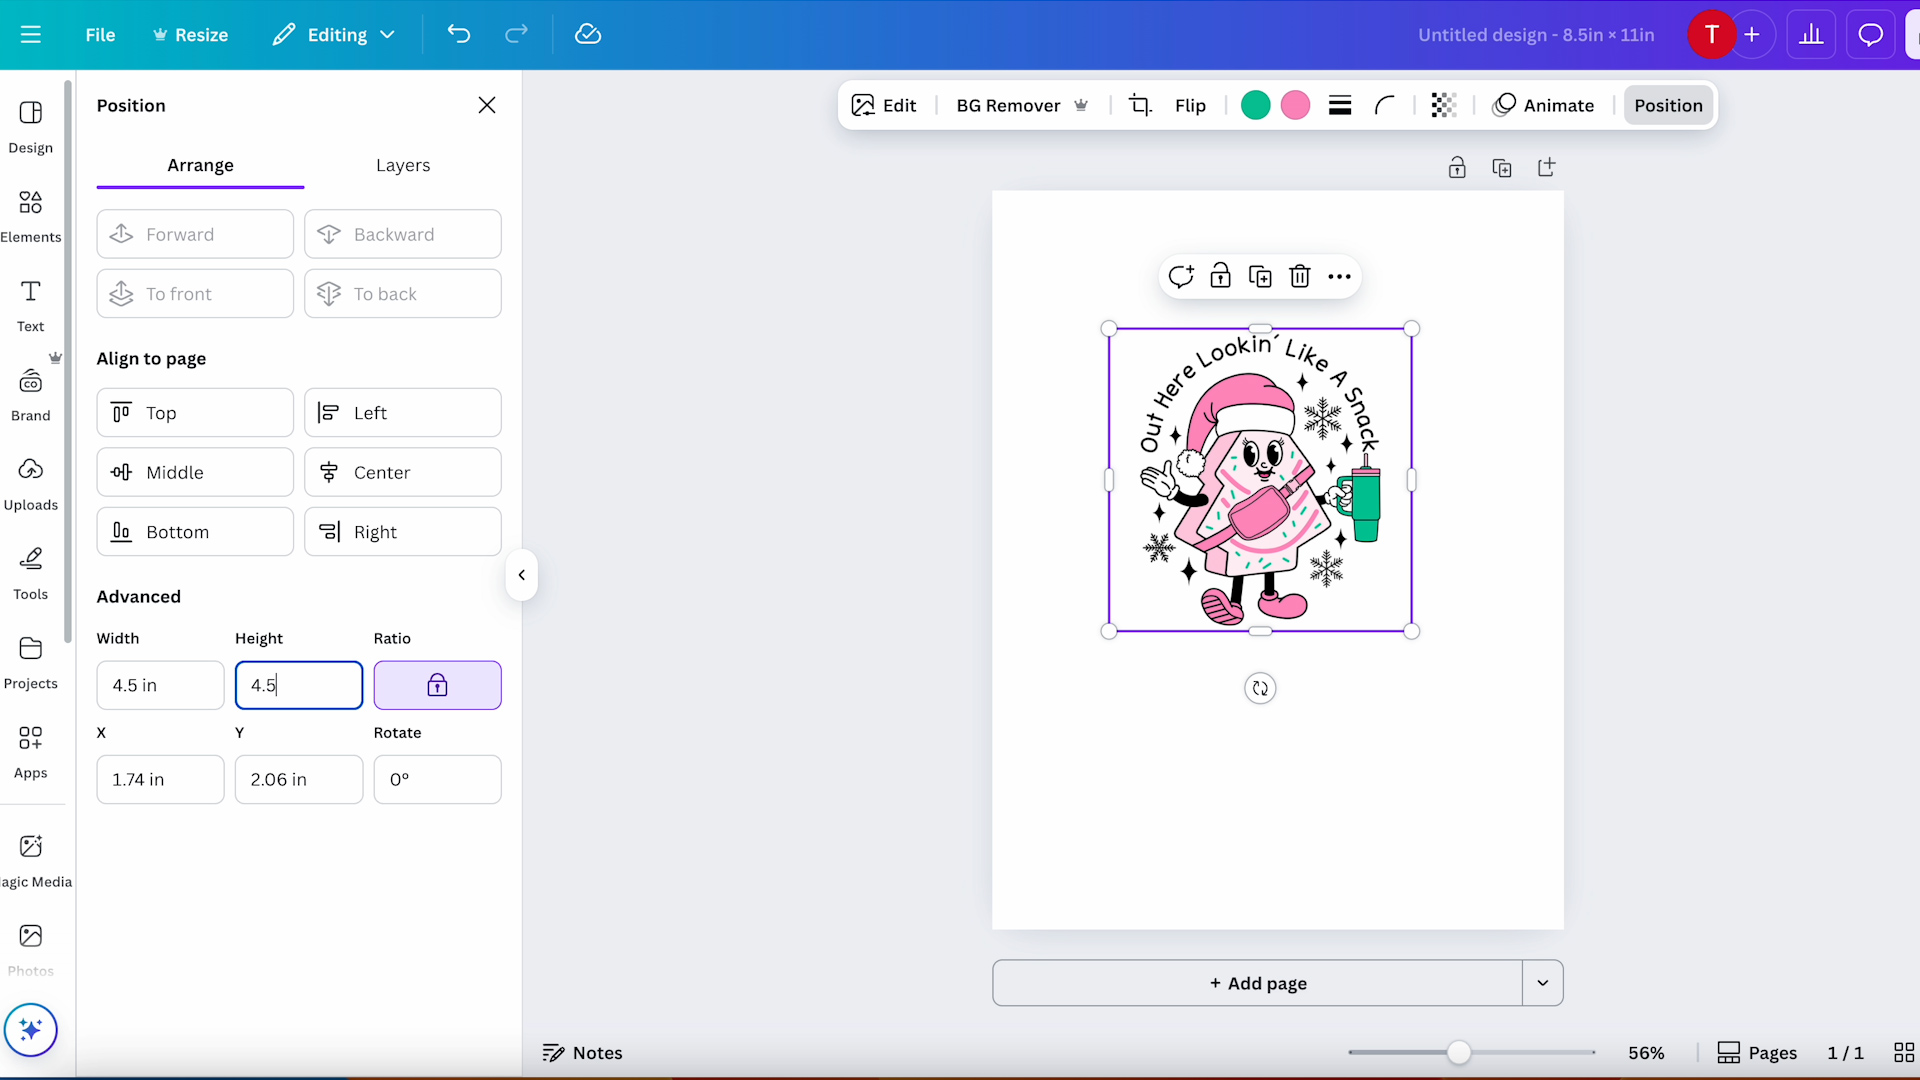
Create a document that is the size of your sublimation paper. Mine is 8.5 by 11 inches. Open the document and upload the design you want to use. I am using the all-over tree and bow design, and the lookin' like a snack design.
Next, add the design to the canvas. For the Lookin' Like a Snack plate, I wanted the design in the middle of the plate. Make sure the Ratio button is locked and resize the design. I sized mine to 4.5 inches to fit the center of the plate.
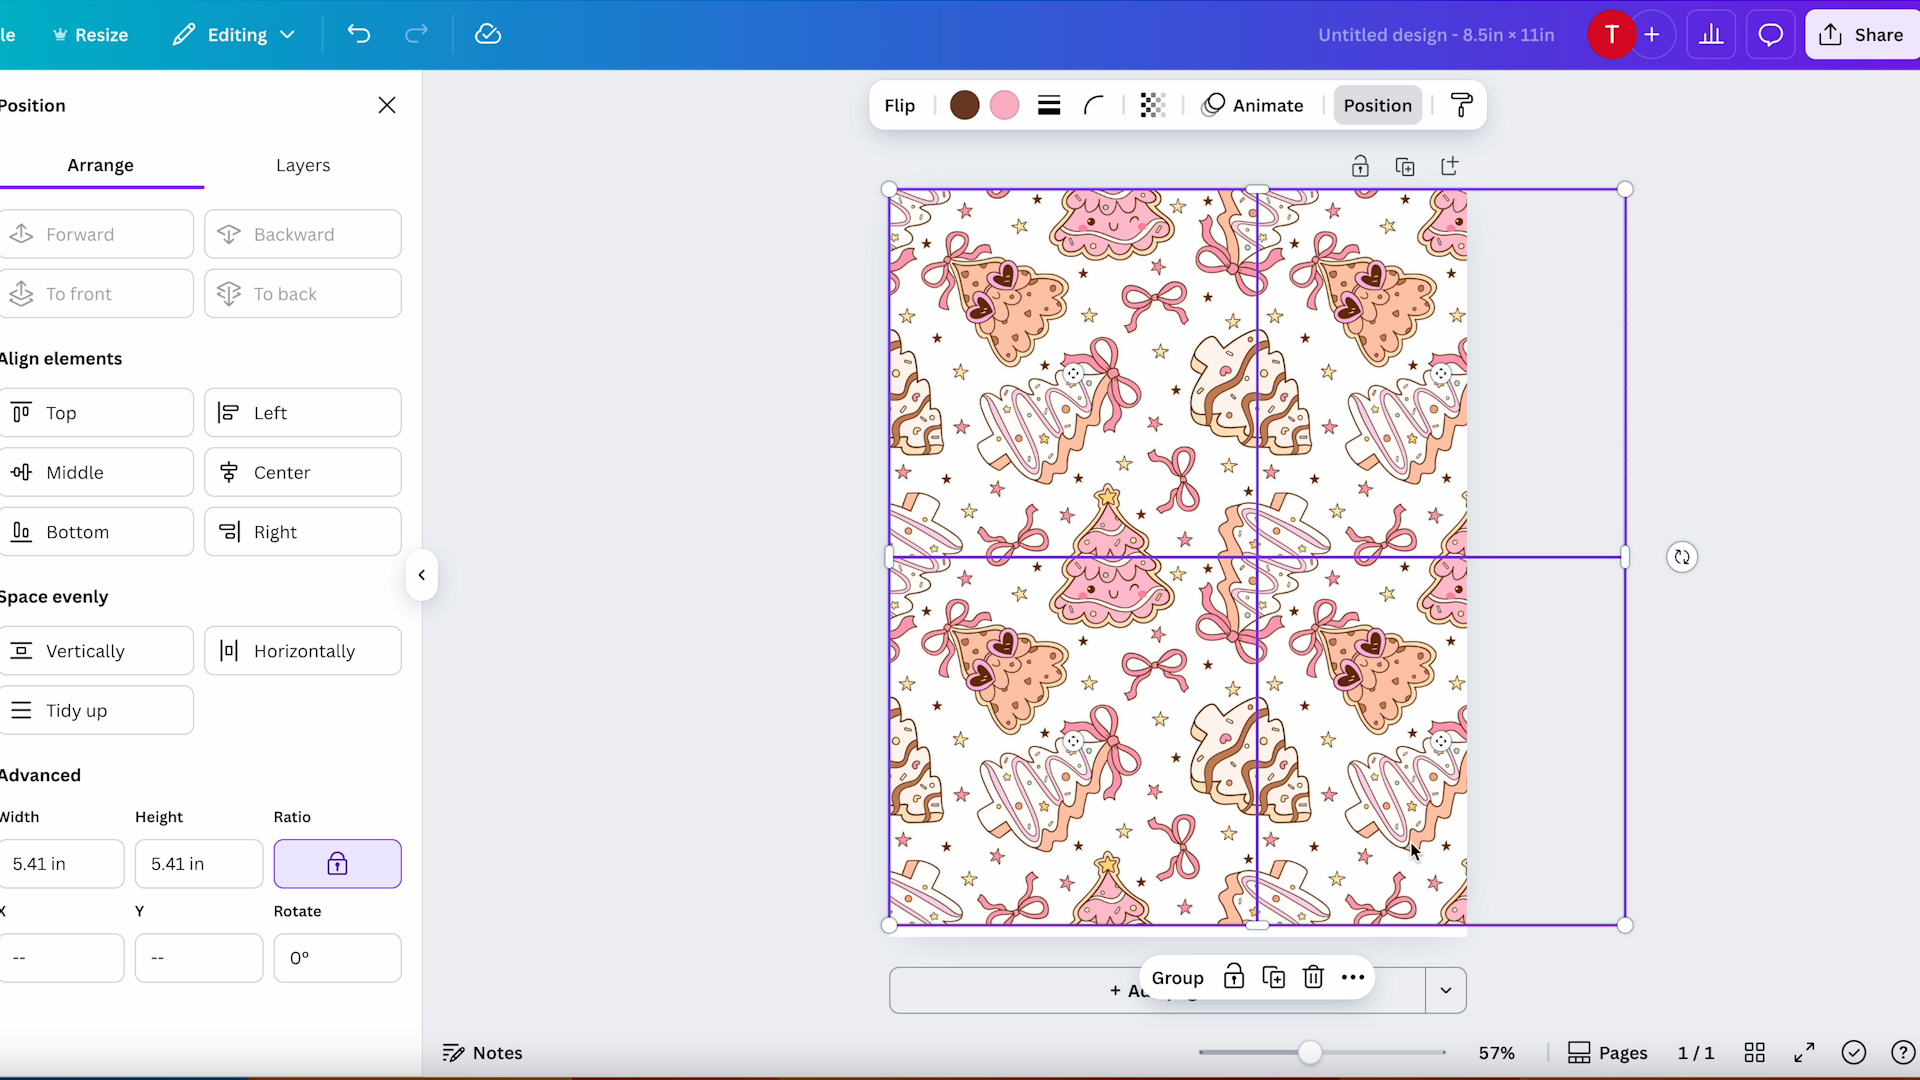
For the all over tree design, I want the print to cover the entire plate. This is a seamless design, so I duplicated it 3 times to give me 4 designs on the page and then lined them up so they matched up where needed, and then selected them all and resized them to cover the entire 8.5 by 11 page.
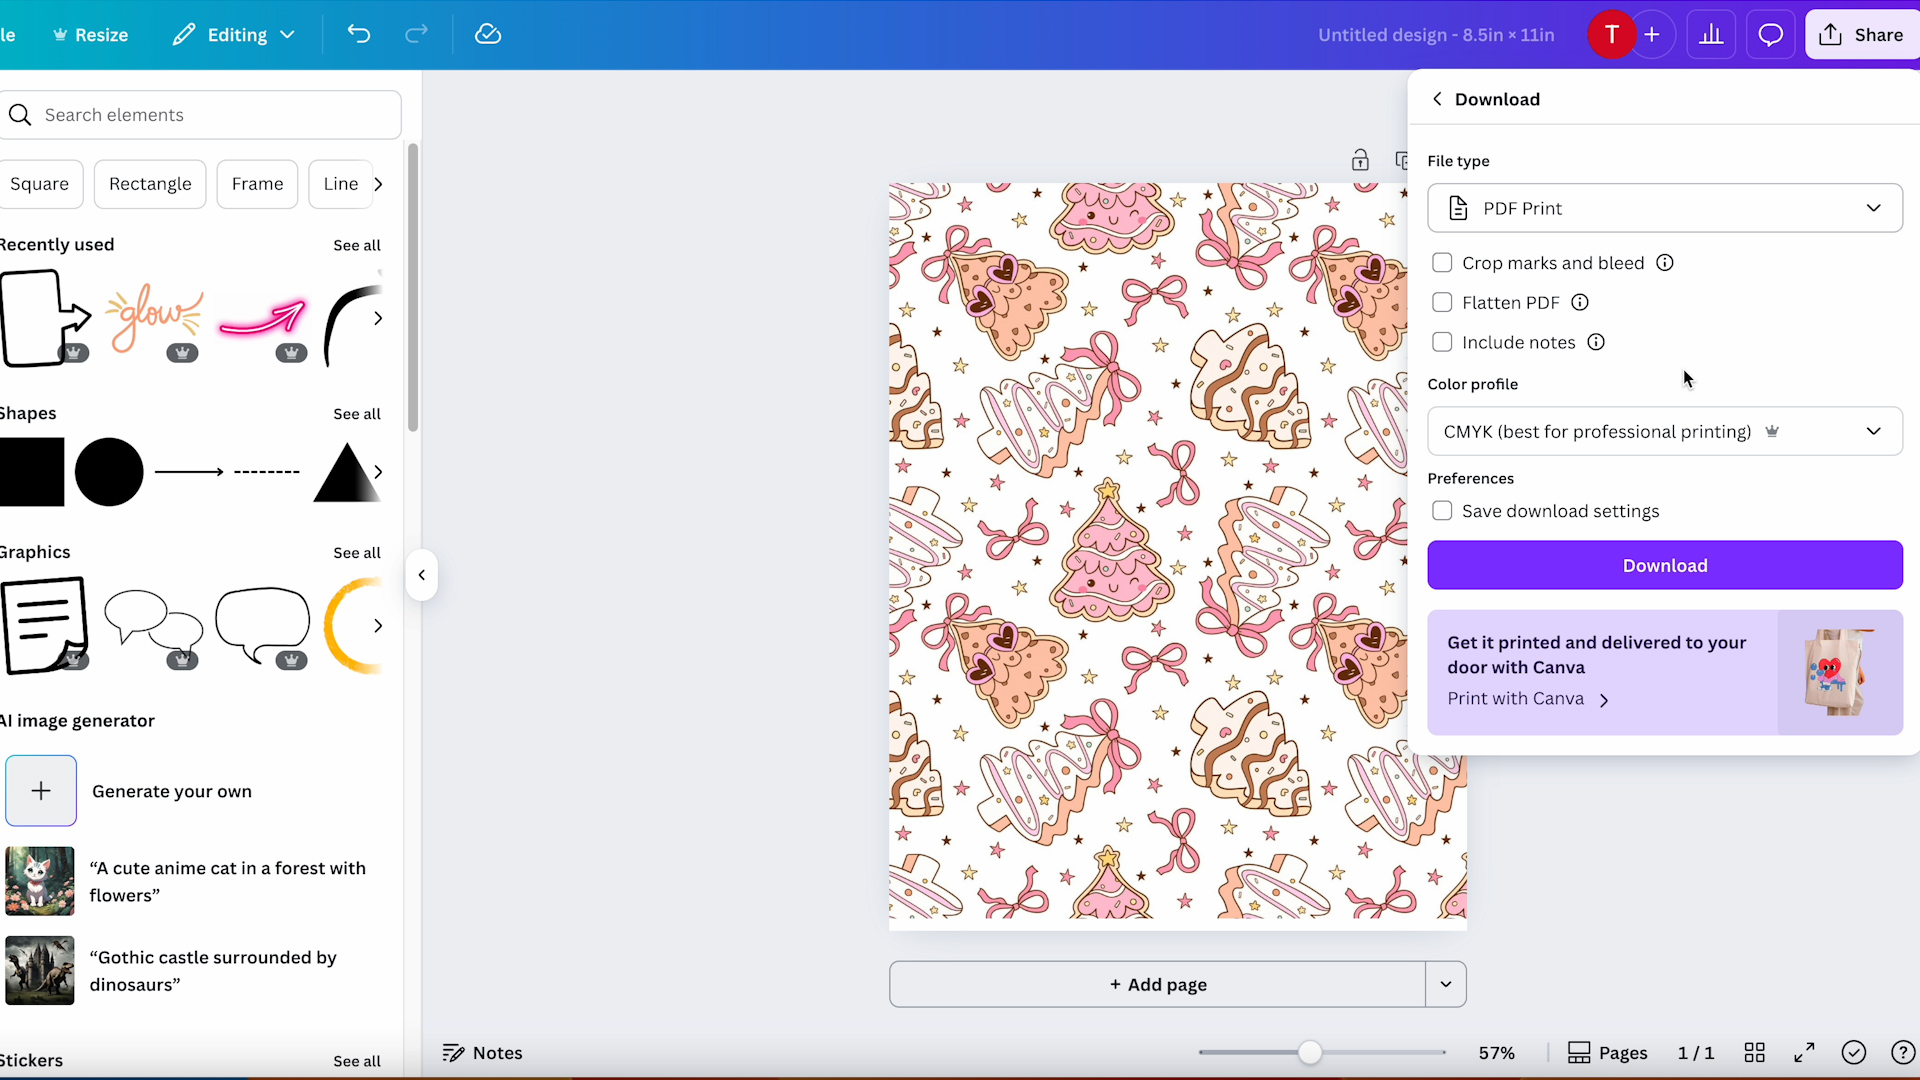
When you have the prints laid out correctly, click Download, select PDF for Print and CMYK, and then click Download.
Print the designs with sublimation ink from a sublimation printer onto sublimation paper. Don't forget to mirror your design before printing.
Step 2. Prep Sublimation Plates and Oven
Preheat the oven with the empty vacuum tray inside. Before adding the tray to the oven, make sure you have it set up correctly. Remove any insert pieces, cover holes with the paper that comes with the tray, etc.
If you haven't used the vacuum tray before, check out my full vacuum tray unboxing and first projects tutorial.

Close the tray and clamp it, and place it in the oven.
I have my oven set to 356 degrees for 10 minutes. That is the recommended time and temperature for the blanks I am using.
Use a lint roller or lint-free cloth to clean the plates, and we're ready to locate our designs.
Step 3. Locate Sublimation Prints
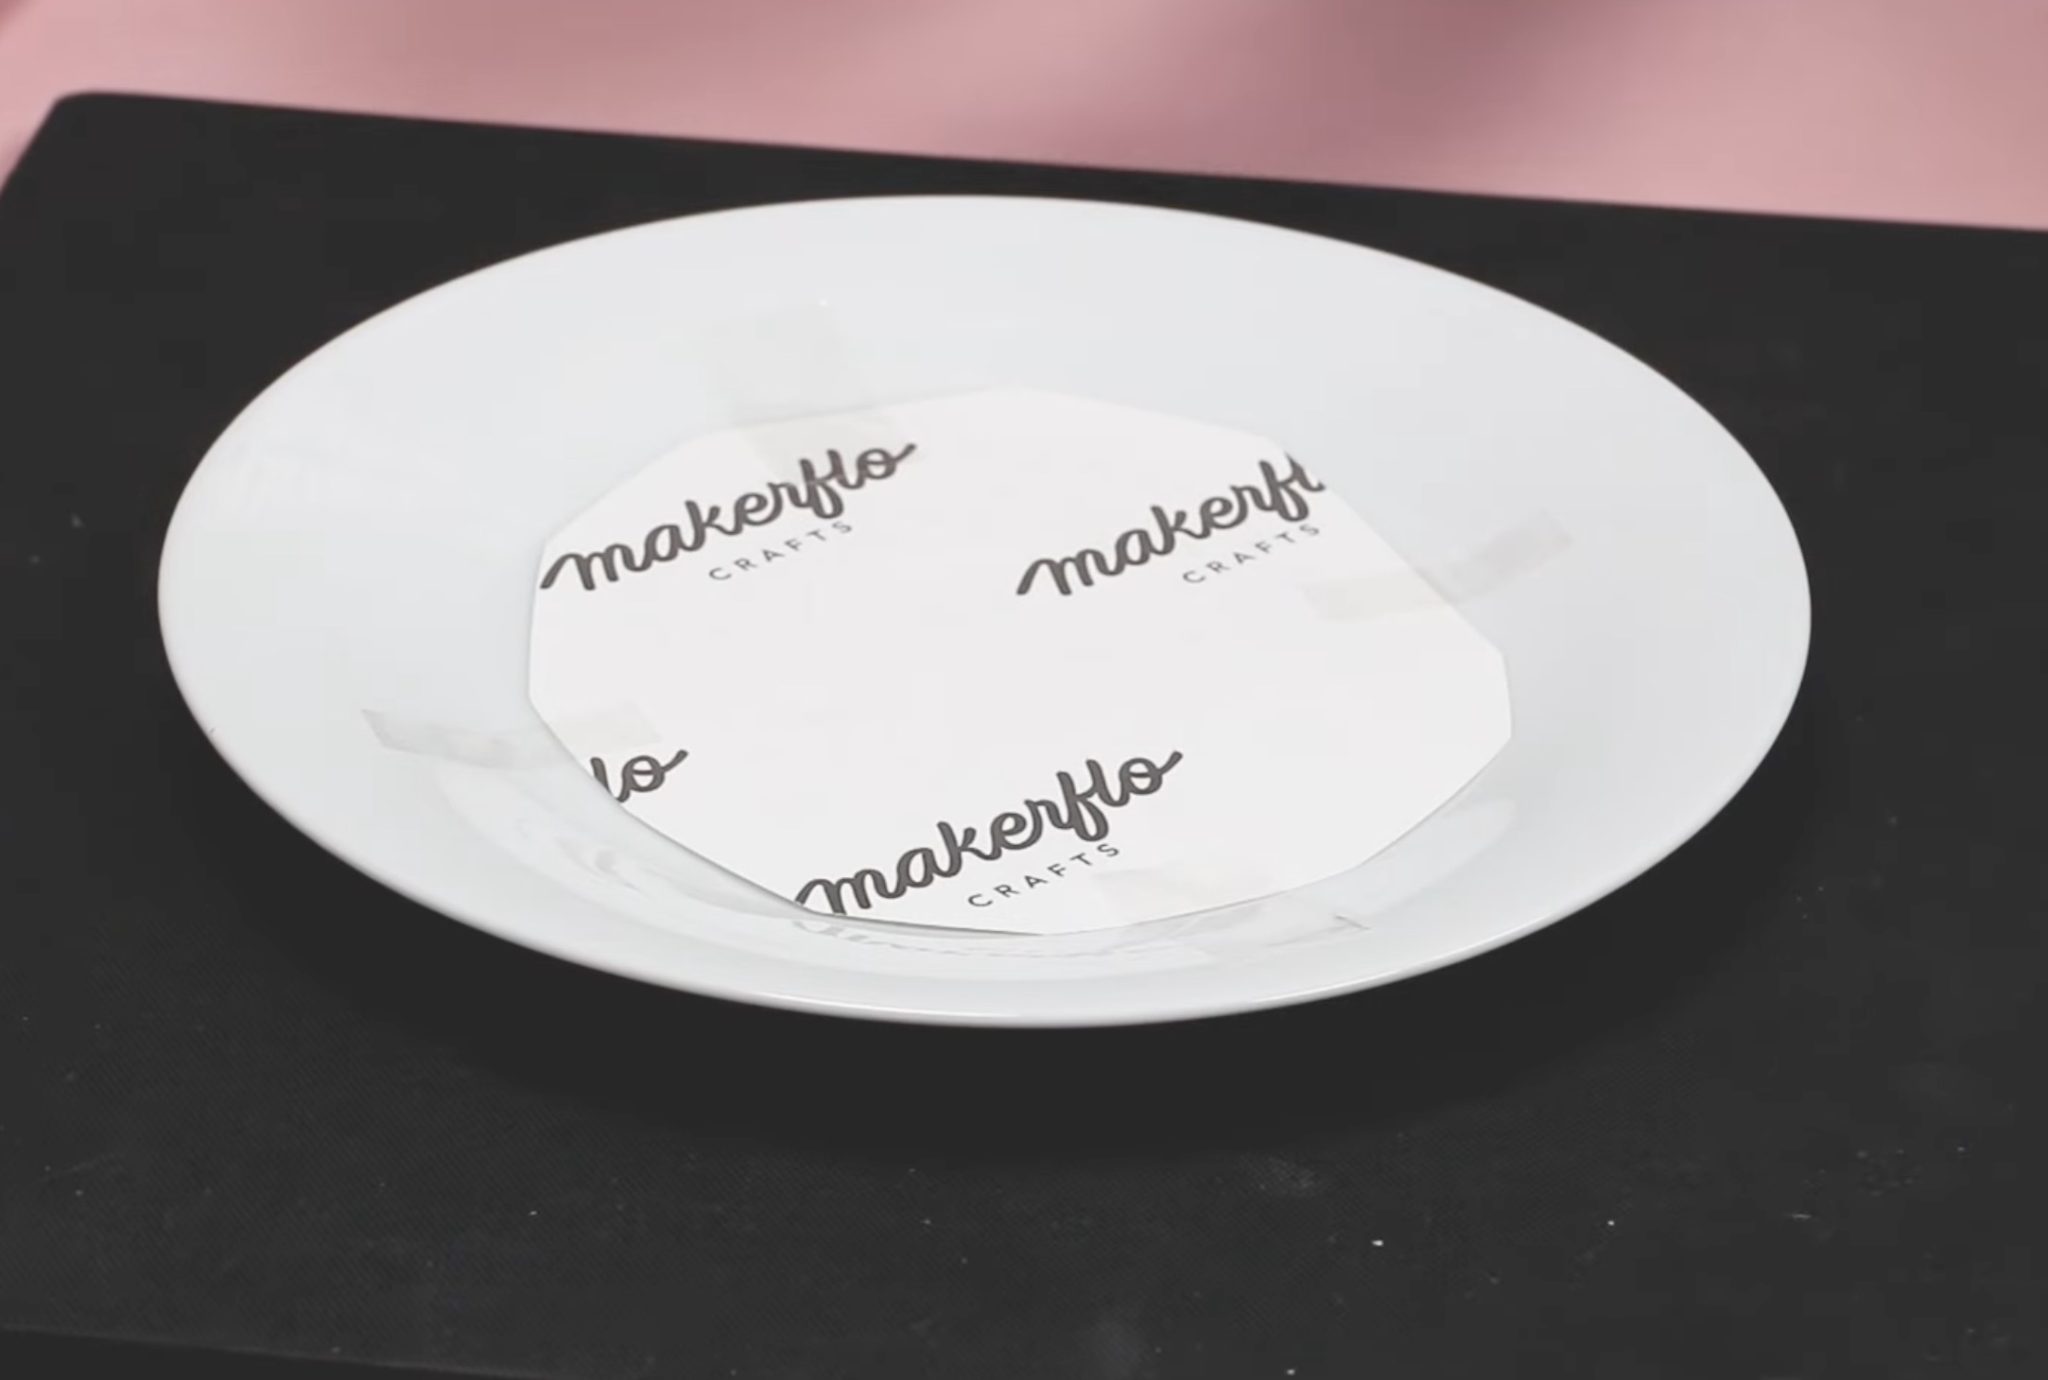
One of my plates has a more severe lip. I am putting the Lookin' Like a Snack design on that plate right in the middle.
Trim the design so it will fit in the middle, and then use heat-resistant tape to secure it in place.
For the full plate design, I am using a plate that has a more gentle curve. I am going to lay the full print on top of the plate when I place it in the vacuum tray. I am afraid that if I try to tape it into place, it will keep the vacuum tray from sucking it down tight against the whole surface.
Step 4. Place Plates in Oven and Sublimate
Make sure you have everything prepared before removing the tray from the oven.
I cut 2 pieces of protective paper for each plate, the same size as the inserts that are in the vacuum tray.
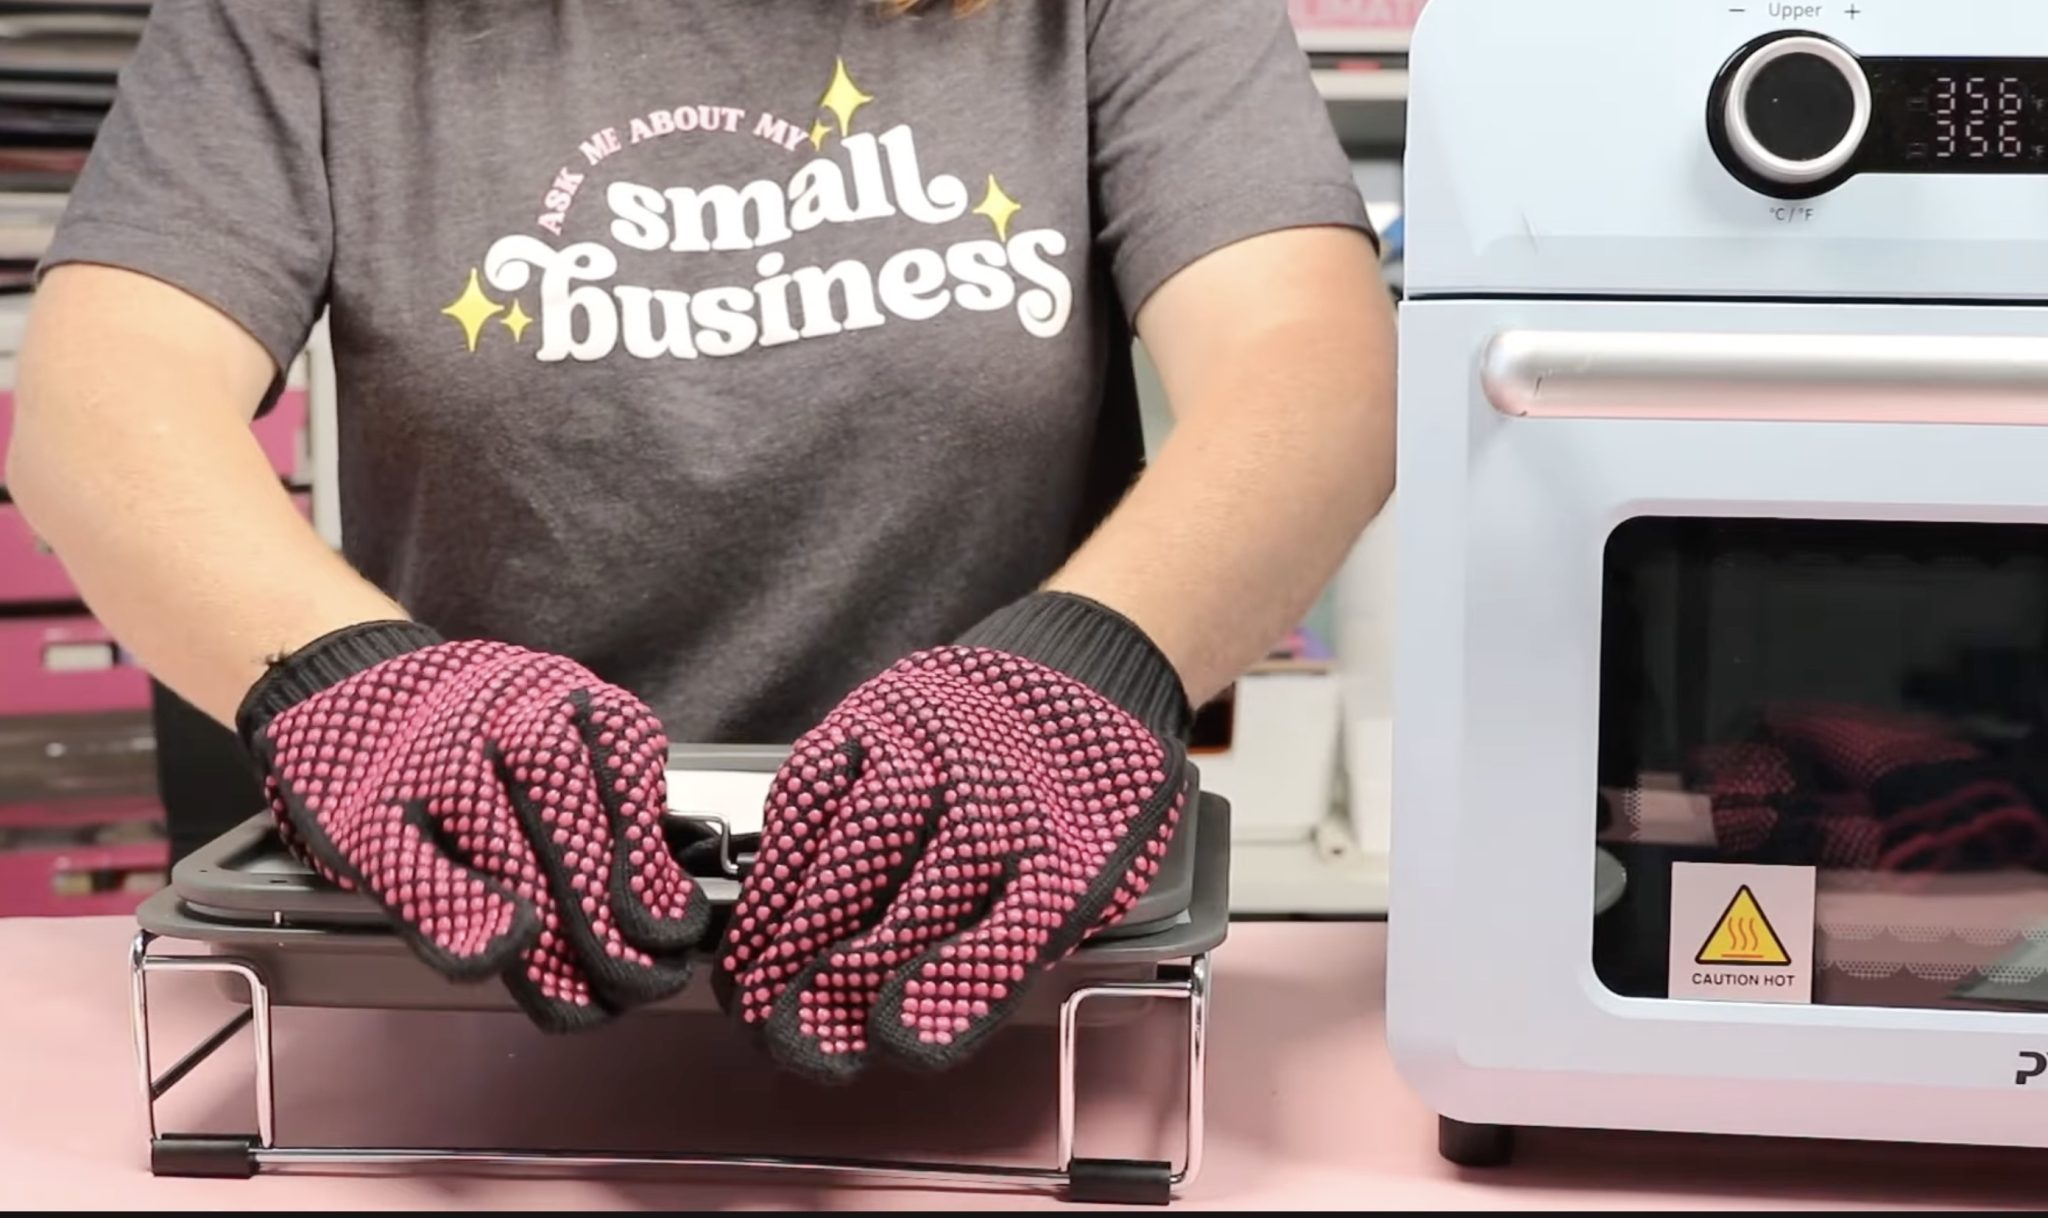
The vacuum tray comes with a heat protective stand. Place that next to the oven and make sure you have heat-resistant gloves on both hands. You will need both hands to work with the tray, and it will be very hot.
When the oven beeps to tell you it has reached the desired temperature, open the front and remove the tray. Place it on the heat-resistant stand and close the oven door to prevent heat from escaping.
Single Design Plate Instructions
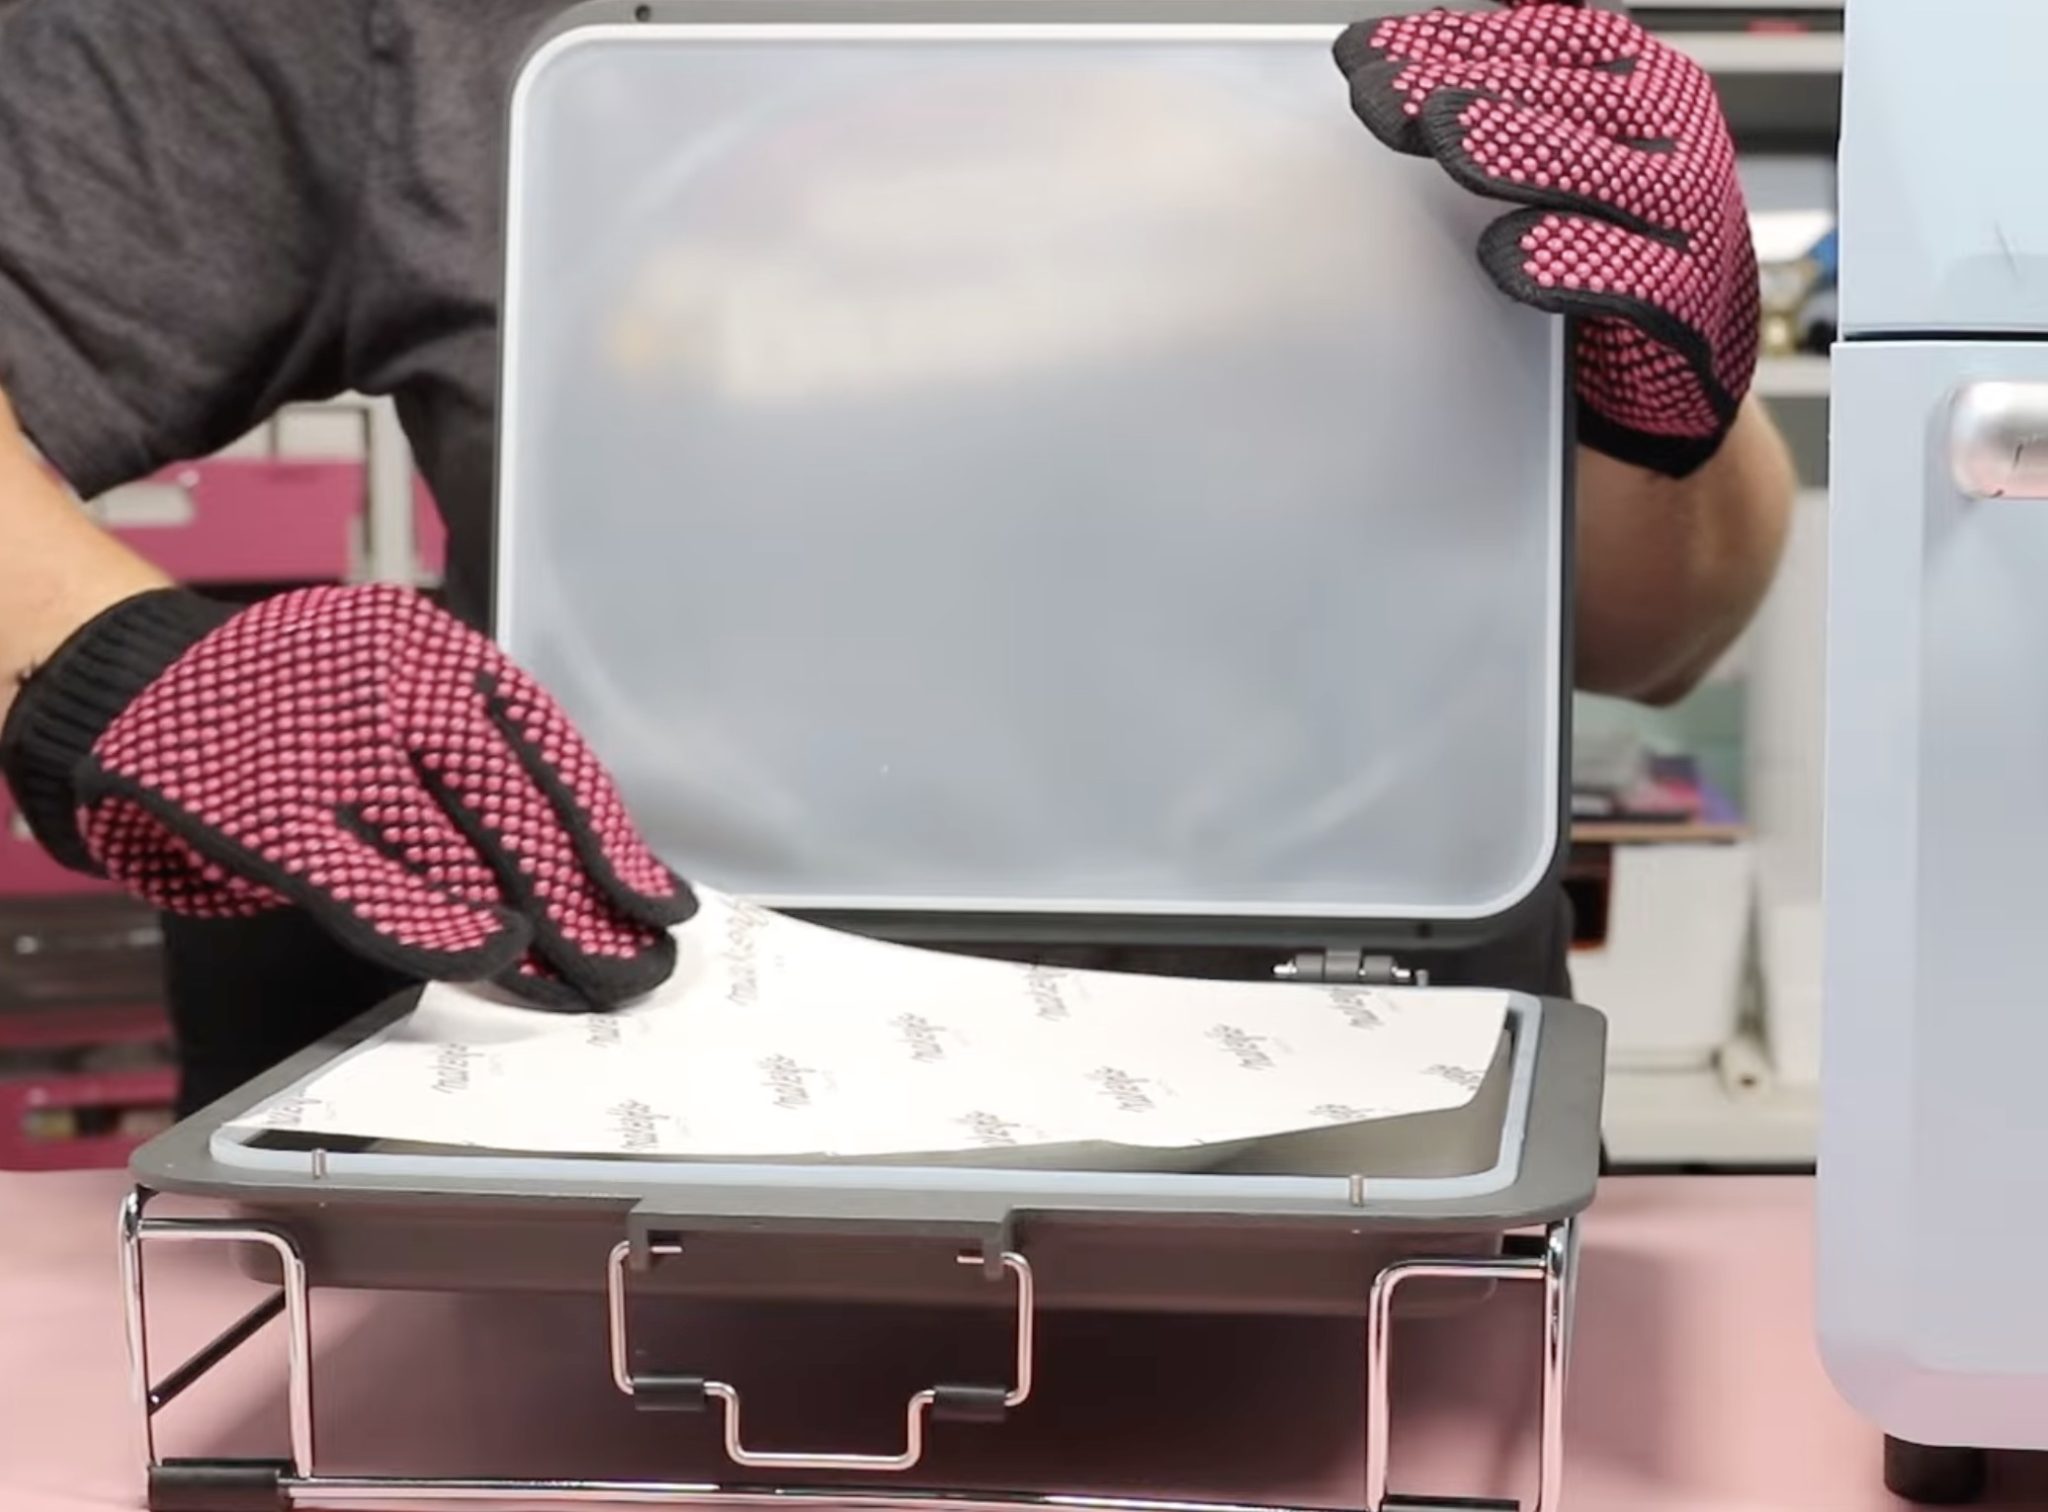
Open the tray, place a piece of protective paper on the bottom, add the plate with the design in the middle inside next with the sublimation print facing up, and then cover the plate with another sheet of protective paper.
Close the lid and make sure the clamp is closed tightly. Place the tray back inside the oven and press the button on the vacuum to start it.
Full Design Plate Instructions
For the full design plate, place protective paper in the tray first. Put the plate on top and lay the sublimation print over the top, print side down and centered over the plate, and cover with protective paper.
Note: Make sure the protective paper covers the entire print on both the top and bottom.
Close the lid and carefully, keeping the tray level so the print and plate don't slide around, place the tray back in the oven.
Step 5. Remove Plates From Oven
When the time is up, turn off the vacuum and open the oven. With heat-resistant gloves, remove the vacuum tray and set it in the heat-resistant stand.
When you pull the tray out of the oven, you'll hear the air release, which is the vacuum releasing.
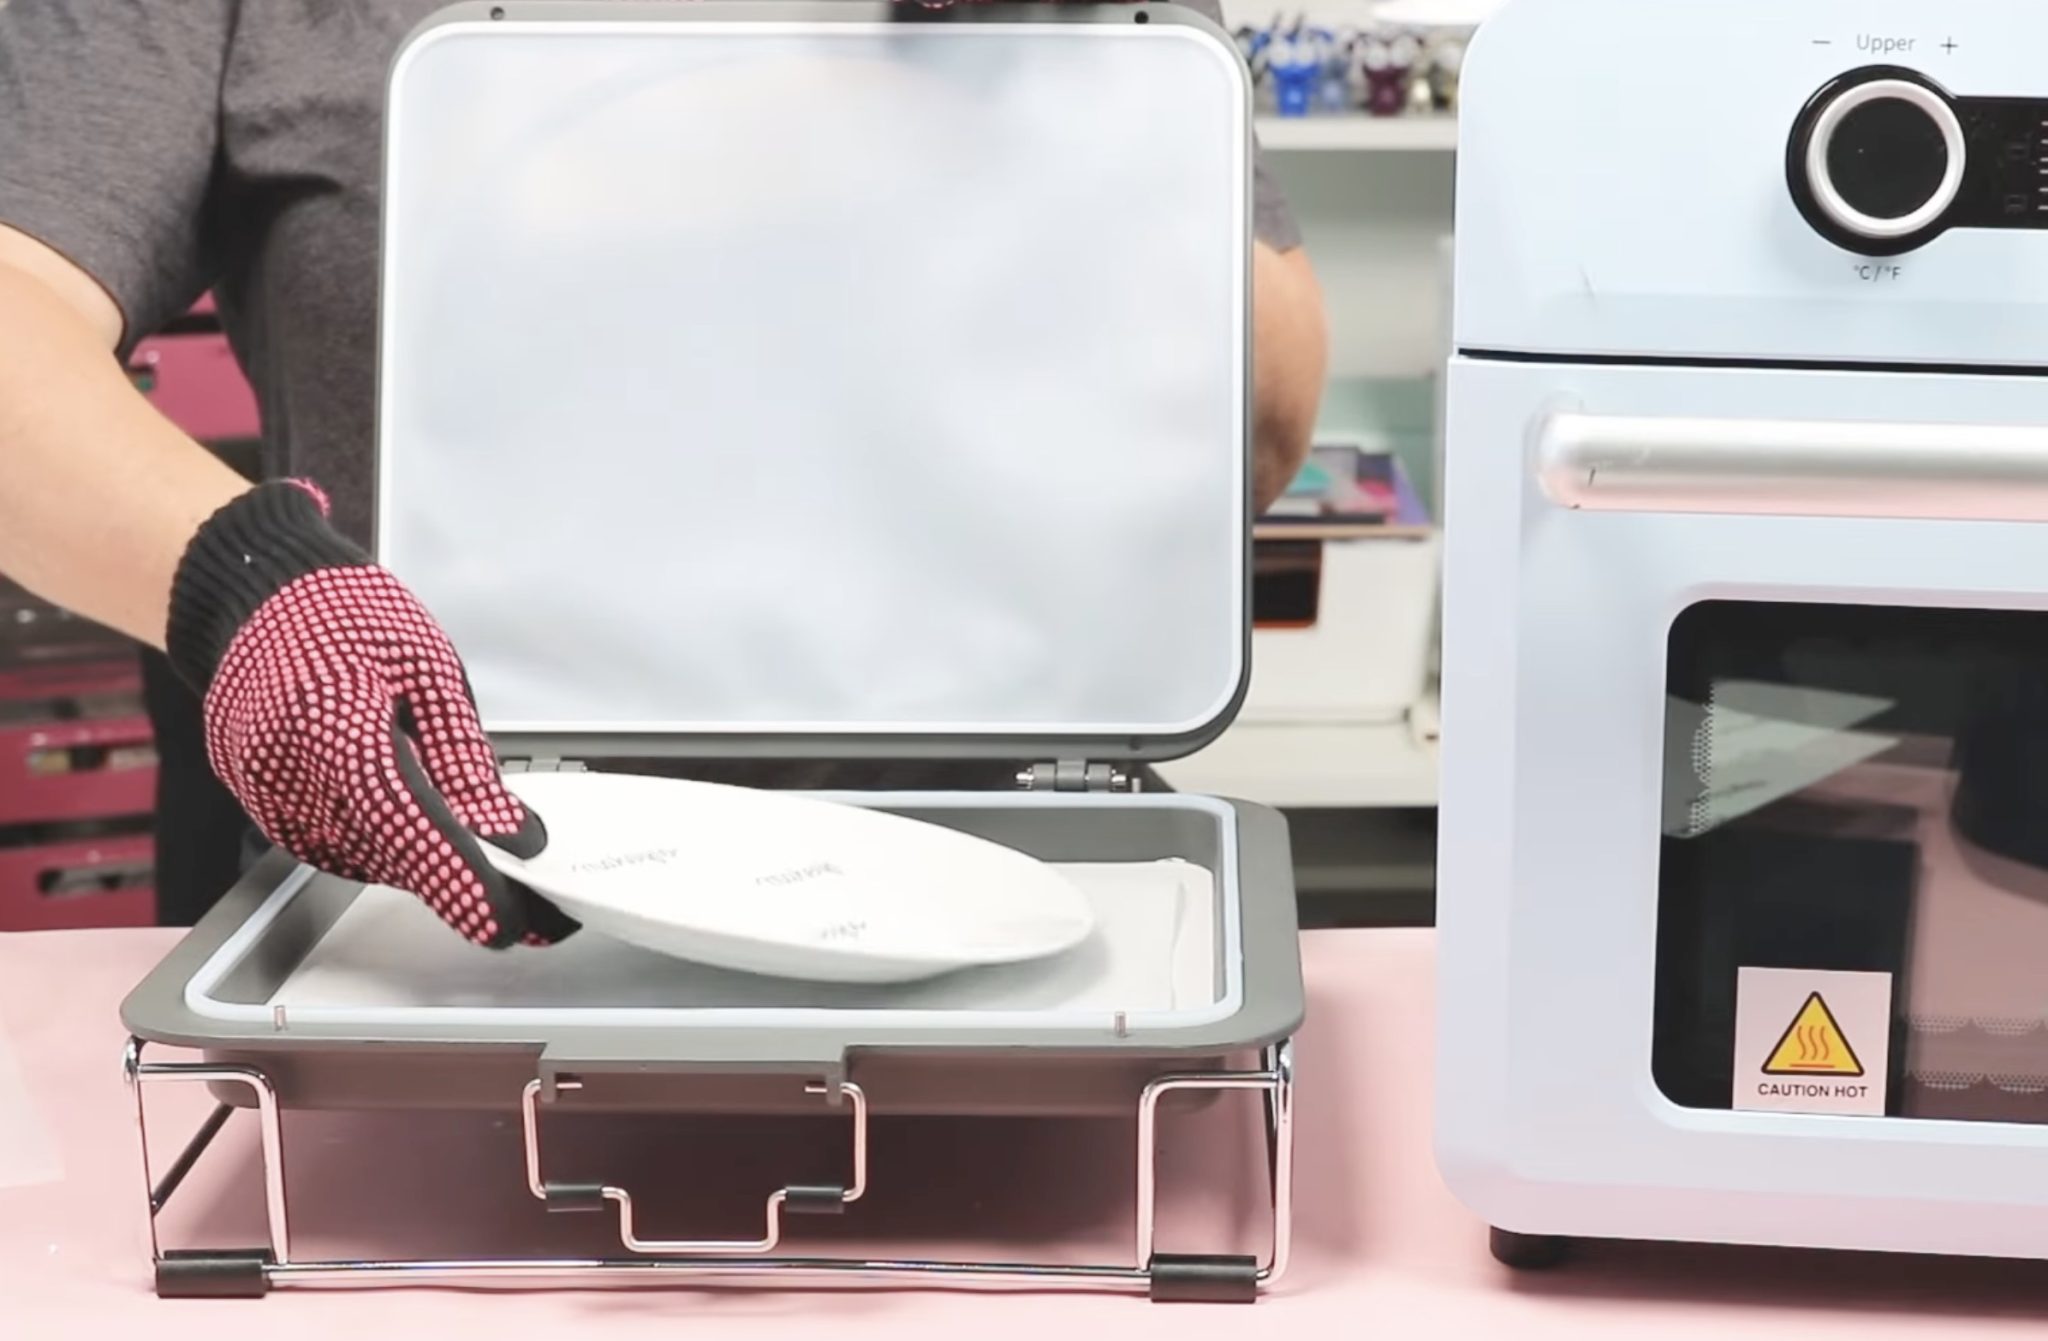
Open the lid and, using heat-resistant gloves, remove the plate and place it on a heat-resistant mat to cool.
Step 6. Remove Sublimation Print and Reveal Finished Plates
When the plates have cooled, remove the sublimation print to reveal the finished plates.
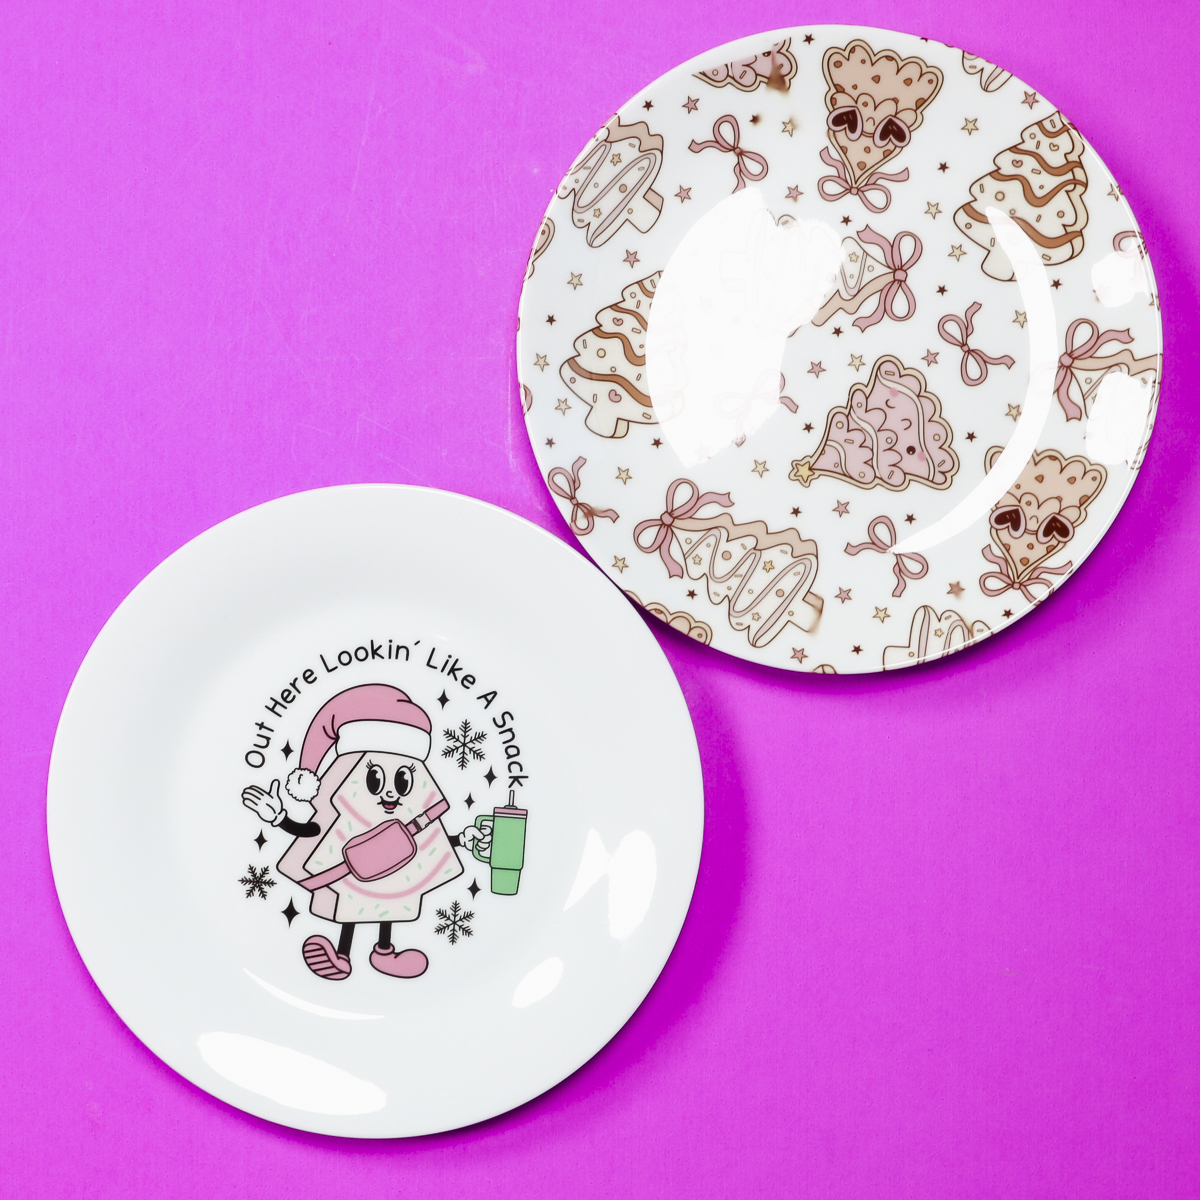
This plate is so cute and turned out perfectly.
This type of design with this type of plate was a perfect combination. If you have a combination heat press with a plate attachment, that would work with this plate style.
You do need to make sure that the plate press will fit the plate you're using.
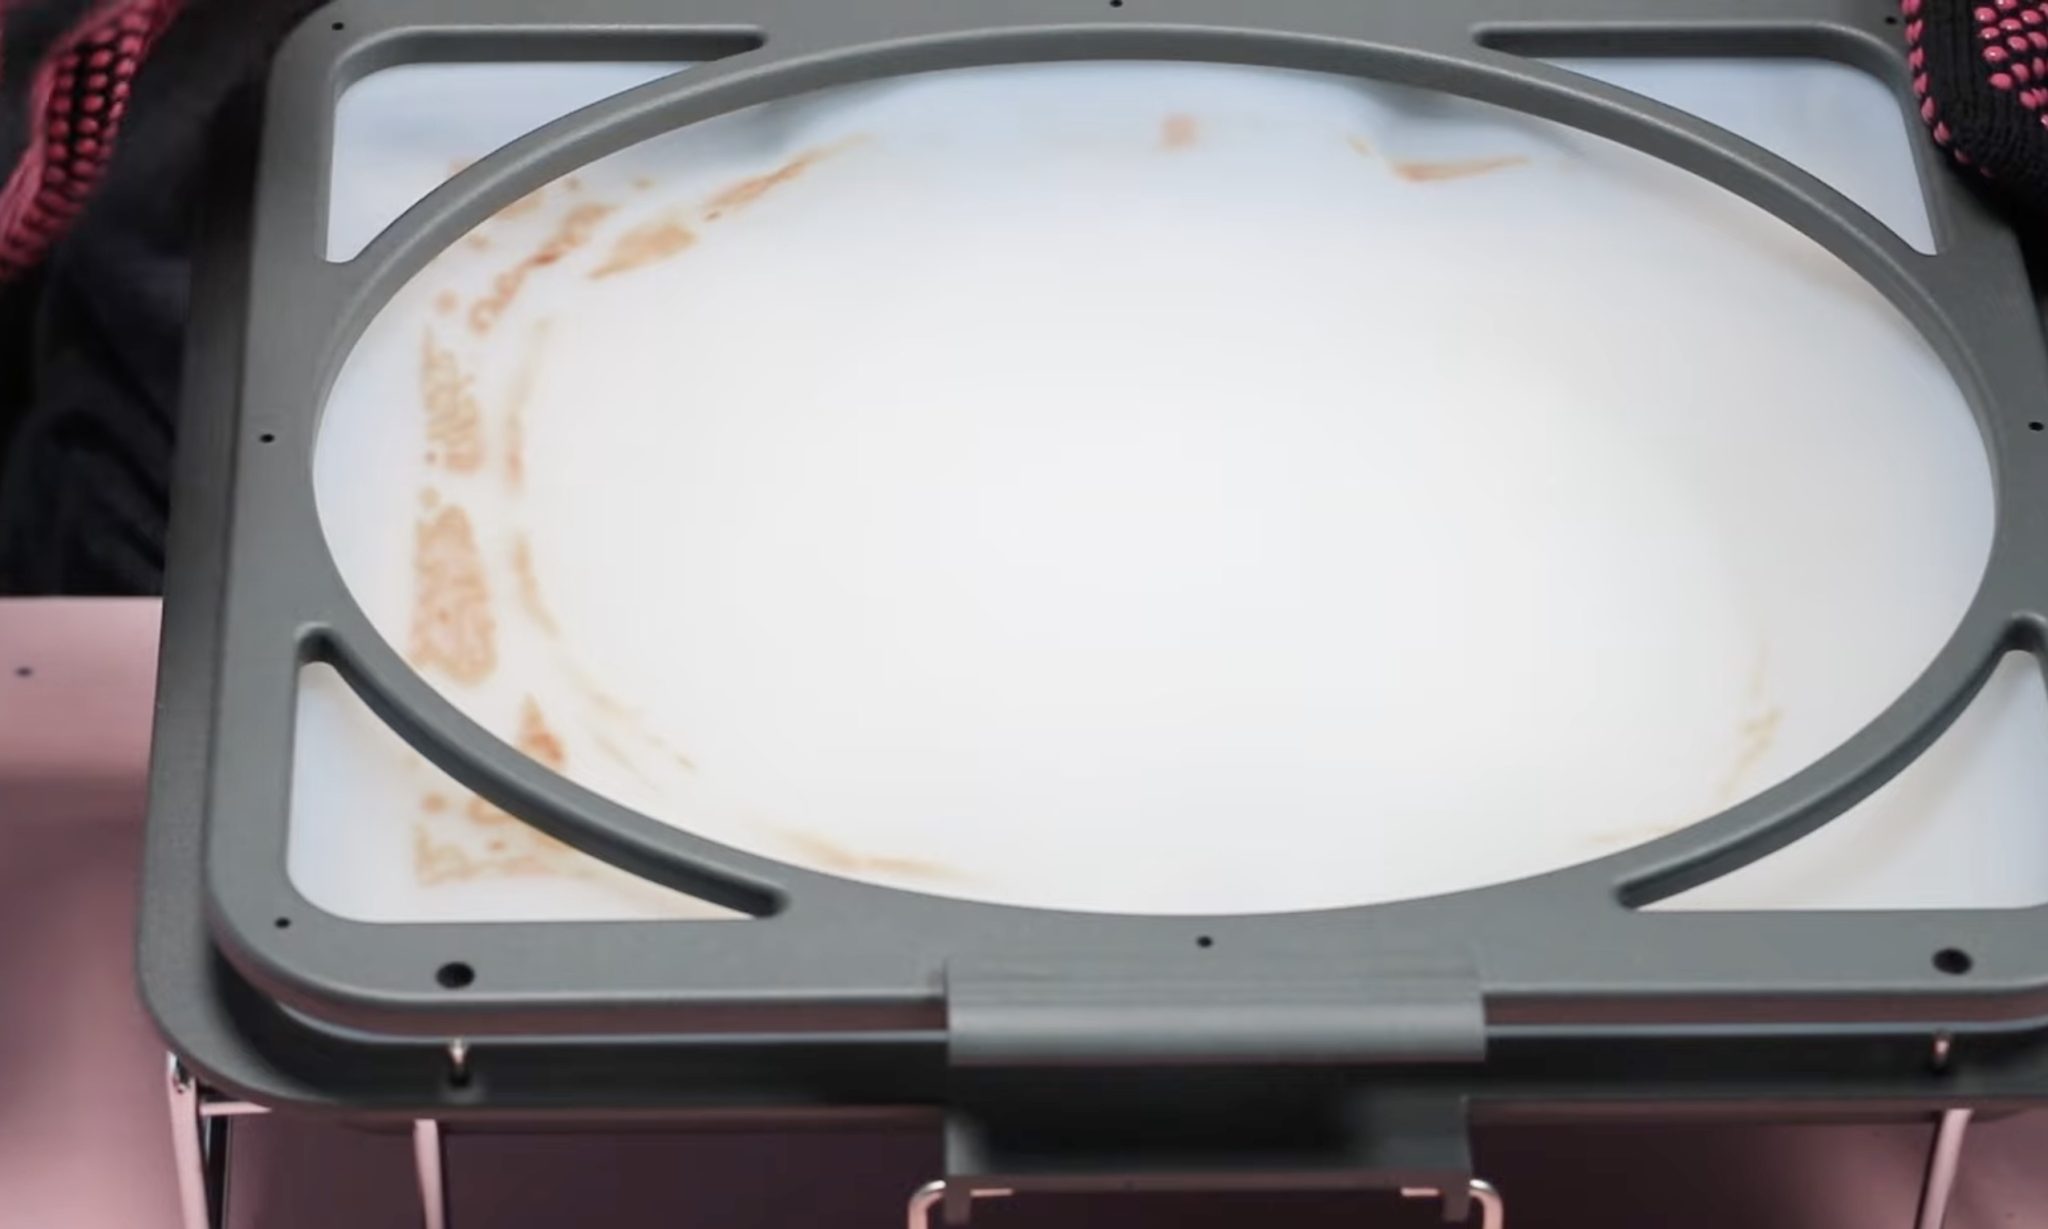
This plate also turned out really cute, but there are problems. In some areas of the curve, there are blurred spots, and along one edge, the print shrank away from the edge.

From a distance, it looks really cute, but it isn't suitable for selling, and I would probably not gift it either.
A couple of things I think would help:
- Use an all-over print design that doesn't have a lot of detail.
- Print the design as large as you can. My printer is limited to 8.5 x 11, but if I had a larger print, it wouldn't have left a blank area along the edge.
- I also think having a white background is ideal.
I did run into an issue with the all-over print in my vacuum tray. The sublimation print transferred onto the inside of the tray. Make sure your protective paper is larger than the print, and I think it might be helpful to use multiple sheets of protective paper.
Are You Ready to Make Custom Plates with the PYD Life Vacuum Press?
These turned out so fun, and I'm glad I finally checked this project off my to-try list.

The single design plate worked better than the all-over print, and there are size restrictions you need to keep in mind.
The sublimation plates are food safe after pressing and perfect for creating custom gifts to send home with your guests at cookie parties, to add fun/beauty to your holiday table, for holiday decor, and so much more.
I hope I've answered any questions you have about creating custom sublimation plates for the holidays. If you have any additional questions, leave them in the comments, and I'll be happy to answer them for you.