
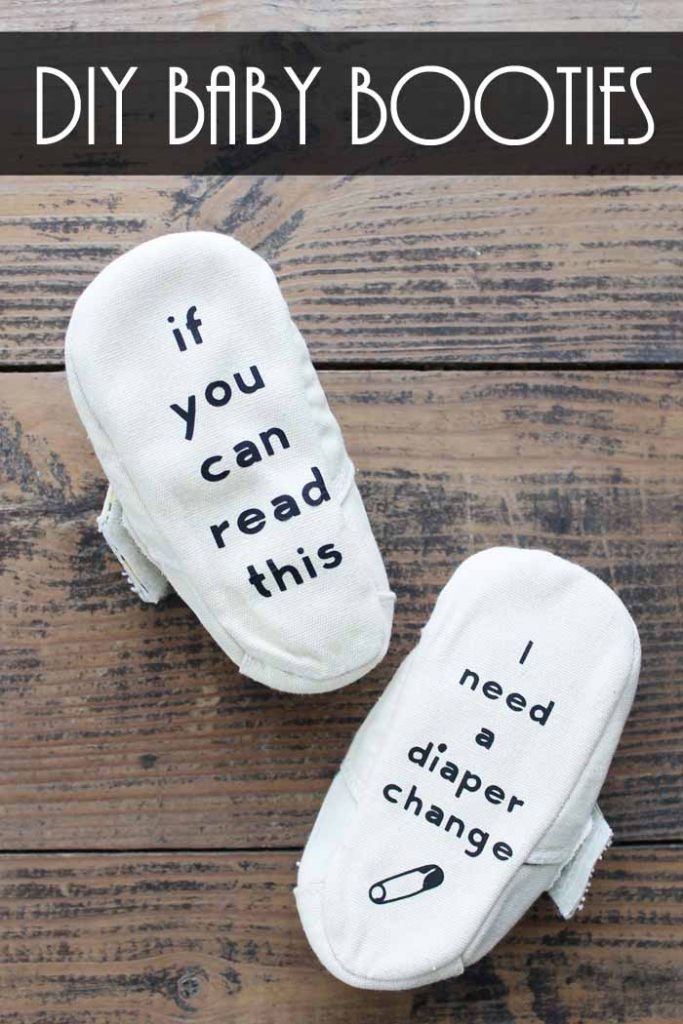
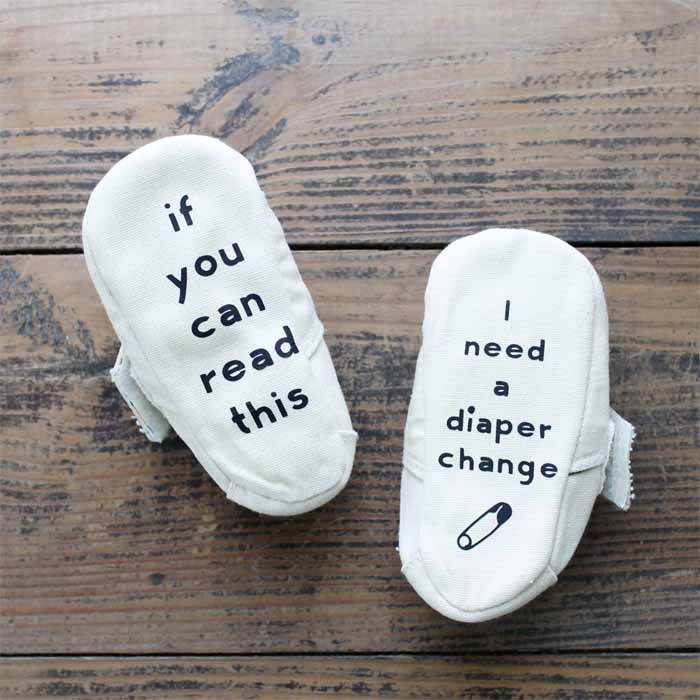
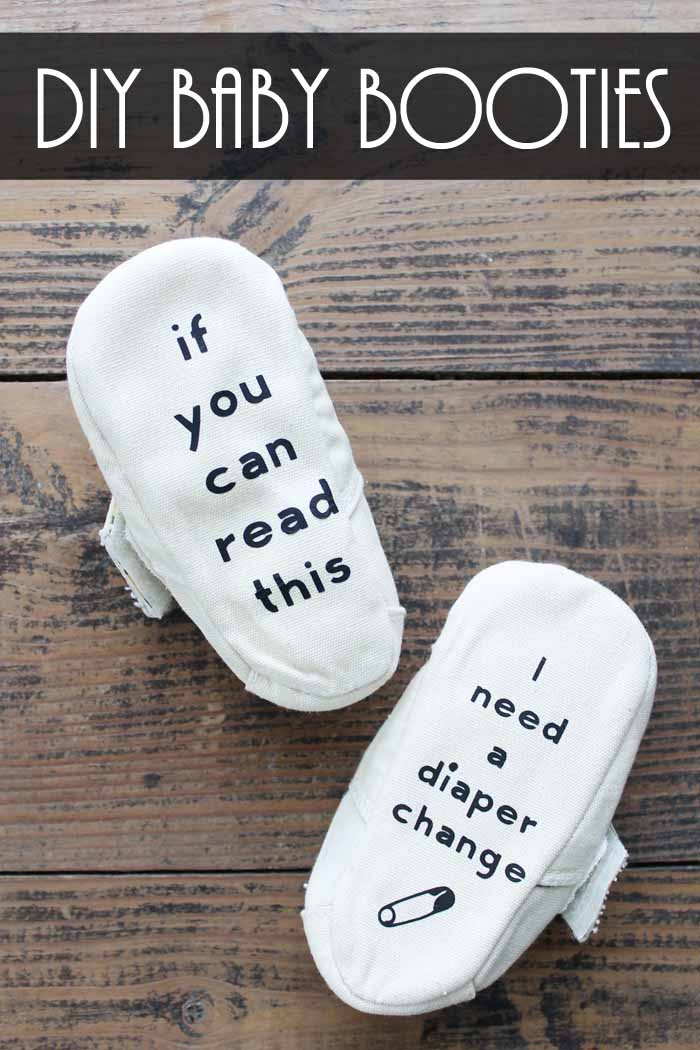
DIY baby shoes are the perfect introduction to baby Cricut projects! All you need to do is add iron-on vinyl to plain booties! You can also do this project with onesies, bibs, or anything else a baby uses! Make them funny with our cute design or create your own design as well. Either way, the parents-to-be are sure to love these cute shoes for their little one. If you are searching for the perfect DIY baby gift, this project is for you!
How To Make DIY Baby Shoes With Iron-on Vinyl
These adorable little shoes are great for baby showers, gender reveals, or just a fun gift for a little one in your life. I love adding iron-on to odd surfaces like these. If you are concerned about the item you want to use, you can read more about all of the materials that iron-on can be used on by clicking here.
Using a Cricut machine is a great way to create a unique gift for a baby. You can use your own creativity to come up with funny sayings, quotes, or monograms. Plus, you don’t have to spend a lot of money to make the gift special!
Supplies Needed To Make DIY Baby Shoes
- Plain baby booties
- Cricut machine (click here to see which one I prefer)
- Iron-on in the color of your choice
- Cricut cut file (click here to access)
- Cricut EasyPress or Iron (click here to see why I like the EasyPress)
- Weeding tools (optional)
- Scraper or flat edge
Step 1: Download File
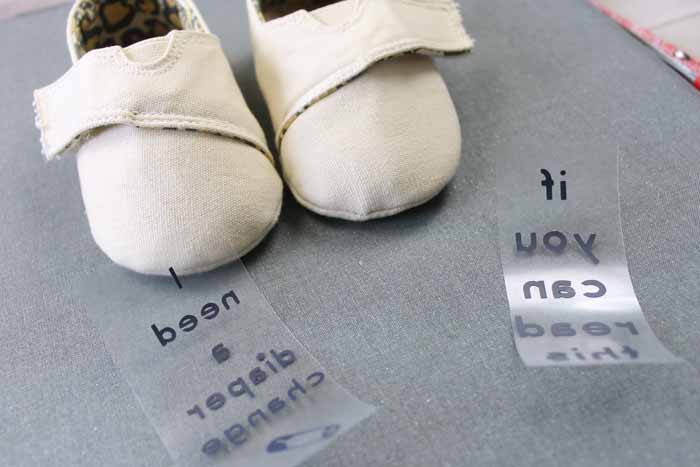
I made a Cricut cut file for baby booties. Download the file or make your own version.
Step 2: Cut Design From Vinyl
Resize the file to fit the size of the shoes you are using for this project. Then, mirror it before cutting the design from the iron-on. Don’t forget to always cut with the iron-on shiny side down.
Step 3: Weed Design
After the design has been cut, weed away the excess from the outside and the centers of the letters. I like to use weeding tools to make this easier, but they are not a must.
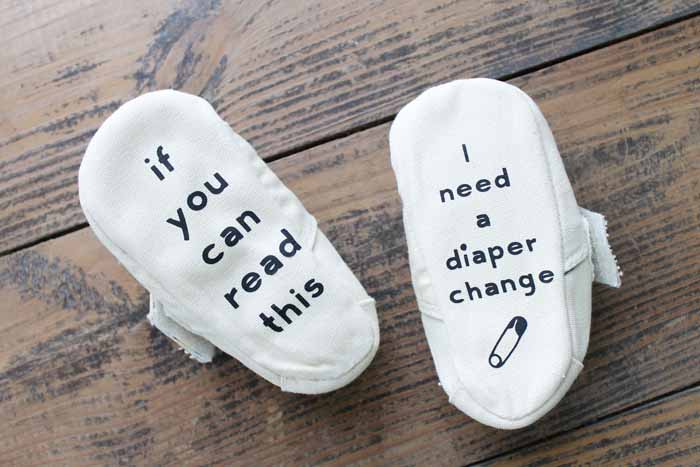
Step 4: Apply Design To Shoes
Then just position your design on the bottom of the shoes and use the EasyPress or an iron to press for the recommended amount of time. I find that using a scraper or flat edge to press the design down after it has been heated helps it to adhere well.
Step 5: Remove Carrier Sheet
Remove the carrier sheet and your DIY baby booties are complete!
These DIY baby shoes are just too cute, and would make the perfect addition to any baby gift!
Again, if you want to be more creative, you can easily come up with your own personalized design or phrase to fit the expecting couple. For example, you could personalize it with the baby’s name, an inside joke, or something that might go with the theme of the baby’s nursery.
The possibilities are endless with this project and I hope you try it out!
FAQs About DIY Baby Shoes
If you have questions about these DIY baby shoes, I have answers for you! Please leave your question for me in the comments if you don’t see it already answered below!
Do I Need To Buy A Special Type Of Baby Shoe?
Technically, no. Any type of canvas or cotton baby shoe will work great for this project. However, with that being said, you will want to stay away from shoes that have a decorative or patterned bottom. This is because you want to be able to read the vinyl phrase you put on the bottom of the shoe.
What Cricut Machine Can I Use For This Project?
All of them! The Cricut Maker, Cricut Explore series, Cricut Joy, Cricut Joy Xtra, and Cricut Venture, can all cut vinyl!
The only thing to keep in mind is that each Cricut machine is different in regard to project size capabilities and the materials it can cut. So, depending on what project you have in mind, you might need to resize the design or cut it out in a different material.
Do You Have Other Options For Sayings That Can Go On The Bottom Of The Shoes?
Yes, I do! If you are looking for more options, check out my Cricut Baby Shower Ideas: Dollar Store Baby Gift Crafts blog post. In the post, I have 3 other designs that I used on baby socks, but you could use them on shoes instead.
Can I Use This Technique On Other Baby Items?
Yes! There are plenty of Cricut Dollar Store options, like onesies, bibs, blankets, and anything else a baby could need. If booties aren’t your thing, use the same steps above for any other baby item you choose.
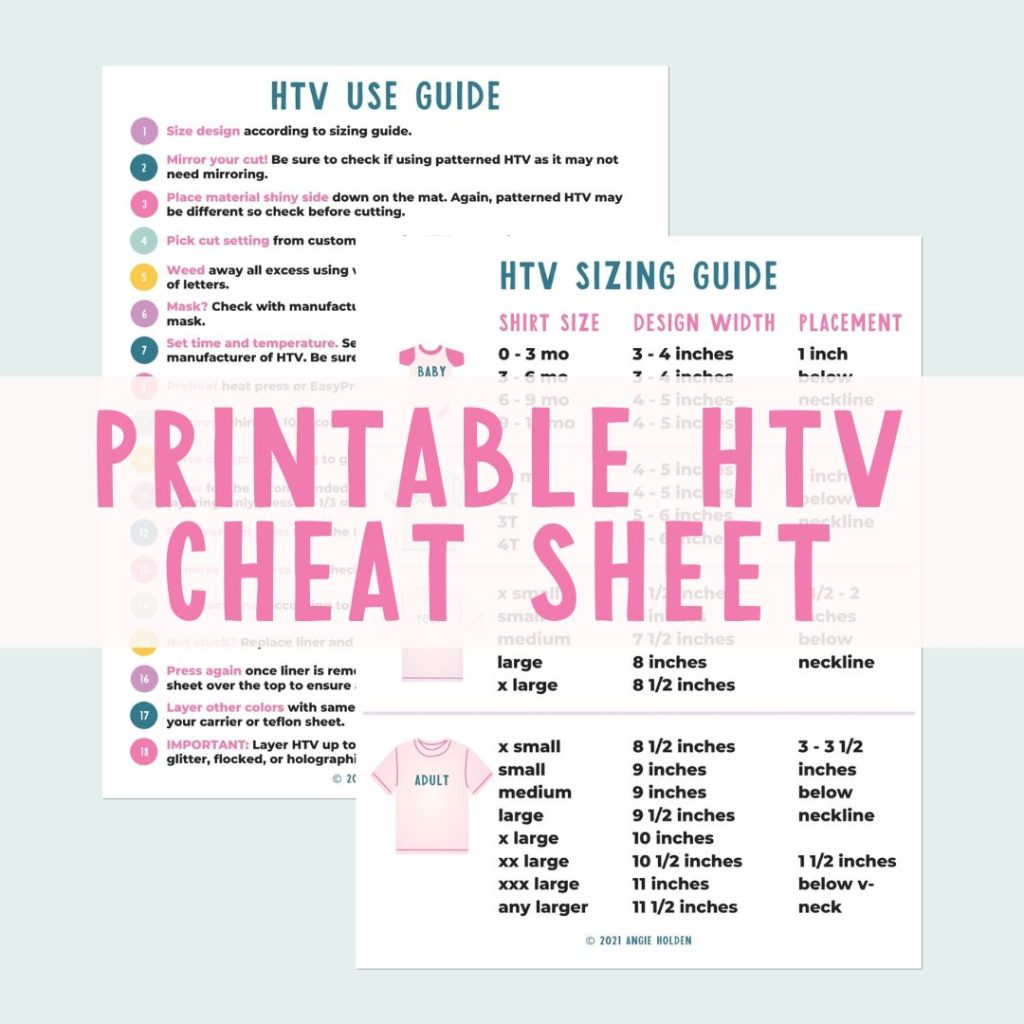
Free HTV Cheat Sheet
Get your FREE Printable HTV Cheat Sheet now! This guide has sizing and position recommendations for infant through adult shirts as well as a handy HTV use guide. Print this double sided guide and put it by any heat press you own!
6 More Baby Crafts
Did you love these DIY baby shoes, and are looking for more baby crafts? Then check out the projects below!
- Baby’s First Holiday SVG Bundle—Nine Holidays!
- Baby Photo Frames with Footprints
- Baby Shower Gifts: Gender Neutral Baby Gift Idea
- Heat Transfer Onesies
- Animal Bibs for Baby
- Free Baby SVG Files for Cricut or Silhouette Machine


OH my goodness! what a darling idea. I now find myself wishing I knew someone who was having a baby just so I could make these. Pinned.
That is so cute. Thank you for sharing on Best of the Weekend.
Hi Angie!
I saw your Baby Booties on Talk of the Town at My Repurposed Life this week and HAD to come over and pin these!!!!! Sooo adorable! I have a Pour Bébé board and, of course, Crafts and Sewing board so I pinned to both and added hashtags. Hope that brings lots of new friends over your way! <3
Love your sweet idea and it gives me another craft idea to do with my Cricut machine {that has been sitting idle…},
Hugs,
Barb 🙂
This is so adorable!! But I couldn’t get the link to work it kept saying “The link is not currently active”
I updated the link in the post so it should work now.