

Few moments are as joyful as announcing a new baby, and a custom shirt makes the moment even more memorable. Pregnancy announcement shirts are a fun and creative way to share the news — and they work beautifully for gender reveals too! Follow along as I show you how to make adorable shirts for your next big announcement.

How To Make DIY Gender Reveal Shirts
There are so many clever and creative ways to announce a pregnancy, but one of my favorites is making pregnancy announcement shirts. Sometimes those shirts are generic and don't indicate gender at all, and at other times, they are adorable gender reveal shirts!
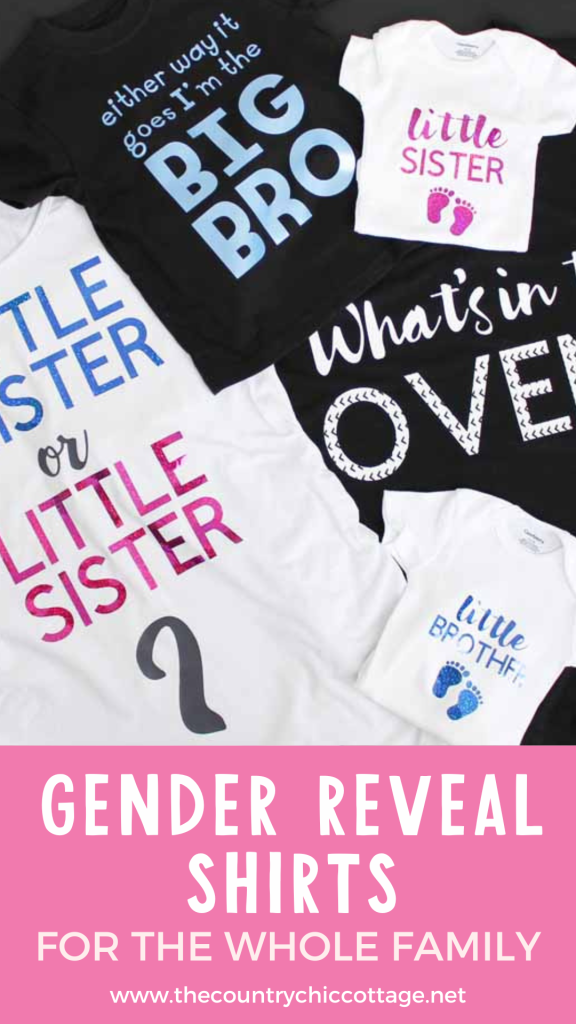
I thought I would share a few gender reveal shirt ideas for the entire family. My daughter is having another baby, and the gender reveal party is fast approaching. So, I've had the opportunity to make a batch of gender reveal shirts for everyone to wear!
Since I made shirts for the entire family for the occasion, I have several designs to share. However, if you are a follower of the blog, you will be happy to know that today's designs are different from my Big Brother Little Brother Shirts and DIY Funny Maternity Shirts! – Who doesn't love more t-shirt options?!
So grab your Cricut machine and your pink and blue vinyl, and let's make some fun gender-reveal shirts!
Supplies Needed To Make Gender Reveal Shirts
- Iron-on vinyl (in the colors and types of your choice)
- Cricut machine (see which machine is my favorite)
- Cricut EasyPress (check out why I recommend this machine)
- EasyPress mat
- Weeding tools (optional)
- Shirts and onesies
- Oven shirt cut file
- Big bro shirt cut file
- Little sister/brother cut file
- Little mister or sister cut file
Step 1: Upload Design To Cricut Design Space
Open up the appropriate cut file in Cricut Design Space and size it to fit your shirt.
Step 2: Cut Design
Next, cut the design from the iron-on of your choice. Be sure to mirror the design before cutting, and don't forget to cut with the shiny side down.
Step 3: Weed Design
Weed away any excess from around the design and from the centers of letters.
Step 4: Press Design To Shirt
Press the design onto the garment according to the package directions. You can also look up the EasyPress settings on the Cricut Heat Guide. Follow their recommendations regarding time and temperature.
Step 5: Remove Carrier Sheet
Remove the carrier sheet and have fun at your gender reveal party!
Gender Reveal Shirt Ideas And Designs
Now that you know how to make the shirts, here is the collection of designs that I created for our gender reveal party.
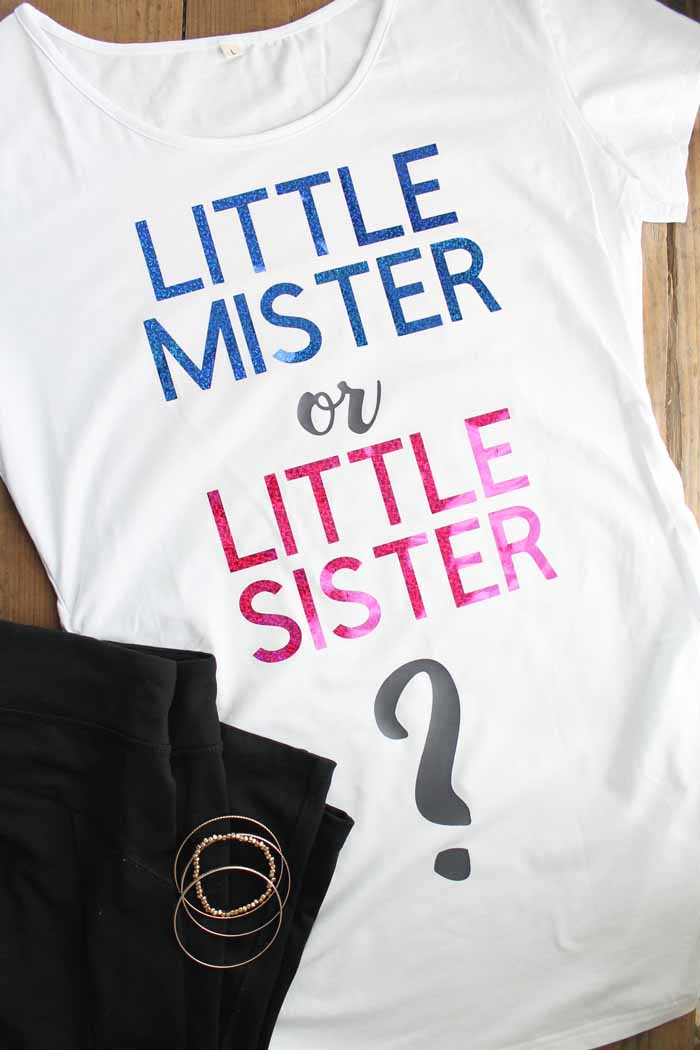
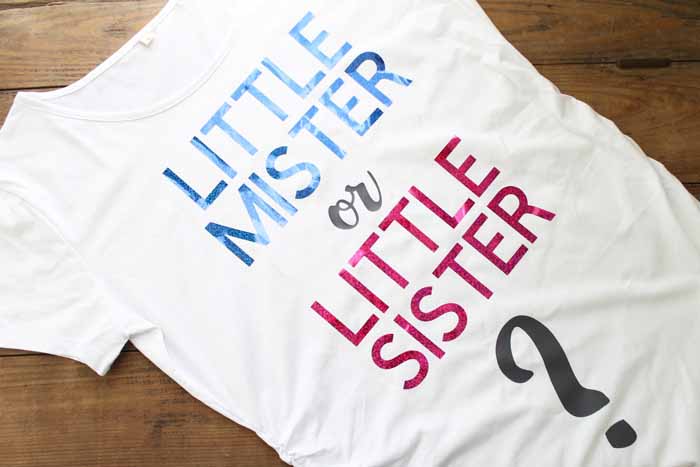
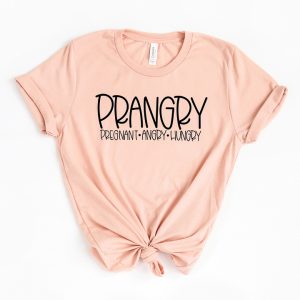
Little Mister Or Little Sister Pregnancy Announcement Shirt
The first is a pregnancy announcement shirt perfect for the mom-to-be. You might consider using SportFlex Iron-on for this one since pregnant bellies might need a little extra stretch.
If you only make one of these shirt designs, this should definitely be the one! When searching for gender reveal ideas for family, this would be at the top of the list!
Isn't this design adorable? It's perfect for a toddler and ideal for a gender reveal party where all the guests are waiting for a gender announcement! Cake cutting, anyone?
What's In The Oven? Father-To-Be Gender Reveal Shirt Idea
Next up is a design perfect for the father-to-be. I wanted a little something special, but didn't want to go overboard for this one. This design seemed perfect!

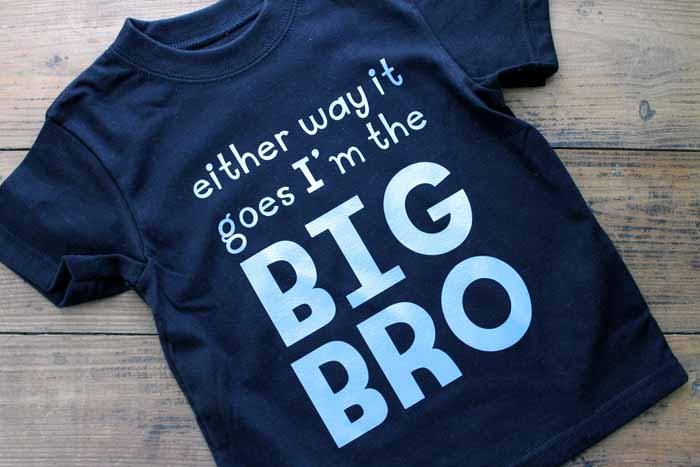
“Big Bro” Gender Reveal Shirt For The Big Brother
Got a big bro in the mix? Be sure to whip up this design! After all, you don't want to leave them out!

A big brother shirt is a great way to include any older siblings in the gender reveal party. And I absolutely love this idea from DIY Danielle!
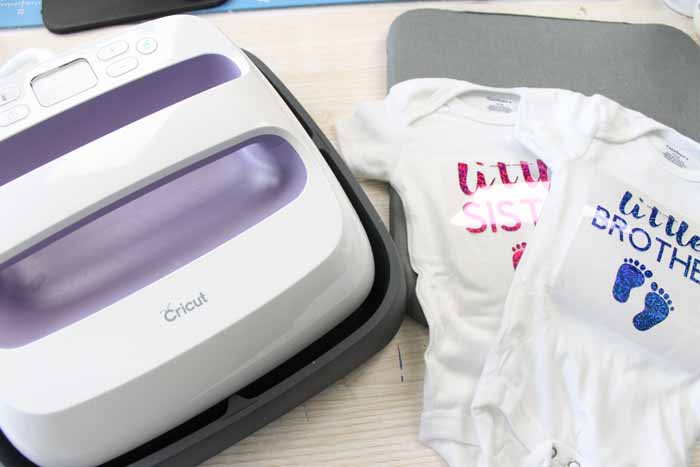
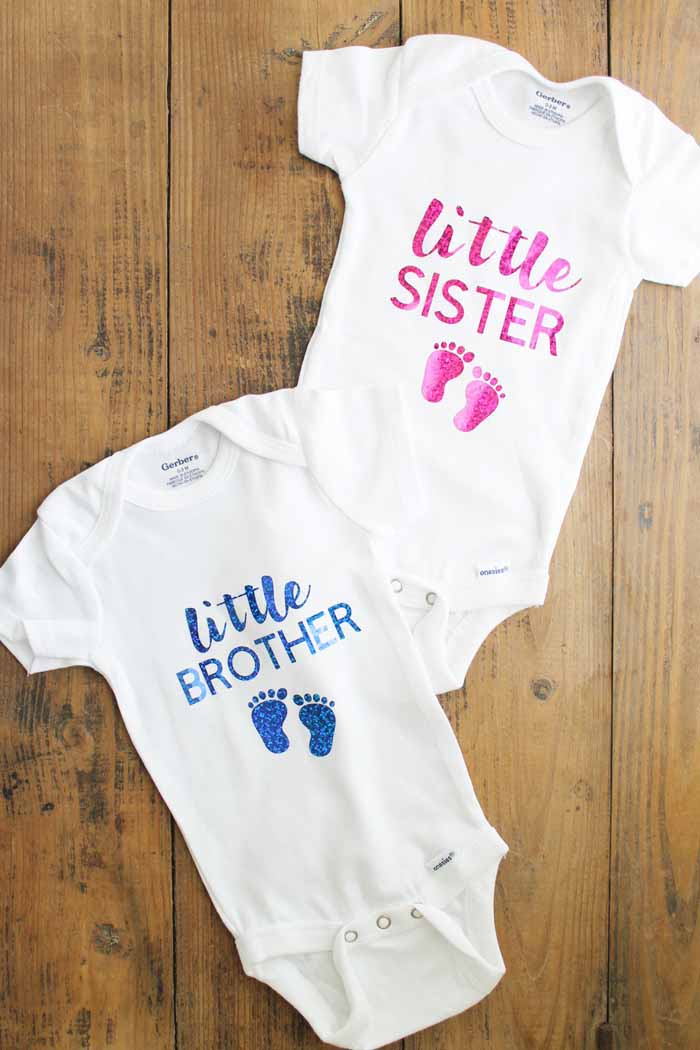
Little Sister And Little Brother Onesie Designs
You can't leave out the new little one when making gender-reveal shirts for the family! If you don't know the baby's gender, make both versions of this design so you will have the right one on hand once the reveal is made.
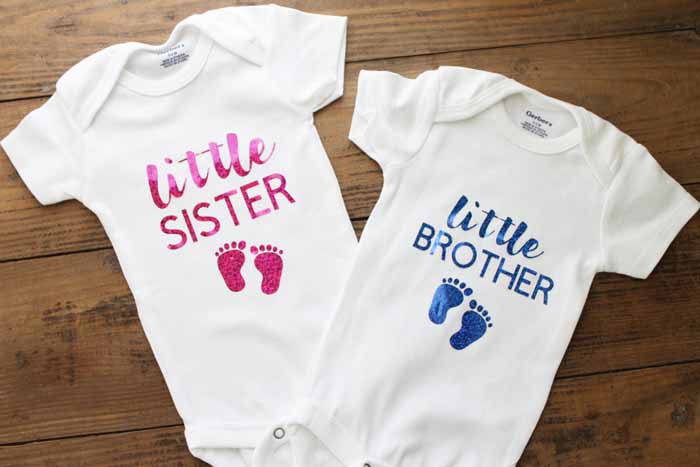
Use these onesies as party decorations, or wrap the right one up and let the older sibling unwrap the surprise in front of the guests.
Do you have a gender reveal party coming up? Be sure to make some of these shirts!
FAQs About Gender Reveal Shirts
Here are answers to some of the most frequently asked questions I get about making these DIY gender-reveal shirts. If your question isn’t listed, feel free to drop it in the comments, and I’ll be happy to help!
Would This Project Work For Older Kids?
Although I made shirts for a toddler, you could definitely adapt this project for older kids. Just make sure the design fits the shirts you plan to use.
Could I Use Different Colored Shirts For This Project?
Absolutely! I chose black-and-white shirts, but you could easily use gray, green, orange, or any other color you prefer. I would recommend avoiding pink or blue since part of the design will blend in.
What Cricut Machine Can I Use For This Project?
All of them! The Cricut Maker, Cricut Explore series, Cricut Joy, Cricut Joy Xtra, and Cricut Venture can all cut iron-on!
The only thing to keep in mind is that each Cricut machine is different in regard to project size capabilities and the materials it can cut. So, depending on what project you have in mind, you might need to resize the design or cut it out in a different material.
Can I Use My Iron Instead Of An EasyPress?
Yes! An iron works well with iron-on vinyl. However, it's important to use appropriate heat settings to prevent scorching or ruining your project. I find that using the EasyPress makes this a little easier.
If you are on the fence about which to use, check out our Cricut EasyPress Versus Iron: Which is Better? blog post!
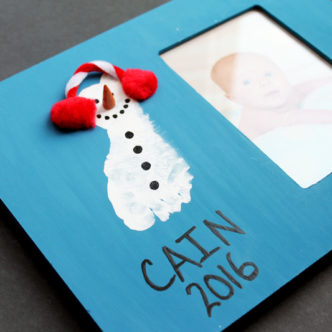
8 More Baby Crafts
Did you love these gender reveal shirts and want more baby crafts? Then check out the projects below!


This is such a nice and creative way to do a gender reveal! I don’t have any friends at the moment that are having a baby but I will definitely keep this in the arsenal for that time!
Maureen | http://www.littlemisscasual.com
What a fun idea for a gender reveal party. Super cute! Thanks for sharing at #HomeMattersParty