

Have you ever tried using t shirt vinyl to create custom shirts? How did that go for you? I have never had luck using an iron with heat transfer vinyl. Never. The Cricut EasyPress has been a god send, it makes making custom shirts easy and fun.
Are you ready to break out the t shirt vinyl and rock some personalized shirts? Learn more below!
Supplies needed to add t shirt vinyl to any shirt:
- Cricut Machine (I used a Maker for this shirt but you can use any Cricut Machine to add t shirt vinyl to any shirt)
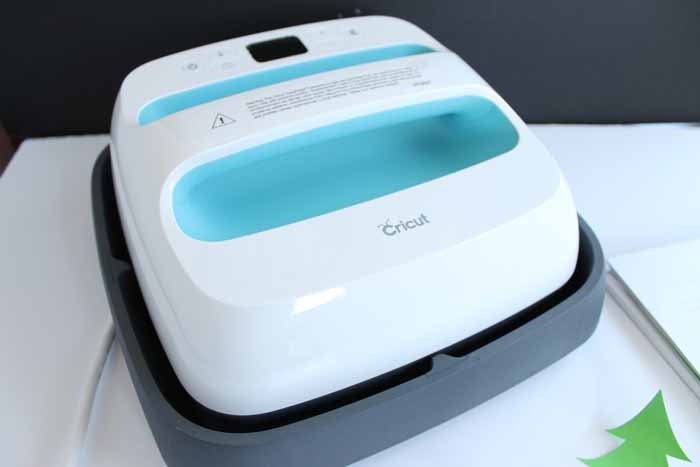
- Cricut EasyPress (Photos show the original EasyPress you can also use the newer EasyPress 2)
- Cricut Iron On (Cricut calls their t shirt vinyl Iron-on)
- Shirts
- Weeding Tools (recommended)
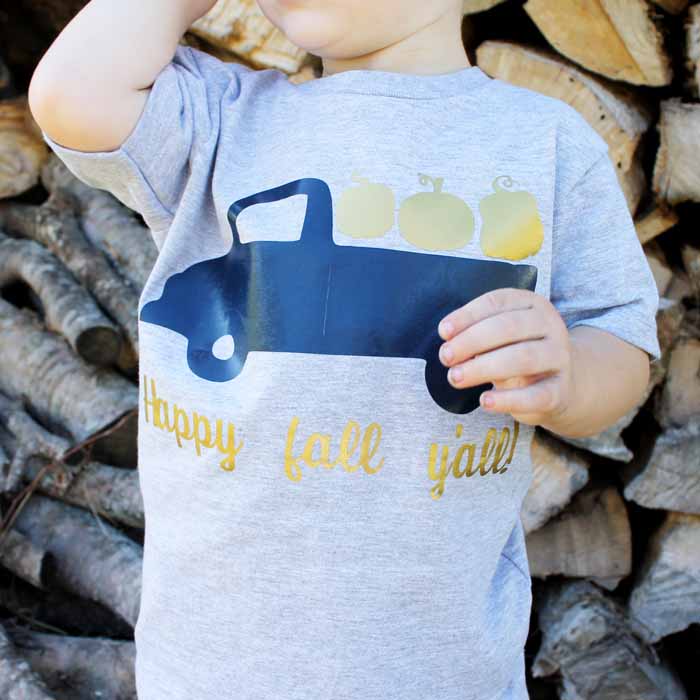
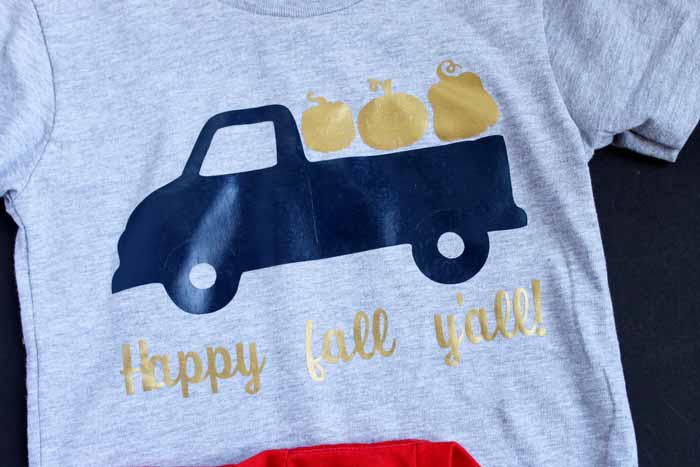
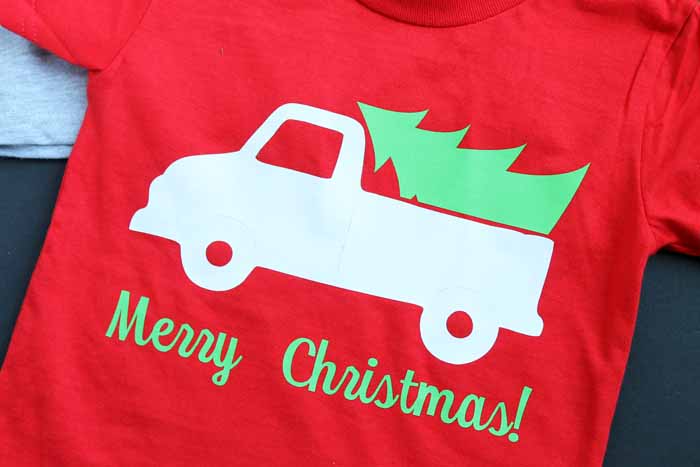
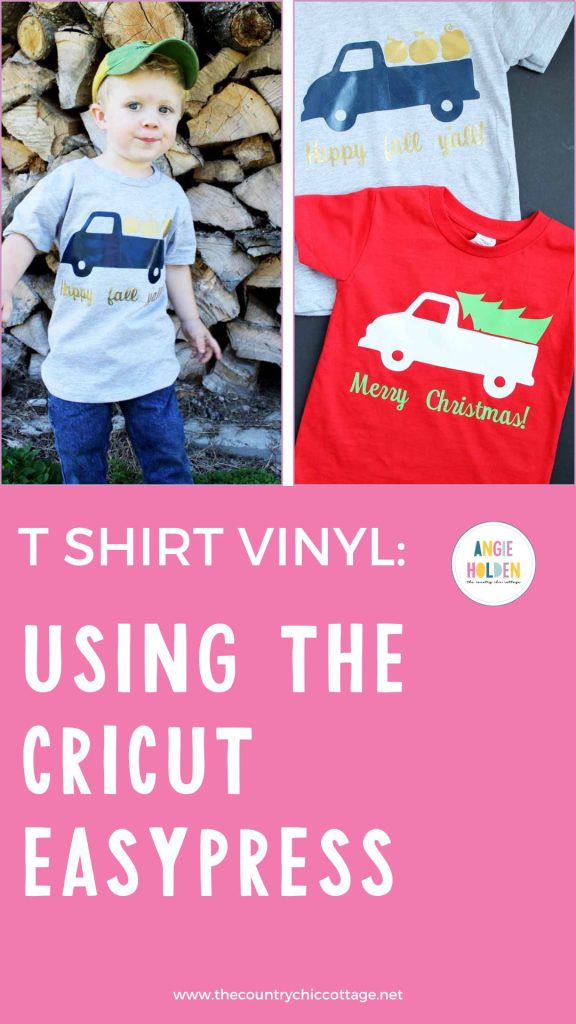
- Trucks designs (search for in Cricut Design Space Similar images: Fall truck #M4C54DEA5, Christmas truck #M4C033AEF)
- Cricut EasyPress Heat Guide
The Cricut EasyPress is perfect for at home crafters. If you are looking for a heat press but not the bulky size, you need to check out the EasyPress.
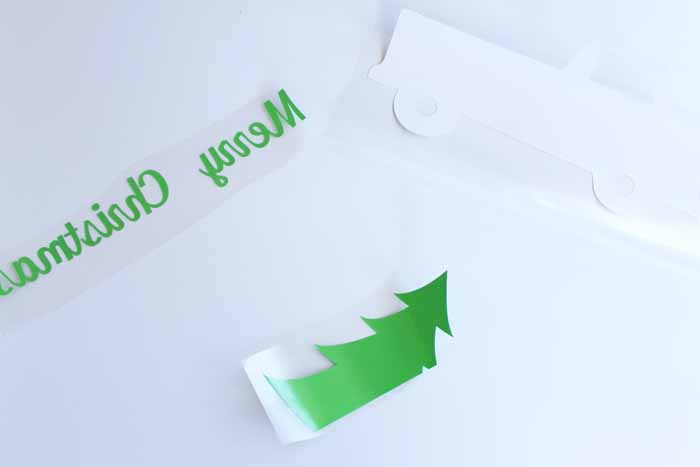
For our t shirt vinyl today, we are going to be cutting some trucks! I have two options for you. You can cut the fall version or the Christmas version.
A little about the vinyl before we continue with this project. I highly recommend the Cricut brand of iron on vinyl for your project needs. I have tried several brands over the years and I have to say that the Cricut brand is amazing! For projects that last, there is no other option.
Their color selection is amazing, I can always find the color I need!! I used a variety of colors and finishes for my project but you can choose from the wide array of colors available on the Cricut site for your project. Will you use regular, holographic, glitter, foil?? The possibilities are endless!
Instructions:
Open the project in Design Space. Make sure to mirror the cuts as this is t shirt vinyl. Resize if needed to fit the front of your shirt. Cut your pieces and then use the weeding tools to remove all excess.
Psst…want to use up your scraps for this project or any other? Here is an easy way to add your pieces to the scraps. Now that our pieces are all cut and ready, we are ready to break out the EasyPress.
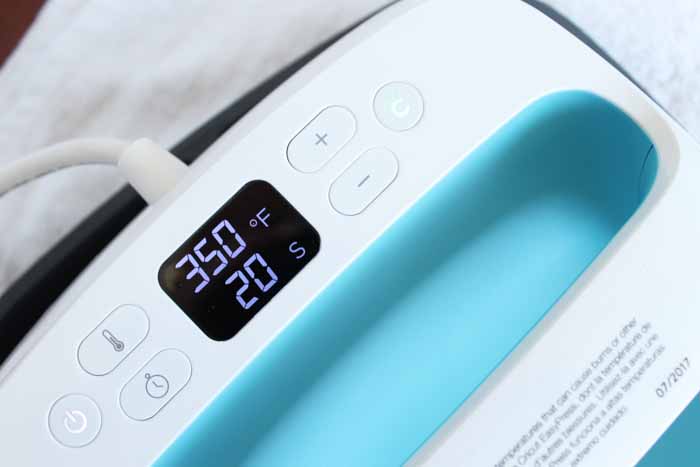
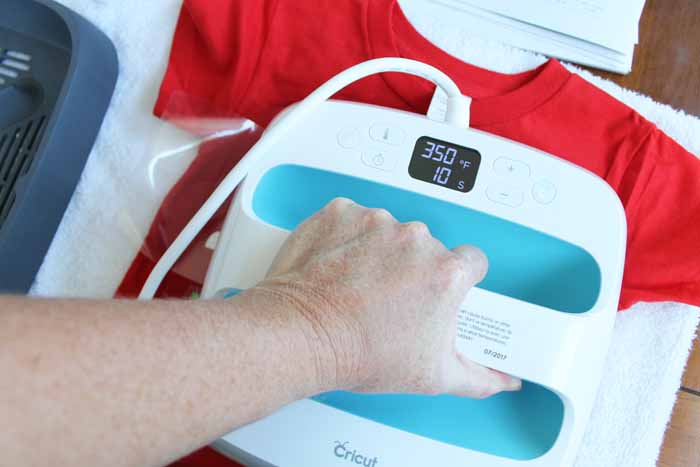
Use the Cricut Heat Guide to find what the time and temperature should be for your material. Then turn on the EasyPress and use the display to set the time and temperature desired.
The EasyPress also heats up really fast! I have seen comparisons with a standard heat press in a variety of models and the EasyPress beat them every single time. It will beep to let you know it is ready as well.
Preheat the shirt itself before adding t shirt vinyl. This removes any moisture in the shirt and helps smooth out any wrinkles. This should only be done for a few seconds. Then just position your vinyl on the shirt with the carrier sheet up as shown below.
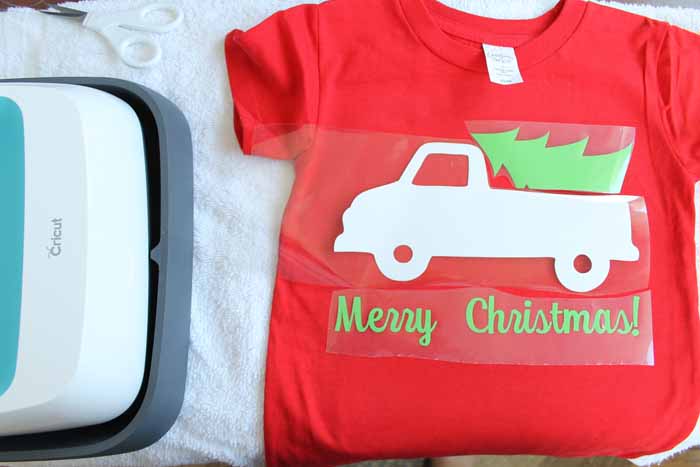
Notice that I have trimmed the carrier sheet on all my pieces so they're not overlapping. If you can't trim your pieces so they don't overlap that is fine. Check out this post for how to layer multiple pieces of t shirt vinyl.
Now you'll put your EasyPress right on top, hit the button to start your countdown, and give it some pressure on the handle. This pressure does not have to be extreme. Just press down while it is working.
Free HTV Cheat Sheet
Get your FREE Printable HTV Cheat Sheet now! This guide has sizing and position recommendations for infant through adult shirts as well as a handy HTV use guide. Print this double sided guide and put it by any heat press you own!
As you can see, my design is a little too large and the EasyPress will not cover it in one press. THAT IS OKAY! When it is done with the first press, it will beep. Then just move it over to the other portion of your design, press the button again, and repeat the heating. It is okay to overlap during this process and heat some areas for more time.
Finally, the EasyPress instructions recommend flipping your item over and pressing from the backside as well. Repeat the same process of heating and pressing down but from the back.
Check the Heat Guide to find out if your material is a warm peel or a cold peel. If it is a warm peel you'll wait until the carrier sheet has cooled enough to touch (this also allows the adhesive to adhere to the shirt) and peel the carrier sheet away slowly making sure your t shirt vinyl isn't lifting.
If it is a cold peel you'll want to wait until it is completely cool before removing the carrier sheet.
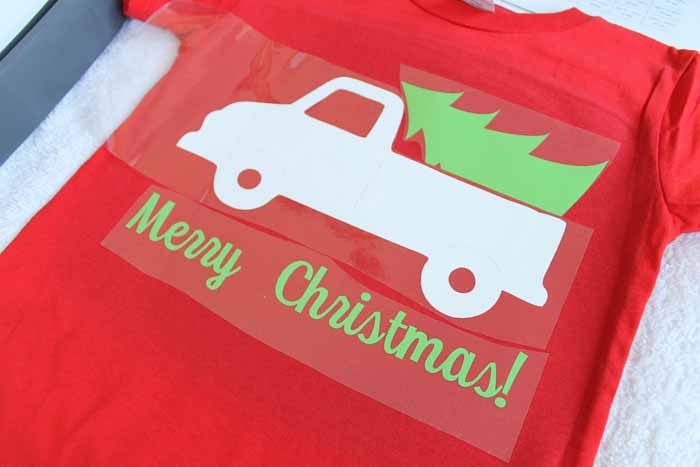
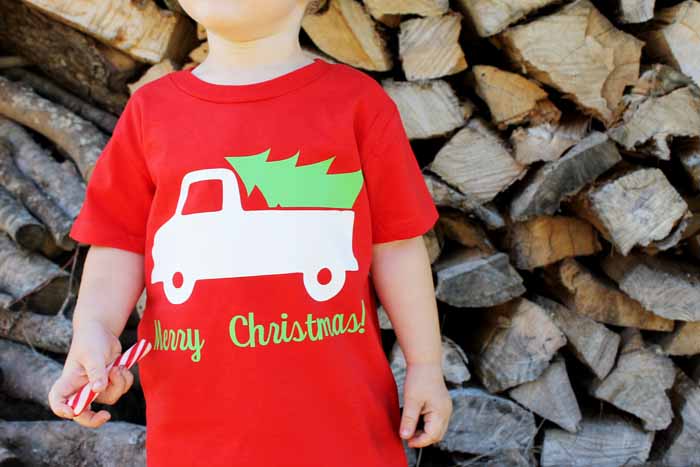
Peeling back that carrier sheet is so satisfying! Now you're left with an awesome shirt that you made yourself. You can put it on a little model to really show them off.

I love the unexpected navy and gold combo of the fall shirt but you could go more traditional with some oranges and browns. Remember with Cricut Iron On you can basically pick the colors that will make your design your own.
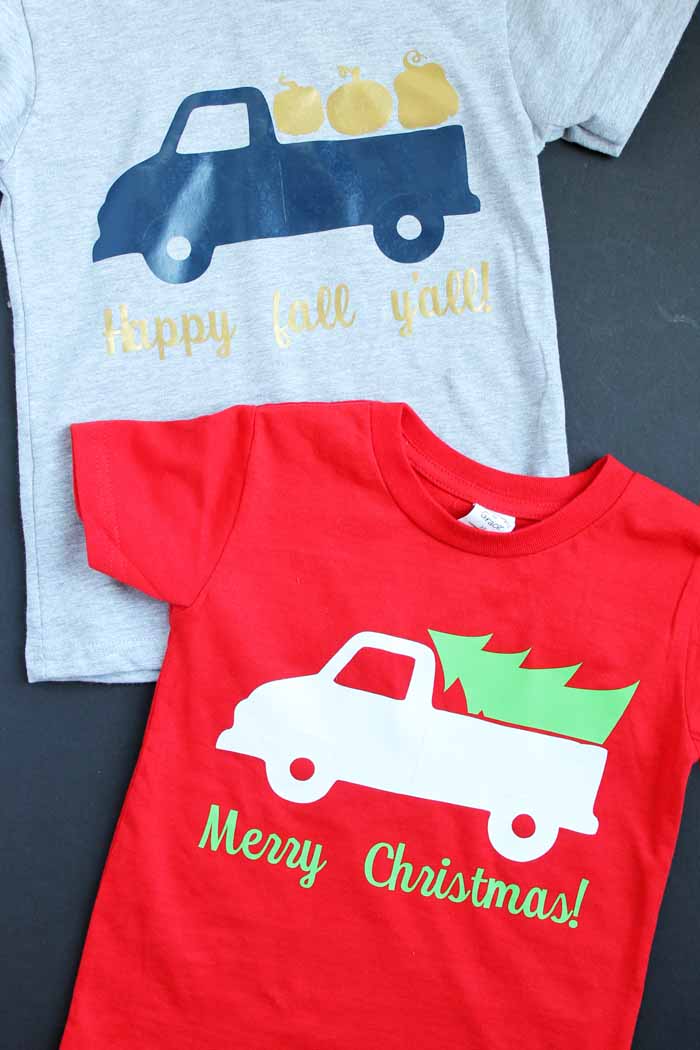
I put the Christmas version on a red shirt so I went with white and green for my vinyl selections. Again, vary your t shirt vinyl selections to make a shirt that is all your own.
Then give them away or keep them for yourself! Now that you know the Cricut EasyPress is the best way to make a shirt that lasts, you will be making them for every holiday and occasion. I know I will be!
Use our designs or create one of your own in Cricut Design Space.
Either way, I know you will love the results from the Cricut EasyPress as much as I do. I can't wait to see the projects you make with t shirt vinyl.
So, y'all stay tuned as I am sure there are more projects like this coming soon! Pick up some t shirt vinyl and a Cricut EasyPress to make all the things!
Love this project and want more ideas with your Cricut? Try the links below!
- Tray Decoration Ideas for Thanksgiving
- Cute Snowman with Your Cricut Maker
- Raven Sun Catcher
- Burlap Succulent Decor
- Pumpkin Pillow

Equipment
- EasyPress
Supplies
- T Shirt Vinyl (Cricut Iron-on)
- T Shirt
Instructions
- Open image in Design Space
- Make sure to Mirror your image
- Lay t shirt on EasyPress Mat (or folded towel) on solid surface
- Preheat t shirt to remove moisture and wrinkles
- Lay image on t shirt making sure not to overlap carrier sheets
- Press front as per Heat Guide instructions
- Press back as per Heat Guide Instructions
- Allow to cool as per Heat Guide Instructions
- Remove carrier sheet
- Admire your finished t shirt!
Notes


I see you used the Cricuit Maker. Can you cut iron on vinyl with the Explore as well?
Of course! You can see my comparison of the machines here: https://www.thecountrychiccottage.net/cricut-maker-versus-cricut-explore-air-2-comparison/
I just saw these in stores and wondered how well they worked. Thanks for the review!
Wow! Love how this turned out. Every time a new Cricut product (new for me, anyway), it makes me want to give the Cricut a try. It seems there is a lot of versatility in this line of product. Very cool!
Thanks so much for linking up such an adorable craft at The Pretty Pintastic Party! We love it so much we’ll be featuring it at this weekend’s party!
I hope you’ll stop by, grab a featured badge, and link up some more amazing posts!
I want the EasyPress so bad! I love how much easier it makes these projects. Thanks for sharing your review and DIY with us at Merry Monday this week!
i neex this truck and tree…. please tell me where or how to get it…
They are for the Cricut machine and the designs are linked in the supply link in the post. Happy crafting!