

Flocked HTV can add something really special to your craft projects! This heat transfer vinyl gives a suede-like feel to your designs that stands off of the shirt. Some might even call it “fuzzy”. The other benefit of flocked heat transfer vinyl is that you can use sublimation ink on it! This means that you can actually do a sublimation design on a cotton shirt. Read on to see how to use flocked heat transfer vinyl with your Cricut and more about that sublimation trick!
Want the hello winter SVG shown in this post? Scroll down to the bottom to get it for free!

Video Tutorial Of How To Use Flocked HTV With A Cricut
Do you want to learn everything about flocked heat transfer vinyl and your Cricut machine? Watch the video below!
Can't watch the video or missed some of the steps? I am also covering everything below for you.
What is flocked HTV?
Flocked HTV is a “fuzzy” or “furry” heat transfer vinyl. It has almost a suede-like feel once applied to your surface. You can use it just like regular HTV, but it adds an extra dimension to any project you add it to.
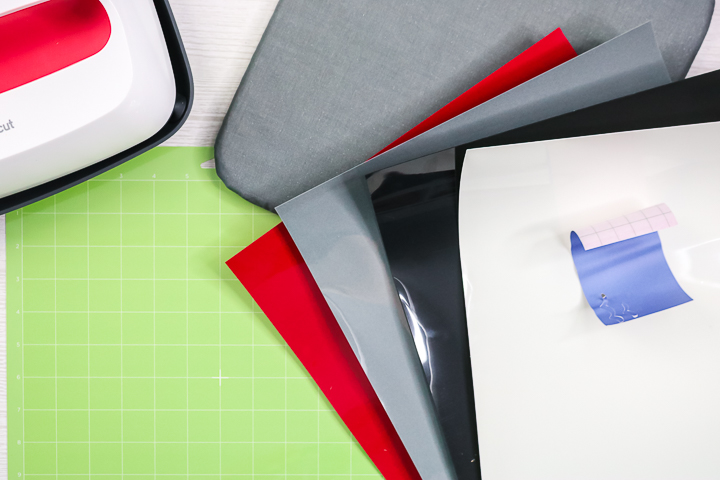
Where Do You Buy Flocked Heat Transfer Vinyl?
I really love the flocked HTV from B-flex – it's getting harder to find, so you can also try the Siser StripFlock Pro.
How Do You Cut Flocked Heat Transfer Vinyl On A Cricut?
The process is basically the same as cutting regular iron-on or heat transfer vinyl. However, you can follow the instructions below if you have questions! Remember that you can cut flocked iron-on with any Cricut machines, since it just uses the fine point blade.
Supplies Needed To Cut Flocked HTV
- Cricut Machine
- Flocked HTV
- Standard Grip or Light Grip Cricut mat
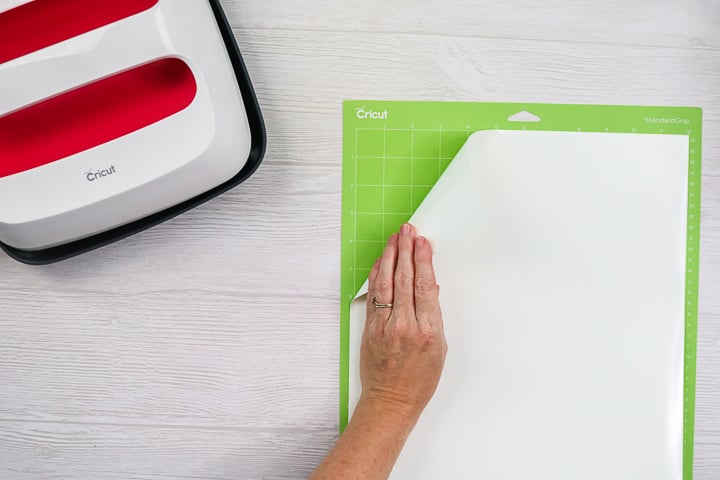
Step 1: Apply Flocked HTV To Cricut Mat
Apply the flocked HTV to your Cricut mat. A Standard Grip or Light Grip mat will work here. Put the material shiny side down and press down well.
Step 2: Add Fine Point Blade To Cricut Machine
Then add your fine-point blade to your Cricut machine and mirror the cut in Cricut Design Space. You will want to use the “Iron-On” setting with “More Pressure: to adjust for the additional thickness of the flocked material.
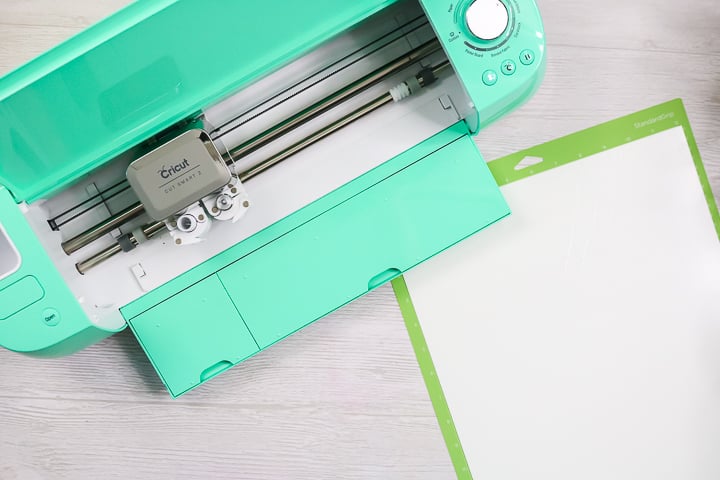
Step 3: Cut Design From Flocked HTV
Then add your mat to your machine and press go to start your cut. Once the cut is complete, remove the mat from the machine. Then weed and apply your HTV.

How Do You Apply Flocked Iron-On With An EasyPress?
Now that you have your flocked material cut, you can apply it to your surface. I am using a shirt as an example, but this can also be used on tote bags, hats, blankets, and so much more. Use the video above for application instructions, or keep reading to see how to apply.
Supplies Needed To Apply Flocked HTV
- Weeding tools
- Cut flocked HTV design
- EasyPress (or iron or heat press)
- EasyPress Mat (or folded towel)
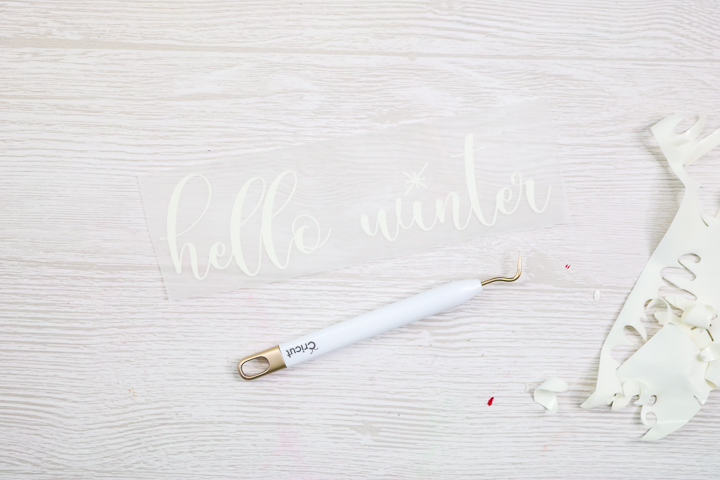
Step 1: Weed Design
Start with the piece that you cut on your Cricut machine above. You will want to weed away all of the excess around the outside as well as the centers of any letters.
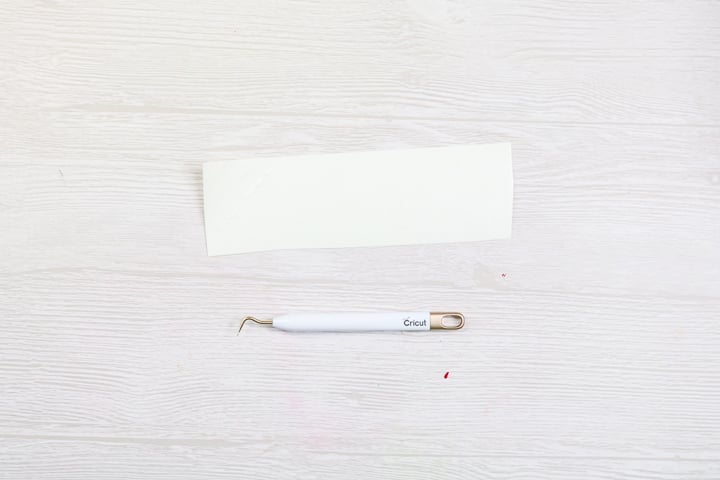
Step 2: Check Your Weeding
This material weeds the same as regular HTV. One thing to note is that some of the fuzz will stay on the sticky portion of the liner. So, the liner will not be as sticky once you have weeded out your design.
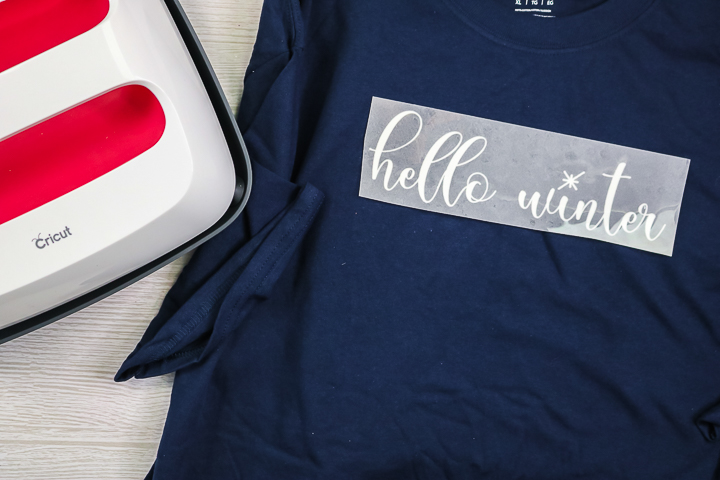
Step 3: Pre-Heat Shirt
Use your EasyPress to heat your shirt slightly to remove any moisture (make sure your EasyPress mat is underneath your shirt). Then select the placement of your design on your shirt.
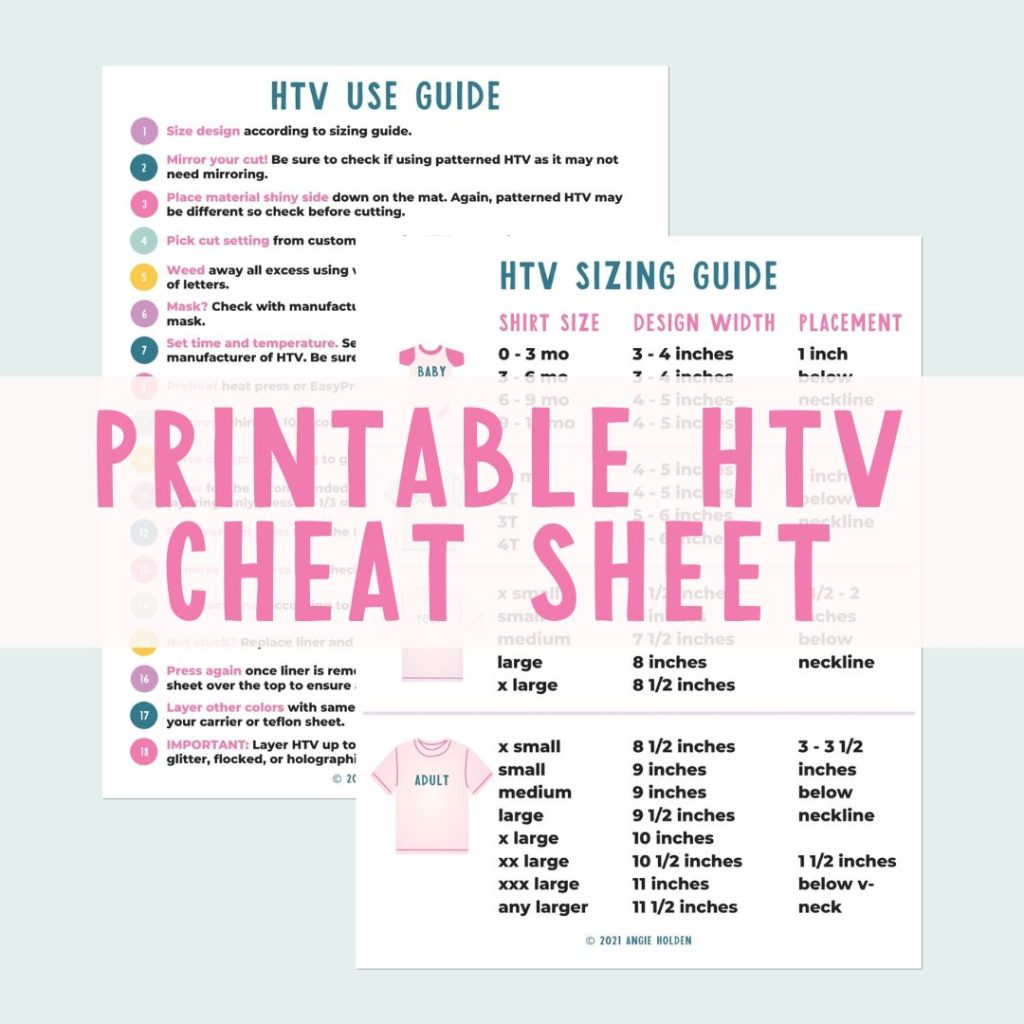
Free HTV Cheat Sheet
Get your FREE Printable HTV Cheat Sheet now! This guide has sizing and position recommendations for infant through adult shirts as well as a handy HTV use guide. Print this double sided guide and put it by any heat press you own!
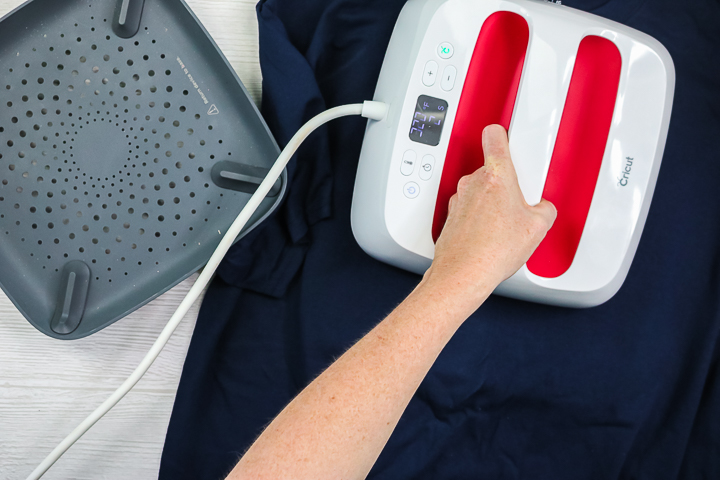
Step 4: Add HTV Design To Shirt
Press the design according to the time and temperature for the brand of flocked HTV you are using. Once you are done pressing, remove the liner.
NOTE: The brand I am using requires you to wait a few minutes before peeling.
Your shirt is now ready to wear! Want to add something special? Read on to see how to add sublimation on top of the flocked heat transfer vinyl.

How Do You Use Sublimation On Flocked HTV?
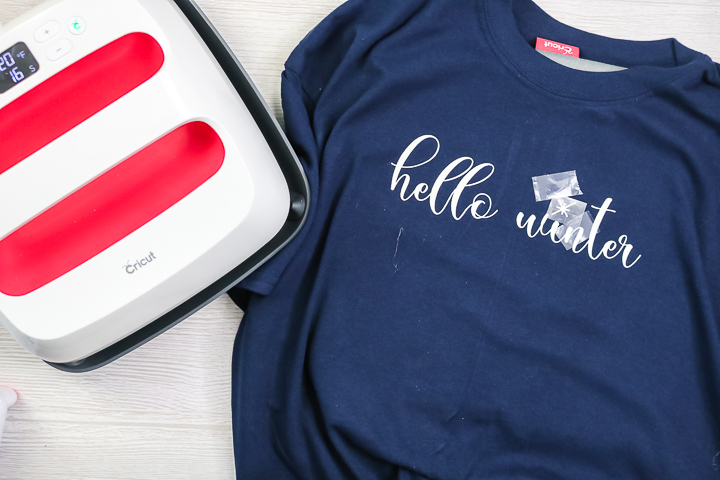
Now for the magic! You can actually use sublimation ink on top of the flocking, as it is polyester-based. I added a little blue to my “snowflake” on top of the I in winter. You can see how to do that below!
Supplies Needed For Sublimation On Flocked HTV
- Shirt made with flocked HTV
- Infusible Ink or other sublimation ink
- EasyPress
- EasyPress mat
- Butcher paper
- Heat-resistant tape
Step 1: Cut Design From Infusible Ink
Cut the design you want to use for sublimation from Infusible Ink, or print with a sublimation printer. Here I just cut the snowflake and weeded it. Then, apply the design ink side down onto the flocking and tape it into place.
NOTE: You will need to use heat-resistant tape.
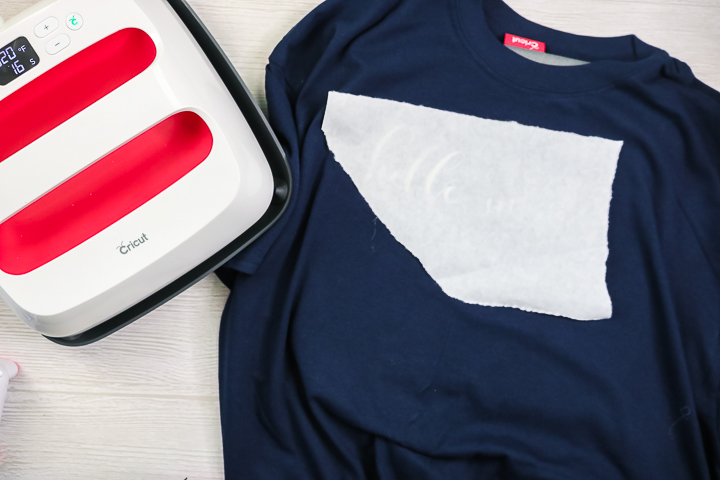
Step 2: Add Butcher Paper
Add your EasyPress mat inside your shirt and cover it with butcher paper. Add butcher paper over your design before pressing. This will protect your surfaces from the ink.
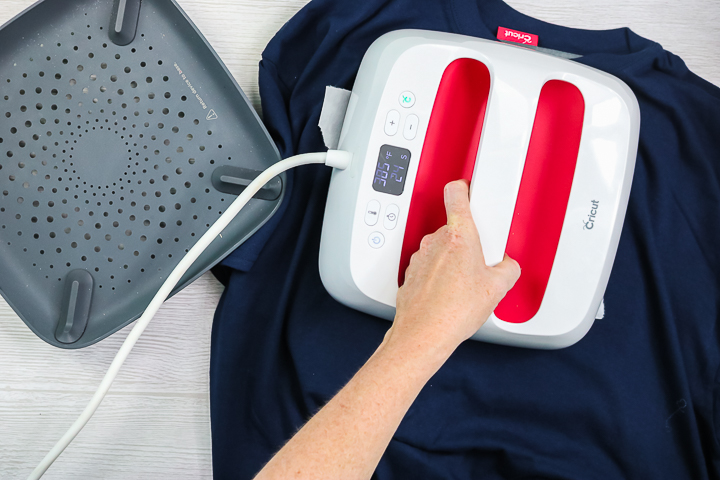
Step 3: Add Sublimation Design To Shirt
Press according to the time and temperature for the product you are using. Then remove the paper to reveal your design!
This process is so easy, but it can make a really big impact! I chose to add a light blue over my flocking here, but you can also go bold!

Free Hello Winter SVG
I am offering up the SVG I used to make this shirt for free. Just subscribe to our newsletter in the box below, and the file will be sent directly to your email address. Look for a box below with a picture of the file you want, and add your information. If you already get our newsletter, just sign up again and you will not be subscribed to anything further.
Please note that this file is for personal use only. You can contact me to ask about commercial use or if you have issues with your download.
Now use your file to create this cute shirt and so much more! Using flocked HTV is so much easier than you think! Grab a sheet and give it a try. I think you will love the effect it gives on your projects.
FAQs About Flocked HTV
Here are answers to some of the most frequently asked questions I receive about using flocked HTV. If your question isn’t listed, feel free to drop it in the comments, and I’ll be happy to help!
What Cricut Machine Do I Need For Flocked Vinyl?
To use flocked vinyl, you can use any Cricut model.
Can Flocked Vinyl Be Layered?
Yes, but the only brand that allows you to layer flocked vinyl is Siser Stripflock Pro.
To learn more about Siser Stripflock Pro, check out my video called Layering Siser Stripflock Pro to Make DIY Varsity Letters. In the video, I go over how to layer flocked vinyl and show you how to make a fun varsity letter hat!
Can I Add Normal HTV On Top Of Flocked Vinyl?
No, flocked vinyl shouldn't have anything on its surface except sublimation.
Can Flocked HTV Work On A Greeting Card?
I would think it would work on paper just like regular HTV. It's definitely worth a try!
Heat Transfer Vinyl And Sublimation Resources
If you are still struggling with using heat transfer vinyl and sublimation/Infusible Ink, check out the resources below, where I share additional tips and tricks!
- Sublimation on cotton with flocked iron-on
- How to Use Infusible Ink
- Heat Transfer Vinyl Basics
- Adding HTV to Hats
- How to Use the Siser Heat Press
- Cricut EasyPress Versus Iron
- Heat Press Versus EasyPress
3 More Flocked HTV Crafts
Do you love this flocked HTV shirt, and are looking for more flocked HTV crafts? Then check out the projects below!


Im so psyched that you can sublimate onto flocked! Thanks!
Isn’t that such a fun hack!?
Do I need to worry about the excess flocked on the transfer shett. I am using black and worried it will all transfer over?
I haven’t had that problem. I know with Glitter HTV a lot is left on the transfer sheet and I’ve never had that transfer to the blank either 🙂