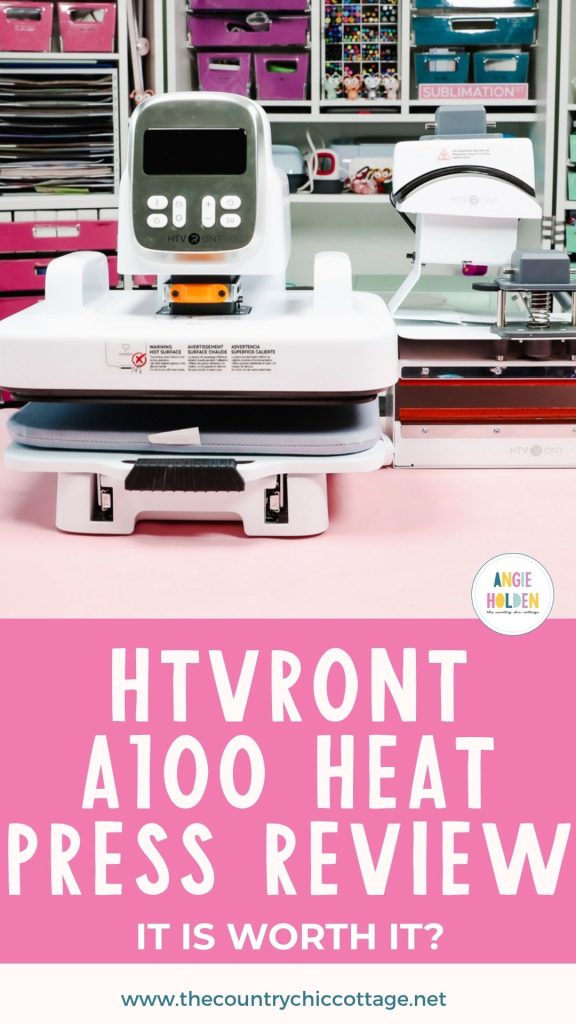
I'm so excited to introduce you to HTVRont's newest machine, the HTVRont A100 Heat Press. Along with being a standard auto press, you can also change it to be a hat press and a tumbler/mug press. Plus, it has adjustable pressure.
If you're looking for a compact press at an affordable price, this may be exactly what you're looking for. I'm going to test it with DTF, sublimation, puff HTV, hats, tumblers, and even glass mugs.
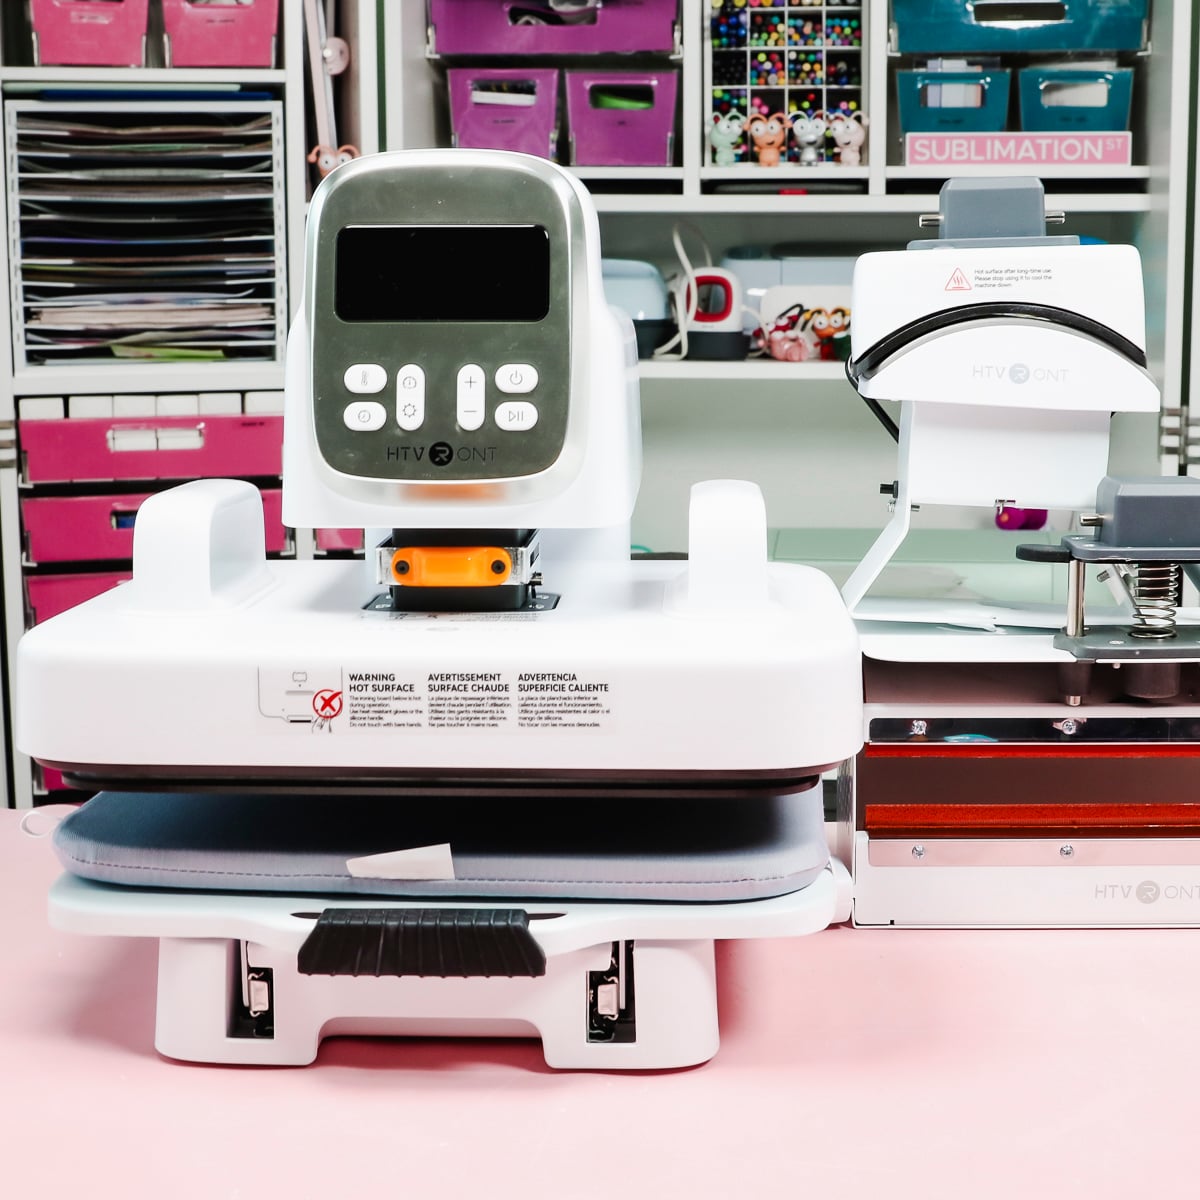
I'm happy to tell you that, when you purchase the HTVRont A100, you get all three modules in the box. You don't have to purchase the modules separately.
That means, right out of the box, you can press things like shirts, hats, mugs, sweatshirts, tumblers, and more.
What Is the HTVRont A100?
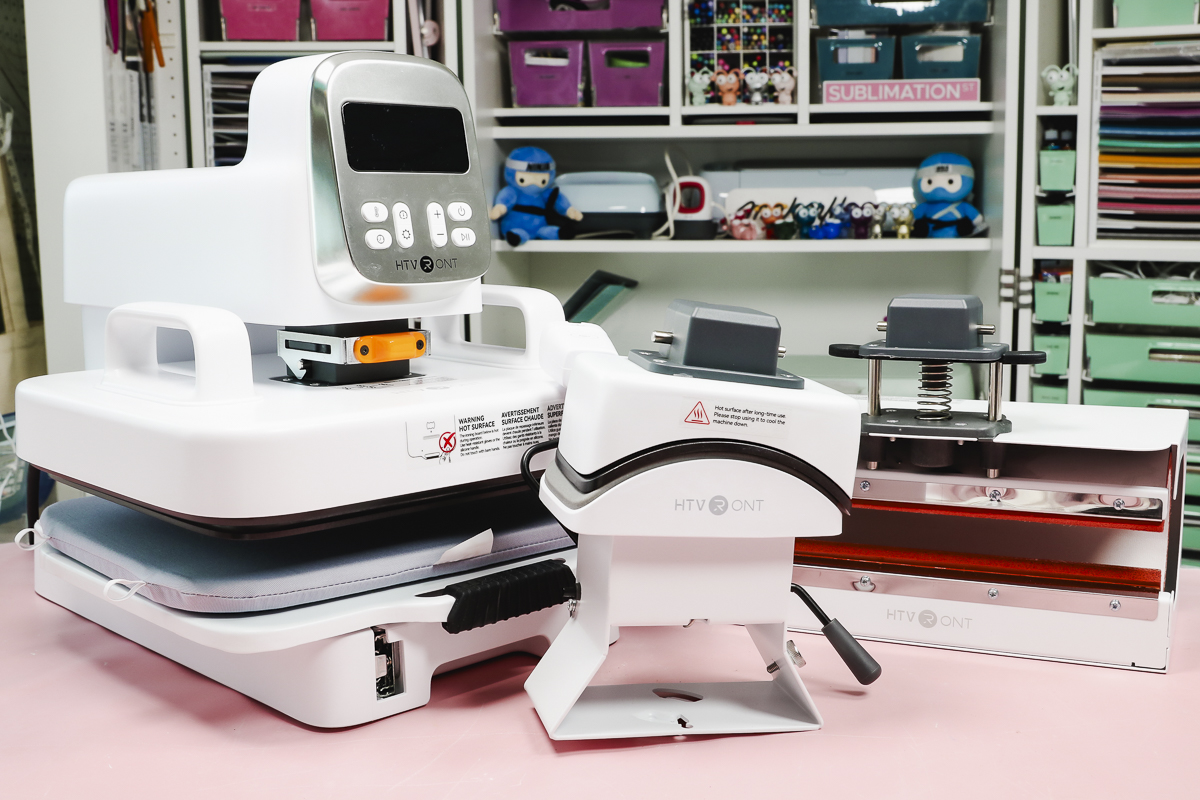
The HTVRont A100 heat press is a convertible, 3-in-1 auto-open press with a relatively small footprint.
Measuring only 12.5 inches wide, 15 inches tall, and 17.5 inches deep (when closed), this is smaller than most other auto presses on the market.
The press has adjustable pressure, which is important if you want to use materials like puff and super-pop HTV.
What are the Different Modules?
There are three different modules included with the A100. Each module snaps into the press quickly and easily.
- First is the flat heat press module. This is a 12×10 press with a pull-out drawer. The press opens automatically when the time stops.
- Next is the hat press module. For the hat press, there are upper and lower platens. These are both curved so hats fit them perfectly.
- Finally, we have the tumbler press module. This is a single-piece module designed to press 20-ounce straight tumblers and small mugs. You can even press glass mugs in this tumbler press.
How to Set Up the HTVRont A100
Setting up the HTVRont A100 heat press is fairly simple.
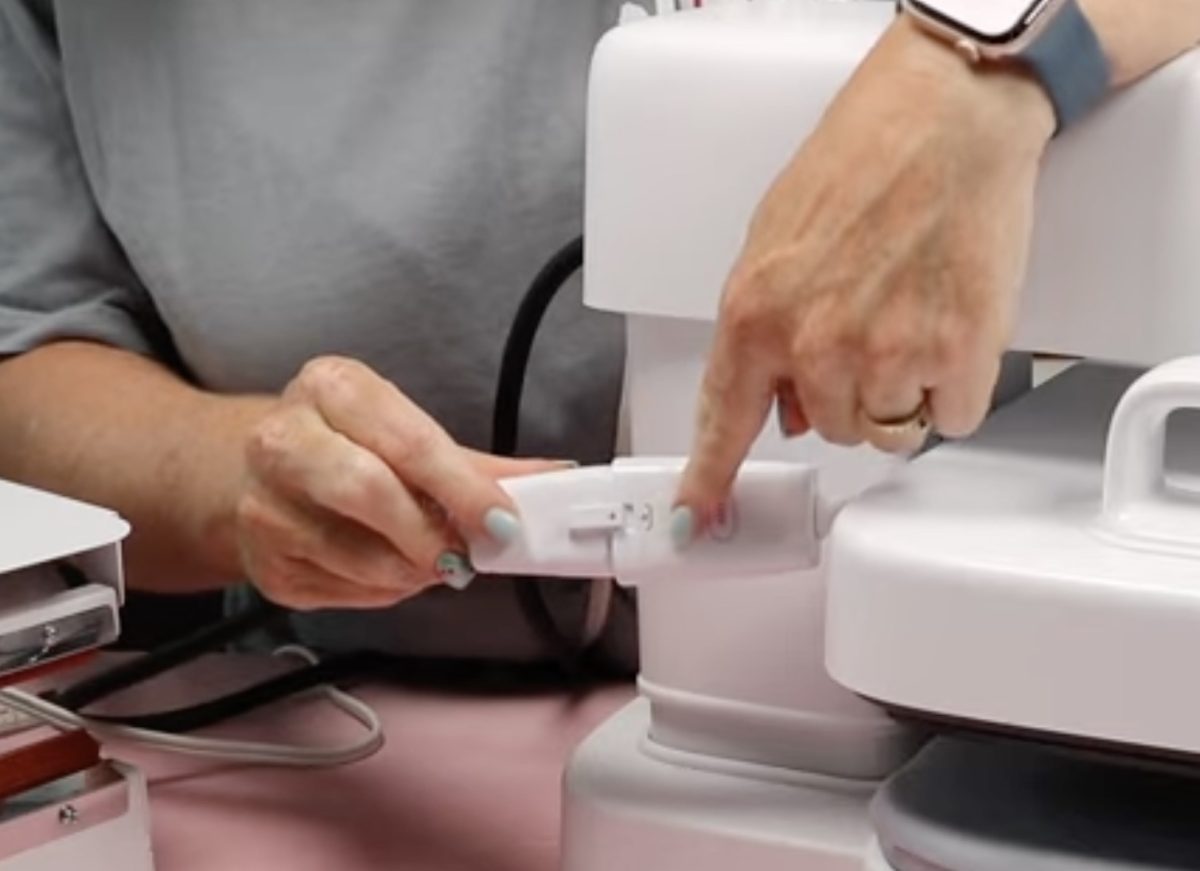
The press itself has 2 cords. One cord plugs into the wall, and the other cord attaches to the different modules.
How you'll set it up depends on the module you're using. Generally, you'll attach one piece to the top of the press and another piece to the bottom. I'll show you specifically as we make projects with each module.
Adjust the Time, Temperature, and Pressure Settings
Adjusting the settings is very easy. To adjust the time, press the clock button and use the + and – buttons to increase or decrease the time. Press the clock again to set the time.
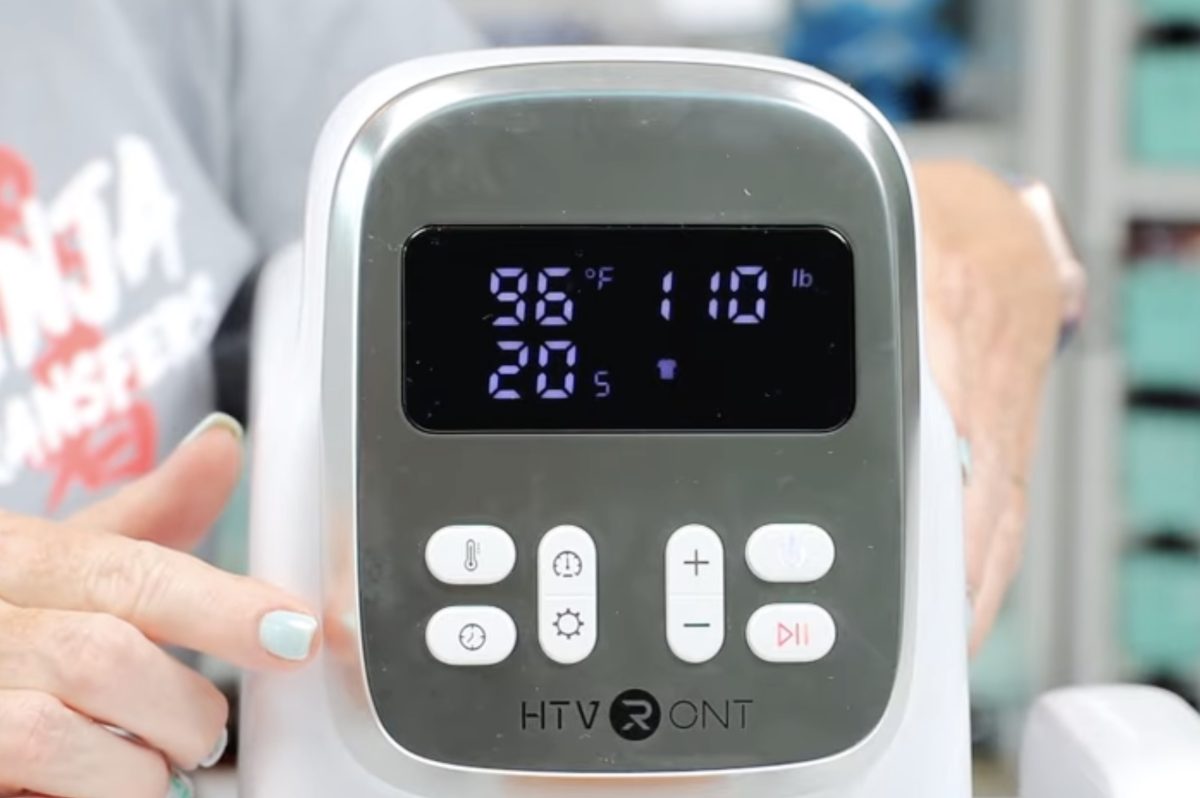
The process is the same for the temperature and pressure.
When you load the material in the press, you'll press the Play/Pause button to start the time. When the time is up, it will open automatically.
The button that kind of looks like a sun is the mode button. Press it and hold it until it beeps. Then you can press it again to change the modes. There are 4 different modes; each mode is tied to a module.
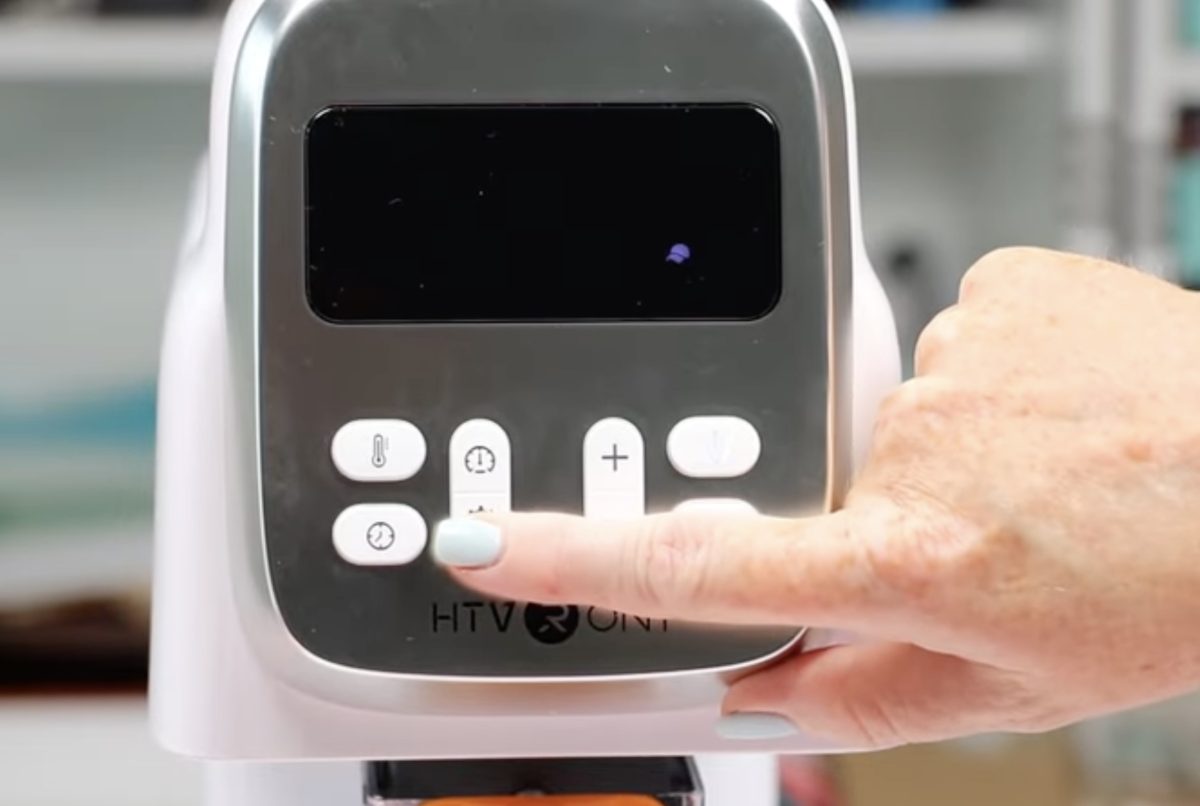
T-shirt mode is for the flat heat press. The decal that looks like a mug is for the tumbler module. There is a hat for the hat module, and the last decal that looks like a settings button is for custom settings. The custom settings mode works with the flat heat press module and is specifically for working with thicker materials.
Now that we've looked at the press, let's look at each of the modules and make a few projects with each one.
HTVRont A100 Flat Heat Press
Place the top heat platen on the base, with the word HTVRont facing the front of the press.
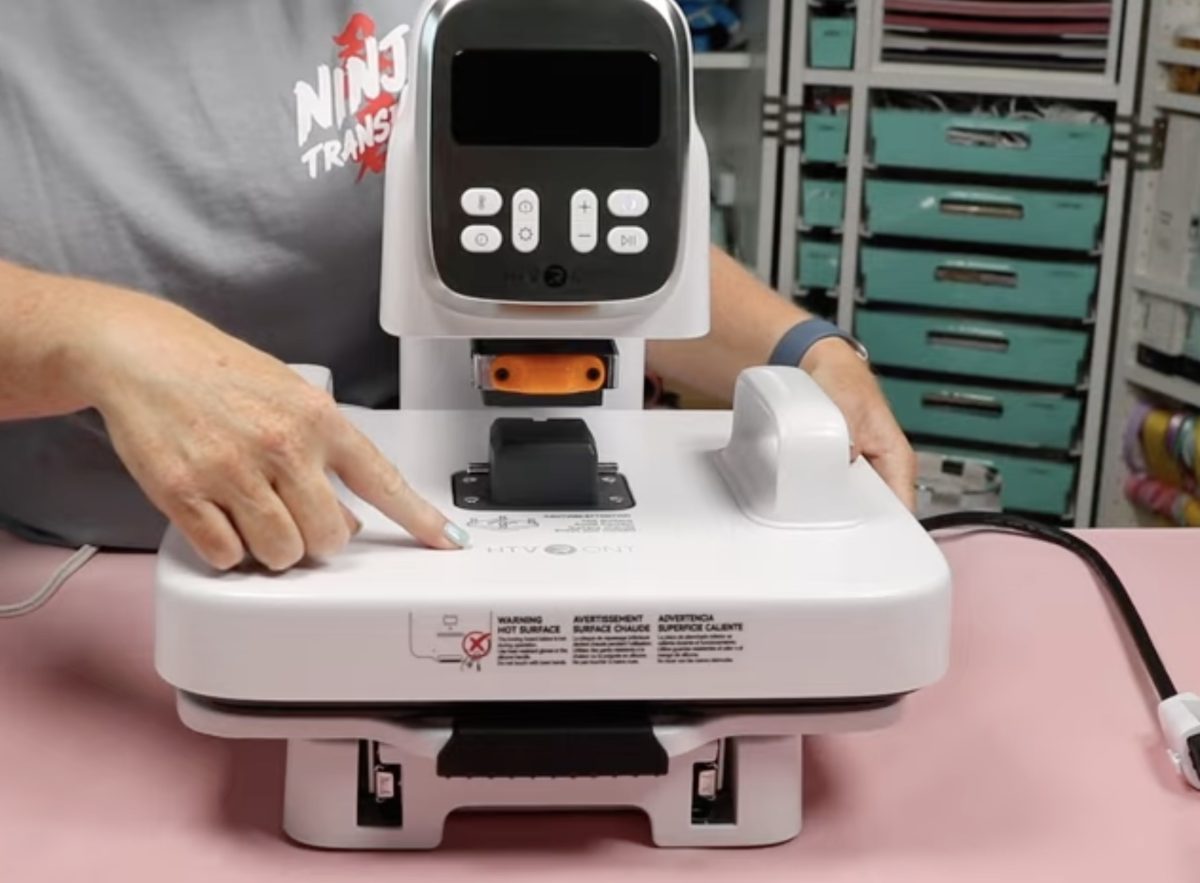
Grasp the handles and lift it until it locks in place.
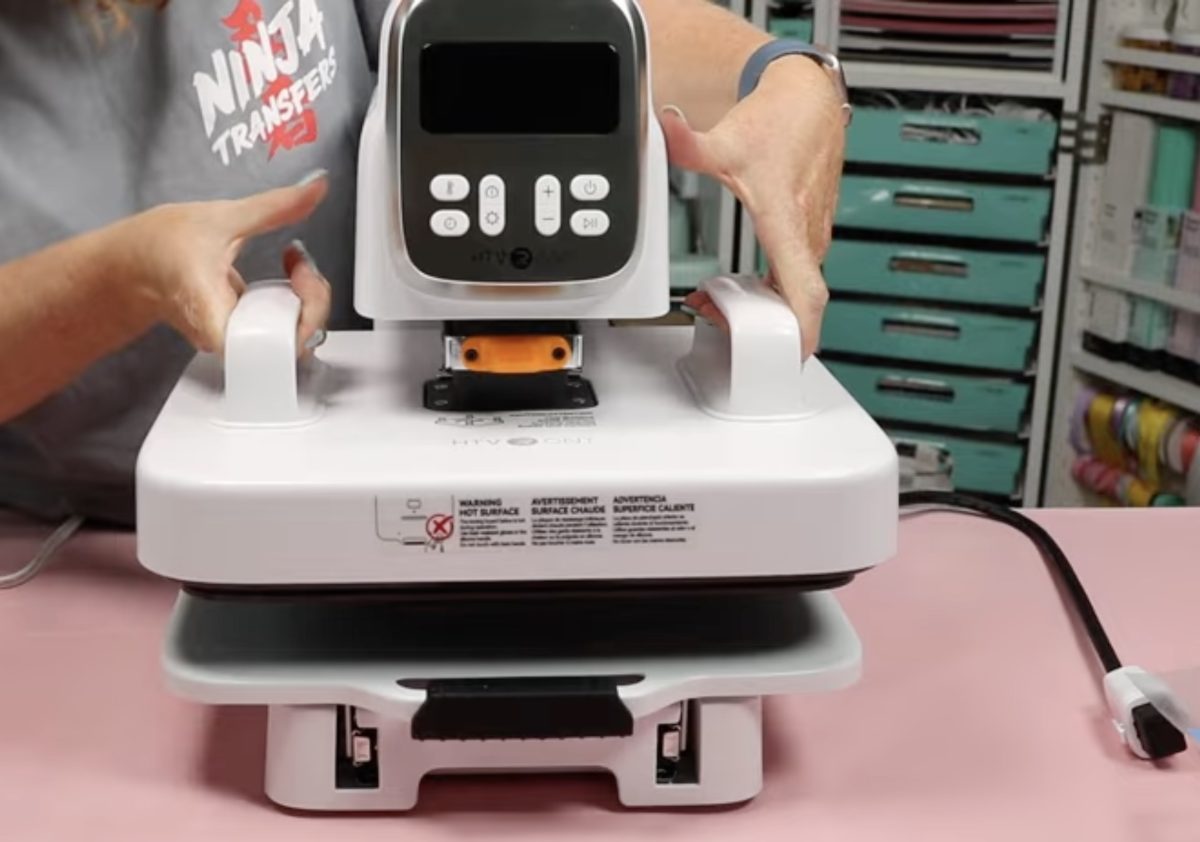
There is a heat-resistant mat that sits on the bottom platen. There are 4 elastic loops on the pad; attach those to the notches on the platen.
Connect the cord from the heat press base to the top platen.
For all of these projects, I am using the T-shirt mode.
Press a DTF Design
First, I'm going to add a DTF design to a child's size canvas apron. I adjusted the settings so the temperature is set to 320°, with a time of 10 seconds, and 130lbs of pressure.
Pull out the bottom tray and place the apron on the tray. Close the tray and press play to do a pre-press. This will help remove any moisture and wrinkles.
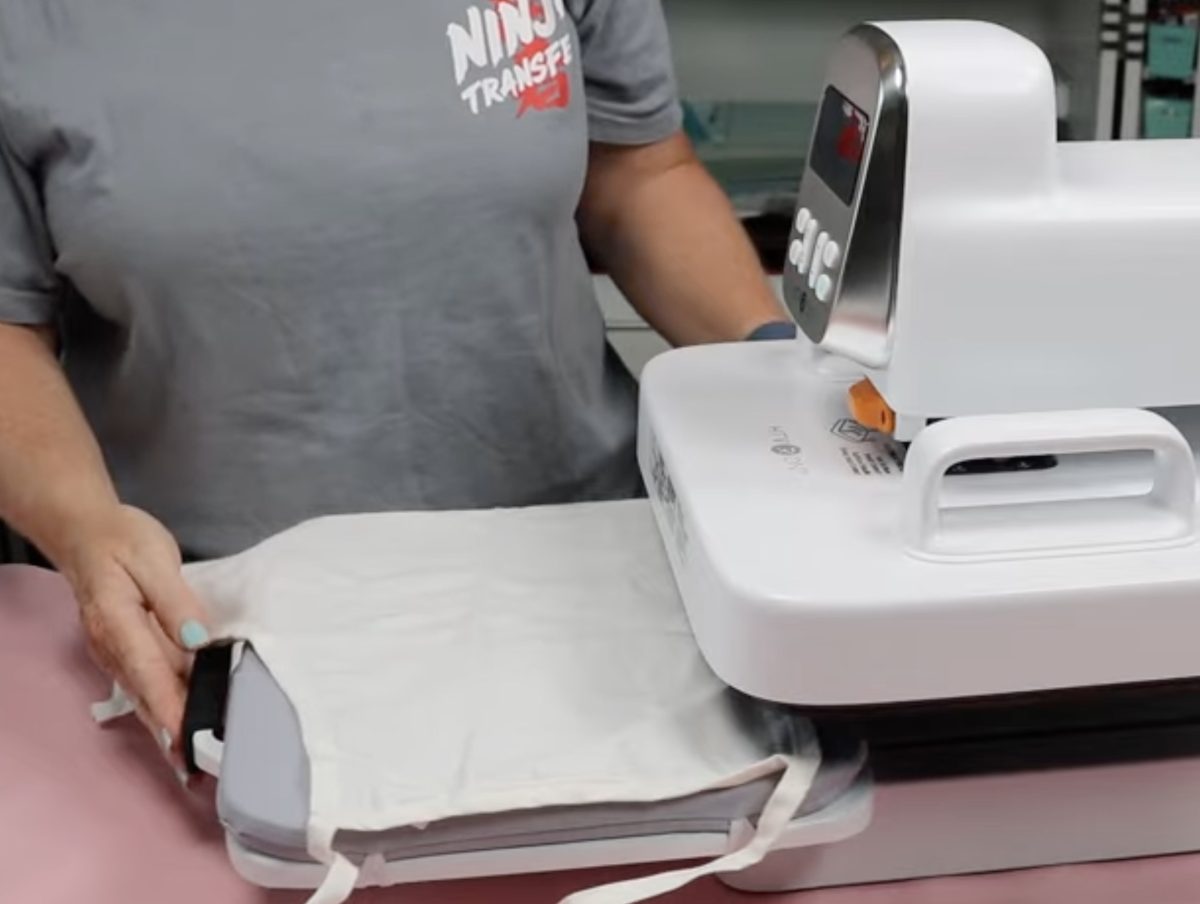
Because this apron is a smaller size, there is no way to press the design without having the seams on the pressing plate. To help prevent those seams from getting in the way, I added a pressing pillow under the pressing area.
Locate the DTF print on the apron. If you're worried about the print moving, secure it in place with heat-resistant tape.
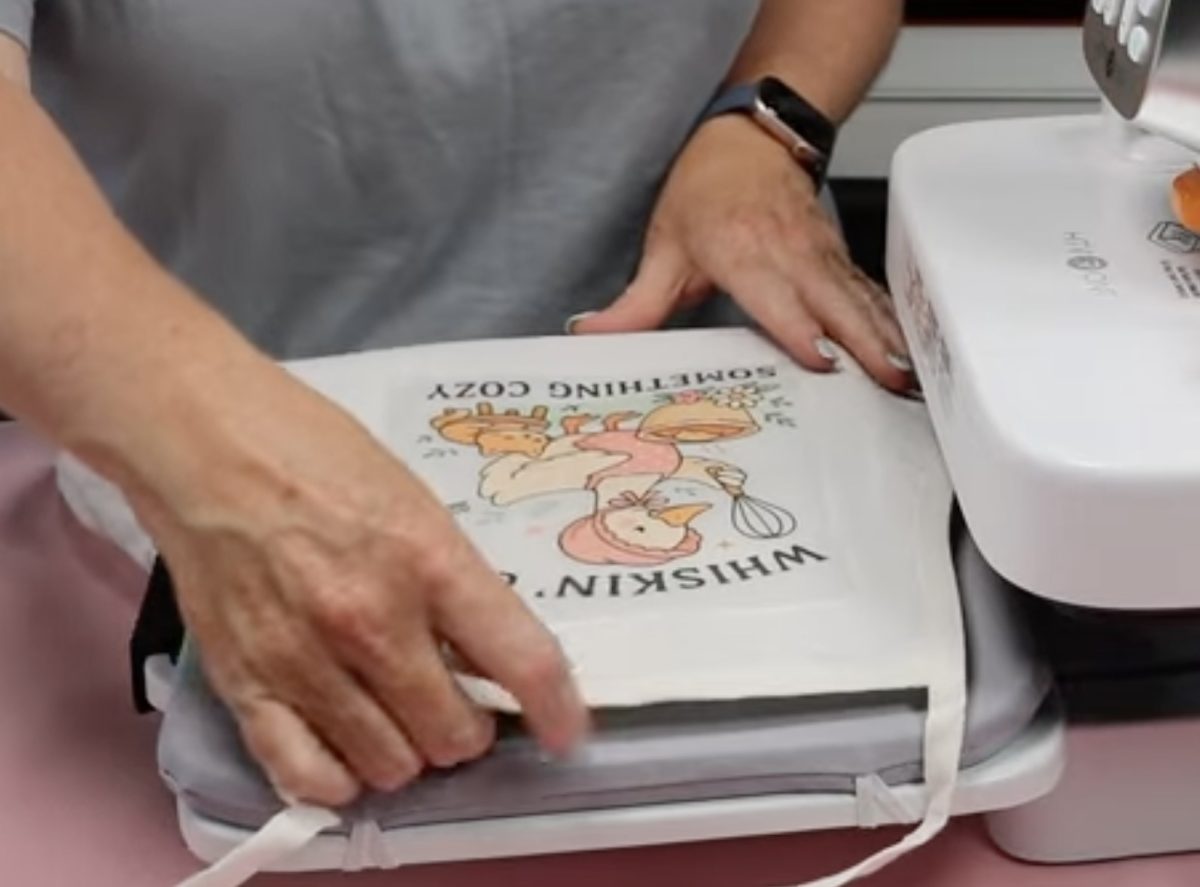
Cover the design with protective paper, close the tray, and press Go on the press.
When it's done, open the tray and use a DTF cooling block to cool it down for a few seconds.
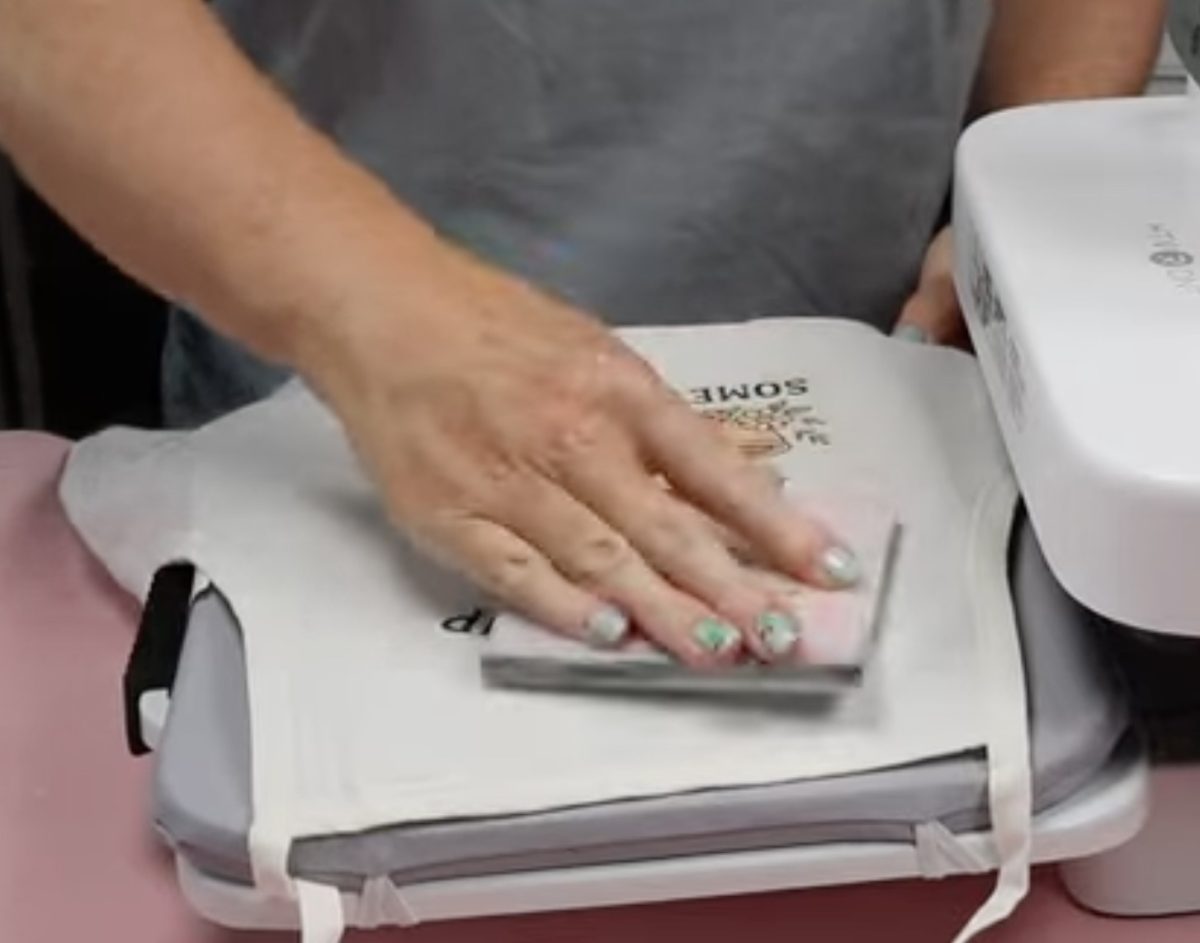
Peel back the carrier sheet.
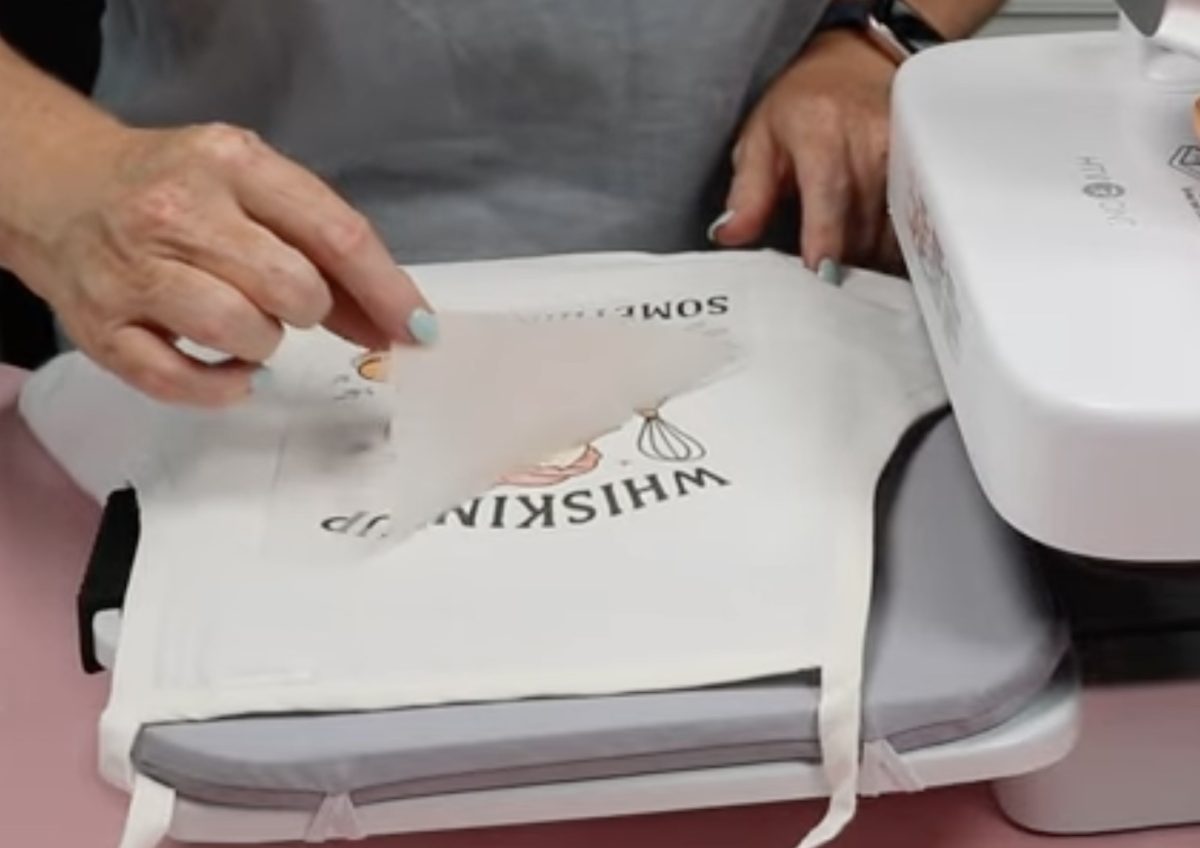
Place the protective paper back on top and press again for 10 seconds. This really helps the DTF stick to the fibers of the fabric.
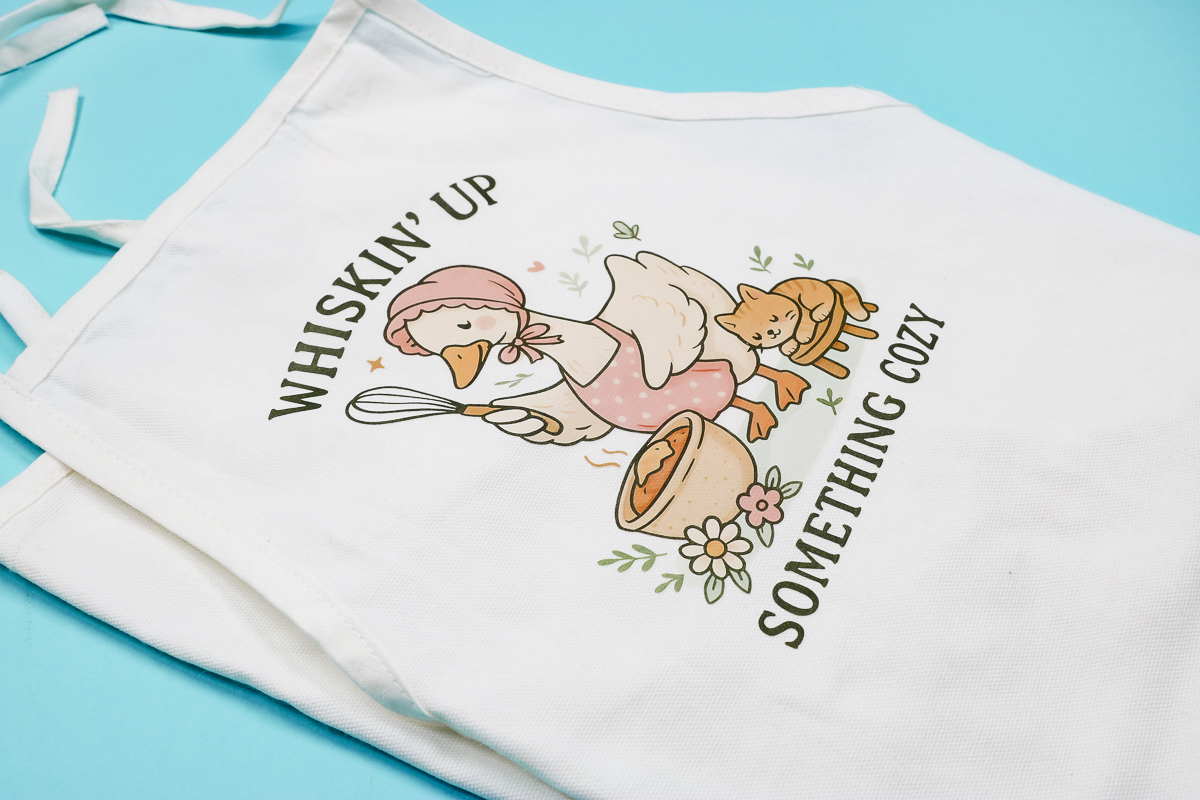
The DTF stuck really well and looks absolutely amazing.
Add Sublimation Print to a Sublimation Pot Holder
Next, we're going to see how it does with sublimation. For this test, I'm using a sublimation print and a sublimation pot holder.
A sublimation print is an image printed with sublimation ink on sublimation paper using a sublimation printer.
The settings I'm using are 390°, 50 seconds, and 110lbs of pressure.
I placed the sublimation pot holder on the tray of the press with a pressing pad under it and closed the tray to preheat for a few seconds.
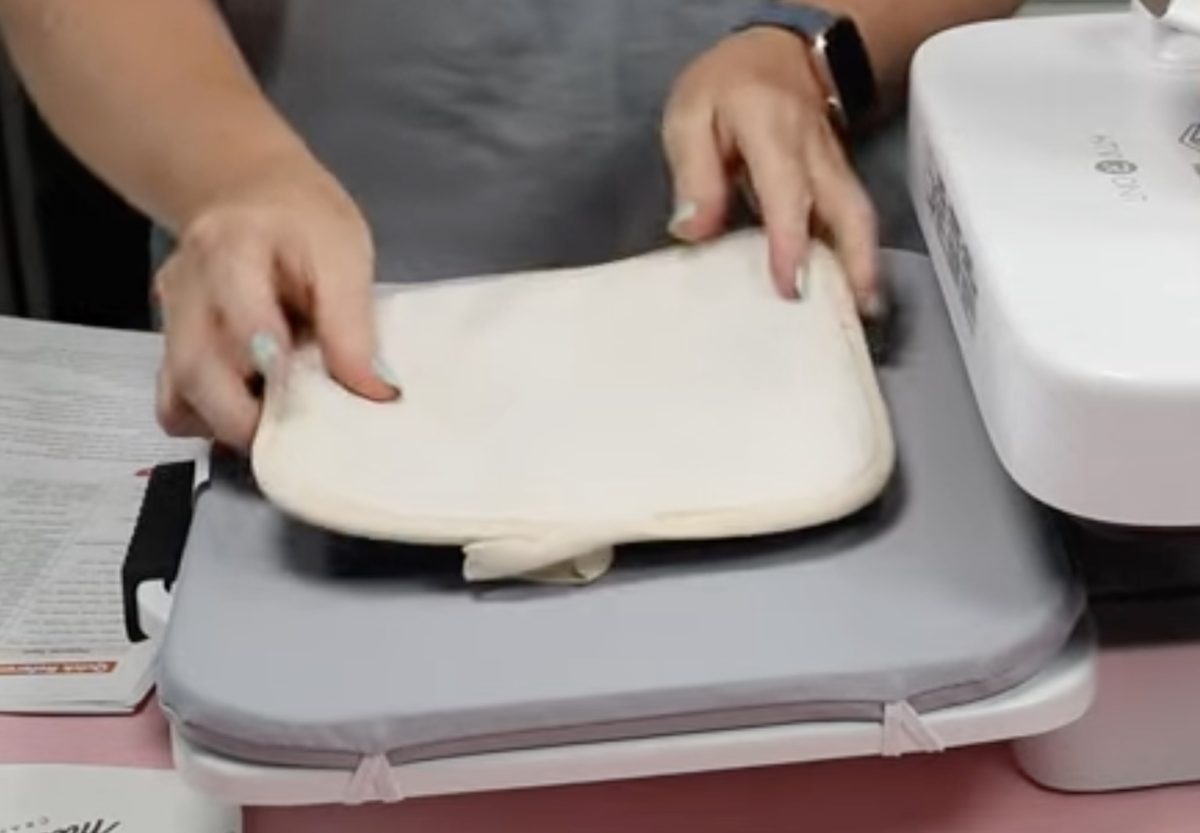
When working with sublimation, it's really important to preheat to remove moisture from your blank. If sublimation has an enemy, it's moisture.
To prepare the sublimation print, I like to tear the edges of the print to feather the edges a little bit. This helps prevent pressing marks.
Locate the design, ink side down, on the pre-pressed hot pad and secure it in place with heat-resistant tape.
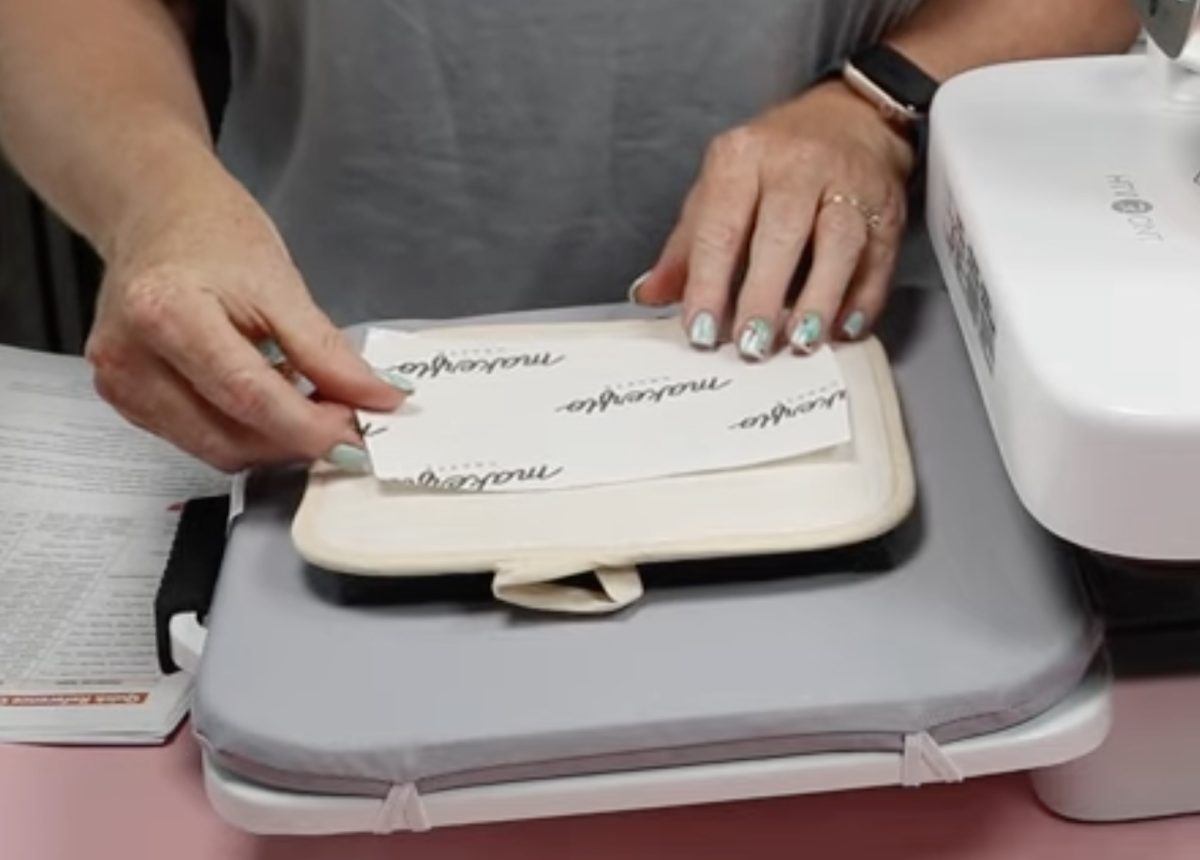
Add protective paper between the hot pad and the foam pad and on top of the sublimation print. This prevents ink from transferring onto the heat press or foam pad.
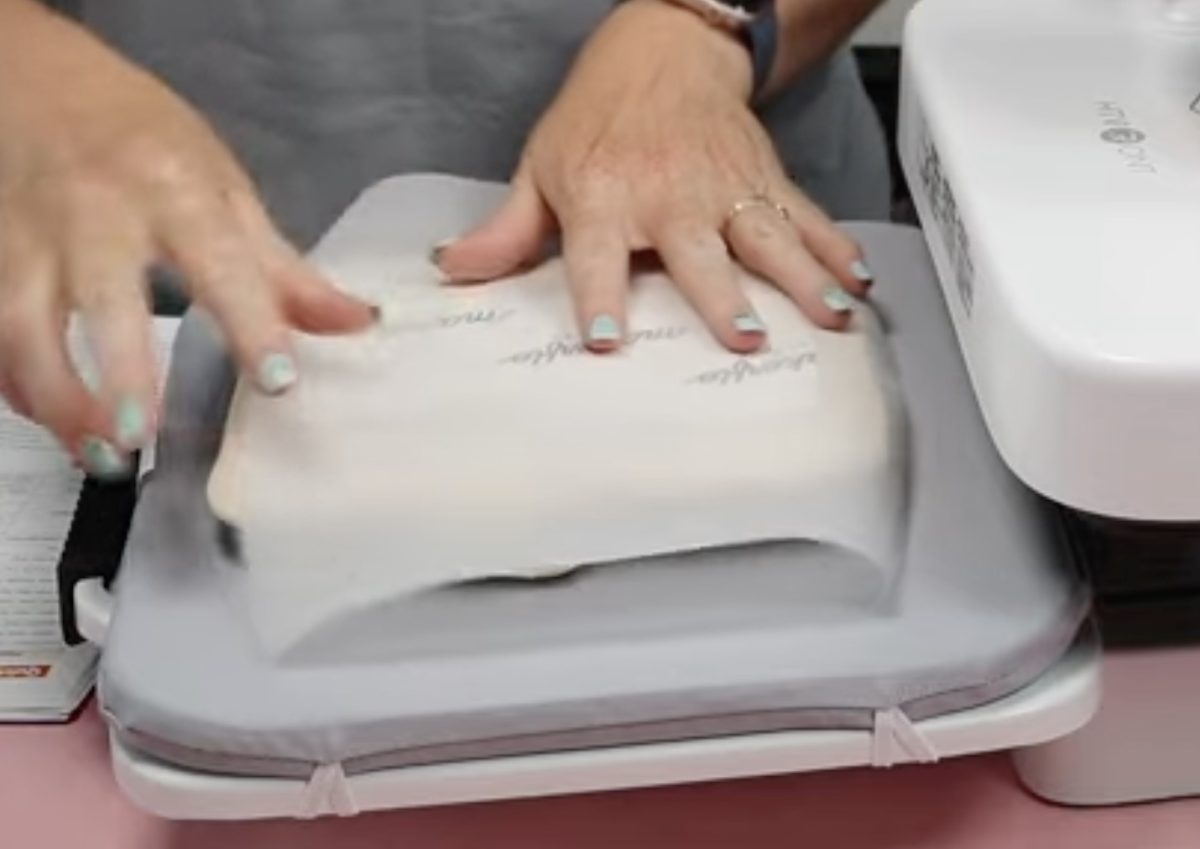
Close the drawer and press play. Press for the full time.
When the time is up, the press will open automatically. Remove the hot pad and carefully peel back the heat-resistant tape and sublimation paper.
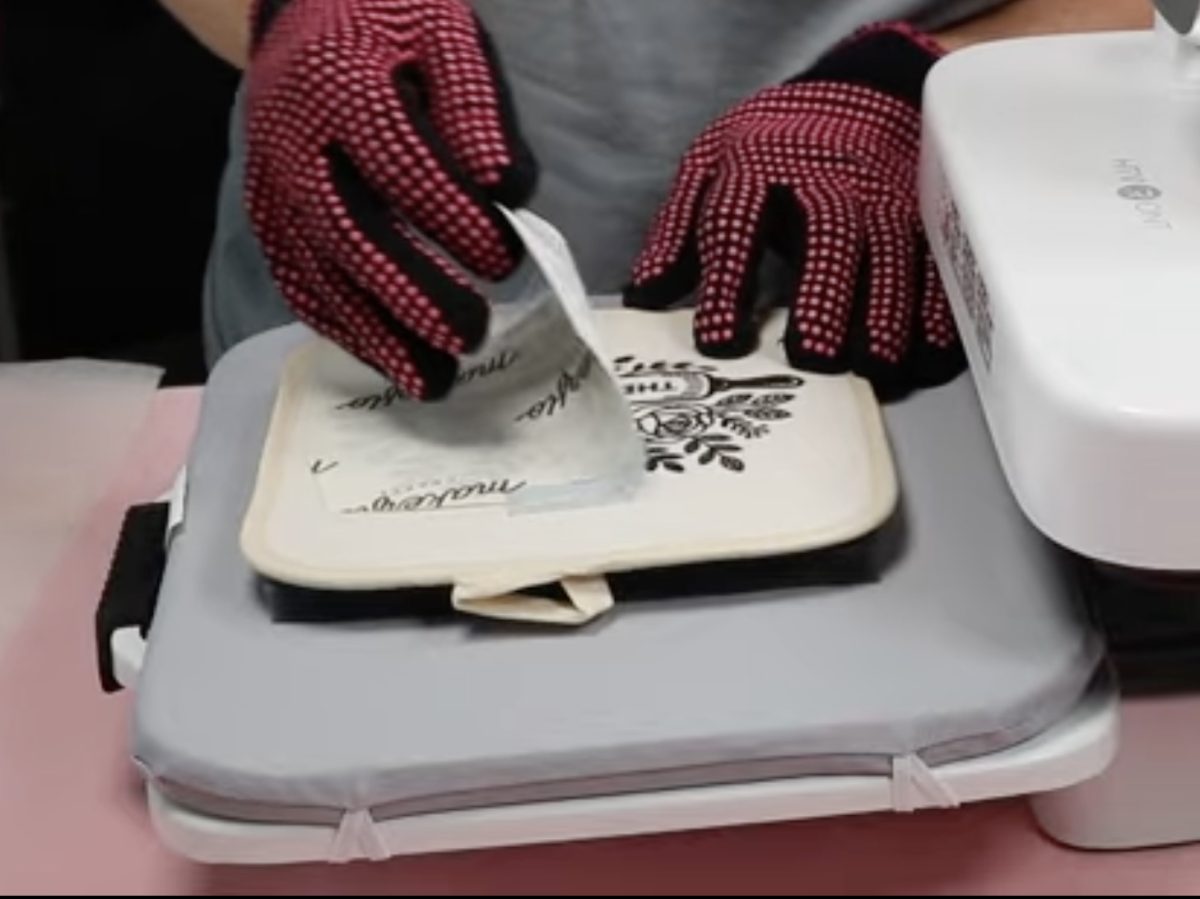
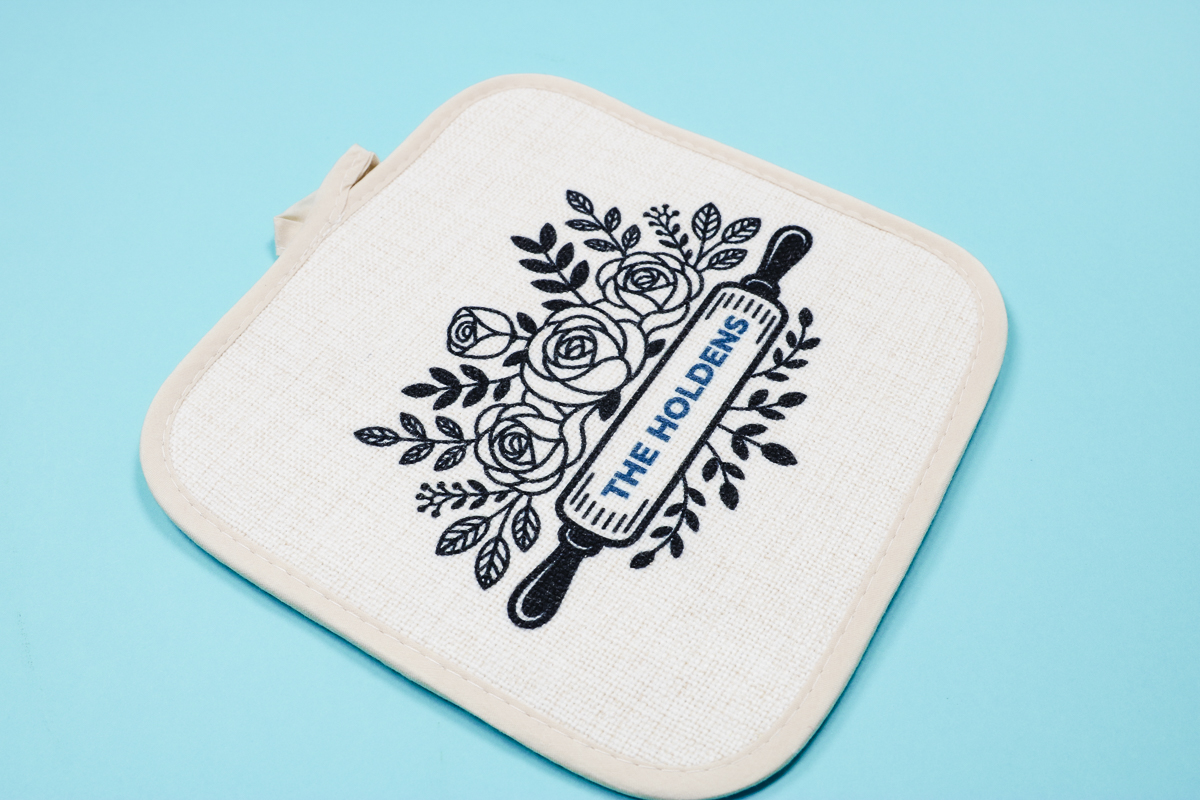
I'm really impressed with how well the A100 transferred the sublimation ink. The pressure and heat seem consistent, resulting in a beautifully transferred design.
Heavy Pressure Puff HTV with HTVRont A100
Now we're ready to really test the heavy pressure setting on the A100. If you've ever done puff HTV, you know it requires really heavy pressure to get a successful puff. I like my puff designs to be raised up consistently and to be smooth. Oftentimes, if you don't have enough pressure, your HTV won't puff at all, or it'll have squiggly lines in it.
For my next project, I'm going to test a few things. I'm testing how the A100 handles a bulky sweatshirt, I'm testing a larger design, and I'm testing heavy pressure and puff HTV.
I used my Cricut machine to cut out the puff HTV. Since the A100 is about 12 inches by 10 inches, I made my design just smaller than that. I wanted to be able to press it all at once.
Weed away the excess HTV material, so you're left with only the design you want to press on the sweatshirt.
I have my press set to 280° with a 10-second duration. The maximum pressure I was able to get was 170lbs so we're going to test that.
Prepress the Sweatshirt
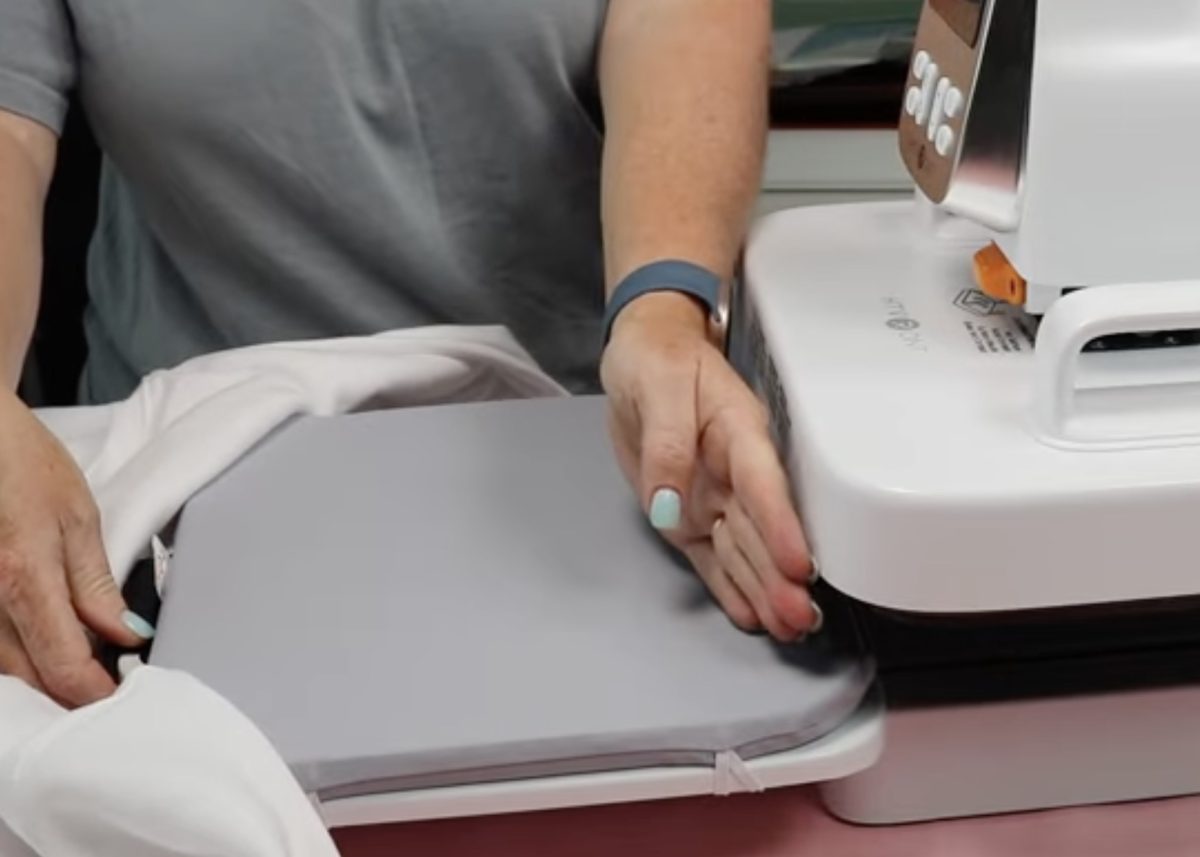
First, we need to place the sweatshirt on the tray. I am locating mine so the collar is toward the back. I want to pre-press the section I'm going to apply the puff to, so I need that whole area on the mat.
This press doesn't have a lot of room in the neck area, so I'm not sure if there is enough room for the sleeves or a bulky hood. It did work with this crewneck sweatshirt with the collar toward the back.
Pre-press to remove any moisture.
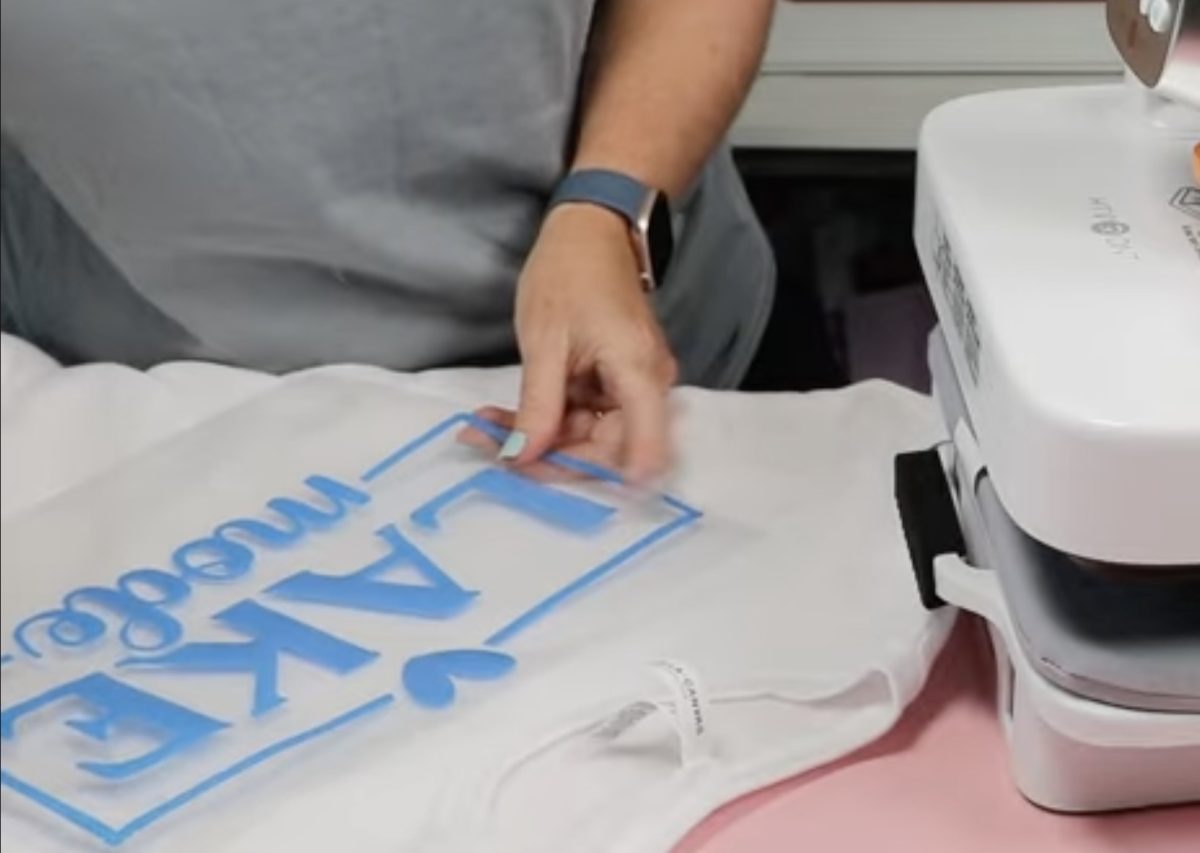
After the pre-press, I took the sweatshirt off the tray to locate the design.
Locate the Puff HTV
With the tray all the way open, the heat plate still hangs over the tray a little bit. That does make it harder to locate large designs while it's on the tray.
Locate the design on the sweatshirt. The carrier sheet for my puff HTV is quite sticky, so it holds the design in place. If your carrier sheet isn't very sticky, I would use heat-resistant tape to hold it in place.
Press the Puff HTV
Place the sweatshirt back on the tray, making sure the whole design is on the mat.
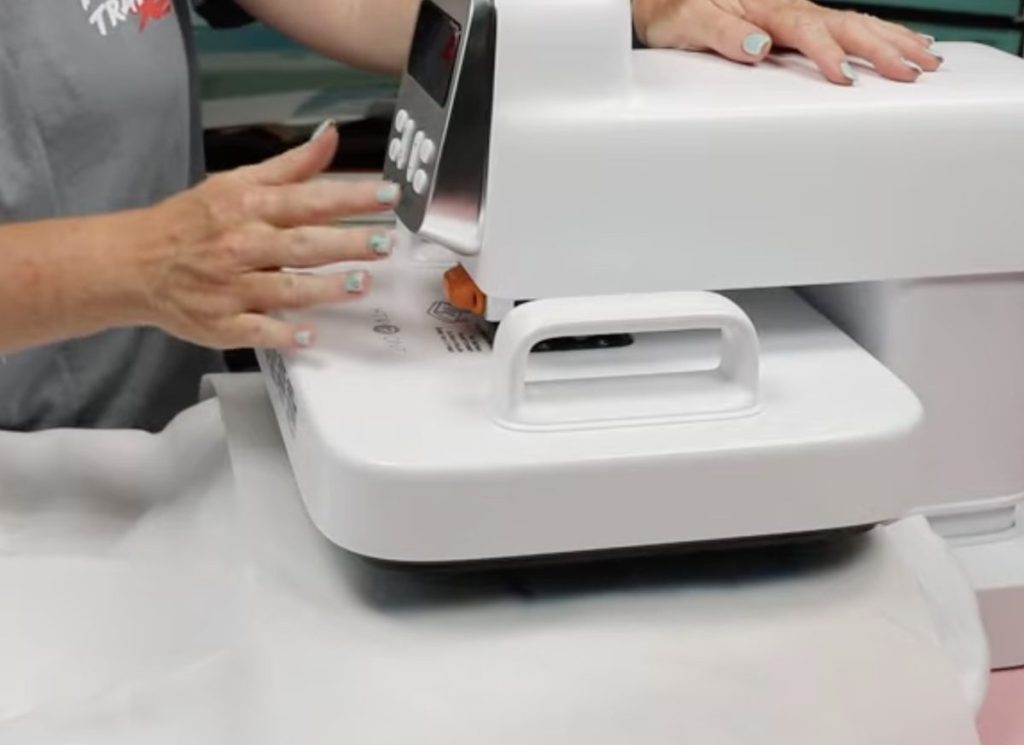
Close the tray and press the start button. Press for the full time, and when the time is up, slide out the tray.
After one press, I don't see any puff at all. This HTV is supposed to puff up with only one press.
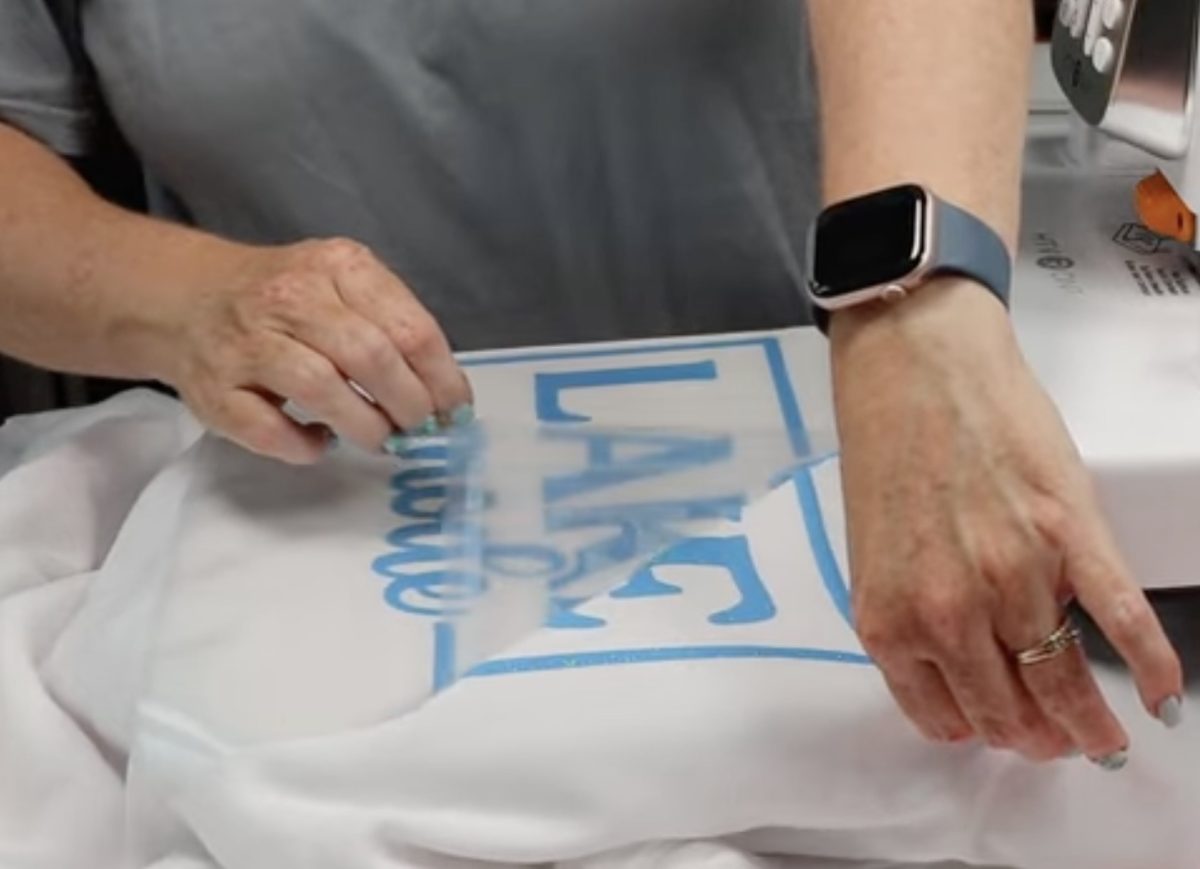
Because mine is so flat but stuck down, I removed the carrier sheet, and I'm going to try pressing it again.
With the carrier sheet removed, I covered the design with protective paper and pressed it again for 10 seconds with heavy pressure.
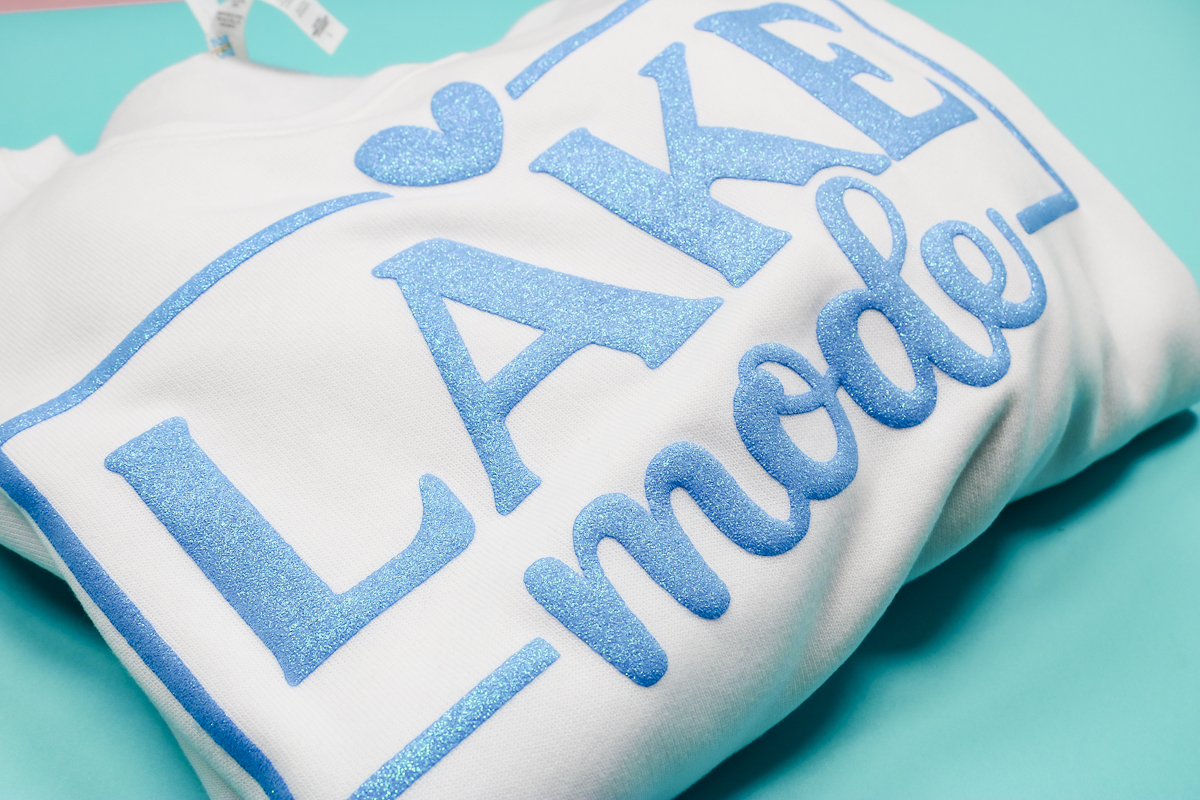
After the second press, the HTV puffed up really well. I'm actually really impressed with how the puff looks.
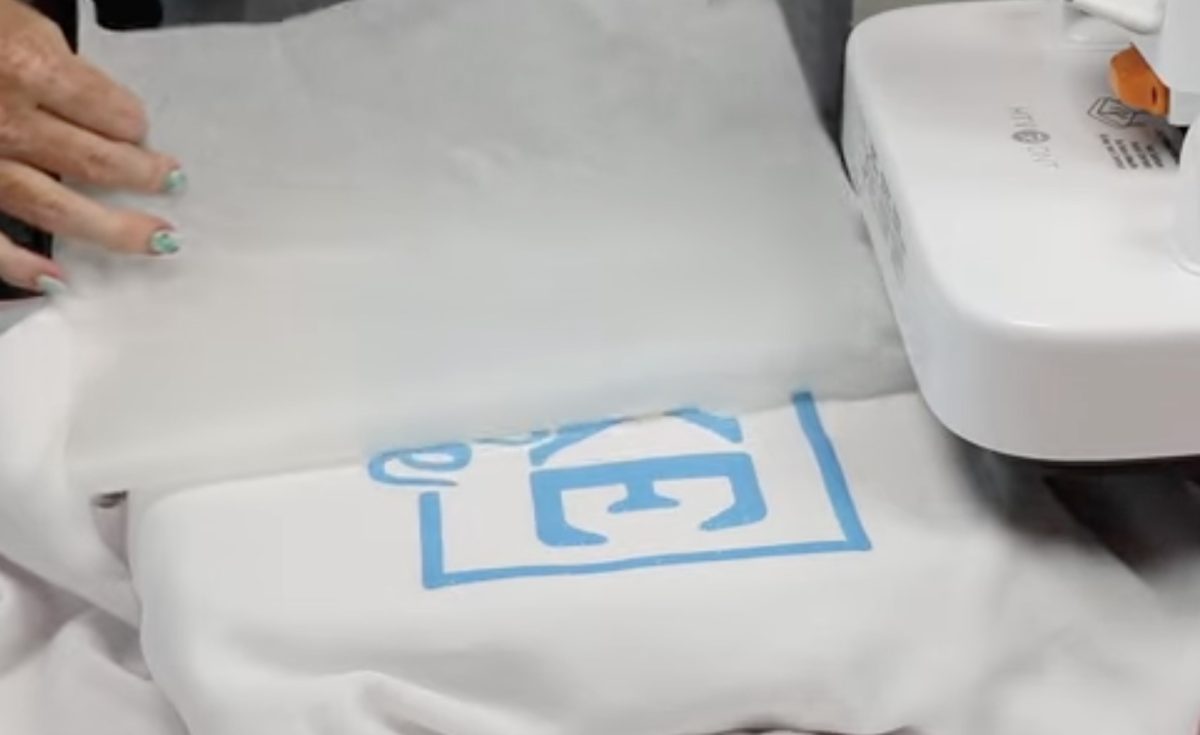
I really like this blue glitter puff, and it worked well after the second press with the A100.
HTVRont A100 Hat Press Module
The next module we're going to test is the hat press. To use the hat press, we need to remove the top heat platen and the mat on the tray.
Turn the heat press off and then press and hold the Mode button and change it over to the hat press. Press the Play button to set the mode, and the top will automatically rise up.
Now, we're ready to remove the top platen. First, remove the mat from the tray and set it on a flat surface so we can set the press on it.
To remove the top platen, disconnect the cord that connects the heat plate to the press. Hold both handles and press the orange button on the front of the press. Make sure you're holding the handles; otherwise the top piece will drop down onto the bottom tray.
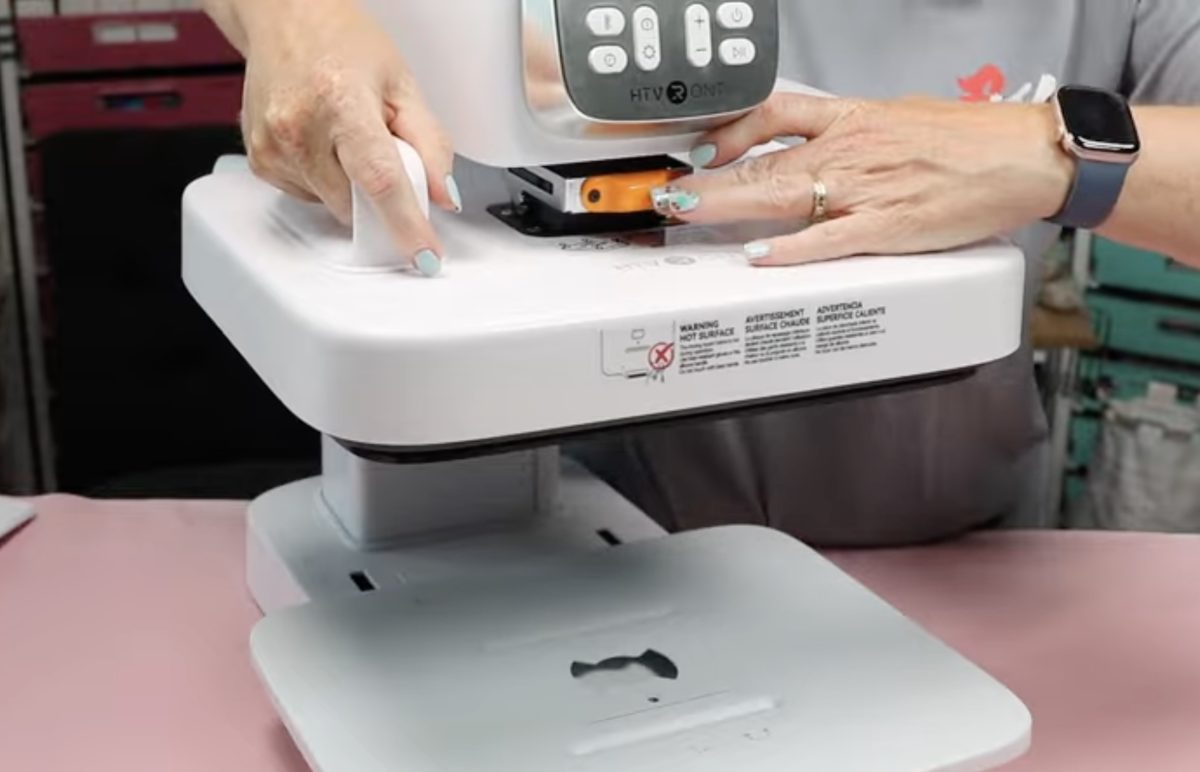
Place the top platen on the mat. This will protect your surface from the heat if it's still hot and will also protect the heat plate from getting scratched or damaged.
Take the base of the hat press and place it on the bottom tray. You'll see that the piece on the bottom of the hat press fits in the hole on the bottom of the tray.
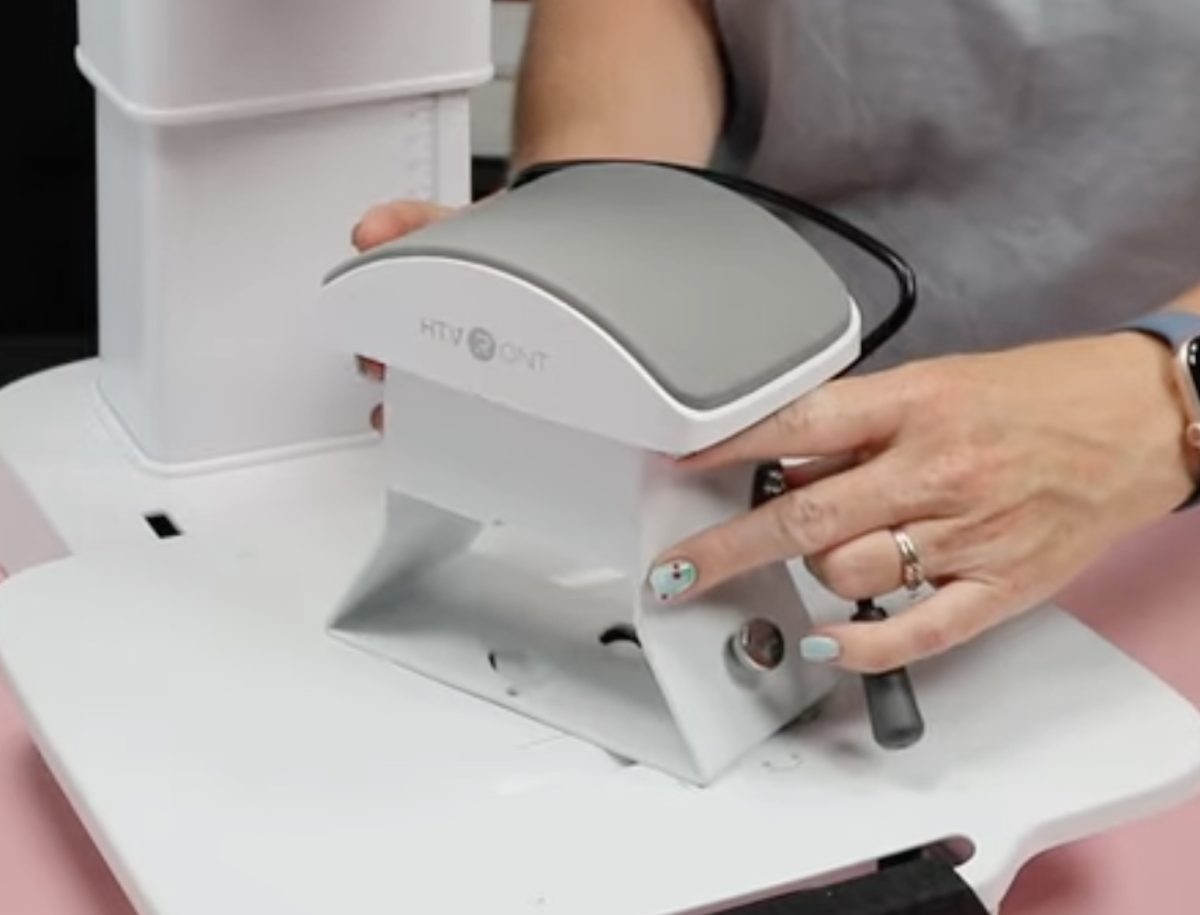
With those two lined up, you'll notice the hat press base is turned toward the side. We want the HTVRont logo to face the front of the press. Grasp both sides of the base and rotate it. You'll feel it lock into place. Make sure the front of the hat press base is lined up with the line on the tray.
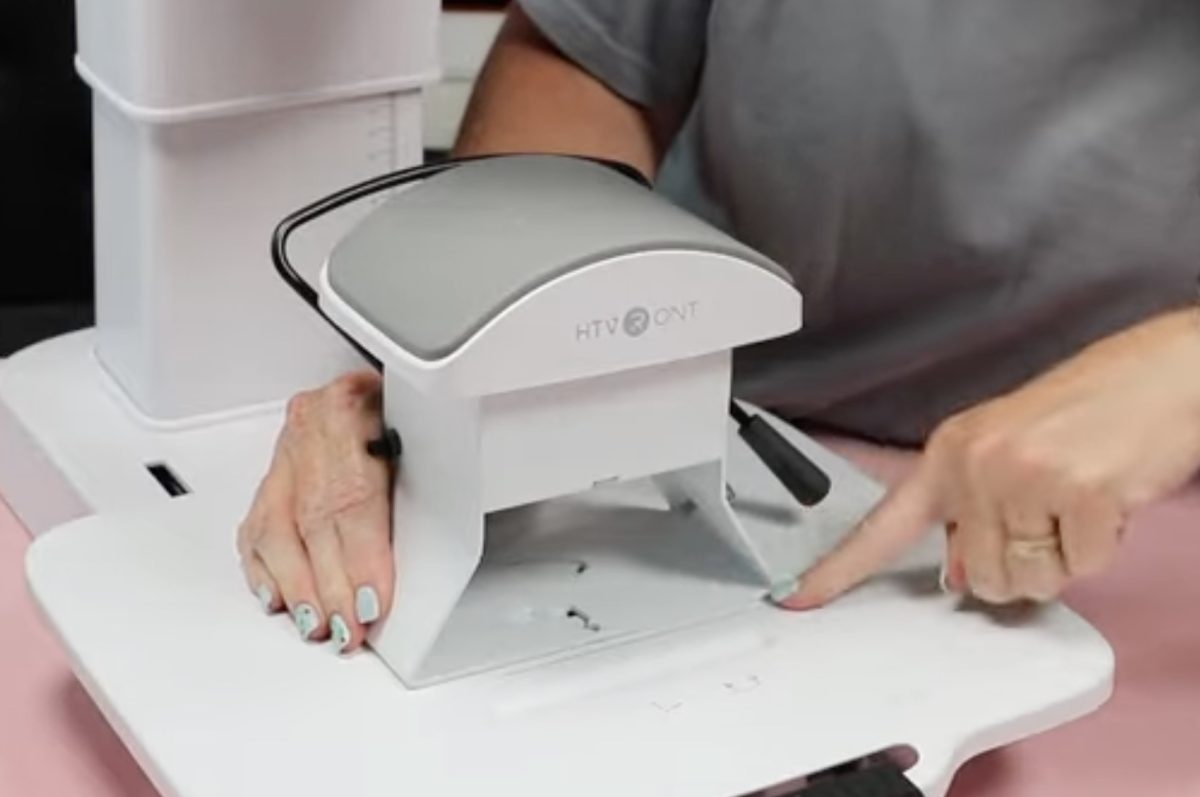
To install the top of the hat press, make sure the cord is facing the back and press the top into the heat press. I found it easier to do when I pushed up on the hat press and down on the top of the press.
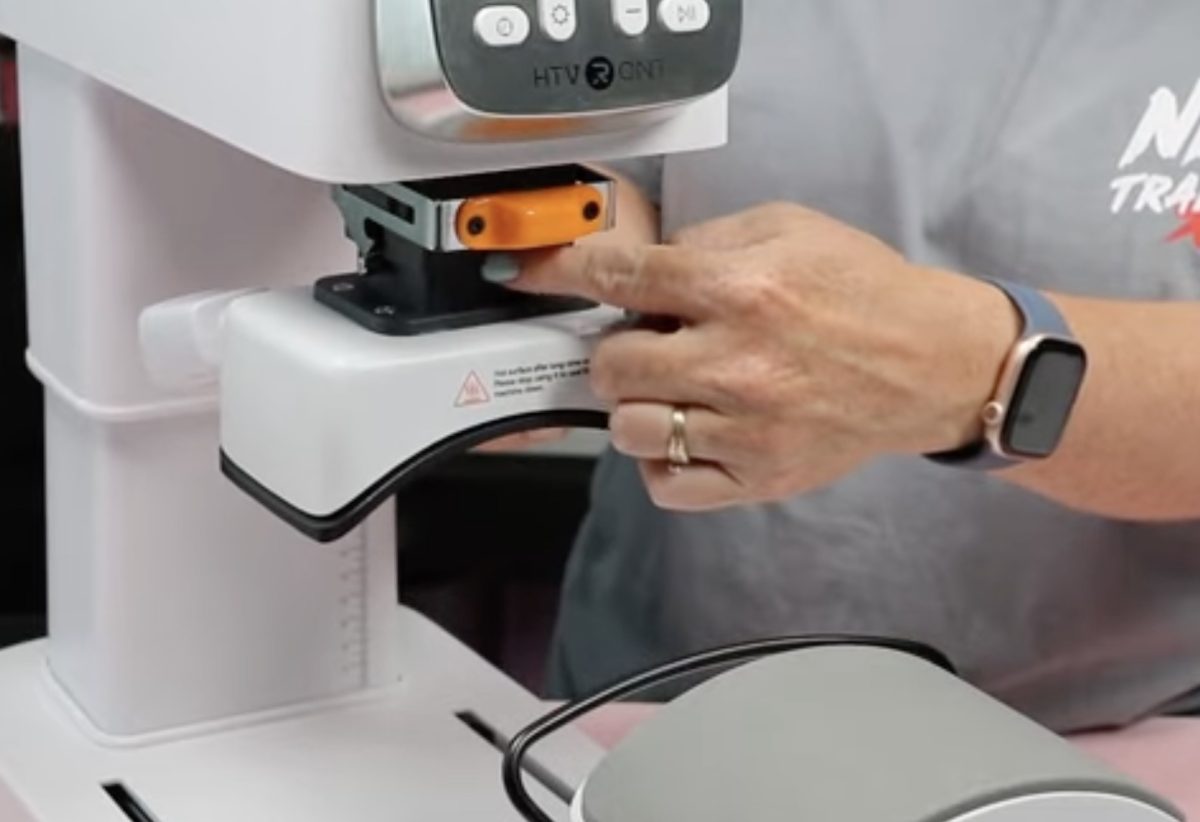
You'll feel the module snap into place. With it in place, you're ready to plug it into the A100.
Super Pop HTV with the HTVRont A100
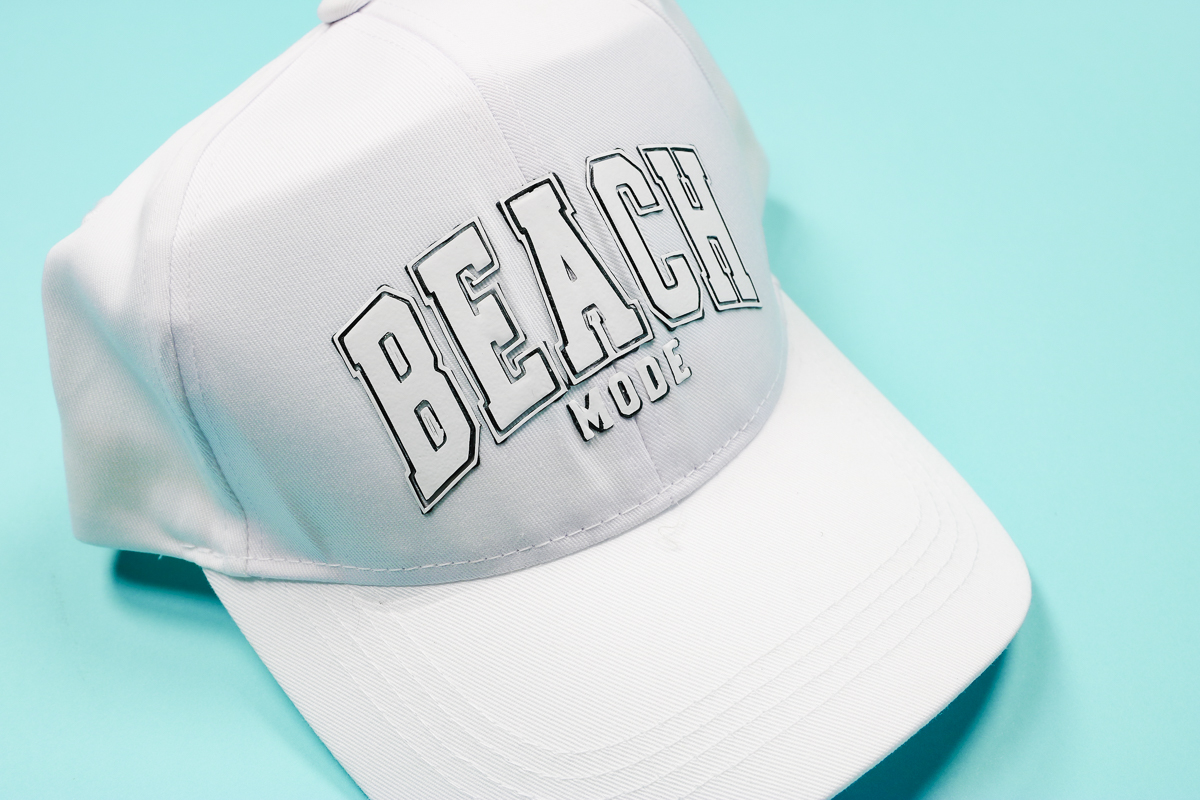
The first project I'm going to make is a hat using Super Pop HTV from Vinyl and Tulle Supply. This is a really cool material that has two colors of HTV after you press it. It needs heavy pressure to push the base HTV layer out, around the edges of the top layer.
I have my press set at 315° for 15 seconds with maximum pressure.
Place the hat on the base of the press. I like to flip the sweatband out so it's not between the press and the hat.
Make sure the lever on the side of the hat press base is pushed down so the piece on the back is up. You want that piece inside the hat.
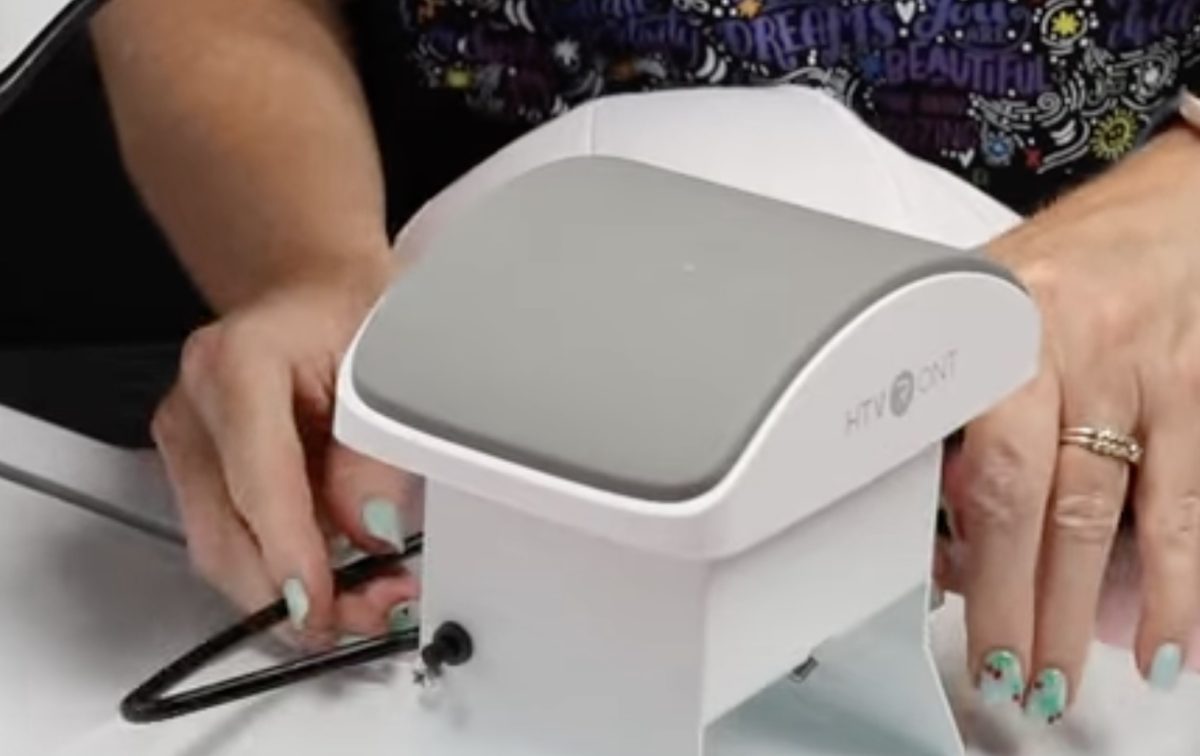
When you have the hat located how you want it on the base, lift the lever and the back piece will lower and tighten the hat onto the base.
I used my Cricut machine to cut out the design and weeded away the excess material.
With the hat nice and tight, locate the HTV on the hat and secure it in place with heat-resistant tape.
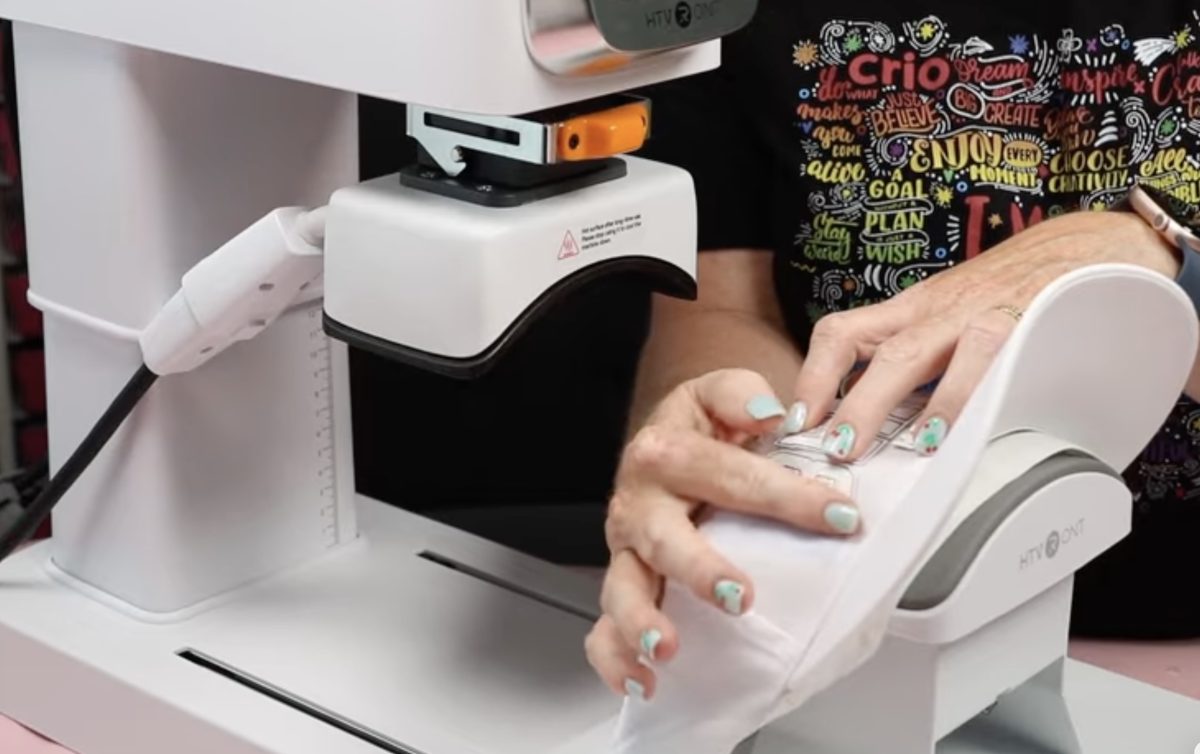
Slide the tray back into the press so the hat press base is lined up with the top piece. Press Play on the press. Allow it to press for the full time, and when the time is up, slide the tray out. While the HTV is cooling, I like to use a scraper tool to go over the surface and really help the adhesive stay stuck down to the hat.
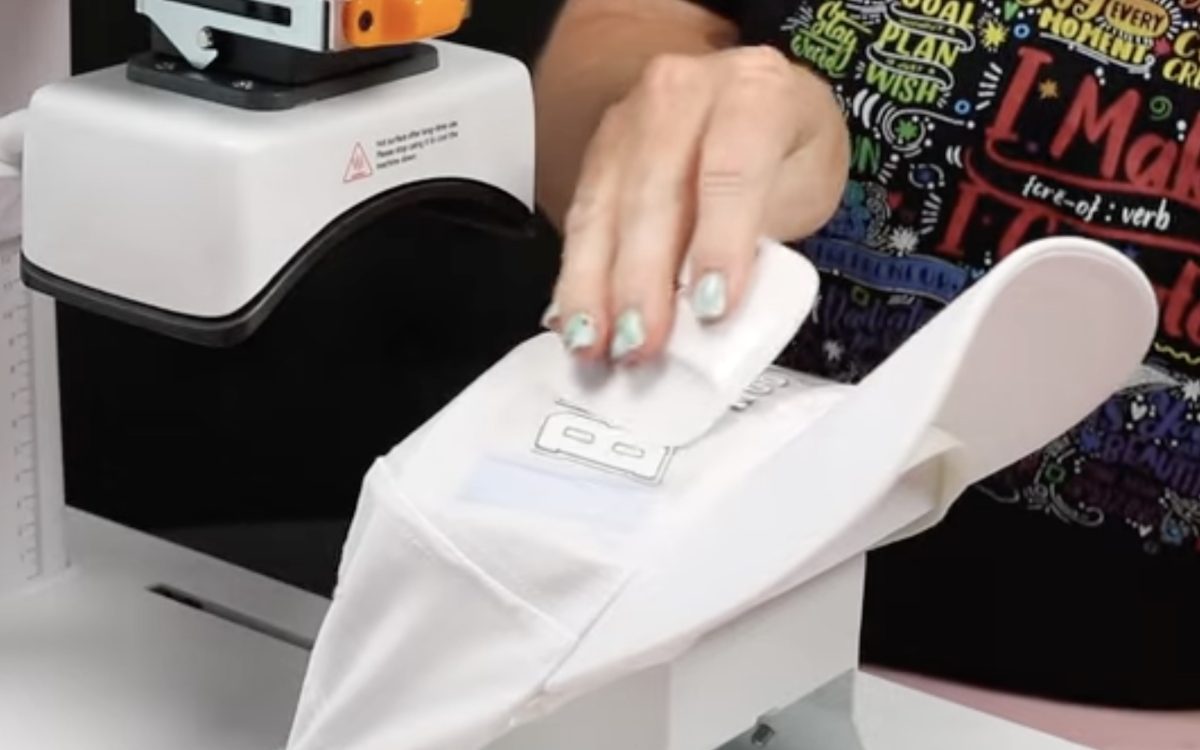
This hat has a lot of seams, so I feel like it's especially important in this case.
When the hat has cooled, peel back the carrier sheet. Cover the HTV with a protective paper and do a post-press.
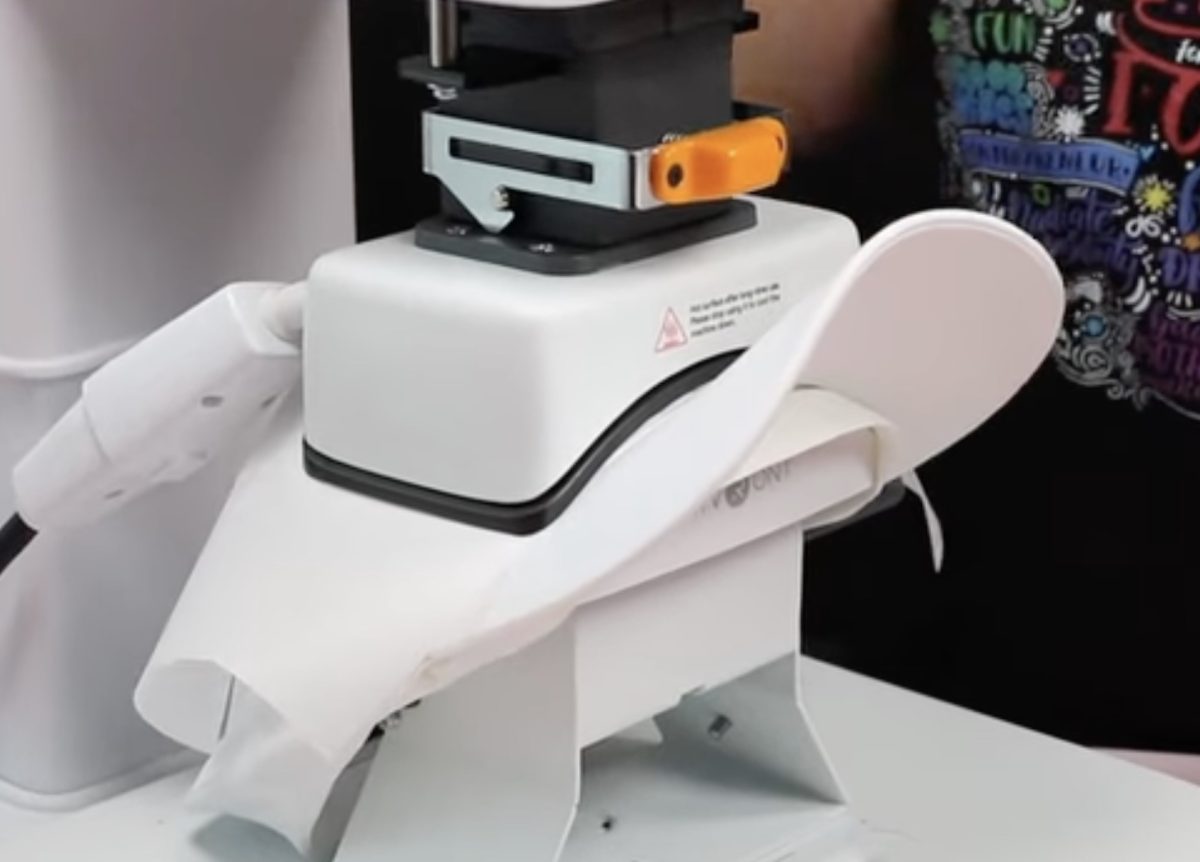
This step will really help adhere the HTV to the hat.
The HTVRont A100 did a great job with the Super Pop HTV. You can see the black all around the white, which shows me that enough pressure was applied evenly.
DTF and the HTVRont A100 Hat Press
I wanted to test the hat press one more time, so I'm going to make a hat with a DTF print.
To make this hat, I kept the time and temperature the same and decreased the pressure to about 130lbs.
Add the hat to the hat press the same way we did before, making sure the sweatband is flipped out.
Locate the DTF print and secure it in place with heat-resistant tape. Cover with protective paper.
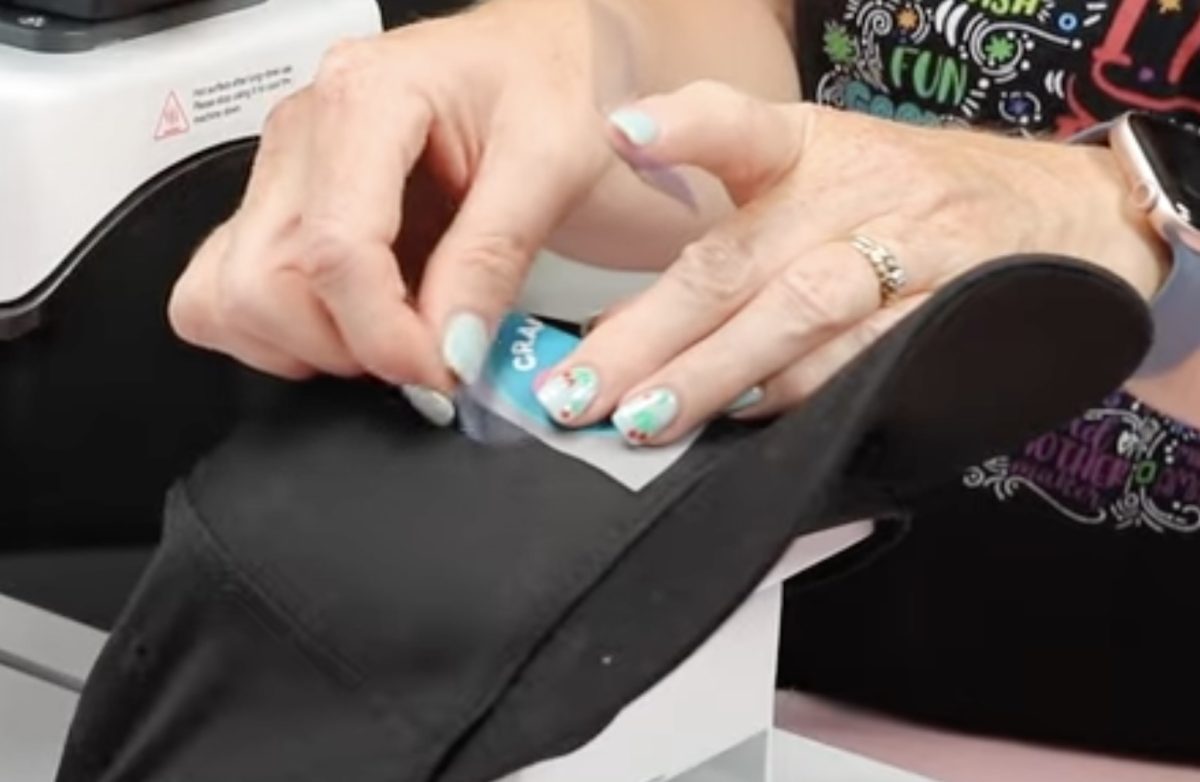
Close the tray, press play on the press, and allow it to press for the full time. When the time is up, pull out the tray, remove the protective paper, and use a DTF cooling block to help cool the DTF print.
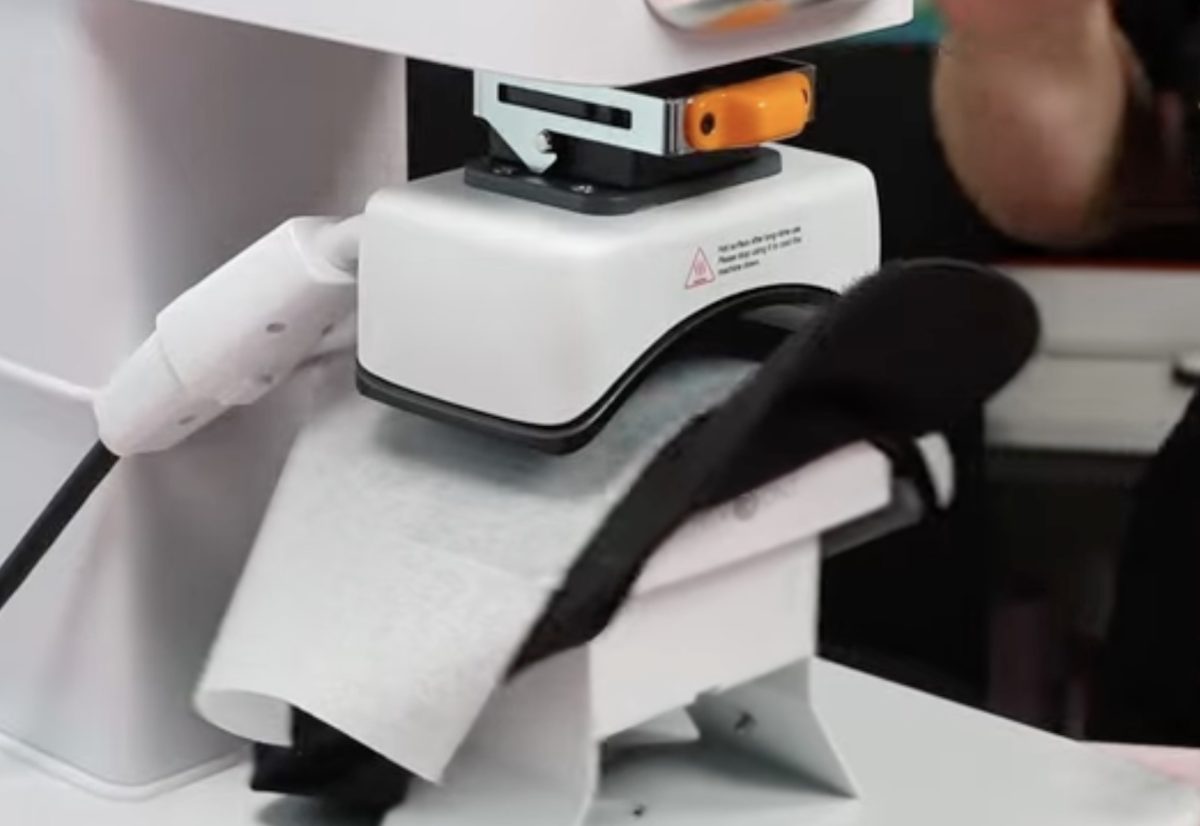
Peel back the carrier sheet and then cover the print with protective paper and do a post-press.
After the post-press, remove the protective paper, and your hat is complete.
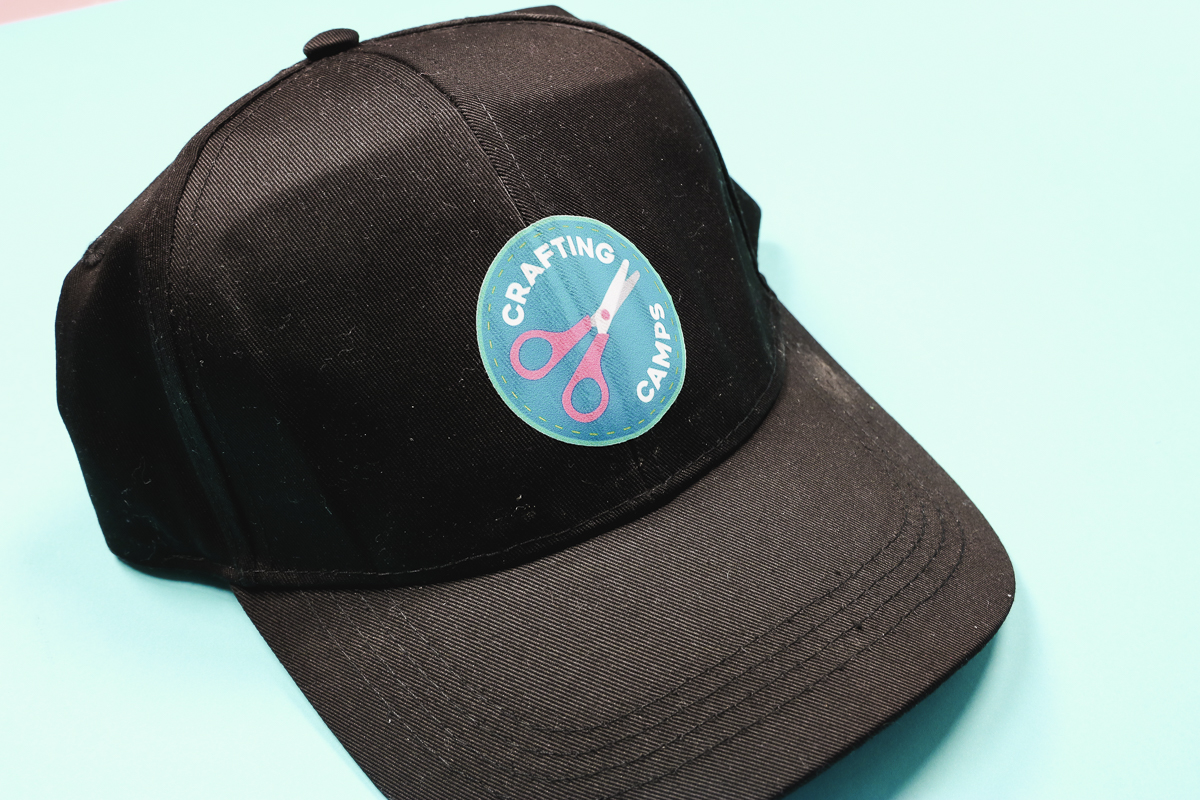
The DTF stuck on this hat perfectly. You can see that the post-press really helped the DTF bond to the fibers of the hat.
HTVRont A100 Tumbler and Mug Press Module
Now we're ready to test the tumbler and mug module in the A100.
To swap the module, we're going to uninstall the hat press. To do that, unplug the top of the module from the machine and then remove the top just like we did the flat heat platen. Remove the base opposite of how you installed it. Grasp both sides and rotate it the other way, and then you can lift it out.
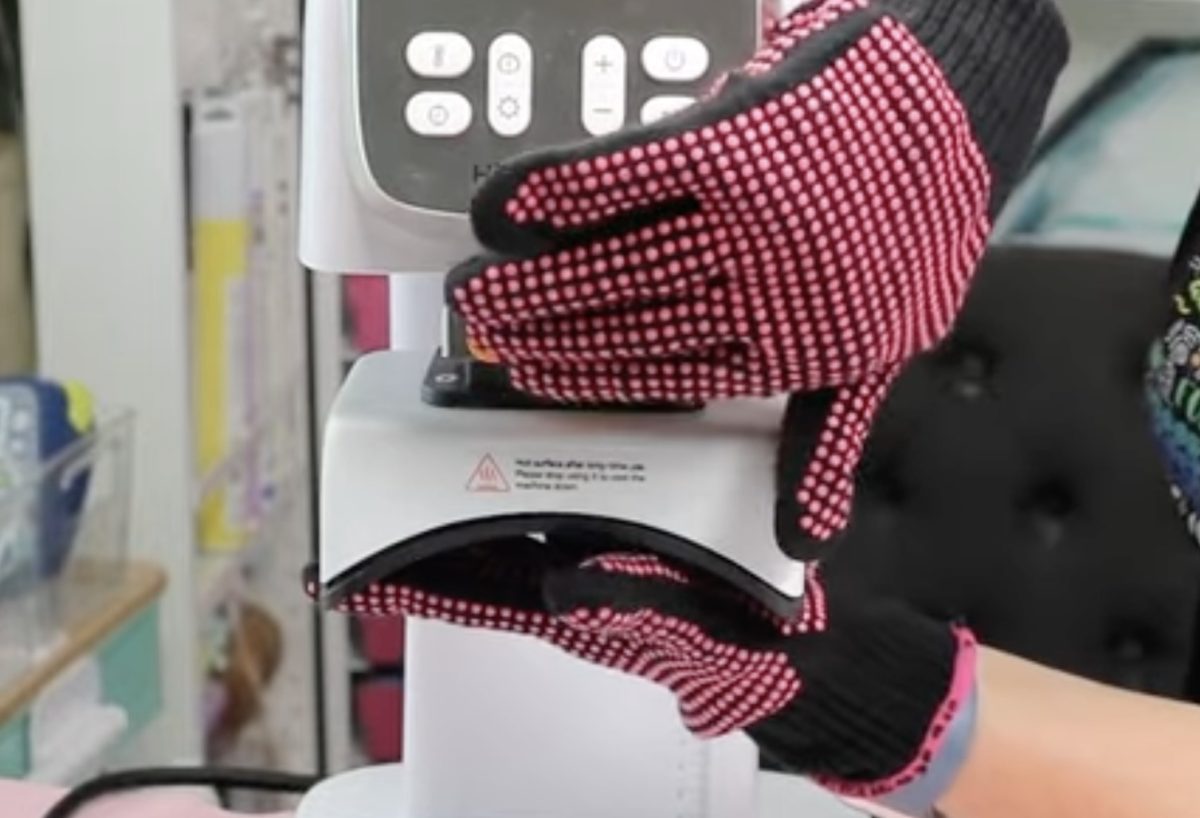
Before we add the tumbler module to the press, let's take a closer look at it.
Close-Up Look at the Tumbler Module
This is what the module looks like, not in the press. If I push down on the top, I can see how far it's able to close. With it out of the press, I can test the blanks I want to use.
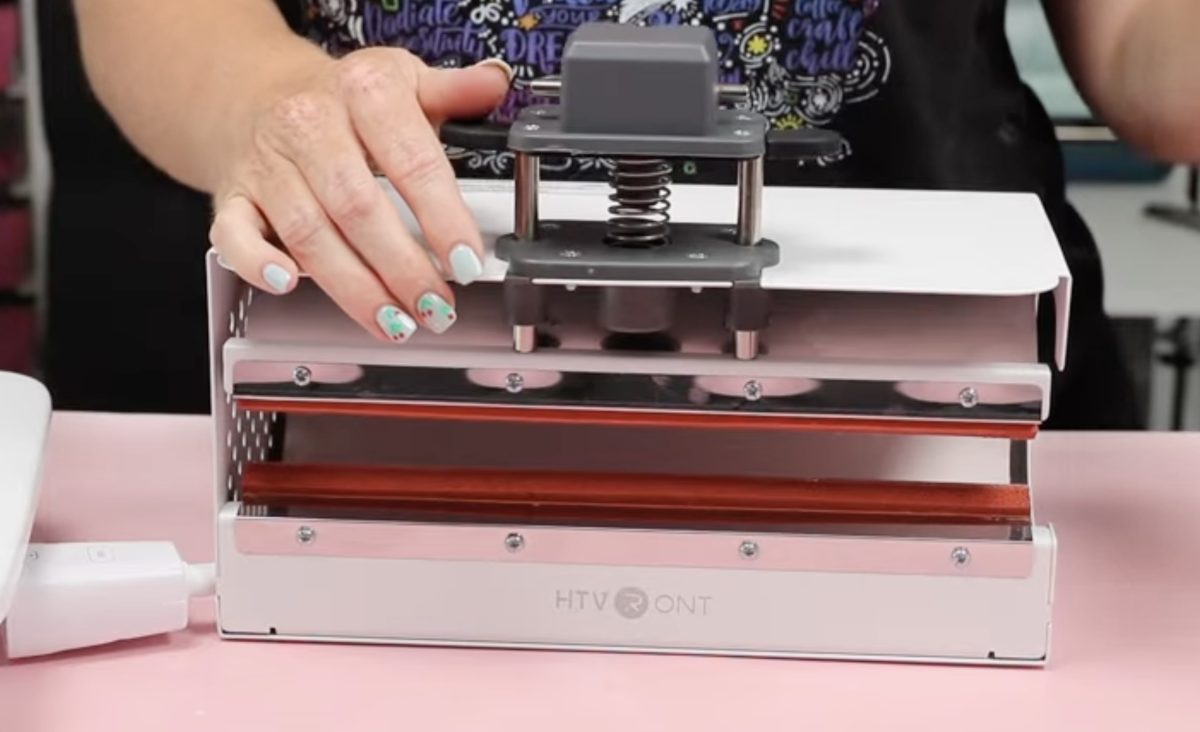
The 20-ounce straight wall tumbler fits really well, and the press closes almost all the way.
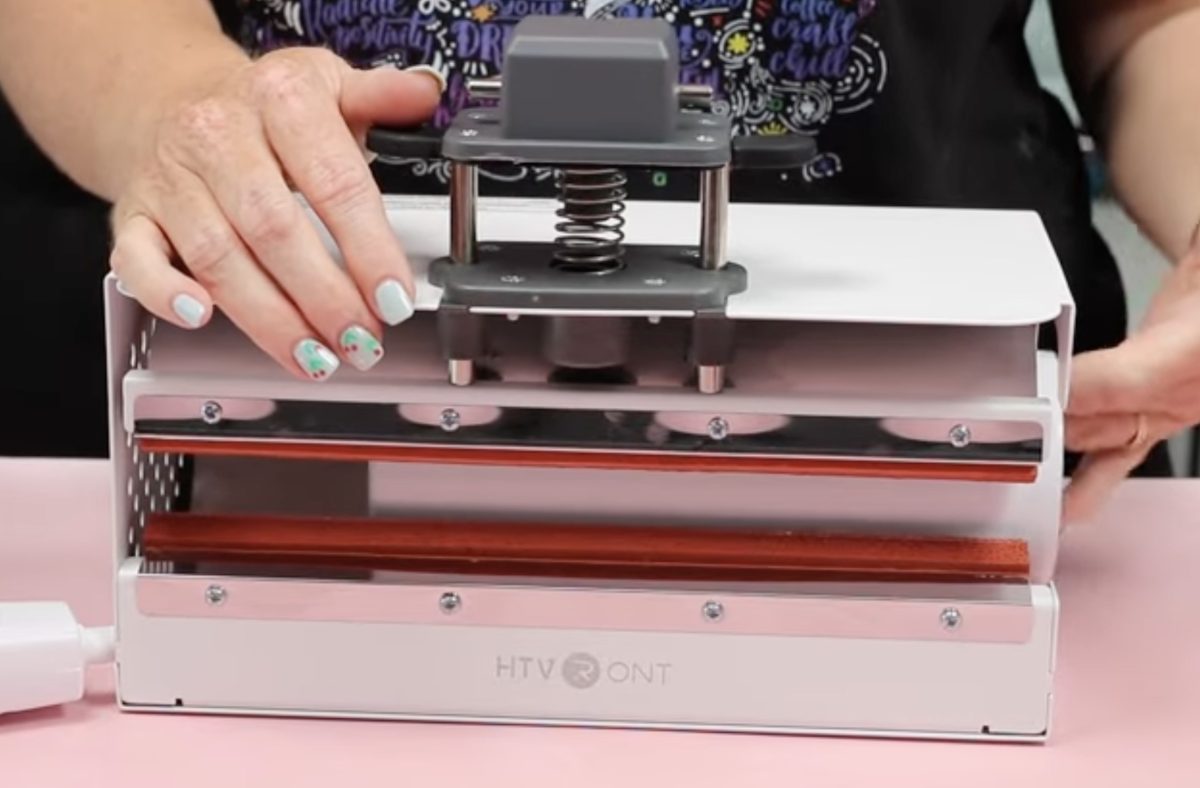
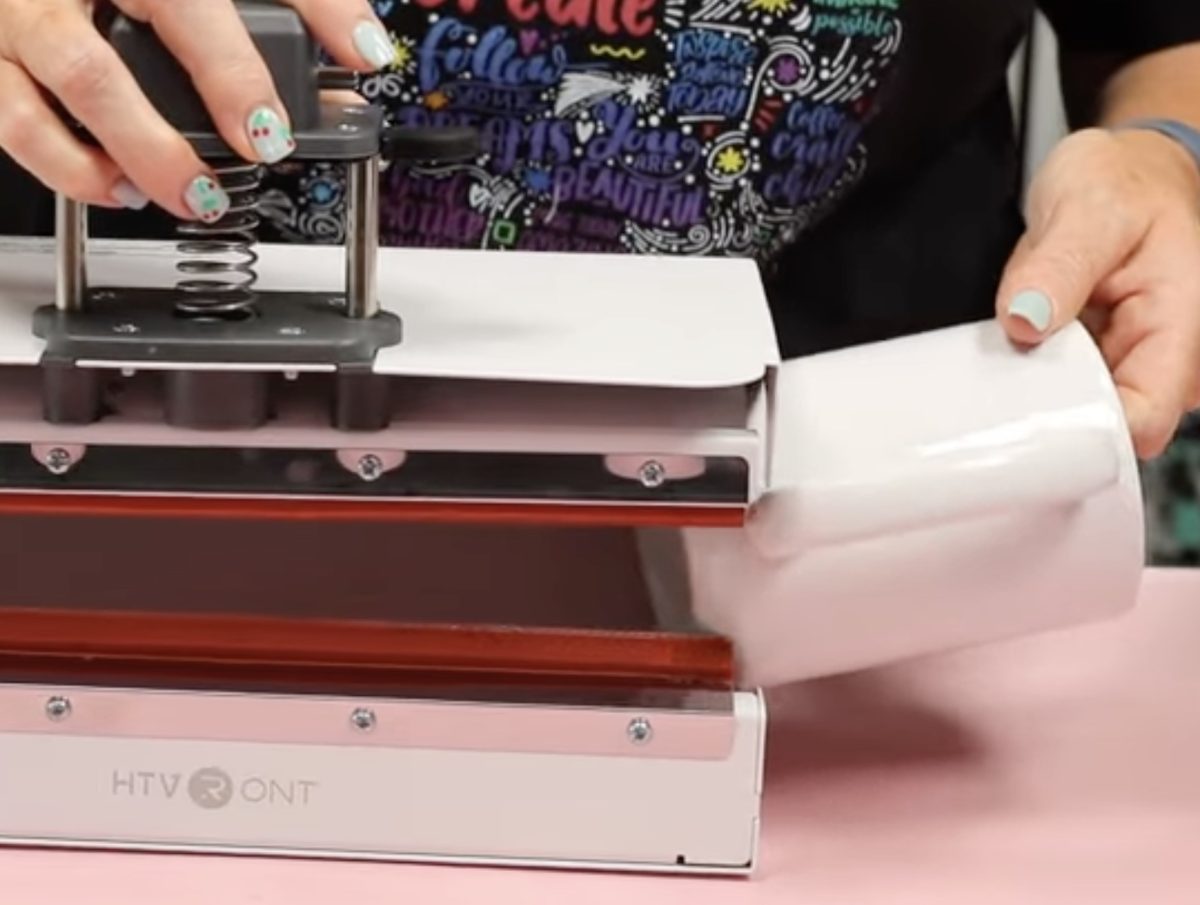
I wanted to test some different mugs to see if they would fit.
I was able to fit some of the smaller-sized mugs inside without issue; I could even press two at a time.
But the larger 15-ounce mugs barely fit. I was able to force one inside, but once you have sublimation paper, heat-resistant tape, and protective paper wrapped around it, I do not think they'd fit.
Now, we're ready to add the module to the press.
Hold the Mode button and then click over to the Tumbler mode; it looks like a coffee cup. Press Play, and it will adjust to accommodate the module.
Place the module on the base of the heat press and locate it so the portion that opens faces the front.
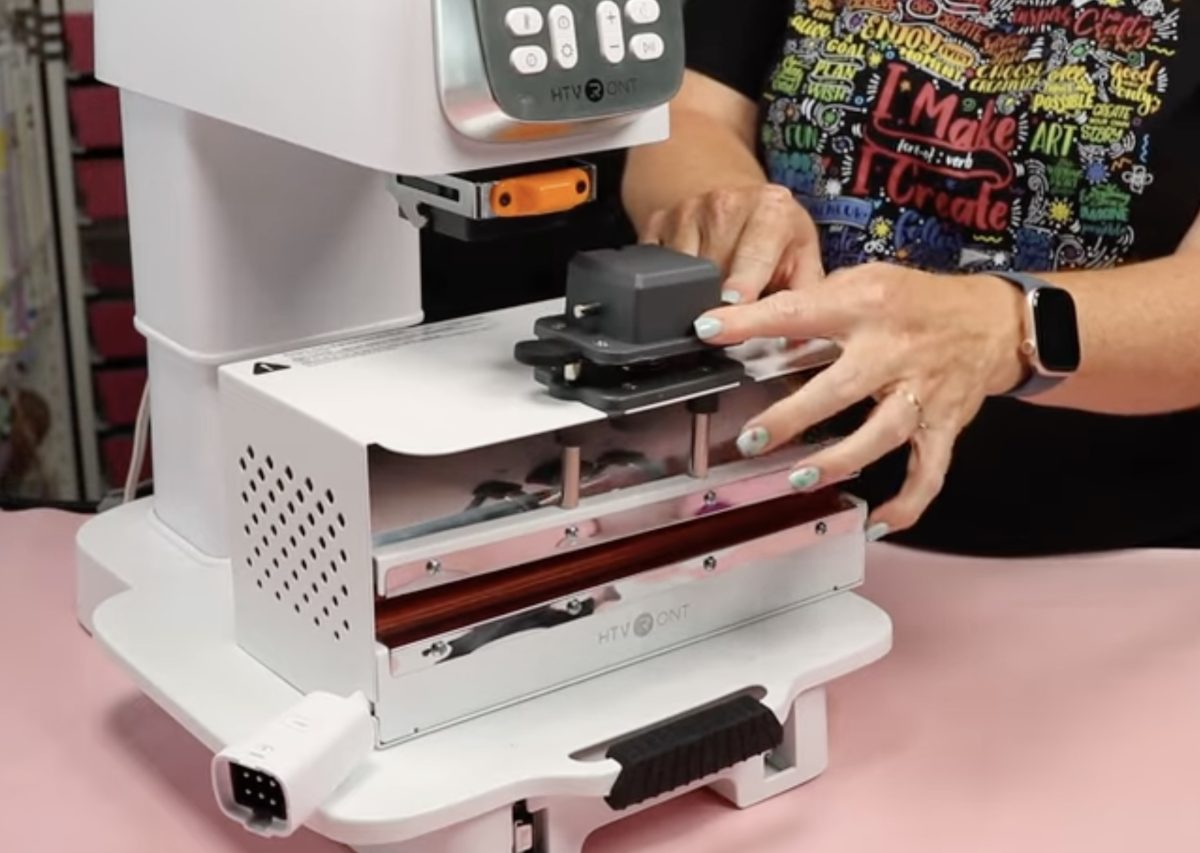
Lift the top of the module until it clicks into place. When it's locked in place, you shouldn't be able to manually push it down.
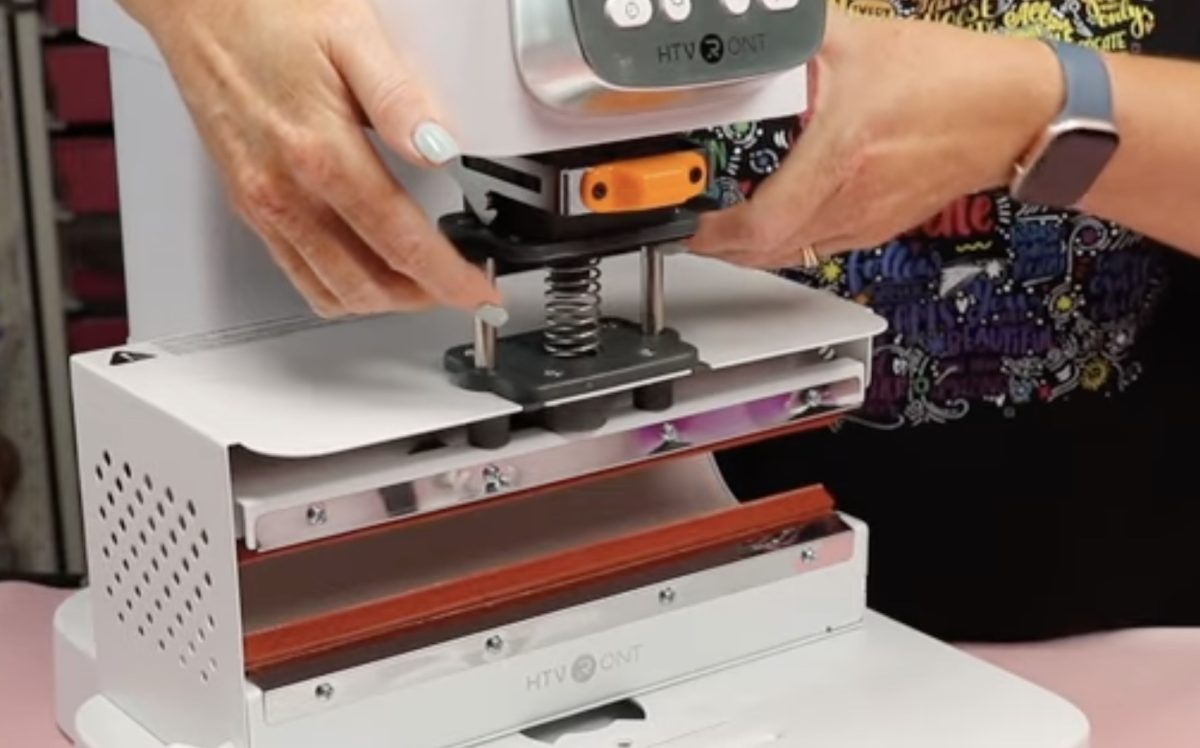
Plug the module into the press, and now we can power it on.
Sublimation Tumbler in the HTVRont A100 Tumbler Module
First, we're going to make a 20-ounce straight-walled tumbler. For this, I have the press set to 360° and the time set to 60 seconds. I am going to press it for 60 seconds and then rotate the tumbler and press for another 60 seconds.
While the press is preheating, prepare the tumbler.
Prepare the Tumbler
Clean the tumbler with a lint roller or lint-free cloth and locate the design.
I am doing a full wrap, so I wrapped my print all the way around the tumbler and taped it together along the long edge and added tape around the top and bottom. You don't want any air pockets between the tumbler and the sublimation print.
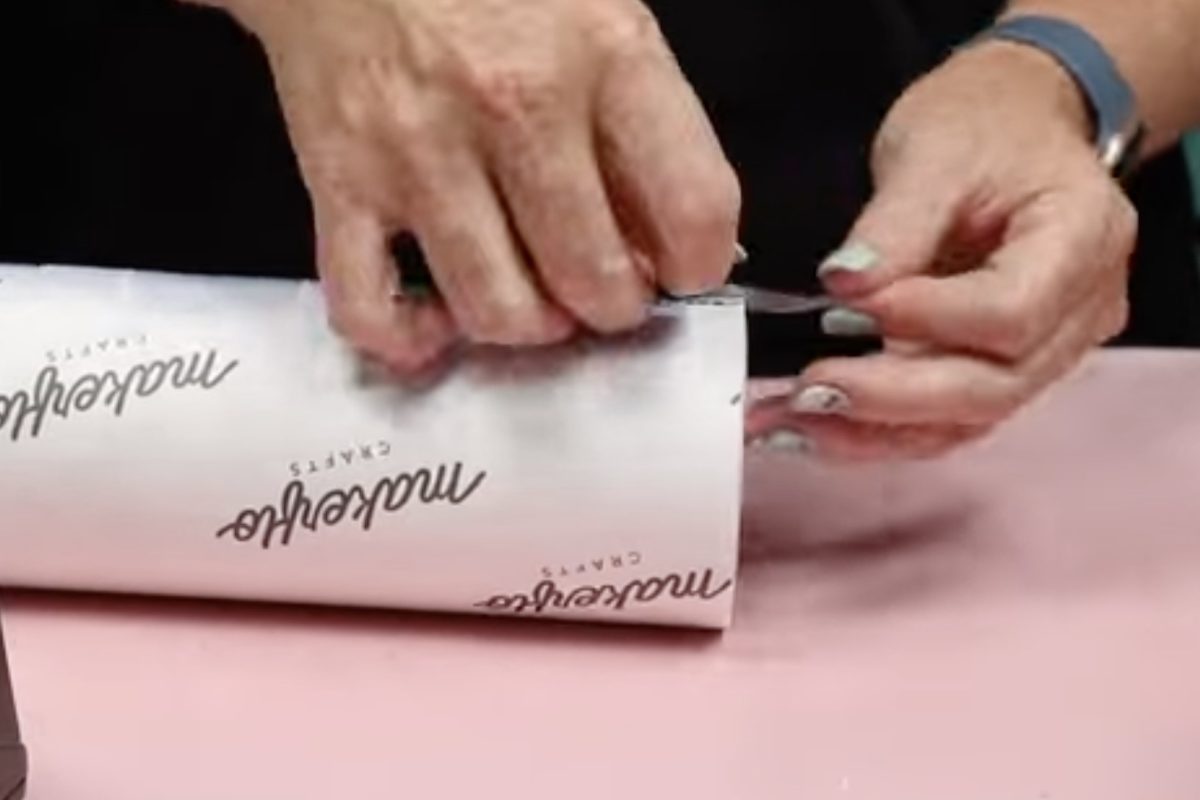
Wrap the print with protective paper, secure it with heat-resistant tape, and slide the tumbler into the press.
Press the Sublimation Tumbler
Make sure to use heat-resistant gloves for this step. The inside of the press is very hot, and we want to push the tumbler toward the middle of the press.
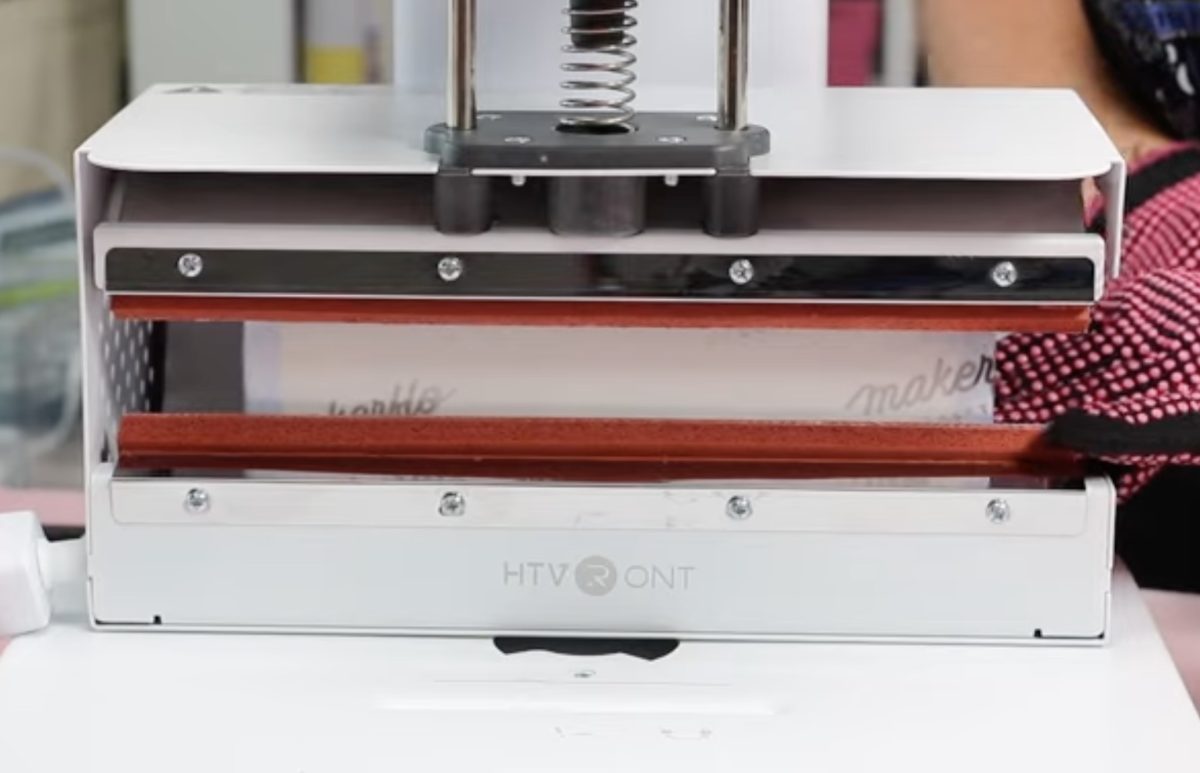
Press Play and let the press go for the full 60 seconds. The tumbler module should close all the way around the tumbler.
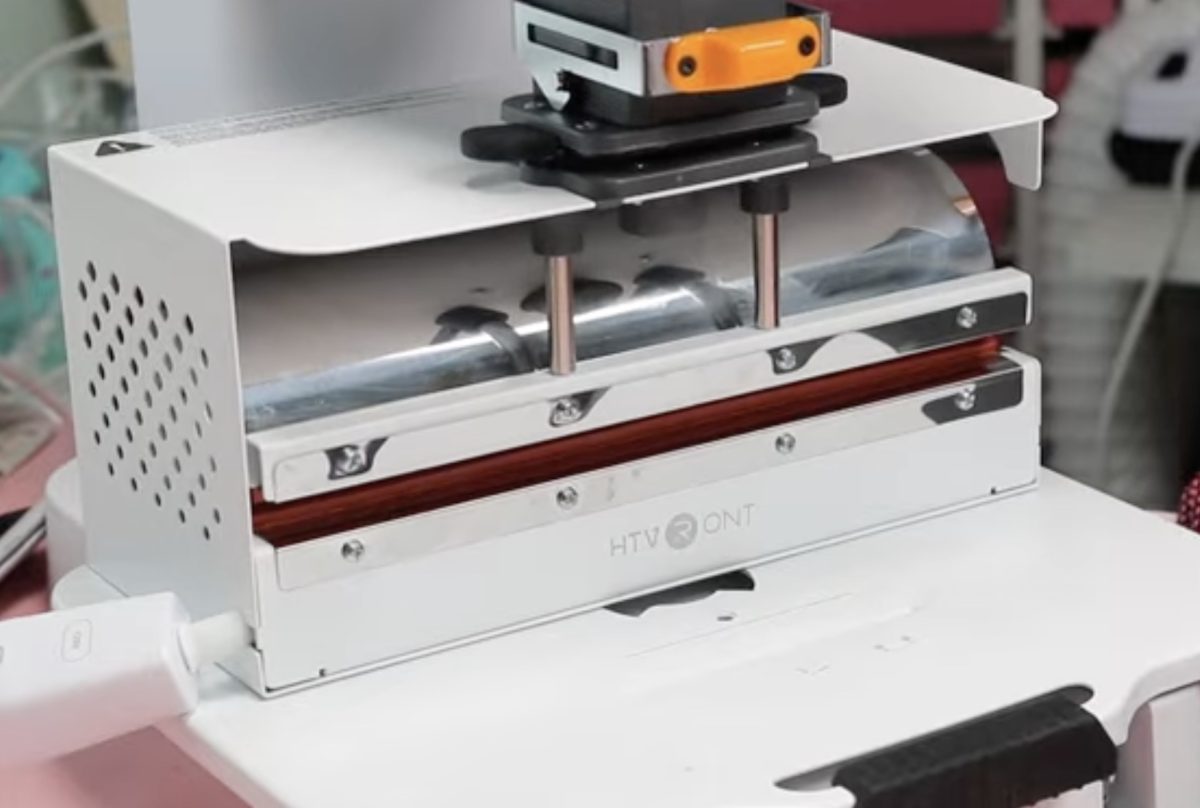
When the time is up, the press will open automatically. Using heat-resistant gloves, slide your hand into the tumbler and rotate it 180 degrees. Press Play again and let it press for the full 60 seconds.
Remove the tumbler from the press and place it on a heat-resistant mat. Using heat-resistant gloves, carefully remove the protective paper, heat-resistant tape, and sublimation paper.
Sublimation Tumbler Results
I found the pressing to be a little inconsistent with the tumbler press. Rotating the tumbler and pressing twice seemed to give me the best results, but it is still possibly a little too hot.
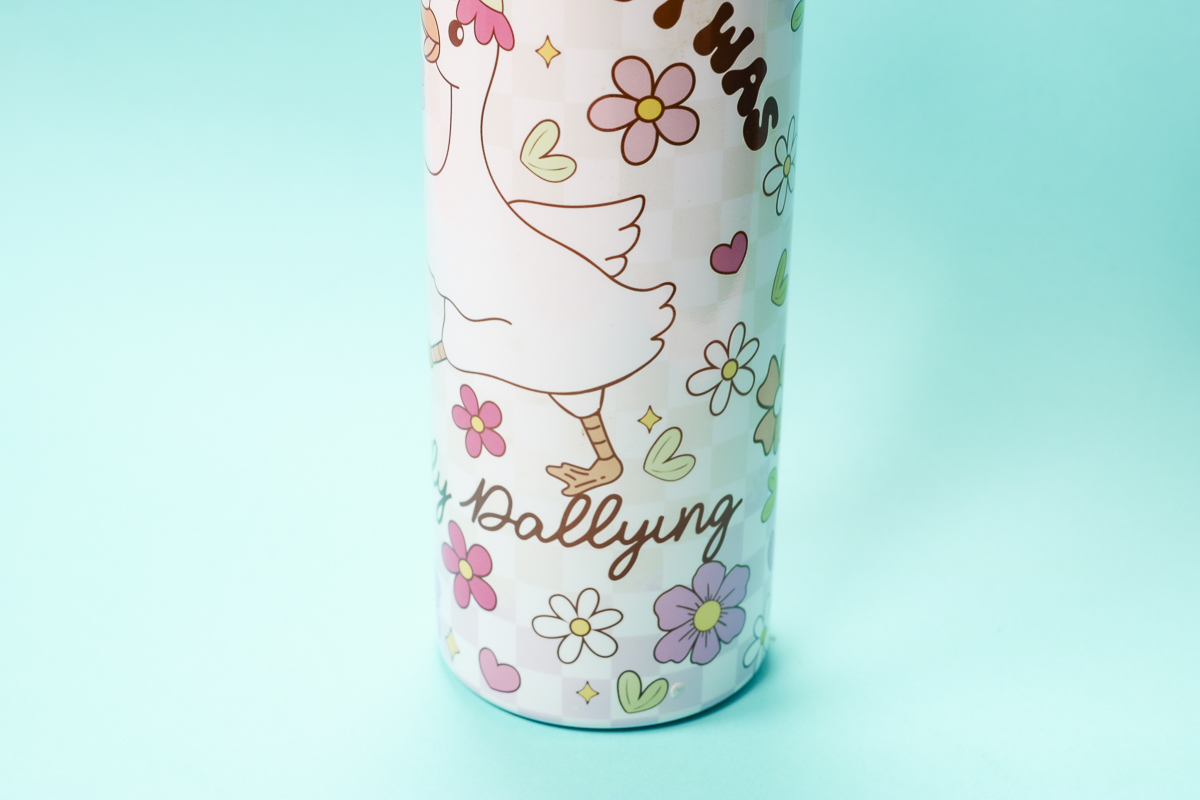
You can see some spots in this area are too overcooked.
I think the recommended settings are either too hot or too long. I made some adjustments and got closer by rotating the tumbler and pressing again.
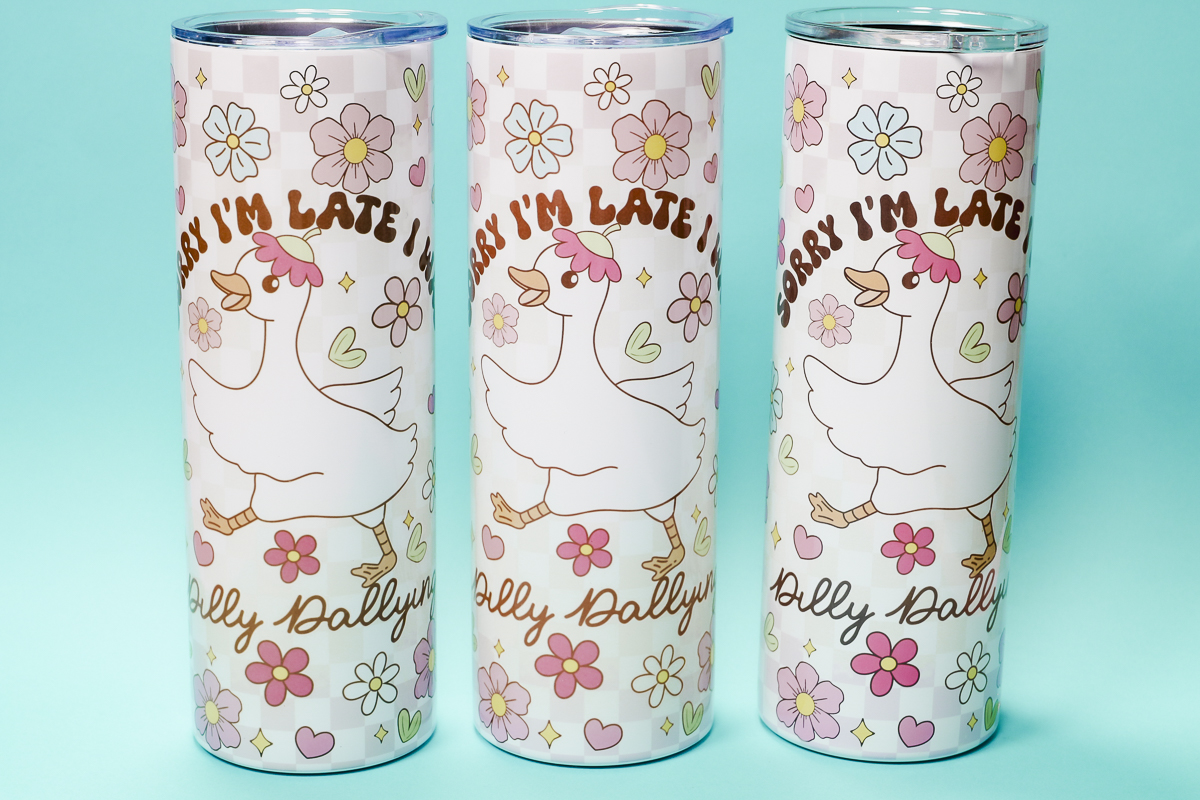
If you want to make tumblers, I'd make sure to have extras on hand while you figure out the best settings for your setup.
How to Make Glass Mugs with the HTVRont A100
Next, I'm going to test making glass mugs in the HTVRont A100 tumbler press module. Glass mugs can be tricky. If you own the Cricut Mug Press, they actually recommend you don't use glass mugs in their press
I prepped the glass mugs the same way I did the tumblers:
- Clean the mug with a lint roller or lint-free cloth.
- Wrap the mug with sublimation print. Make sure to mirror your sublimation print. The tumbler press will not press right up against the handle, so make sure your design doesn't go further than the press will reach.
- Secure with heat-resistant tape. Make sure the print is pulled tight so there are no air pockets.
- Wrap protective paper around the sublimation print to protect the tumbler press from ink blowout.
The settings for glass mugs are 300° for 300 seconds. I am pressing two glass mugs at the same time, and I have them slid toward the middle of the press.
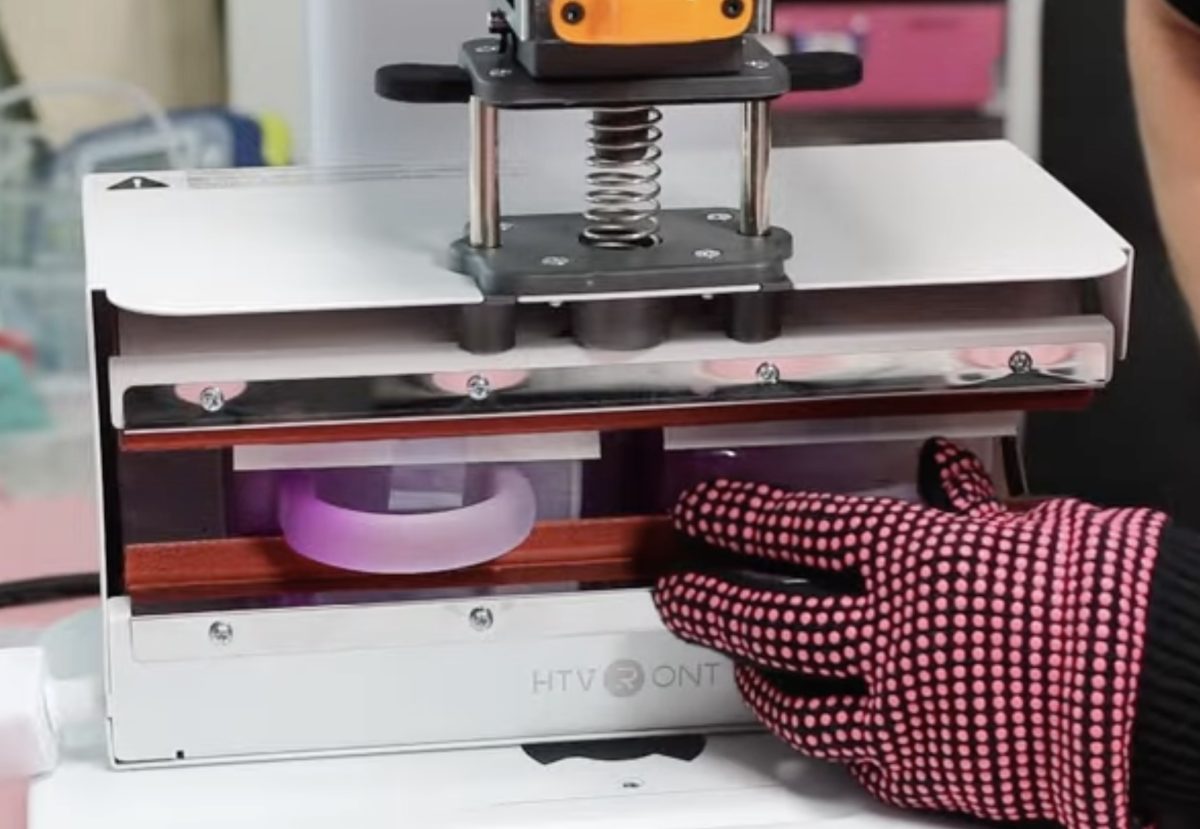
Press Play on the A100, and the press will close and apply the pressure. This part always stresses me out when working with glass, but it looks really good in this press.
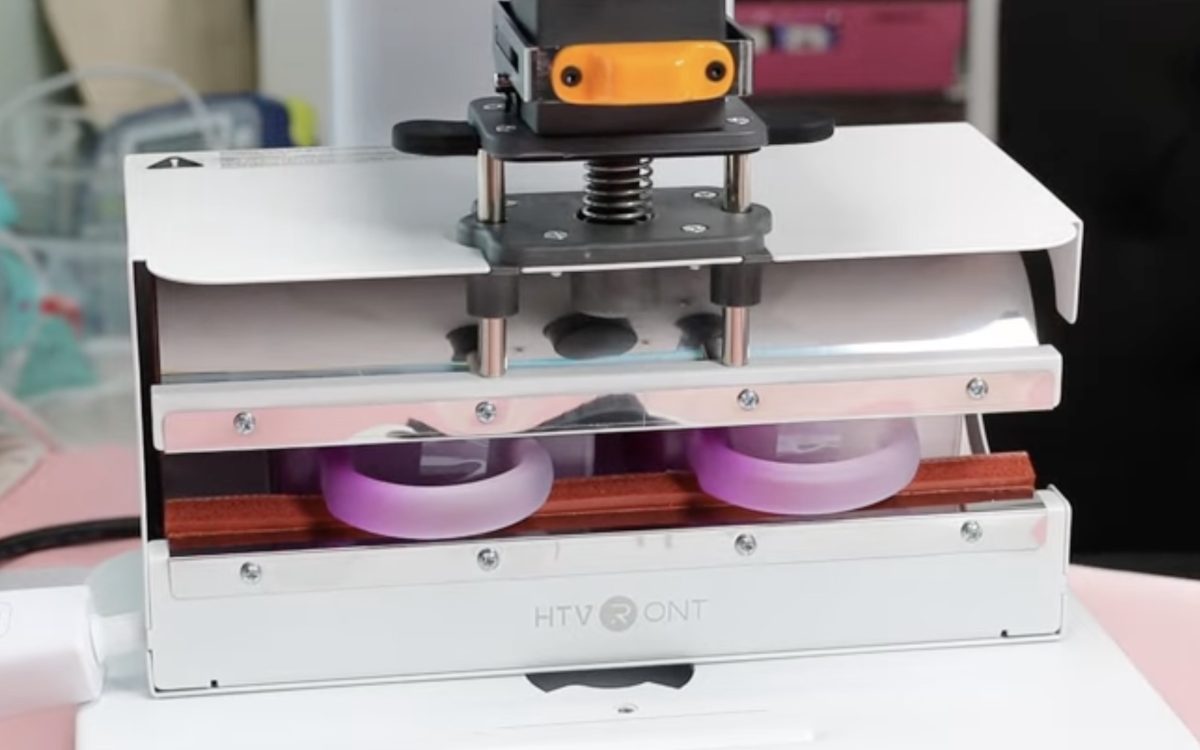
When the time is up, remove the mugs from the tumbler press and place them on a heat-resistant mat.
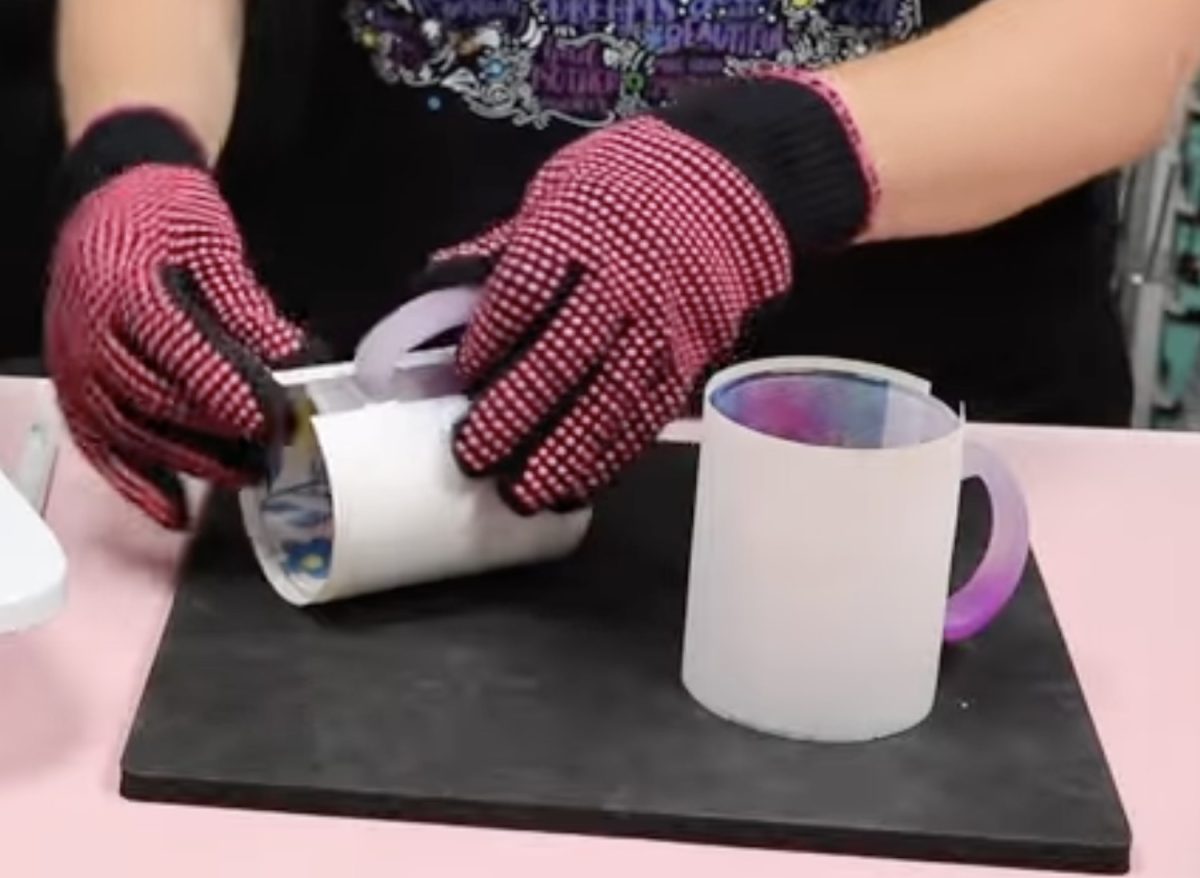
Since these are glass, I can see through the inside of the mug, and these look like they sublimated well.
Remove the protective paper and sublimation print to reveal the finished glass mugs, and mine look really good.
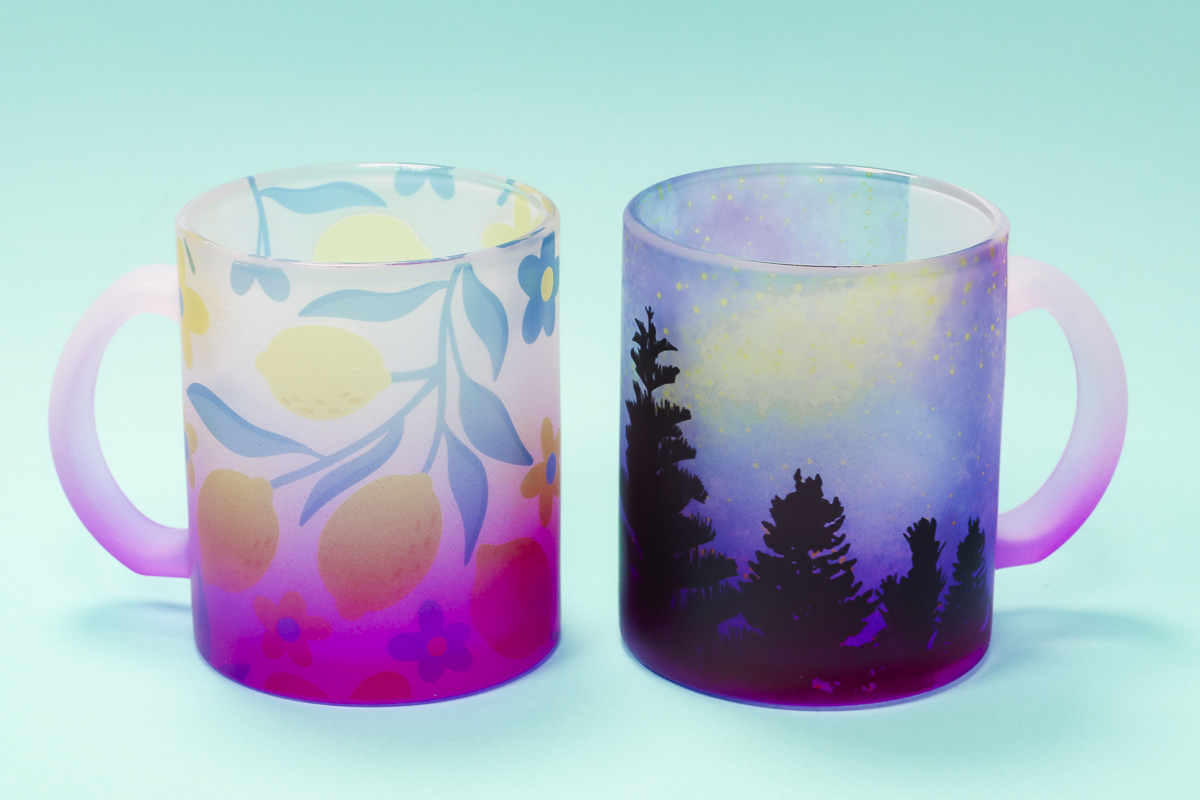
I think these look perfect. The sky transferred beautifully. I'm a fan; these worked amazingly on the first try.
Sublimation 15oz Ceramic Mug in the Tumbler Press
Because the 15-ounce ceramic mug did fit in the tumbler press, I wanted to test it to see how it would do.
Prepare the mug the same way we prepared the glass mugs. I taped all the way around the top edge because that is the end I slid into the press first. My paper kept catching on the press and tearing when it wasn't taped.
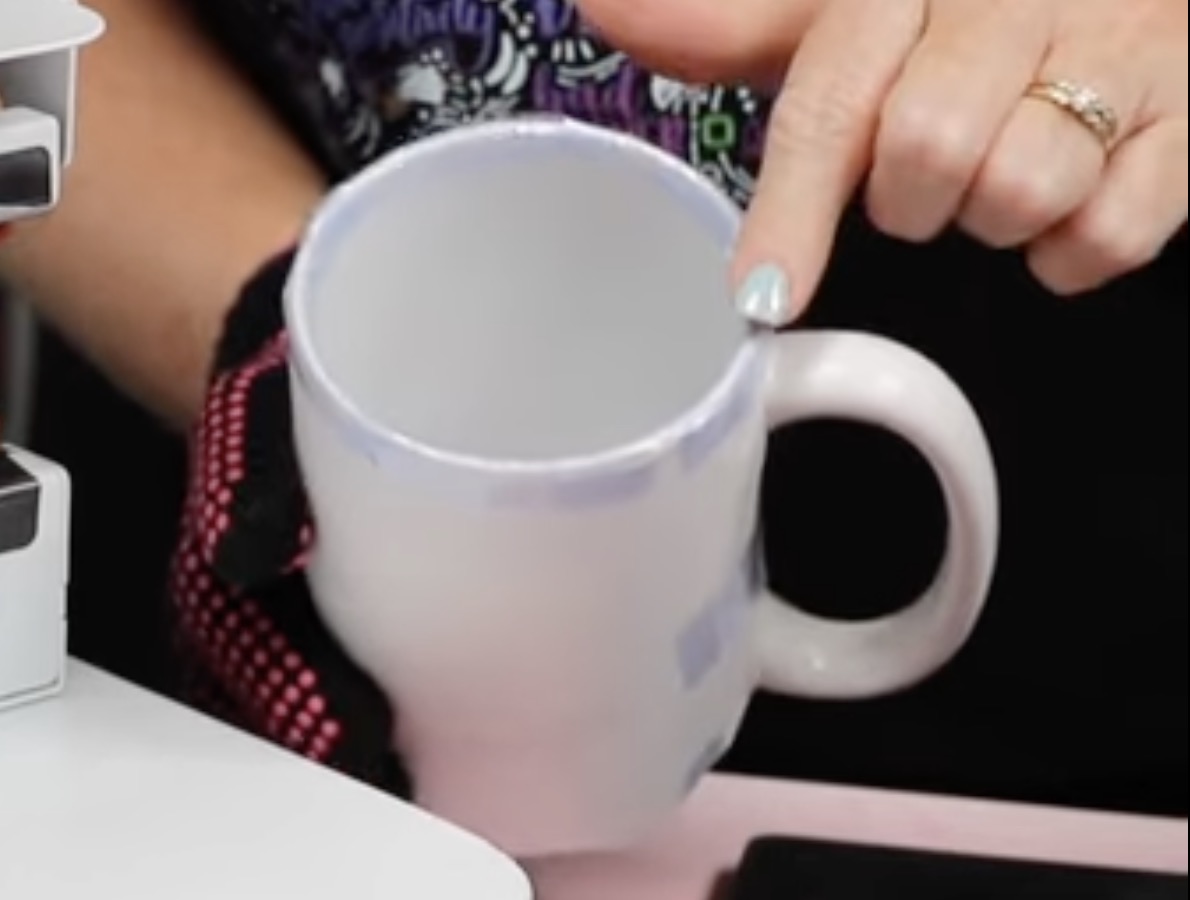
For the ceramic mug, the settings I used are 330° and 330 seconds.
This is an incredibly tight fit; I had to kind of force the end of the mug into the press.
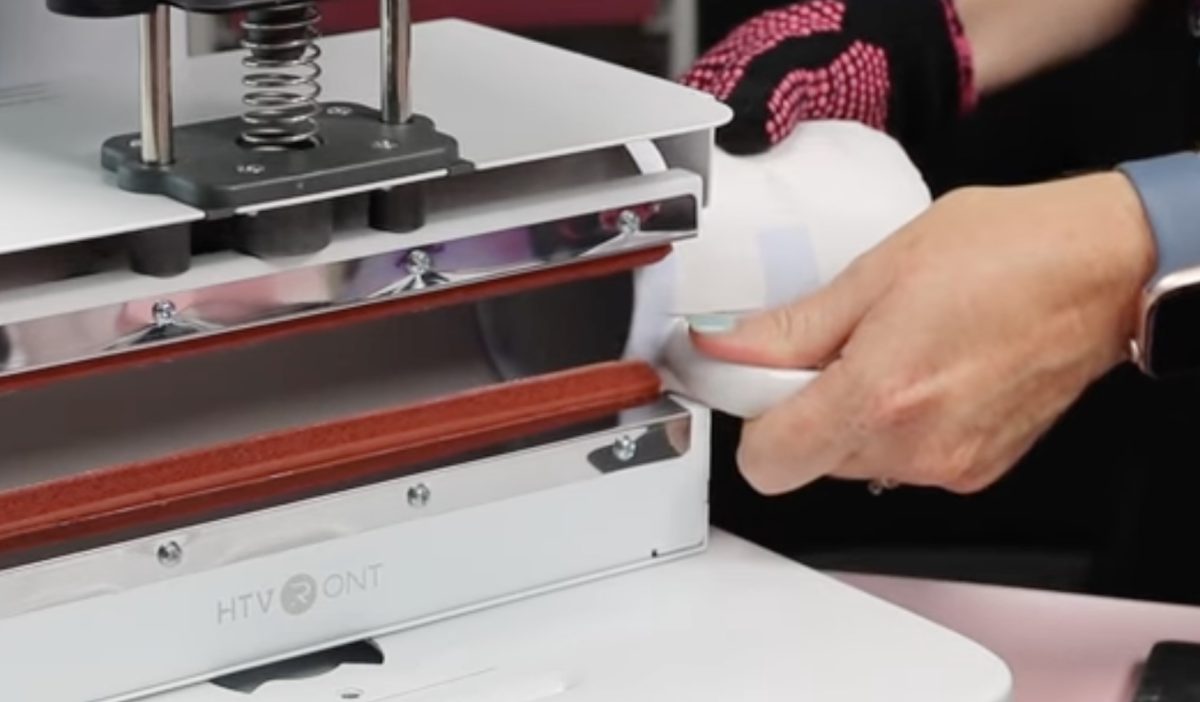
When pressing only one mug, make sure to move it to the middle of the tumbler press. This will help ensure you get even pressure.
I also moved the handle so it was centered in the opening.
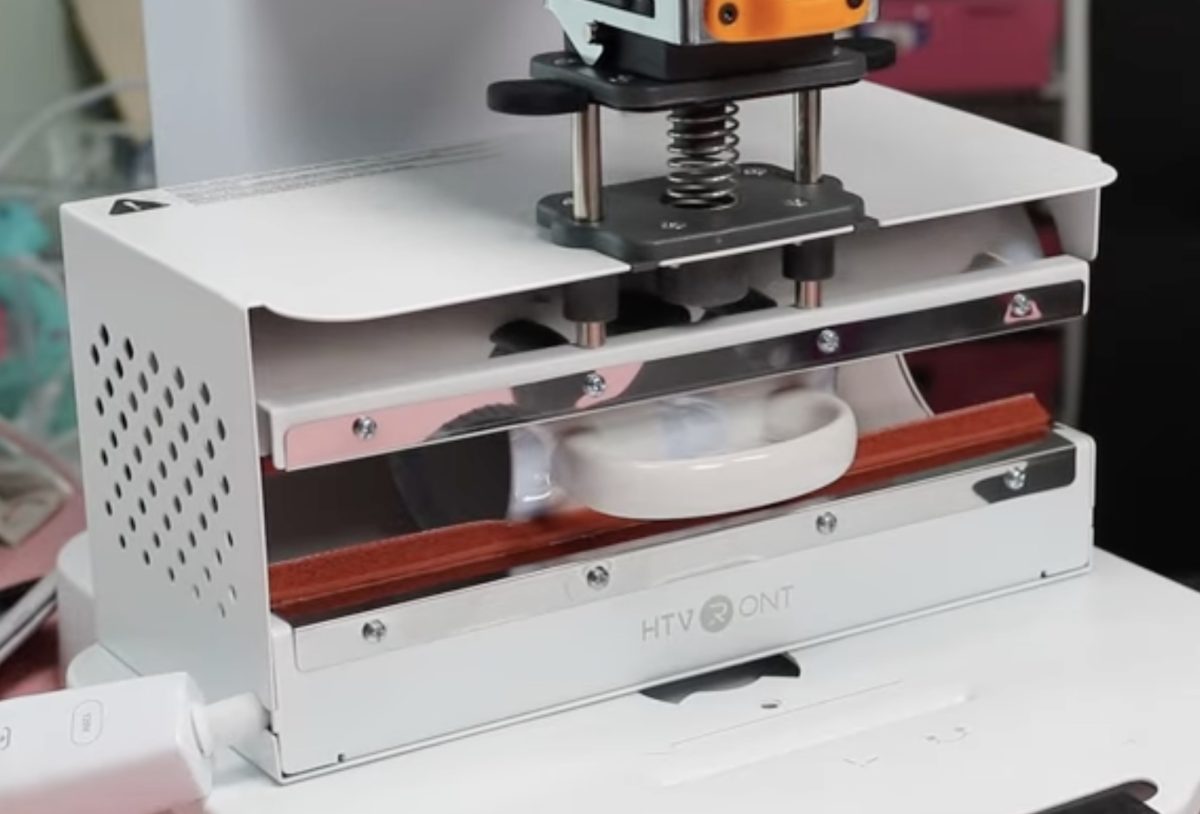
Press Play on the press and let it go for the full time. When the time is up, remove the mug from the press and set it on a heat-resistant mat.
The settings I used for the ceramic mug are less than what is recommended, and I still feel there are spots that are over-cooked.
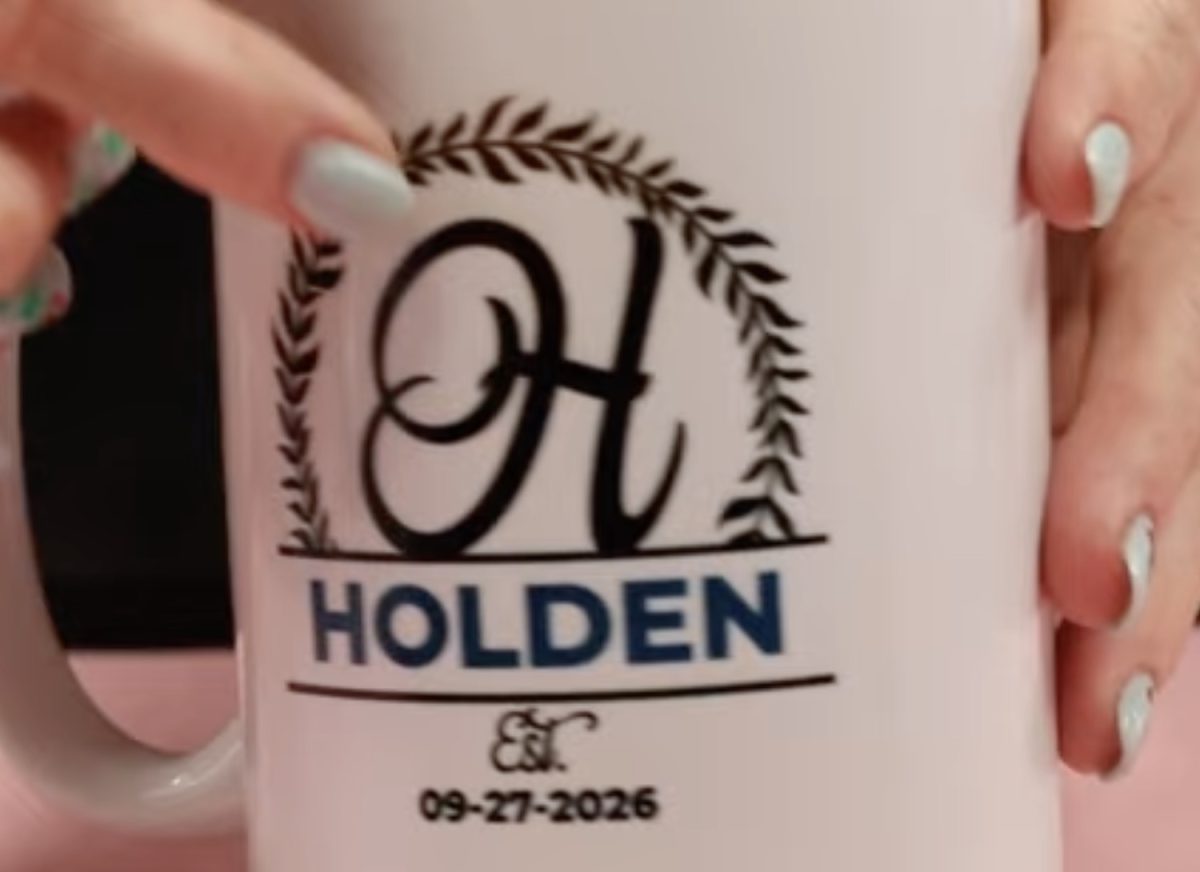
The sublimation print did transfer everywhere, but it is over-cooked in some areas and not in others.
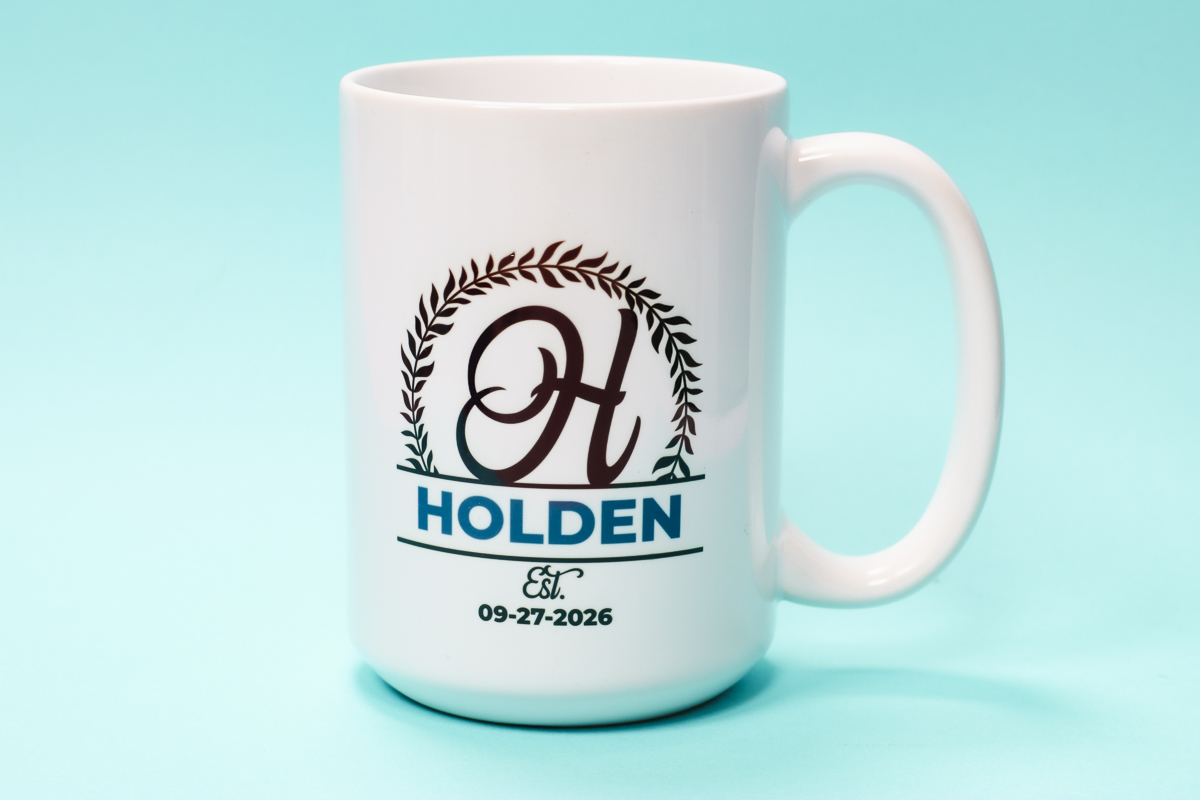
While the 15-ounce mug fits in the press, I wouldn't recommend it. It's too big, too hard to get in and out, and the results weren't good enough to make it worth the hassle.
When you're done with the tumbler press, it removes the same way. Unplug the tumbler module from the press. Press the orange button on the top, and it will release the top of the tumbler module, and you can remove it.
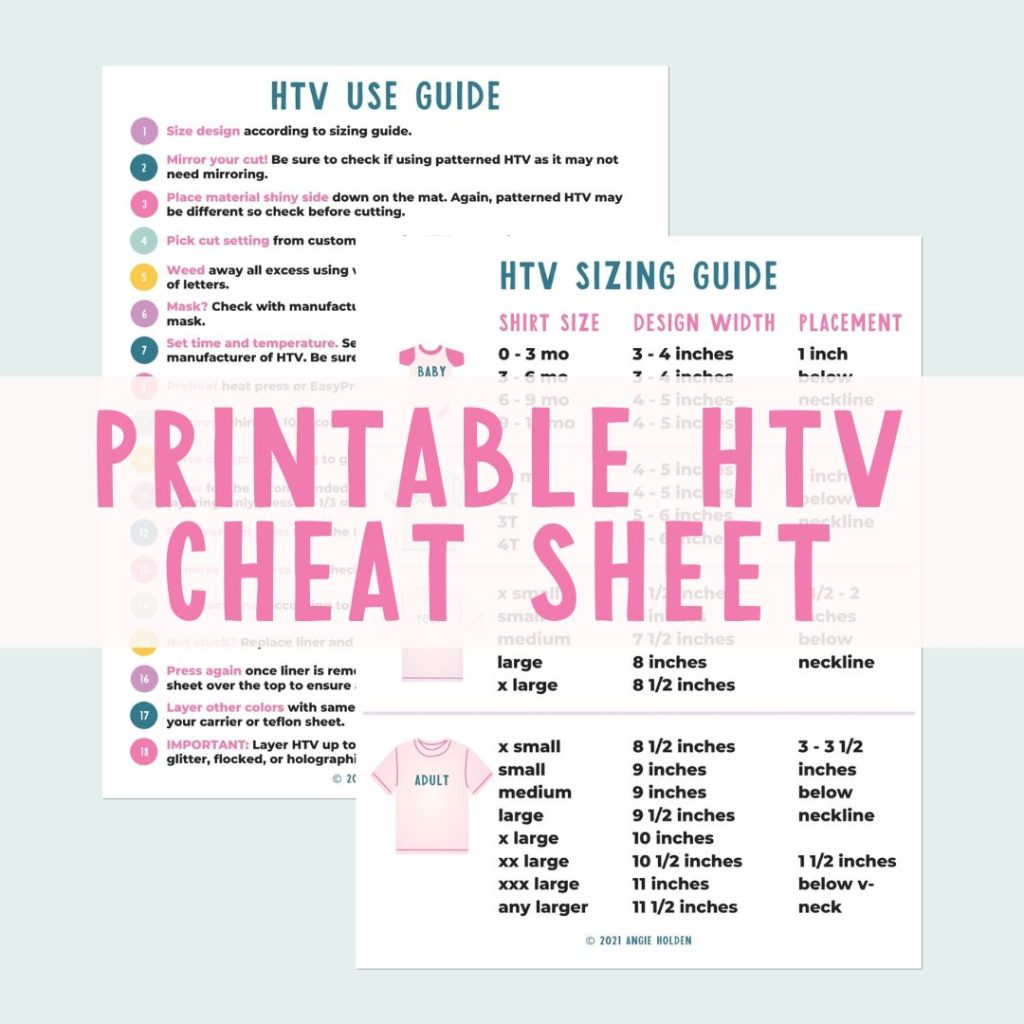
Free HTV Cheat Sheet
Get your FREE Printable HTV Cheat Sheet now! This guide has sizing and position recommendations for infant through adult shirts as well as a handy HTV use guide. Print this double sided guide and put it by any heat press you own!
HTVRont A100 Multi Heat Press Pros and Cons
Now that we've looked at each of the different modules, let's talk about the pros and cons of the HTVRont A100.
HTRont A100 Pros
- Compact size. The size of this press is a real pro, especially if you're limited on space. Three presses in the place of one smaller-sized press.
- Adjustable pressure. I am always a fan of adjustable pressure, and this seems to go high enough for even heavy-pressure materials.
- Auto-Open feature. I think it's so important, especially for small business owners, to be able to do something else while pressing. The auto-open feature removes the worry of overpressing if you're doing something else.
- I like that there are custom settings that let you open the flat heat press wider if you're using bulkier materials.
- It's easy to change the pressing modules. I found they were each easy to swap.
- Even though there are 3 different modules, they don't take up much room. Storing the other modules can easily be done on a shelf or in a basket.
- I think it is a great value for someone who wants or needs the ability to do multiple things. You don't have to purchase the modules separately. Everything comes with the press.
HTVRont A100 Cons
I don't want you to look at these cons and think this is a bad press. Every heat press will have both pros and cons, and the cons may not even matter to what you need the press for.
- The 12×10 flat pressing plate is smaller than many of the heat presses on the market right now. While it's not small, it will require multiple presses or careful alignment for larger designs/blanks.
- Limited throat opening. If you're working with bulky blanks like hoodies and sweatshirts, there is not a lot of room behind the tray for excess material.
- Tumbler module settings. With both the tumbler blanks and ceramic mug, I found the time and/or temperature settings to be too hot. I think there is a learning curve for the tumbler module, and you need to be prepared to have some test blanks that may be ruined while you figure out the right settings for your press. I would not go by the recommended settings.
- Tumbler module hot/cold spots. I think there are some spots that are either hot or cold in the tumbler press. In each of the tumblers I pressed, even when I decreased the time and temperature, there were still spots that were over-cooked. This was not consistent across the entire design.
- The tray doesn't slide completely out from under the press. When using the flat heat press, even when pulled out all the way, the tray doesn't come out completely from under the press. This made locating materials on larger blanks/designs more difficult after the pre-press. To avoid having my hands close to the heat element, I had to remove the sweatshirt from the tray.
- Learning curve for loading hats. I don't necessarily think this is a con; I just want to note it. There is a little bit of a learning curve for loading hats on the hat module to ensure they're nice and tight. Once I loaded a hat a couple of times, I knew what needed to be done, so just play with it a little bit and you'll know exactly what to do.
Who Is the HTVRont A100 Multi Heat Press For?
I think the HTVRont A100 is perfect for crafters who have limited space, because it is so compact. It would also be great for someone who wants to start a small craft business and needs the different modules and currently doesn't have a lot of space.
Make sure to keep in mind the size restraints of this press. As a small business owner, if you are pressing mostly bulky sweatshirts, this is probably not the right press for you. If you press mostly child-sized items and t-shirts, it could be just what you're looking for.
The same applies to the tumbler press; there are going to be tumblers and mugs that don't fit in the press.
As far as the hat press goes. I think you could do any sized hat. But, if you're doing mostly hats, you may not need everything else the A100 offers.
Is the HTVRont A100 Right for You?
After using the HTVRont A100 to make a variety of projects, I think it is a great press. I think it's exactly what a lot of crafters and small business owners have been asking for. You get an auto-open press with a relatively large heat plate and adjustable pressure in a small footprint.
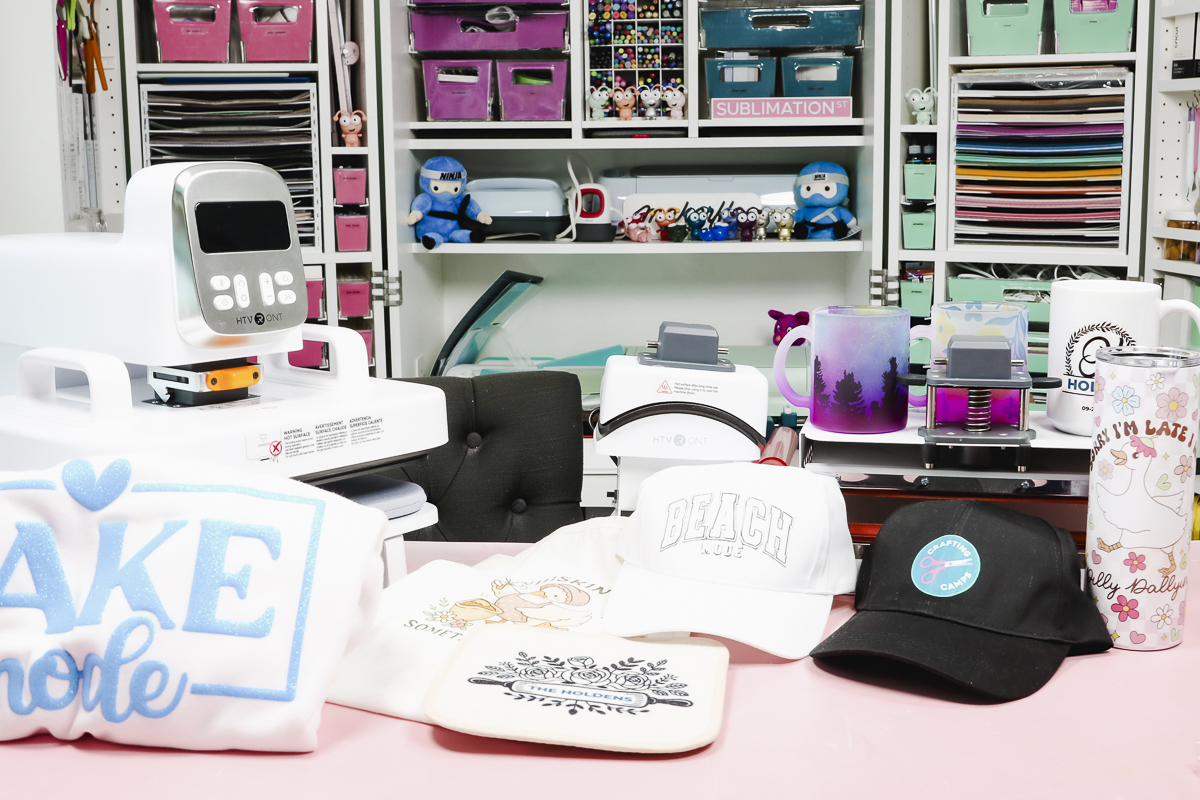
With the purchase of one press, you have the ability to make hats, tumblers, mugs, and anything you need to make with a traditional flat heat press.
I would definitely recommend it for someone needing these features who doesn't have a lot of room to store their craft machines.
I hope I've answered any questions you have about the HTVRont A100. If you have any additional questions, leave them in the comments, and I'll be happy to answer them for you.