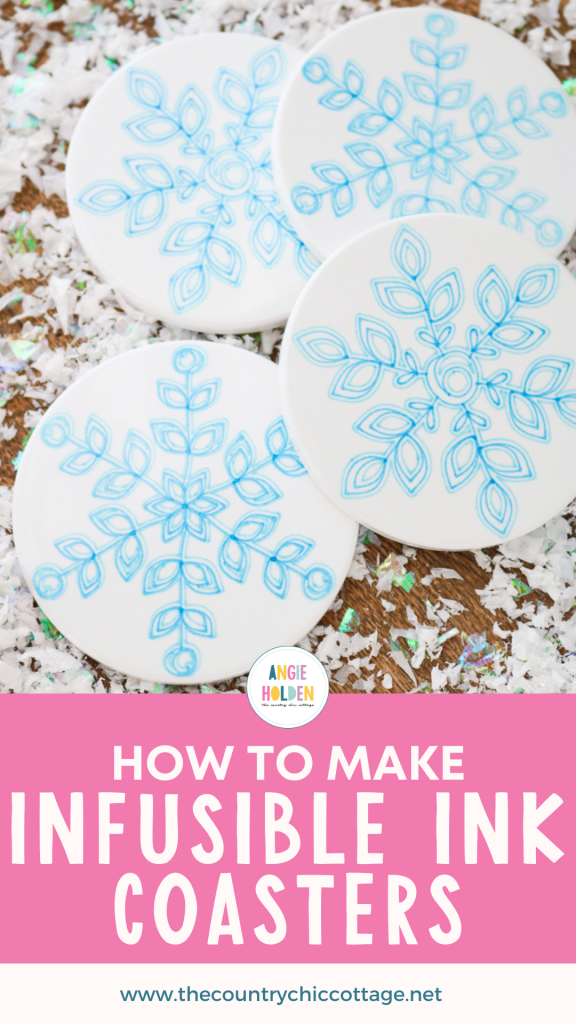
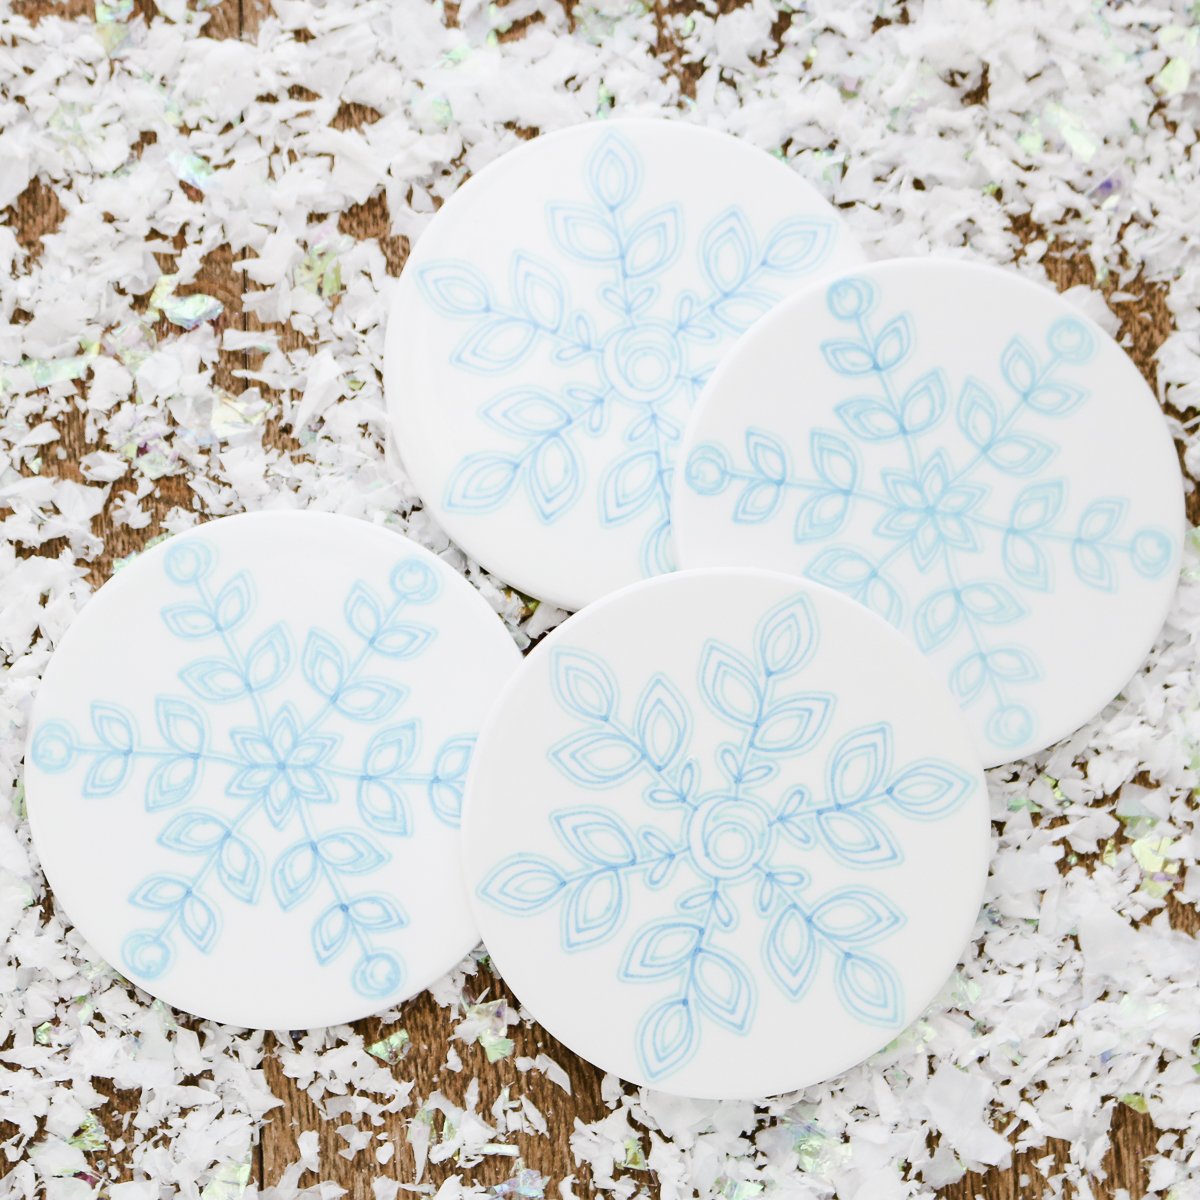
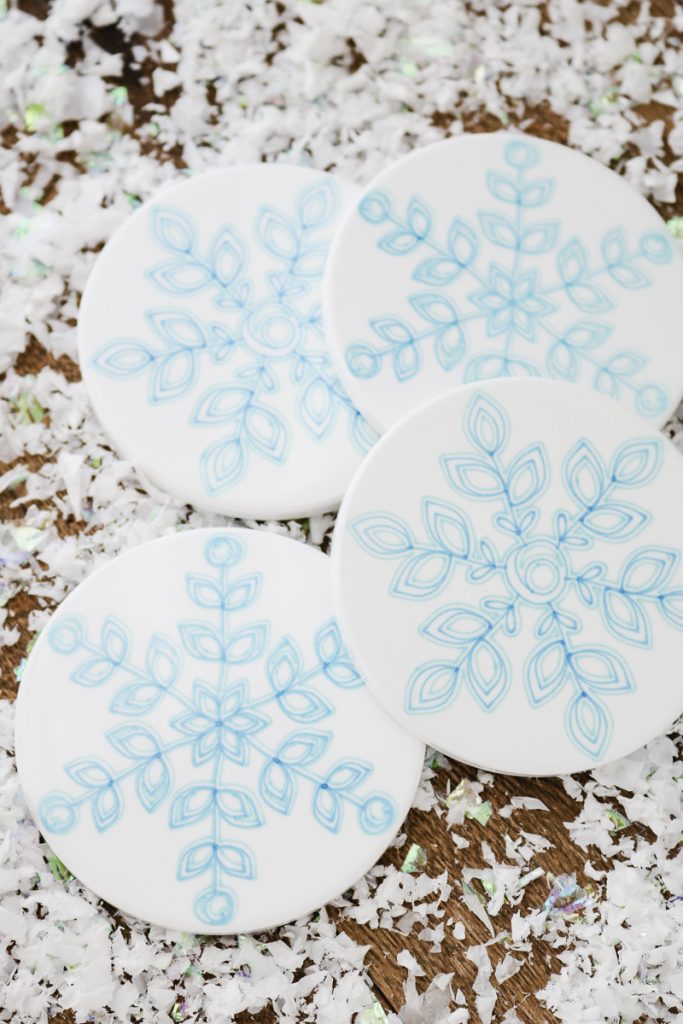
Are you looking for a quick and thoughtful gift idea that’s both unique and stylish? Look no further! Infusible Ink coasters are easy to create and can be transformed into a professional-looking set in just a few minutes. Whether for a birthday, housewarming, or any special occasion, these coasters make the perfect gift, adding a personal touch to anyone's home, including yours!
This was first published on November 25, 2019; however, I am republishing with more information.
Infusible Ink Coasters Video Tutorial
Want to watch me make these coasters with Infusible Ink? I have a video showing you how below.
Can't watch the video? Missed some of the steps? I am also outlining the instructions below.
How to Make Infusible Ink Coasters
As I mentioned before, Infusible Ink coasters make for the best gift! Today, I will show you how to make a set of winter-inspired coasters, but you can easily use this tutorial to create any type of coaster set you wish!
Just remember to always mirror your image in Cricut Design Space before you cut!
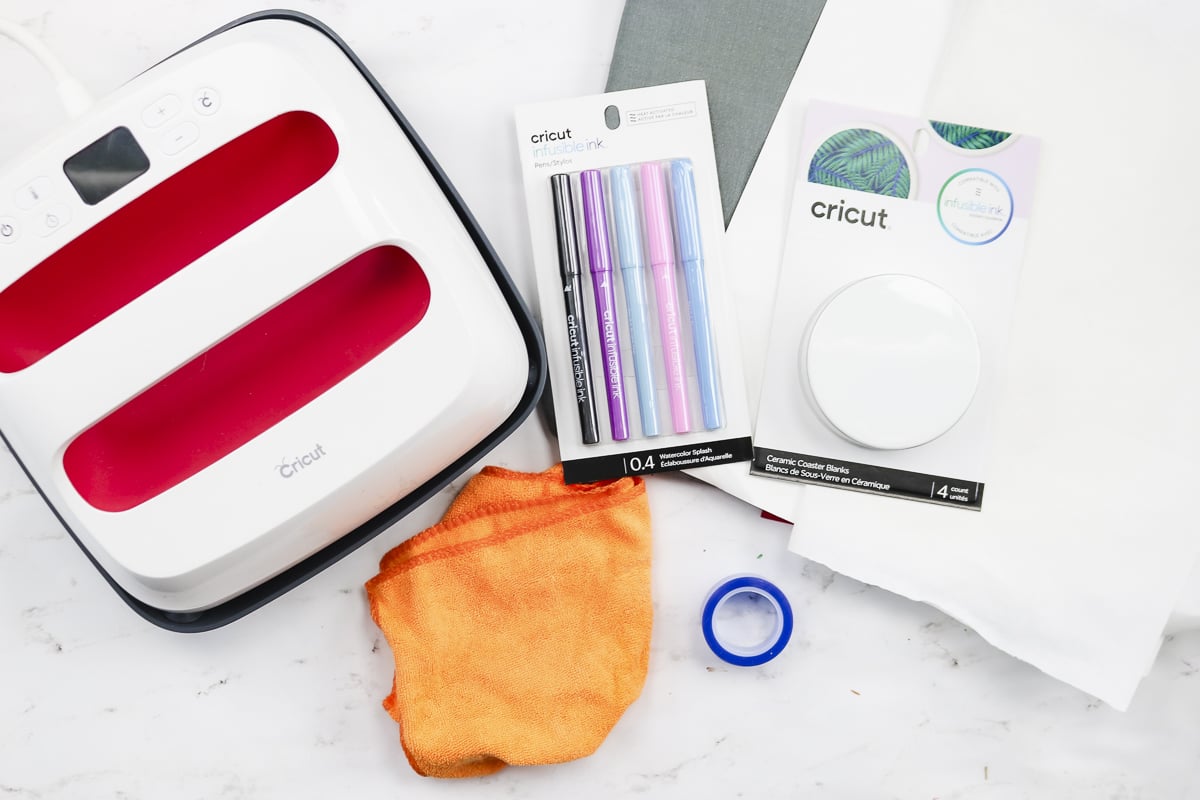
Supplies To Make Infusible Ink Coasters
- Infusible Ink Pens (I used the new watercolor set)
- Cricut Ceramic Coaster blanks
- Cricut cut file
- EasyPress Mat
- Cricut EasyPress
- Lint-free cloth
- White cardstock
- Butcher paper
- Heat-resistant tape
- Blue cardstock (2 shades)
- Black Cricut pen
- Twine
- Laser copy paper
- Scissors
Do you want to learn more about the basics of Infusible Ink? Then check out our How to Use Cricut Infusible Ink the Right Way blog post!
Step 1: Prepare The Designs
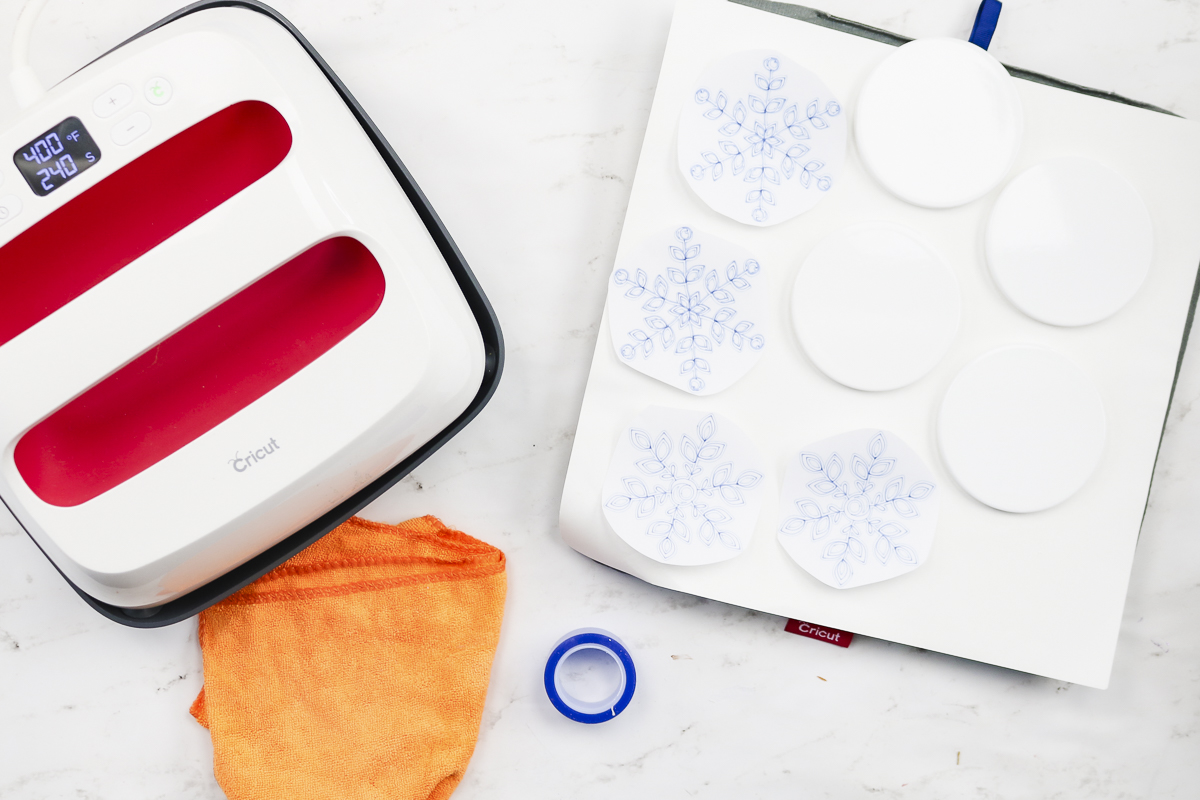
Start by pulling up my profile in Cricut Design Space and scrolling to “Infusible Ink Snowflake Ceramic Coasters”. Click “Make” and draw the designs for your Infusible Ink ceramic coasters on laser copy paper.
You want to make sure the copy paper you use is rated for laser printers so it can withstand the heat.
Use the two blue markers in the watercolor pen pack to draw the designs.
Design Space will prompt you to put in each pen. You can also make your own design, just make sure it will fit on the coaster surface.

Once your design has been drawn, cut the paper as close as possible to the designs. Please note that Infusible Ink colors will brighten once pressed. So don't be discouraged if your colors are not very bright on the paper.
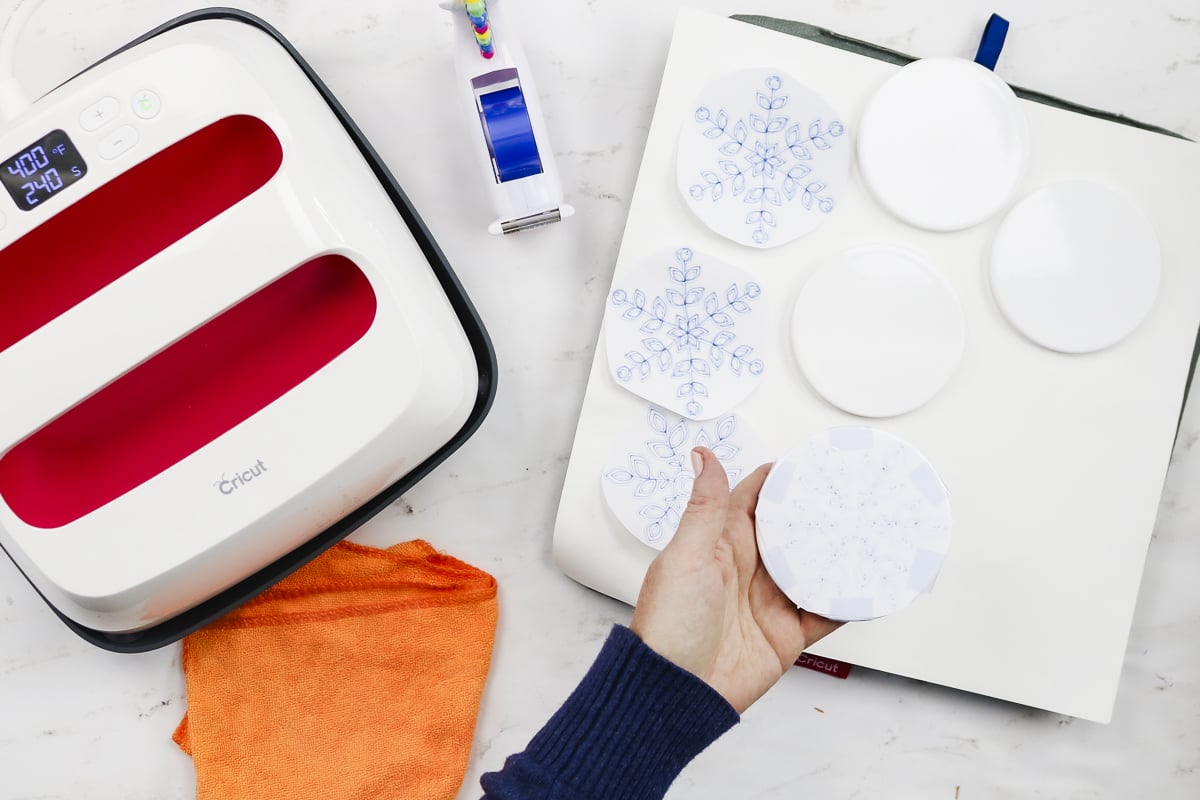
Step 2: Prepare The Coasters
Open your package of ceramic coasters and clean each one with the lint-free cloth. You will be putting the images on the smooth side of the coasters. The matte or rough side is the bottom of the coaster.
Note that Infusible Ink does require a sublimation surface. This will not work with ceramic tiles from your home improvement store.
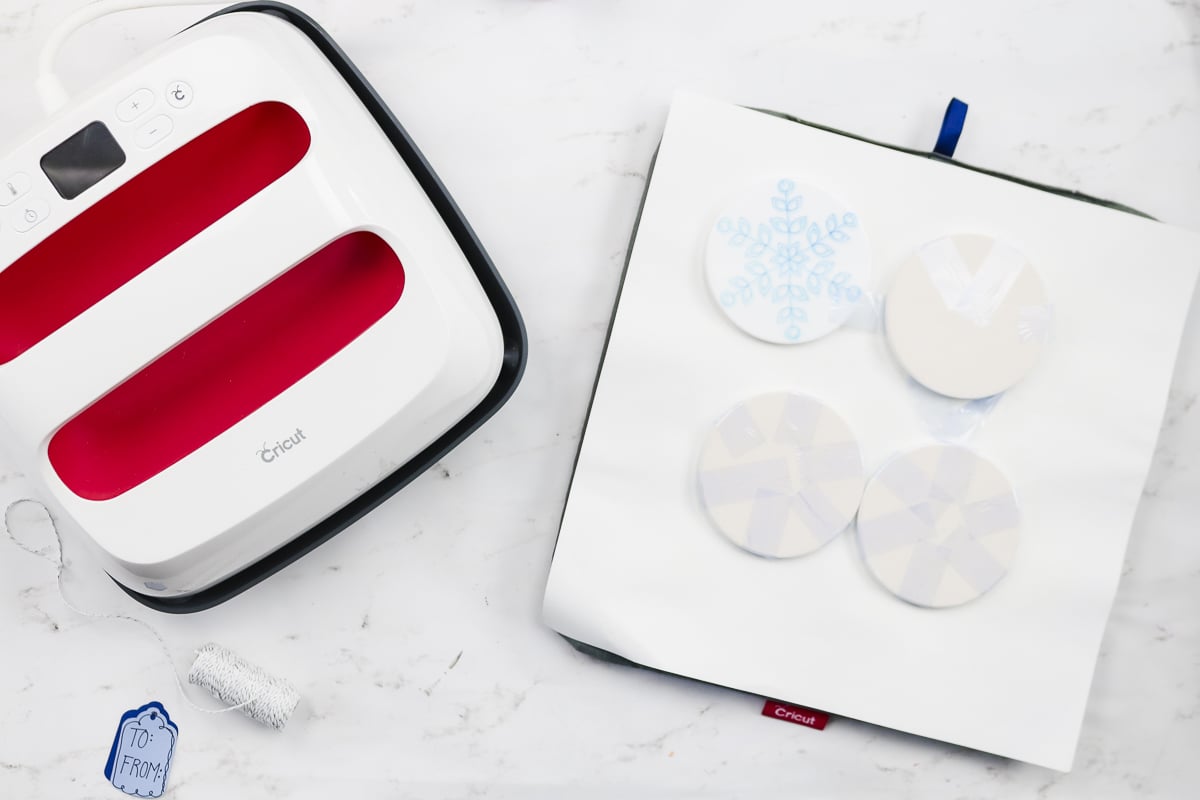
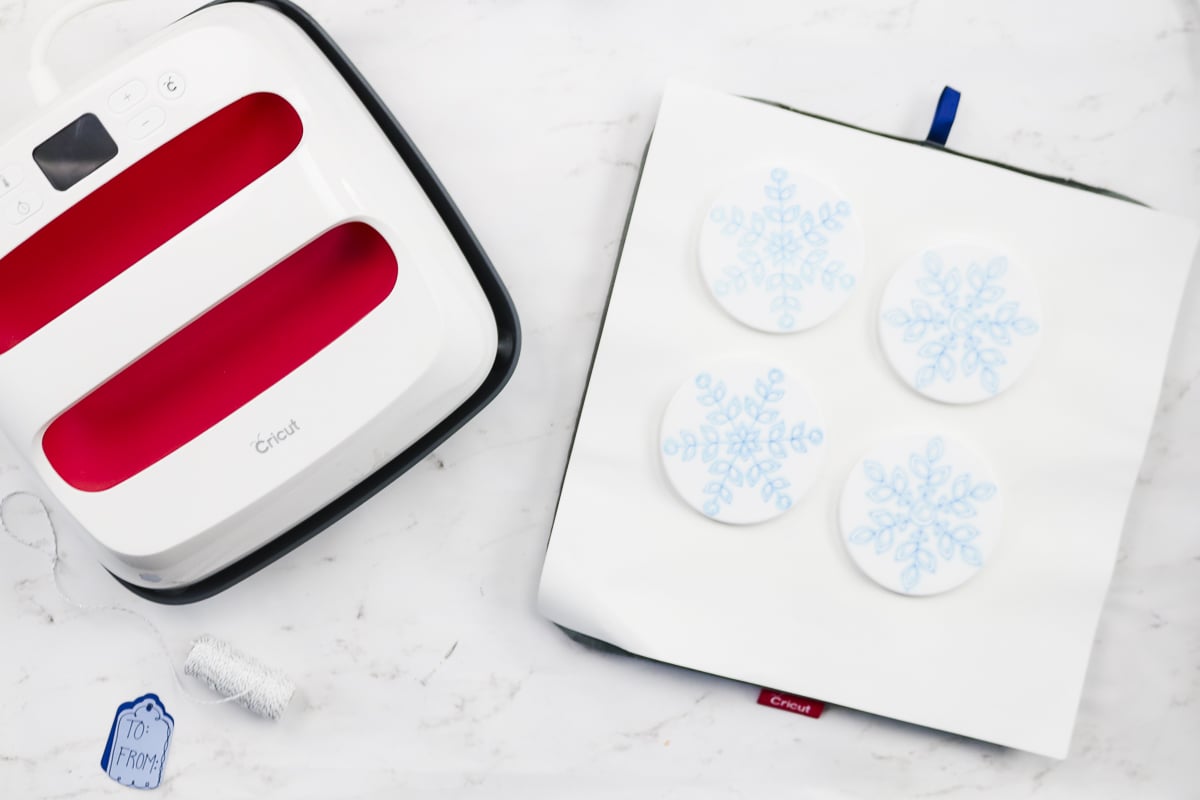
Add the side of the paper drawn on by the Cricut to the top of each coaster, using heat-resistant tape to secure each piece in place. Try to avoid where the writing is when taping. Also, make sure you tape well and keep the paper tight onto the surface.
Step 3: Use The Cricut EasyPress To Infuse Your Design
To infuse your design, place an EasyPress mat on your work surface, then add a piece of white cardstock on top to protect your mat.
Next, place the coasters FACE DOWN on the cardstock. The paper you put on top of the coasters should be against the white cardstock (as shown below).
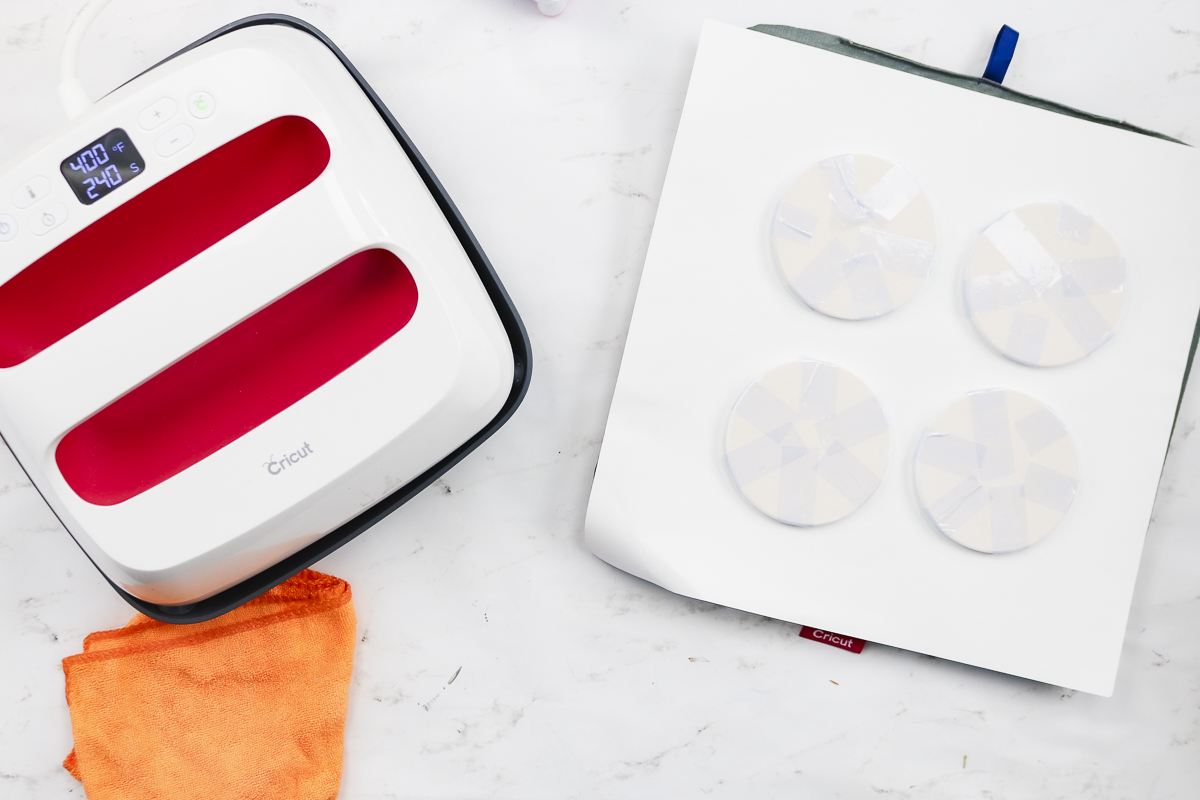
Then lay butcher paper over your coasters to protect your EasyPress.
Place your EasyPress on top of the stack and press according to the instructions on the Cricut Heat Guide. There is no reason to hold or press down on the EasyPress. The machine's weight alone is enough.
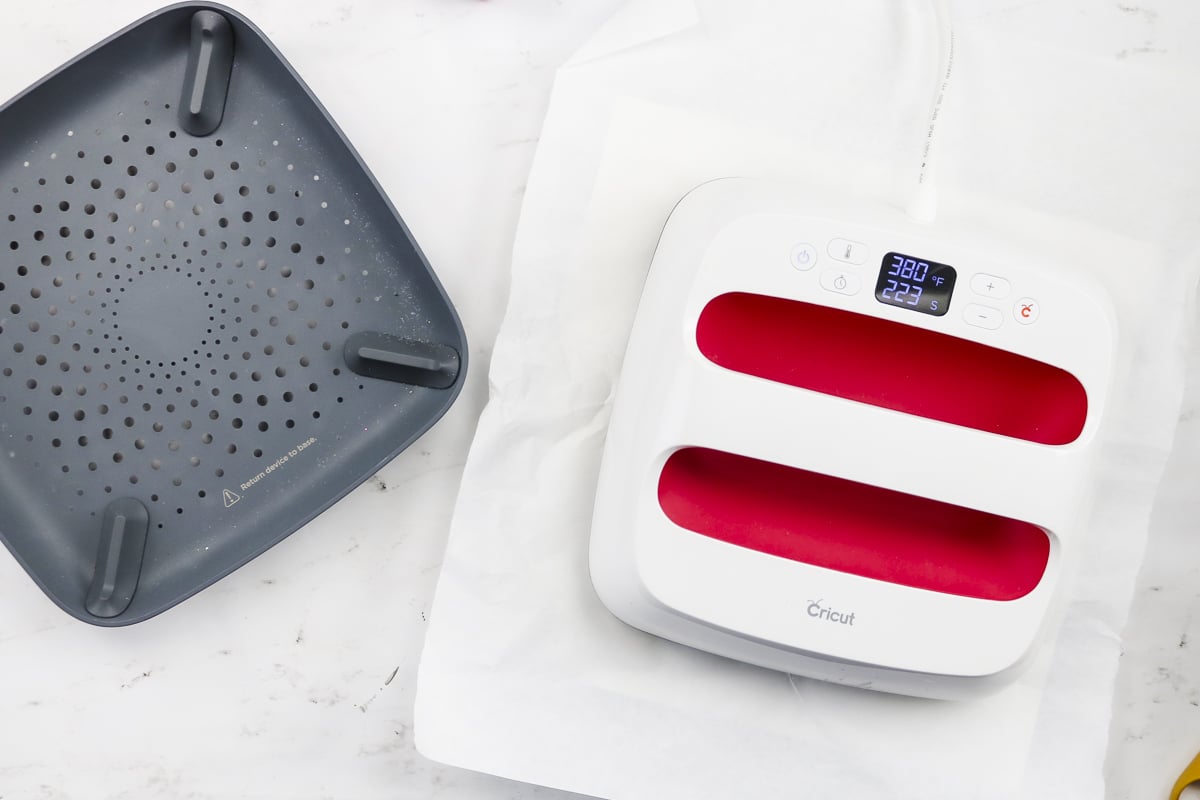
Once the time has elapsed, remove the EasyPress and allow your coasters to cool completely. This will take at least 10 to 15 minutes. Do not touch the coasters while hot! They will burn you!
NOTE: You will want to discard the white cardstock under the coasters, as it may have ink on it, which can ruin other projects.
Once the coasters have completely cooled, remove the tape and paper from the front of each coaster to reveal the design. These coasters are done and ready to use as soon as you remove the paper. They are completely sealed, and no other steps are needed!
Making A DIY Coaster Gift Set
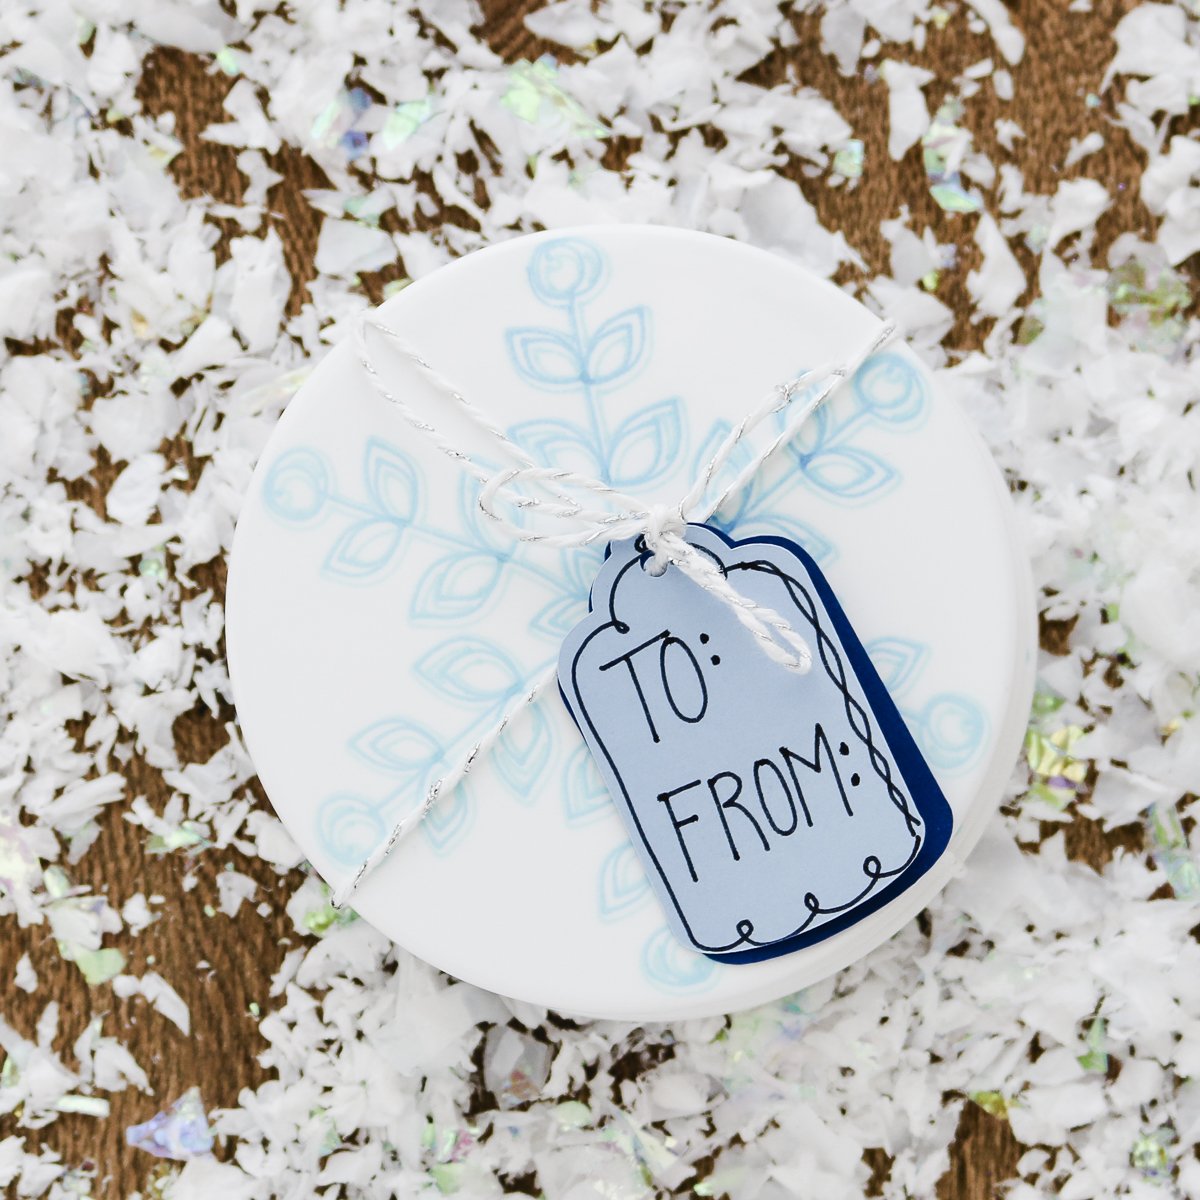
Want to turn these Infusible Ink ceramic coasters into a gift? The Design Space canvas also has a gift tag that you will want to cut!
To turn these coasters into a gift set, wrap them in twine and add the gift tag!
Now you are ready to give this gift for any occasion!
After reading this post or watching the video, all that is left to do is make some coasters of your own with Infusible Ink. You are going to be amazed at how professional these look when they are done!

Now I prefer the ceramic coasters shown in this post, but there are also some square coasters that are more affordable that you can try. You will want to make sure you use the Cricut-branded coasters or another coaster compatible with sublimation.
Then wrap up the gift of DIY coasters for someone special. They are sure to love custom coasters handmade just for them!
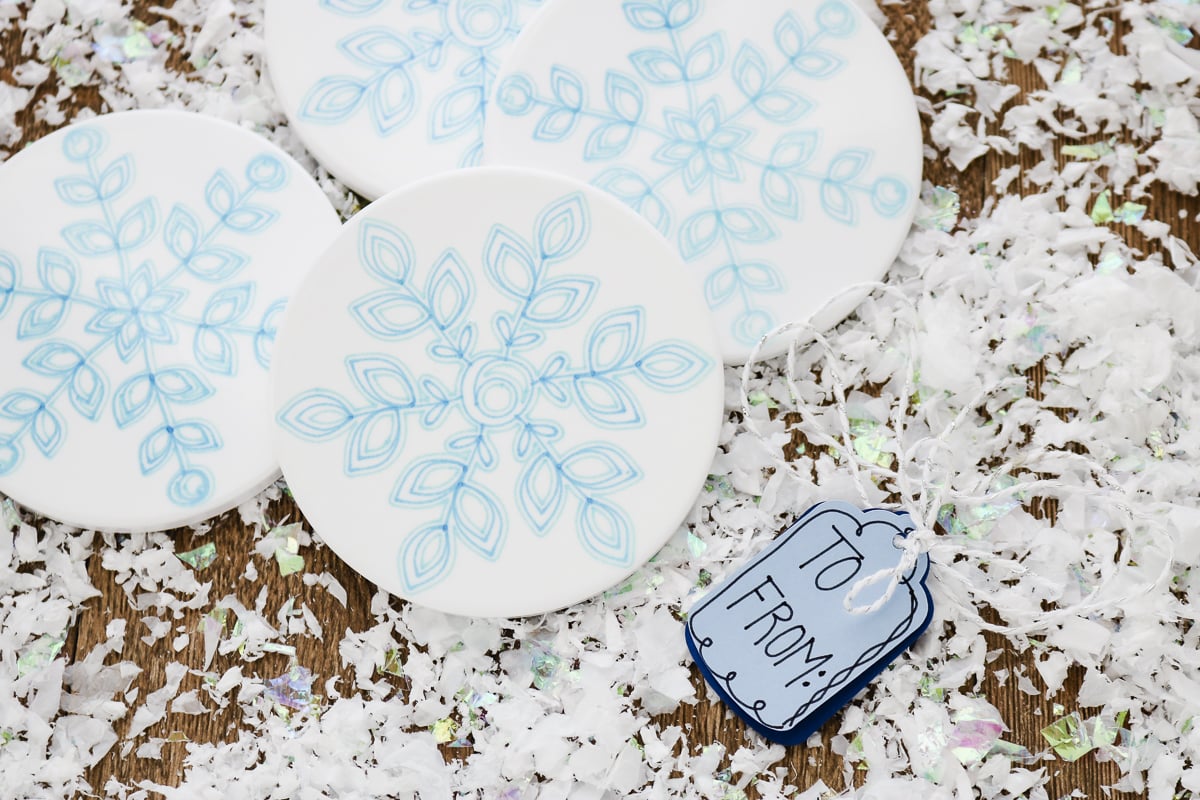
With the quality of these Infusible Ink ceramic coasters, they'll wonder where you purchased these beauties! Just tell them they are handmade with love!
FAQs About Infusible Ink Coasters
Here are answers to some of the most frequently asked questions I receive about creating these Infusible Ink coasters. If your question isn’t listed, feel free to drop it in the comments, and I’ll be happy to help!
Why Can't You Use Regular Tiles?
For the ink to be permanent, it must react with a sublimation coating. This process involves a chemical reaction. If you used a regular tile, the ink would wipe off easily, which is why it is essential to use tiles specifically designed for sublimation.
Why Can't You Use Regular Copy Paper?
Since we are using heat to make our coasters, you need to use copy paper rated for laser printers so it can withstand the heat.
Can You Reuse the Heat Tape?
Yes, you can!
How Long Should I Let The Coaster Cool?
I would let them cool for about 15-20 minutes because the coaster will be extremely hot after you use the EasyPress.
Can I Add Something To The Bottom Of The Coasters?
Yes, you can! If you don't want the coasters sliding around on your table, you can add felt or cork circles to the bottom.
I Am New To Infusible Ink And Submilation. Do You Have Any Resources To Help Me Get Started?
Yes, I do! If you are new to Infusible Ink and Submilation, check out the resources below to learn more about each topic!
- How to Use Cricut Infusible Ink the Right Way
- Sublimation for Beginners: Your Guide to Getting Started
- The One Sublimation Course You Need!
- How to Prevent Dull Sublimation for Vibrant Results
- How to Fix Lines in Sublimation Prints
- What Sublimation Pads and Pillows Do You Need?
5 More Infusible Ink Crafts
Do you love these Infusible Ink coasters and want more Infusible Ink crafts? Then check out the projects below!
- DIY Makeup Bag with Cricut Infusible Ink
- Distressed Infusible Ink Shirt How-To Tutorial
- DIY Mouse Pad with Cricut Infusible Ink
- Make Your Own Koozie with a Cricut
- Cricut Infusible Ink Watercolor Coasters