

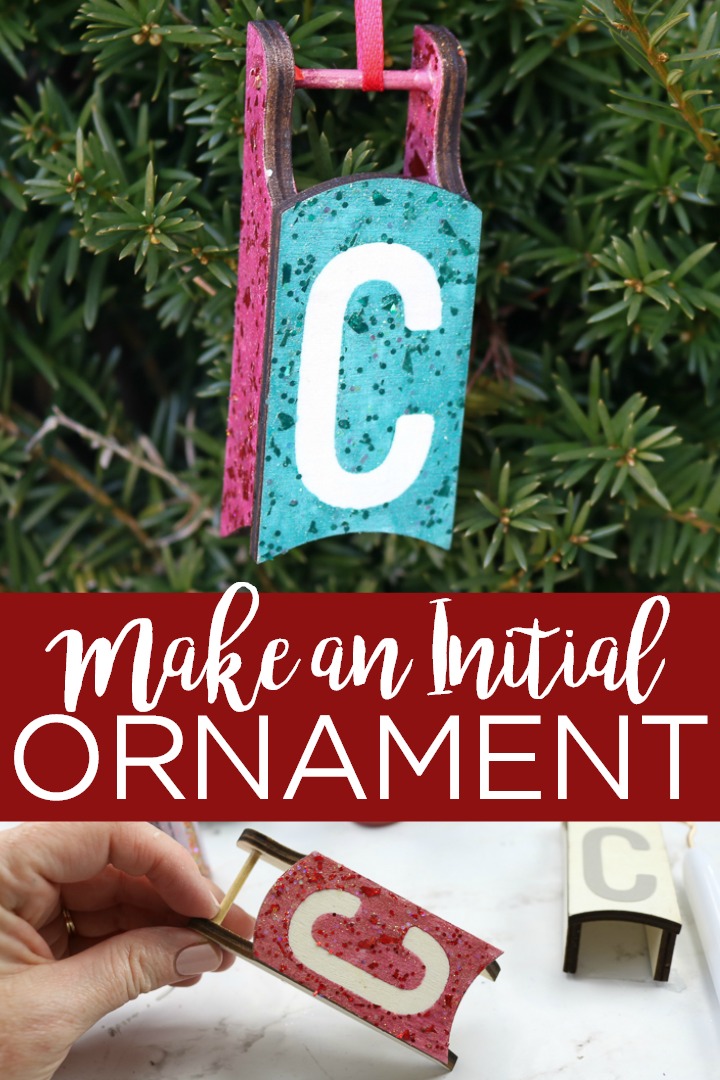
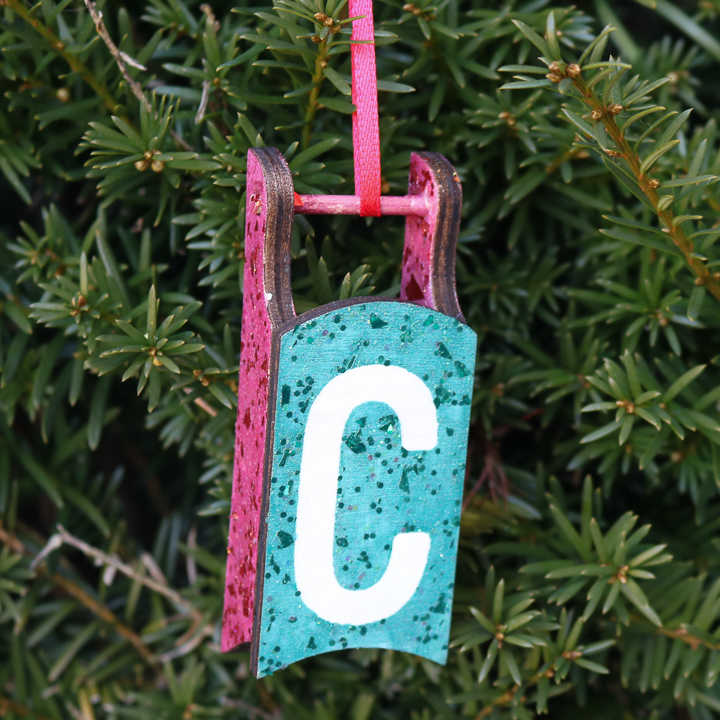
You can make an initial ornament with a small wood sled and some glitter paint! This fun project is perfect for kids and your Christmas tree! I am using my favorite glitter paint and a small wooden sled ornament for this one as well. Add a personalized touch with an initial, too! If you are wondering about the best paint for all your holiday glitter crafts, keep reading!
I am wrapping up glitter Craft Lightning week today with a fun initial ornament that even kids can make. If you have missed any of the Craft Lightning fun this week, you will want to catch up with day 1, day 2, day 3, and day 4. You will also want to scroll to the bottom of this post to see more glitter ideas from our partner bloggers for today.
If you've been around here long, you know how much I love the Christmas season! I love making all of the special crafts for our loved ones and friends. There's something about handmade ornaments that make decorating your Christmas tree so special and fun.
I especially love creating wooden ornaments. They add a rustic flare to your tree! If you love farmhouse Christmas vibes, check out the Santa wood slice ornaments, wooden snowman ornaments, or the wooden spool Christmas tree ornamants.
Just like with so many other projects, this craft is super easy to make and can be personalized with your own flare and style. Plus, you can add an initial to the sled for a monogram. Let's get crafting!
How to paint an initial on an ornament
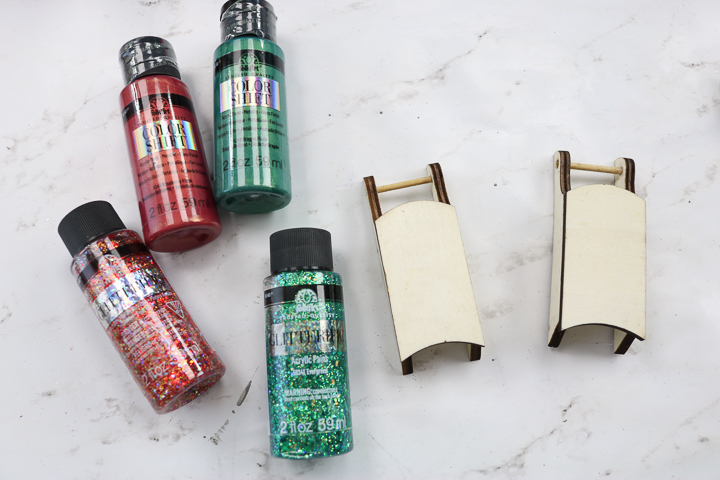
Supplies to make an initial ornament:
- Wooden sleds
- FolkArt Color Shift Paint
- FolkArt Glitterific Paint
- Paintbrushes
- Letter stickers or you can cut vinyl with a Cricut
- Ribbon
- Scissors
Instructions
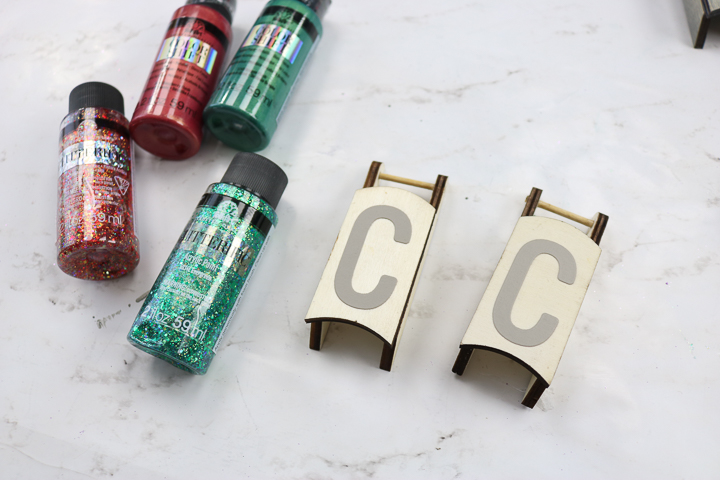
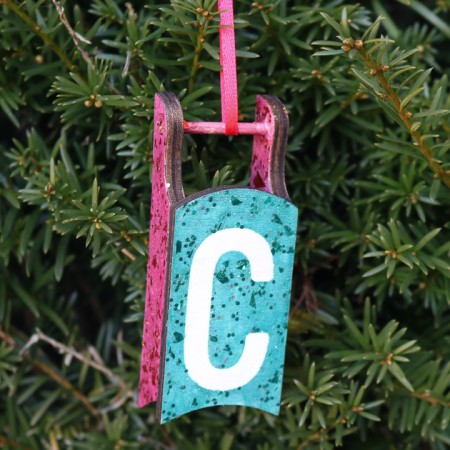
Start by applying the letter stickers to the plain wood ornaments. You can also cut vinyl with your Cricut machine and use it for this step. I did this over the plain wood allowing it to show through on my final piece. You can also paint or stain the wood before starting with the masking.
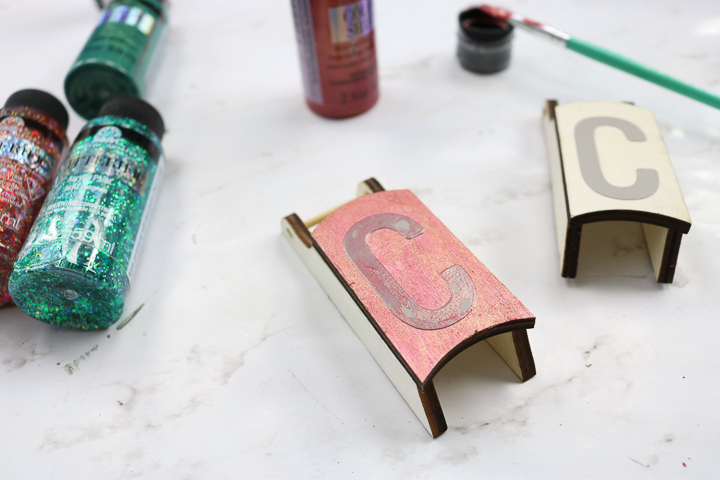
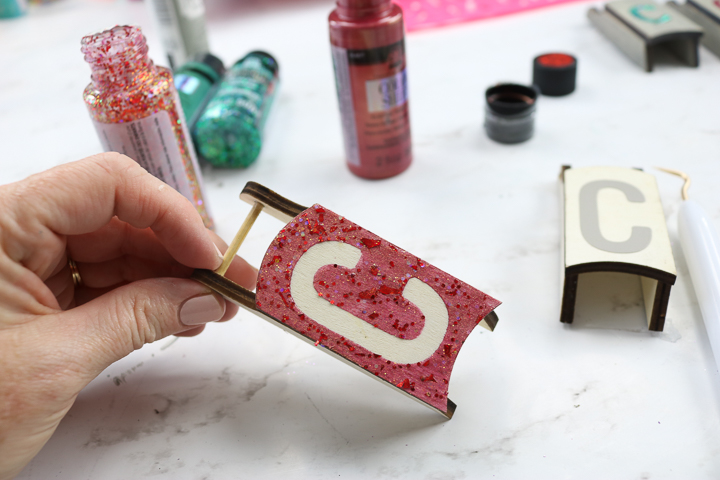
Paint one coat of paint over the letter. I used the FolkArt Color Shift as it has some shimmer to it but regular craft paint would work as well. NOTE: I left the dark brown edges unpainted but you can paint those as well.
Then put a coat of the Glitterific paint right over the top. All of those bits are in one bottle which is what I love about this paint. You get an amazing look with large and small bits all in one bottle. You don't have to allow the first coat to dry. Just go right over it with the glitter paint.

While the paint is still wet, remove the letter sticker. You can use a needle or hook to help you pick it up. Discard the masking.
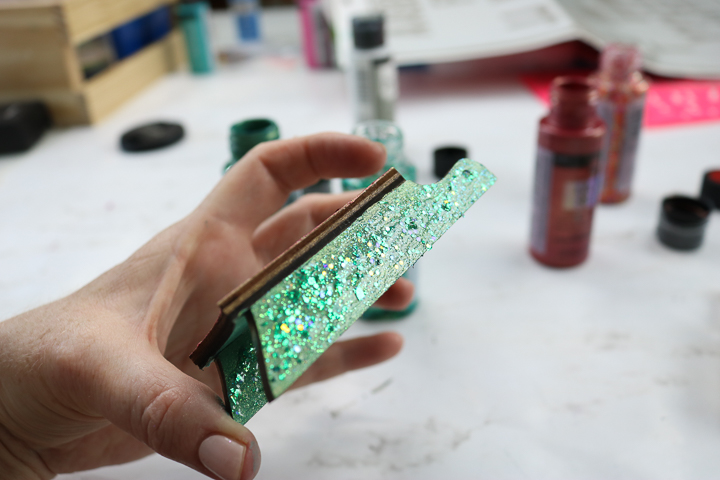
I used a green color shift and glitterific paint on the other parts of the sled. You can use the same color as the top if you wish.
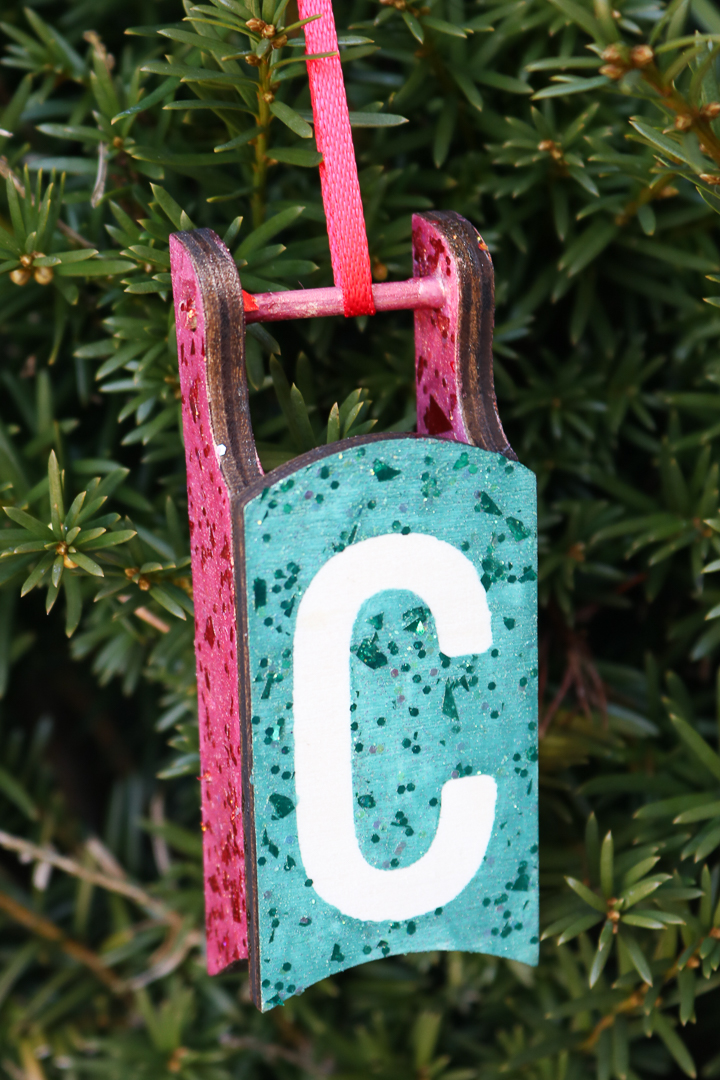
Allow everything to dry completely then add a ribbon for hanging on your Christmas tree.
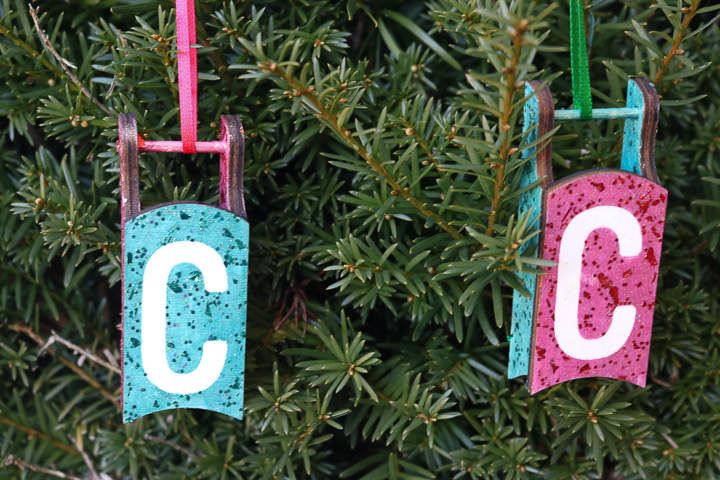
This one is definitely easy enough for the kids to make but cute enough that you could even use it as a present topper. I made all the “C” ornaments since my grandson's first names both start with C. You can personalize this ornament for anyone in your life.
So, will you be making your own initial ornament this holiday season?
Love this monogram ornament and want more glitter craft ideas? Try the links below!
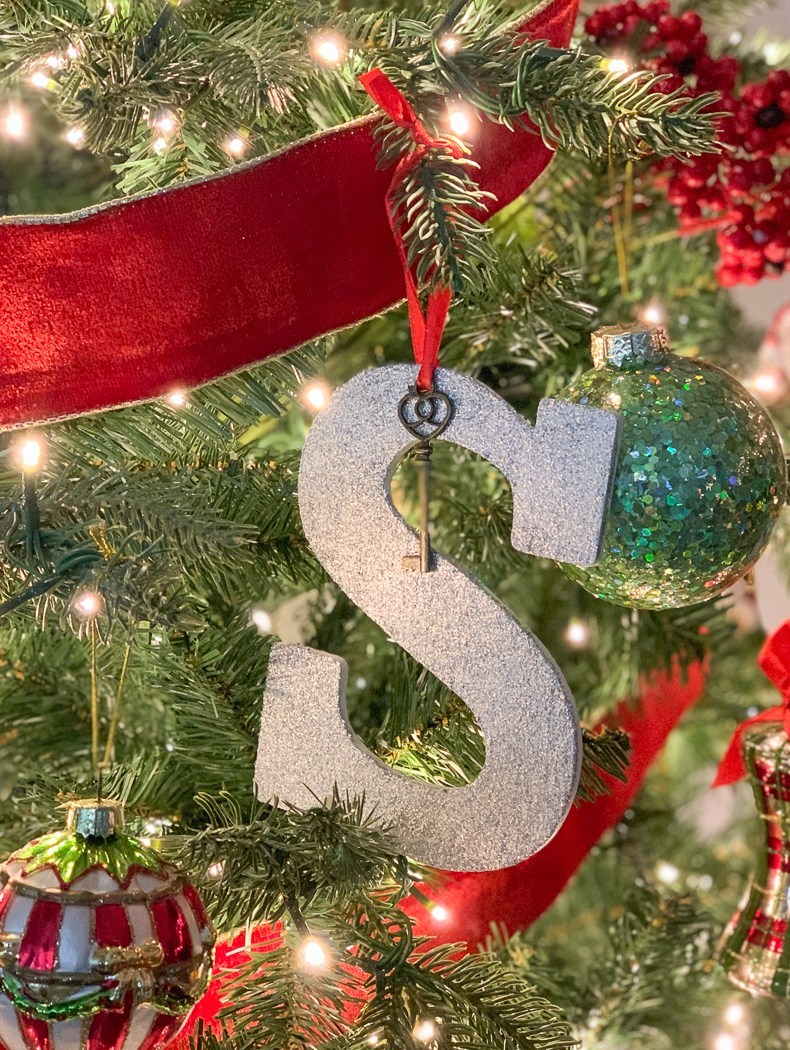
I love the idea of this glitter Santa key from Everyday Party Magazine.
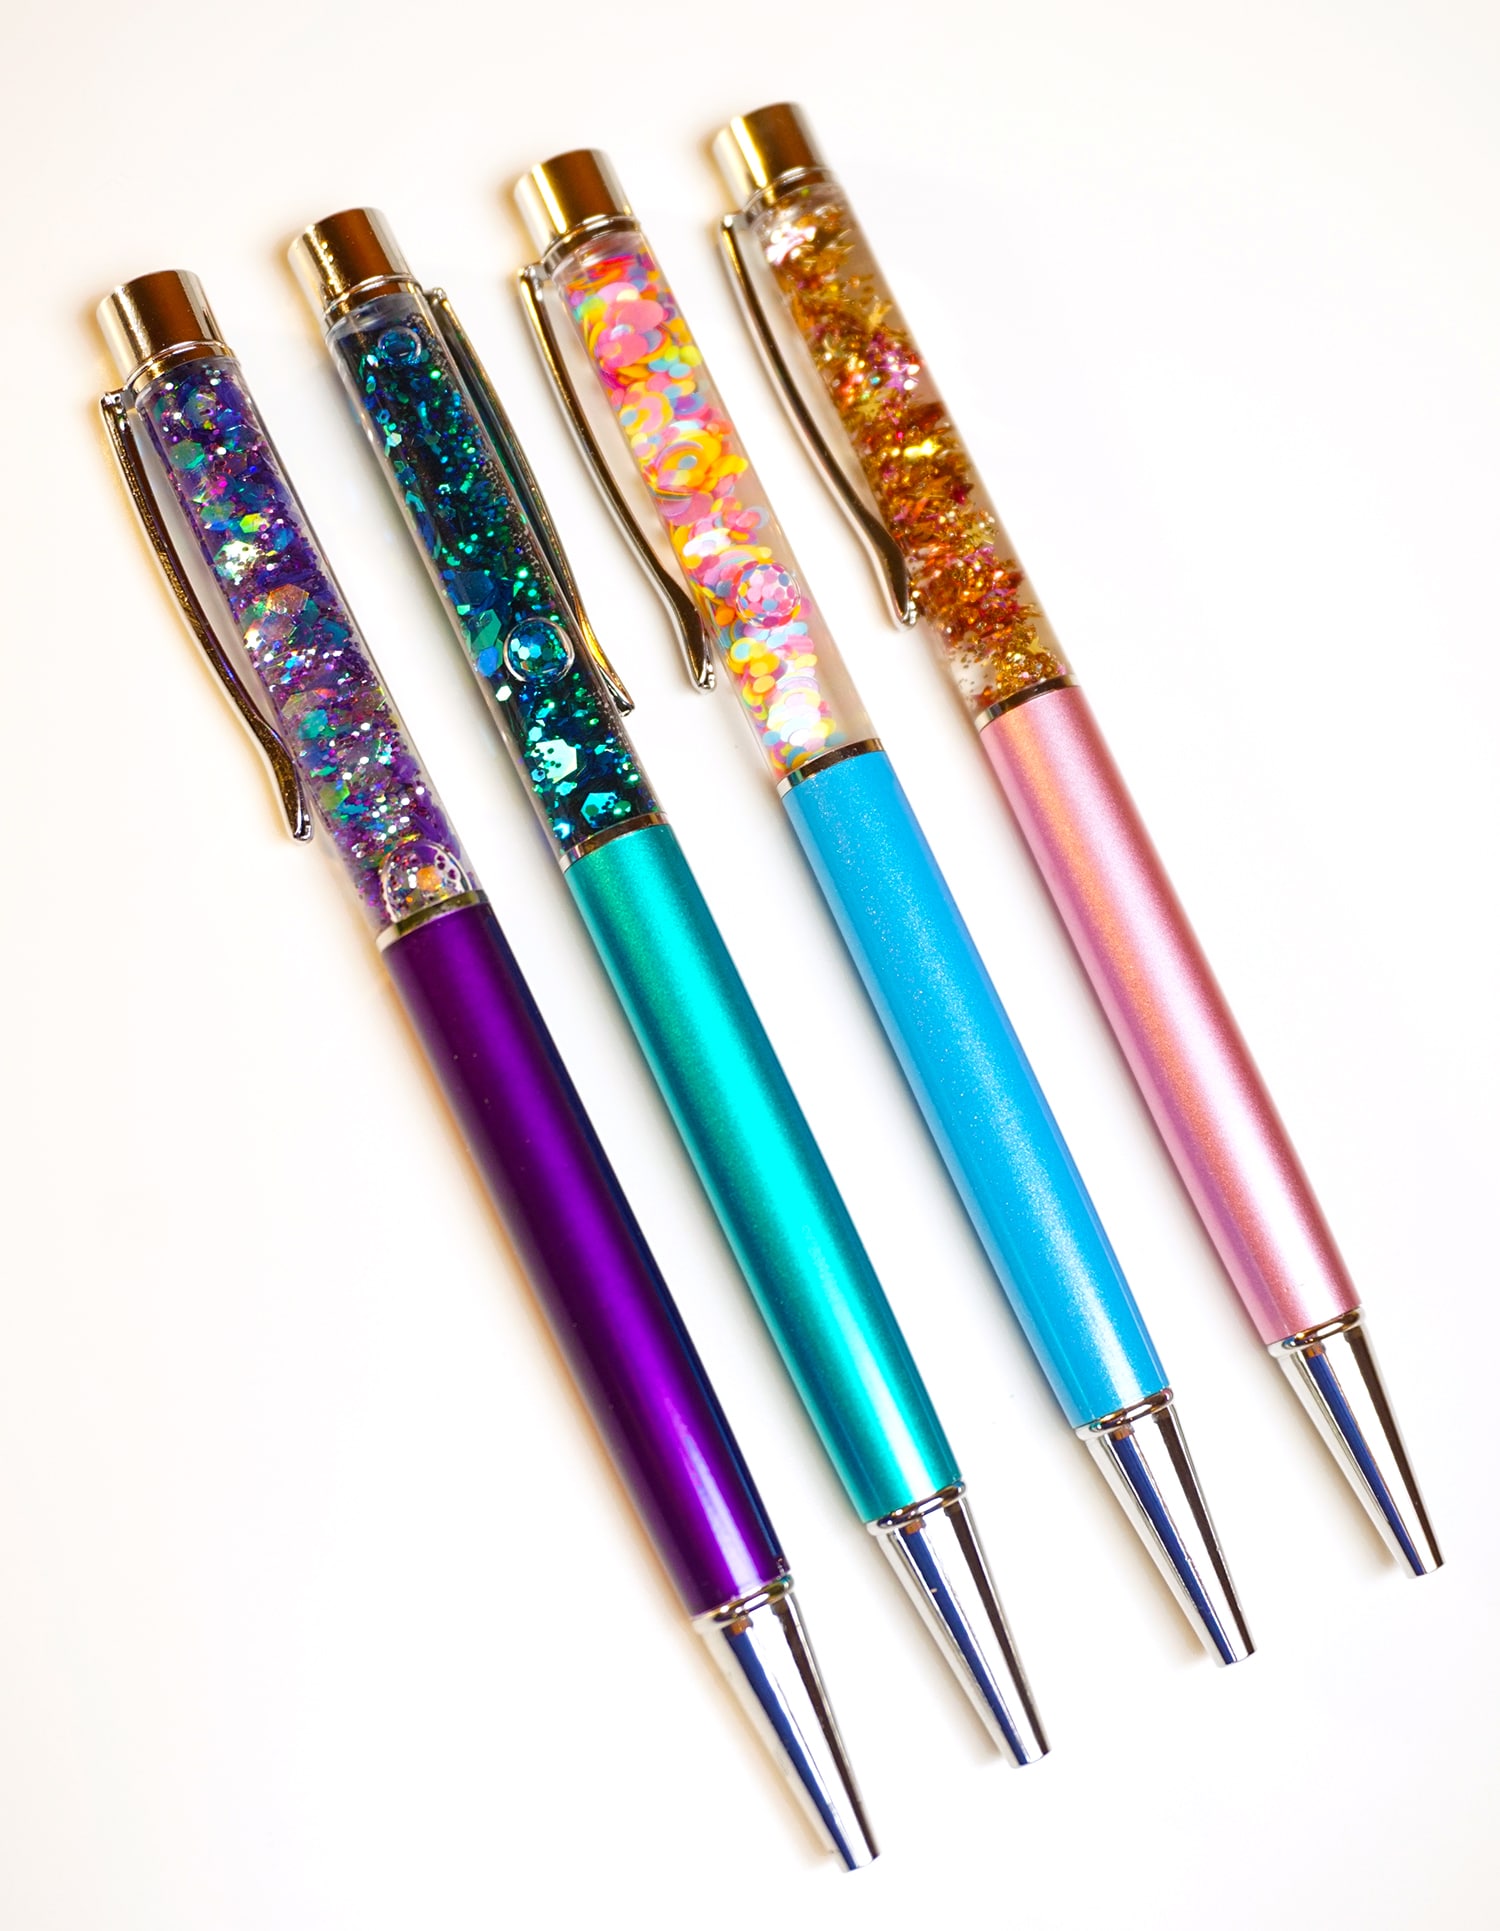
Looking for stocking stuffers? Try making these DIY glitter pens from Happiness is Homemade.
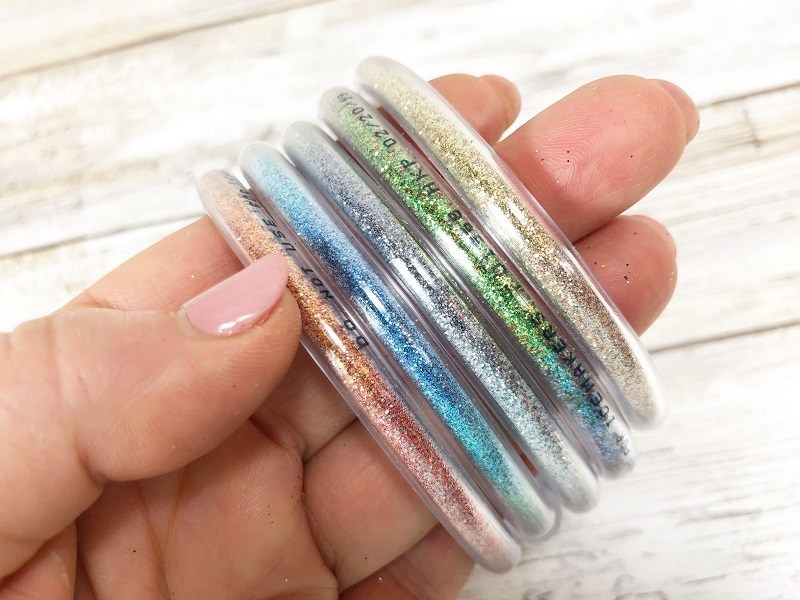
Another stocking stuffer idea is these DIY glitter bracelets from Creatively Beth.
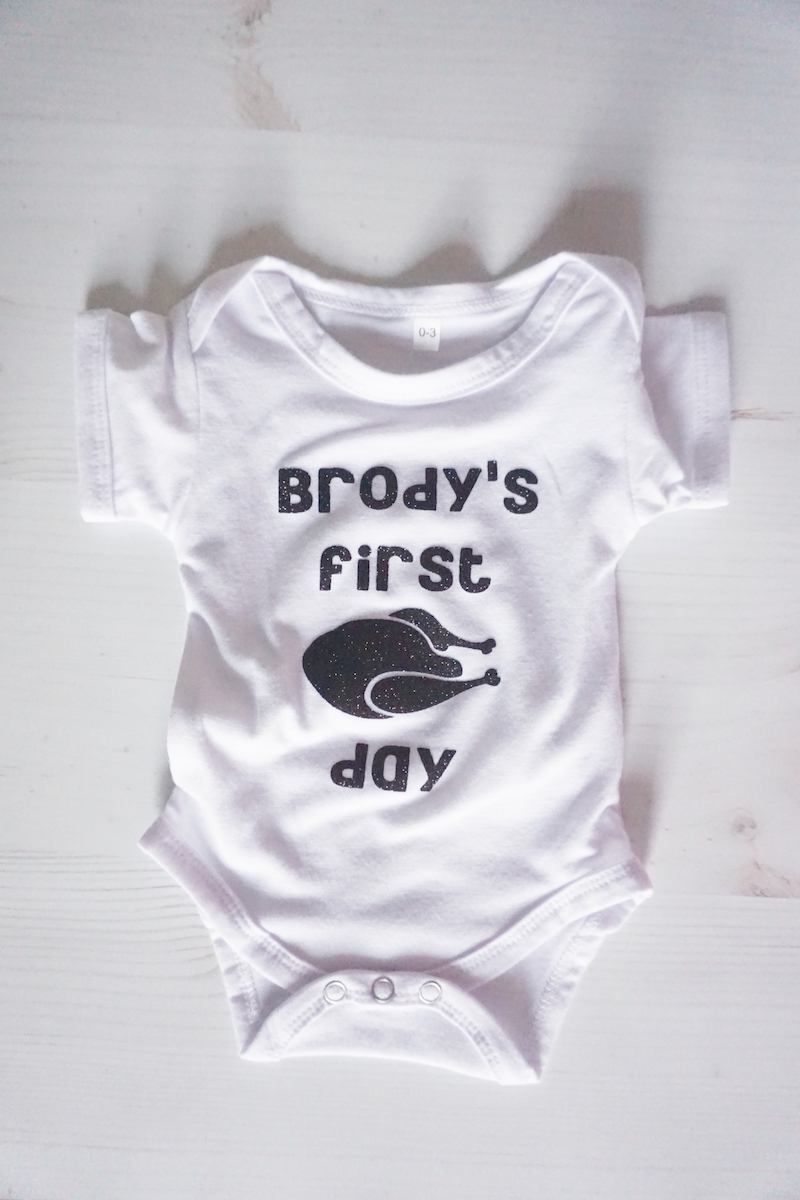
Make your little one a personalized Thanksgiving onesie like this one from Underground Crafter.
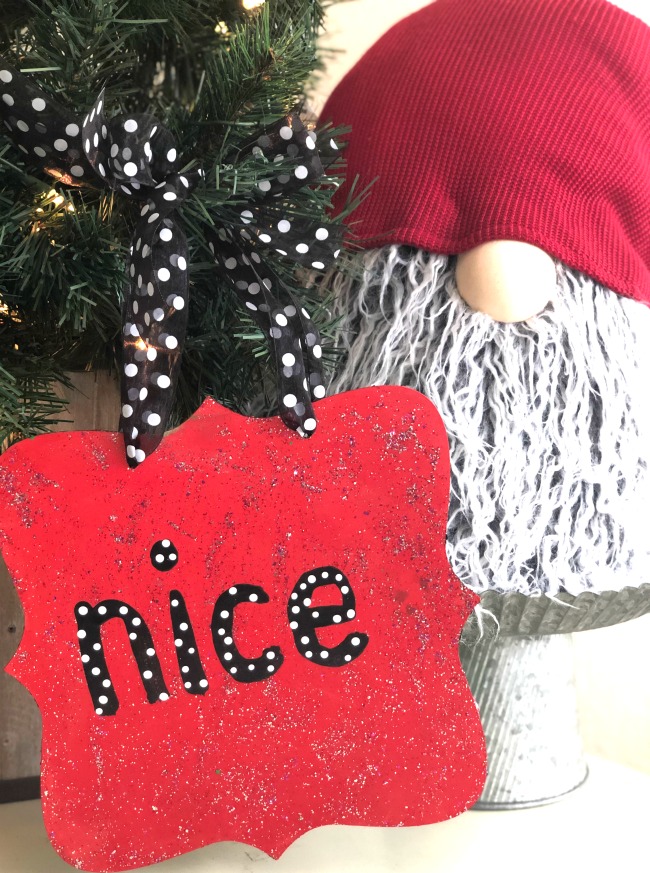
See if you have been good this year with this naughty or nice glitter sign from Laura Kelly Designs.
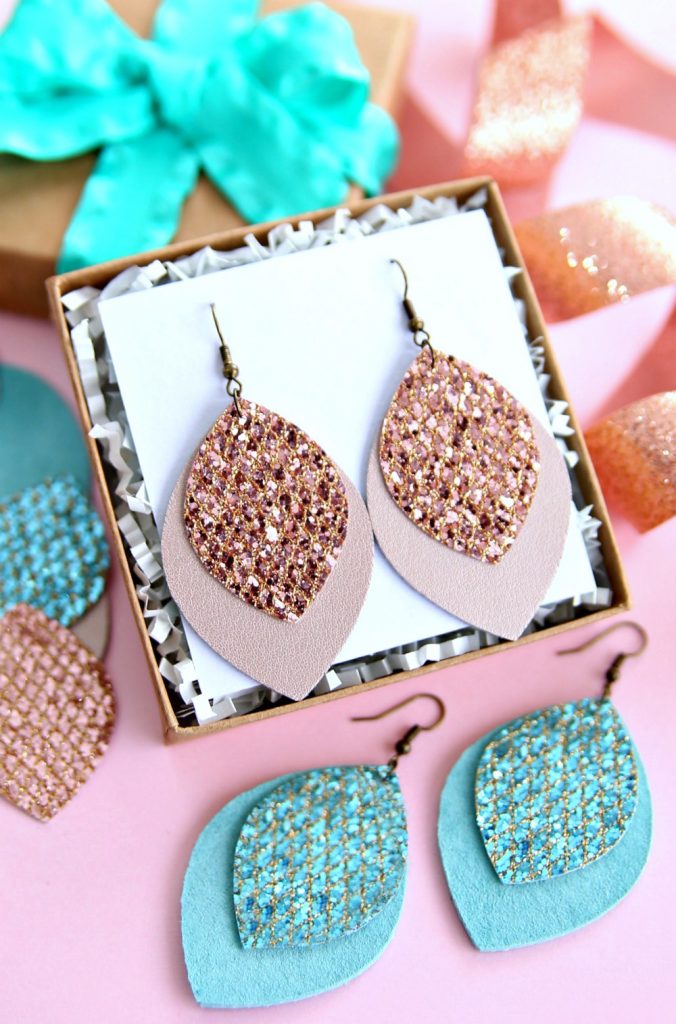
You can also whip up a pair of glitter leather earrings like these from Happy Go Lucky.
Every mom will love this mom juice wine tumbler from A Sweet Berry.

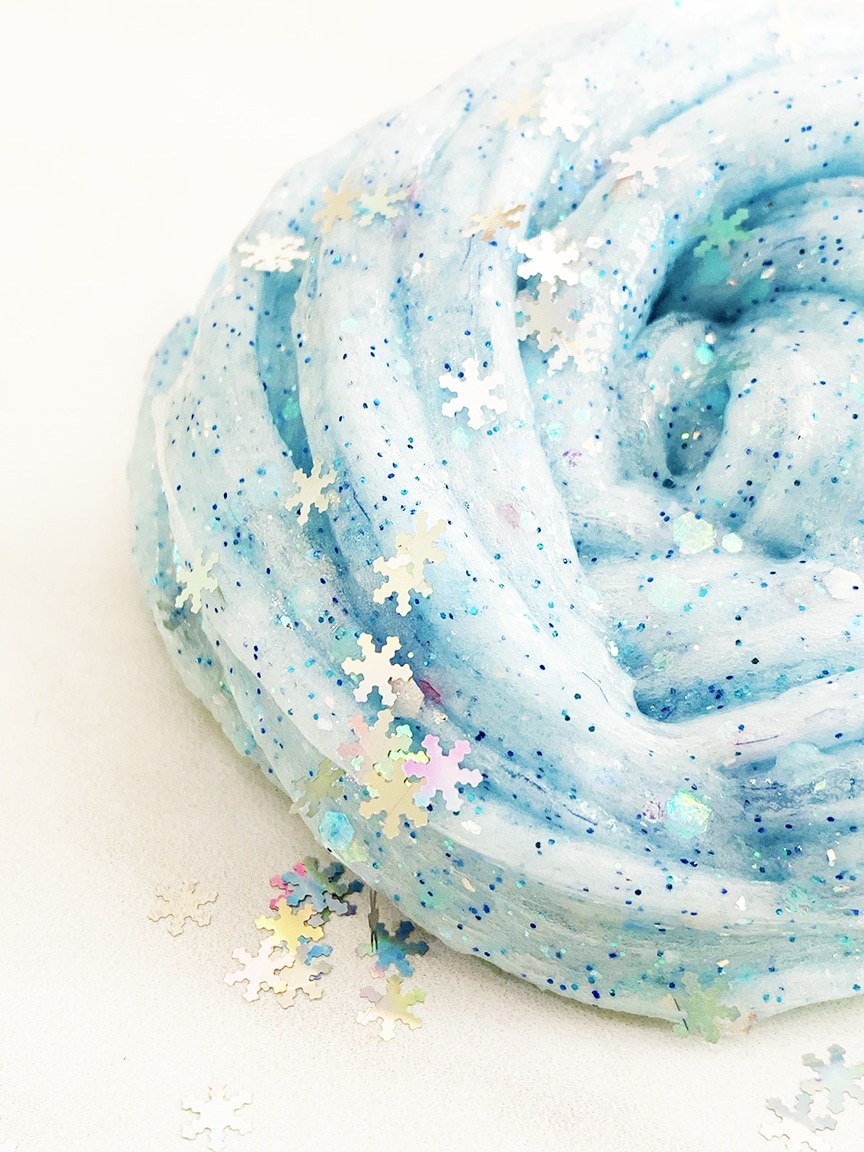
The kids will love this frozen inspired glitter slime recipe from our co-hostess Pineapple Paper Company.
So, make your own initial ornament or any of these other glitter crafts for the holidays. We will be back with a round up of all of the glitter goodness from this week just in case you missed anything.
Equipment
- Ribbon
Supplies
- Wooden sleds
- FolkArt Color Shift Paint
- FolkArt Glitterific Paint
- Letter stickers or you can cut vinyl with a Cricut
Instructions
- Start by applying the letter stickers to the plain wood ornaments. You can also cut vinyl with your Cricut machine and use it for this step. I did this over the plain wood allowing it to show through on my final piece. You can also paint or stain the wood before starting with the masking.
- Paint one coat of paint over the letter. I used the FolkArt Color Shift as it has some shimmer to it but regular craft paint would work as well. NOTE: I left the dark brown edges unpainted but you can paint those as well.
- Then put a coat of the Glitterific paint right over the top. All of those bits are in one bottle which is what I love about this paint. You get an amazing look with large and small bits all in one bottle. You don’t have to allow the first coat to dry. Just go right over it with the glitter paint.
- While the paint is still wet, remove the letter sticker. You can use a needle or hook to help you pick it up. Discard the masking.
- I used a green color shift and glitterific paint on the other parts of the sled. You can use the same color as the top if you wish.
- Allow everything to dry completely then add a ribbon for hanging on your Christmas tree.


