
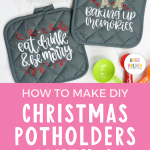
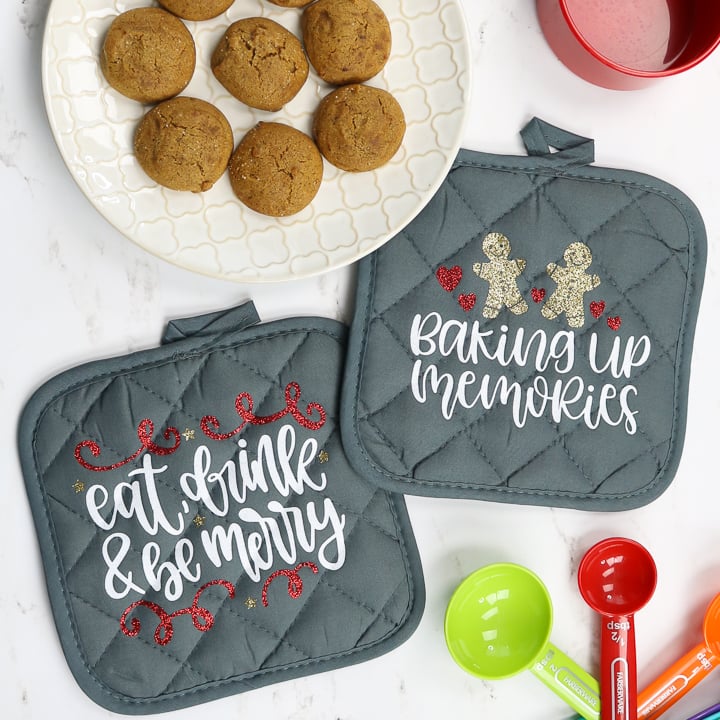
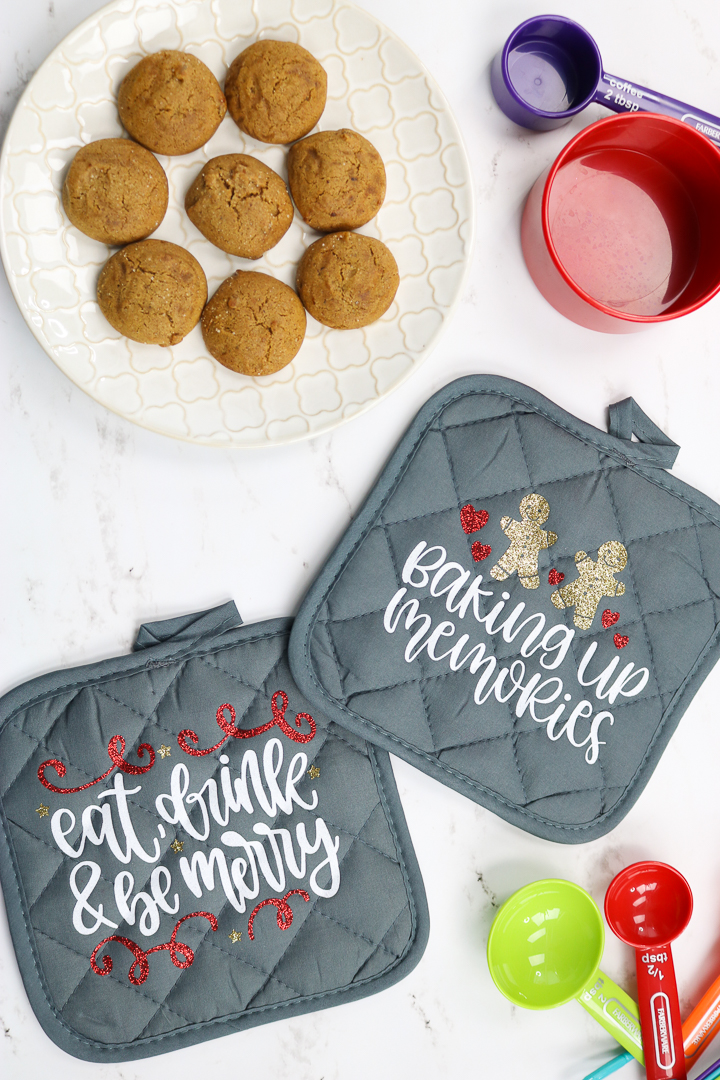
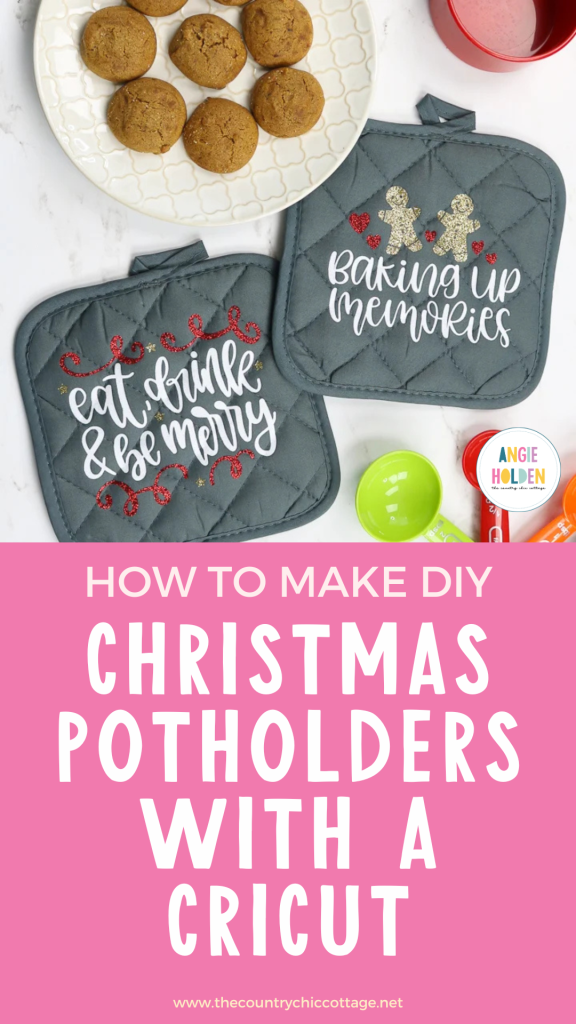
Bring your Christmas decor into the kitchen by making some adorably festive DIY Christmas potholders. They're a cinch to make with your Cricut!
DIY Christmas potholders are great for use in your own kitchen, but they also work great for adding to a gift basket during the holiday season. Or make them as a cute Secret Santa gift!
I love projects like this that come together quickly but look like you spent all day (or more!) on them.
Keep reading to see how to get your own Christmas potholder SVG cut files for this project and how to use glitter heat transfer vinyl to really make them shine!
NOTE: If you love simple Christmas Cricut projects, make sure you check out my Christmas Gnome Banner, Christmas Shapes SVG Files, and Christmas Lights SVG Monogram Frame!
Video Tutorial For Making Christmas Potholders With A Cricut
Hello, visual learners! Sometimes it's just easier to learn how to make something with a video tutorial. You can watch me make these Christmas potholders below. Feel free to follow along and make it with me!
Can't watch the video or missed some of the steps? Then just keep reading for the step-by-step instructions.
How To Make Christmas Potholders
The process of making these DIY Christmas pot holders is very easy. Similar to our Felt Christmas Tree project, this craft uses the Cricut machine. Just follow these instructions!
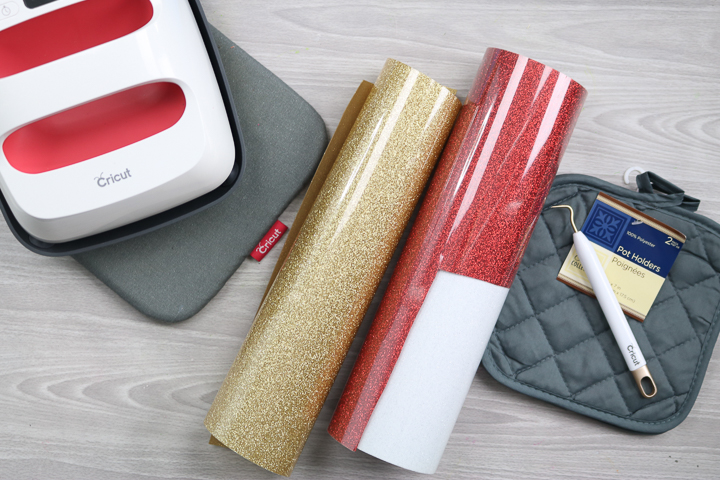
Supplies Needed To Make Christmas Potholders
- Potholders (I picked these up at my local Dollar Tree.)
- Glitter iron-on in white, red, and gold
- Cricut machine (you can see which I like here)
- Cricut EasyPress
- EasyPress mat
- Weeding tools (optional)
- Scissors
- This project is made with Design Space files. Click here for my profile. Once on my profile, find the image of the project you want to create, click it to open it up, and then you can make it yourself.
- Iron-on protective sheet or parchment paper
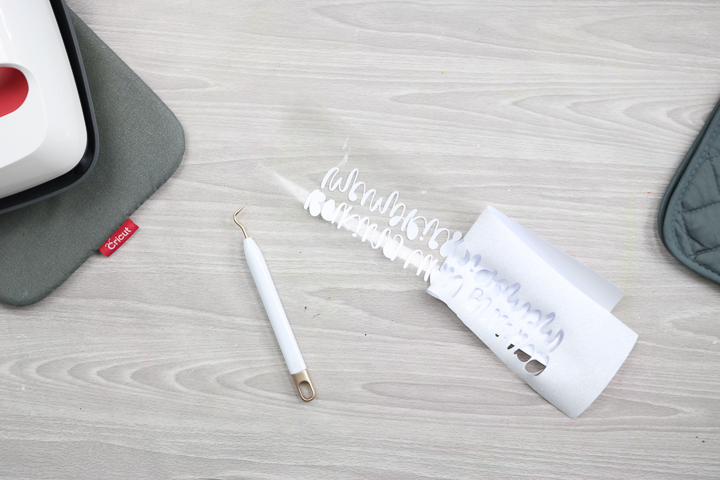
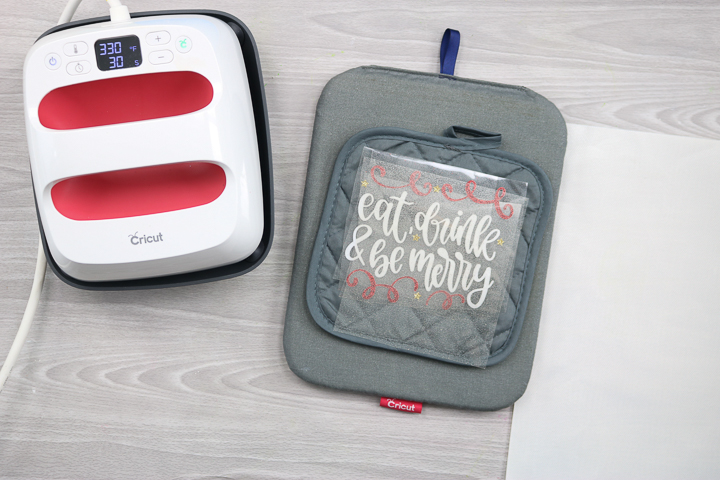
Step 1: Cut & Weed Design
Start by going to my Design Space profile and scrolling to “Holiday Pot Holders” to cut your pieces from glitter heat transfer vinyl.
Don't forget to mirror the mats before cutting them. Cut with the good side down on your mat. You can read more about the basics of cutting iron-on here.
After cutting, use your weeding tools to remove all excess from around your design as well as the centers of any letters.
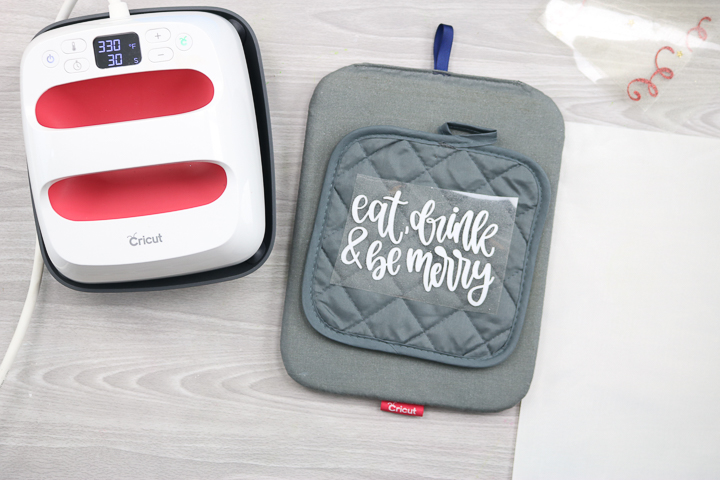
Step 2: Position Design On Potholder
Then position your design where you want it to be on the potholder.
Step 3: Leave One Color Of The Design On The Potholder
Leave one color (I recommend leaving the letters) and remove all the remaining colors because we'll only press one color at a time.
If you need a little support, you can find the time and temperature for your EasyPress on the Cricut Heat Guide here.
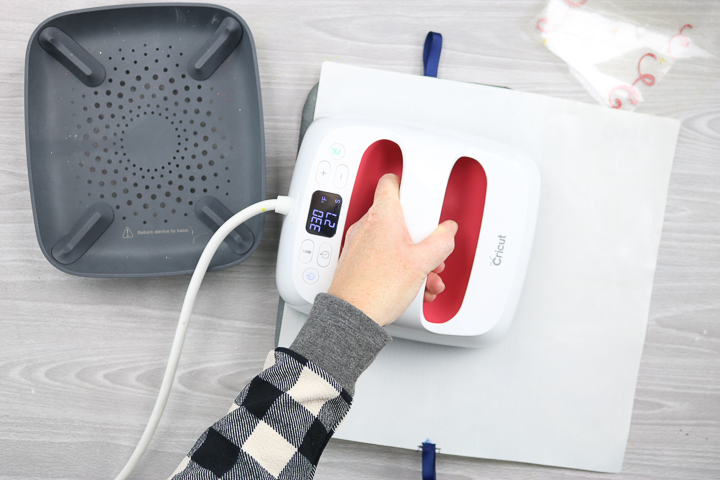
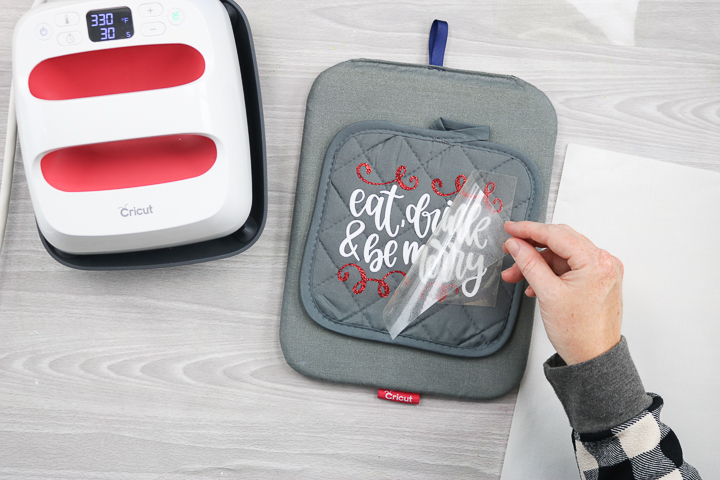
Step 4: Press Design Onto Potholder
Cover your design with an iron-on protective sheet (or parchment paper). Press with your Cricut EasyPress for the proper amount of time at the right temperature.
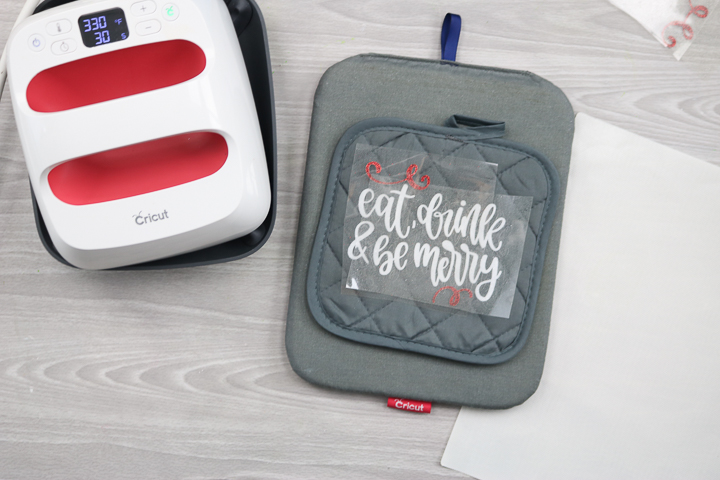
Step 5: Peel Away Protective Liner
Peel away the protective liner, but do not throw it away.

Step 6: Add Next Color & Press Design
It's time to add the next color to the design. Put it on the potholder in the place you want it.
Place the protective sheet that you just removed on top of it to help protect your iron-on material.
Step 7: Peel Away Protective Liner
Press then remove all of the liners to reveal your design.
Step 8: Repeat Steps 6-7 For All Your Other Colors
Follow the same process for all of the colors of iron-on. Once you have pressed all the colors in the design, turn the potholder over and press from the back according to the directions on the heat guide.
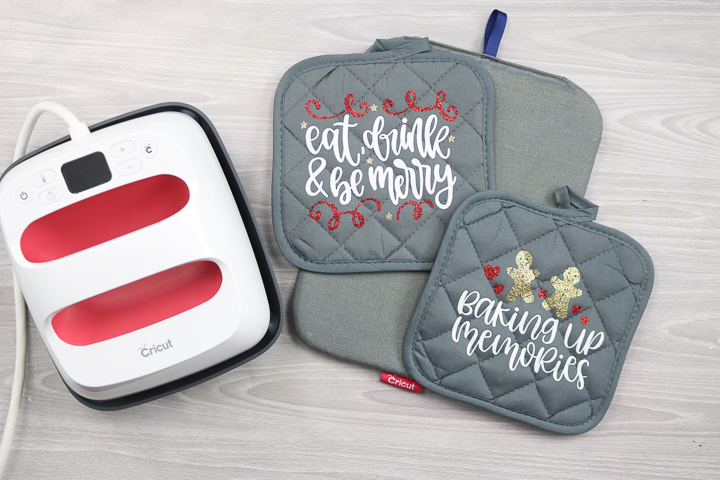
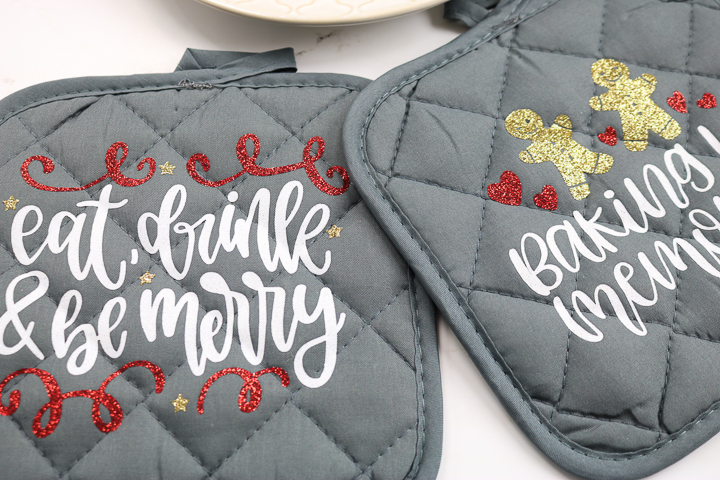
Ta-da! Your Christmas potholders are done and ready to use or give as a gift (and they make awesome small gift ideas!).
You can definitely make these in other colors and even other designs as well. Our free baking spirits bright SVG would actually be perfect for this project.
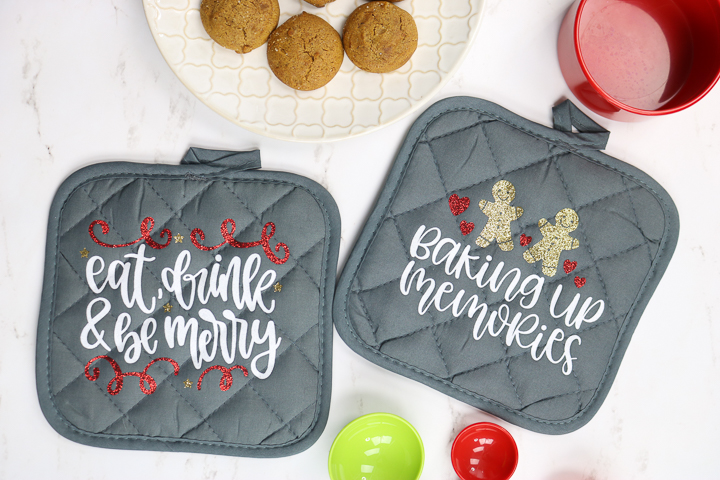
Just look at that sparkle from the glitter heat transfer vinyl! Isn't it amazing?
Pick up some potholders the next time you are at the Dollar Store and turn them into something amazing! Making Christmas pot holders is so much easier than you think it is!
FAQs About Christmas Potholders
Here are a couple of questions that I see readers ask about these Christmas potholders. If you have a question, please check to see if I’ve already answered it below. Don’t see your question? Leave it for me in the comments!
Did You Wash The Potholders Prior To Making The Project?
I didn't, but you can.
What Kind Of Vinyl Did You Use For The Christmas Potholders?
I prefer to use heat transfer vinyl (HTV). It helps to transfer the design fully and cleanly. Using the Cricut EasyPress makes it so easy to press the design exactly where you want to every time!
Why Cover With The Protective Sheet Before You Press It?
I tend to do this anytime I am unsure of the base material. In this case, I didn't want to damage the potholder itself, so I decided to cover it.
Which Is Better To Use: The Cricut EasyPress Or An Iron?
When you use heat transfer vinyl, you need to be able to heat it to a certain temperature and keep it there. Without the right amount of heat, the design won't transfer to the new surface properly.
The Cricut EasyPress allows you to set a specific temperature to ensure you get the design hot enough to transfer. It also has a larger surface area to ensure that you cover the entire (or a larger portion of) the design.
Unfortunately, a traditional iron doesn't let you set a specific temperature, nor does it heat as much of the area at one time. For these reasons, I highly recommend using the Cricut EasyPress for crafts like this one.
Can You Put A Hot Pan On Potholders that Have HTV?
I use the opposite side of them.
What Are The Washing Instructions For These Christmas Potholders?
You can wash in the washing machine. I would hang them to dry if you want the iron-on to last longer.
9 Glitter Fun Christmas Crafts
If you love these Christmas potholders and want to make more fun crafts with glitter, try these links!
- Mason Jar Lid Ornaments
- Cute football-themed towel from Polka Dotted Blue Jay that would make a great holiday gift.
- How to Make a Glitter Tumbler
- DIY Santa napkins with iron-on from Crafting in the Rain.
- Christmas Fairy Garden in 15 Minutes or Less
- Glitter bookmarks that would make the best stocking stuffers from Artsy-Fartsy Mama.
- Initial Ornament Made with Glitter Paint
- Light-up penguin from Leap of Faith Crafting will make a visual “splash” in your holiday decor.
- How to Make Clay Ornaments for Christmas {with Video}
So, whether you make the Christmas potholders or one of these other ideas, be sure to break out the glitter for some holiday crafts this year!
3 More Cricut Gift Crafts
Do you want to add something to these Christmas potholders to make the perfect gift set? Then check out the Cricut gift crafts below!
- Free Kitchen Towel SVG File Plus More Kitchen Designs
- Watco Food Safe Sealer with Handwritten Recipe Project Idea
- DIY Christmas Mugs with a Cricut Machine


Hi. Is there any way to save this design as an SVG? I have it open in Design Space but I need to be able to save as an SVG. Thank you for your cute designs!!!
This is a design space file only! Sorry! I do them both ways with offering SVGs as well as offering design space files. I am sure you can search etsy for something similar.
what font did you use for this? I love it !
It was a design in Cricut Design Space. You can click the cut file link and can find it!
I can’t seem to find the project in Design Space 🙁 When I click on the link it does not take me there. Do you know what it might be called? Thanks!
I just tried to fix it. Can you try again?
Yes, it worked. Thank you SO much! These are adorable. Do you know if these are available for commercial use or just personal use?
The should fall under the Cricut Angel Policy. You can look that up to see any restrictions.
Love these! I was just wondering if I should wash the potholders before putting the HTV on. Also, any special care instructions for after the HTV is on or should I just follow the washing instructions that come with the potholder?
I didn’t wash them before and I just did regular washing after!
Tried this using the small hand held press but HTV wouldn’t stick. Should I be using the large press? I also used Sport Flex iron on. Any suggestions? Thanks!
Are you using the EasyPress Mini or a different press? Sometimes the fabric has sizing on it that can prevent HTV from sticking. I wouldn’t use SportFlex Iron-on for this project.