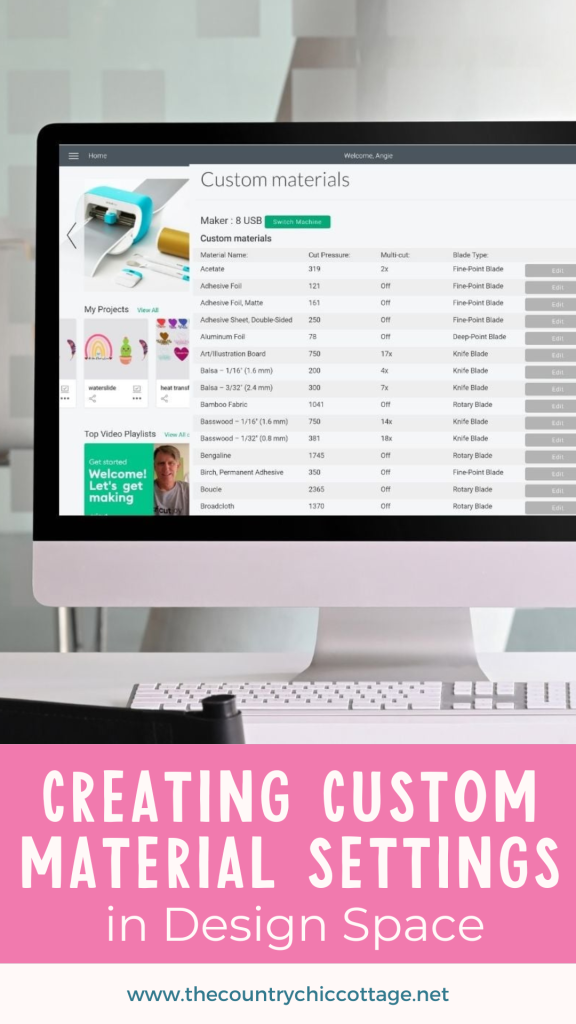
Did you know that you can create a custom material setting in Design Space? You can save this material setting to your account, allowing you to reuse it whenever you need. This feature is a fantastic way to quickly access the settings that work best for your materials. Follow the guide below to create custom Cricut settings in just a few minutes. This is another helpful Cricut hack that will save you both time and money when using your machine.
How to Make a Custom Material Setting
You can definitely stick to the standard material settings in Design Space, as there are literally 100s to choose from. However, you may find that the specialty material you love to craft with just doesn't cut well on any of the standard settings. That is when a custom material setting will save your project and prevent future frustration. Let's look at how to create one.
Want to watch me make a custom material setting right in Design Space? Just click play on the video below!
Can't watch the video or missed some of the steps? You can also follow along with the tutorial and screenshots below.
Getting to the Custom Material Screen
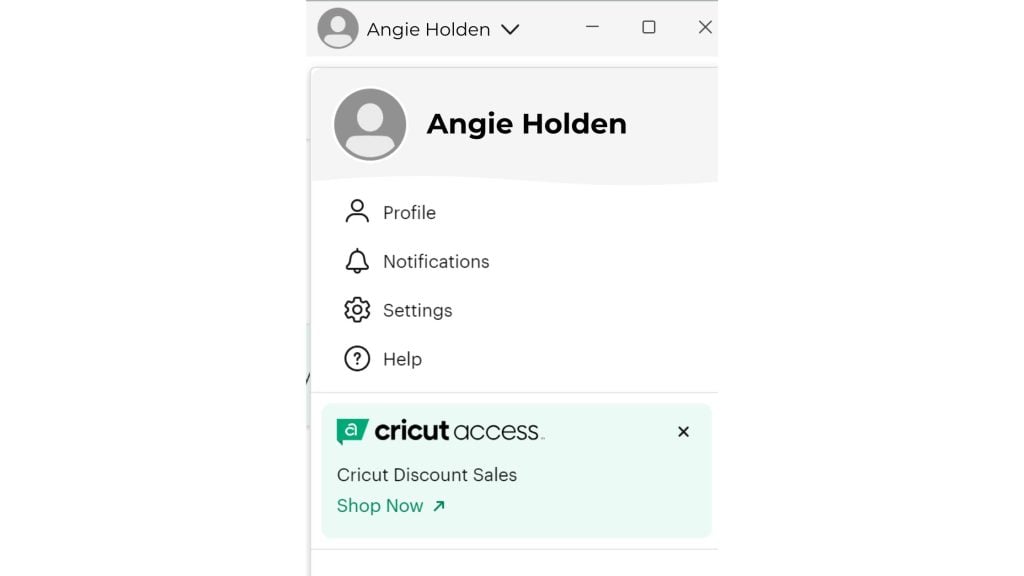
There are actually two ways to get to the materials screen. The first is on the home page. Just click on your name on the right side of the page to drop down the menu, and you will see Settings.
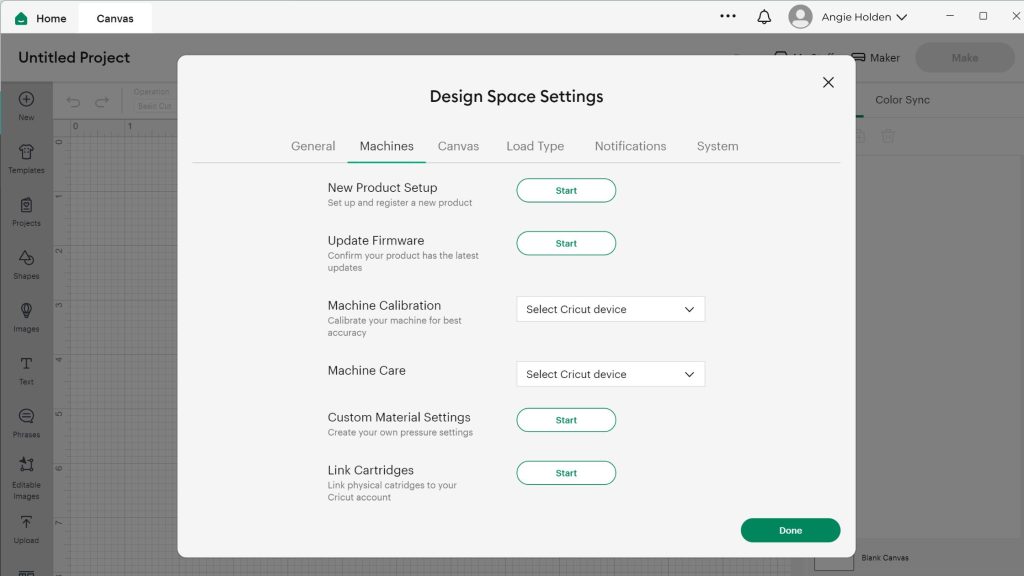
From the Settings menu, click on the Materials tab at the top. Then click Start next to Custom Material Settings.
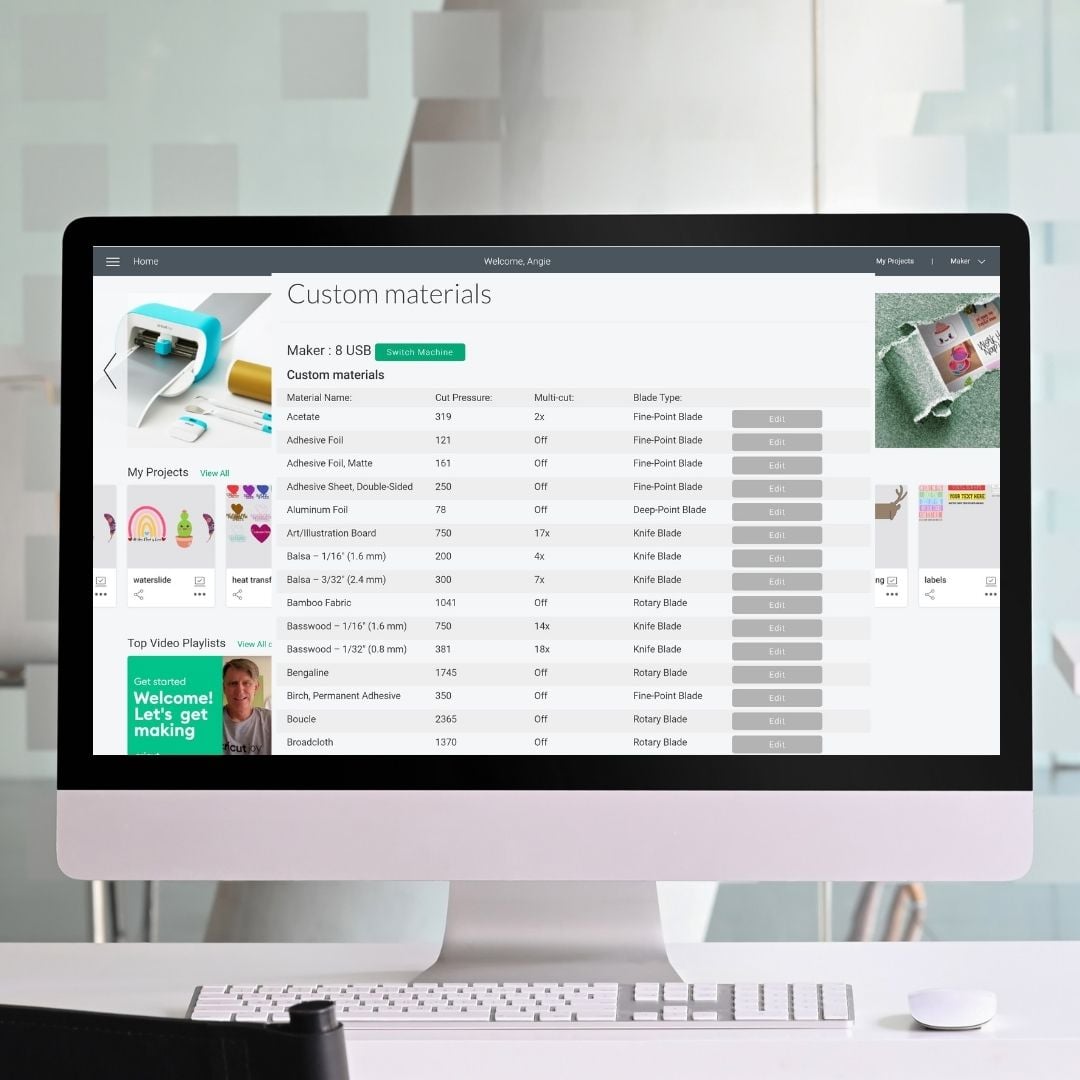
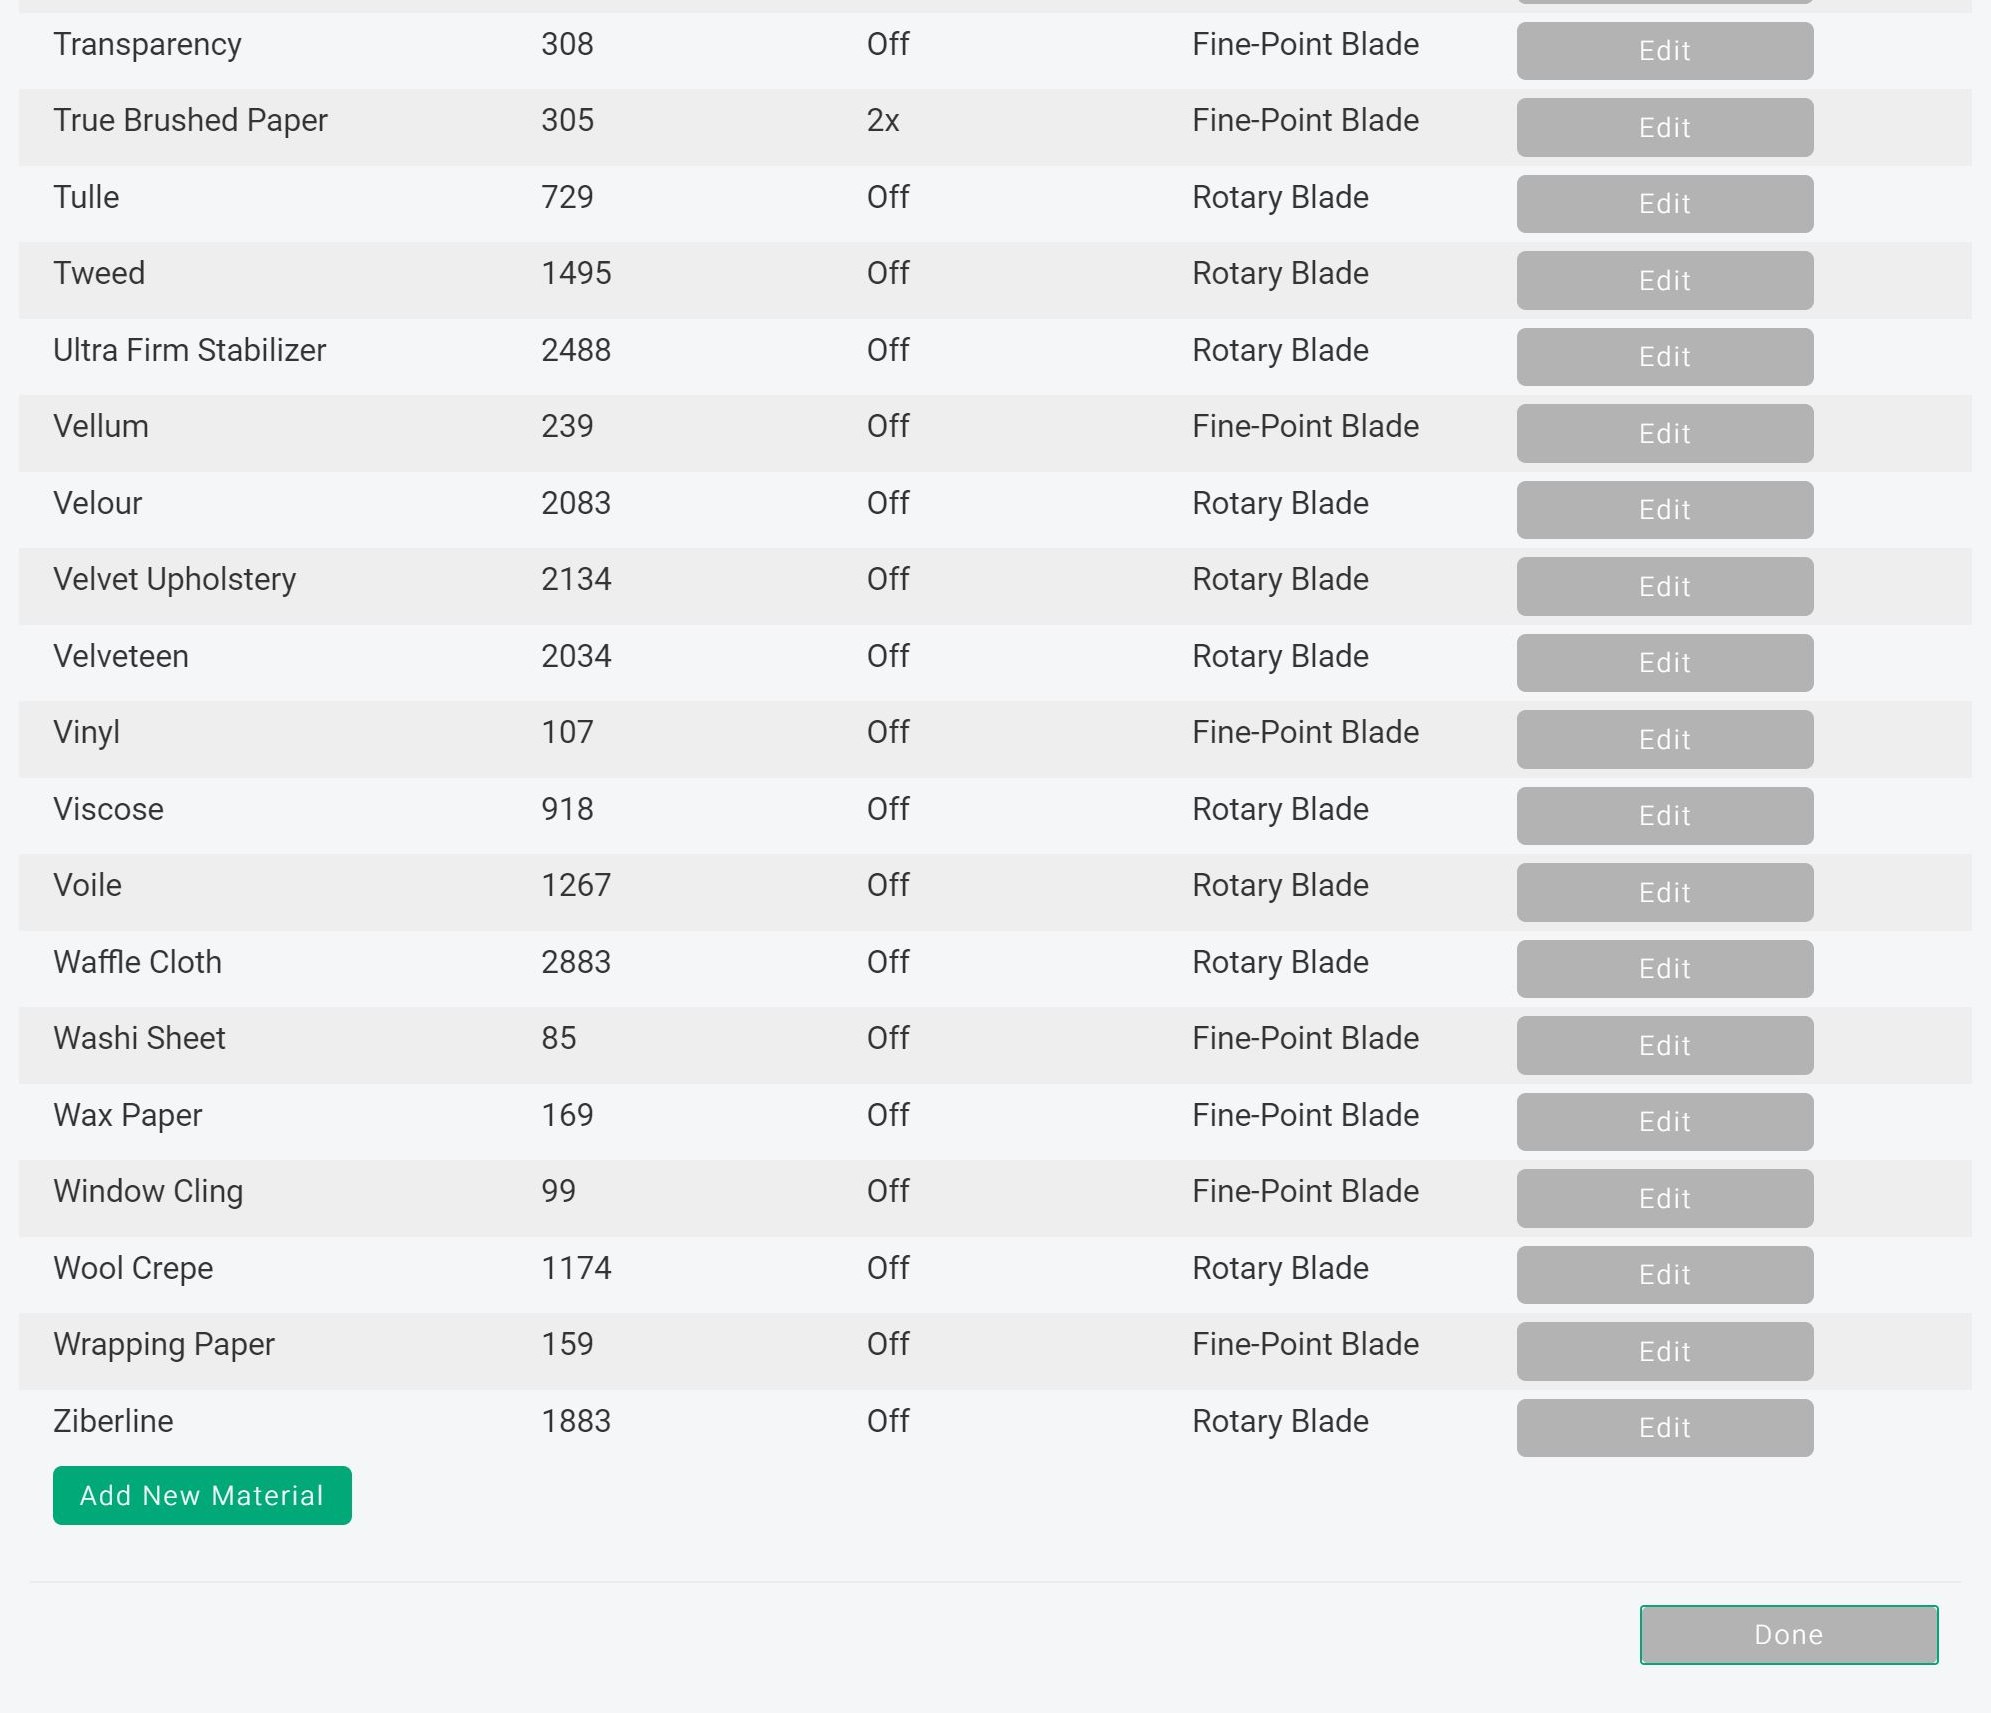
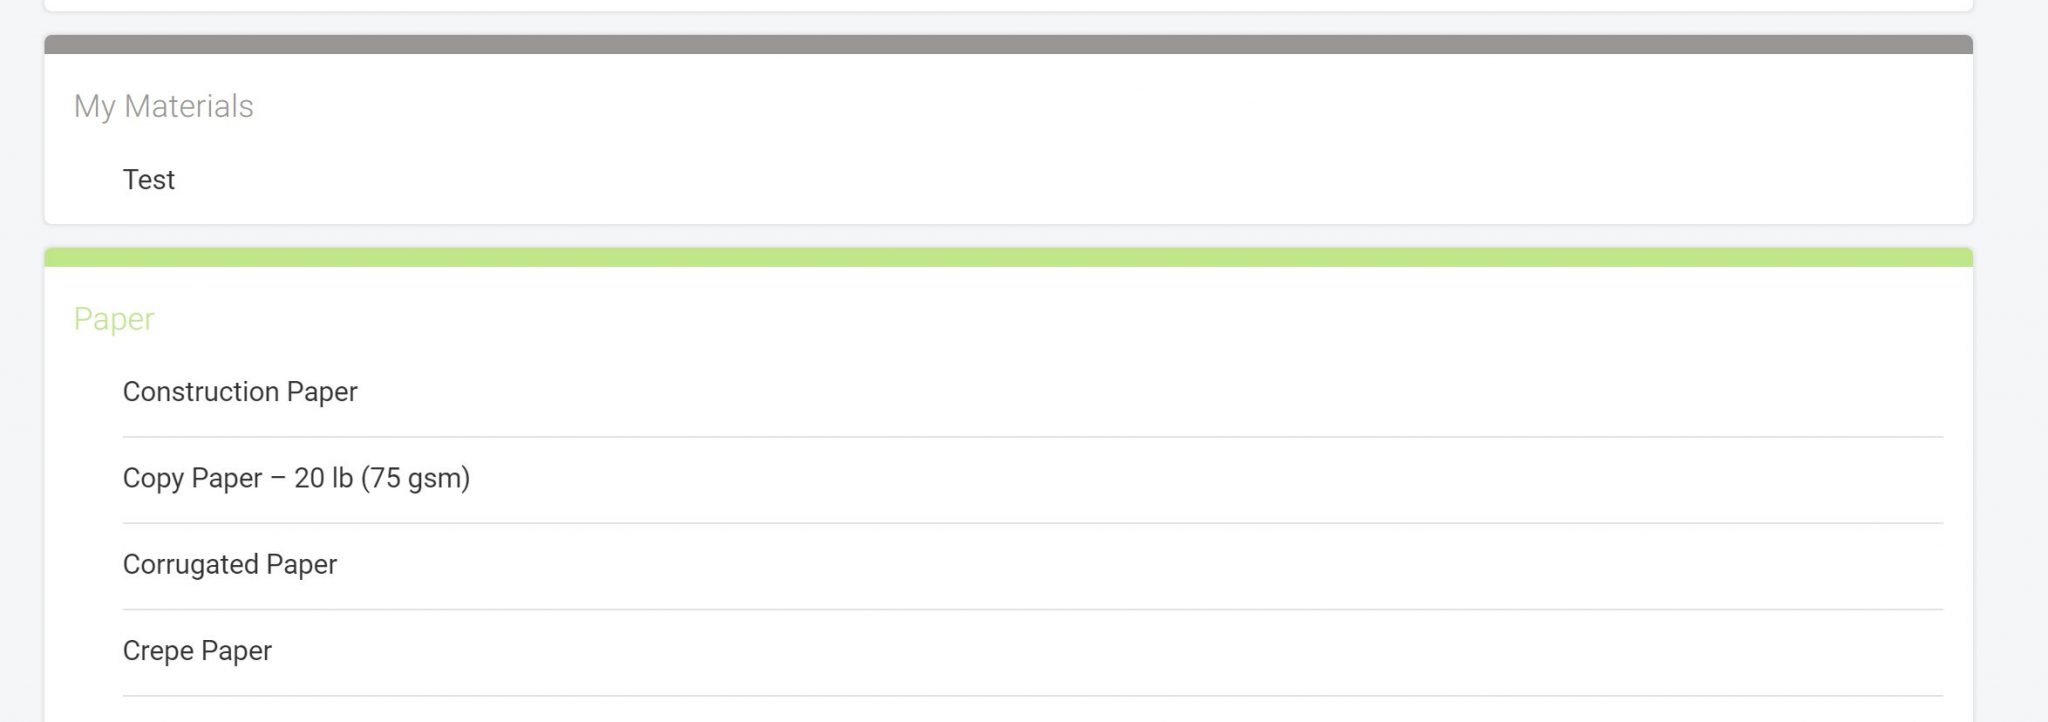
From here, you can view a list of all materials or create a new one.
You can also modify any existing materials if necessary. Remember, you must have a machine connected to see your custom materials.

Scroll all the way to the bottom for the button to add a new material.
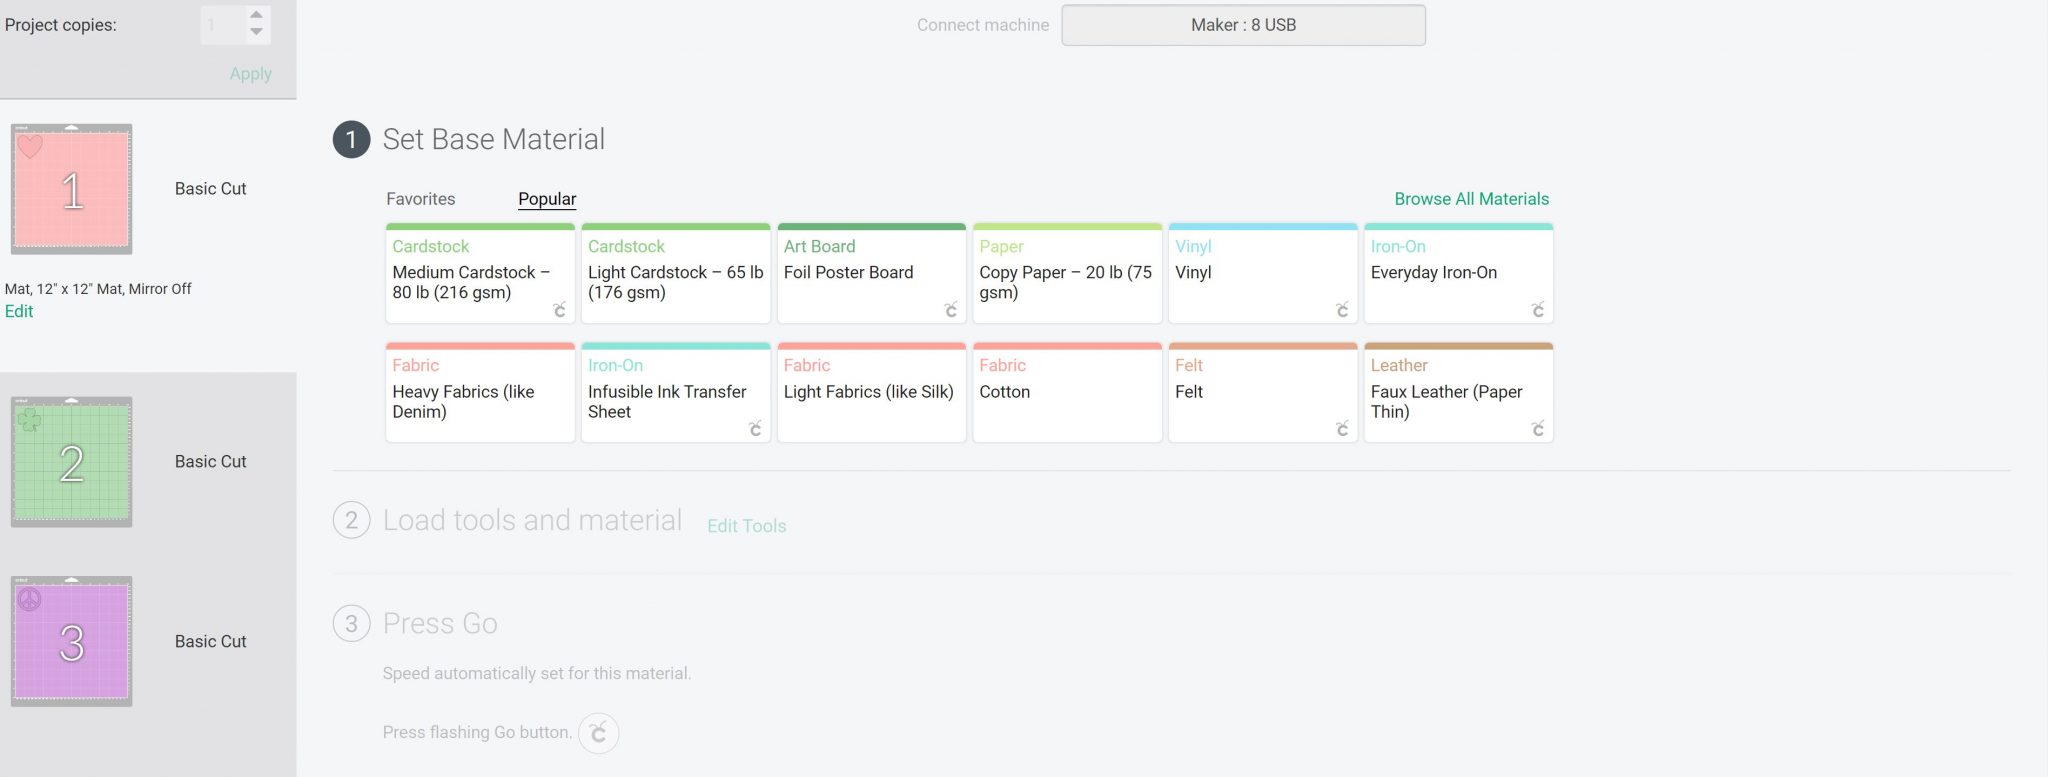
You can also access your custom materials after clicking “Make It” on any project. Just click Browse all materials from the Base Material screen. To view this on the Explore, you will need to have your dial set to custom.
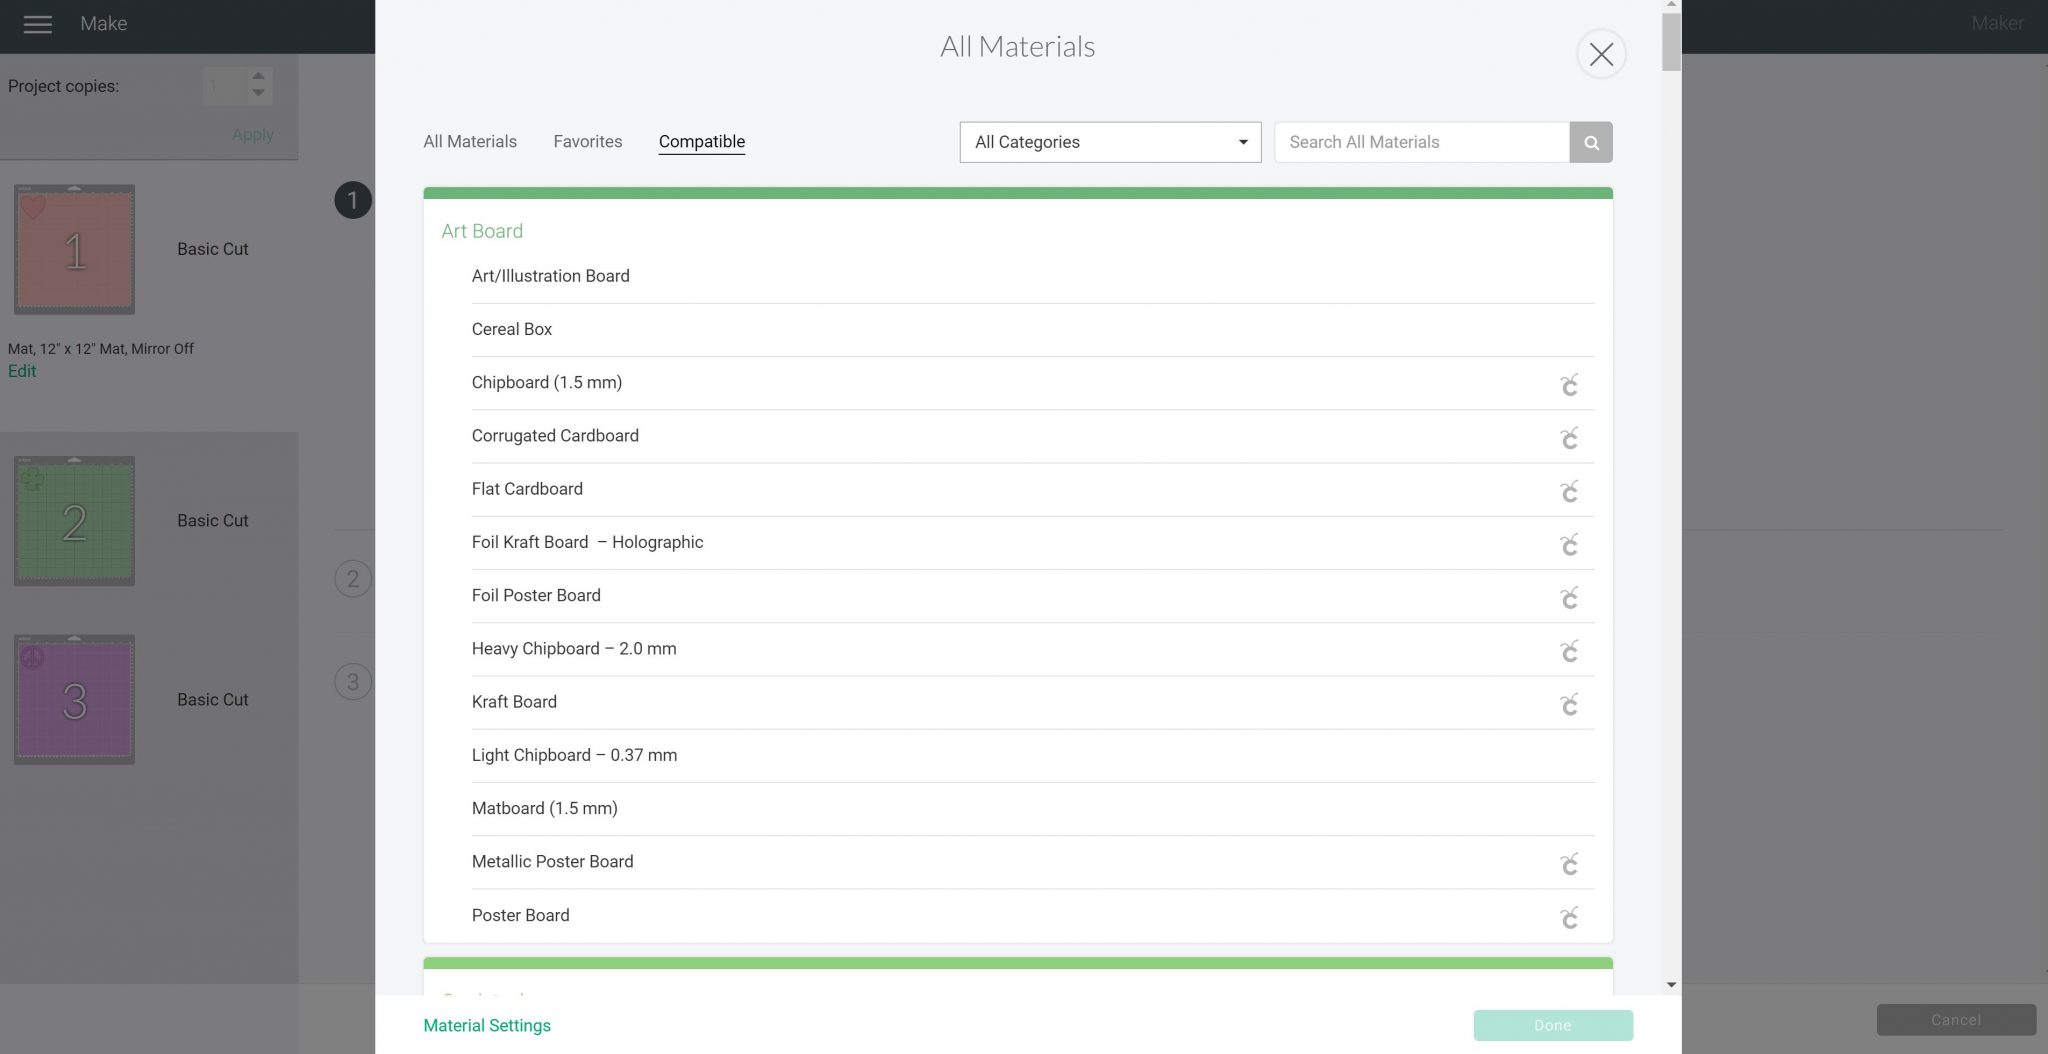
Then click Material Settings all the way at the bottom to access the custom materials.
Adding a New Material to Design Space
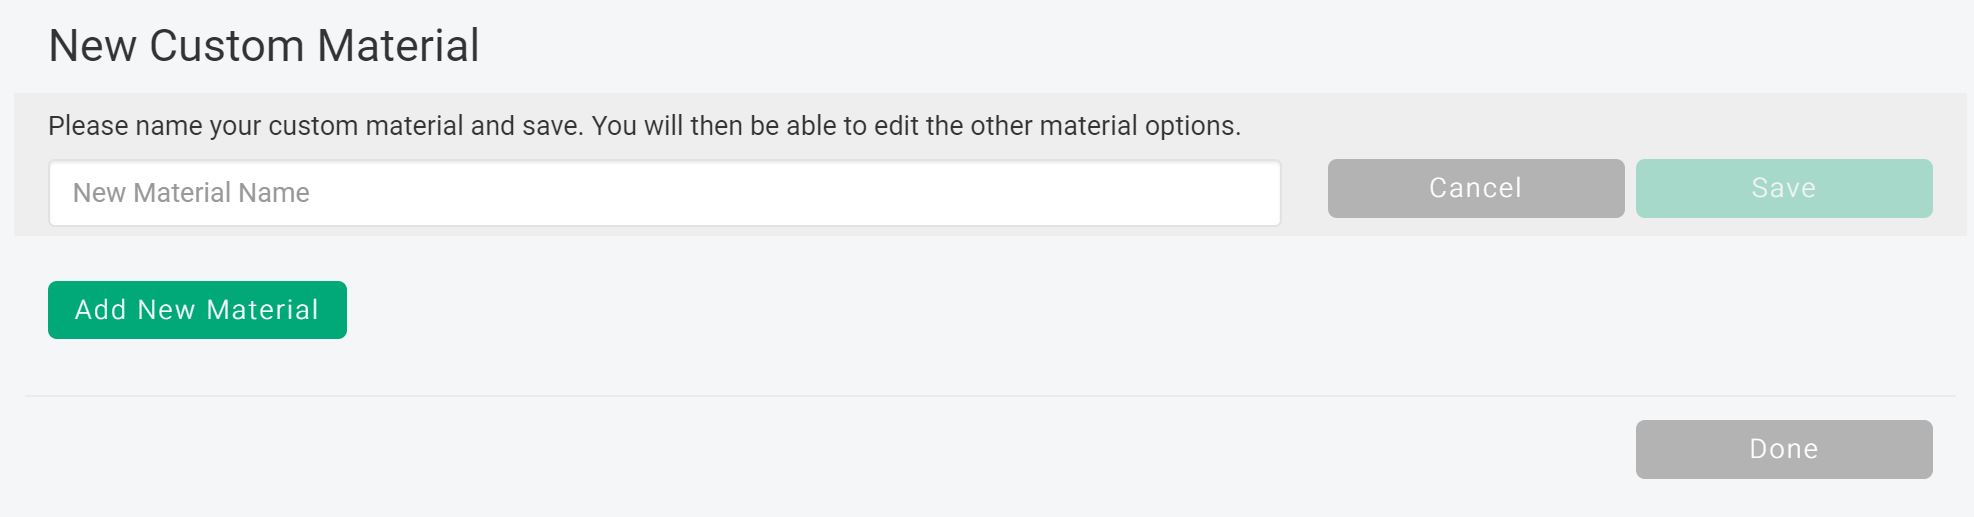
Click add new material then type a name for your material and click save. You want this name to be something you will remember.
Once you click save, you can adjust a variety of settings. To get a starting point for these settings, look for a material in Design Space that is similar to what you are trying to cut.
- Cut Pressure (adjust the slider or use the +/- buttons) (NOTE: the pressure is different for the rotary blade)
- Multi-cut (this directs the machine to cut multiple times over the same image and is recommended for thicker materials)
- Blade Type (the only blades you can use for a custom setting are fine point, deep point, and rotary blade if you have the Maker)
Click save when you are done adding the settings you would like. Remember, you can come back at any time and adjust these.

Click the X in the top right-hand corner to close the window. Then, look for the name of the material you just created in the list and select it to use.
FAQ:
Here are answers to some of the most frequently asked questions I receive about creating custom material settings. If your question isn’t listed, feel free to drop it in the comments and I’ll be happy to help!
Why do I need a custom material setting?
Although you may find a material that works for you in the list in Design Space, there are times when you want to cut other materials. Saving the settings that work for these materials will save you time and money in the long run.
Why can't I make a material setting with any blade?
Cricut does not currently allow for custom materials to be created with other blades. You can only use the fine point, deep point, and rotary blade to make your material setting. The rotary blade will only show up if you have a Maker. I will say that the knife blade is powerful and can damage your machine. You always need to exercise caution when experimenting with this blade, which is why there is no custom option.
What should I name my custom material?
Name it something that you will remember later, and something that describes the material you are cutting.
Where can I find the materials I have created?
They will be right in your material list when you go to cut in Design Space. So, turn your Explore dial to custom or just cut with your Maker or Joy. Search for the name you gave the material and pick it to start cutting.
Why can't I find these settings on the app?
Currently, you cannot set custom materials from the Android app. You can set them up on your computer or the iOS app. Any settings you create using either of these methods will appear as options when you use the Android app.
My custom setting is not working for my material.
Try editing it to apply more pressure or even multiple passes to cut through the material. Then, make sure to perform a test cut before starting your project to prevent waste.
Hopefully, this helps you to make a custom material setting in Cricut Design Space. This craft-saving hack will help you cut your materials consistently and accurately every time!
More Cricut Ideas
Love this and want more Cricut ideas? Try the links below as well!