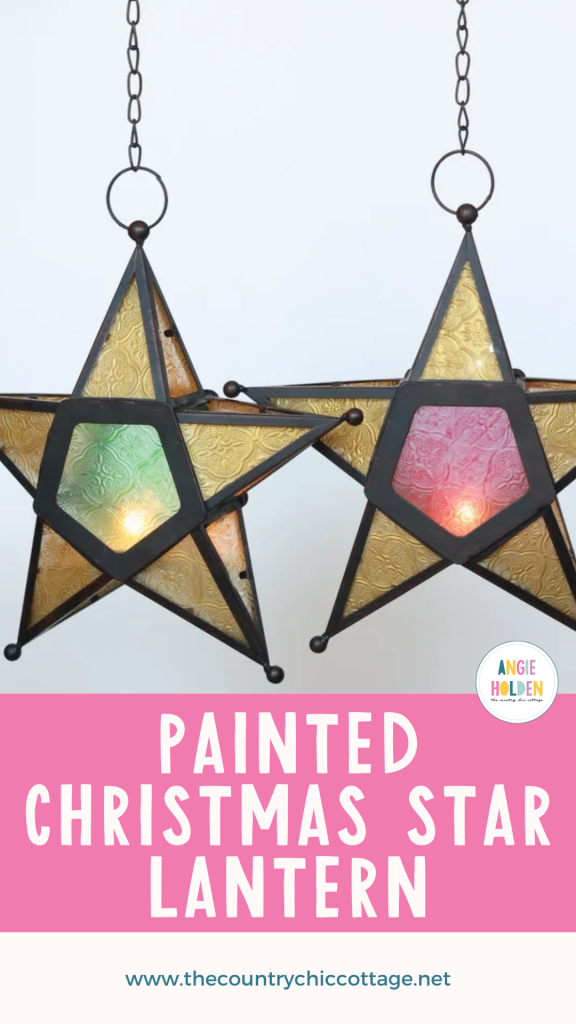
Create these stunning Christmas star lanterns inspired by traditional Philippine Christmas lanterns. These beautiful decorations are surprisingly inexpensive and super simple to paint at home. Once finished, they’ll truly shine as the star of your holiday décor.
How To Make A Christmas Star Lantern
It is the last day of Craft Lightning, and I am ending it with a gorgeous painted Christmas star lantern. This lantern has become one of my favorite projects of this year because it looks expensive but is made with inexpensive supplies.
When it comes to creating these lanterns, the process is similar to that of our stained glass ornaments. However, in this case, the lanterns can be hung either throughout your home or outside. Plus, they would look beautiful with our Christmas mason jar candles or even our DIY nativity scene jars with tea lights.
Finally, if you missed any of the Craft Lightning fun this week, be sure to check out the quick holiday crafts from days 1, 2, 3, and 4. Just a note that this post is part of my design team status with DecoArt, for which I am compensated. All projects and opinions are my own, however.
Supplies Needed To Make A Christmas Star Lantern
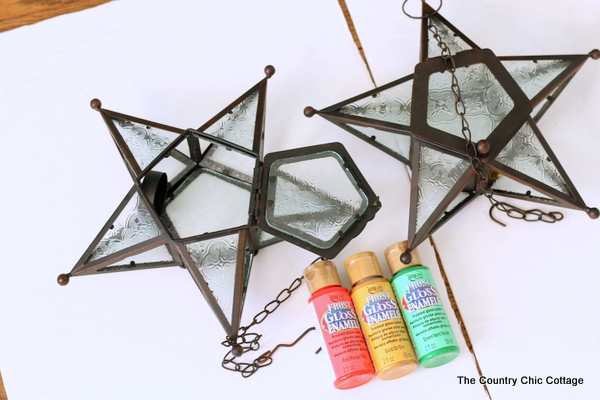
- Glass Hanging Star Candle Lantern
- Frost gloss enamels in Red, Gold, and Green
- Paintbrush
- Tea light candle
- Rubbing alcohol
- Screwdriver
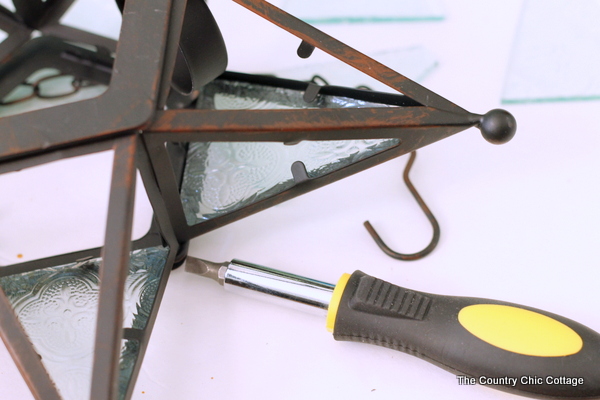
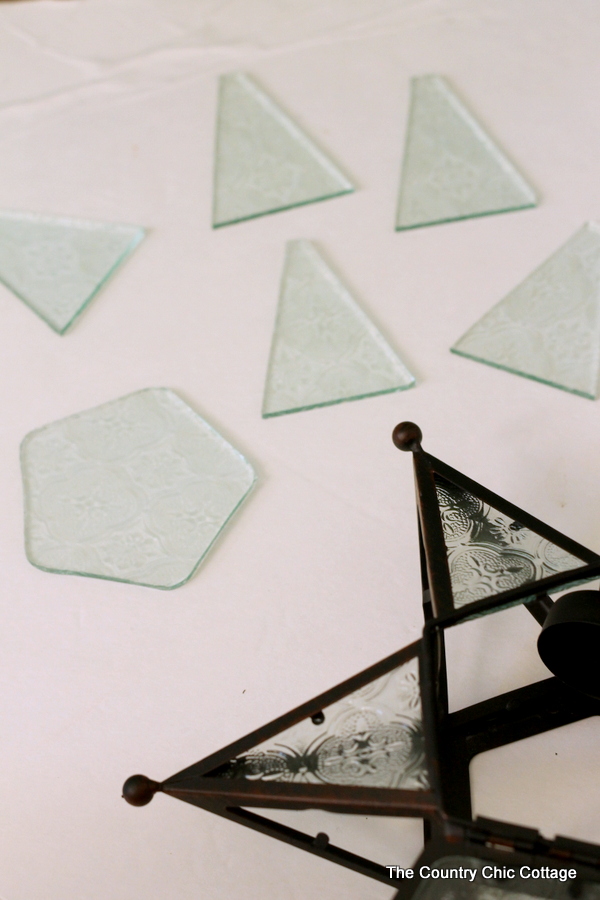
Step 1: Remove Panes Of Glass From Lanterns
The panes of the lanterns are held in place by small tabs similar to those in a picture frame. Use a small screwdriver to pry up the tabs and remove each pane of glass.
Step 2: Clean Panes Of Glass With Rubbing Alcohol
I kept the sides together as I removed them, just so everything went back the same way as it came out. Lay the pieces smooth side down, as we will be painting the textured side. Clean the textured side with some rubbing alcohol and allow it to dry completely.
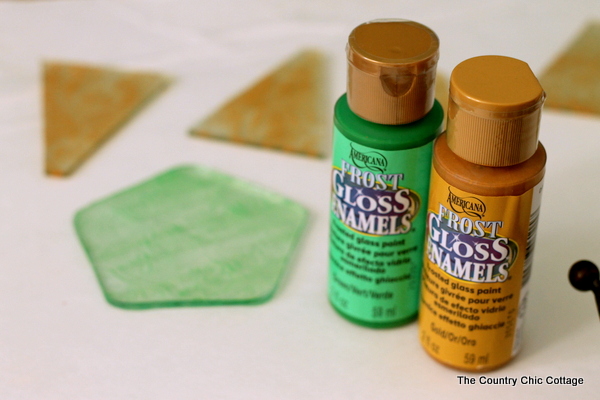
Step 3: Paint & Bake Panes Of Glass
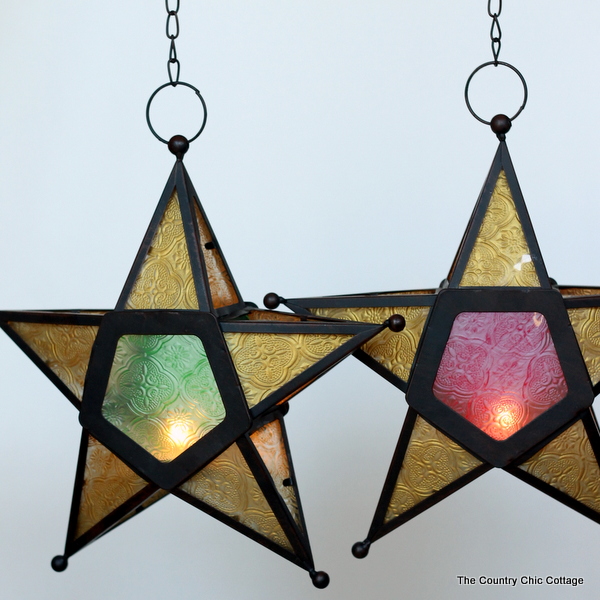
Use the Frost Gloss Enamels to paint each piece. These paints will dry somewhat translucent, so there will be color, but the light can still shine through. I had to apply two coats to each piece and three coats to the red. Allow to dry completely between coats. You can also bake the pieces according to the package directions to ensure the paint is permanently on the glass.
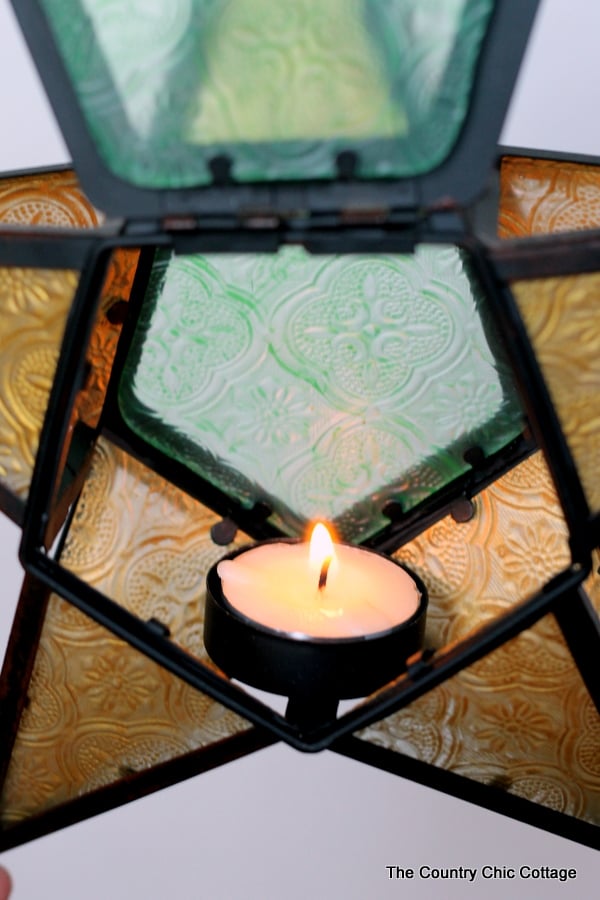
Step 4: Insert Panes Of Glass Back Into Lantern
Then use your screwdriver to reinsert the pieces into the lantern and secure them with the small tabs. Add your tea light to the inside of your completed Christmas star lantern.
I was inspired to make these great lanterns when my friend Jessica, from Mad in Crafts, mentioned the beauty of the Philippine Christmas stars, or parols. These gorgeous hand-painted stars are a Christmas tradition there and are so colorful and unique. This is a very simple version compared to some of the ones created there. Be sure to do a Google Image search so you can be amazed, too. My small version will have to do for my home decor, but they will remind me of the gorgeous images every day this holiday season.
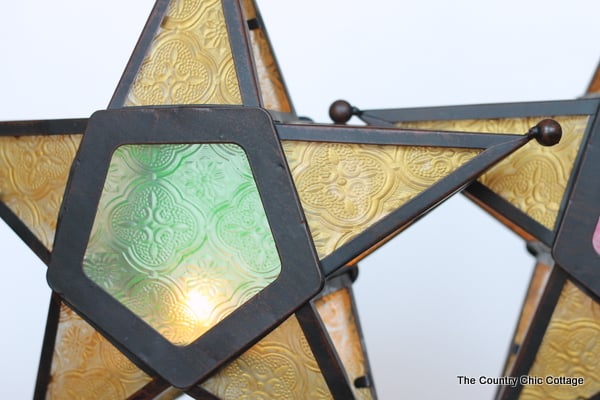
The stars come with the chain to hang them. I think these would be great for outdoor or indoor decor this holiday season. Be sure to pick a few of these up and spend a few minutes painting. You can choose to paint them like mine or vary the colors for your own version. Either way, these Christmas star lanterns will shine in your home this holiday season!
Tips and Tricks for Christmas Star Lantern
Now that you’ve seen this Christmas star lantern, are you ready to make your own? Here are a few tips and tricks!
- Find Your Favorite Star Lantern – There are tons of star lanterns out on the market that come in different styles, sizes, and finishes. So, find the one you like best and have fun making your own lantern!
- Take Your Time Removing The Panes Of Glass – Most lanterns have metal tabs holding the panes in place. These tabs can easily break if you apply too much pressure, so take your time and don't rush when removing your glass from the lantern.
- Don't Skip Cleaning Your Panes Of Glass – After you remove your panes of glass, make sure to clean them. This is because cleaning the glass will remove any dust or debris and provide a nice base for your paint to adhere to.
- Change Up The Color – For my lantern, I chose traditional Christmas colors. However, depending on your Christmas decor style (peppermint, woodland, bright, pastel, etc.), you can change up the colors to match your theme!
5 More Christmas Decor Crafts
If you loved learning how to make this Christmas star lantern and want even more Christmas decor crafts, then check out the projects below!
- DIY Wooden Christmas Tree For Holiday Decor
- DIY Christmas Cottage Decoration
- Gingerbread Man Made From Terra Cotta Pots
- Cricut Crafts for Christmas: Custom Wood Trees
- Pallet Christmas Tree: Farmhouse Style Christmas Decor