
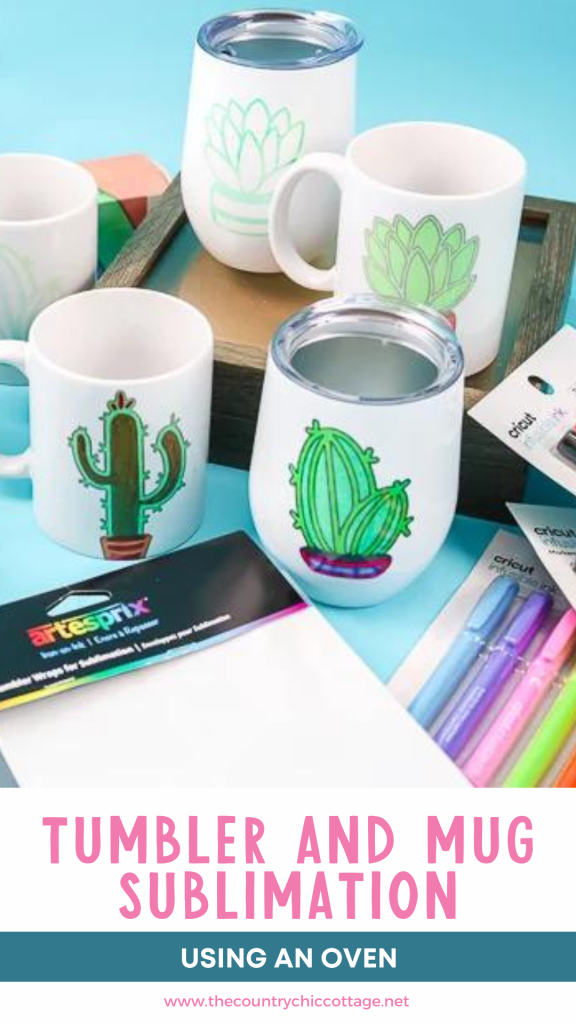
If you're looking for a custom mug, you'll want to know how to create your own mug sublimation using an oven! The process is so much easier than you might think, and you'll have custom mugs and tumblers in no time! We'll discuss a few methods and materials for the actual sublimation ink. Which is best? Read on to find out!
Don't know what sublimation is? Try this post to learn more!
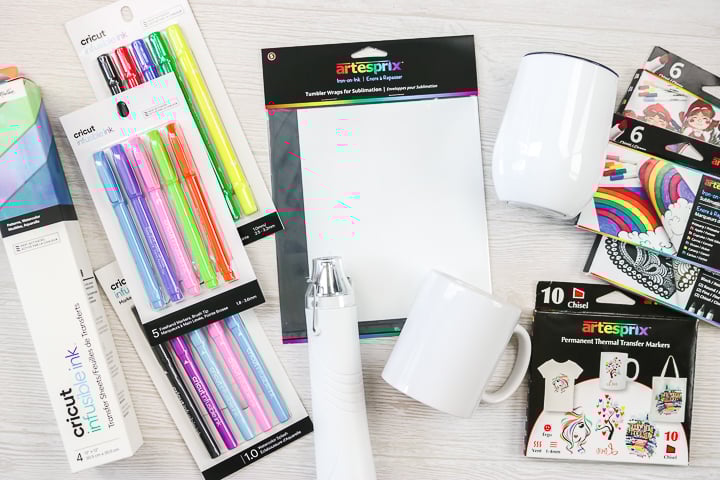
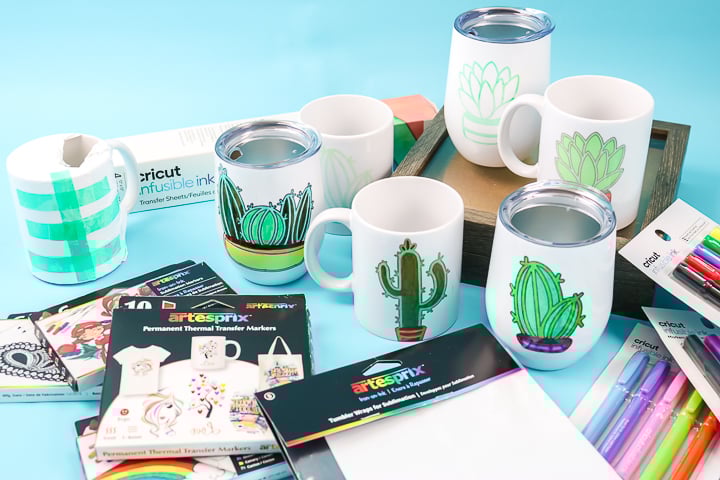
Supplies needed:
First, let's discuss the supplies you will need, as there are quite a few things that are special about sublimation.
Sublimation Surfaces
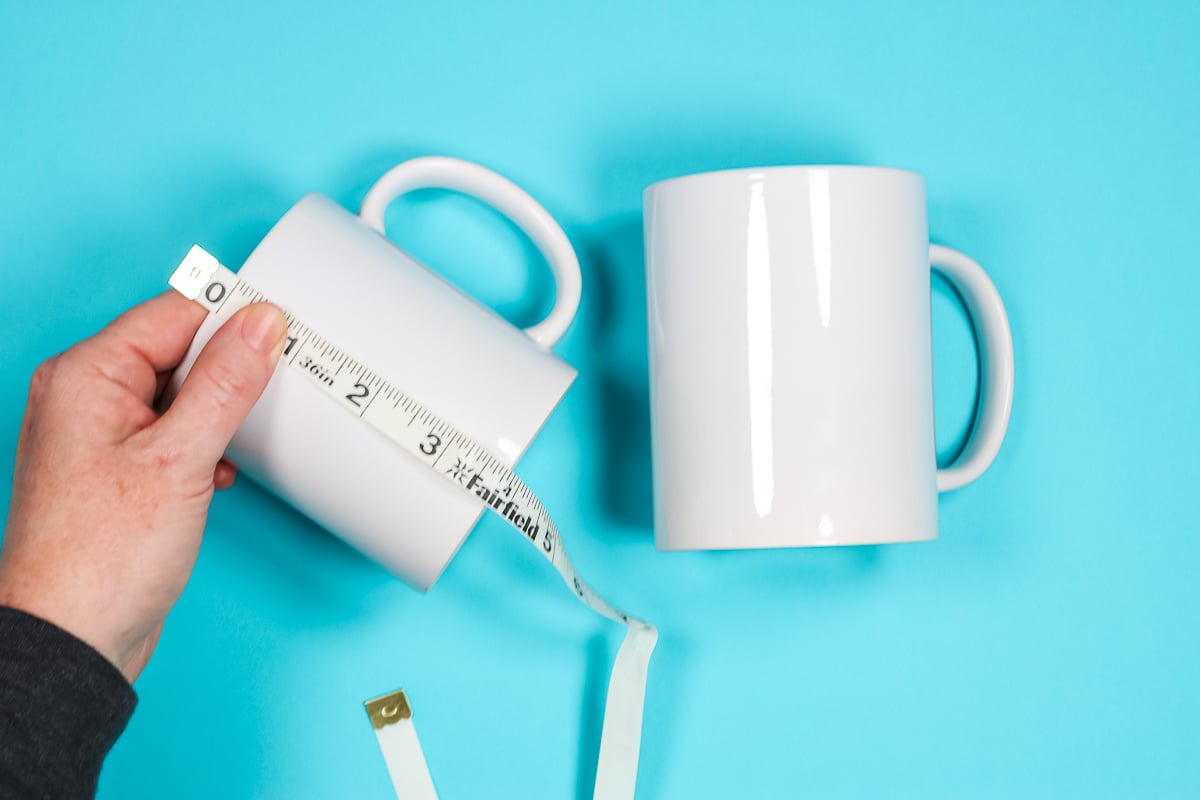
While it might look like a standard coffee mug, there's a catch. It has already been prepped for sublimation by being coated with a glaze that can take the sublimation ink. Keep that in mind when you're looking for mugs or other surfaces to sublimate on.
Want to use the mugs and tumblers that I am using? Try the links below to purchase.
Sublimation Wraps
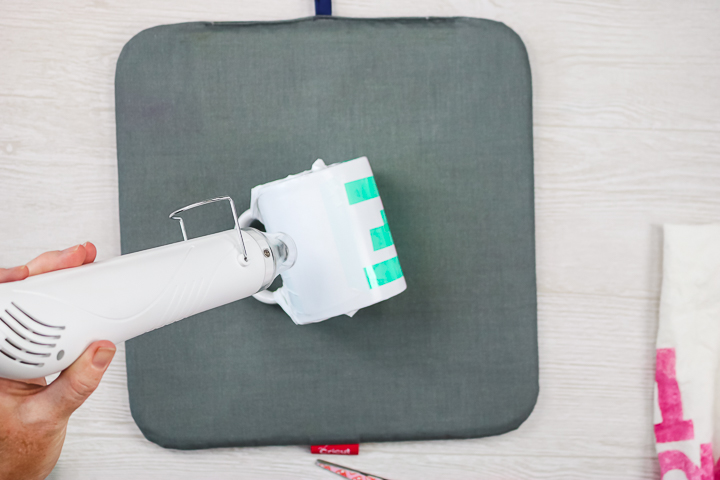
The hardest part of sublimating on a mug or tumbler is putting your design on and having it where it doesn't move. Tumbler wraps are part of the secret of how to do sublimation on mugs in an oven. Most people use tape and try to tape their design down, but if it moves even just a little bit, you'll get ghosting and ruin your entire project. Tumbler wraps help to prevent that. You use a heat gun to shrink the tumbler wrap to the tumbler or the coffee mug for a really tight fit.
I am using these tumbler wraps, and I will go over how to use those on both a mug and a tumbler. You can also try this adjustable mug wrap, but I have not tried it yet.
Sublimation Ink
We are going to experiment with a few different varieties of sublimation ink to see which gives us the best result. I am going to be testing the following:
All of these options use sublimation ink, so you will need sublimation surfaces to put them on. Be sure to pick up the sublimation mugs and tumblers that I mentioned above. I am going to try each of these types in an oven and experiment a bit with a heat gun to see if they will work.
You will need to get the regular pack of Infusible Ink markers that goes into your Explore Air or Maker machines. If you have the Joy or Joy Xtra, you'll need to look for ones that are marked for Joy because the pens are two different sizes. The Artesprix markers fit into the Joy just by themselves without any adapters, so they will work in the Joy. You will need an adapter to use them in the Explore or Maker machines. Infusible Ink markers also come in freehand packs for coloring in your designs.
Sublimation Oven
Before we discuss how to use these different types of sublimation, we need to talk about sublimation safety. Sublimation is the process where what you’ve printed, or your Infusible Ink, turns to a gas before it bonds to the polyester of your surface. During that gas phase, it can let off fumes that can get into things – like the inside of your oven.
You should never cook food in an oven that has been used for sublimation, even if your kitchen oven is a convection oven.
If you’re going to use a regular convection oven for sublimation, you'll need a stand-alone oven. If you’re going to buy a convection oven for sublimation, it needs to be used for crafting only. You will never cook food in it again. So mark it, label it, and make sure anyone and everyone knows it’s for crafting only.
If you are looking to purchase a sublimation oven, here is a post that I have about choosing one that fits your needs.
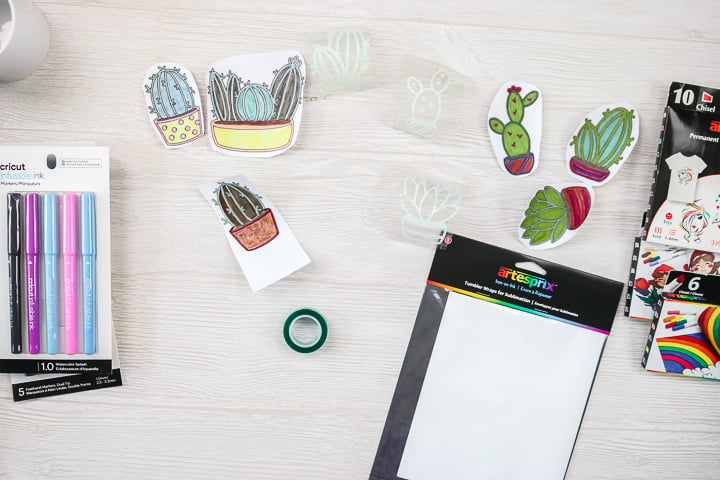
Cactus Cut File
Want to use the same cactus as I am using? I have a free cut file that you will want to download to do just that! You can sign up for our newsletter and download all of the cactus designs that you see here. They are a great way to experiment with designs or make a mug for a plant lover!
Other Supplies
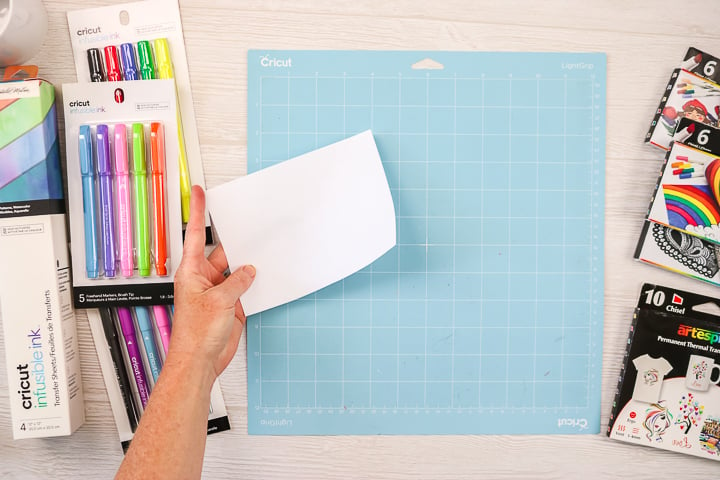
- Light grip mat
- Regular copy paper (rated for use with a laser printer) If it is not rated for a laser printer the heat of the sublimation process will affect the paper.
- Heat gun
- Heat resistant tape
- Scissors
- Cricut machine
Mug Sublimation Video
Want to watch the entire process on video instead of reading about it? You can click play below to do just that!
Don't want to watch the video or missed some of the steps? You can also get the instructions below.
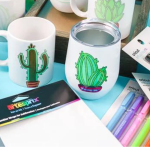
Tumbler and Mug Sublimation
Now that you have all of the correct supplies, it is time to actually do the sublimation. I am going to walk you through my process for creating mugs and tumblers with this process below.
Instructions
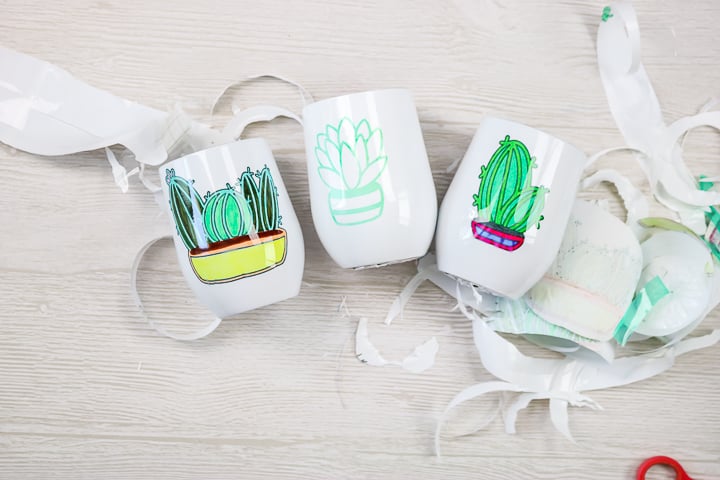
- Stick the copy paper on the light grip mat. Then use your Cricut machine to draw your design with either the infusible ink markers or the Artesprix markers. Whichever marker you have, be sure to mirror your design, draw it with your Cricut, and then you can color it in.
2. Color in the designs with your sublimation markers. When I'm adding colors to my designs, I like using a couple of different shades of the same color. You just have to play around with the colors you have, it is just like coloring a coloring book page.
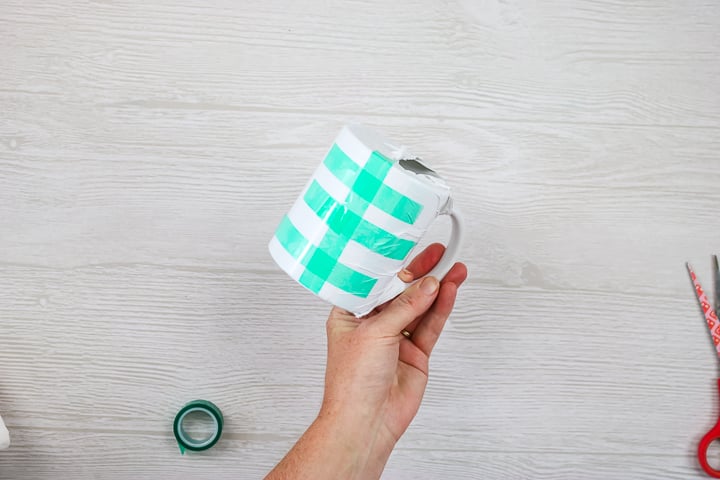
3. Once you have your designs ready, you need to get them placed onto the mug so that you can transfer the design. First, tape the design ink side down onto the front of your mug using heat-resistant tape. Then add your heat wrap. For the mug, you will need to cut the sublimation wrap. Tape one end of the wrap to the back of your mug both horizontally and vertically. Then, wrap it all the way around, putting the wrap through the handle. Tape again in both directions and use your heat gun to shrink the wrap to the surface. Add two more pieces of tape to secure after shrinking.
4. Now, the mug is ready for the oven. You can repeat the same procedure for the tumblers, except you don't have to cut and tape the wrap. Just add the design ink-side down and tape it into place. Then, put the tumbler inside the wrap and shrink it with the heat gun. So easy! Add your wrapped items to your oven.
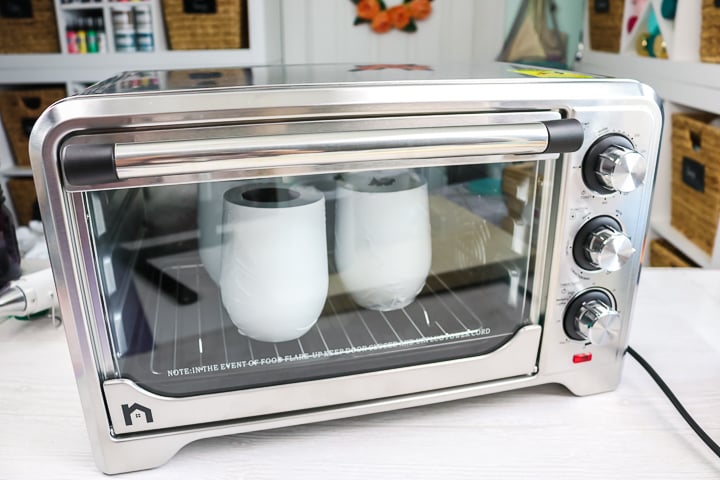
5. I put the bottom rack in, set the oven to 350 degrees, and put it on bake. Let it preheat for five minutes, and then put the mugs in and heat those for seven minutes. Use a towel to protect your hand. Once the mugs are heated up we'll remove those, add the tumblers, and heat them up for seven minutes. Then we'll take the wrappings off by peeling off the tape and removing the wrap. Then you can see the magic!
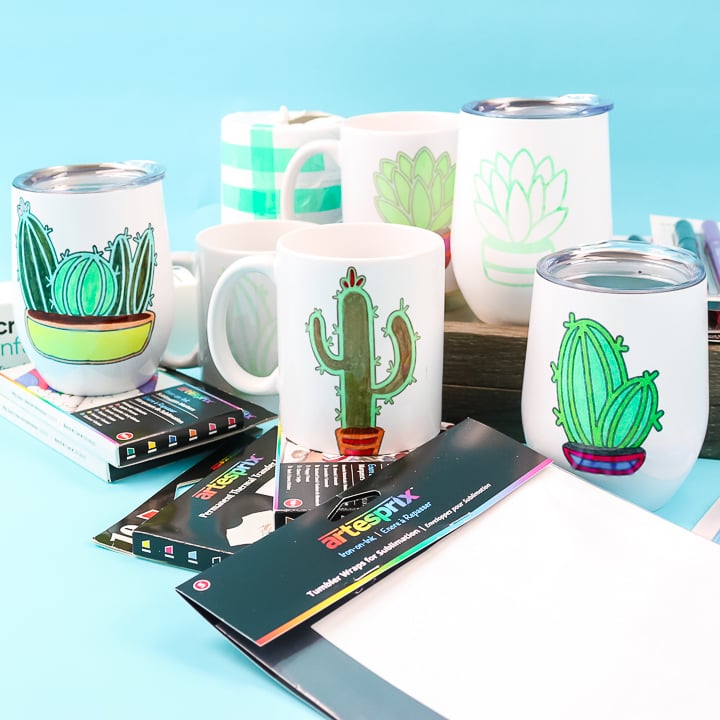
Infusible Ink vs. Artesprix Markers
Which is better? Which performed better in our tests? I must say that they are both just about equal, but I will run through some specifics that I noticed.
Infusible Ink Transfer Sheets
I used the watercolor transfer sheets, which are really forgiving. If you are just getting started with sublimation, I can highly recommend these. I loved how my design looked on both a mug and a tumbler. You can actually read more about Infusible Ink here.
On the tumbler, you often get some imperfection around the curved portion as your paper cannot sit perfectly on the surface. You really don't see that discoloration at the bottom with the watercolor transfer sheets. There probably is some discoloration, but you really can't see it and you don't notice it because it looks like it's part of the design. That's why I love these watercolor designs and transfer sheets because they're so forgiving.
Infusible Ink Markers
The mugs and tumblers I made with the markers came out great. I did have some discoloration at the bottom of the tumbler from the curved surface but otherwise, I loved the cactus designs!
Artesprix Markers
I did two different ones with Artesprix while experimenting with mug sublimation, and I can tell you that it is so important to get that wrapper taped down well on those mugs. If it lifts, your design will not look good! But if you have everything in place well, the Artesprix markers performed similarly to the Infusible Ink markers.
For the tumbler with the Artesprix markers, the colors are gorgeous! But again, you can see some discoloration and imperfection around that curved area, just because of the way the paper lays on the curve.
As far as comparing the different sublimation inks, I can't tell a difference between Infusible Ink and the Artesprix markers. The main thing to keep in mind is to get it taped down really well so that everything stays in place.
Can I use a heat gun for mug sublimation?
I really wanted to try using the heat gun for mug sublimation. What if you didn't need an oven? So, I prepared my mug like I did above for the oven and applied heat with the heat gun for 7 minutes. I ran the gun back and forth across the entire area of my sublimation design.
Technically, it did work, but the results were inconsistent. It would work well in some areas and not in others just due to the inconsistency of the heat application. So, I definitely think an oven is the only way to go with tumbler and mug sublimation.
So now that you know how to make your own mug sublimation, what are you waiting for? There are so many projects just waiting for you to make them!

Tips and Tricks for Mug Sublimation
Want to learn more about sublimating on other blanks? My sublimation for beginners post has lots of great info about other ways to try sublimation.
Protect your hands! Make sure you have a thick towel or heat-resistant gloves nearby to handle your (very) hot items.
Spots on your blank not taking ink? Sometimes, even the best oven has hot or cold spots that create issues with getting an even distribution of heat for your project. You may need a sublimation pad or pillow to help.
Other uses for sublimation markers: Your new sublimation markers don't have to be limited to mugs and tumblers. You can use them on any sublimation blank!
More Sublimation Project Ideas
Try the links below for other fun ways to create with Sublimation!


do explain everything. Well done
I see how the wrap would be useful for the tumbler, but it seems like you would have been better off using all that heat resistant tape on the design paper for the mug rather than doing it over the wrap? I haven’t tried sublimation yet, so maybe I’m missing something?
I find that the tape doesn’t hold it secure enough to get a really good print. But maybe others have a different experience.
Can you please help me I am taking as sublimation design and trying to remove something from it and add something else in its place can this be done
Depends on the design! You may need something like Photoshop to do this.
Have you tried sublimating using a cricut brand mug with infusible ink? Would you recommend the same heat as you used in this tutorial? I read another tutorial that recommended 400 for 15 minutes and I got some browning, I think it was likely a bit too hot.
Also, when you do larger tumblers that you need to lay on the side in the convection oven, is it okay to lay them shrink wrapped directly on the rack? Does it cause the wrap to melt or cause the area where rack touches to get too hot and cause transfer issues or browning? Thanks so much for the tutorial!
I have a Nomex pad on my rack so I never put anything directly on it. I am not sure on the time/temp on the mugs but that does sound long.