
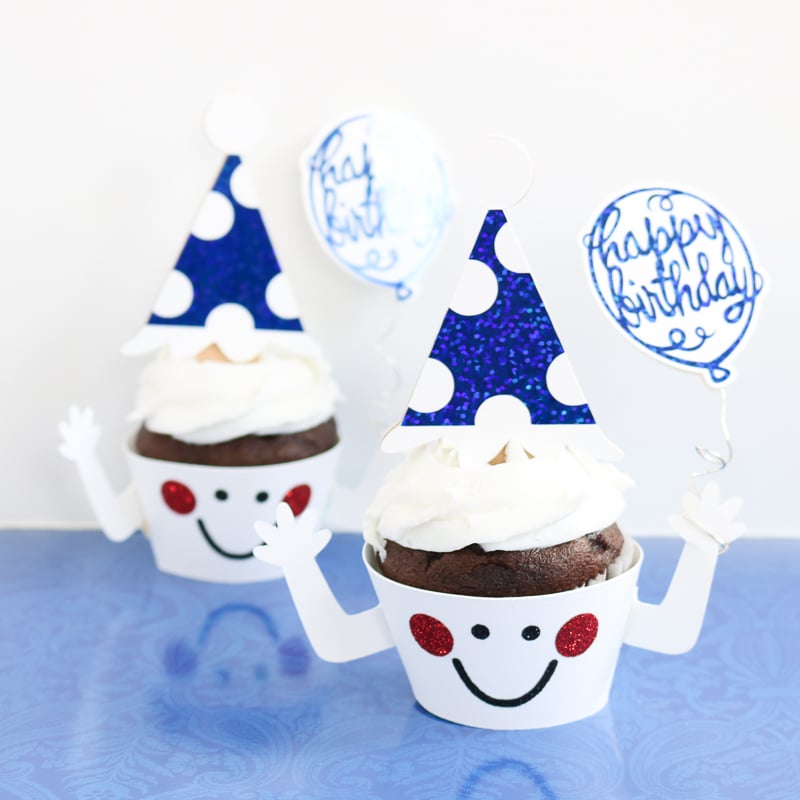
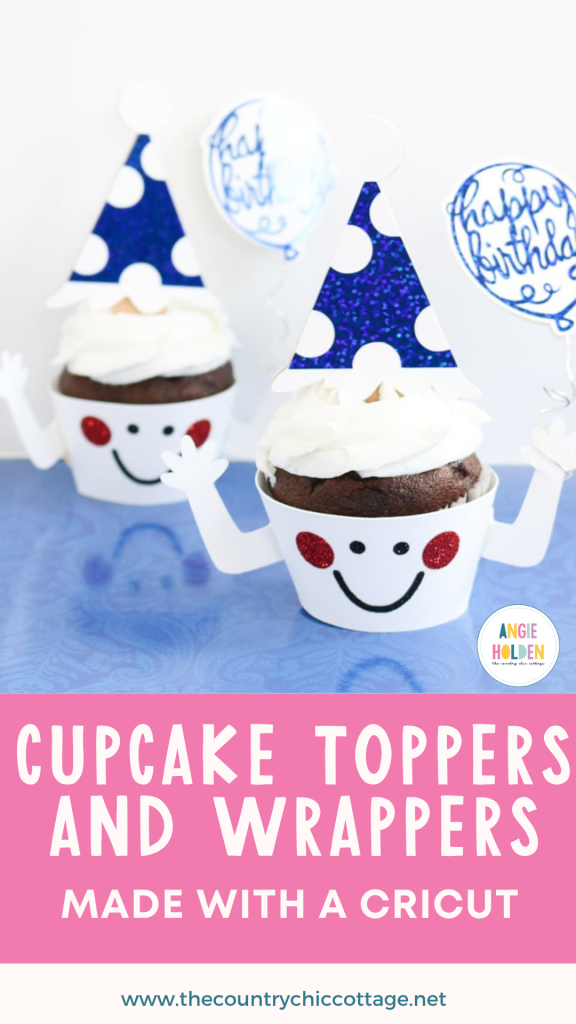
You can make Cricut cupcake toppers and wrappers with your favorite Cricut machine for a birthday or any other holiday! Here we are adding a happy birthday spin to our version, but you can change up the colors or message to fit your occasion. Once you learn how to spice up your parties with your Cricut, you may never go back!
This is a sponsored conversation written by me on behalf of Cricut. The opinions and text are all mine.
Cricut Cupcake Topper Video Tutorial
Want to see just how to make these cupcake toppers and wrappers with your Cricut Maker? I thought this one would work well with a video tutorial. You can watch that below.
Can't watch the video or missed some of the steps? Just follow along with our step-by-step instructions below!
How To Make Cricut Cupcake Toppers
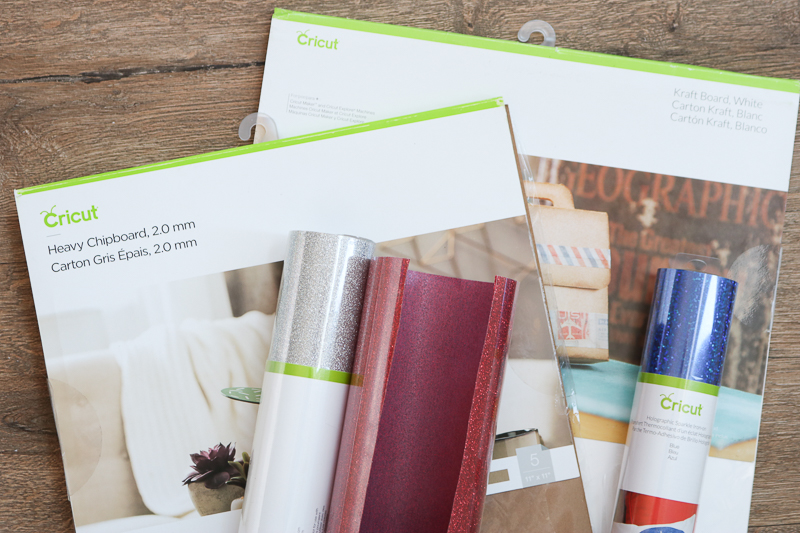
These Cricut cupcake toppers and wrappers are so easy to make and require a few craft supplies. For my cupcake toppers and wrappers, I used Holographic Iron-On because I thought it added that extra pizzazz. However, if you don't have Holographic Iron-On, don't worry! You can use any iron-on that you have on hand for this project!
Supplies Needed To Make Cricut Cupcake Toppers
- Cricut Kraftboard (I used white)
- Cricut Chipboard
- Iron-on (I used blue holographic sparkle as well as black and red glitter)
- Cricut Maker (click here to see why I love the Maker)
- Cricut Knife Blade
- Cut file (click here to access)
- Cricut EasyPress (click here to see why I love the EasyPress)
- EasyPress mat (optional)
- Masking tape
- Wire
- Adhesive
- Weeding tools (optional)
- Craft stick
- Iron-on protective sheet or parchment paper.
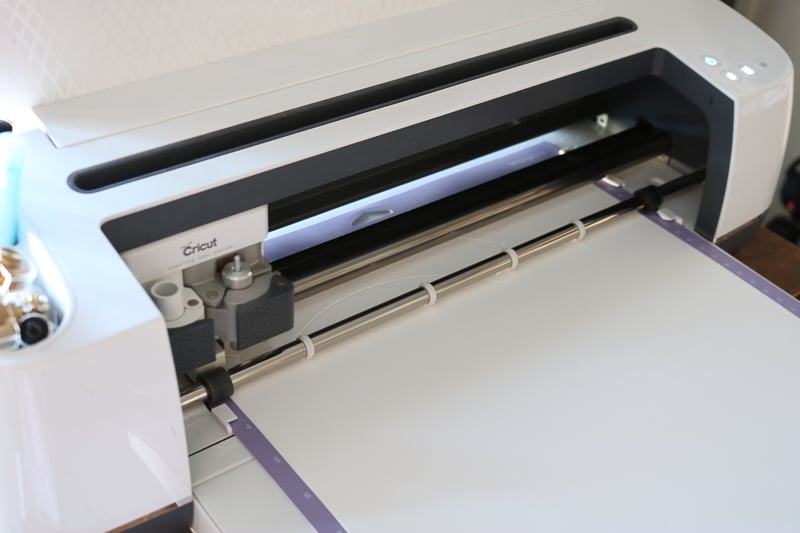
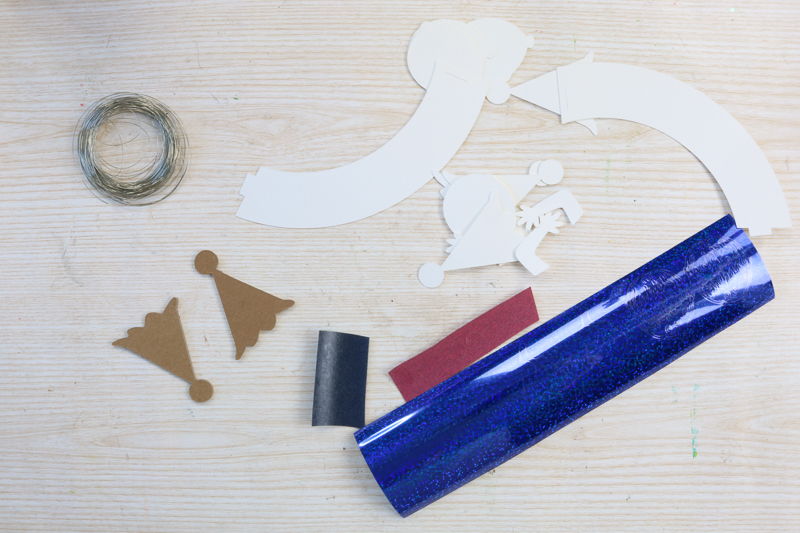
Step 1: Cut Pieces
Start by cutting all of the pieces with your Cricut Maker machine. You can access the cut file in Cricut Design Space. Be sure to mirror the iron-on images before cutting and cut with the shiny side down on the mat. The chipboard will require the knife blade. You can see more about using the knife blade with your Cricut Maker by clicking here. You will need to use a strong grip mat and tape the chipboard down on the edges all the way around.
Would you like to see a video of the knife blade? Click here to watch!
Once all your pieces are cut, you can begin assembling your cupcake toppers and wrappers. What you see below is enough for two cupcakes.
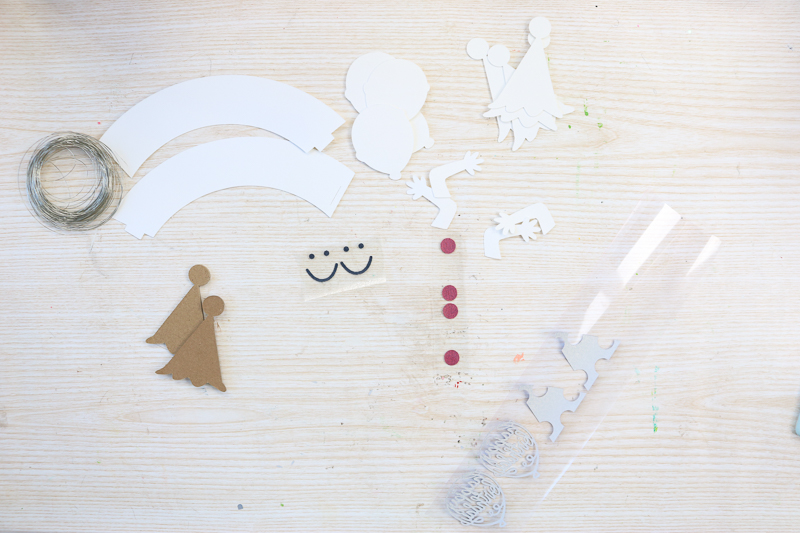
Step 2: Weed Cut Pieces
Weed away all the excess around your iron-on. You will also need to remove things like the centers of letters. Essentially, anything you do not want included in your final project needs to be removed from the iron-on design. Weeding tools make this step a bit easier, but they are optional.
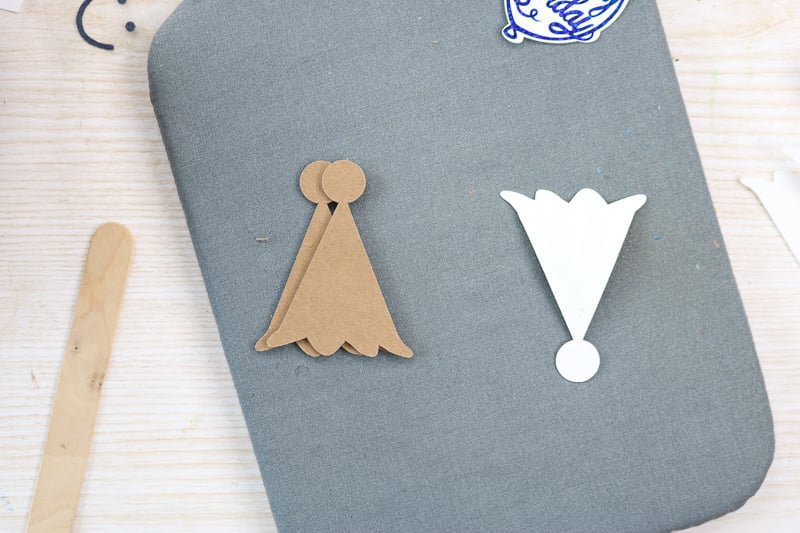
Step 3: Add Iron-On
Then you will want to use your EasyPress to add the iron-on to your kraftboard. The Cricut website has a chart with recommended heat settings. Be sure to look up the type of iron-on you are using and use cardstock as your base material. Then adhere the iron-on materials to your kraftboard as shown in the image below. I am using the EasyPress mat, but it is optional. I also always use a protective sheet or parchment paper over my cardstock to ensure the heat does not damage it.

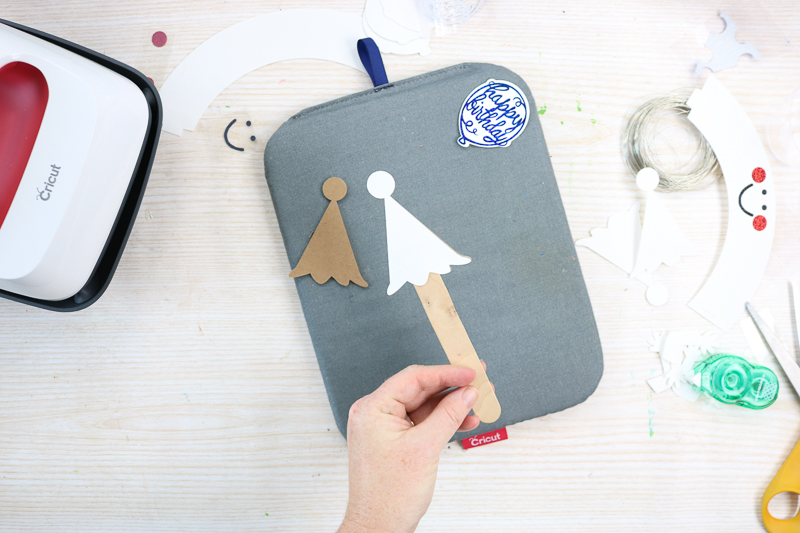
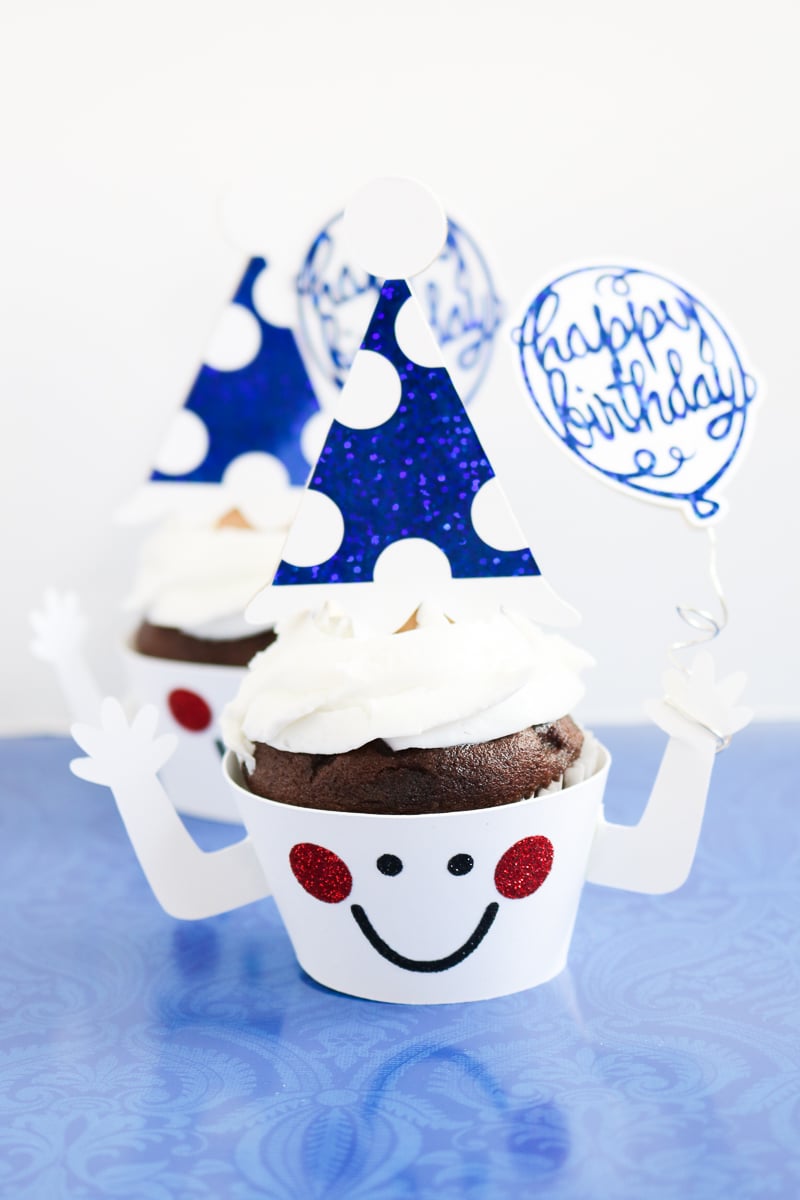
Step 4: Assemble Cupcake Toppers
Now you can assemble your Cricut cupcake toppers. Each one will use a chipboard hat, a kraftboard hat with iron-on applied, and a plain kraftboard hat.
Add the iron-on hat to the front of the chipboard hat using adhesive. Any type of adhesive you love will work here. Then add the craft stick to the back of the chipboard hat with additional adhesive.
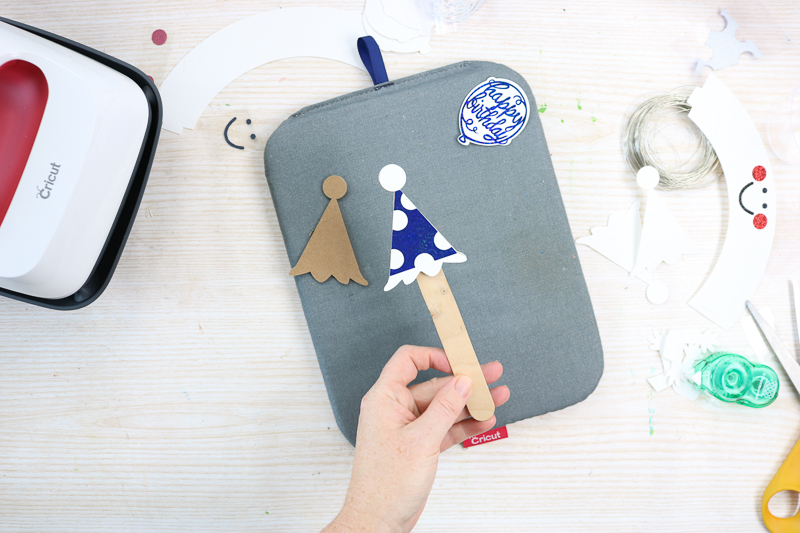
Then cover everything with a plain kraftboard hat on the back to finish the look.
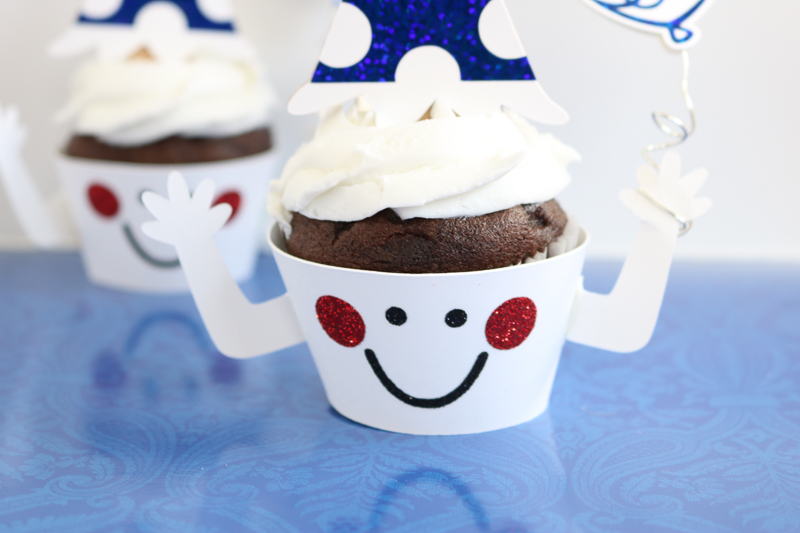
Step 5: Assemble Cupcake Wrappers
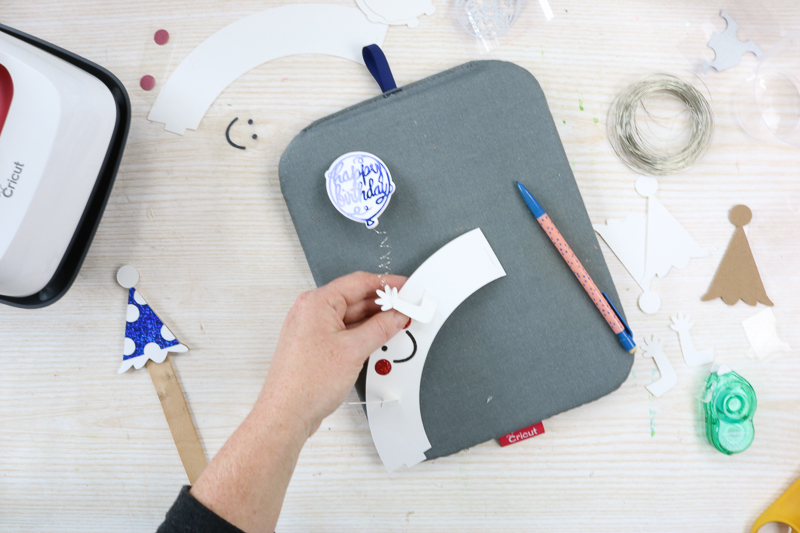
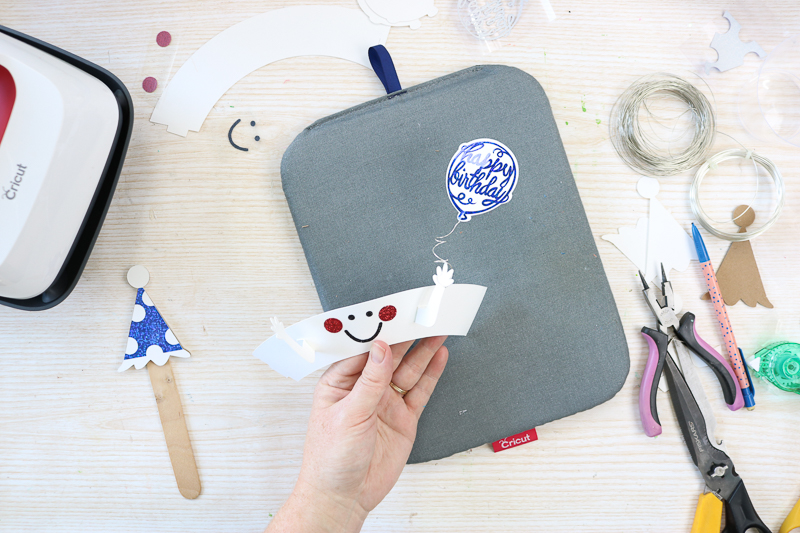
Start by adding arms to each of your cupcake wrappers.
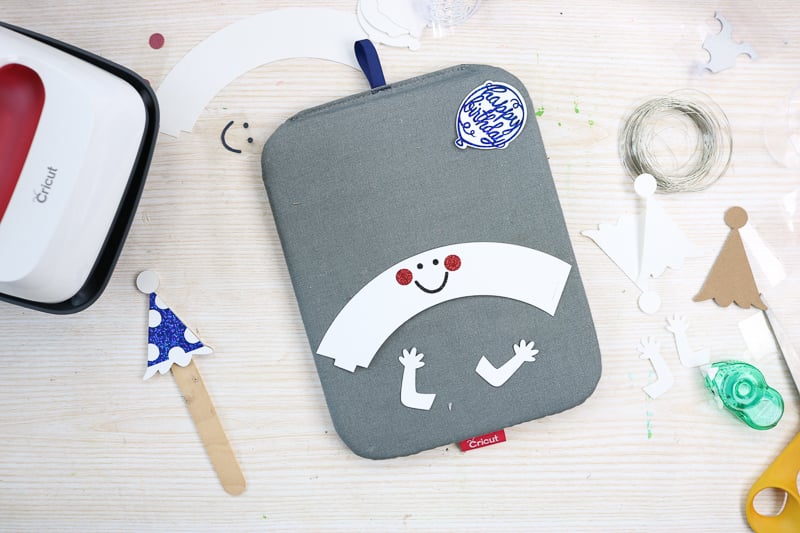
Fold the ends of each arm and use adhesive to secure them to the sides of your cupcake wrapper.
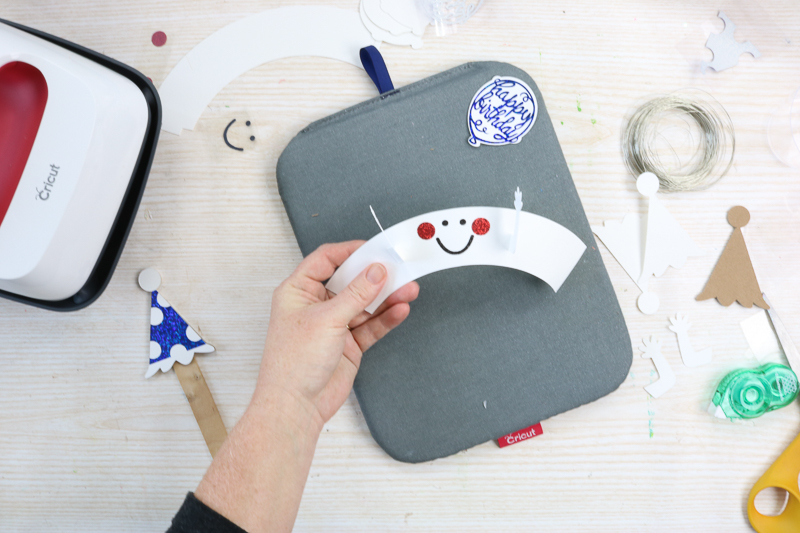
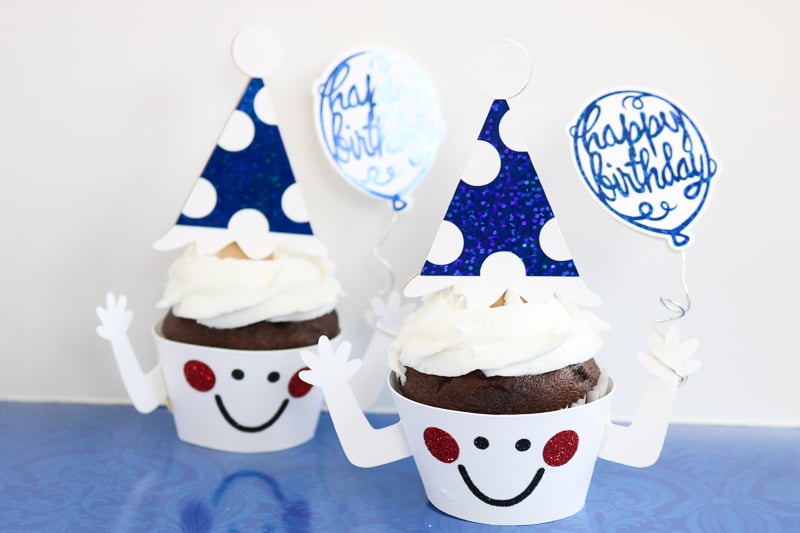
Then make your balloon for your wrapper to “hold”. Sandwich a wire between a balloon with an iron-on and a plain balloon. Secure this with adhesive. You may have to experiment with the size of the wire. You want it to easily bend but be strong enough to hold the balloon upright.
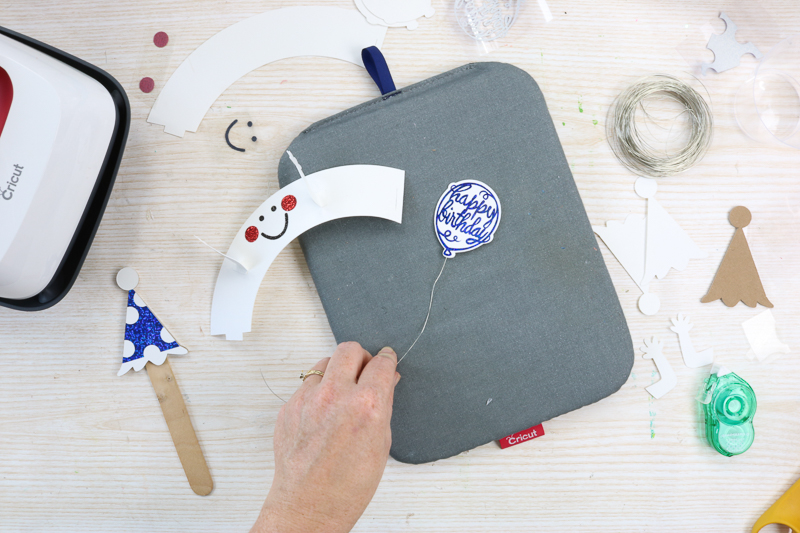
Wrap the wire around a pencil to get a “curly” look as shown below. Then wrap the end around the “hand” of your wrapper.
Add this cute cupcake wrapper around a cupcake and secure it in the back with a bit of tape.
These cupcake toppers and wrappers are the perfect way to celebrate a special occasion, such as a birthday, anniversary, or shower.
Customize the look to go with your event and cut the pieces with your Cricut Maker.
Everyone will love these happy faces and the balloons happily floating in the air.
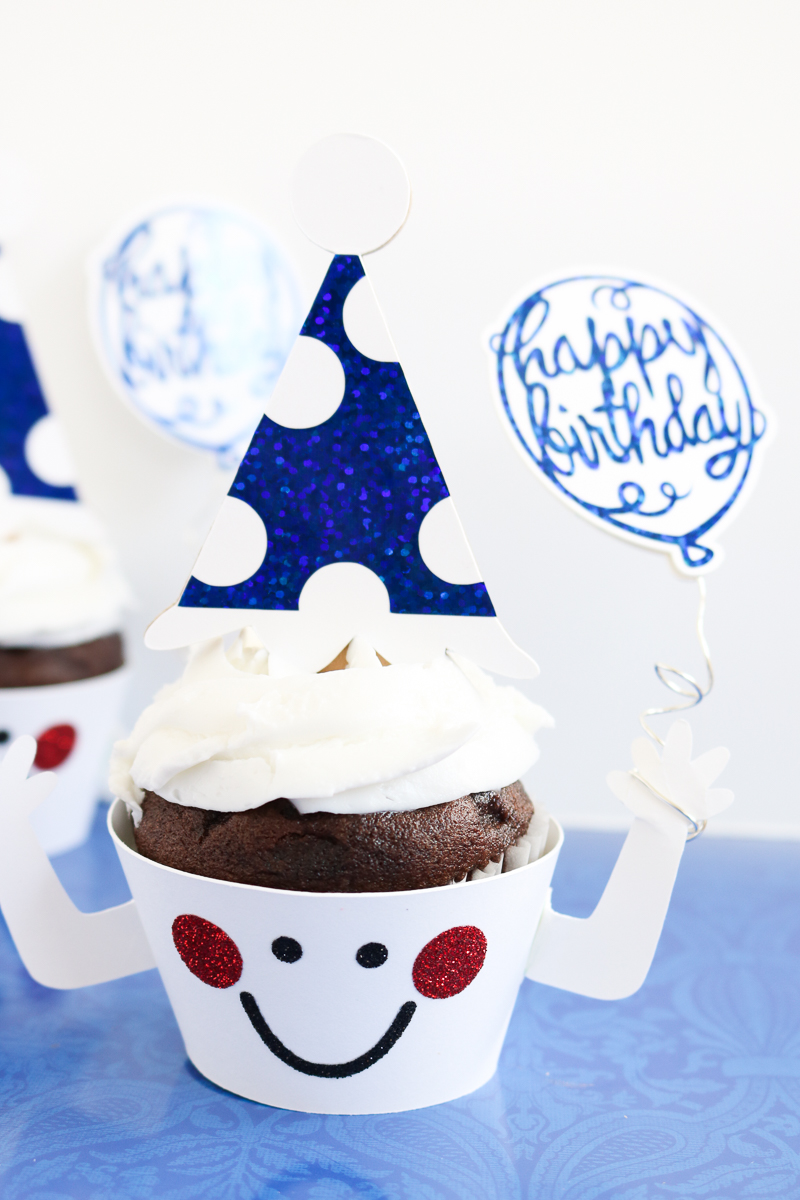
You can see a bit of what the hat and balloon look like from a side view below. The hats may stand up without the chipboard but I felt it was needed to add some stability to this project.
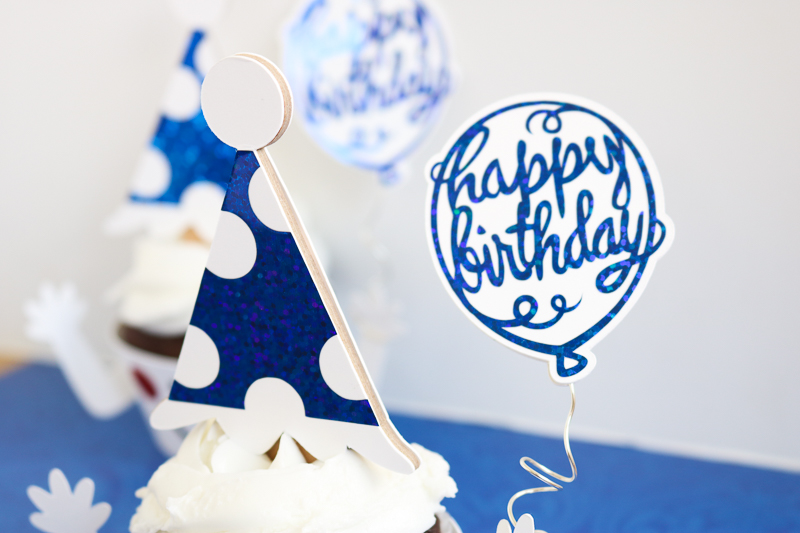
The iron-on works perfectly on the kraftboard, and it makes your pieces almost look painted.
Y'all enjoy and make your own version of these Cricut cupcake toppers and wrappers today!
FAQs About Cricut Cupcake Toppers
Here are answers to some of the most frequently asked questions I receive about creating these Cricut cupcake toppers. If your question isn’t listed, feel free to drop it in the comments, and I’ll be happy to help!
What Cricut Machine Can I Use For This Project?
Since this project involves cutting a variety of materials (kraftboard, chipboard, iron-on, etc.), you will want to use the Cricut Maker.
Can I Adjust The Size Of The Cupcake Toppers/Wrappers?
Yes, you can! You can adjust the size of the topper/wrappers to fit mini or extra-large cupcakes.
When Do You Add Cupcake Wrappers To Your Cupcakes?
I prefer to add my cupcake wrappers at the very end of the decorating process so they don’t get frosting or other decorations spilled on them. Please do not use these cupcake wrappers as liners and bake your cupcakes in them. It won’t work!
Can I Use This Same Process To Make Cupcake Wrappers For Other Occasions?
Yes! I love using cupcake wrappers because they add a lovely final touch to your cupcakes. This process works for any cupcakes – you aren’t limited to making birthday cupcakes! To adjust it for different celebrations, find the cut files you want and change out the cardstock colors/ sentiment on the balloon to fit your theme.
Can I Add These Cupcake Liners To Store Bought Cupcakes?
Yes, you can! You don’t need to make homemade cupcakes to use these liners.
5 More Cricut Cupcake Crafts
Did you love these Cricut cupcake toppers, and are looking for more Cricut cupcake crafts? Then check out the projects below!
- Free Printable Cupcake Toppers and More Party Printables
- 30 Second Cupcake Wrappers
- DIY Pumpkin Cupcake Topper with Your Cricut
- DIY Cupcake Wrappers With Your Cricut
- DIY Cupcake Wrappers For Graduation (Made With Cricut)


Super cute! I just got a Cricut for Christmas so I’m excited to make projects like these! Visiting from Talk of the Town.
Adorable! Pinned and shared
Cut file (click here to access) is not working at this time. It has a sharesale notification. Can you please check into this? This file looks like it would be adorable.
I got that link updated for you. Thanks for letting me know.
The Cut file is not working I would love to make these super cute cupcake Toppers and wrapper
Can you try refreshing your browser or deleting cookies? I did update that link so it should open Design Space right to it.
link didn’t work for me either…
This link was updated recently. I am able to open it on mobile and on a computer. Can you try again? It’s possible you may need to delete cookies.