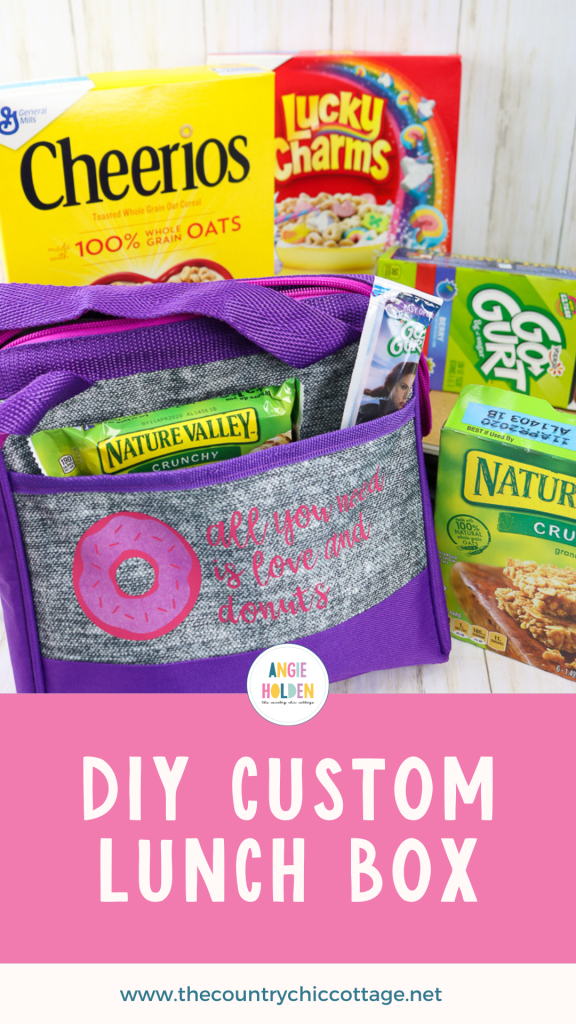
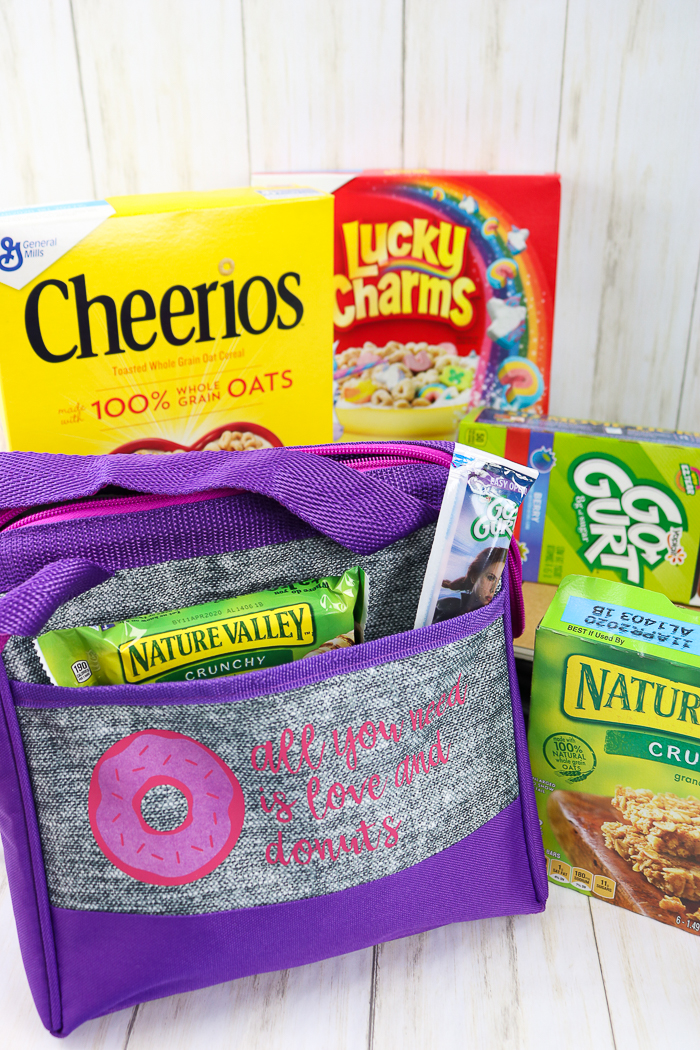
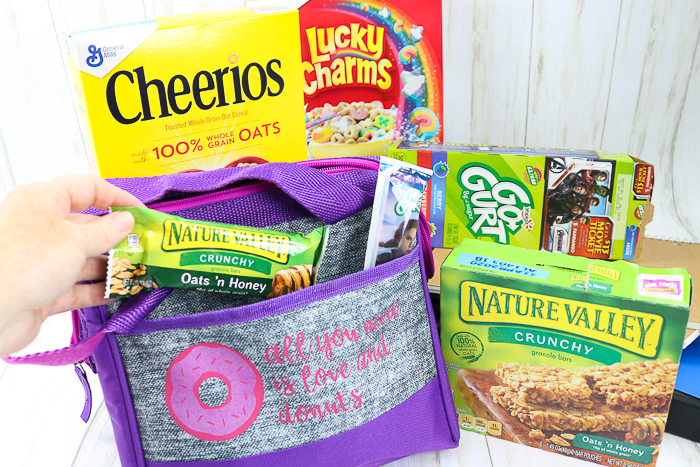
Creating a DIY custom lunch box is easy with your Cricut! Back-to-school season is upon us, and it is time to stock up on essentials and start thinking about craft projects to send the kids back in style. We have ideas for both of those, so keep reading to learn more! Plus, customizing a lunch box with heat transfer vinyl is fun, especially when you use the donut cut file below. I mean, who doesn't love donuts?
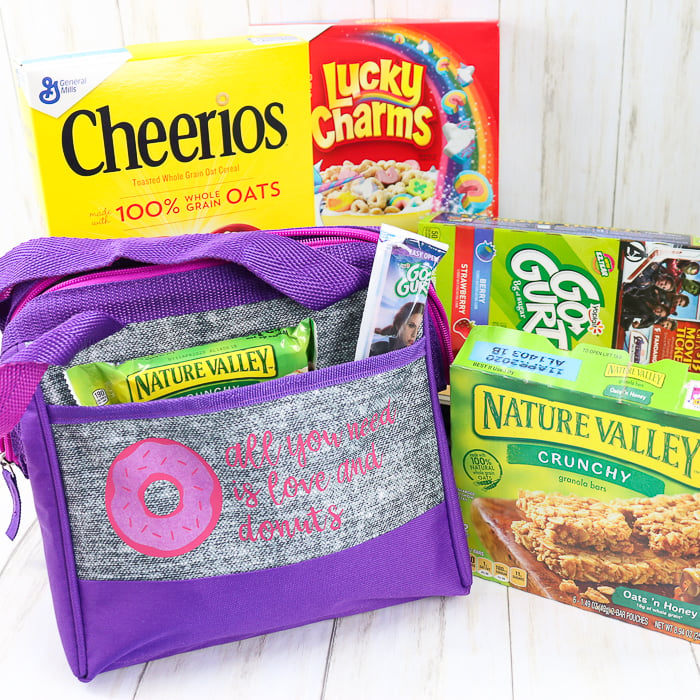
With back-to-school around the corner, it's time to start shopping for school supplies. Make this DIY lunch box for your kiddo this year that you can customize and personalize to your heart's content!
Then, slip sweet lunchbox notes inside for a great first day of school. Need some school lunch ideas? Try this mason jar lunchable.
Video Tutorial For Personalizing A DIY Lunch Box:
Want to watch the entire process for personalizing your child's lunch box on video? Just hit play below!
If you can't watch the video or missed some of the steps, just follow along with our instructions.
Personalized DIY Lunch Box
If you picked up a lunch box while stocking up on back-to-school essentials, you might want to give it a little personality! Check out the step-by-step tutorial below to see how to update any fabric/canvas lunch box you might have bought.
Supplies Needed To Make A Custom DIY Lunch Box
- Lunch box
- Iron-on in the colors of your choice
- Cricut machine (you can see which one is my favorite here)
- Cricut EasyPress (see more about the EasyPress here)
- EasyPress Mat
- Iron-on Protective Sheet
- Weeding tools (optional)
- Donut cut file (click here to access)
How To Make A Personalized DIY Lunch Box
Step 1: Upload File To Cricut Design Space
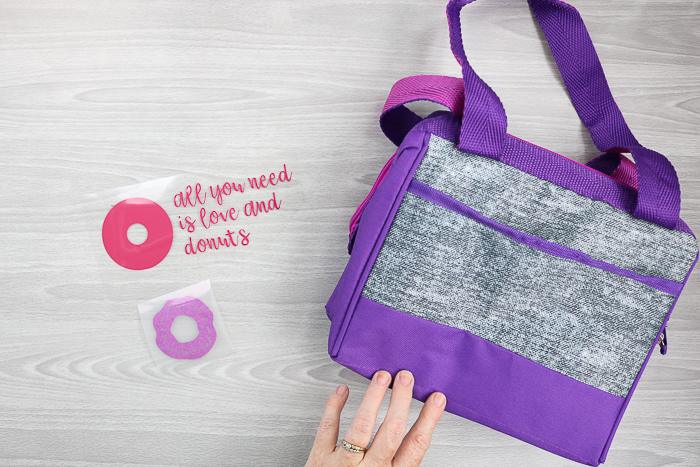
You can access the donut cut file we used or create your own. Resize it to fit the area on your lunch box and cut it from heat transfer vinyl.
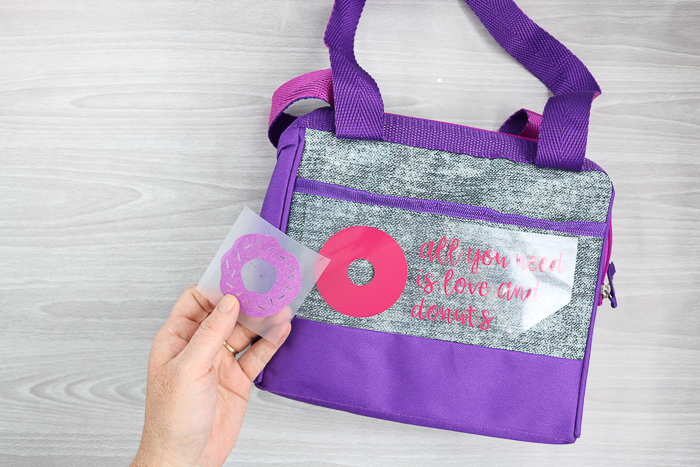
Step 2: Weed Vinyl
Remember to mirror the image before cutting and cut with the shiny side down on the mat. Then, weed away all excess until you have something that looks like the image below.
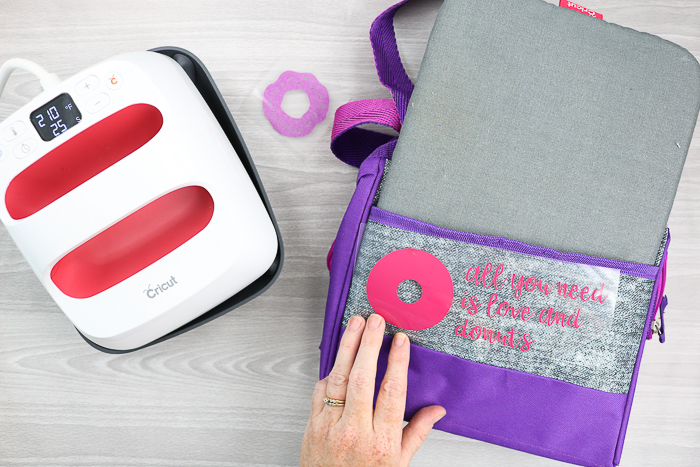
Step 3: Lay The First Layer Of Design On The Lunch Box
Our custom lunch box has a layered design, but you can choose just one color if you prefer. First, put your EasyPress mat inside the lunch box for protection, then add your first color to the front.
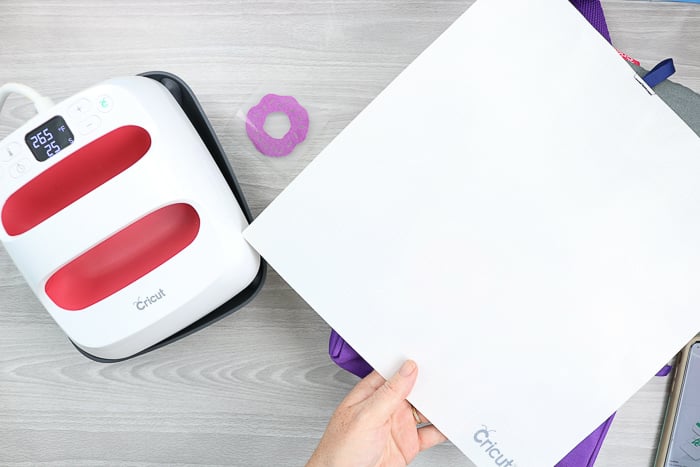
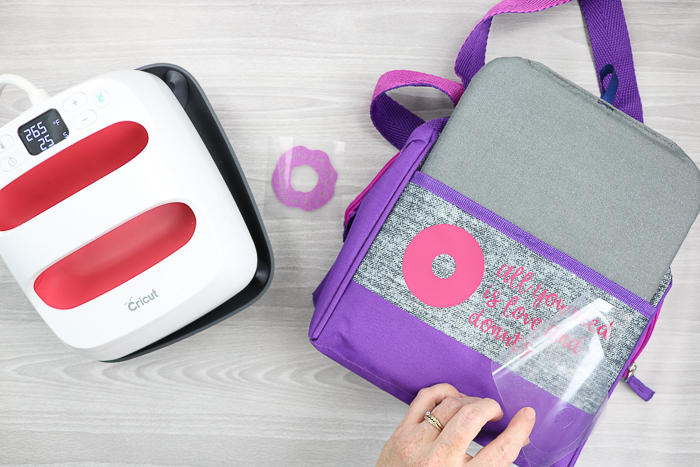
Step 4: Cover The First Layer With Protective Sheet
Cover with the protective sheet to protect any areas the EasyPress may touch, as you don't want them to get too hot.
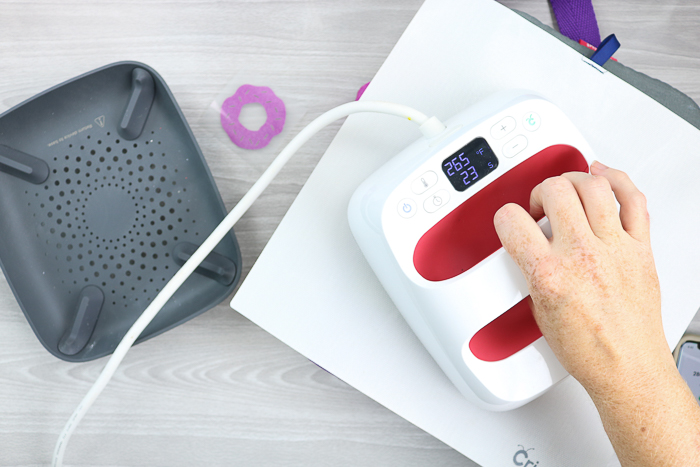
Step 5: Add The First Layer Of Your Design Using Cricut EasyPress
Then, press for the recommended time and the recommended temperature. Be sure not to let the EasyPress rest on any seams on the lunch box, as this could cause uneven heating.
If you have never used a Cricut EasyPress to add vinyl, don't worry! Check out my How to Use Cricut Iron-On Vinyl with the EasyPress blog post, where I go over everything you need to know about using the EasyPress with vinyl.
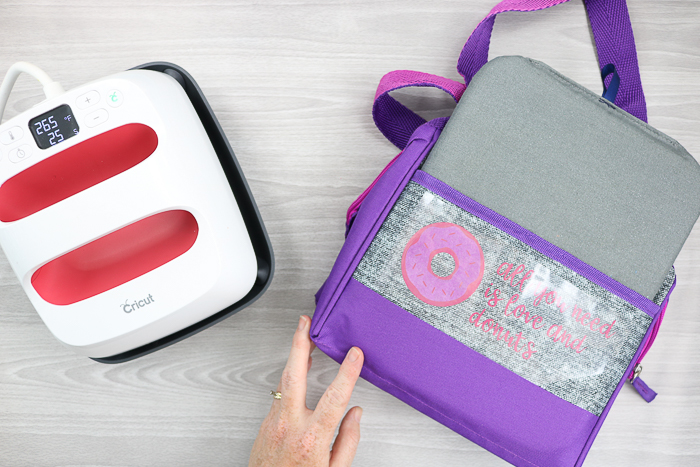
Step 6: Peel Back Liner
Allow to cool, then peel back the liner to reveal your design. If needed, press a second time.
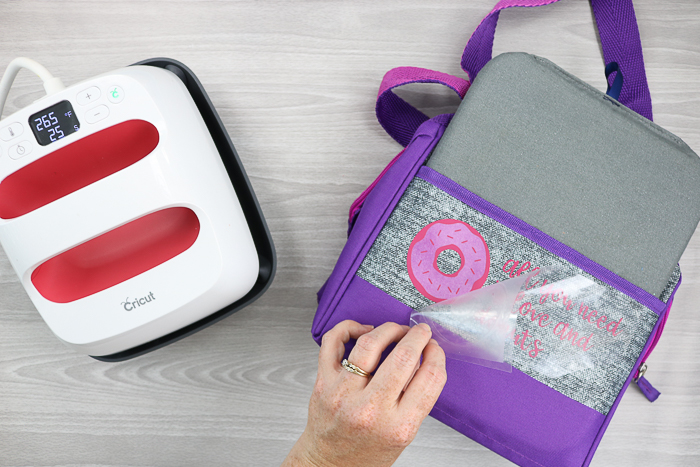
Step 7: Lay The Second Layer Of Your Design Over The First Layer
Then, add your second color over the top of the donut. Be sure to replace the protective sheet over your entire design before pressing to protect it.
Step 8: Add The Second Layer Of Your Design Using Cricut EasyPress
Press using the same method as before with the protective sheet in place. Then, allow your design to cool.
Step 9: Peel Back Liner
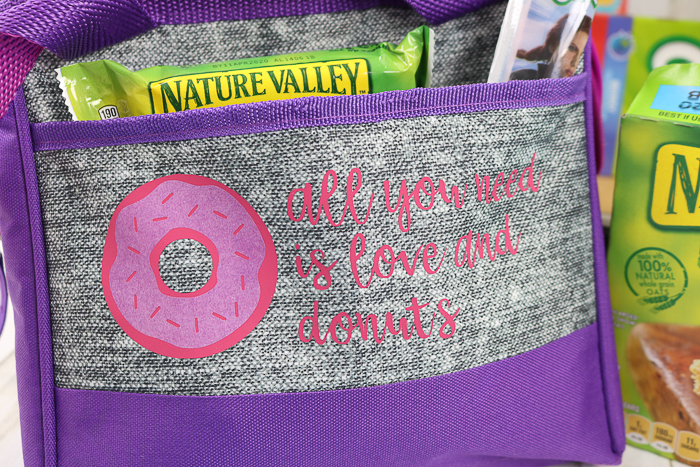
Peel back the liner to reveal your completed custom lunch box!
A personalized DIY lunch box is a great way to celebrate back-to-school season!
We are almost ready to head back to school now! Do you think it is early? Our schools actually started a few weeks ago, so I really needed all of these things right now!
Even if you live in another part of the country, it will be packing lunch season before you know it!
Tips and Tricks for DIY Lunch Box
Now that you’ve seen how to make a DIY lunch box, are you ready to make your own? Here are a few tips and tricks to ensure your project goes as smoothly as possible!
- Choose Your Design First, Then Your Lunch Box – This might sound a bit backward, but you don't want to pick up a lunch box with tons of crazy patterns or too many pockets that interfere with your design. Due to that, my recommendation is to choose your design first, then find a lunch box that would work with that design.
- Get The Right Lunch Box – You don't need a fancy lunch box to make this project, but you do need to pick the right one that will work not only with your design but also with vinyl. For example, I chose a plain canvas-style lunch box, which gave me tons of options for customizing. However, you could choose a lunch box that has a fun pattern and work around the pattern when adding your design. Just remember to keep both your design and vinyl material in mind when lunch box shopping. If you need some lunch box inspiration, below are some more DIY lunch box ideas that you can make with your Cricut!
- Get Creative With Your Design – Depending on who you are making the lunch box for, you can customize it in so many ways! You can add their name, a hobby they like, a character they like, or even their favorite sports team. The sky is truly the limit!
- Use Those Scraps – This project is perfect for all those scrap pieces of vinyl you have been saving! Plus, if you are familiar with Cricut SnapMat, this project would be perfect to make if you like using that feature from Cricut.
5 More School-Themed Projects
So, make a custom DIY lunch box and stock it with all of those lunch items for back to school! Also, if you are looking for even more school-themed projects to make, check out the ones below!
- First Day of School Gifts with Free Printable Tag
- DIY Unicorn Charm with Free Unicorn SVG
- Free School SVG: 16 Files for Your Crafts
- Unicorn SVG: 15 Free Files for Your Cricut and More
- Bento Lunch Box Ideas for Kids