
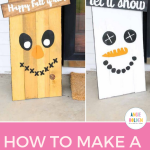
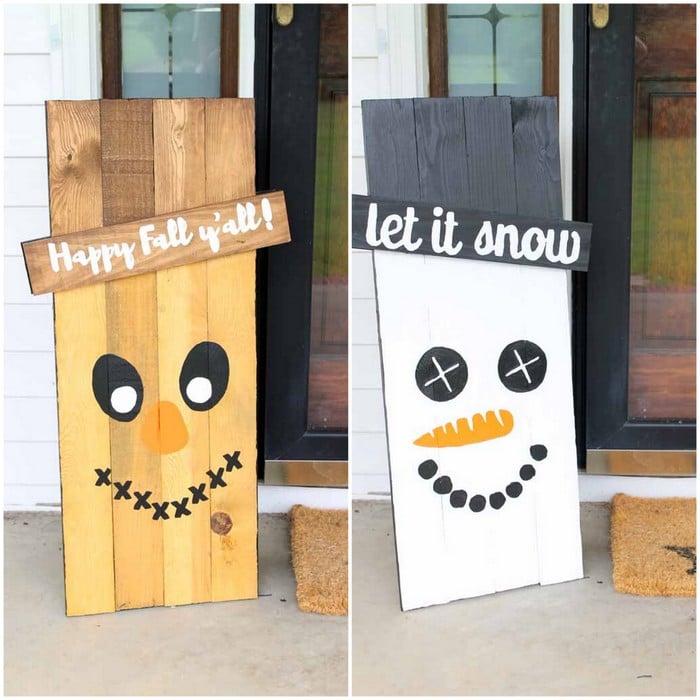
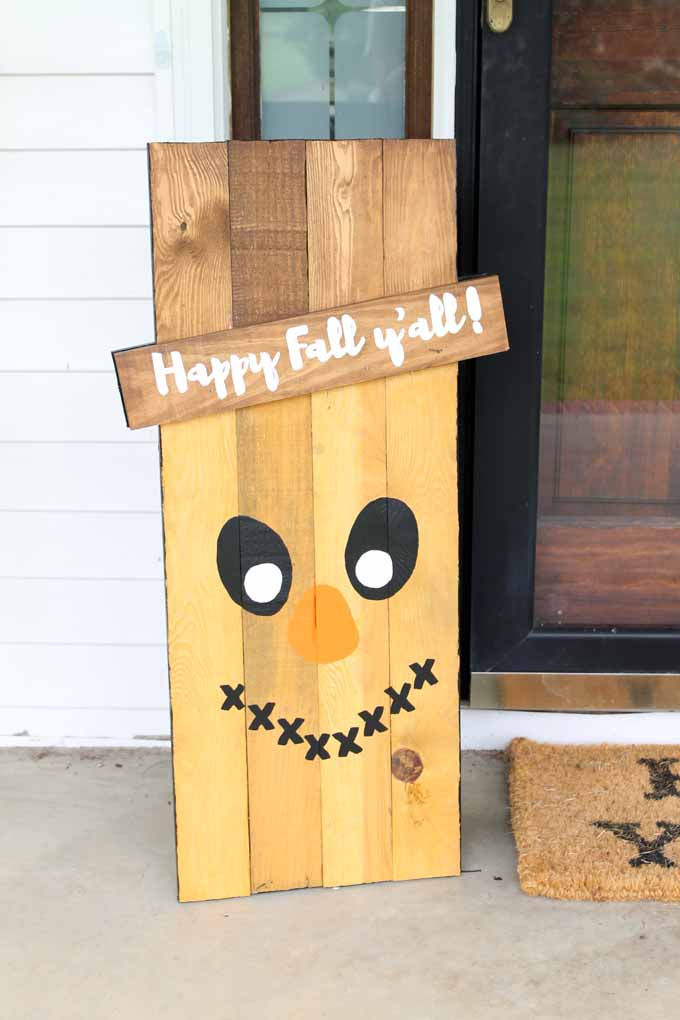
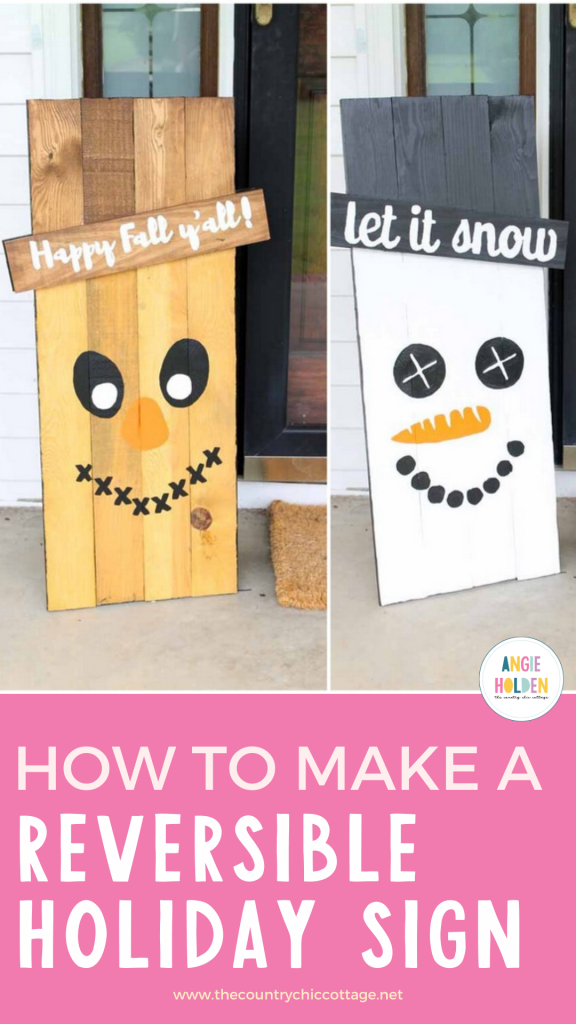
Kick off the season by making some holiday signs. This reversible scarecrow snowman sign is super easy to make and we even have free templates for you to print to get it just right. Make one for yourself, one for your neighbor, and maybe even a few to sell.
Once you get your supplies gathered, the DIY part of this sign will surprise you! It is that simple to make a scarecrow snowman craft for your fall porch.
This was first published on October 6, 2017, however, I am republishing with more information.
How to Make Reversible Signs
I am going to walk you through a simple process below to make these signs with simple supplies, however, if you have a Cricut machine, I will offer alternatives that may make the process a bit quicker!
Supplies needed to make these holiday signs:
- 1×4 boards (I used two that were 10 feet long)
- Saw
- Screws
- Nails
- Wood glue
- Drill or screwdriver
- Hammer
- Brown and gold wood stain (I love the Americana Decor Color Stain)
- Outdoor paint in white, black, and orange
- Paintbrushes
- Printable template (Click here to get the template and SVG file!)
- Scissors
- Tape
- Transfer paper (helps to have both black and white)
- Spray sealer
- Computer and printer
Step 1: Make the sign from wood
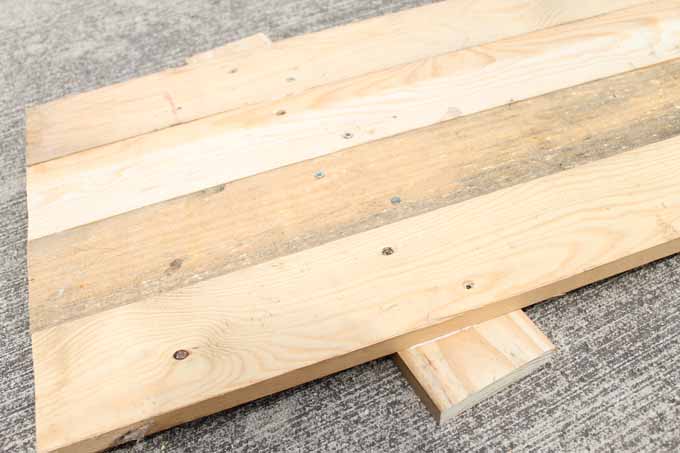
Cut four pieces from your 1 x 4 boards that are 3 foot long and two pieces that are 18 inches long.
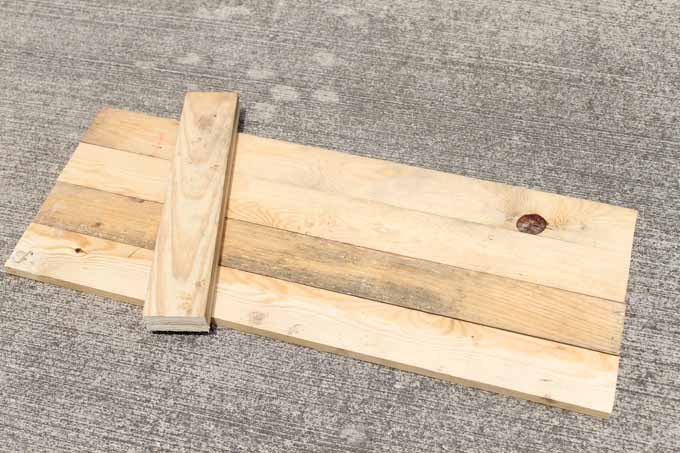
Then layout your boards as shown below. The shorter 18 inch boards go across. I placed mine approximately 6 inches from the top on one side and 9 inches on the other.
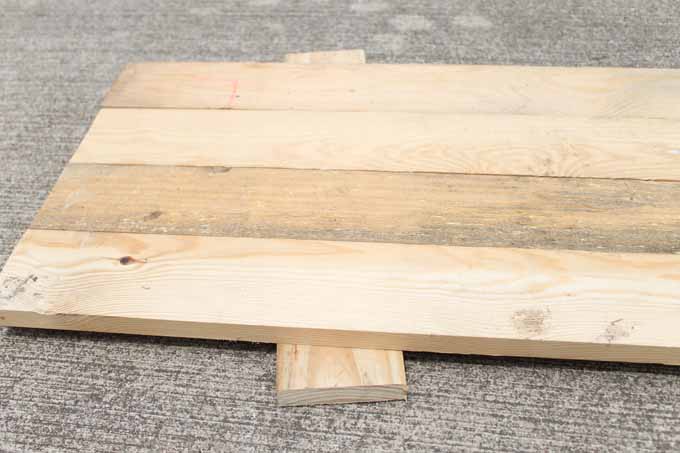
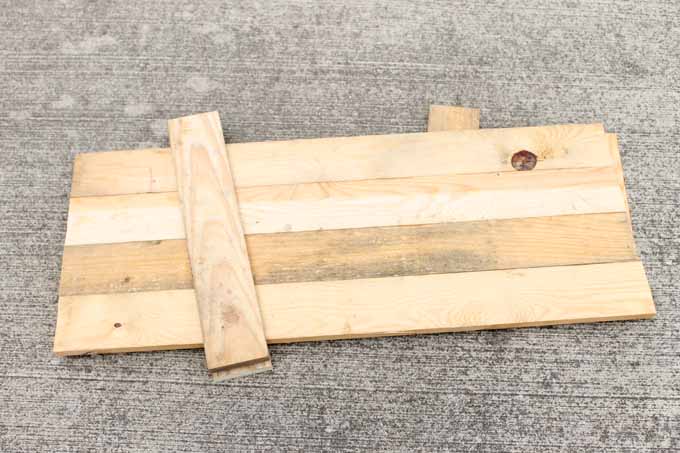
Add wood glue between all of the joints then use screws from the backside to hold in place. NOTE: Screws should go through the first board and about half way through the second.
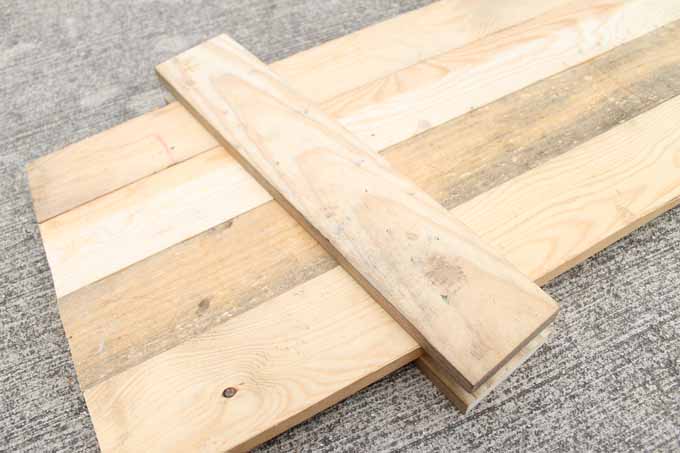
Then add the second 18 inch piece on top of the screws and lining up with the first piece. Once again add glue in between the joints and this time use finishing nails to hold in place. NOTE: Once again fasteners should go all the way through the first board and about half way through the second.
Wipe away all excess glue and allow everything to dry completely. NOTE: Adding a scrap board or two under the bottom portion as shown below will keep everything level while it dries.
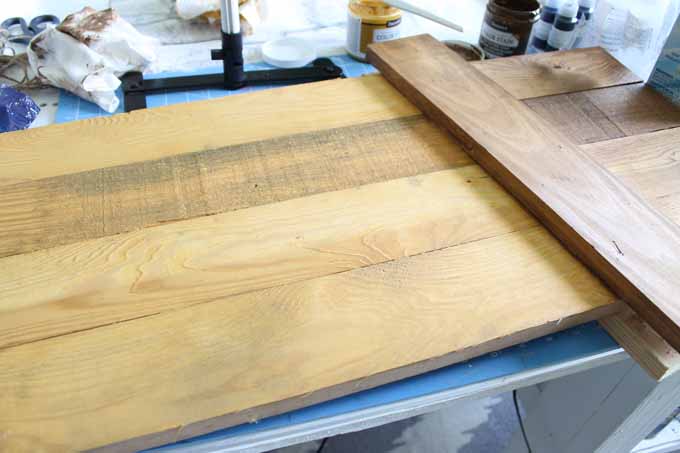
Step 2: Paint the Scarecrow
After everything has dried, you can start painting your project. For the scarecrow side, use dark wood stain for his hat and gold for his face. Brush on, allow to set a few minutes, then wipe away excess with a rag.
You can choose to follow the tips below for painting the words or you can cut the words from vinyl using a Cricut machine. See the steps here for cutting vinyl.
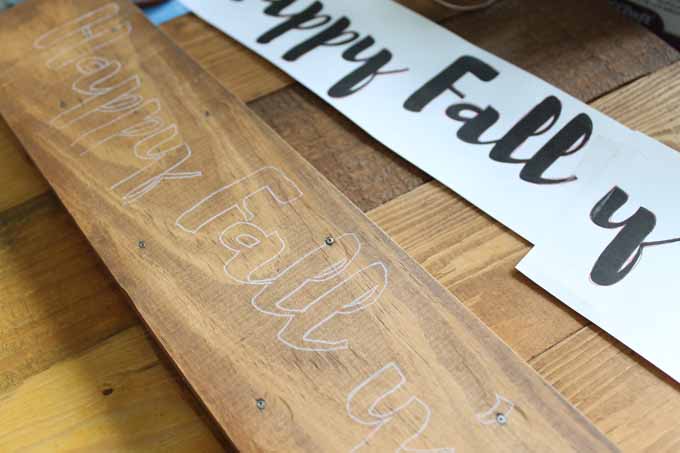
Once your stain has dried, you can start adding the painted elements. Print out your template here. Cut out your pieces and tape together. Then tape in place on your sign.
Add transfer paper glossy side down under the template. NOTE: Use black transfer paper over lighter paint and white over darker paint.

Use a pen to trace around your template and then remove the paper. You will be left with lines as a guide for your paint.
Start filling in those lines with the paint colors of your choice. NOTE: Each element will take 2 to 4 coats of paint and you need to be sure to allow each coat to dry before adding another layer.
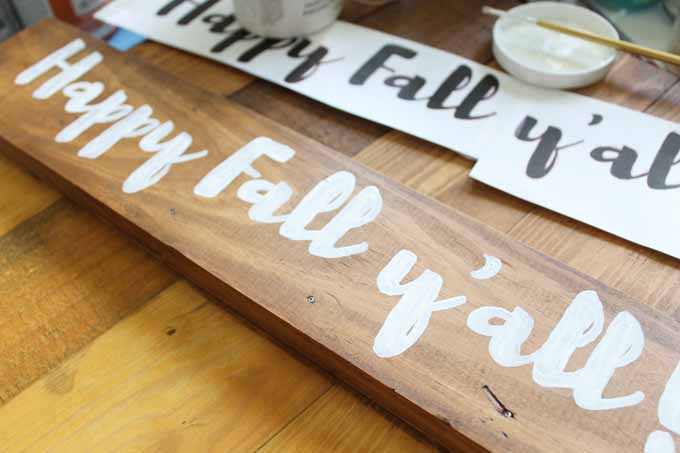
Then just keep repeating these steps for each element on the scarecrow side.
Allow that side to dry completely before flipping over for the reversible snowman side.
NOTE: If you have used vinyl for the elements, be sure to coat with a sealer over the entire surface several times!
Step 3: Paint the Snowman
Repeat the same steps with the template pieces for your snowman.
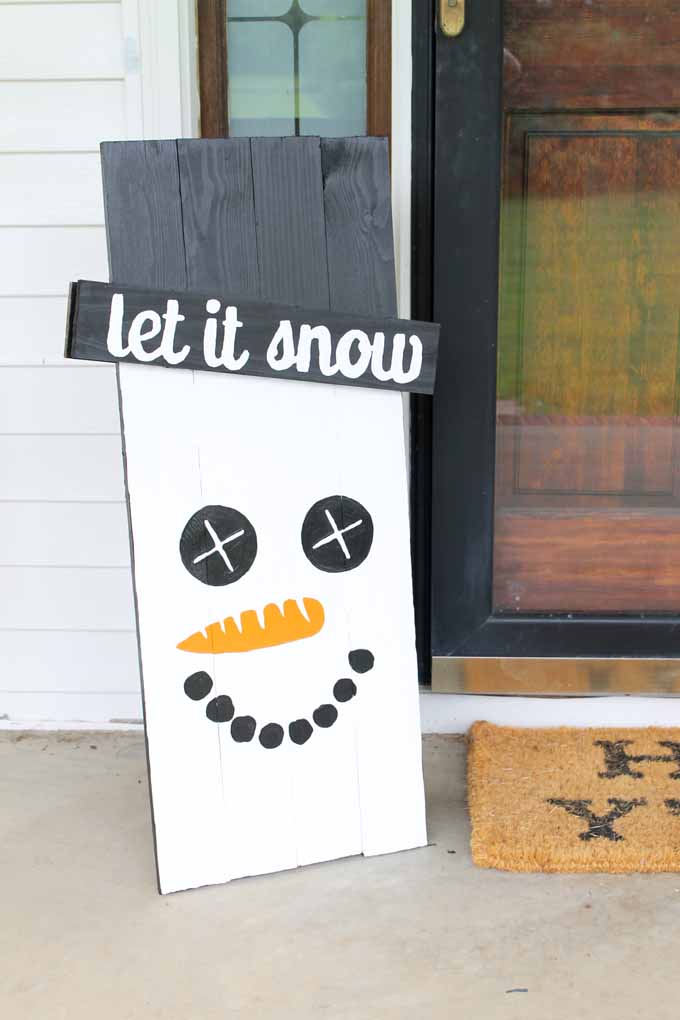
You will want all surfaces to be painted as you will probably be using your holiday signs outdoors. So be sure to paint the edges of your sign as well as the front and back. I used the black paint on the edges however you can use any color you choose.
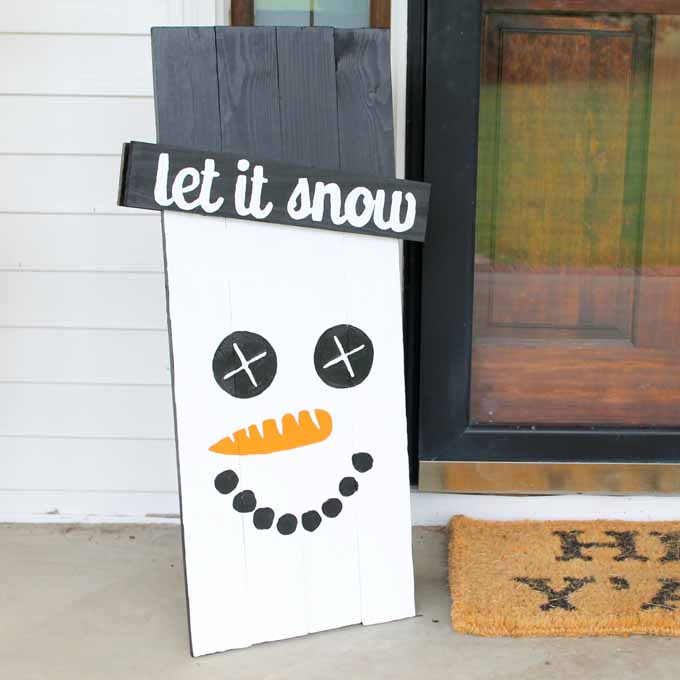
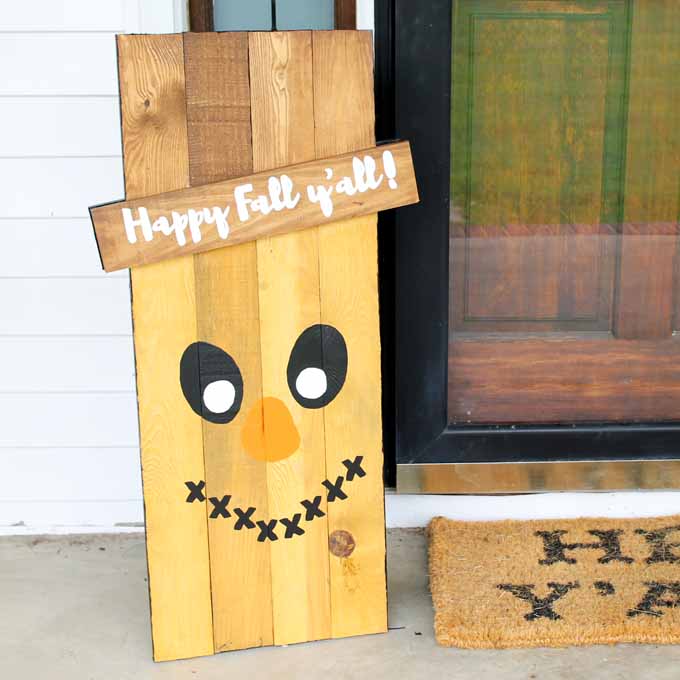
After your reversible snowman scarecrow sign is complete, be sure to lean it up on your front porch to welcome visitors.

I love a project that works for multiple seasons, don't you? Make some holiday signs for gift giving! Everyone will love these adorable signs and they are also super affordable to make.
So do you love these holiday signs and want more ideas? Try the links below!
- Pumpkin Patch Sign
- Mason Jar Sign
- DIY Beware Bat Sign
- Rustic Wood Sign
- Reversible Scrap Wood Pumpkins
- Glow in the Dark Eyes Halloween Wreath


So adorable. I love holiday decor that I can leave out for more than one holiday!