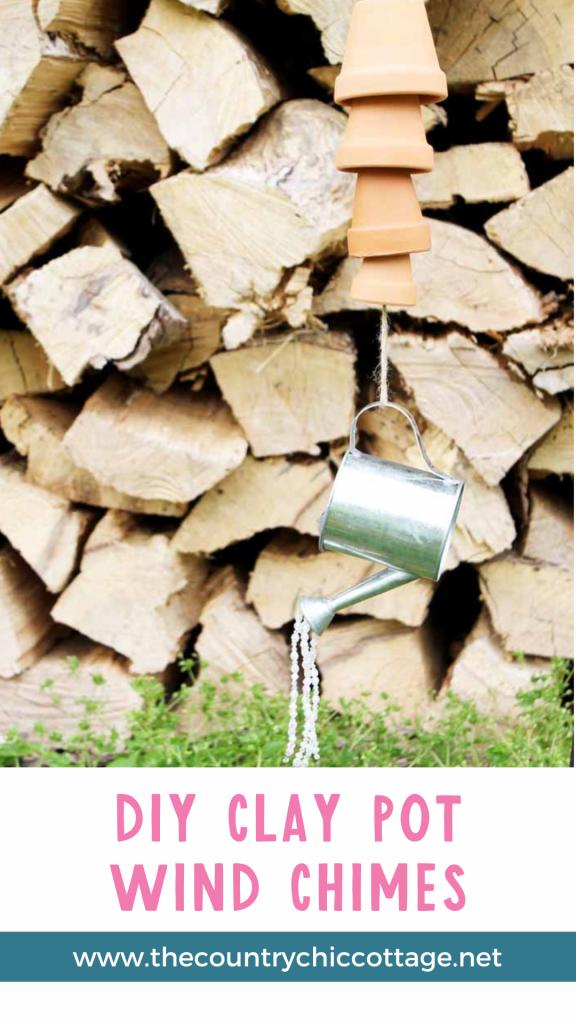
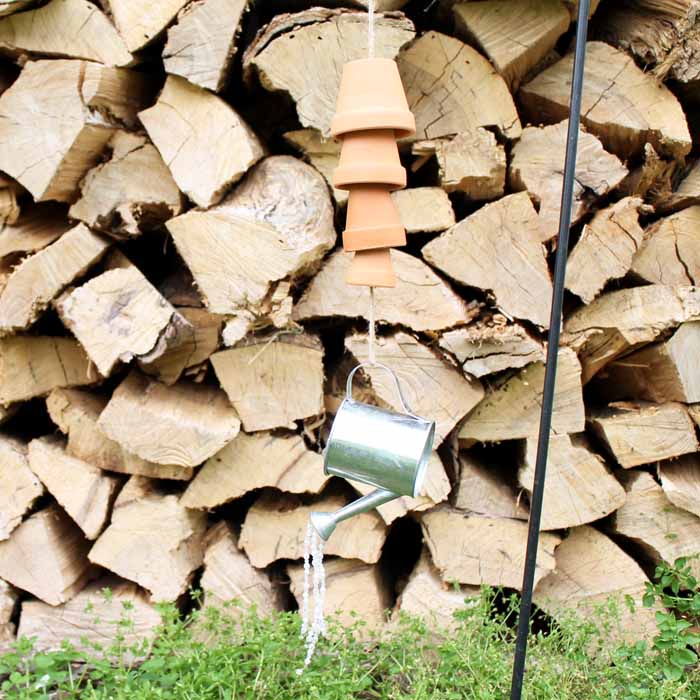
Wind chimes create a lovely melody, but buying them can be expensive. Instead, you can make your own DIY clay wind chimes for a fraction of the cost using simple, affordable clay pots!
How To Make DIY Clay Wind Chimes
I love the sound of wind chimes in the breeze. Their peaceful, harmonious bell-like sounds can help relieve stress on overwhelming days or lull me to sleep at night.
But I nearly had a panic attack not too long ago when my old set broke, and I saw how much money the store wanted for a set of simple wind chimes! At nearly $150, a new set was NOT in the budget.
So I turned to my crafting roots and thought about how I could get what I wanted for a fraction of the cost of a new set of wind chimes at the store. Did you know that you can make DIY wind chimes with ordinary clay pots? This fun craft idea will add both musical harmony and visual bling to your yard.
I shared this idea with my friend Amanda from Crafts by Amanda because she loved it too!
If you want even more DIY backyard ideas, check out my Painted Birdhouse Camper, Easy Decorative Garden Stones, and DIY Mason Jar Garden Flag ideas.
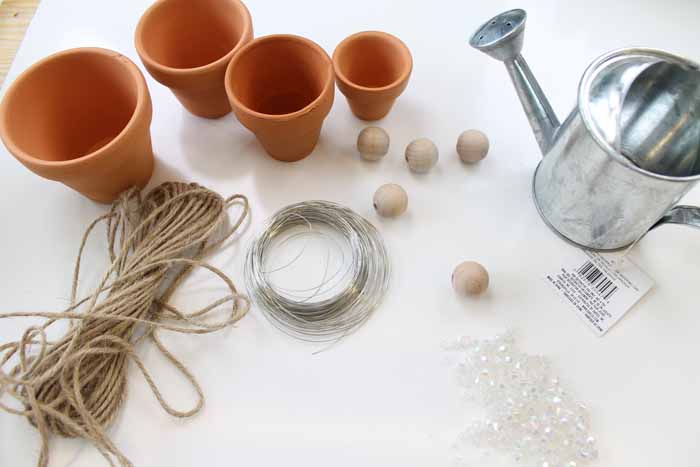
Supplies Needed To Make Clay Wind Chimes
Although I've seen several different types of materials people have used to make homemade wind chimes, I wanted something that would deliver just the right sound. After some thought, I decided to use simple mini clay pots.
- Terra cotta pots (in various sizes, so smaller ones can fit inside larger ones)
- Wood beads
- Twine
- Small galvanized watering can
- Wire
- Clear faceted beads
- Jewelry pliers
- Wire cutters
- Scissors
Step 1: Add Wire Through Holes Of Watering Can
Start by adding the beads to your watering can. Run some wire in through one hole and out through the opposite hole.
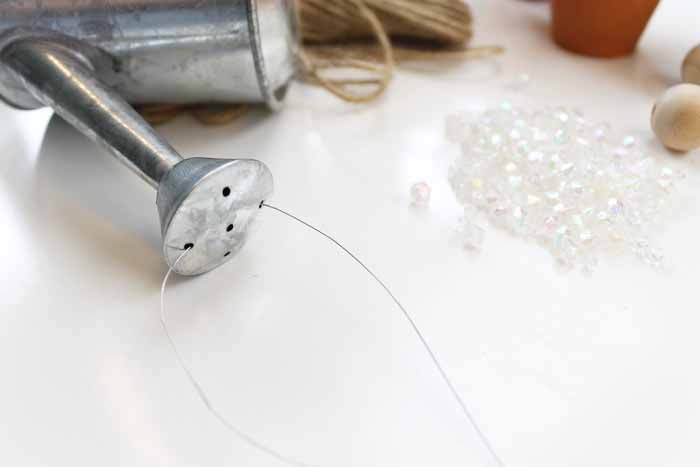
It may take a few tries to fish the wire through the holes, but don't give up if you don't get it on the first attempt, because it is possible!
Then you just need to repeat for all sets of holes in your watering can.
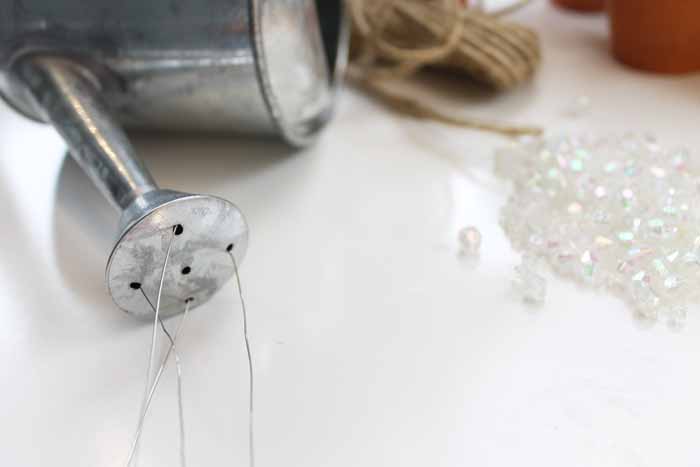
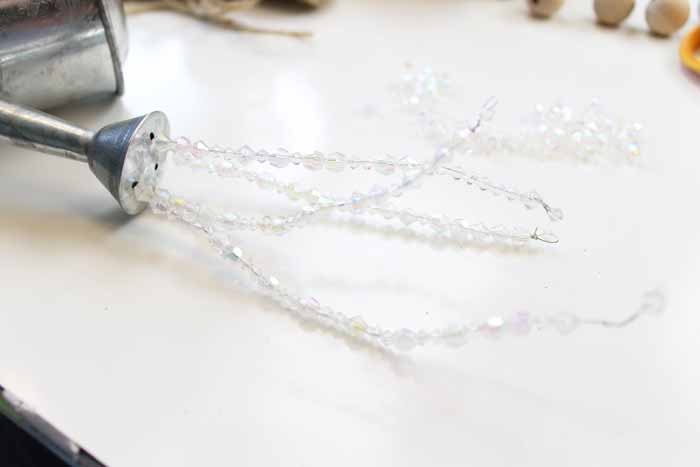
Step 2: String Beads Onto Wire
Next, string clear faceted beads onto each wire. Wrap the ends of the wires around themselves with wire pliers to secure the beads in place for your DIY wind chimes.
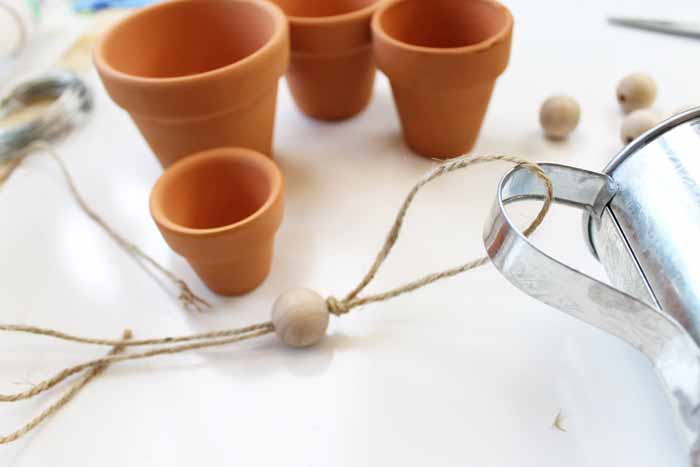
Step 3: Tie Twine Through Watering Can Handle
Now that we have completed the bling, we will proceed with the actual wind chime part of the project.
Start by running a long piece of twine through the handle of your watering can. Add a knot where you want your first clay pot to sit. Then run the ends of your twine through a wood bead.
NOTE: You can wrap the tape around the ends of your twine (similar to the ends of shoelaces) to make threading through the beads and pots easier.
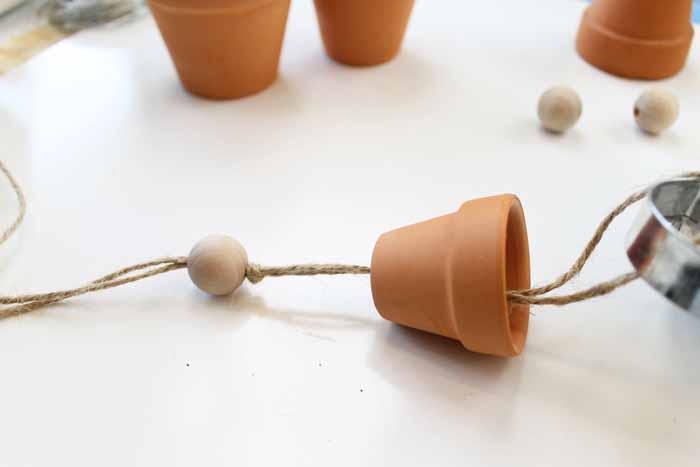
Step 4: Add Clay Pots To Twine
Add a pot to the twine on top of your first wood bead. Then tie another knot wherever you want your second clay pot to rest and add another bead.
TIP: Remember, you can tie and untie these repeatedly to get the locations correct.
Continue adding knots, beads, as well as pots until your homemade wind chimes are complete.
Step 5: Make A Loop For Hanging
Finally, tie the twine at the top to make a loop for hanging, and your DIY clay wind chimes are done and ready to hang!
You will love the sound when the wind is blowing as your watering can catches the wind.
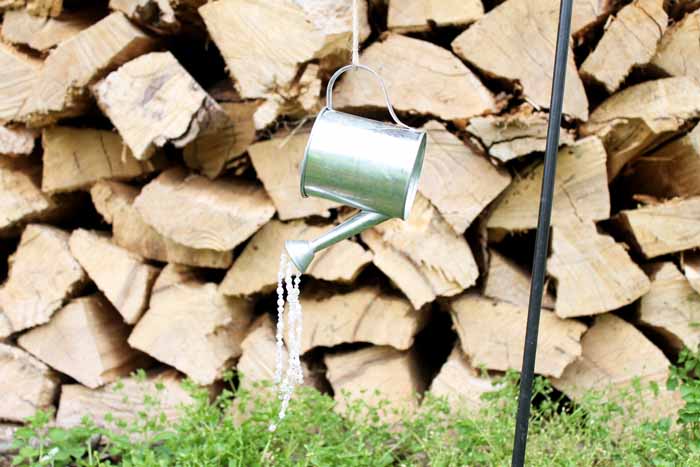
This quick and easy craft project will look great in your garden. Don’t those strings of beads resemble water flowing from the can?
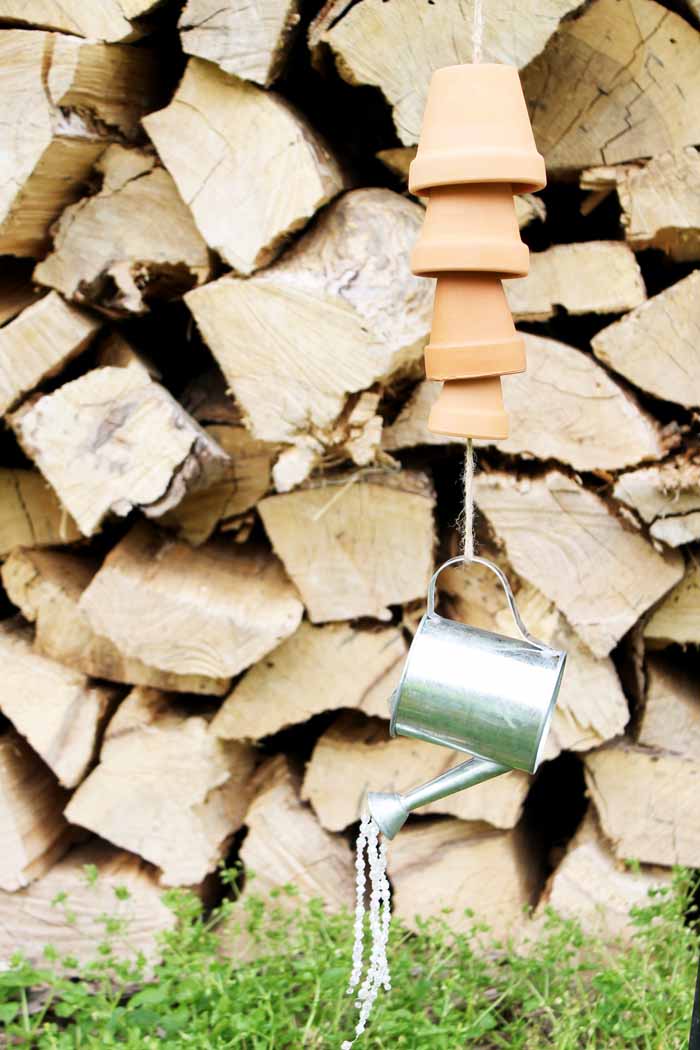
My helper also loves my homemade wind chimes made from clay pots, and I must say I agree with him!

FAQs About DIY Clay Wind Chimes
Here are answers to some of the most common questions I get about this DIY Clay Pot Wind Chime. If your question isn’t listed, feel free to drop it in the comments, and I’ll be happy to help!
Can I Adjust The Size Of This Clay Wind Chime?
Absolutely! You can make this wind chime as small or as big as you would like.
Do I Have To Use A Galvanized Watering Can?
No, you don't! You can use any watering can that you like for this project. You can even paint your watering can with a unique design or with your kids' handprints!
What Other Materials Can Be Used To Make DIY Wind Chimes?
I chose terra cotta pots because I love the rustic look that's a natural fit for any garden. However, if you want to try using other materials, there are tons of ways you can create a similar product.
Explore making this project with metal or wood. Other wind chime materials could be shells, bamboo, glass, stones, and more. I love these Sea Glass Wind Chimes that I also made!
How Can I Personalize These DIY Wind Chimes For My Yard?
Try using different colored beads. You could also paint your pots using a few different techniques or ideas. I think this DIY Tiered Planter Simple Paint Technique would look cute as wind chimes!
Or, you could give your pots an aged look with this tutorial on Aging Terracotta Clay Pots with Paint.
Finally, use this technique for Terra Cotta Painted Pots to completely personalize your pots with color for a unique set of DIY wind chimes you'll love to look at.
5 More Clay Pot Crafts
Do you love these DIY clay wind chimes and want more clay pot crafts? Then check out the projects below!