

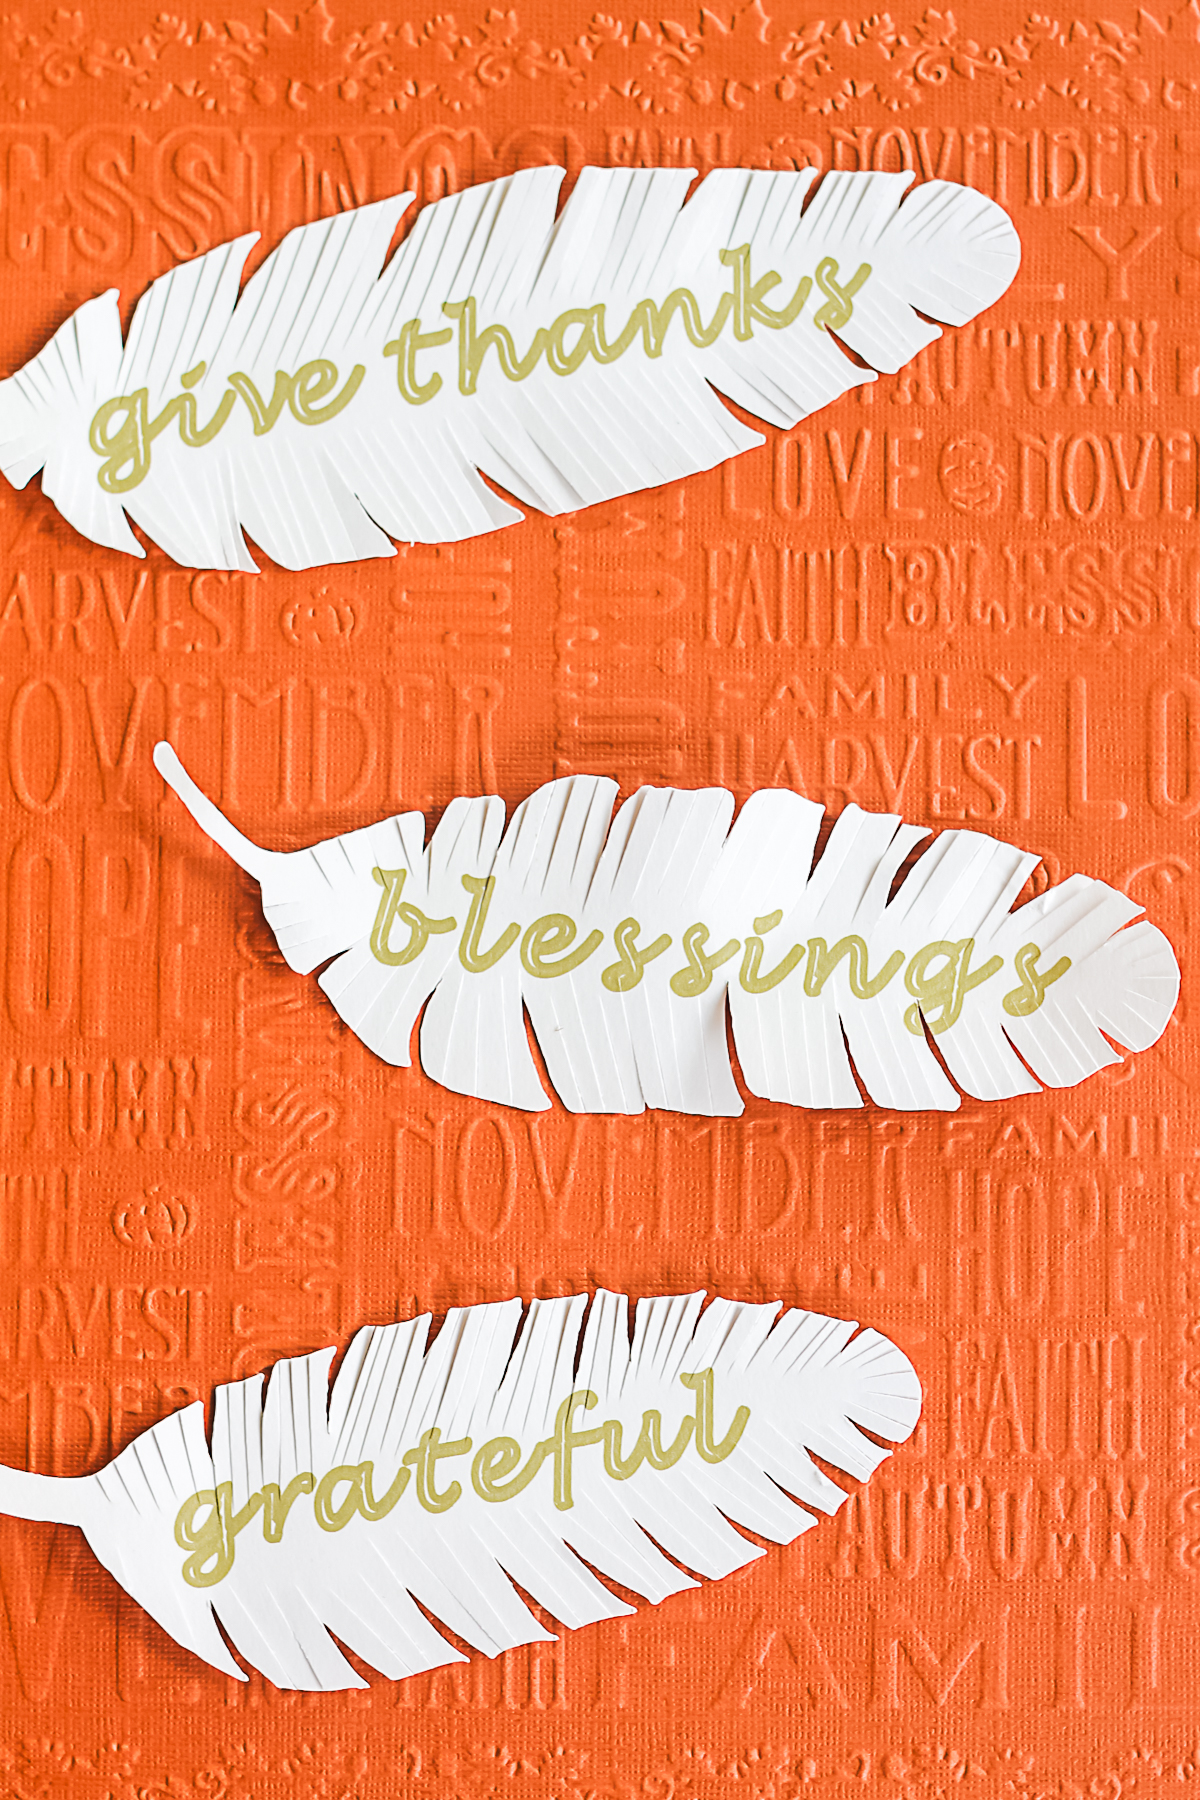
Learn how to make paper feathers with your Cricut machine. These paper feathers are the perfect addition to your Thanksgiving decor or nature-inspired celebration. Using a Cricut template, you can showcase everything you are grateful for and share it with your friends and family. I used a gold marker in my Cricut, but feel free to choose any pen color that complements your fall decor.
This one was first published on October 17, 2014; however, I am republishing it with more information.

How To Make Paper Feathers
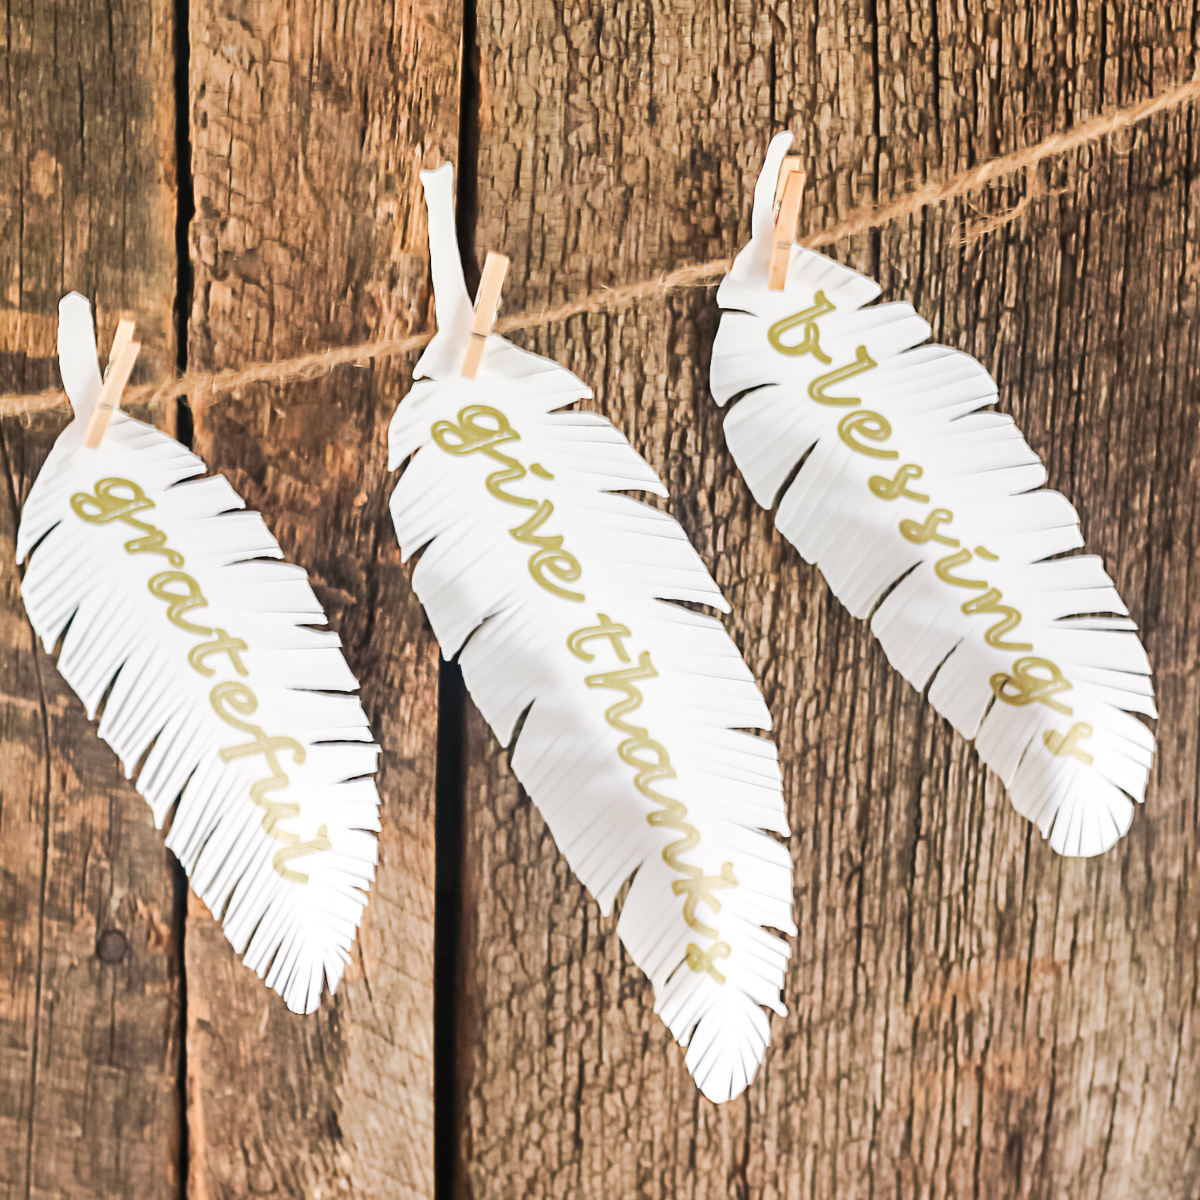
This is such a cute Thanksgiving craft and a great reminder of everything we are thankful for! I chose to write grateful, give thanks, and blessings, but you can choose any text you like. Try family members' names or challenge your family to write one blessing on a feather every day.
Print out as many as you like and have your whole family write a blessing on the feather at Thanksgiving Dinner!
Supplies Needed To Make Paper Feathers
- Cricut Explore, computer, and internet connection (any Cricut machine will work for making these paper feathers)
- White cardstock
- Gold metallic pen that will work in your Cricut (see how to use a wide variety of pens in your machine here)
- Scissors
- Feather SVG file (you can get it for free below)
Download Free Feather SVG File
You can get the feather SVG file sent to your email address by signing up for the newsletter below. Look for a form with a picture of the file you need and add your information. If you already get the newsletter, just add your information again, and you will not be signed up for anything further. Check your email to get your file after you sign up. Then you can upload it to your Cricut machine following the tutorial here.
Please note that this file is for personal use only. You can contact me if you need assistance.
Cricut Paper Feathers
Follow along below to put the feather svgs into Design Space.
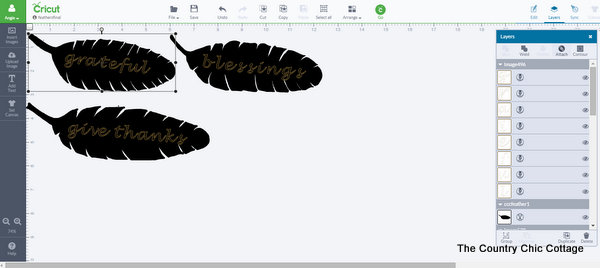
Step 1: Upload Feather Images To Cricut Design Space
Choose a feather image and import the image into the Cricut Design Space.
Step 2: Add Text To Feathers
Once you have the feathers in Design Space, add the text of your choice to each one. Add text in any font, then put that text right over the top of your feathers. Click that text layer and select WRITE instead of BASIC CUT in the Operations menu. If you don't want the font to be an outline, you will need to find a single-line font.

Step 3: Click Attach
Be sure the text is positioned exactly as you want it. Then, pick the feather and the text both at the same time. Click “ATTACH” to combine the two. Your feather is now ready for cutting and writing.
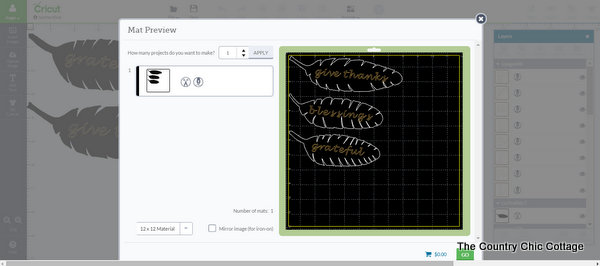
Step 4: Click Make It
When you click Make in the Cricut software, you should see your feathers with writing on top. If it does not appear to be together, you will want to go back and make sure everything is attached together correctly.
Writing & Cutting With A Cricut
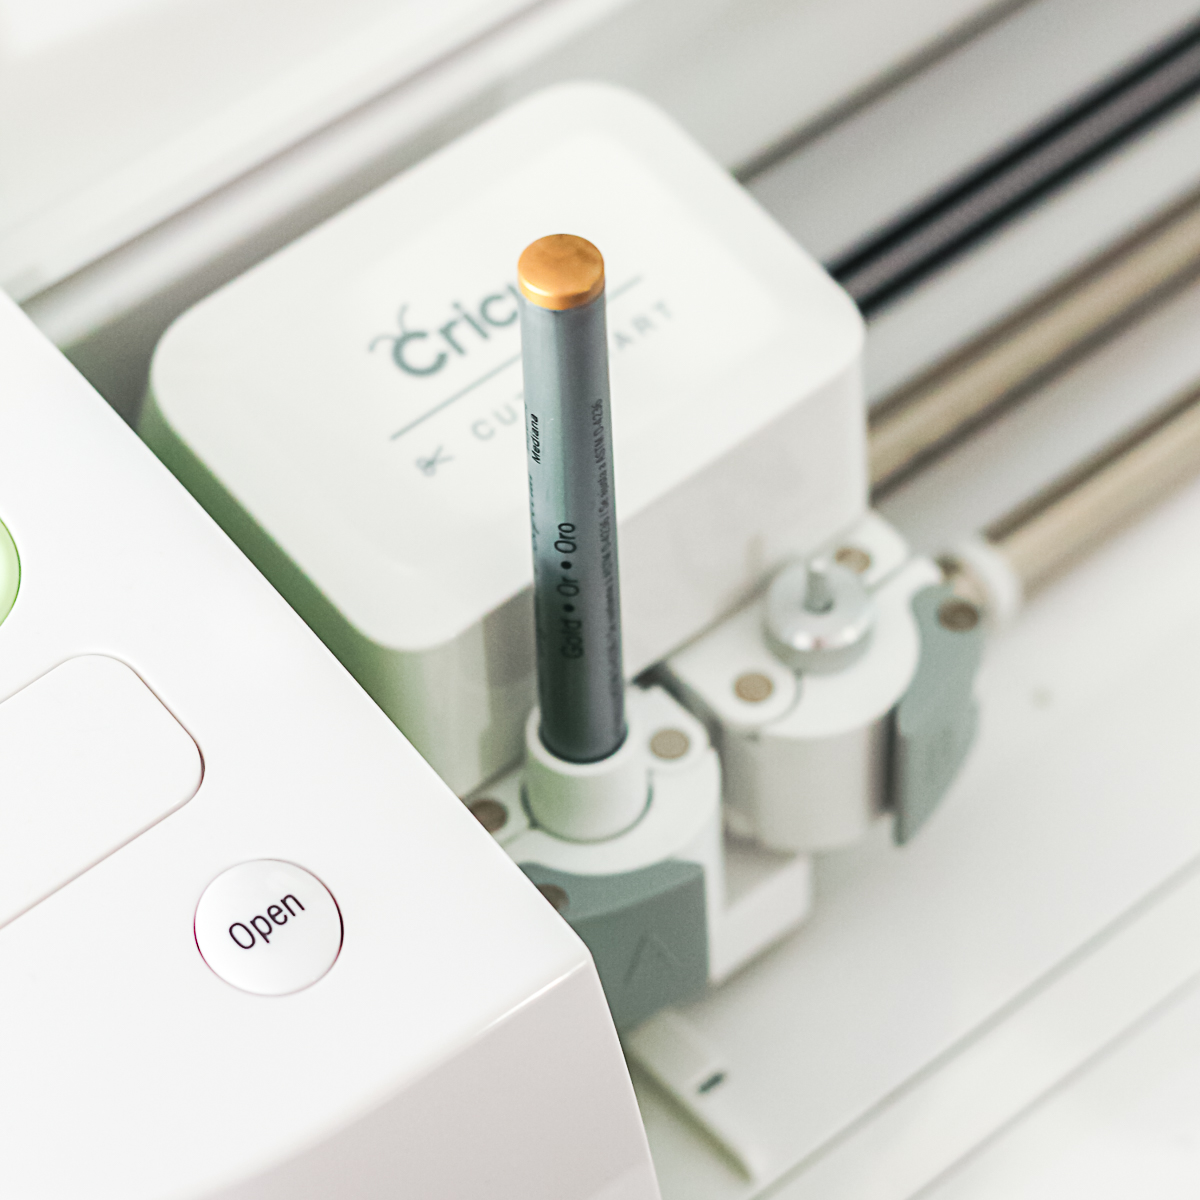
Step 1: Insert Marker Into Cricut Machine
You will need to insert your marker into the Cricut before continuing. Only certain markers will work properly with this machine. I did extensive research before purchasing the Recollections brand. Please do your research if you are going with a different brand. You can also see my hack for using other markers here.
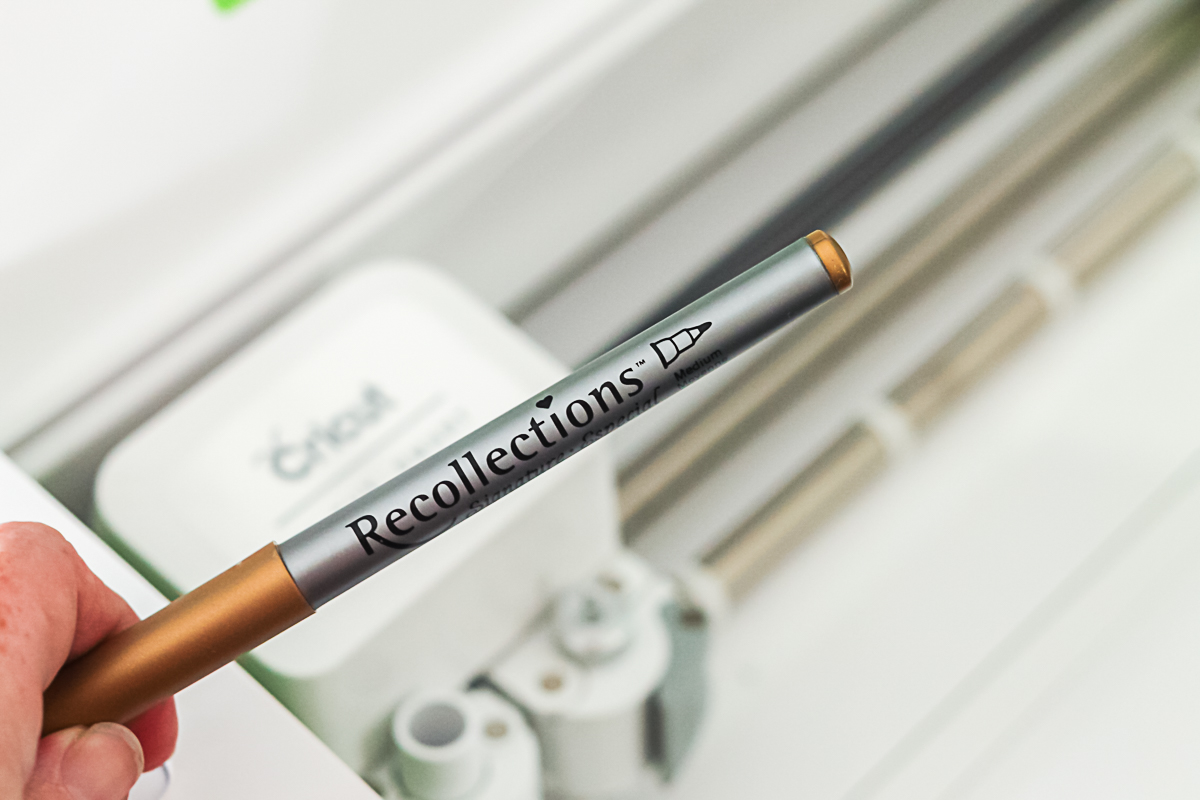
Place the marker into the Cricut Explore firmly so that it seats all the way down. NOTE: The cap was removed, and I opened the clamp before inserting it. Pick the cardstock setting in Cricut Design Space to begin cutting.
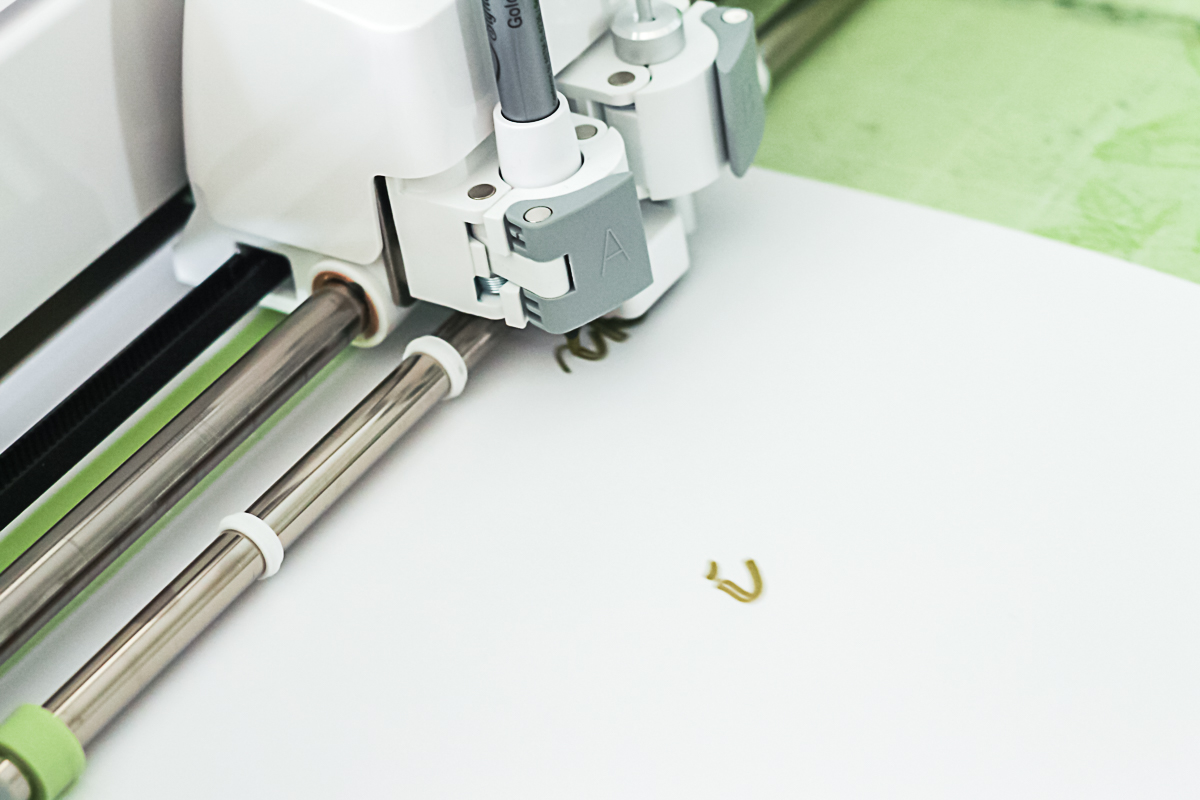
Step 2: Load Paper Into Your Cricut
Add your paper to the Cricut mat and load it into your Cricut. Click the arrow button to load the mat and hit “GO” on the Cricut Explore. You can see the machine writing before it starts to cut. If it is NOT writing first, then the marker is probably not seated properly. Stop the machine and readjust.
Finishing Paper Feathers
Step 1: Give Feather More Fringe
The cut feather will look like the top feather in the image below. But if you want it to look more like the bottom feather. Just use a pair of scissors to give the feather more fringe.

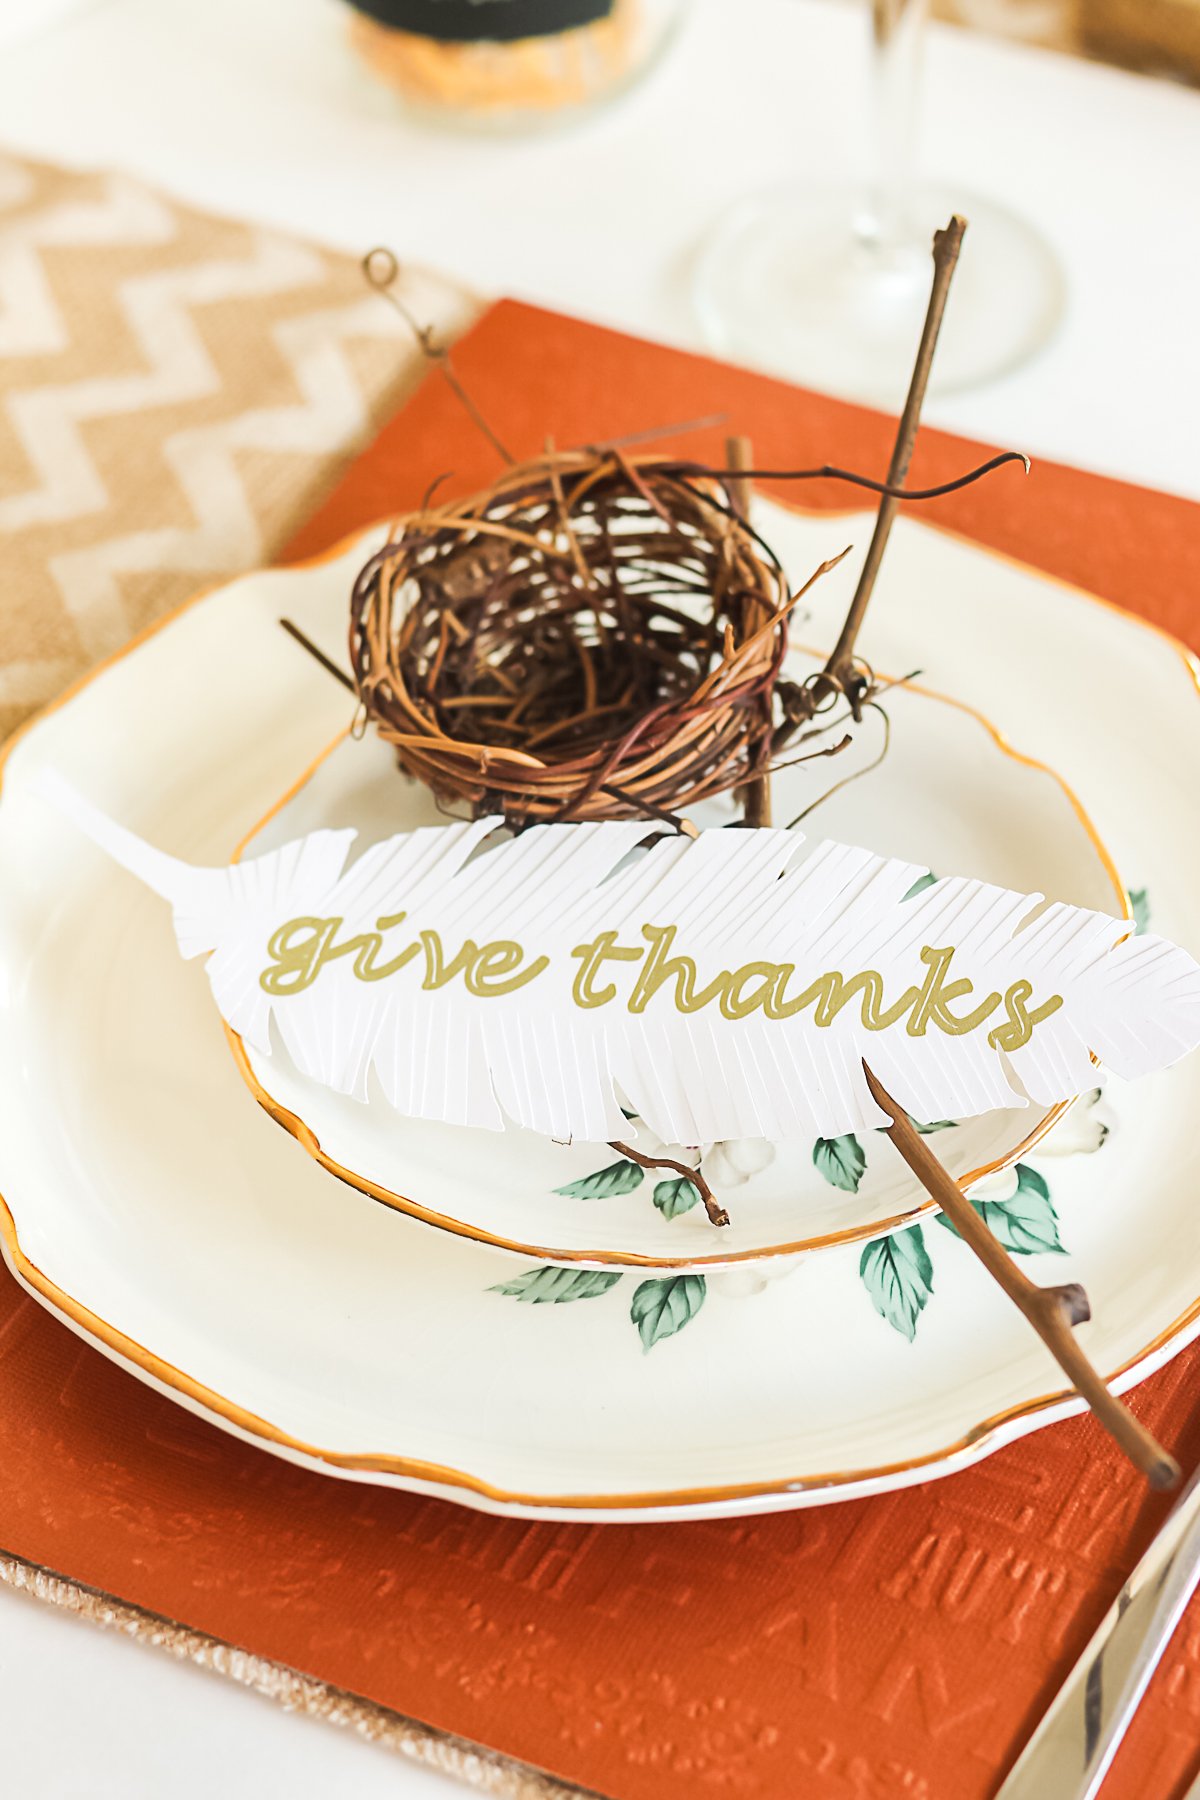
Now that you have your gorgeous handmade paper feathers, what are you going to do with them? Well, they make fabulous holiday home decor. I like stringing them up as a banner or just laying them in a bowl.

You can also use them for your Thanksgiving table setting this year.
You could even add names to the feathers instead and use this idea as place cards for your Thanksgiving meal. There are so many ways to use paper feathers this Fall!

Whichever you choose, these handmade paper feathers are sure to be a hit in your home. Will you make paper feathers for your home? Where will you use your creations? Be sure to pick up a Cricut machine, as it makes it so much easier to make these beauties!

You could also make these with themes for other times of the year. Try some holiday words for your Christmas tree or just plain without text for any time of the year.
So, grab your cardstock and a pen for your Cricut machine to make something amazing for Fall and Thanksgiving. You will love how these paper feathers look in your farmhouse-style home!
FAQs About Paper Feathers
Here are answers to some of the most frequently asked questions I receive about making these paper feathers. If your question isn’t listed, feel free to drop it in the comments, and I’ll be happy to help!
Can I Change The Size Of This Project?
Yes, you can! Depending on how you are going to use your paper feathers, you can make them smaller or bigger in Cricut Design Space.
What Cricut Machine Can I Use For This Project?
All of them! The Cricut Maker, Cricut Explore series, Cricut Joy, Cricut Joy Xtra, and Cricut Venture can all use Cricut Pens!
The only thing to keep in mind is that each Cricut machine uses different pens. To learn more about using Cricut pens with your Cricut machine, check out our blog post titled How to Use Cricut Pens in ANY Cricut Machine.
Do You Have More Resources About How To Use Cricut Design Space?
Yes, I do! Check out the blog posts below to learn more about how to use Cricut Design Space.
- What is Cricut Design Space? How Does It Work?
- How To Use Cricut Design Space Guides
- How to Use Cricut Design Space for Desktop
Does Cricut Make Metallic Pens?
Yes, they do! You can buy Cricut pens in colors ranging from your classic colors (black, blue, etc.) to metallics (gold, silver, etc.) and even glitter-gel!
I just used Recollections in the project because I had it on hand.
Can I Change The Colors In This Project?
Absolutely! However, the only thing to keep in mind is that you want to be able to read the word you are writing on your feather. So, you will want to use a cardstock and pen color that coordinates well.
5 Thanksgiving Crafts
Did you love learning how to make paper feathers, and want even more Thanksgiving crafts? Then check out the ideas below!
- Fall Mason Jars You Need to Make This Year
- Free Printable Thanksgiving Placemat
- Quick Fall Place Setting with Foil Accents
- Make Your Own Thanksgiving Kitchen Towel with Your Cricut
- Thankful Tree Idea with Photos


These look great! I love how easy it was using the Cricut.
those are gorgeous! I love that the writing was done right there with the cutting all in one process. Anything that will save the world from my awful handwriting is a VERY good thing. 😉
I love how the pen will write for you on the design! Love the gold look too.
Cute! I love them displayed in the bowl.
I love how these turned out Angie! So pretty!
Super cute idea, Angie!! And very on trend. 🙂
Lovely for a Thanksgiving banner!
So cool! I especially love how it writes with the pen! Wow!
Nancy
I love this! They look so great and would be perfect for a Thanksgiving table.
I love anything involving feathers — these are super cute!